
Recomendados
Mais conteúdo relacionado
Destaque
Destaque (20)
Semelhante a Apresentação 2ºPeríodo
Semelhante a Apresentação 2ºPeríodo (20)
Último
Último (20)
Apresentação 2ºPeríodo
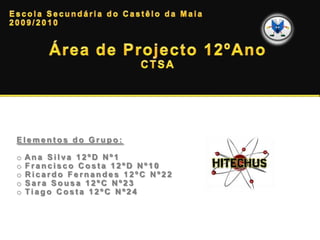
- 1. Elementos do Grupo: o Ana Silva 12ºD Nº1 o Francisco Costa 12ºD Nº10 o Ricardo Fernandes 12ºC Nº22 o Sara Sousa 12ºC Nº23 o Tiago Costa 12ºC Nº24
- 2. 3ªParte • Trabalho de 2ª Parte campo • Trabalho desenvolvido 1ª Parte • Planificação ÁreadeProjecto12ºAno
- 3. Planificação Janeiro Fevereiro Março Dia 5 –-Inicio da Construção do Site. 13 Publicação online do site. Reunião com o DEQ. Dia 15 -Planificação da feira. a Feira. 5 – Envio de convites para Distribuição de inquéritos. 10 – Procura do programa da Faculdade de Farmácia. 9 – Ida à Semana aberta ideal Dia 15 -Levantamento das meadas. para a realização do site. 9 –– Inicio do mini-projecto com o DEQ (tingimento com corante laranja). 11 Envio de convites para a Feira. Dia 21 -Tentativa de obtenção de informações sobre os pré requisitos na Faculdade de Dia 28 – Melhoramento“como construir um relatório?” 12 Palestra sobre do Blog. Medicina. Dia 19 – Realização do mini – projecto com o DEQ (tingimento com corante verde). Dia 19 – Estruturação gráfica do site. ÁreadeProjecto12ºAno
- 4. Trabalho desenvolvido Site Blog Feira de Profissões Suporte teórico e pesquisa ÁreadeProjecto12ºAno
- 5. Site – página e endereço estudanoporto.com ÁreadeProjecto12ºAno
- 6. Site – direitos de imagem ÁreadeProjecto12ºAno
- 7. Blog ÁreadeProjecto12ºAno
- 8. Feira de Profissões ÁreadeProjecto12ºAno
- 9. Suporte teórico Desenvolvimento das informações recolhidas sobre o Ensino Superior. - Nota de candidatura; Englobamento de novas faculdades e cursos: - FADEUP (Faculdade de Desporto da Universidade do Porto); - FMDUP (Faculdade de Medicina Dentária da Universidade do Porto) ÁreadeProjecto12ºAno
- 10. Pesquisas •1 Erasmus •2 Processo de Bolonha •3 Bolsas •4 Pré-requisitos ÁreadeProjecto12ºAno
- 11. Erasmus O Programa ERASMUS é um programa de acção comunitária no domínio da aprendizagem ao longo da vida que oferece aos estudantes a possibilidade de efectuarem um período de estudos/ estágio numa outra Universidade/empresa Europeia, com reconhecimento académico (como parte integrante do programa de estudos da universidade de origem). Tem como objectivo promover a dimensão europeia e melhorar a qualidade da educação através do fomento da cooperação entre os países participantes. Estes compreendem os vinte e cinco Estados Membros da UE . Foi estabelecido em 1987; Duração de 3, 6 e 12 meses; ÁreadeProjecto12ºAno
- 12. Processo de Bolonha A Declaração de Bolonha (19 de Junho de 1999) — que desencadeou o denominado Processo de Bolonha — é um documento conjunto assinado pelos Ministros da Educação de 29 países europeus, reunidos na cidade italiana de Bolonha. Objectivos mudança em relação às políticas ligadas ao ensino superior dos países envolvidos reformas de seus sistemas de ensino. a importância da educação para o desenvolvimento sustentável de sociedades tolerantes e democráticas. Os governos dos países signatários comprometem-se a reorganizar os sistemas de ensino superior dos seus países. Elevar a competitividade internacional do sistema europeu do ensino superior. Promover entre os cidadãos europeus a empregabilidade e a competitividade internacional do sistema europeu do Ensino Superior. ÁreadeProjecto12ºAno
- 13. Bolsas Bolsas de estudo Os Serviços de Acção Social dos estabelecimentos do Ensino Superior (universitário e politécnico) concedem apoios sociais directos e indirectos. Directos Indirectos -Aos estudantes socialmente -Pode ser atribuída a qualquer estudante; desfavorecidos, deslocados ou portadores de deficiência; - Serviço de alojamento, serviço de - Atribuição de bolsas de estudo e auxílios refeições, serviços de saúde (diagnóstico, de emergência. prevenção, apoio a actividades culturais e desportivas) Bolsas por mérito São atribuídas aos estudantes com aproveitamento excepcional, independentemente dos seus rendimentos. ÁreadeProjecto12ºAno
- 14. Pré-requisitos Os pré-requisitos são condições de natureza física, funcional ou vocacional que assumem particular relevância para acesso a determinados cursos do ensino superior. Compete a cada estabelecimento de ensino superior decidir se a candidatura a algum dos seus cursos deverá estar sujeita à satisfação de pré-requisitos e fixar o seu conteúdo. Os pré-requisitos podem, consoante a sua natureza, ser eliminatórios, destinar-se à selecção e seriação ou apenas à seriação dos candidatos. A satisfação dos pré- requisitos que não exijam provas de aptidão física, funcional ou vocacional e que sejam de comprovação meramente documental, são entregues pelos candidatos no acto da matrícula e inscrição no ensino superior, no par estabelecimento/curso que os exige, caso ali venham a obter colocação, sendo condição indispensável para a realização da matrícula e inscrição. (data limite de inscrição: 19 de Março) ÁreadeProjecto12ºAno
- 15. Trabalho de campo Semana “Como tingir Inquéritos no Inquéritos ao aberta da coisas” blog 12ºano FFUP ÁreadeProjecto12ºAno
- 18. Inquéritos - Blog O que achas da informação disponível sobre o Ensino Superior? 18% 27% Muito útil Suficiente 37% 18% Pouco esclarecedora Não me interessa Pretendes ingressar no Ensino Superior? 13% 6% Sim Não 81% Não sei ÁreadeProjecto12ºAno
- 19. Inquéritos – 12ºano ÁreadeProjecto12ºAno
Notas do Editor
- Custom animation effects: rise up and shrink(Basic)To reproduce the rectangle on this slide, do the following:On the Home tab, in theSlides group, click Layout, and then click Blank.On the Home tab, in the Drawing group, click Shapes, and then under Rectangles click Rectangle (first option from the left). On the slide, drag to draw a rectangle.Select the rectangle. Under Drawing Tools, on the Format tab, in the Size group, do the following:In the Shape Height box, enter 3”. In the Shape Width box, enter 10”.With the rectangle still selected, on the Home tab, in the Drawing group, do the following:Click the arrow next to Shape Fill, and then under Theme Colors click Black, Text 1, Lighter 5% (sixth row, second option from the left).Click the arrow next to Shape Outline, and then click No Outline.On the Home tab, in the Drawing group, click Arrange, point to Align, and then do the following:Click Align to Slide.Click Align Top.Click Align Center. To reproduce the text on this slide, do the following:On the Insert tab, in the Text group, click Text Box, and then on the slide, drag to draw a text box. Enter text in the text box and select the text. On the Home tab, in the Font group, do the following:In the Font list, select Arial Black.In the Font Size box, enter 38.Click Bold. On the Home tab, in the Paragraph group, click Center to center the text in the text box.Select the text box. Under Drawing Tools, on the Format tab, in the bottom right corner of the WordArt Styles group, click the Format Text Effects dialog box launcher. In the Format Text Effects dialog box,click Text Fill in the left pane, select Gradient fill in the Text Fill pane, and then do the following:In the Type list, select Linear.Click the button next to Direction, and then click Linear Down (first row, second option from the left). Under Gradient stops, click Add or Remove until threestops appear in the drop-down list.Also under Gradient stops, customize the gradient stops that you added as follows:Select Stop 1 from the list, and then do the following:In the Stop position box, enter 0%.Click the button next to Color, click More Colors, and then in the Colors dialog box, on the Custom tab, enter values for Red: 255,Green: 214, Blue: 63.Select Stop 2 from the list, and then do the following: In the Stop position box, enter 75%.Click the button next to Color, click More Colors, and then in the Colors dialog box, on the Custom tab, enter values for Red: 255, Green: 192, Blue: 0.Select Stop 3 from the list, and then do the following: In the Stop position box, enter 100%.Click the button next to Color, click More Colors, and then in the Colors dialog box, on the Custom tab, enter values for Red: 255, Green: 162, Blue: 96.Also in the Format Text Effects dialog box, click Shadow in the left pane. In the Shadow pane, click the button next to Presets, under Outer click Offset Bottom (first row, second option from the left), and then do the following:In the Transparency box, enter 70%.In the Size box, enter 100%.In the Blur box, enter 6.3 pt.In the Angle box, enter 84°.In the Distance box, enter 3.2 pt.Also in the Format Text Effects dialog box, click 3-D Format in the left pane, and then do the following in the 3-D Format pane:Under Bevel, click the button next to Top, and then under Bevel click Circle (first row, first option from the left). Next to Top, in the Width box, enter 2 pt, and in the Height box, enter 2 pt.Under Contour, click the button next to Color, click More Colors, and then in the Colors dialog box, on the Custom tab, enter values for Red: 215, Green: 130, Blue: 60. In the Size box, enter 1 pt. Under Surface, in the Material list, under Standard,select WarmMatte (second option from the left). In the Lighting list, under Special, select Glow (third option from the left). In the Angle box, enter 90°.On the slide, drag the text box just above the bottom edge of the rectangle.With the text box still selected, on the Home tab, in the Drawing group, click Arrange, point to Align, and then do the following:Click Align to Slide.Click Align Center. To reproduce the line on this slide, do the following:On the Home tab, in the Drawing group, click Shapes, and then under Lines click Line (first option from the left). On the slide, press and hold SHIFT, and then drag to draw a straight, horizontal line.Select the line. Under Drawing Tools, on the Format tab, in the Size group, in the Shape Width box, enter 10”.Under Drawing Tools, on the Format tab, in the bottom right corner of the Shape Styles group, click the Format Shape dialog box launcher. In the Format Shape dialog box, click Line Color in the left pane. In the Line Color pane, select Solid fill, click the button next to Color, and then select More Colors. In the Colors dialog box, on the Custom tab, enter values for Red: 255, Green: 232, Blue: 63.Also in the Format Shape dialog box, click Line Style in the left pane. In the Line Style pane, in the Width box, enter 4.5 pt.Also in the Format Shape dialog box, click 3-D Format in the left pane. In the 3-D Format pane, under Bevel, do the following:Click the button next to Top, and then under Bevel click Circle (first row, first option from the left). Next to Top, in the Width box, enter 3 pt. Next to Top, in the Height box, enter 6 pt.On the slide, drag the line until the top edge touches the bottom edge of the rectangle.On the Home tab, in the Drawing group, click Arrange, point to Align, and then do the following:Click Align to Slide.Click Align Center. To reproduce the animation effects on this slide, do the following:On the Animations tab, in the Animations group, click Custom Animation.On the slide, select the text box. In the CustomAnimation task pane, do the following:Click AddEffect, point to Exit, and then click More Effects. In the Add Exit Effect dialog box, under Basic, click Disappear.Select the animation effect (disappear effect for the text box). Under Modify: Disappear, in theStart list, selectAfter Previous.On the slide, select the text box. In the CustomAnimation task pane, do the following:Click AddEffect, point to Emphasis, and then click More Effects. In the Add Emphasis Effect dialog box, under Basic, click Grow/Shrink.Select the second animation effect (grow/shrink effect for the text box). Click the arrow to the right of the effect, and then click Effect Options. In the Grow/Shrink dialog box, do the following:On the Effect tab, in the Size list, in the Custom box, enter 400%, and then press ENTER. Also in the Size list, click Vertical. On the Timing tab, do the following:In theStart list, selectAfter Previous. In the Speed box, enter 0.01 seconds.On the slide, select the text box. In the CustomAnimation task pane, do the following:Click AddEffect, point to Entrance, and then click More Effects. In the AddEntrance Effect dialog box, under Basic, click Appear.Select the third animation effect (appear effect for the text box). Under Modify: Appear, in theStart list, selectAfter Previous.On the slide, select the text box. In the CustomAnimation task pane, do the following:Click AddEffect, point to Emphasis, and then click More Effects. In the Add Emphasis Effect dialog box, under Basic, click Grow/Shrink.Select the fourth animation effect (grow/shrink effect for the text box). Click the arrow to the right of the effect, and then click Effect Options. In the Grow/Shrink dialog box, do the following:On the Effect tab, in the Size list, in the Custom box, enter 25%, and then press ENTER. Also in the Size list, click Vertical. On the Timing tab, do the following:In theStart list, selectWith Previous. In the Speed list, select 1 seconds (Fast).On the slide, select the text box. In the CustomAnimation task pane, do the following:Click AddEffect, point to Entrance, and then click More Effects. In the Add Entrance Effect dialog box, under Moderate, click Rise Up.Select the fifth animation effect (rise-up effect for the text box). Under Modify: Rise Up, do the following:In theStart list, selectWith Previous. In the Speed list, selectFast.On the slide, press and hold CTRL, and then select the rectangle and the line. In the CustomAnimation task pane, do the following:Click AddEffect, point to Entrance, and then click More Effects. In the Add Entrance Effect dialog box, under Moderate, click Descend.Press and hold CTRL, and then select the sixth and seventh animation effects (descend effects for the rectangle and the line). Under Modify: Descend, do the following:In theStart list, selectWith Previous. In the Speed list, selectFast.To reproduce the background effects on this slide, do the following:Right-click the slide background area, and then click Format Background. In the Format Background dialog box, click Fill in the left pane, select Gradient fill in the Fill pane, and then do the following:In the Type list, select Linear.Click the button next to Direction, and then click Linear Up (second row, second option from the left).Under Gradient stops, click Add or Remove until two stops appear in the drop-down list.Also under Gradient stops, customize the gradient stops that you added as follows:Select Stop 1 from the list, and then do the following:In the Stop position box, enter 0%.Click the button next to Color, and then under Theme Colors click Black, Text 1, Lighter 15% (fifth row, second option from the left).Select Stop 2 from the list, and then do the following: In the Stop position box, enter 100%.Click the button next to Color, and then under Theme Colors clickBlack, Text 1, Lighter 50% (second row, second option from the left).
- SmartArt custom animation effects: upward arrow process(Basic)To reproduce the SmartArt effects on this slide, do the following:On the Home tab, in the Slides group, click Layout, and then clickBlank. On the Insert tab, in the Illustrations group, click SmartArt. In the Choose a SmartArt Graphic dialog box, in the left pane, click Process. In the Process pane, click Upward Arrow (sixth row, third option from the left), and then click OK to insert the graphic into the slide.Select the graphic, and then click one of the arrows on the left border. In the Type your text here dialog box, enter text. (Note: To create a bulleted list below each heading, select the heading text box in the Type your text here dialog box, and then under SmartArtTools, on the Design tab, in the CreateGraphic group, click AddBullet. Enter text into the new bullet text box.)On the slide, select the graphic. Under SmartArtTools, on the Design tab, in the SmartArtStyles group, do the following:Click ChangeColors, and then under Colorful click Colorful Range - Accent Colors 3 to 4 (third option from the left).Click More, and then under Best Match for Document click Intense Effect (fifth option from the left).On the Home tab, in the Font group, select Calibri from the Font list, and then select 24 from the Font Size list.Select the text in the first text box from the left. Under SmartArtTools, on the Format tab, in the WordArtStyles group, click the arrow next to TextFill, and then under Theme Colors clickOliveGreen, Accent 3, Darker 25% (fifth row, seventh option from the left).Select the text in the second text box from the left. Under SmartArtTools, on the Format tab, in the WordArtStyles group, click the arrow next to TextFill, and then under Theme Colors clickAqua, Accent 5, Darker 25% (fifth row, ninth option from the left).Select the text in the third text box from the left. Under SmartArtTools, on the Format tab, in the WordArtStyles group, click the arrow next to TextFill, and then under Theme Colors clickPurple, Accent 4, Darker 25% (fifth row, eighth option from the left).To reproduce the animation effects on this slide, do the following:On the Animations tab, in the Animations group, click CustomAnimation.On the slide, select the graphic. In the CustomAnimation task pane, do the following:Click Add Effect, point to Entrance, and then click MoreEffects. In the Add Entrance Effect dialog box, under Basic, click Wipe. Under Modify: Wipe, in the Direction list, select From Left.Under Modify: Wipe, in the Speed list, select Fast.Also in the Custom Animation task pane, select the wipe effect. Click the arrow to the right of the wipe effect, and then click Effect Options. In the Wipe dialog box, on the SmartArt Animation tab, in the Group graphic list, select One by one.Also in the Custom Animation task pane, click the double arrow under the wipe effect to expand the contents of the list of effects.Also in the Custom Animation task pane, select the second wipe effect and then do the following:Click Change, point to Entrance, and then click More Effects. In the Change Entrance Effect dialog box, under Exciting, click Curve Up.Under Modify: Curve Up,in the Start list, select With Previous. Under Modify: Curve Up,in the Speed list, select Very Fast.Also in the Custom Animation taskpane, select the third wipe effect and then do the following:Click Change, point to Entrance, and then click More Effects.In the Change Entrance Effect dialog box, under Moderate, click Descend.Under Modify: Descend,in the Start list, select With Previous. Under Modify: Descend,in the Speed list, select Very Fast.Click the arrow to the right of the third wipe effect, and then click Timing. In the Descend dialog box, on the Timing tab, in the Delay box, enter 0.5.Also in the Custom Animation task pane, select the fourth wipe effect and then do the following:Click Change, point to Entrance, and then click More Effects.In the Change Entrance Effect dialog box, under Exciting, click Curve Up.Under Modify: Curve Up,in the Start list, select On Click. Under Modify: Curve Up,in the Speed list, select Very Fast.Also in the Custom Animation taskpane, select the fifth wipe effect and then do the following:Click Change, point to Entrance, and then click More Effects.In the Change Entrance Effect dialog box, under Moderate, click Descend.Under Modify: Descend,in the Start list, select After Previous. Under Modify: Descend,in the Speed list, select Very Fast.Also in the Custom Animation task pane, select the sixth wipe effect and then do the following:Click Change, point to Entrance, and then click More Effects.In the Change Entrance Effect dialog box, under Exciting, click Curve Up.Under Modify: Curve Up,in the Start list, select On Click. Under Modify: Curve Up,in the Speed list, select Very Fast.Also in the Custom Animation task pane, select the seventh wipe effect and then do the following:Click Change, point to Entrance, and then click More Effects.In the Change Entrance Effect dialog box, under Moderate, click Descend.Under Modify: Descend,in the Start list, select After Previous. Under Modify: Descend,in the Speed list, select Very Fast.To reproduce the background effects on this slide, do the following:Right-click the slide background area, and then click Format Background. In the Format Background dialog box, click Fill in the left pane, select Gradient fill in the Fill pane, and then do the following:In the Type list, select Linear.In the Direction list, click Linear Right (first row, fourth option from the left).Under Gradient stops, click Add or Remove until two stops appear in the drop-down list.Also under Gradient stops, customize the gradient stops that you added as follows:Select Stop 1 from the list, and then do the following:In the Stop position box, enter 39%.Click the button next to Color, and then under Theme Colors click White, Background 1 (first row, first option from the left).Select Stop 2 from the list, and then do the following: In the Stop position box, enter 100%.Click the button next to Color, and then under Theme Colors click Olive Green, Accent 3, Lighter 60%(third row, seventh option from the left).To increase the size of the SmartArt graphic so that it spans the entire slide, do the following:On the slide, select the graphic. Point to the top right corner of the graphic border, until a two-headed arrow appears. Drag the top right corner of the graphic border into the top right corner of the slide. Point to the bottom left corner of the graphic border, until a two-headed arrow appears. Drag the bottom left corner of the graphic border into the bottom left corner of the slide.
- Custom animation effects: moving binder tabs(Intermediate)Tip: You will need to use drawing guides to position the shapes and text on the slide. To display and set the drawing guides, do the following:On the Home tab, in the Slides group, click Layout, and then click Blank.Right-click the slide background area, and then click Grid and Guides.In the Grid and Guides dialog box, underGuidesettings, select Display drawing guides on screen. (Note: One horizontal and one vertical guide will display on the slide at 0.00, the default position. As you drag the guides, the cursor will display the new position.) On the slide, do the following:Press and hold CTRL, select the vertical guide, and then drag it left to the 3.50 position.Press and hold CTRL, select the vertical guide, and then drag it left to the 1.75 position.Press and hold CTRL, select the vertical guide, and then drag it right to the 1.75 position.Press and hold CTRL, select the vertical guide, and then drag it right to the 3.50 position.To reproduce the long, thin rectangle on this slide, do the following:On the Home tab, in the Drawing group, click Shapes, and then under Rectangles click Rectangle (first option from the left). On the slide, drag to draw a rectangle. Select the rectangle. Under DrawingTools, on the Format tab, in the Size group, do the following: In the ShapeHeight box, enter 0.05”.In the ShapeWidth box, enter 10”.Under DrawingTools, on the Format tab, in the bottom right corner of the ShapeStyles group, click the FormatShape dialog box launcher. In the FormatShape dialog box, in the left pane, click LineColor. In the LineColor pane, select Noline.Also in the FormatShape dialog box, in the left pane, click Shadow. In the Shadow pane, click the button next to Presets, under Outer click OffsetBottom (first row, second option from the left), and then do the following:In the Transparency box, enter 68%.In the Blur box, enter 3.5 pt.In the Distance box, enter 2.2 pt.Also in the FormatShape dialog box, in the left pane, click 3-D Format. In the 3-D Format pane, do the following:Under Bevel, click the button next to Top, and then under Bevel click Circle (first row, first option from the left). Next to Top, in the Width box, enter 15 pt,and in the Height box, enter 3 pt.Under Surface, click the button next to Lighting, and then under Neutral click Balance (first row, second option from the left). In the Angle box, enter 145°. On the slide, drag the rectangle about 0.25” above the 0.00 horizontal drawing guide. (Note: To view the ruler, on the View tab, in the Show/Hide group, select Ruler.)On the Home tab, in the Drawing group, click Arrange, point to Align, and then do the following:Click Align to Slide. Click AlignCenter.To reproduce the tab (rounded rectangle) on this slide, do the following:On the Home tab, in the Drawing group, click Shapes, and then under Rectangles click Round Same Side Corner Rectangle (eighth option from the left). On the slide, drag to draw a rounded rectangle. On the slide, select the rounded rectangle. Under DrawingTools, on the Format tab, in the Size group, do the following: In the ShapeHeight box, enter 0.58”.In the ShapeWidth box, enter 1.33”.Under DrawingTools, on the Format tab, in the bottom right corner of the ShapeStyles group, click the FormatShape dialog box launcher. In the FormatShape dialog box, in the left pane, click LineColor. In the LineColor pane, select Noline.Also in the FormatShape dialog box, in the left pane, click Shadow. In the Shadow pane, click the button next to Presets, under Outer click OffsetBottom (first row, second option from the left), and then do the following:In the Transparency box, enter 68%.In the Blur box, enter 3.5 pt.In the Distance box, enter 2.2 pt.Also in the FormatShape dialog box, in the left pane, click 3-D Format. In the 3-D Format pane, do the following:Under Bevel, click the button next to Top, and then under Bevel click Circle (first row, first option from the left). Next to Top, in the Width box, enter 4 pt,and in the Height box, enter 4 pt.Under Surface, click the button next to Lighting, and then under Neutral click Balance (first row, second option from the left). In the Angle box, enter 145°. On the slide, drag the rounded rectangle until the bottom edge touches the top edge of the long, thin rectangle and it is centered on the 3.50 left vertical drawing guide.To reproduce the first text box on this slide, do the following:On the Insert tab, in the Text group, click TextBox. On the slide, drag to draw a text box. Enter TAB ONE,and then select the text. On the Home tab, in the Font group, do the following:In the Font list, select TW Cen MT Condensed.In the FontSize box, enter 22 pt. On the Home tab, in the Paragraph group, click Center to center the text in the text box.On the slide, drag the text box onto the rounded rectangle until the bottom edge of the text is 1” above the 0.00 horizontal drawing guide and it is centered on the 3.50 left vertical drawing guide.To reproduce the other text boxes on this slide, do the following:On the slide, select the first text box. On the Home tab, in the Clipboard group, click the arrow under Paste, and then click Duplicate. Repeat this process three more times for a total of five text boxes.Click in one of the duplicate text boxes, delete TAB ONE, and then enter TAB TWO. Drag the second text box until the bottom edge of the text is 1” above the 0.00 horizontal drawing guide and it is centered on the 1.75 left vertical drawing guide.Click in another duplicate text box, delete TAB ONE, and then enter TAB THREE.Drag the third text box until the bottom edge of the text is 1” above the 0.00 horizontal drawing guide and it is centered on the 0.00 vertical drawing guide. Click in another duplicate text box, delete TAB ONE, and then enter TAB FOUR.Drag the fourth text box until the bottom edge of the text is 1” above the 0.00 horizontal drawing guide and it is centered on the 1.75 right vertical drawing guide.Click in the last duplicate text box, delete TAB ONE, and then enter TAB FIVE.Drag the fifth text box until the bottom edge of the text is 1” above the 0.00 horizontal drawing guide and it is centered on the 3.50 right vertical drawing guide.Select the text in the first text box. On the Home tab, in the Font group, click the arrow next to Font Color, and then under ThemeColors click White, Background 1 (first row, first option from the left). Repeat this process for each of the other text boxes. To reproduce the animation effects on this slide, do the following:On the Animations tab, in the Animations group, click CustomAnimation. On the Home tab, in the Editing group, click Select, and then click Selection Pane.In the Selection and Visibilitypane, select the rounded rectangle (“Round Same Side Corner Rectangle” object). In the CustomAnimation task pane, do the following:Click AddEffect, point to MotionPaths, and then click Right. Select the first animation effect (right motion path for the rounded rectangle).On the slide, point to the endpoint (red arrow) of the selected motion path until the cursor becomes a two-headed arrow. Press and hold SHIFT, and then drag the endpoint to the 1.75 left vertical drawing guide. In the Selection and Visibility pane, select the rounded rectangle again. In the CustomAnimation task pane, do the following:Click AddEffect, point to MotionPaths, and then click Right. Select the second animation effect (right motion path for the rounded rectangle).On the slide, point to the endpoint (red arrow) of the selected motion path until the cursor becomes a two-headed arrow. Press and hold SHIFT, and then drag the endpoint to the 0.00 vertical drawing guide. On the slide, point to the starting point (green arrow) of the selected motion path until the cursor becomes a two-headed arrow. Press and hold SHIFT, and then drag the starting point to the 1.75 left vertical drawing guide. In the Selection and Visibility pane, select the rounded rectangle again. In the CustomAnimation task pane, do the following:Click AddEffect, point to MotionPaths, and then click Right. Select the third animation effect (right motion path for the rounded rectangle). On the slide, point to the endpoint (red arrow) of the selected motion path until the cursor becomes a two-headed arrow. Press and hold SHIFT, and then drag the endpoint to the 1.75 right vertical drawing guide. On the slide, point to the starting point (green arrow) of the selected motion path until the cursor becomes a two-headed arrow. Press and hold SHIFT, and then drag the starting point to the 0.00 vertical drawing guide. In the Selection and Visibility pane, select the rounded rectangle again. In the CustomAnimation task pane, , do the following:Click AddEffect, point to MotionPaths, and then click Right. Select the fourth animation effect (right motion path for the rounded rectangle).On the slide, point to the endpoint (red arrow) of the selected motion path until the cursor becomes a two-headed arrow. Press and hold SHIFT, and then drag the endpoint to the 3.50 right vertical drawing guide. On the slide, point to the starting point (green arrow) of the selected motion path until the cursor becomes a two-headed arrow. Press and hold SHIFT, and then drag the starting point to the 1.75 right vertical drawing guide. On the View tab, in the Show/Hide group, clear Ruler.Right-click the slide background area, and then click Grid and Guides. In the Grid and Guides dialog box, under Guide settings, clear Display drawing guides on screen. To reproduce the background effects on this slide, do the following:Right-click the slide background area, and then click Format Background. In the Format Background dialog box, click Fill in the left pane, select Gradient fill in the Fill pane, and then do the following:In the Type list, select Linear.Click the button next to Direction, and then click Linear Up (second row, second option from the left).Under Gradient stops, click Add or Remove until two stops appear in the drop-down list.Also under Gradient stops, customize the gradient stops that you added as follows:Select Stop 1 from the list, and then do the following:In the Stop position box, enter 65%.Click the button next to Color, and then under Theme Colors click White, Background 1 (first row, first option from the left).Select Stop 2 from the list, and then do the following: In the Stop position box, enter 100%.Click the button next to Color, and then under Theme Colors clickBlue, Accent 1, Lighter 60% (third row, fifth option from the left).
- Custom animation effects: object spins on end(Advanced)To reproduce the background effects on this slide, do the following:On the Home tab, in theSlides group, click Layout, and then click Blank.Right-click the slide background area, and then click Format Background. In the Format Background dialog box, click Fill in the left pane, and then select Solid fill in the Fill pane. Click the button next to Color, and then under Theme Colors click White, Background 1 (first row, first option from the left).To reproduce the rectangle on this slide, do the following:On the Home tab, in the Drawing group, click Shapes, and then under Rectangles click Rounded Rectangle (second option from the left). On the slide, drag to draw a rounded rectangle.Select the rectangle. Drag the yellow diamond adjustment handle to the left to decrease the amount of rounding on the corners. With the rounded rectangle still selected, under Drawing Tools, on the Format tab, in the Size group, do the following:In the Shape Height box, enter 3.5”.In the Shape Width box, enter 0.25”.Under Drawing Tools, on the Format tab, in the bottom right corner of the Shape Styles group, click the Format Shape dialog box launcher. In the Format Shape dialog box, click Fill in the left pane. In the Fill pane, select Solid fill, click the button next to Color, and then under Theme Colors click White, Background 1, Darker 15% (third row, first option from the left).Also in the Format Shape dialog box, click Line Color in the left pane. In the Line Color pane, select No line. Also in the Format Shape dialog box, click Shadow in the left pane. In the Shadow pane, click the button next to Presets, under Outer select Offset Bottom (first row, second option from the left), and then do the following:In the Transparency box, enter 0%.In the Sizebox, enter 100%.In the Blur box, enter 8.5 pt.In the Angle box, enter 90°.In the Distance box, enter 1 pt.Also in the Format Shape dialog box, click 3-D Format in the left pane. In the 3-D Format pane, do the following:Under Bevel, click the button next to Top, and then under Bevel click Circle (first row, first option from the left). Next to Top, in the Width box, enter 5 pt, and in the Height box, enter 5 pt.Under Surface, click the button next to Material, and then under Standard clickMatte (first row, first option from the left).Click the button next to Lighting, and then under Neutral click Soft (first row, third option from the left).On the slide, select the rounded rectangle. On the Home tab, in the Clipboard group, click the arrow under Paste, and then click Duplicate.Select the duplicate rectangle. On the Home tab, in the Drawing group, do the following:Click the arrow next to Shape Fill, and then click No Fill.Click the arrow next to Shape Outline, and then click No Outline.Drag the second rectangle above the first rectangle until the lower edge overlays the top edge of the first rectangle. (Note: When the spinning animation effect is created later for these rectangles, the spin will center where the edges of the rectangles meet.)Press and hold CTRL, and then select both rectangles. On the Home tab, in the Drawing group, click Arrange, and do the following:Point to Align, and then click Align Selected Objects.Point to Align, and then click Align Center.Click Group. On the slide, drag the group until it is centered horizontally on the left edge of the slide (straddling the edge).On the Home tab, in the Drawing group, click Arrange, point to Align, and then do the following:Click Align to Slide.Click Align Middle.To reproduce the dashed arc on this slide, do the following:On the Home tab, in the Drawing group, click Shapes, and then under Basic Shapes click Arc (third row, 12th option from the left). On the slide, drag to draw an arc.Select the arc. Under Drawing Tools, on the Format tab, in the Size group, do the following:In the Shape Height box, enter 7.5”.In the Shape Width box, enter 7.5”.With the arc still selected, on the Home tab, in the Drawing group, click the arrow next to Shape Outline,and then do the following:Under Theme Colors, click White, Background 1, Darker 15% (third row, first option from the left).Point to Dashes, and then click Dash (fourth option from the top).On the slide, drag the yellow diamond adjustment handle on the right side of the arc to the bottom of the arc to create a half circle.Drag the arc until the yellow diamond adjustment handles are on the left edge of the slide.With the arc still selected, on the Home tab, in the Drawing group, click Arrange, point to Align, and then do the following:Click Align to Slide. Click Align Middle. To reproduce the half circle on this slide, do the following:On the slide, select the arc. On the Home tab, in the Clipboard group, click the arrow under Paste, and then click Duplicate.Select the duplicate arc. Under Drawing Tools, on the Format tab, in the Size group, do the following:In the Shape Height box, enter 3.33”.In the Shape Width box, enter 3.33”.With the second arc still selected, under Drawing Tools, on the Format tab, in the Shape Styles group, click the arrow next to Shape Fill, and then under Theme Colors click White, Background 1, Darker 5% (second row, first option from the left).Under Drawing Tools, on the Format tab, in the Shape Styles group, click the arrow next to Shape Outline,and then click No Outline.Under Drawing Tools, on the Format tab, in the Shape Styles group, click Shape Effects, point to Shadow, and then click ShadowOptions. In the Format Shape dialog box, click Shadow in the left pane. In the Shadow pane, click the button next to Presets, under Inner click Inside Right (second row, third option from the left), and then do the following:In the Transparency box, enter 86%.In the Blur box, enter 24 pt.In the Angle box, enter 315°.In the Distance box, enter 4 pt.On the slide, drag the second arc until the yellow diamond adjustment handles are on the left edge of the slide. On the Home tab, in the Drawing group, click Arrange, and then do the following:Point to Align, and then click Align to Slide. Point to Align, and then click Align Middle. Click Send to Back.To reproduce the button shapes on this slide, do the following:On the Home tab, in the Drawing group, click Shapes, and then under Basic Shapes click Oval (first row, second option from the left). On the slide, drag to draw an oval.Select the oval. Under Drawing Tools, on the Format tab, in the Size group, do the following:In the Shape Height box, enter 0.34”.In the Shape Width box, enter 0.34”.Under Drawing Tools, on the Format tab, in the Shape Styles group, click More, and then click Light 1 Outline, Colored Fill – Dark 1 (third row, first option from the left).Under Drawing Tools, on the Format tab, in the bottom right corner of the Shape Styles group, click the Format Shape dialog box launcher. In the Format Shape dialog box, click Fill in the left pane. In the Fill pane, select Solid Fill. Click the button next to Color, and then under Theme Colors click Olive Green, Accent 3, Lighter 80°(second row, seventh option from the left).Also in the Format Shape dialog box, click Line Color in the left pane. In the Line Color pane, select No line. Also in the Format Shape dialog box, click Shadow in the left pane. In the Shadow pane, click the button next to Presets, under Outer click Offset Bottom (first row, second option from the left), and then do the following:In the Transparency box, enter 0%.In the Size box, enter 100%.In the Blur box, enter 8.5 pt.In the Angle box, enter 90°.In the Distance box, enter 1 pt.Also in the Format Shape dialog box, click 3-D Format in the left pane, and then do the following in the 3-D Format pane:Under Bevel, click the button next to Top, and then under Bevel click Art Deco (third row, fourth option from the left). Next to Top, in the Width box, enter 5 pt, and in the Height box, enter 5 pt.UnderContour, click the button next to Color, and then under Theme Colors click White, Background 1 (first row, first option from the left). In the Size box, enter 3.5 pt.Under Surface, click the button next to Material, and then under Standard click Matte (first row, first option from the left). Click the button next to Lighting, and then under Neutral click Soft (first row, third option from the left).On the slide, select the oval. Under Drawing Tools, on the Format tab, in the bottom right corner of the Size group, click the Size and Position dialog box launcher. In the Size and Position dialog box, on the Position tab, do the following:In the Horizontal box, enter 2.98”.In the Vertical box, enter 1.5”.Select the oval. On the Home tab, in the Clipboard group, click the arrow under Paste, and then click Duplicate.Select the duplicate oval. Under Drawing Tools, on the Format tab, in the bottom right corner of the Size group, click the Size and Position dialog box launcher. In the Size and Position dialog box, on the Position tab, do the following:In the Horizontal box, enter 3.52”.In the Vertical box, enter 2.98”. Repeat step 9 two more times, for a total of four ovals. Under Drawing Tools, on the Format tab, in the bottom right corner of the Size group, click the Size and Position dialog box launcher. In the Size and Position dialog box, on the Position tab, do the following to position the third and fourth ovals:Select the third oval on the slide, and then enter 3.52” in theHorizontal box and 4.27” in the Vertical box.Select the fourth oval on the slide, and then enter 2.99” in theHorizontal box and 5.66” in the Vertical box.To reproduce the text on this slide, do the following:On the Insert tab, in the Text group, click Text Box, and then on the slide, drag to draw the text box. Enter text in the text box and select the text. On the Home tab, in the Font group, do the following: In the Font list, select Corbel.In the Font Size list, select 22.Click the arrow next to Font Color, and then under Theme Colors click White, Background 1, Darker 50% (sixth row, first option from the left).On the Home tab, in the Paragraph group, click Align Text Left to align the text left in the text box.On the slide, drag the text box to the right of the first oval.Select the text box. On the Home tab, in the Clipboard group, click the arrow under Paste, and then click Duplicate. Click in the text box and edit the text. Drag the second text box to the right of the second oval.Repeat steps 5-7 to create the third and fourth text boxes, dragging them to the right of the third and fourth ovals. To reproduce the animation effects on this slide, do the following:On the Animations tab, in the Animations group, click Custom Animation.On the Home tab, in the Editing group, click Select, and then click Selection Pane. In the Selection and Visibility pane, select the rectangle group. In the CustomAnimation task pane, do the following:Click AddEffect, point to Emphasis, and then click More Effects. In the Add Emphasis Effect dialog box, under Basic, click Spin. Select the animation effect (spin effect for the rectangle group). Under Modify: Spin, do the following:In theStart list, selectWith Previous. In the Amount list, in the Custom box, enter 123°,and then press ENTER. Also in the Amount list, clickCounterclockwise.In the Speedlist, select Fast. On the slide, select the first oval. In the CustomAnimation task pane, do the following:Click AddEffect, point to Emphasis, and then click More Effects. In the Add Emphasis Effect dialog box, under Basic, click Change Fill Color. Select the second animation effect (change fill color effect for the first oval). Under Modify: Change Fill Color, do the following:In the Startlist, select After Previous. In the Fill Color list, click More Colors. In the Colors dialog box, on the Custom tab, enter values for Red: 130, Green: 153, Blue: 117. In the Speedlist, select Very Fast.On the slide, select the first text box. In the CustomAnimation task pane, do the following:Click Add Effect, point to Entrance,and then click More Effects. In the Add Entrance Effect dialog box, under Subtle, clickFade. Select the third animation effect (fade effect for the first text box). Under Modify: Fade, do the following:In theStart list, selectWith Previous.In the Speed list, select Very Fast. In the Selection and Visibility pane, select the rectangle group. In the CustomAnimation task pane, do the following:Click AddEffect, point to Emphasis, and then click More Effects. In the Add Emphasis Effect dialog box, under Basic, click Spin. Select the fourth animation effect (spin effect for the rectangle group). Under Modify: Spin, do the following:In theStart list, selectOn Click. In the Amount list, in the Custom box, enter 22°, and then press ENTER. Also in the Amount list, click Clockwise.In the Speed list, select Very Fast.On the slide, select the second oval. In the CustomAnimation task pane, do the following:Click AddEffect, point to Emphasis, and then click More Effects. In the Add Emphasis Effect dialog box, under Basic, click Change Fill Color. Select the fifth animation effect (change fill color effect for the second oval). Under Modify: Change Fill Color, do the following:In the Startlist, select After Previous. In the Fill Color list, click More Colors. In the Colors dialog box, on the Custom tab, enter values for Red: 130, Green: 153, Blue: 117. In the Speedlist, select Very Fast.On the slide, select the second text box. In the CustomAnimation task pane, do the following:Click Add Effect, point to Entrance and then click More Effects. In the Add Entrance Effect dialog box, under Subtle, clickFade. Select the sixth animation effect (fade effect for the second text box). Under Modify: Fade, do the following:In theStart list, selectWith Previous.In the Speed list, select Very Fast. On the slide, select the third oval. In the CustomAnimation task pane, do the following:Click AddEffect, point to Emphasis, and then click More Effects. In the Add Emphasis Effect dialog box, under Basic, click Change Fill Color. Select the seventh animation effect (change fill color effect for the third oval). Under Modify: Change Fill Color, do the following:In the Startlist, select After Previous. In the Fill Color list, click More Colors. In the Colors dialog box, on the Custom tab, enter values for Red: 130, Green: 153, Blue: 117. In the Speedlist, select Very Fast.On the slide, select the third text box. In the CustomAnimation task pane, do the following:Click Add Effect, point to Entrance and then click More Effects. In the Add Entrance Effect dialog box, under Subtle, clickFade. Select the eighth animation effect (fade effect for the third text box). Under Modify: Fade, do the following:In theStart list, selectWith Previous.In the Speed list, select Very Fast. On the slide, select the fourth oval. In the CustomAnimation task pane, do the following:Click AddEffect, point to Emphasis, and then click More Effects. In the Add Emphasis Effect dialog box, under Basic, click Change Fill Color. Select the ninth animation effect (change fill color effect for the fourth oval). Under Modify: Change Fill Color, do the following:In the Startlist, select After Previous. In the Fill Color list, click More Colors. In the Colors dialog box, on the Custom tab, enter values for Red: 130, Green: 153, Blue: 117. In the Speedlist, select Very Fast.On the slide, select the fourth text box. In the CustomAnimation task pane, do the following:Click Add Effect, point to Entrance,and then click More Effects. In the Add Entrance Effect dialog box, under Subtle, clickFade. Select the 10th animation effect (fade effect for the fourth text box). Under Modify: Fade, do the following:In theStart list, selectWith Previous.In the Speed list, select Very Fast.
- SmartArt custom animation effects: vertical block list(Intermediate)To reproduce the SmartArt effects on this slide, do the following:On the Home tab, in the Slides group, click Layout, and then clickBlank. On the Insert tab, in the Illustrations group, click SmartArt. In the Choose a SmartArt Graphic dialog box, in the left pane, click List. In the List pane, click Vertical Block List (fourth row, third option from the left), and then click OK to insert the graphic into the slide.To create a fourth row, do the following:Select the third block shape (the shape on the left side) at the bottom of the graphic, under SmartArtTools, on the Design tab, in the CreateGraphic group, click the arrow next to AddShape, and select AddShapeAfter.To add a bulleted rectangle next to the fourth block shape, select the fourth block shape, and then under SmartArtTools, on the Design tab, in the CreateGraphic group, click AddBullet.To enter numbers and text in the blocks and rectangles, select the graphic, and then click one of the arrows on the left border. In the Type your text here dialog box, enter text for each shape. (Note: In the example slide, the first-level text boxes contain “1,” “2,” “3,” and “4.” There should be only one second-level text box for each first-level box (delete the second bullet), and they contain “First statement,” “Second statement,” and so on.)To reproduce the rectangle effects on this slide, do the following:Press and hold CTRL, and then select each of the rectangles (on the right side of the graphic).Under SmartArtTools, on the Format tab, in the Shapes group, click the arrow to the right of ChangeShape, and under Rectangles select SnipDiagonalCornerRectangle (fifth option from the left).With the rectangles still selected, drag one of the left center adjustment handles 1” to the left to lengthen all four rectangles.With the rectangles still selected, on the Home tab, in the Font group, in the FontSize box, select 36, and in the FontColor list, under ThemeColors select White, Background 1 (first row, first option from the left). With the rectangles still selected, on the Home tab, in the bottom right corner of the Paragraph group, click the Paragraph dialog box launcher. In the Paragraph dialog box, under Indentation, do the following:In the BeforeText box, enter 1”.In the Special list, select Hanging.Next to the Special list, in the By box, enter 1”.Select the SmartArt graphic, and then under SmartArtTools, on the Design tab, in the SmartArtStyles group, click MoreStyles, and under 3-D select PolishedEffect (first option from the left). Select the first rectangle from the top (“First statement” in the example slide), and on the Home tab, in the Drawing group, click the arrow to the right of ShapeFill, and under ThemeColors select Red, Accent 2 (first row, sixth option from the left).Select the second rectangle from the top (“Second statement” in the example slide), and on the Home tab, in the Drawing group, click the arrow to the right of ShapeFill, and under ThemeColors select Olive Green, Accent 3 (first row, seventh option from the right).Select the third rectangle from the top (“Third statement” in the example slide), and on the Home tab, in the Drawing group, click the arrow to the right of ShapeFill, and under ThemeColors select Purple, Accent 4 (first row, eighth option from the left). Select the fourth rectangle from the top (“Fourth statement” in the example slide), and on the Home tab, in the Drawing group, click the arrow to the right of ShapeFill, and under ThemeColors select Orange, Accent 6 (first row, tenth option from the left). To reproduce the circleson this slide, do the following:Press and hold CTRL, and then select the four block shapes (the shapes on the left side) in the SmartArt graphic, and then under SmartArtTools, on the Format tab, in the Shapes group, click the arrow to the right of ChangeShape, and under BasicShapes select Oval (first row, first option from the left). On the slide, drag one of the top right adjustment handles to the left to change the ovals into circles and to decrease their size.Also with the four circles selected, drag the circles until they cover the bullet on the rectangles, and then on the Home tab, in the Font group, in the FontColor list, under ThemeColors select White, Background 1, Darker 50% (sixth row, first option from the left). Also on the Home tab, in the bottom right corner of the Drawing group, click the FormatShape dialog box launcher. In the FormatShape dialog box, click Fill in the left pane, select Gradientfill in the Fill pane, and then do the following:In the Type list, select Radial.In the Direction list, select FromCenter (third option from the left).Under Gradient stops, click Add or Remove until two stops appear in the drop-down list.Also under Gradient stops, customize the gradient stops that you added as follows:Select Stop 1 from the list, and then do the following:In the Stop position box, enter 0%.Click the button next to Color, and then under ThemeColors select White, Background 1 (first row, first option from the left). Select Stop 2 from the list, and then do the following: In the Stop position box, enter 100%.Click the button next to Color, and then under ThemeColors select White, Background 2, Darker 25% (fourth row, first option from the left). To reproduce the animation effects on this slide, do the following:On the Animations tab, in the Animations group, click CustomAnimation. On the slide, select the SmartArt graphic, and then inthe CustomAnimation task pane, do the following:Click AddEffect, point to Entrance, and select MoreEffects. In the AddEntranceEffect dialog box, under Subtle select Fade.With the SmartArt graphic still selected, clickAddEffect, point to MotionPaths, and select Right.On the slide, right-click the motion path and select ReversePathDirection. Inthe CustomAnimation task pane, do the following:Press and hold CTRL, and select the two effects in the task pane. Click the arrow to the right of the selected effects and select EffectOptions. In the EffectsOptions dialog box, do the following:On the Timing tab, in the Speed list, select Fast. On the SmartArtAnimation tab, in the Group graphic list, select Onebyone.Click the double arrows under the two effects to show all the effects for all the shapes (16 effects).Press and hold CTRL, select all of the effects, and then under Modify selected effects, in the Start list, select WithPrevious.Press and hold CTRL, select the first, third, fifth, and seventh effects (fade entrance effects), and then do the following:Click Change, point to Entrance, and select MoreEffects. In the ChangeEntranceEffect dialog box, under Moderate, select Grow & Turn.Under Modify: Grow & Turn, in the Start list, select AfterPrevious.Press and hold CTRL, and select the ninth, 11th, 13th, and 15th effects (right motion paths). Click the arrow next to one of the selected effects, and then click Remove.Drag the ninth effect (right motion path) until it is third in the list of effects.Drag the 10theffect (right motion path), until it is sixth in the list of effects.Drag the 11th effect (right motion path), until it is ninth in the list of effects.To reproduce the background effects on this slide, do the following:Right-click the slide background area, and then click Format Background. In the Format Background dialog box, click Fill in the left pane, select Gradient fill in the Fill pane, and then do the following:In the Type list, select Radial.Click the button next to Direction, and then click From Center (third option from the left). Under Gradient stops, click Add or Remove until two stops appear in the drop-down list.Also under Gradient stops, customize the gradient stops that you added as follows:Select Stop 1 from the list, and then do the following:In the Stop position box, enter 33%.Click the button next to Color, and then under ThemeColors select White, Background 1 (first row, first option from the left). Select Stop 2 from the list, and then do the following: In the Stop position box, enter 100%.Click the button next to Color, and then under ThemeColors select White, Background 1, Darker 25% (fourth row, first option from the left).
- SmartArt custom animation effects: horizontal picture list(Intermediate)To reproduce the SmartArt effects on this page, do the following:On the Home tab, in the Slides group, click Layout, and then clickBlank. On the Insert tab, in the Illustrations group, click SmartArt.In the Choose a SmartArt Graphic dialog box, in the left pane, click List. In the List pane, double-click Horizontal Picture List (third row, third option from the left) to insert the graphic into the slide. Press and hold CTRL, and select the picture placeholder and text shape (top and bottom shape) in one of the objects. Under SmartArt Tools,on the Design tab, in the Create Graphic group, click Add Shape, and then click Add Shape After. Repeat this process one more time for a total of five picture placeholders and text shapes. Select the graphic. Under SmartArt Tools, on the Format tab, click Size, and then do the following:In the Height box, enter 4.44”.In the Width box, enter 9.25”.Under SmartArt Tools, on the Format tab, click Arrange, click Align, and then do the following:Click Align to Slide.Click Align Middle. Click Align Center. Select the graphic, and then click one of the arrows on the left border. In the Type your text here dialog box, enter text.Press and hold CTRL, and then select all five text boxes in the graphic. On the Home tab, in the Font group, select Corbel from the Font list,and then enter 22 in the Font Size box.Select the graphic. Under SmartArtTools, on the Design tab, in the SmartArtStyles group, do the following: Click ChangeColors, and then under Colorful click Colorful Range – Accent Colors 2 to 3 (second option from the left).Click More, and then under Best Match for Document click Moderate Effect (fourth option from the left).Select the rounded rectangle at the top of the graphic. Under SmartArtTools, on the Format tab, in the ShapeStyles group, click the arrow next to ShapeFill, and then under Theme Colors clickWhite, Background 1, Darker 35% (fifth row, first option from the left).Click each of the five picture placeholders in the SmartArt graphic, select a picture, and then click Insert.To reproduce the animation effects on this slide, do the following:On the Animations tab, in the Animations group, click CustomAnimation.On the slide, select the graphic. In the CustomAnimation task pane, do the following:Click Add Effect, point to Entrance, and then click MoreEffects. In the Add Entrance Effect dialog box, under Moderate, click Ascend. Under Modify: Ascend, in the Speed list, select Fast.Also in the Custom Animation taskpane, click the arrow to the right of the animation effect, and then click Effect Options. In the Ascend dialog box, on the SmartArtAnimation tab, in the Group Graphic list, select One by one.Also in the Custom Animation task pane, click the double-arrow below the animation effect to expand the list of effects.Also in the Custom Animation task pane, do the following to modify the list of effects:Select the first animation effect, and then do the following:Click Change, point toEntrance, and then clickMoreEffects. In the Change Entrance Effect dialog box, under Moderate, click Compress. Under Modify: Compress, in the Start list, select With Previous.Press and hold CTRL, select the third, fifth, seventh, ninth, and 11th animation effects (effects for the text shapes), and then do the following:Click Change, point toEntrance, and then clickMoreEffects. In the Change Entrance Effect dialog box, under Basic, click Peek In, and then click OK. Under Modify: Peek In, in the Direction list, select From Top.Under Modify: Peek In, in the Speed list, select Fast.Press and hold CTRL, select the second, fourth, sixth, eighth, and 10th animation effects (effects for the pictures). Under Modify: Ascend, in the Start list, selectAfter Previous.To reproduce the background effects on this slide, do the following:Right-click the slide background area, and then click Format Background. In the Format Background dialog box, click Fill in the left pane, select Gradient fill in the Fill pane, and then do the following:In the Type list, select Linear.Click the button next to Direction, and then click Linear Down (first row, second option from the left).Under Gradient stops, click Add or Remove until two stops appear in the drop-down list.Also under Gradient stops, customize the gradient stops as follows:Select Stop 1 from the list, and then do the following:In the Stop position box, enter 0%.Click the button next to Color, click More Colors, and then in the Colors dialog box, on the Custom tab, enter values for Red: 130, Green: 126, and Blue: 102.Select Stop 2 from the list, and then do the following: In the Stop position box, enter 71%.Click the button next to Color, and then click Black, Text 1(first row, second option from the left).