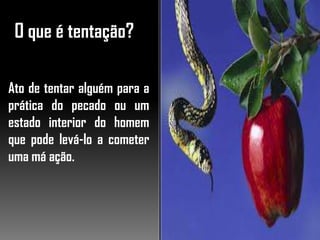
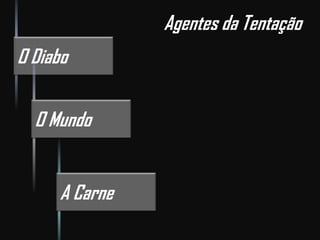
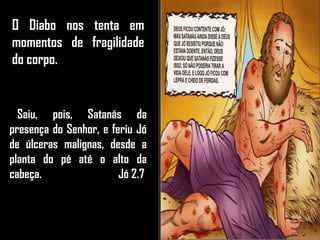
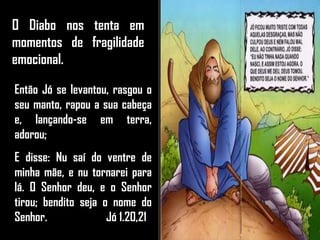
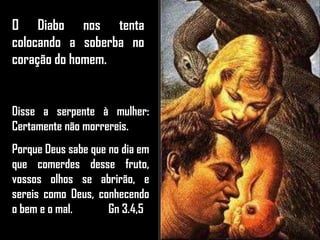
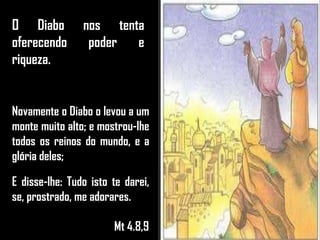
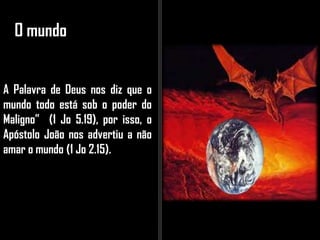
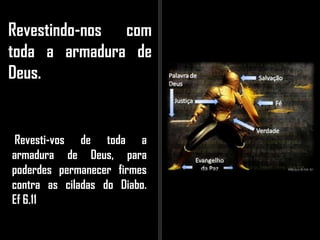
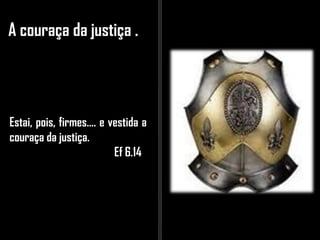
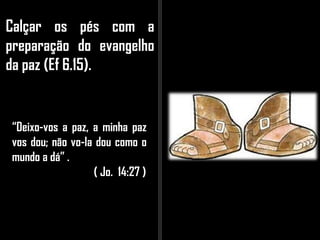
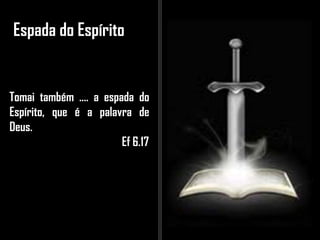
SlideShare uma empresa Scribd logo
1 de 39
Curso de Discipulado
Igreja Pentecostal Shekinah
Ministério Moreno
Lição 1 - Oração
Lição 2 - Jejum
Lição 3 - Tentação
Lição 4 - Fé
MÓDULO II
Tentação
O que é tentação?
Ato de tentar alguém para a
prática do pecado ou um
estado interior do homem
que pode levá-lo a cometer
uma má ação.
Ninguém, sendo tentado,
diga: Sou tentado por
Deus; porque Deus não
pode ser tentado pelo
mal e ele a ninguém
tenta. Tg 1.13
Ninguém é tentando
por Deus.
Cada um, porém, é tentado,
quando atraído e engodado pela
sua própria concupiscência;
então a concupiscência, havendo
concebido, dá à luz o pecado; e o
pecado, sendo consumado, gera
a morte. Tg 1.14,15
O pecado é gerado
no coração do
homem.
Não vos sobreveio nenhuma
tentação, senão humana; mas fiel
é Deus, o qual não deixará que
sejais tentados acima do que
podeis resistir, antes com a
tentação dará também o meio de
saída, para que a possais
suportar. 1 Co 10.13
Não somos tentados
além das nossas
forças.
Se confessarmos os nossos
pecados, ele é fiel e justo
para nos perdoar e nos
purificar de toda injustiça.
1 Jo 1.9
O que encobre as suas
transgressões nunca
prosperará; mas o que as
confessa e deixa, alcançará
misericórdia. Pv 28.13
Portanto, qual deve
ser nossa atitude
após pecarmos ?
O Diabo
O Mundo
A Carne
Agentes da Tentação
O Diabo
Seus nomes ou referências Bíblicas
descrevem seu caráter maligno:
1) Diabo (de origem grega)
significa caluniador;
2) Satanás (de origem hebraica)
significa adversário;
3) Pai da Mentira (Jo 8.44);
4) O Dragão e a Antiga Serpente
(Ap.20:2 );
5) O deus deste século” (2 Co.4:4 );
6) O príncipe deste mundo(Jo.12:31 ).
O Diabo e seus métodos
O Diabo nos tenta em
momentos de fragilidade
do corpo.
Saiu, pois, Satanás da
presença do Senhor, e feriu Jó
de úlceras malignas, desde a
planta do pé até o alto da
cabeça. Jó 2.7
O Diabo nos tenta em
momentos de fragilidade
emocional.
Então Jó se levantou, rasgou o
seu manto, rapou a sua cabeça
e, lançando-se em terra,
adorou;
E disse: Nu saí do ventre de
minha mãe, e nu tornarei para
lá. O Senhor deu, e o Senhor
tirou; bendito seja o nome do
Senhor. Jó 1.20,21
O Diabo nos tenta
colocando a soberba no
coração do homem.
Disse a serpente à mulher:
Certamente não morrereis.
Porque Deus sabe que no dia em
que comerdes desse fruto,
vossos olhos se abrirão, e
sereis como Deus, conhecendo
o bem e o mal. Gn 3.4,5
O Diabo nos tenta
oferecendo poder e
riqueza.
Novamente o Diabo o levou a um
monte muito alto; e mostrou-lhe
todos os reinos do mundo, e a
glória deles;
E disse-lhe: Tudo isto te darei,
se, prostrado, me adorares.
Mt 4.8,9
O mundo
A Palavra de Deus nos diz que o
mundo todo está sob o poder do
Maligno” (1 Jo 5.19), por isso, o
Apóstolo João nos advertiu a não
amar o mundo (1 Jo 2.15).
O que o mundo nos oferece ?
A cobiça da carne
Desejos por prazeres
sexuais e outras cobiças.
(Gl 5.16,17)
A cobiça da olhos
Refere-se ao desejos malignos
originados por aquilo que
vemos, em especial, coisas
materiais.
(2 Rs 5.20)
A soberba da vida
É o anseio pecaminoso por
proeminência e glória .
(Jo 19.10).
Nossa natureza: a
carne.
Cada um, porém, é tentado,
quando atraído e engodado pela
sua própria concupiscência;
Então a concupiscência, havendo
concebido, dá à luz o pecado; e o
pecado, sendo consumado, gera a
morte. Tg 1.14,15
Somos um ser
tricotômico, logo a tentação
se manifesta através do
nosso corpo, alma e espírito.
E o próprio Deus de paz vos
santifique completamente; e o
vosso espírito, e alma e corpo
sejam plenamente conservados
irrepreensíveis para a vinda de
nosso Senhor Jesus Cristo.
1 Ts 5.23
O corpo é a casa onde
habitamos (2 Co 5.1)
Ex. Prostituíção, glutonaria,
etc. Gl 5.19-21
A alma é o centro das
emoções, dos desejos e
pensamentos.
Ex: Inimizades, contendas e
ciúmes (Gl 5.20)
O espírito é a parte que
nos capacita a ter
comunhão com Deus.
Ex: idolatria (Rm 1.23-25)
Revestindo-nos com
toda a armadura de
Deus.
Revesti-vos de toda a
armadura de Deus, para
poderdes permanecer firmes
contra as ciladas do Diabo.
Ef 6.11
O cinto da verdade.
Estai, pois, firmes, tendo
cingidos os vossos lombos com
a verdade... Ef 6.14
... Conhecereis a verdade, e a
verdade vos libertará.
(Jo 8.32)
A couraça da justiça .
Estai, pois, firmes.... e vestida a
couraça da justiça.
Ef 6.14
Calçar os pés com a
preparação do evangelho
da paz (Ef 6.15).
“Deixo-vos a paz, a minha paz
vos dou; não vo-la dou como o
mundo a dá” .
( Jo. 14:27 )
Escudo da fé.
Tomando, sobretudo, o escudo
da fé, com o qual podereis
apagar todos os dardos
inflamados do Maligno.
Ef 6.16
Capacete da salvação
Tomai também o capacete da
salvação..... Ef 6.17
Guarda com toda a diligência o
teu coração, porque dele
procedem as fontes da vida...
Pv 4.23
Espada do Espírito
Tomai também .... a espada do
Espírito, que é a palavra de
Deus.
Ef 6.17
Oração
“Vigiai e orai, para que não
entreis em tentação; o
espírito, na verdade, está
pronto, mas a carne é fraca”.
Mt 26.41
www.shekinahmoreno.blogspot.com

Mais conteúdo relacionado

Mais procurados

Como Reconhecer a Voz de Deus
Como Reconhecer a Voz de DeusComo Reconhecer a Voz de Deus
Como Reconhecer a Voz de DeusIBMemorialJC
 
A Escolha da Entrega
A Escolha da EntregaA Escolha da Entrega
A Escolha da EntregaIBMemorialJC
 
O FALSO LIVRE ARBÍTRIO X A SOBERANIA DE DEUS
O FALSO LIVRE ARBÍTRIO X A SOBERANIA DE DEUSO FALSO LIVRE ARBÍTRIO X A SOBERANIA DE DEUS
O FALSO LIVRE ARBÍTRIO X A SOBERANIA DE DEUSmegaedvania
 
1. todos recebemos da sua plenitude
1. todos recebemos da sua plenitude1. todos recebemos da sua plenitude
1. todos recebemos da sua plenitudeTiagoRibeiro255530
 
Vencendo as Provações pelo Poder das Promessas de Deus
Vencendo as Provações pelo Poder das Promessas de DeusVencendo as Provações pelo Poder das Promessas de Deus
Vencendo as Provações pelo Poder das Promessas de DeusIBMemorialJC
 
CURSO BIBLICO A Doutrina da Salvação Aula 4 Regeneração
CURSO BIBLICO A Doutrina da Salvação Aula 4 RegeneraçãoCURSO BIBLICO A Doutrina da Salvação Aula 4 Regeneração
CURSO BIBLICO A Doutrina da Salvação Aula 4 RegeneraçãoDr. Paulo Lis
 
Crescendo por Meio dos Problemas
Crescendo por Meio dos ProblemasCrescendo por Meio dos Problemas
Crescendo por Meio dos ProblemasIBMemorialJC
 
Pecado [slides]
Pecado [slides]Pecado [slides]
Pecado [slides]PIBJA
 
Princípios para uma Vida de Santidade
Princípios para uma Vida de SantidadePrincípios para uma Vida de Santidade
Princípios para uma Vida de SantidadeIBMemorialJC
 
A Escolha da Liberdade
A Escolha da LiberdadeA Escolha da Liberdade
A Escolha da LiberdadeIBMemorialJC
 
O Chamado (4/4)
O Chamado (4/4)O Chamado (4/4)
O Chamado (4/4)daalianca
 
CURSO BIBLICO A Doutrina da Salvação Aula 1 depravação
CURSO BIBLICO A Doutrina da Salvação Aula 1 depravaçãoCURSO BIBLICO A Doutrina da Salvação Aula 1 depravação
CURSO BIBLICO A Doutrina da Salvação Aula 1 depravaçãoDr. Paulo Lis
 
A Cultura do Reino
A Cultura do ReinoA Cultura do Reino
A Cultura do ReinoIBMemorialJC
 
Corra para Ver Vidas Transformadas
Corra para Ver Vidas TransformadasCorra para Ver Vidas Transformadas
Corra para Ver Vidas TransformadasIBMemorialJC
 
Desista de Controlar
Desista de ControlarDesista de Controlar
Desista de ControlarIBMemorialJC
 
Vença o Sofrimento
Vença o SofrimentoVença o Sofrimento
Vença o SofrimentoIBMemorialJC
 

Mais procurados (20)

Como Reconhecer a Voz de Deus
Como Reconhecer a Voz de DeusComo Reconhecer a Voz de Deus
Como Reconhecer a Voz de Deus
 
A Escolha da Entrega
A Escolha da EntregaA Escolha da Entrega
A Escolha da Entrega
 
O FALSO LIVRE ARBÍTRIO X A SOBERANIA DE DEUS
O FALSO LIVRE ARBÍTRIO X A SOBERANIA DE DEUSO FALSO LIVRE ARBÍTRIO X A SOBERANIA DE DEUS
O FALSO LIVRE ARBÍTRIO X A SOBERANIA DE DEUS
 
Consciência de Ataques Malignos no Lar
Consciência de Ataques Malignos no LarConsciência de Ataques Malignos no Lar
Consciência de Ataques Malignos no Lar
 
1. todos recebemos da sua plenitude
1. todos recebemos da sua plenitude1. todos recebemos da sua plenitude
1. todos recebemos da sua plenitude
 
Vencendo as Provações pelo Poder das Promessas de Deus
Vencendo as Provações pelo Poder das Promessas de DeusVencendo as Provações pelo Poder das Promessas de Deus
Vencendo as Provações pelo Poder das Promessas de Deus
 
CURSO BIBLICO A Doutrina da Salvação Aula 4 Regeneração
CURSO BIBLICO A Doutrina da Salvação Aula 4 RegeneraçãoCURSO BIBLICO A Doutrina da Salvação Aula 4 Regeneração
CURSO BIBLICO A Doutrina da Salvação Aula 4 Regeneração
 
Crescendo por Meio dos Problemas
Crescendo por Meio dos ProblemasCrescendo por Meio dos Problemas
Crescendo por Meio dos Problemas
 
Pecado [slides]
Pecado [slides]Pecado [slides]
Pecado [slides]
 
Princípios para uma Vida de Santidade
Princípios para uma Vida de SantidadePrincípios para uma Vida de Santidade
Princípios para uma Vida de Santidade
 
A Escolha da Liberdade
A Escolha da LiberdadeA Escolha da Liberdade
A Escolha da Liberdade
 
O Chamado (4/4)
O Chamado (4/4)O Chamado (4/4)
O Chamado (4/4)
 
Apresentação1
Apresentação1Apresentação1
Apresentação1
 
CURSO BIBLICO A Doutrina da Salvação Aula 1 depravação
CURSO BIBLICO A Doutrina da Salvação Aula 1 depravaçãoCURSO BIBLICO A Doutrina da Salvação Aula 1 depravação
CURSO BIBLICO A Doutrina da Salvação Aula 1 depravação
 
A Cultura do Reino
A Cultura do ReinoA Cultura do Reino
A Cultura do Reino
 
Corra para Ver Vidas Transformadas
Corra para Ver Vidas TransformadasCorra para Ver Vidas Transformadas
Corra para Ver Vidas Transformadas
 
A soberania de Deus
A soberania de  DeusA soberania de  Deus
A soberania de Deus
 
Desista de Controlar
Desista de ControlarDesista de Controlar
Desista de Controlar
 
O Poder da Paz
O Poder da PazO Poder da Paz
O Poder da Paz
 
Vença o Sofrimento
Vença o SofrimentoVença o Sofrimento
Vença o Sofrimento
 

Semelhante a Lição 3 tentação

Semelhante a Lição 3 tentação (20)

Desenvolvendo a auto aceitação
Desenvolvendo a auto aceitaçãoDesenvolvendo a auto aceitação
Desenvolvendo a auto aceitação
 
VENCENDO AS TENTAÇÕES
VENCENDO AS TENTAÇÕESVENCENDO AS TENTAÇÕES
VENCENDO AS TENTAÇÕES
 
Tentação
TentaçãoTentação
Tentação
 
A armadura de deus 1
A armadura de deus 1A armadura de deus 1
A armadura de deus 1
 
A armadura de deus 1
A armadura de deus 1A armadura de deus 1
A armadura de deus 1
 
Suportando a provação_342014_GGR
Suportando a provação_342014_GGRSuportando a provação_342014_GGR
Suportando a provação_342014_GGR
 
Suportando a provação_Lição_original com textos_342014
Suportando a provação_Lição_original com textos_342014Suportando a provação_Lição_original com textos_342014
Suportando a provação_Lição_original com textos_342014
 
O QUE PRECISO FAZER PARA SER SALVO?
O QUE PRECISO FAZER PARA SER SALVO?O QUE PRECISO FAZER PARA SER SALVO?
O QUE PRECISO FAZER PARA SER SALVO?
 
Corpo alma espirito
Corpo alma espiritoCorpo alma espirito
Corpo alma espirito
 
Confissao Franca Rochelle
Confissao Franca RochelleConfissao Franca Rochelle
Confissao Franca Rochelle
 
O que eu preciso fazer para ser salvo?
O que eu preciso fazer para ser salvo?O que eu preciso fazer para ser salvo?
O que eu preciso fazer para ser salvo?
 
O que fazer para ser salvo?
O que fazer para ser salvo?O que fazer para ser salvo?
O que fazer para ser salvo?
 
Mas não é assim o dom gratuito como a ofensa
Mas não é assim o dom gratuito como a ofensaMas não é assim o dom gratuito como a ofensa
Mas não é assim o dom gratuito como a ofensa
 
Apostila discipulado
Apostila discipuladoApostila discipulado
Apostila discipulado
 
Libertação espiritual
Libertação espiritualLibertação espiritual
Libertação espiritual
 
Libertação espiritual
Libertação espiritualLibertação espiritual
Libertação espiritual
 
Aprendendo
AprendendoAprendendo
Aprendendo
 
Treinamento PPT
Treinamento PPTTreinamento PPT
Treinamento PPT
 
CHEIOS DO ESPÍRITO.pptx
CHEIOS DO ESPÍRITO.pptxCHEIOS DO ESPÍRITO.pptx
CHEIOS DO ESPÍRITO.pptx
 
A doutrina do engano
A doutrina do enganoA doutrina do engano
A doutrina do engano
 

Mais de Wilson Paulo de Santana Paulo

Mais de Wilson Paulo de Santana Paulo (19)

A completuda da bíblia
A completuda da bíbliaA completuda da bíblia
A completuda da bíblia
 
A Clareza e Supremacia da Palavra de Deus
A Clareza e Supremacia da Palavra de DeusA Clareza e Supremacia da Palavra de Deus
A Clareza e Supremacia da Palavra de Deus
 
A Infalibilidade das Sagradas Escrituras
A Infalibilidade das Sagradas EscriturasA Infalibilidade das Sagradas Escrituras
A Infalibilidade das Sagradas Escrituras
 
A Inerrância da Palavra de Deus
A Inerrância da Palavra de Deus A Inerrância da Palavra de Deus
A Inerrância da Palavra de Deus
 
Missão do Discípulo
Missão do DiscípuloMissão do Discípulo
Missão do Discípulo
 
A igreja primitiva
A igreja primitivaA igreja primitiva
A igreja primitiva
 
Dons do Espírito Santo
Dons do Espírito SantoDons do Espírito Santo
Dons do Espírito Santo
 
Batismo no Espírito santo
Batismo no Espírito santo Batismo no Espírito santo
Batismo no Espírito santo
 
O chamado ministerial
O chamado ministerialO chamado ministerial
O chamado ministerial
 
Lição 2 jejum
Lição 2   jejumLição 2   jejum
Lição 2 jejum
 
Lição 1 oração
Lição 1   oração Lição 1   oração
Lição 1 oração
 
Lição 2 jejum
Lição 2   jejumLição 2   jejum
Lição 2 jejum
 
Lição 1 oração
Lição 1   oração Lição 1   oração
Lição 1 oração
 
Modulo i 4 atualizado
Modulo i 4 atualizadoModulo i 4 atualizado
Modulo i 4 atualizado
 
Modulo i 3 atualizado
Modulo i 3 atualizadoModulo i 3 atualizado
Modulo i 3 atualizado
 
Modulo i 2 atualizado
Modulo i 2 atualizadoModulo i 2 atualizado
Modulo i 2 atualizado
 
Modulo i 2 atualizado
Modulo i 2 atualizadoModulo i 2 atualizado
Modulo i 2 atualizado
 
1º encontro do corpo diaconal shekinah cópia
1º encontro do corpo diaconal shekinah   cópia1º encontro do corpo diaconal shekinah   cópia
1º encontro do corpo diaconal shekinah cópia
 
Teologia econômica financeira
Teologia econômica financeira Teologia econômica financeira
Teologia econômica financeira
 

Lição 3 tentação

  • 1. Curso de Discipulado Igreja Pentecostal Shekinah Ministério Moreno
  • 2. Lição 1 - Oração Lição 2 - Jejum Lição 3 - Tentação Lição 4 - Fé MÓDULO II
  • 4. O que é tentação? Ato de tentar alguém para a prática do pecado ou um estado interior do homem que pode levá-lo a cometer uma má ação.
  • 5.
  • 6.
  • 7. Ninguém, sendo tentado, diga: Sou tentado por Deus; porque Deus não pode ser tentado pelo mal e ele a ninguém tenta. Tg 1.13 Ninguém é tentando por Deus.
  • 8. Cada um, porém, é tentado, quando atraído e engodado pela sua própria concupiscência; então a concupiscência, havendo concebido, dá à luz o pecado; e o pecado, sendo consumado, gera a morte. Tg 1.14,15 O pecado é gerado no coração do homem.
  • 9. Não vos sobreveio nenhuma tentação, senão humana; mas fiel é Deus, o qual não deixará que sejais tentados acima do que podeis resistir, antes com a tentação dará também o meio de saída, para que a possais suportar. 1 Co 10.13 Não somos tentados além das nossas forças.
  • 10. Se confessarmos os nossos pecados, ele é fiel e justo para nos perdoar e nos purificar de toda injustiça. 1 Jo 1.9 O que encobre as suas transgressões nunca prosperará; mas o que as confessa e deixa, alcançará misericórdia. Pv 28.13 Portanto, qual deve ser nossa atitude após pecarmos ?
  • 11. O Diabo O Mundo A Carne Agentes da Tentação
  • 12. O Diabo Seus nomes ou referências Bíblicas descrevem seu caráter maligno: 1) Diabo (de origem grega) significa caluniador; 2) Satanás (de origem hebraica) significa adversário; 3) Pai da Mentira (Jo 8.44); 4) O Dragão e a Antiga Serpente (Ap.20:2 ); 5) O deus deste século” (2 Co.4:4 ); 6) O príncipe deste mundo(Jo.12:31 ).
  • 13. O Diabo e seus métodos
  • 14. O Diabo nos tenta em momentos de fragilidade do corpo. Saiu, pois, Satanás da presença do Senhor, e feriu Jó de úlceras malignas, desde a planta do pé até o alto da cabeça. Jó 2.7
  • 15. O Diabo nos tenta em momentos de fragilidade emocional. Então Jó se levantou, rasgou o seu manto, rapou a sua cabeça e, lançando-se em terra, adorou; E disse: Nu saí do ventre de minha mãe, e nu tornarei para lá. O Senhor deu, e o Senhor tirou; bendito seja o nome do Senhor. Jó 1.20,21
  • 16. O Diabo nos tenta colocando a soberba no coração do homem. Disse a serpente à mulher: Certamente não morrereis. Porque Deus sabe que no dia em que comerdes desse fruto, vossos olhos se abrirão, e sereis como Deus, conhecendo o bem e o mal. Gn 3.4,5
  • 17. O Diabo nos tenta oferecendo poder e riqueza. Novamente o Diabo o levou a um monte muito alto; e mostrou-lhe todos os reinos do mundo, e a glória deles; E disse-lhe: Tudo isto te darei, se, prostrado, me adorares. Mt 4.8,9
  • 18. O mundo A Palavra de Deus nos diz que o mundo todo está sob o poder do Maligno” (1 Jo 5.19), por isso, o Apóstolo João nos advertiu a não amar o mundo (1 Jo 2.15).
  • 19. O que o mundo nos oferece ?
  • 20. A cobiça da carne Desejos por prazeres sexuais e outras cobiças. (Gl 5.16,17)
  • 21. A cobiça da olhos Refere-se ao desejos malignos originados por aquilo que vemos, em especial, coisas materiais. (2 Rs 5.20)
  • 22. A soberba da vida É o anseio pecaminoso por proeminência e glória . (Jo 19.10).
  • 23. Nossa natureza: a carne. Cada um, porém, é tentado, quando atraído e engodado pela sua própria concupiscência; Então a concupiscência, havendo concebido, dá à luz o pecado; e o pecado, sendo consumado, gera a morte. Tg 1.14,15
  • 24.
  • 25. Somos um ser tricotômico, logo a tentação se manifesta através do nosso corpo, alma e espírito. E o próprio Deus de paz vos santifique completamente; e o vosso espírito, e alma e corpo sejam plenamente conservados irrepreensíveis para a vinda de nosso Senhor Jesus Cristo. 1 Ts 5.23
  • 26.
  • 27. O corpo é a casa onde habitamos (2 Co 5.1) Ex. Prostituíção, glutonaria, etc. Gl 5.19-21
  • 28. A alma é o centro das emoções, dos desejos e pensamentos. Ex: Inimizades, contendas e ciúmes (Gl 5.20)
  • 29. O espírito é a parte que nos capacita a ter comunhão com Deus. Ex: idolatria (Rm 1.23-25)
  • 30.
  • 31. Revestindo-nos com toda a armadura de Deus. Revesti-vos de toda a armadura de Deus, para poderdes permanecer firmes contra as ciladas do Diabo. Ef 6.11
  • 32. O cinto da verdade. Estai, pois, firmes, tendo cingidos os vossos lombos com a verdade... Ef 6.14 ... Conhecereis a verdade, e a verdade vos libertará. (Jo 8.32)
  • 33. A couraça da justiça . Estai, pois, firmes.... e vestida a couraça da justiça. Ef 6.14
  • 34. Calçar os pés com a preparação do evangelho da paz (Ef 6.15). “Deixo-vos a paz, a minha paz vos dou; não vo-la dou como o mundo a dá” . ( Jo. 14:27 )
  • 35. Escudo da fé. Tomando, sobretudo, o escudo da fé, com o qual podereis apagar todos os dardos inflamados do Maligno. Ef 6.16
  • 36. Capacete da salvação Tomai também o capacete da salvação..... Ef 6.17 Guarda com toda a diligência o teu coração, porque dele procedem as fontes da vida... Pv 4.23
  • 37. Espada do Espírito Tomai também .... a espada do Espírito, que é a palavra de Deus. Ef 6.17
  • 38. Oração “Vigiai e orai, para que não entreis em tentação; o espírito, na verdade, está pronto, mas a carne é fraca”. Mt 26.41

Notas do Editor

  1. Custom animation effects: title fade-in on path and text fade by letter(Intermediate)Tip: For the effects on this slide, use a picture that measures 7.5” high (the height of the slide) and 2.61” wide.To reproduce the shape effects on this slide, do the following:On the Home tab, in theDrawing group, clickShapes, and then under Rectangles click Rectangle (first option from the left). On the slide, drag to draw a rectangle.Select the rectangle. Under DrawingTools, on the Format tab, in the Size group, do the following: In the ShapeHeight box, enter 3.17”.In the ShapeWidth box, enter 9.5”.Drag the rectangle slightly above the middle of the slide. Select the rectangle. On the Home tab, in the Drawing group, click Arrange, point to Align, and then do the following:Click Align to Slide.Click Align Left.Under DrawingTools, on theFormat tab, in the ShapeStyles group, click the next to ShapeOutline, and then click NoOutline.Under DrawingTools, on the Format tab, in the bottom right corner of the ShapeStyles group, click the FormatShape dialog box launcher. In the FormatShape dialog box, click Fill in the left pane, select Gradient fill in the Fill pane, and then do the following:In the Type list, select Linear.Click the button next to Direction, and then click Linear Right (first row, fourth option from the left). Under Gradient stops, click Add or Remove until two stops appear in the drop-down list.Also under Gradient stops, customize the gradient stops that you added as follows:Select Stop 1 from the list, and then do the following:In the Stop position box, enter 0%.Click the button next to Color, and then under Theme Colors click Orange, Accent 6, Darker 50% (fifth row, 10th option from the left).Select Stop 2 from the list, and then do the following: In the Stop position box, enter 100%.Click the button next to Color, and then under Theme Colors click Orange, Accent 6, Darker 25% (fourth row, 10th option from the left).To reproduce the “heading” text box on this slide, do the following:On the Insert tab, in the Text group, select TextBox. On the slide, drag to draw a text box.Enter the heading text, and then select text. On the Home tab, in the Font group, do the following:In the Font list, select Calibri.In the FontSize box, enter 38.Click Bold.Click the arrow next to FontColor, and then under ThemeColors click Orange, Accent 6, Darker 25% (fourth row, 10th option from the left).On the Home tab, in the Paragraph group, click AlignTextLeft.Drag the text box just above the rectangle, in the right half of the slide. To reproduce the second text box on this slide, do the following:On the Insert tab, in the Text group, click TextBox. On the slide, drag to draw a text box.Enter three lines of text with paragraph breaks, and then select the text. On the Home tab, in the Font group, do the following:In the Font list, select Calibri.In the FontSize list, select 28.Click Bold.Click the arrow next to FontColor, and then under ThemeColors click White, Background 1 (first row, first option from the left).On the Home tab, in the Paragraph group, click AlignTextLeft.Drag the second text box onto the rectangle, below the “heading” text box. To reproduce the full-color picture on this slide, do the following:On the Home tab, in theSlides group, click Layout, and then click Blank.On the Insert tab, in the Illustrations group, clickPicture. In the InsertPicture dialog box, select the 7.5” x 2.61” picture, and then click Insert.On the slide, select the picture. Under Picture Tools, on the Format tab, in the bottom right corner of the Size group, click the Size and Position dialog box launcher. In the Size and Position dialog box, on the Size tab, under Crop from,in the Bottom box, enter 2.43”. (Note: Under Size and rotate, the Height should now be 5.08”.)On the slide, select the picture. UnderPicture Tools, on the Format tab, in the Picture Styles group, click Picture Effects, point to Glow, and then under Glow Variations click Accent color 1, 5 pt glow (first row, first option from the left).Also under PictureTools, on the Format tab, in the PictureStyles group, click PictureEffects, point to Glow, point to MoreGlowColors, and then under ThemeColors click White, Background 1 (first row, first option from the left).Drag the full-color picture on top of the rectangle, to the left of the text boxes. On the Home tab, in the Drawing group, click Arrange, point to Align, and then do the following:Click Align to Slide.Click Align Top. To reproduce the second picture on this slide, do the following:On the Insert tab, in the Illustrations group, click Picture. In the InsertPicture dialog box, select the same 7.5” x 2.61” picture, and then click Insert. On the slide, select the picture. Under Picture Tools, on the Format tab, in the bottom right corner of the Size group, click the Size and Position dialog box launcher. In the Size and Position dialog box, on the Size tab, under Crop from,in the Top box, enter 5.08”. (Note: Under Size and rotate, the Height should now be 2.43”.)On the slide, select the second, smaller picture. Under PictureTools, on the Format tab, in the PictureStyles group, click the FormatShape dialog box launcher. In the FormatPicture dialog box, click Picture in the left pane, and in the Picture pane do the following:In the Brightness box, enter 70%.In the Contrast box, enter -70%.On the slide, drag the smaller picture until it is directly underneath the larger full-color picture.Select the smaller picture. On the Home tab, in the Drawing group, click Arrange, point to Align, and then do the following:Click Align to Slide.Click Align Bottom. Press and hold CTRL, and then select both pictures. On the Home tab, in the Drawing group, click Arrange, point to Align, and then do the following:Click Align Selected Objects.Click Align Center. To reproduce the animation effects on this slide, do the following:On the Animations tab, in the Animations group, click CustomAnimation. On the slide, select the “heading” text box. In the CustomAnimation task pane, do the following:Click AddEffect, point to Entrance, and then click MoreEffects. In the AddEntranceEffect dialog box, under Subtle, click Fade.Select the animation effect (fade effect for the “heading” text box). Click the arrow to the right of the selected text box, and then click Timing. In the Fade dialog box, on the Timing tab, do the following:In the Start list, select WithPrevious.In the Delay box, enter 1.5.In the Speed list, select 2 seconds (Medium).On the slide, select the “heading” text box. In the CustomAnimation task pane, do the following:ClickAddEffect, point to MotionPaths, and then click Left.Select the second animation effect (left motion path for the “heading” text box). Under Modify: Left,do the following:In the Start list, select WithPrevious.In the Speed list, select Medium. On the slide, right-click the left motion path and click ReversePathDirection. With the motion path still selected,point to the starting point (green arrow) of the motion path until the cursor becomes a two-headed arrow. Press and hold SHIFT, and then drag the starting pointabout 1.5” off the left edge of the slide. (Note: It may help to display the ruler. On the View tab, in the Show/Hide group, select Ruler. If your lines of text are longer than in the example above, you may need to further increase the length of the motion path. )On the slide, select the second text box. In the CustomAnimation task pane, do the following:Click AddEffect, point to Entrance, and then click MoreEffects. In the AddEntranceEffect dialog box, under Subtle, click Fade.Select the third animation effect (fade effect for the second text box). Click the arrow to the right of the selected effect, and then click Effect Options. In the Fade dialog box, do the following:On the Effect tab, do the following:In the Animate text list, select By Letter.In the % delay between letters box, enter 5.On the Timing tab, do the following:In the Start list, select AfterPrevious.In the Speed list, select 0.5 seconds (VeryFast).On the TextAnimation tab, in the Grouptext list, select By 1st Level Paragraphs.To reproduce the background on this slide, do the following:Right-click the slide background area, and then click Format Background. In the Format Background dialog box, click Fill in the left pane, select Gradient fill in the Fill pane, and then do the following:In the Type list, select Radial.Click the button next to Direction, and then click From Center (third option from the left).Under Gradient stops, click Add or Remove until three stops appear in the drop-down list.Also under Gradient stops, customize the gradient stops that you added as follows:Select Stop 1 from the list, and then do the following:In the Stop position box, enter 0%.Click the button next to Color, and then under Theme Colors click White, Background 1 (first row, first option from the left).Select Stop 2 from the list, and then do the following: In the Stop position box, enter 40%.Click the button next to Color, and then under Theme Colors click White, Background 1 (first row, first option from the left).Select Stop 3 from the list, and then do the following: In the Stop position box, enter 100%.Click the button next to Color, click More Colors, and then in the Colors dialog box, on the Custom tab, enter values for Red: 232, Green: 227, and Blue: 216.
  2. Custom animation effects: line sweeps in picture and text(Basic)To reproduce the shape effects on this slide, do the following:On the Home tab, in theSlides group, click Layout, and then click Blank.On the Home tab, in the Drawing group, click Shapes, and then under Lines click Line (first option from the left).On the slide, press and hold SHIFT, and then drag to draw a straight, vertical line.Select the line. Under DrawingTools, on the Format tab, in the Size group, in the Shape Width box, enter 7.5”.Under DrawingTools, on the Format tab, in the ShapeStyles group, click the Format Shape dialog box launcher. In the Format Shape dialog box, click LineColor in the left pane. In the LineColor pane, select Solidline, click the button next to Color, and then under ThemeColors click Black, Text 1 (first row, second option from the left).Also in the Format Shape dialog box, click LineStyle in the left pane. In the LineStyle pane, in the Weight box, enter 2 pt.Under DrawingTools, on the Format tab, in the ShapeStyles group, click ShapeEffects, point to Glow, and then under GlowVariations click Accent color 1, 5 pt glow (first row, first option from the left). Under DrawingTools, on the Format tab, in the ShapeStyles group, click ShapeEffects, point to Glow, point to MoreGlowColors, and then under ThemeColors click White, Background 1 (first row, first option from the left).On the Home tab, in the Drawing group, click Arrange, point to Align, and then do the following:Click Align to Slide.Click AlignCenter.Click AlignMiddle.On the slide, select the line. On the Home tab, in the Clipboard group, click the arrow under Paste, and then click Duplicate.Drag the duplicate line slightly off the right edge of the slide.With the duplicate line still selected, on the Home tab, in the Drawing group, click Arrange, point to Align, and then do the following: Click Align to Slide. Click Align Middle.On the Insert tab, in the Illustrations group, click Picture. In the InsertPicture dialog box, select a picture, and then click Insert.On the slide, select the picture. Under Picture Tools, on the Format tab, in the bottom right corner of the Size group, click the Size and Position dialog box launcher. In the Size and Position dialog box, on the Size tab, resize or crop the picture as needed so that under Size and rotate, the Height box is set to 7.5” and the Width box is set to 5”. Resize the picture under Size and rotate by entering values into the Height and Width boxes. Crop the picture under Crop from by entering values into the Left, Right, Top, and Bottom boxes. On the Home tab, in the Drawing group, click Arrange, point to Align, and then do the following:Click Align to Slide.ClickAlignRight.ClickAlignMiddle.To reproduce the text effects on this slide, do the following:On the Insert tab, in the Illustrations group, click TextBox. On the slide, drag to draw a text box.Enter text in the text box, and then select the text. On the Home tab, in the Font group, do the following:In the Font list, select Arial.In the FontSize list, select 28.Click Bold.Click the button next to FontColor, and then under ThemeColors click White, Background 1 (first row, first option from the left).On the Home tab, in the Paragraph group, click AlignTextRight to align the text right in the text box. Drag the text box onto the left half of the slide.To reproduce the background effects on this slide, do the following:Right-click the slide background area, and then click Format Background. In the Format Background dialog box, click Fill in the left pane, select Gradient fill in the Fill pane, and then do the following:In the Type list, select Linear.Click the button next to Direction, and then click Linear Down (first row, second option from the left).Under Gradient stops, click Add or Remove until two stops appear in the drop-down list.Also under Gradient stops, customize the gradient stops that you added as follows:Select Stop 1 from the list, and then do the following:In the Stop position box, enter 40%.Click the button next to Color, and then click Black, Text 1 (first row, second option from the left).Select Stop 2 from the list, and then do the following: In the Stop position box, enter 100%.Click the button next to Color, and then click Black, Text 1, Lighter 50% (second row, second option from the left).To reproduce the animation effects on this slide, do the following:On the Animations tab, in the Animations group, click CustomAnimation. Select the line off the right edge of the slide. In the CustomAnimation task pane, do the following:Click AddEffect, point to Entrance, and then click MoreEffects. In the AddEntranceEffect dialog box, under Basic, click FlyIn.Select the animation effect (fly-in effect for the second line). Under Modify: Fly In,do the following:In the Start list, select After Previous.In the Direction list, select FromLeft.In the Speed list, select Fast.On the Home tab, in the Editing group, click Select, and then click Selection Pane.In the Selection and Visibility pane, select the first line you created (in the middle of the slide). In the CustomAnimation task pane, do the following:Click AddEffect, point to Entrance, and then click MoreEffects. In the AddEntranceEffect dialog box, under Basic, click FlyIn.Select the second animation effect (fly-in effect for the first line). Under Modify: Fly In,do the following:In the Start list, select AfterPrevious.In the Direction list, select FromRight.In the Speed list, select Fast.On the slide, select the picture. In the CustomAnimation task pane, do the following:Click AddEffect, point to Entrance, and then click MoreEffects. In the AddEntranceEffect dialog box, under Basic, click Wipe.Select the third animation effect (wipe effect for the picture). Under Modify: Wipe,do the following:In the Start list, select WithPrevious.In the Direction list, select FromRight.In the Speed list, select Fast.On the slide, select the text box. In the CustomAnimation task pane, do the following:Click AddEffect, point to Entrance, and then click MoreEffects. In the AddEntranceEffect dialog box, under Basic, clickFlyIn.Select the fourth animation effect (fly-in effect for the text box). Under Modify: Fly In,do the following:In the Start list, select WithPrevious.In the Direction list, select FromRight.In the Speed list, select Fast.
  3. Custom animation effects: line sweeps in picture and text(Basic)To reproduce the shape effects on this slide, do the following:On the Home tab, in theSlides group, click Layout, and then click Blank.On the Home tab, in the Drawing group, click Shapes, and then under Lines click Line (first option from the left).On the slide, press and hold SHIFT, and then drag to draw a straight, vertical line.Select the line. Under DrawingTools, on the Format tab, in the Size group, in the Shape Width box, enter 7.5”.Under DrawingTools, on the Format tab, in the ShapeStyles group, click the Format Shape dialog box launcher. In the Format Shape dialog box, click LineColor in the left pane. In the LineColor pane, select Solidline, click the button next to Color, and then under ThemeColors click Black, Text 1 (first row, second option from the left).Also in the Format Shape dialog box, click LineStyle in the left pane. In the LineStyle pane, in the Weight box, enter 2 pt.Under DrawingTools, on the Format tab, in the ShapeStyles group, click ShapeEffects, point to Glow, and then under GlowVariations click Accent color 1, 5 pt glow (first row, first option from the left). Under DrawingTools, on the Format tab, in the ShapeStyles group, click ShapeEffects, point to Glow, point to MoreGlowColors, and then under ThemeColors click White, Background 1 (first row, first option from the left).On the Home tab, in the Drawing group, click Arrange, point to Align, and then do the following:Click Align to Slide.Click AlignCenter.Click AlignMiddle.On the slide, select the line. On the Home tab, in the Clipboard group, click the arrow under Paste, and then click Duplicate.Drag the duplicate line slightly off the right edge of the slide.With the duplicate line still selected, on the Home tab, in the Drawing group, click Arrange, point to Align, and then do the following: Click Align to Slide. Click Align Middle.On the Insert tab, in the Illustrations group, click Picture. In the InsertPicture dialog box, select a picture, and then click Insert.On the slide, select the picture. Under Picture Tools, on the Format tab, in the bottom right corner of the Size group, click the Size and Position dialog box launcher. In the Size and Position dialog box, on the Size tab, resize or crop the picture as needed so that under Size and rotate, the Height box is set to 7.5” and the Width box is set to 5”. Resize the picture under Size and rotate by entering values into the Height and Width boxes. Crop the picture under Crop from by entering values into the Left, Right, Top, and Bottom boxes. On the Home tab, in the Drawing group, click Arrange, point to Align, and then do the following:Click Align to Slide.ClickAlignRight.ClickAlignMiddle.To reproduce the text effects on this slide, do the following:On the Insert tab, in the Illustrations group, click TextBox. On the slide, drag to draw a text box.Enter text in the text box, and then select the text. On the Home tab, in the Font group, do the following:In the Font list, select Arial.In the FontSize list, select 28.Click Bold.Click the button next to FontColor, and then under ThemeColors click White, Background 1 (first row, first option from the left).On the Home tab, in the Paragraph group, click AlignTextRight to align the text right in the text box. Drag the text box onto the left half of the slide.To reproduce the background effects on this slide, do the following:Right-click the slide background area, and then click Format Background. In the Format Background dialog box, click Fill in the left pane, select Gradient fill in the Fill pane, and then do the following:In the Type list, select Linear.Click the button next to Direction, and then click Linear Down (first row, second option from the left).Under Gradient stops, click Add or Remove until two stops appear in the drop-down list.Also under Gradient stops, customize the gradient stops that you added as follows:Select Stop 1 from the list, and then do the following:In the Stop position box, enter 40%.Click the button next to Color, and then click Black, Text 1 (first row, second option from the left).Select Stop 2 from the list, and then do the following: In the Stop position box, enter 100%.Click the button next to Color, and then click Black, Text 1, Lighter 50% (second row, second option from the left).To reproduce the animation effects on this slide, do the following:On the Animations tab, in the Animations group, click CustomAnimation. Select the line off the right edge of the slide. In the CustomAnimation task pane, do the following:Click AddEffect, point to Entrance, and then click MoreEffects. In the AddEntranceEffect dialog box, under Basic, click FlyIn.Select the animation effect (fly-in effect for the second line). Under Modify: Fly In,do the following:In the Start list, select After Previous.In the Direction list, select FromLeft.In the Speed list, select Fast.On the Home tab, in the Editing group, click Select, and then click Selection Pane.In the Selection and Visibility pane, select the first line you created (in the middle of the slide). In the CustomAnimation task pane, do the following:Click AddEffect, point to Entrance, and then click MoreEffects. In the AddEntranceEffect dialog box, under Basic, click FlyIn.Select the second animation effect (fly-in effect for the first line). Under Modify: Fly In,do the following:In the Start list, select AfterPrevious.In the Direction list, select FromRight.In the Speed list, select Fast.On the slide, select the picture. In the CustomAnimation task pane, do the following:Click AddEffect, point to Entrance, and then click MoreEffects. In the AddEntranceEffect dialog box, under Basic, click Wipe.Select the third animation effect (wipe effect for the picture). Under Modify: Wipe,do the following:In the Start list, select WithPrevious.In the Direction list, select FromRight.In the Speed list, select Fast.On the slide, select the text box. In the CustomAnimation task pane, do the following:Click AddEffect, point to Entrance, and then click MoreEffects. In the AddEntranceEffect dialog box, under Basic, clickFlyIn.Select the fourth animation effect (fly-in effect for the text box). Under Modify: Fly In,do the following:In the Start list, select WithPrevious.In the Direction list, select FromRight.In the Speed list, select Fast.
  4. Custom animation effects: dotted line with text fade by letter(Basic)To reproduce the text effects on this slide, do the following:On the Home tab, in the Slides group, click Layout, and then click Blank.On the Insert tab, in the Text group, click Text Box, and then on the slide, drag to draw a text box that spans the entire width of the slide.On the Insert tab, in the Text group, click Symbol. In the Symbol dialog box, do the following:In the Font list, select (normal text).In the Subset list, select General Punctuation.In the Character Code box, enter 2022 to select BULLET, and then click Insert.Click Insert 33 more times until there is a row of 34 bullets in the text box. In the text box, select the text, and then on the Home tab, in the Font group do the following:In the Font list, select ArialBlack.In the FontSize list, select 44.Click the arrow next to FontColor, and then under ThemeColors click White, Background 1 (first row, first option from the left).On the Home tab, in the Drawing group, click Arrange, point to Align, and then do the following:Click Align to Slide.Click AlignCenter.Click AlignMiddle.On the Insert tab, in the Text group, click TextBox. Drag to draw a text box on the slide.Enter and select the text. On the Home tab, in the Font group, do the following:In the Font list, select Corbel.In the FontSize box, enter 50.Click the arrow next to FontColor, and then under ThemeColors click White, Background 1 (first row, first option from the left).Click Bold.With the text still selected, on the Home tab, in the Paragraph group, click Center.Select the second text box. On the Home tab, in the Drawing group, click Arrange, point to Align, and then do the following:Click Align to Slide.Click AlignCenter.Click AlignMiddle.To reproduce the background effects on this slide, do the following:Right-click the slide background area, and then click Format Background. In the Format Background dialog box, click Fill in the left pane, select Gradient fill in the Fill pane, and then do the following:In the Type list, select Radial.Click the button next to Direction, and then click From Center (third option from the left). Under Gradient stops, click Add or Remove until two stops appear in the drop-down list.Also under Gradient stops, customize the gradient stops that you added as follows:Select Stop 1 from the list, and then do the following:In the Stop position box, enter 0%.Click the button next to Color, and then under ThemeColors select Blue, Accent 1, Darker 25% (fifth row, fifth option from the left). Select Stop 2 from the list, and then do the following: In the Stop position box, enter 100%.Click the button next to Color, and then under ThemeColors select Black, Text 1 (first row, second option from the left). To reproduce the animation effects on this slide, do the following:On the Animations tab, in the Animations group, click CustomAnimation. On the slide, select the first text box. In the CustomAnimation task pane, do the following:Click AddEffect, point to Entrance, and then click MoreEffects. In the AddEntrance Effect dialog box, under Basic, click Fly In.Select the animation effect (fly-in effect for the first text box). Click the arrow to the right of the selected effect, and then click EffectOptions. In the Fly In dialog box, do the following:On the Effect tab, do the following:In the Direction list, select FromLeft.In the Animatetext list, selectByLetter.In the % delay between letters box, enter 10.On the Timing tab, do the following:In the Start list, select WithPrevious.In the Speed list, select 0.5 seconds (Very Fast).On the slide, select the first text box. In the CustomAnimation task pane, do the following:Click AddEffect, point to Exit, and then click MoreEffects. In the Add Exit Effect dialog box, under Subtle, click Fade. Select the second animation effect (fade effect for the first text box). Click the arrow to the right of the selected effect, and then click EffectOptions. In the Fade dialog box, do the following:On the Effect tab, do the following:In the Animatetext list, selectByLetter.In the % delay between letters box, enter 10.On the Timing tab, do the following:In the Start list, select WithPrevious.In the Delay box, enter 1.5.In the Speed list, select 0.5 seconds (Very Fast).On the slide, select the second text box. In the CustomAnimation task pane, do the following.Click AddEffect, point to Entrance, and then click MoreEffects. In the AddEntranceEffect dialog box, under Subtle, click Fade.Select the third animation effect (fade effect for the second text box). Click the arrow to the right of the selected effect, and then click EffectOptions. In the Fade dialog box, do the following:On the Effect tab, do the following:In the Animatetext list, selectByLetter.In the % delay between letters box, enter 6.On the Timing tab, do the following:In the Start list, select WithPrevious.In the Delay box,enter 2.In the Speed list, select 0.5 seconds (Very Fast).
  5. Custom animation effects: dotted line with text fade by letter(Basic)To reproduce the text effects on this slide, do the following:On the Home tab, in the Slides group, click Layout, and then click Blank.On the Insert tab, in the Text group, click Text Box, and then on the slide, drag to draw a text box that spans the entire width of the slide.On the Insert tab, in the Text group, click Symbol. In the Symbol dialog box, do the following:In the Font list, select (normal text).In the Subset list, select General Punctuation.In the Character Code box, enter 2022 to select BULLET, and then click Insert.Click Insert 33 more times until there is a row of 34 bullets in the text box. In the text box, select the text, and then on the Home tab, in the Font group do the following:In the Font list, select ArialBlack.In the FontSize list, select 44.Click the arrow next to FontColor, and then under ThemeColors click White, Background 1 (first row, first option from the left).On the Home tab, in the Drawing group, click Arrange, point to Align, and then do the following:Click Align to Slide.Click AlignCenter.Click AlignMiddle.On the Insert tab, in the Text group, click TextBox. Drag to draw a text box on the slide.Enter and select the text. On the Home tab, in the Font group, do the following:In the Font list, select Corbel.In the FontSize box, enter 50.Click the arrow next to FontColor, and then under ThemeColors click White, Background 1 (first row, first option from the left).Click Bold.With the text still selected, on the Home tab, in the Paragraph group, click Center.Select the second text box. On the Home tab, in the Drawing group, click Arrange, point to Align, and then do the following:Click Align to Slide.Click AlignCenter.Click AlignMiddle.To reproduce the background effects on this slide, do the following:Right-click the slide background area, and then click Format Background. In the Format Background dialog box, click Fill in the left pane, select Gradient fill in the Fill pane, and then do the following:In the Type list, select Radial.Click the button next to Direction, and then click From Center (third option from the left). Under Gradient stops, click Add or Remove until two stops appear in the drop-down list.Also under Gradient stops, customize the gradient stops that you added as follows:Select Stop 1 from the list, and then do the following:In the Stop position box, enter 0%.Click the button next to Color, and then under ThemeColors select Blue, Accent 1, Darker 25% (fifth row, fifth option from the left). Select Stop 2 from the list, and then do the following: In the Stop position box, enter 100%.Click the button next to Color, and then under ThemeColors select Black, Text 1 (first row, second option from the left). To reproduce the animation effects on this slide, do the following:On the Animations tab, in the Animations group, click CustomAnimation. On the slide, select the first text box. In the CustomAnimation task pane, do the following:Click AddEffect, point to Entrance, and then click MoreEffects. In the AddEntrance Effect dialog box, under Basic, click Fly In.Select the animation effect (fly-in effect for the first text box). Click the arrow to the right of the selected effect, and then click EffectOptions. In the Fly In dialog box, do the following:On the Effect tab, do the following:In the Direction list, select FromLeft.In the Animatetext list, selectByLetter.In the % delay between letters box, enter 10.On the Timing tab, do the following:In the Start list, select WithPrevious.In the Speed list, select 0.5 seconds (Very Fast).On the slide, select the first text box. In the CustomAnimation task pane, do the following:Click AddEffect, point to Exit, and then click MoreEffects. In the Add Exit Effect dialog box, under Subtle, click Fade. Select the second animation effect (fade effect for the first text box). Click the arrow to the right of the selected effect, and then click EffectOptions. In the Fade dialog box, do the following:On the Effect tab, do the following:In the Animatetext list, selectByLetter.In the % delay between letters box, enter 10.On the Timing tab, do the following:In the Start list, select WithPrevious.In the Delay box, enter 1.5.In the Speed list, select 0.5 seconds (Very Fast).On the slide, select the second text box. In the CustomAnimation task pane, do the following.Click AddEffect, point to Entrance, and then click MoreEffects. In the AddEntranceEffect dialog box, under Subtle, click Fade.Select the third animation effect (fade effect for the second text box). Click the arrow to the right of the selected effect, and then click EffectOptions. In the Fade dialog box, do the following:On the Effect tab, do the following:In the Animatetext list, selectByLetter.In the % delay between letters box, enter 6.On the Timing tab, do the following:In the Start list, select WithPrevious.In the Delay box,enter 2.In the Speed list, select 0.5 seconds (Very Fast).
  6. Custom animation effects: shrink transparent shapes(Intermediate)Tip: You will need to use drawing guides to reproduce the effects on this slide. To display and set the drawing guides, do the following:On the Home tab, in theSlides group, click Layout, and then click Blank.Right-click the slide background area, and then click Grid and Guides.In the Grid and Guides dialog box, do the following:Under Snap to, select Snap objects to grid.Under Gridsettings, in the Spacing box, enter 0.25.Under Guide settings, select Displaydrawingguideson screen.On the slide, press and hold CTRL, select the vertical guide, and then drag it left to the 2.00 position. (Note: One horizontal and one vertical guide will display on the slide at 0.00, the default position. As you drag the guides, the cursor will display the new position.) Press and hold CTRL, select the vertical guide, and then drag it left to the 2.00 position. Press and hold CTRL, select the horizontal guide, and then drag it up to the 2.00 position. Press and hold CTRL, select the horizontal guide, and then drag it down to the 1.25 position. Right-click the slide background area, and then click Grid and Guides.In the Grid and Guides dialog box, under Snap to, clear Snap objects to grid.To reproduce the animated shape effects on this slide, do the following:On the Home tab, in the Drawing group, click Shapes, and then under Rectangle click Rounded Diagonal Corner Rectangle (ninth option from the left). On the slide, drag to draw a rectangle.Select the rectangle. Under Drawing Tools, on the Format tab, in the Size group, do the following:In the Shape Height box, enter 8.1”. In the Shape Width box, enter 10.5”.Under the Drawing Tools, on the Format tab, in the Shapes Styles group, click the arrow next to Shape Outline, and then click No Outline.On the Home tab, in the Drawing group, click Arrange, point to Align, and then do the following:Click Align to Slide.Click Align Center.Click Align Middle.On the Animations tab, in the Animations group, click Custom Animation.On the slide, select the rectangle. In the CustomAnimation task pane, do the following:Click AddEffect, point to Emphasis, and then click More Effects. In the Add Emphasis Effect dialog box, under Basic, click Grow/Shrink.Select the animation effect (grow/shrink effect for the rectangle). Click the arrow next to the selected effect, and then click Effect Options. In the Grow/Shrink dialog box, do the following:On the Effect tab, in the Size list, in the Custom box, enter 37%, and then press ENTER. On the Timing tab, do the following:In theStart list, selectWith Previous. In the Speed box, enter 1.5 seconds.On the slide, select the rectangle. In the CustomAnimation task pane, do the following:Click AddEffect, point to Motion Paths,and then click Left. Select the second animation effect (left motion path for the rectangle). Click the arrow next to the selected effect, and then click Timing. In the Left dialog box, on the Timing tab, do the following:In theStart list, selectWith Previous. In the Delay box, enter 0.7.In the Speed box, enter 0.8 seconds.On the slide, select the motion path. Point to the endpoint (red arrow) until the cursor becomes a two-headed arrow, and then drag the endpoint to the intersection of the 2.00 top horizontal and the 2.00 left vertical drawing guides. Select the rectangle. On the Home tab, in the Clipboard group, click the arrow under Paste, and then click Duplicate.Select the duplicate rectangle. On the Home tab, in the Drawing group, click Arrange, point to Align, and then do the following:Click Align Center.Click Align Middle.With the second rectangle still selected, under Drawing Tools, on the Format tab, in the bottom right corner of the Shape Styles group, click the Format Shape dialog box launcher. In the Format Shape dialog box, click Fill in the left pane, select Solid fill in the Fill pane, and then do the following: Click the button next to Color, and then under Theme Colors click White, Background 1 (first row, first option from the left).In the Transparency box, enter 50%.In the Custom Animation task pane, select the fourth animation effect (motion path for the second rectangle). On the slide, point to the endpoint (red arrow) until the cursor becomes a two-headed arrow, and then drag the endpoint to the intersection of the 1.25 bottom horizontal and the 2.00 left vertical drawing guides.To reproduce the animated text effects on this slide, do the following: On the Insert tab, in the Text group, click Text Box, and then on the slide, drag to draw the text box. Enter text in the text box, and then select the text. On the Home tab, in the Font group, do the following:In the Font list, select Gill Sans MT.In the Font Size box, enter 26.On the Home tab, in the Paragraph group, click Center to center the text in the text box.On the slide, drag the text box until it is centered at the intersection of the 2.00 top horizontal and the 2.00 left vertical drawing guides. On the Animations tab, in the Animations group, click Custom Animation.With the text box still selected, in the Custom Animation task pane, do the following:Click AddEffect, point to Entrance, and then click More Effects. In the Add Entrance Effect dialog box, under Subtle, click Fade.Select the fifth animation effect (fade effect for the first text box). Under Modify: Fade, do the following:In the Start list, select After Previous.In the Speed list, select Medium.On the slide, select the text box. On the Home tab, in the Clipboard group, click the arrow under Paste, and then click Duplicate.Click in the second, duplicate text box, and then edit the text. Select the text in the second text box. On the Home tab, in the Font group, click the arrow next to Font Color, and then click Black, Text 1 (first row, second option from the left).On the slide, drag the second text box until it is centered at the intersection of the 1.25 bottom horizontal and the 2.00 left vertical drawing guides.With the second text box still selected, in the Custom Animation task pane, select the sixth animation effect (fade effect for the second text box). Click the arrow next to the selected effect, and then click Timing. In the Fade dialog box, on the Timing tab, in the Delay box, enter 1. Right-click off the slide, and then click Grid and Guides. In the Grid and Guides dialog box, under Guide settings, clear Display drawing guides on screen. To modify the color of the objects on the slide, do the following:In the Selection and Visibility pane, select the first rectangle you created on the slide. Under the DrawingTools, on the Format tab, in the bottom right corner in the Shapes Styles group, click the Format Shape dialog box launcher. In the Format Shape dialog box, click Fill in the left pane, select Solid fill in the Fill pane, and then do the following:Click the button next to Colors, and then under Theme Colors click Black, Text 1 (first row, second option from the left). In the Transparency box, enter 50%.On the slide, select the text in the first text box. On the Home tab, in the Font group, click the arrow next to Font Color,and then under Theme Colors click White, Background 1 (first row, first option from the left).On the slide, select the text in the second text box. On the Home tab, in the Font group, click the arrow next to Font Color,and then under Theme Colors click Black, Text 1, Lighter 15% (fifth row, second option from the left). To reproduce the background effects on this slide, do the following: On the Design tab, in the bottom right corner of the Background group, click the Format Background dialog box launcher.In the Format Background dialog box, click Fill in the left pane, select Picture or texture fill in the Fill pane, and then under Insert from, click File.In the Insert Picture dialog box, select a picture, and then click Insert.
  7. Custom animation effects: shrink transparent shapes(Intermediate)Tip: You will need to use drawing guides to reproduce the effects on this slide. To display and set the drawing guides, do the following:On the Home tab, in theSlides group, click Layout, and then click Blank.Right-click the slide background area, and then click Grid and Guides.In the Grid and Guides dialog box, do the following:Under Snap to, select Snap objects to grid.Under Gridsettings, in the Spacing box, enter 0.25.Under Guide settings, select Displaydrawingguideson screen.On the slide, press and hold CTRL, select the vertical guide, and then drag it left to the 2.00 position. (Note: One horizontal and one vertical guide will display on the slide at 0.00, the default position. As you drag the guides, the cursor will display the new position.) Press and hold CTRL, select the vertical guide, and then drag it left to the 2.00 position. Press and hold CTRL, select the horizontal guide, and then drag it up to the 2.00 position. Press and hold CTRL, select the horizontal guide, and then drag it down to the 1.25 position. Right-click the slide background area, and then click Grid and Guides.In the Grid and Guides dialog box, under Snap to, clear Snap objects to grid.To reproduce the animated shape effects on this slide, do the following:On the Home tab, in the Drawing group, click Shapes, and then under Rectangle click Rounded Diagonal Corner Rectangle (ninth option from the left). On the slide, drag to draw a rectangle.Select the rectangle. Under Drawing Tools, on the Format tab, in the Size group, do the following:In the Shape Height box, enter 8.1”. In the Shape Width box, enter 10.5”.Under the Drawing Tools, on the Format tab, in the Shapes Styles group, click the arrow next to Shape Outline, and then click No Outline.On the Home tab, in the Drawing group, click Arrange, point to Align, and then do the following:Click Align to Slide.Click Align Center.Click Align Middle.On the Animations tab, in the Animations group, click Custom Animation.On the slide, select the rectangle. In the CustomAnimation task pane, do the following:Click AddEffect, point to Emphasis, and then click More Effects. In the Add Emphasis Effect dialog box, under Basic, click Grow/Shrink.Select the animation effect (grow/shrink effect for the rectangle). Click the arrow next to the selected effect, and then click Effect Options. In the Grow/Shrink dialog box, do the following:On the Effect tab, in the Size list, in the Custom box, enter 37%, and then press ENTER. On the Timing tab, do the following:In theStart list, selectWith Previous. In the Speed box, enter 1.5 seconds.On the slide, select the rectangle. In the CustomAnimation task pane, do the following:Click AddEffect, point to Motion Paths,and then click Left. Select the second animation effect (left motion path for the rectangle). Click the arrow next to the selected effect, and then click Timing. In the Left dialog box, on the Timing tab, do the following:In theStart list, selectWith Previous. In the Delay box, enter 0.7.In the Speed box, enter 0.8 seconds.On the slide, select the motion path. Point to the endpoint (red arrow) until the cursor becomes a two-headed arrow, and then drag the endpoint to the intersection of the 2.00 top horizontal and the 2.00 left vertical drawing guides. Select the rectangle. On the Home tab, in the Clipboard group, click the arrow under Paste, and then click Duplicate.Select the duplicate rectangle. On the Home tab, in the Drawing group, click Arrange, point to Align, and then do the following:Click Align Center.Click Align Middle.With the second rectangle still selected, under Drawing Tools, on the Format tab, in the bottom right corner of the Shape Styles group, click the Format Shape dialog box launcher. In the Format Shape dialog box, click Fill in the left pane, select Solid fill in the Fill pane, and then do the following: Click the button next to Color, and then under Theme Colors click White, Background 1 (first row, first option from the left).In the Transparency box, enter 50%.In the Custom Animation task pane, select the fourth animation effect (motion path for the second rectangle). On the slide, point to the endpoint (red arrow) until the cursor becomes a two-headed arrow, and then drag the endpoint to the intersection of the 1.25 bottom horizontal and the 2.00 left vertical drawing guides.To reproduce the animated text effects on this slide, do the following: On the Insert tab, in the Text group, click Text Box, and then on the slide, drag to draw the text box. Enter text in the text box, and then select the text. On the Home tab, in the Font group, do the following:In the Font list, select Gill Sans MT.In the Font Size box, enter 26.On the Home tab, in the Paragraph group, click Center to center the text in the text box.On the slide, drag the text box until it is centered at the intersection of the 2.00 top horizontal and the 2.00 left vertical drawing guides. On the Animations tab, in the Animations group, click Custom Animation.With the text box still selected, in the Custom Animation task pane, do the following:Click AddEffect, point to Entrance, and then click More Effects. In the Add Entrance Effect dialog box, under Subtle, click Fade.Select the fifth animation effect (fade effect for the first text box). Under Modify: Fade, do the following:In the Start list, select After Previous.In the Speed list, select Medium.On the slide, select the text box. On the Home tab, in the Clipboard group, click the arrow under Paste, and then click Duplicate.Click in the second, duplicate text box, and then edit the text. Select the text in the second text box. On the Home tab, in the Font group, click the arrow next to Font Color, and then click Black, Text 1 (first row, second option from the left).On the slide, drag the second text box until it is centered at the intersection of the 1.25 bottom horizontal and the 2.00 left vertical drawing guides.With the second text box still selected, in the Custom Animation task pane, select the sixth animation effect (fade effect for the second text box). Click the arrow next to the selected effect, and then click Timing. In the Fade dialog box, on the Timing tab, in the Delay box, enter 1. Right-click off the slide, and then click Grid and Guides. In the Grid and Guides dialog box, under Guide settings, clear Display drawing guides on screen. To modify the color of the objects on the slide, do the following:In the Selection and Visibility pane, select the first rectangle you created on the slide. Under the DrawingTools, on the Format tab, in the bottom right corner in the Shapes Styles group, click the Format Shape dialog box launcher. In the Format Shape dialog box, click Fill in the left pane, select Solid fill in the Fill pane, and then do the following:Click the button next to Colors, and then under Theme Colors click Black, Text 1 (first row, second option from the left). In the Transparency box, enter 50%.On the slide, select the text in the first text box. On the Home tab, in the Font group, click the arrow next to Font Color,and then under Theme Colors click White, Background 1 (first row, first option from the left).On the slide, select the text in the second text box. On the Home tab, in the Font group, click the arrow next to Font Color,and then under Theme Colors click Black, Text 1, Lighter 15% (fifth row, second option from the left). To reproduce the background effects on this slide, do the following: On the Design tab, in the bottom right corner of the Background group, click the Format Background dialog box launcher.In the Format Background dialog box, click Fill in the left pane, select Picture or texture fill in the Fill pane, and then under Insert from, click File.In the Insert Picture dialog box, select a picture, and then click Insert.
  8. Custom animation effects: shrink transparent shapes(Intermediate)Tip: You will need to use drawing guides to reproduce the effects on this slide. To display and set the drawing guides, do the following:On the Home tab, in theSlides group, click Layout, and then click Blank.Right-click the slide background area, and then click Grid and Guides.In the Grid and Guides dialog box, do the following:Under Snap to, select Snap objects to grid.Under Gridsettings, in the Spacing box, enter 0.25.Under Guide settings, select Displaydrawingguideson screen.On the slide, press and hold CTRL, select the vertical guide, and then drag it left to the 2.00 position. (Note: One horizontal and one vertical guide will display on the slide at 0.00, the default position. As you drag the guides, the cursor will display the new position.) Press and hold CTRL, select the vertical guide, and then drag it left to the 2.00 position. Press and hold CTRL, select the horizontal guide, and then drag it up to the 2.00 position. Press and hold CTRL, select the horizontal guide, and then drag it down to the 1.25 position. Right-click the slide background area, and then click Grid and Guides.In the Grid and Guides dialog box, under Snap to, clear Snap objects to grid.To reproduce the animated shape effects on this slide, do the following:On the Home tab, in the Drawing group, click Shapes, and then under Rectangle click Rounded Diagonal Corner Rectangle (ninth option from the left). On the slide, drag to draw a rectangle.Select the rectangle. Under Drawing Tools, on the Format tab, in the Size group, do the following:In the Shape Height box, enter 8.1”. In the Shape Width box, enter 10.5”.Under the Drawing Tools, on the Format tab, in the Shapes Styles group, click the arrow next to Shape Outline, and then click No Outline.On the Home tab, in the Drawing group, click Arrange, point to Align, and then do the following:Click Align to Slide.Click Align Center.Click Align Middle.On the Animations tab, in the Animations group, click Custom Animation.On the slide, select the rectangle. In the CustomAnimation task pane, do the following:Click AddEffect, point to Emphasis, and then click More Effects. In the Add Emphasis Effect dialog box, under Basic, click Grow/Shrink.Select the animation effect (grow/shrink effect for the rectangle). Click the arrow next to the selected effect, and then click Effect Options. In the Grow/Shrink dialog box, do the following:On the Effect tab, in the Size list, in the Custom box, enter 37%, and then press ENTER. On the Timing tab, do the following:In theStart list, selectWith Previous. In the Speed box, enter 1.5 seconds.On the slide, select the rectangle. In the CustomAnimation task pane, do the following:Click AddEffect, point to Motion Paths,and then click Left. Select the second animation effect (left motion path for the rectangle). Click the arrow next to the selected effect, and then click Timing. In the Left dialog box, on the Timing tab, do the following:In theStart list, selectWith Previous. In the Delay box, enter 0.7.In the Speed box, enter 0.8 seconds.On the slide, select the motion path. Point to the endpoint (red arrow) until the cursor becomes a two-headed arrow, and then drag the endpoint to the intersection of the 2.00 top horizontal and the 2.00 left vertical drawing guides. Select the rectangle. On the Home tab, in the Clipboard group, click the arrow under Paste, and then click Duplicate.Select the duplicate rectangle. On the Home tab, in the Drawing group, click Arrange, point to Align, and then do the following:Click Align Center.Click Align Middle.With the second rectangle still selected, under Drawing Tools, on the Format tab, in the bottom right corner of the Shape Styles group, click the Format Shape dialog box launcher. In the Format Shape dialog box, click Fill in the left pane, select Solid fill in the Fill pane, and then do the following: Click the button next to Color, and then under Theme Colors click White, Background 1 (first row, first option from the left).In the Transparency box, enter 50%.In the Custom Animation task pane, select the fourth animation effect (motion path for the second rectangle). On the slide, point to the endpoint (red arrow) until the cursor becomes a two-headed arrow, and then drag the endpoint to the intersection of the 1.25 bottom horizontal and the 2.00 left vertical drawing guides.To reproduce the animated text effects on this slide, do the following: On the Insert tab, in the Text group, click Text Box, and then on the slide, drag to draw the text box. Enter text in the text box, and then select the text. On the Home tab, in the Font group, do the following:In the Font list, select Gill Sans MT.In the Font Size box, enter 26.On the Home tab, in the Paragraph group, click Center to center the text in the text box.On the slide, drag the text box until it is centered at the intersection of the 2.00 top horizontal and the 2.00 left vertical drawing guides. On the Animations tab, in the Animations group, click Custom Animation.With the text box still selected, in the Custom Animation task pane, do the following:Click AddEffect, point to Entrance, and then click More Effects. In the Add Entrance Effect dialog box, under Subtle, click Fade.Select the fifth animation effect (fade effect for the first text box). Under Modify: Fade, do the following:In the Start list, select After Previous.In the Speed list, select Medium.On the slide, select the text box. On the Home tab, in the Clipboard group, click the arrow under Paste, and then click Duplicate.Click in the second, duplicate text box, and then edit the text. Select the text in the second text box. On the Home tab, in the Font group, click the arrow next to Font Color, and then click Black, Text 1 (first row, second option from the left).On the slide, drag the second text box until it is centered at the intersection of the 1.25 bottom horizontal and the 2.00 left vertical drawing guides.With the second text box still selected, in the Custom Animation task pane, select the sixth animation effect (fade effect for the second text box). Click the arrow next to the selected effect, and then click Timing. In the Fade dialog box, on the Timing tab, in the Delay box, enter 1. Right-click off the slide, and then click Grid and Guides. In the Grid and Guides dialog box, under Guide settings, clear Display drawing guides on screen. To modify the color of the objects on the slide, do the following:In the Selection and Visibility pane, select the first rectangle you created on the slide. Under the DrawingTools, on the Format tab, in the bottom right corner in the Shapes Styles group, click the Format Shape dialog box launcher. In the Format Shape dialog box, click Fill in the left pane, select Solid fill in the Fill pane, and then do the following:Click the button next to Colors, and then under Theme Colors click Black, Text 1 (first row, second option from the left). In the Transparency box, enter 50%.On the slide, select the text in the first text box. On the Home tab, in the Font group, click the arrow next to Font Color,and then under Theme Colors click White, Background 1 (first row, first option from the left).On the slide, select the text in the second text box. On the Home tab, in the Font group, click the arrow next to Font Color,and then under Theme Colors click Black, Text 1, Lighter 15% (fifth row, second option from the left). To reproduce the background effects on this slide, do the following: On the Design tab, in the bottom right corner of the Background group, click the Format Background dialog box launcher.In the Format Background dialog box, click Fill in the left pane, select Picture or texture fill in the Fill pane, and then under Insert from, click File.In the Insert Picture dialog box, select a picture, and then click Insert.
  9. Custom animation effects: shrink transparent shapes(Intermediate)Tip: You will need to use drawing guides to reproduce the effects on this slide. To display and set the drawing guides, do the following:On the Home tab, in theSlides group, click Layout, and then click Blank.Right-click the slide background area, and then click Grid and Guides.In the Grid and Guides dialog box, do the following:Under Snap to, select Snap objects to grid.Under Gridsettings, in the Spacing box, enter 0.25.Under Guide settings, select Displaydrawingguideson screen.On the slide, press and hold CTRL, select the vertical guide, and then drag it left to the 2.00 position. (Note: One horizontal and one vertical guide will display on the slide at 0.00, the default position. As you drag the guides, the cursor will display the new position.) Press and hold CTRL, select the vertical guide, and then drag it left to the 2.00 position. Press and hold CTRL, select the horizontal guide, and then drag it up to the 2.00 position. Press and hold CTRL, select the horizontal guide, and then drag it down to the 1.25 position. Right-click the slide background area, and then click Grid and Guides.In the Grid and Guides dialog box, under Snap to, clear Snap objects to grid.To reproduce the animated shape effects on this slide, do the following:On the Home tab, in the Drawing group, click Shapes, and then under Rectangle click Rounded Diagonal Corner Rectangle (ninth option from the left). On the slide, drag to draw a rectangle.Select the rectangle. Under Drawing Tools, on the Format tab, in the Size group, do the following:In the Shape Height box, enter 8.1”. In the Shape Width box, enter 10.5”.Under the Drawing Tools, on the Format tab, in the Shapes Styles group, click the arrow next to Shape Outline, and then click No Outline.On the Home tab, in the Drawing group, click Arrange, point to Align, and then do the following:Click Align to Slide.Click Align Center.Click Align Middle.On the Animations tab, in the Animations group, click Custom Animation.On the slide, select the rectangle. In the CustomAnimation task pane, do the following:Click AddEffect, point to Emphasis, and then click More Effects. In the Add Emphasis Effect dialog box, under Basic, click Grow/Shrink.Select the animation effect (grow/shrink effect for the rectangle). Click the arrow next to the selected effect, and then click Effect Options. In the Grow/Shrink dialog box, do the following:On the Effect tab, in the Size list, in the Custom box, enter 37%, and then press ENTER. On the Timing tab, do the following:In theStart list, selectWith Previous. In the Speed box, enter 1.5 seconds.On the slide, select the rectangle. In the CustomAnimation task pane, do the following:Click AddEffect, point to Motion Paths,and then click Left. Select the second animation effect (left motion path for the rectangle). Click the arrow next to the selected effect, and then click Timing. In the Left dialog box, on the Timing tab, do the following:In theStart list, selectWith Previous. In the Delay box, enter 0.7.In the Speed box, enter 0.8 seconds.On the slide, select the motion path. Point to the endpoint (red arrow) until the cursor becomes a two-headed arrow, and then drag the endpoint to the intersection of the 2.00 top horizontal and the 2.00 left vertical drawing guides. Select the rectangle. On the Home tab, in the Clipboard group, click the arrow under Paste, and then click Duplicate.Select the duplicate rectangle. On the Home tab, in the Drawing group, click Arrange, point to Align, and then do the following:Click Align Center.Click Align Middle.With the second rectangle still selected, under Drawing Tools, on the Format tab, in the bottom right corner of the Shape Styles group, click the Format Shape dialog box launcher. In the Format Shape dialog box, click Fill in the left pane, select Solid fill in the Fill pane, and then do the following: Click the button next to Color, and then under Theme Colors click White, Background 1 (first row, first option from the left).In the Transparency box, enter 50%.In the Custom Animation task pane, select the fourth animation effect (motion path for the second rectangle). On the slide, point to the endpoint (red arrow) until the cursor becomes a two-headed arrow, and then drag the endpoint to the intersection of the 1.25 bottom horizontal and the 2.00 left vertical drawing guides.To reproduce the animated text effects on this slide, do the following: On the Insert tab, in the Text group, click Text Box, and then on the slide, drag to draw the text box. Enter text in the text box, and then select the text. On the Home tab, in the Font group, do the following:In the Font list, select Gill Sans MT.In the Font Size box, enter 26.On the Home tab, in the Paragraph group, click Center to center the text in the text box.On the slide, drag the text box until it is centered at the intersection of the 2.00 top horizontal and the 2.00 left vertical drawing guides. On the Animations tab, in the Animations group, click Custom Animation.With the text box still selected, in the Custom Animation task pane, do the following:Click AddEffect, point to Entrance, and then click More Effects. In the Add Entrance Effect dialog box, under Subtle, click Fade.Select the fifth animation effect (fade effect for the first text box). Under Modify: Fade, do the following:In the Start list, select After Previous.In the Speed list, select Medium.On the slide, select the text box. On the Home tab, in the Clipboard group, click the arrow under Paste, and then click Duplicate.Click in the second, duplicate text box, and then edit the text. Select the text in the second text box. On the Home tab, in the Font group, click the arrow next to Font Color, and then click Black, Text 1 (first row, second option from the left).On the slide, drag the second text box until it is centered at the intersection of the 1.25 bottom horizontal and the 2.00 left vertical drawing guides.With the second text box still selected, in the Custom Animation task pane, select the sixth animation effect (fade effect for the second text box). Click the arrow next to the selected effect, and then click Timing. In the Fade dialog box, on the Timing tab, in the Delay box, enter 1. Right-click off the slide, and then click Grid and Guides. In the Grid and Guides dialog box, under Guide settings, clear Display drawing guides on screen. To modify the color of the objects on the slide, do the following:In the Selection and Visibility pane, select the first rectangle you created on the slide. Under the DrawingTools, on the Format tab, in the bottom right corner in the Shapes Styles group, click the Format Shape dialog box launcher. In the Format Shape dialog box, click Fill in the left pane, select Solid fill in the Fill pane, and then do the following:Click the button next to Colors, and then under Theme Colors click Black, Text 1 (first row, second option from the left). In the Transparency box, enter 50%.On the slide, select the text in the first text box. On the Home tab, in the Font group, click the arrow next to Font Color,and then under Theme Colors click White, Background 1 (first row, first option from the left).On the slide, select the text in the second text box. On the Home tab, in the Font group, click the arrow next to Font Color,and then under Theme Colors click Black, Text 1, Lighter 15% (fifth row, second option from the left). To reproduce the background effects on this slide, do the following: On the Design tab, in the bottom right corner of the Background group, click the Format Background dialog box launcher.In the Format Background dialog box, click Fill in the left pane, select Picture or texture fill in the Fill pane, and then under Insert from, click File.In the Insert Picture dialog box, select a picture, and then click Insert.
  10. Custom animation effects: fly-in and shrink lines, stretch rectangles(Intermediate)To reproduce the first vertical line on this slide, do the following:On the Home tab, in the Slides group, click Layout, and then click Blank.On the Home tab, in the Drawing group, click Shapes, and then under Lines click Line. On the slide, press and hold SHIFT, and then drag to draw a straight, vertical line.UnderDrawing Tools, on the Format tab, in the Size group, in the Shape Width box, enter 4.5”.On the Home tab, in the bottom right corner of the Drawing group, click the Format Shape dialog box launcher. In the Format Shape dialog box, click Line Color in the left pane, select Gradient fill in the Line Color pane, and then do the following:In the Type list, select Linear.Click the button next to Direction, and then click Linear Right (first row, fourth option from the left).In the Angle box, enter 0°.Under Gradient stops, click Add or Remove until three stops appear in the drop-down list.Also under Gradient stops, customize the gradient stops that you added as follows:Select Stop 1 from the list, and then do the following:In the Stop position box, enter 0%.Click the button next to Color, select More Colors, and then in the Colors dialog box, on the Custom tab, enter values for Red: 148, Green: 172, and Blue: 208.In the Transparency box, enter 100%.Select Stop 2 from the list, and then do the following: In the Stop position box, enter 50%.Click the button next to Color, select More Colors, and then in the Colors dialog box, on the Custom tab, enter values for Red: 148, Green: 172, and Blue: 208.In the Transparency box, enter 0%.Select Stop 3 from the list, and then do the following:In the Stop position box, enter 99%.Click the button next to Color, select More Colors, and then in the Colors dialog box, on the Custom tab, enter values for Red: 148, Green: 172, and Blue: 208.In the Transparency box, enter 100%.Also in the Format Shape dialog box, click Line Style in the left pane. In the Line Style pane, in the Width box, enter 6 pt.To reproduce the first rectangle on this slide, do the following:On the Home tab, in the Drawing group, click Shapes, and then under Rectangles click Rectangle (first option from the left). On the slide, drag to draw a rectangle.Select the rectangle. Under DrawingTools, on the Format tab, in the Size group, do the following:In the ShapeHeight box, enter 2”.In the ShapeWidth box, enter 2”.Under Drawing Tools, on the Format tab, in the bottom right corner of the ShapeStyles group, click the FormatShape dialog box launcher. In the FormatShape dialog box, click Fill in the left pane, select Gradient fill in the Fill pane, and then do the following:In the Type list, select Linear.Click the button next to Direction, and then click Linear Up (second row, second option from the left).In the Angle box, enter 270°.Under Gradient stops, click Add or Remove until three stops appear in the drop-down list.Also under Gradient stops, customize the gradient stops that you added as follows:Select Stop 1 from the list, and then do the following:In the Stop position box, enter 0%.Click the button next to Color, click More Colors, and then in the Colors dialog box, on the Custom tab, enter values for Red: 44, Green: 93, and Blue: 152.In the Transparency box, enter 0%.Select Stop 2 from the list, and then do the following: In the Stop position box, enter 80%.Click the button next to Color, click More Colors, and then in the Colors dialog box, on the Custom tab, enter values for Red: 60, Green: 123, Blue: 199.In the Transparency box, enter 0%.Select Stop 3 from the list, and then do the following:In the Stop position box, enter 100%.Click the button next to Color, click More Colors, and then in the Colors dialog box, on the Custom tab, enter values for Red: 58, Green: 124, Blue: 203.In the Transparency box, enter 0%.Also in the Format Shape dialog box, click Line Color in the left pane. In the Line Color pane, select No line. Also in the Format Shape dialog box, click 3-D Format in the left pane, and in the 3-D Format pane, do the following:Under Bevel, click the button next to Top, and then under Bevel click Circle (first row, first option from the left). Next to Top, in the Width box, enter 5 pt, and in the Height box, enter 2 pt.Under Surface, in the Angle box, enter 20°.On the slide, right-click the rectangle and then click Edit Text.Enter text in the text box and select the text. On the Home tab, in the Font group, do the following:In the Font list, select Calibri.In the Font Size list, select 32.Click the button next to Font Color, and then under Theme Colors click White, Background 1 (first row, first option from the left).On the slide, press and hold CTRL, and then select the line and the rectangle.On the Home tab, in the Drawing group, click Arrange, point to Align, and then do the following:Click Align Selected Objects.Click Align Left.With the line and rectangle still selected, drag them to the left side of the slide. To reproduce the animation effects for the first vertical line and rectangle on this slide, do the following:On the Animations tab, in the Animations group, click CustomAnimation. On the slide, select the line. In the CustomAnimation task pane, do the following:Click AddEffect, point to Entrance, and then click MoreEffects. In the AddEntranceEffect dialog box, under Basic, click FlyIn.Select the first animation effect (fly-in effect for the line), and then under Modify: Fly In,do the following:In the Start list, select WithPrevious.In the Direction list, select FromTop.In the Speed list, select Fast.On the slide, select the line. In the CustomAnimation task pane, do the following:Click AddEffect, point to Emphasis, and then click MoreEffects. In the AddEmphasisEffect dialog box, under Basic, click Grow/Shrink.Select the second animation effect (grow/shrink effect for the line). Click the arrow to the right of the effect, and then click Effect Options. In the Grow/Shrink dialog box, do the following:On the Effect tab, do the following:In the Size list, select Tiny. Also in the Size list, select Vertical.On the Timing tab, do the following:In the Start list, select WithPrevious.In the Delay box, enter 0.5.In the Speed list, select 1 seconds (Fast).On the slide, select the rectangle. In the CustomAnimation task pane, do the following:Click AddEffect, point to Entrance, and then click MoreEffects. In the AddEntranceEffect dialog box, under Moderate, click Stretch.Select the third animation effect (stretch effect for the rectangle), and then under Modify: Stretch,do the following:In the Start list, select AfterPrevious.In the Direction list, select FromLeft.In the Speed list, select Fast.To reproduce the other shapes with animation effects on this slide, do the following:On the slide, press and hold CTRL, and then select the rectangle and the line. On the Home tab, in the Clipboard group, click the arrow under Paste, and then click Duplicate. On the slide, drag the second line and rectangle to the center of the slide. With the second line and rectangle still selected, on the Home tab, in the Clipboard group, click the arrow under Paste, and then click Duplicate. On the slide, drag the third line and rectangle to the right side of the slide. On the slide, press CTRL+A to select all the objects. On the Home tab, in the Drawing group, click Arrange, point to Align, and then do the following:Click Align to Slide.Click Align Middle. Click the text in each of the duplicate rectangles, and then edit the text.On the slide, select the second (middle) line. On the Home tab, in the bottom right corner of the Drawing group, click the Format Shape dialog box launcher. In the Format Shape dialog box, click Line Color in the left pane, select Gradient fill in the Line Color pane, and then do the following:In the Type list, select Linear.Click the button next to Direction, and then click Linear Right (first row, fourth option from the left).In the Angle box, enter 0°.Under Gradient stops, click Add or Remove until three stops appear in the drop-down list.Also under Gradient stops, customize the gradient stops that you added as follows:Select Stop 1 from the list, and then do the following:In the Stop position box, enter 0%.Click the button next to Color, select More Colors, and then in the Colors dialog box, on the Custom tab, enter values for Red: 154, Green: 181, Blue: 228.In the Transparency box, enter 100%.Select Stop 2 from the list, and then do the following: In the Stop position box, enter 50%.Click the button next to Color, and then under Theme Colors click White, Background 1, Darker 25% (fourth row, first option from the left).In the Transparency box, enter 0%.Select Stop 3 from the list, and then do the following:In the Stop position box, enter 99%.Click the button next to Color, and then under Theme Colors click White, Background 1, Darker 25% (fourth row, first option from the left).In the Transparency box, enter 100%.On the slide, select the second (middle) rectangle. On the Home tab, in the bottom right corner of the Drawing group, click the Format Shape dialog box launcher. In the Format Shape dialog box, click Fill in the left pane, select Gradient fill in the Fill pane, and then do the following:In the Type list, select Linear.Click the button next to Direction, and then click Linear Up (second row, second option from the left).In the Angle box, enter 270°.Under Gradient stops, click Add or Remove until three stops appear in the drop-down list.Also under Gradient stops, customize the gradient stops that you added as follows:Select Stop 1 from the list, and then do the following:In the Stop position box, enter 0%.Click the button next to Color, click More Colors, and then in the Colors dialog box, on the Custom tab, enter values for Red: 118, Green: 149, Blue: 53.Select Stop 2 from the list, and then do the following: In the Stop position box, enter 80%.Click the button next to Color, click More Colors, and then in the Colors dialog box, on the Custom tab, enter values for Red: 115, Green: 195, Blue: 72.Select Stop 3 from the list, and then do the following:In the Stop position box, enter 100%.Click the button next to Color, click More Colors, and then in the Colors dialog box, on the Custom tab, enter values for Red: 156, Green: 199, Blue: 70.On the slide, select the third (right) line. On the Home tab, in the bottom right corner of the Drawing group, click the Format Shape dialog box launcher. In the Format Shape dialog box, click Line Color in the left pane, select Gradient fill in the Line Color pane, and then do the following:In the Type list, select Linear.Click the button next to Direction, and then click Linear Right (first row, fourth option from the left).In the Angle box, enter 0°.Under Gradient stops, click Add or Remove until three stops appear in the drop-down list.Also under Gradient stops, customize the gradient stops that you added as follows:Select Stop 1 from the list, and then do the following:In the Stop position box, enter 0%.Click the button next to Color, and then underTheme Colorsclick Aqua, Accent 5, Lighter 40% (fourth row, ninth option from the left).In the Transparency box, enter 100%.Select Stop 2 from the list, and then do the following: In the Stop position box, enter 50%.Click the button next to Color, and then underTheme Colorsclick Aqua, Accent 5, Lighter 40% (fourth row, ninth option from the left).In the Transparency box, enter 0%.Select Stop 3 from the list, and then do the following:In the Stop position box, enter 99%.Click the button next to Color, and then underTheme Colorsclick Aqua, Accent 5, Lighter 40% (fourth row, ninth option from the left).In the Transparency box, enter 100%.On the slide, select the third (right) rectangle. On the Home tab, in the bottom right corner of the Drawing group, click the Format Shape dialog box launcher. In the Format Shape dialog box, click Fill in the left pane, select Gradient fill in the Fill pane, and then do the following:In the Type list, select Linear.Click the button next to Direction, and then click Linear Up (second row, second option from the left).In the Angle box, enter 270°.Under Gradient stops, click Add or Remove until three stops appear in the drop-down list.Also under Gradient stops, customize the gradient stops that you added as follows:Select Stop 1 from the list, and then do the following:In the Stop position box, enter 0%.Click the button next to Color, select More Colors, and then in the Colors dialog box, on the Custom tab, enter values for Red: 39, Green: 135, Blue: 160.Select Stop 2 from the list, and then do the following: In the Stop position box, enter 80%.Click the button next to Color, select More Colors, and then in the Colors dialog box, on the Custom tab, enter values for Red: 54, Green: 177, Blue: 210.Select Stop 3 from the list, and then do the following:In the Stop position box, enter 100%.Click the button next to Color, select More Colors, and then in the Colors dialog box, on the Custom tab, enter values for Red: 52, Green: 179, Blue: 214.To reproduce the background effects on this slide, do the following:Right-click the slide background area, and then click Format Background. In the Format Background dialog box, click Fill in the left pane, select Gradient fill in the Fill pane, and then do the following:In the Type list, select Radial.Click the button next to Direction, and then click From Center (third option from the left).Under Gradient stops, click Add or Remove until three stops appear in the drop-down list.Also under Gradient stops, customize the gradient stops that you added as follows:Select Stop 1 from the list, and then do the following:In the Stop position box, enter 33%.Click the button next to Color, and then under Theme Colors click White, Background 1 (first row, first option from the left).Select Stop 2 from the list, and then do the following: In the Stop position box, enter 67%.Click the button next to Color, select More Colors, and then in the Colors dialog box, on the Custom tab, enter values for Red: 228, Green: 233, Blue: 236.Select Stop 3 from the list, and then do the following: In the Stop position box, enter 100%.Click the button next to Color, select More Colors, and then in the Colors dialog box, on the Custom tab, enter values for Red: 178, Green: 186, Blue: 210.
  11. Custom animation effects: line sweeps in picture and text(Basic)To reproduce the shape effects on this slide, do the following:On the Home tab, in theSlides group, click Layout, and then click Blank.On the Home tab, in the Drawing group, click Shapes, and then under Lines click Line (first option from the left).On the slide, press and hold SHIFT, and then drag to draw a straight, vertical line.Select the line. Under DrawingTools, on the Format tab, in the Size group, in the Shape Width box, enter 7.5”.Under DrawingTools, on the Format tab, in the ShapeStyles group, click the Format Shape dialog box launcher. In the Format Shape dialog box, click LineColor in the left pane. In the LineColor pane, select Solidline, click the button next to Color, and then under ThemeColors click Black, Text 1 (first row, second option from the left).Also in the Format Shape dialog box, click LineStyle in the left pane. In the LineStyle pane, in the Weight box, enter 2 pt.Under DrawingTools, on the Format tab, in the ShapeStyles group, click ShapeEffects, point to Glow, and then under GlowVariations click Accent color 1, 5 pt glow (first row, first option from the left). Under DrawingTools, on the Format tab, in the ShapeStyles group, click ShapeEffects, point to Glow, point to MoreGlowColors, and then under ThemeColors click White, Background 1 (first row, first option from the left).On the Home tab, in the Drawing group, click Arrange, point to Align, and then do the following:Click Align to Slide.Click AlignCenter.Click AlignMiddle.On the slide, select the line. On the Home tab, in the Clipboard group, click the arrow under Paste, and then click Duplicate.Drag the duplicate line slightly off the right edge of the slide.With the duplicate line still selected, on the Home tab, in the Drawing group, click Arrange, point to Align, and then do the following: Click Align to Slide. Click Align Middle.On the Insert tab, in the Illustrations group, click Picture. In the InsertPicture dialog box, select a picture, and then click Insert.On the slide, select the picture. Under Picture Tools, on the Format tab, in the bottom right corner of the Size group, click the Size and Position dialog box launcher. In the Size and Position dialog box, on the Size tab, resize or crop the picture as needed so that under Size and rotate, the Height box is set to 7.5” and the Width box is set to 5”. Resize the picture under Size and rotate by entering values into the Height and Width boxes. Crop the picture under Crop from by entering values into the Left, Right, Top, and Bottom boxes. On the Home tab, in the Drawing group, click Arrange, point to Align, and then do the following:Click Align to Slide.ClickAlignRight.ClickAlignMiddle.To reproduce the text effects on this slide, do the following:On the Insert tab, in the Illustrations group, click TextBox. On the slide, drag to draw a text box.Enter text in the text box, and then select the text. On the Home tab, in the Font group, do the following:In the Font list, select Arial.In the FontSize list, select 28.Click Bold.Click the button next to FontColor, and then under ThemeColors click White, Background 1 (first row, first option from the left).On the Home tab, in the Paragraph group, click AlignTextRight to align the text right in the text box. Drag the text box onto the left half of the slide.To reproduce the background effects on this slide, do the following:Right-click the slide background area, and then click Format Background. In the Format Background dialog box, click Fill in the left pane, select Gradient fill in the Fill pane, and then do the following:In the Type list, select Linear.Click the button next to Direction, and then click Linear Down (first row, second option from the left).Under Gradient stops, click Add or Remove until two stops appear in the drop-down list.Also under Gradient stops, customize the gradient stops that you added as follows:Select Stop 1 from the list, and then do the following:In the Stop position box, enter 40%.Click the button next to Color, and then click Black, Text 1 (first row, second option from the left).Select Stop 2 from the list, and then do the following: In the Stop position box, enter 100%.Click the button next to Color, and then click Black, Text 1, Lighter 50% (second row, second option from the left).To reproduce the animation effects on this slide, do the following:On the Animations tab, in the Animations group, click CustomAnimation. Select the line off the right edge of the slide. In the CustomAnimation task pane, do the following:Click AddEffect, point to Entrance, and then click MoreEffects. In the AddEntranceEffect dialog box, under Basic, click FlyIn.Select the animation effect (fly-in effect for the second line). Under Modify: Fly In,do the following:In the Start list, select After Previous.In the Direction list, select FromLeft.In the Speed list, select Fast.On the Home tab, in the Editing group, click Select, and then click Selection Pane.In the Selection and Visibility pane, select the first line you created (in the middle of the slide). In the CustomAnimation task pane, do the following:Click AddEffect, point to Entrance, and then click MoreEffects. In the AddEntranceEffect dialog box, under Basic, click FlyIn.Select the second animation effect (fly-in effect for the first line). Under Modify: Fly In,do the following:In the Start list, select AfterPrevious.In the Direction list, select FromRight.In the Speed list, select Fast.On the slide, select the picture. In the CustomAnimation task pane, do the following:Click AddEffect, point to Entrance, and then click MoreEffects. In the AddEntranceEffect dialog box, under Basic, click Wipe.Select the third animation effect (wipe effect for the picture). Under Modify: Wipe,do the following:In the Start list, select WithPrevious.In the Direction list, select FromRight.In the Speed list, select Fast.On the slide, select the text box. In the CustomAnimation task pane, do the following:Click AddEffect, point to Entrance, and then click MoreEffects. In the AddEntranceEffect dialog box, under Basic, clickFlyIn.Select the fourth animation effect (fly-in effect for the text box). Under Modify: Fly In,do the following:In the Start list, select WithPrevious.In the Direction list, select FromRight.In the Speed list, select Fast.
  12. Custom animation effects: shrink picture circle with text(Intermediate)To reproduce the picture effects on this slide, do the following:On the Home tab, in theSlides group, click Layout, and then click Blank.On the Insert tab, in the Illustrations group, click Picture. In the InsertPicture dialog box, select a picture, and then click Insert.On the slide, select the picture. Under PictureTools, on the Format tab, in the PictureStyles group, click PictureShape, and then under BasicShapes click Oval (first row, first option from the left).Select the picture-filled oval. Under Picture Tools, on the Format tab, in the bottom right corner of the Size group, click the Size and Position dialog box launcher. In the Size and Position dialog box, on the Size tab, resize or crop the picture as needed so that under Size and rotate, the Height box is set to 6” and the Width box is set to 6”. Resize the picture under Size and rotate by entering values into the Height and Width boxes. Crop the picture under Crop from by entering values into the Left, Right, Top, and Bottom boxes. Under PictureTools, on the Format tab, in the PictureStyles group, click PictureEffects, point to Glow, and then under GlowVariations click Accent color 1, 18 pt glow (fourth row, first option from the left).Under PictureTools, on the Format tab, in the PictureStyles group, click PictureEffects, point to Glow, point to More Glow Colors, and then under ThemeColors click White, Background 1 (first row, first option from the left).On the Home tab, in the Drawing group, click the Format Shape dialog box launcher. In the Format Picture dialog box, click Shadow in the left pane. In the Shadow pane, click the button next to Presets, under Inner click InsideDiagonalBottomLeft (third row, first option from the left), and then do the following:In the Transparency box, enter 50%.In the Blur box, enter 8 pt.In the Angle box, enter 135°.In the Distance box, enter 8 pt.On the Insert tab, in the Text group, click TextBox. On the slide, drag to draw a text box.Enter text, and then select the text. On the Home tab, in the Font group, do the following:In the Font list, select Candara.In the FontSize box, enter 30.Click the arrow next to FontColor, and then click Black, Text 1, Lighter 25% (fourth row, second option from the left).On the Home tab, in the Paragraph group, click AlignTextLeft.On the slide, select the text box. Under DrawingTools, on the Format tab, in the WordArt Styles group, click TextEffects, point to Reflection, and then under ReflectionVariations click TightReflection, touching (first row, first option from the left).Drag the text box onto the right half of the slide.With the text box still selected, on the Home tab, in the Drawing group, click Arrange, and then do the following:Point to Align, and then click Align to Slide.Point to Align, and then click Align Right.Point to Align, and then click Align Middle.Click Send to Back. To reproduce the animation effects on this slide, do the following:On the Animations tab, in the Animations group, click CustomAnimation. On the slide, select the picture. In CustomAnimation task pane, do the following:Click Add Effect, point to Entrance, and then click More Effects. In the Add Entrance Effect dialog box, under Basic, click Wheel.Select the animation effect (wheel effect for the picture). Under Modify: Wheel,do the following:In the Start list, select WithPrevious.In the Spokes list, select 1 Spoke.In the Speed list, select Medium. On the slide, select the picture. In CustomAnimation task pane, do the following:Click Add Effect, point to Entrance, and then click More Effects. In the Add Entrance Effect dialog box, under Subtle, click FadedZoom.Select the second animation effect (faded zoom effect for the picture). Under Modify: FadedZoom,do the following:In the Start list, select WithPrevious.In the Speed list, select Medium. On the slide, select the picture. In CustomAnimation task pane, do the following:Click Add Effect, point to Emphasis, and then click More Effects. In the Add Emphasis Effect dialog box, under Basic, click Grow/Shrink.Select the third animation effect (grow/shrink effect for the picture). Click the arrow to the right of the selected effect, and then click EffectOptions. In the Grow/Shrink dialog box, do the following:On the Effect tab, under Settings, do the following:In the Size list, in the Custom box, enter 95%, and then press ENTER.Select SmoothStart.Select SmoothEnd.Select Auto-reverse.On the Timing tab, do the following: In the Start list, select AfterPrevious. In the Speed box, enter 0.3 seconds. On the slide, select the picture. In CustomAnimation task pane, do the following:Click Add Effect, point to Emphasis, and then click More Effects. In the Add Emphasis Effect dialog box, under Basic, click Grow/Shrink.Select the fourth animation effect (grow/shrink effect for the picture). Under Grow/Shrink, do the following:In the Start list, select AfterPrevious.In the Size list, select Smaller.In the Speed list, select Medium. On the slide, select the picture. In CustomAnimation task pane, do the following:ClickAddEffect, point to MotionPaths, and then click Left.Select the fifth animation effect (left motion path for the picture). Under Modify: Left,do the following:In the Start list, select WithPrevious.In the Speed list, select Medium.On the slide, select the text box. In the CustomAnimation task pane, do the following:Click Add Effect, point to Entrance, and then click More Effects. In the Add Entrance Effect dialog box, under Subtle, select Fade.Select the sixth animation effect (fade effect for the text box). Click the arrow to the right of the selected effect, and then click Timing. In the Fade dialog box, on the Timing tab, do the following:In the Start list, select WithPrevious.In the Delay box, enter 1.5.In the Speed list, select 1 seconds (Fast).On the slide, select the text box. In CustomAnimation task pane, do the following:ClickAddEffect, point to MotionPaths, and then click Left.Select the seventh animation effect (left motion path for the text box). Under Modify: Left,do the following:In the Start list, select WithPrevious.In the Speed list, select Fast.On the slide, right–click the selected motion path for the text box, and then clickReversePathDirection. To reproduce the rectangle on this slide, do the following: On the Home tab, in theDrawing group, clickShapes, and then under Rectangles click Rectangle (first option from the left). On the slide, drag to draw a rectangle.Select the rectangle.Under DrawingTools, on the Format tab, in the Size group, do the following:In the ShapeHeight box, enter 1.54”.In theShapeWidth box, enter 10”.Under DrawingTools, on theFormat tab, in the ShapeStyles group, click the arrow next to ShapeOutline, and then click NoOutline.Under DrawingTools, on the Format tab, in the bottom right corner of the ShapeStyles group, click the FormatShape dialog box launcher. In the Format Shape dialog box, clickFill in the left pane, selectGradientfill in the Fill pane, and then do the following:In the Type list, select Linear.Click the button next to Direction, and then click Linear Right (first row, fourth option from the left). Under Gradient stops, click Add or Remove until two stops appear in the drop-down list.Also under Gradient stops, customize the gradient stops that you added as follows:Select Stop 1 from the list, and then do the following:In the Stop position box, enter 0%.Click the button next to Color, and then under Theme Colors click White, Background 1 (first row, first option from the left).In the Transparency box, enter 88%.Select Stop 2 from the list, and then do the following: In the Stop position box, enter 100%.Click the button next to Color, and then under Theme Colors click White, Background 1 (first row, first option from the left).In the Transparency box, enter 43%.On the Home tab, in the Drawinggroup, click Arrange, and then do the following:Point to Align, and then click Align to Slide. Point to Align, and then clickAlignMiddle.Point to Align, and then clickAlignCenter.Click Send to Back. To reproduce the background effects on this slide, do the following:Right-click the slide background area, and then click Format Background. In the Format Background dialog box, click Fill in the left pane, select Gradient fill in the Fill pane, and then do the following:In the Type list, select Radial.Click the button next to Direction, and then click From Center (third option from the left).Under Gradient stops, click Add or Remove until two stops appear in the drop-down list.Also under Gradient stops, customize the gradient stops that you added as follows:Select Stop 1 from the list, and then do the following:In the Stop position box, enter 0%.Click the button next to Color, and then under Theme Colors click White, Background 1 (first row, first option from the left).Select Stop 2 from the list, and then do the following: In the Stop position box, enter 100%.Click the button next to Color, and then under Theme Colors click Black, Text 1, Lighter 50% (second row, second option from the left).
  13. Custom animation effects: line sweeps in picture and text(Basic)To reproduce the shape effects on this slide, do the following:On the Home tab, in theSlides group, click Layout, and then click Blank.On the Home tab, in the Drawing group, click Shapes, and then under Lines click Line (first option from the left).On the slide, press and hold SHIFT, and then drag to draw a straight, vertical line.Select the line. Under DrawingTools, on the Format tab, in the Size group, in the Shape Width box, enter 7.5”.Under DrawingTools, on the Format tab, in the ShapeStyles group, click the Format Shape dialog box launcher. In the Format Shape dialog box, click LineColor in the left pane. In the LineColor pane, select Solidline, click the button next to Color, and then under ThemeColors click Black, Text 1 (first row, second option from the left).Also in the Format Shape dialog box, click LineStyle in the left pane. In the LineStyle pane, in the Weight box, enter 2 pt.Under DrawingTools, on the Format tab, in the ShapeStyles group, click ShapeEffects, point to Glow, and then under GlowVariations click Accent color 1, 5 pt glow (first row, first option from the left). Under DrawingTools, on the Format tab, in the ShapeStyles group, click ShapeEffects, point to Glow, point to MoreGlowColors, and then under ThemeColors click White, Background 1 (first row, first option from the left).On the Home tab, in the Drawing group, click Arrange, point to Align, and then do the following:Click Align to Slide.Click AlignCenter.Click AlignMiddle.On the slide, select the line. On the Home tab, in the Clipboard group, click the arrow under Paste, and then click Duplicate.Drag the duplicate line slightly off the right edge of the slide.With the duplicate line still selected, on the Home tab, in the Drawing group, click Arrange, point to Align, and then do the following: Click Align to Slide. Click Align Middle.On the Insert tab, in the Illustrations group, click Picture. In the InsertPicture dialog box, select a picture, and then click Insert.On the slide, select the picture. Under Picture Tools, on the Format tab, in the bottom right corner of the Size group, click the Size and Position dialog box launcher. In the Size and Position dialog box, on the Size tab, resize or crop the picture as needed so that under Size and rotate, the Height box is set to 7.5” and the Width box is set to 5”. Resize the picture under Size and rotate by entering values into the Height and Width boxes. Crop the picture under Crop from by entering values into the Left, Right, Top, and Bottom boxes. On the Home tab, in the Drawing group, click Arrange, point to Align, and then do the following:Click Align to Slide.ClickAlignRight.ClickAlignMiddle.To reproduce the text effects on this slide, do the following:On the Insert tab, in the Illustrations group, click TextBox. On the slide, drag to draw a text box.Enter text in the text box, and then select the text. On the Home tab, in the Font group, do the following:In the Font list, select Arial.In the FontSize list, select 28.Click Bold.Click the button next to FontColor, and then under ThemeColors click White, Background 1 (first row, first option from the left).On the Home tab, in the Paragraph group, click AlignTextRight to align the text right in the text box. Drag the text box onto the left half of the slide.To reproduce the background effects on this slide, do the following:Right-click the slide background area, and then click Format Background. In the Format Background dialog box, click Fill in the left pane, select Gradient fill in the Fill pane, and then do the following:In the Type list, select Linear.Click the button next to Direction, and then click Linear Down (first row, second option from the left).Under Gradient stops, click Add or Remove until two stops appear in the drop-down list.Also under Gradient stops, customize the gradient stops that you added as follows:Select Stop 1 from the list, and then do the following:In the Stop position box, enter 40%.Click the button next to Color, and then click Black, Text 1 (first row, second option from the left).Select Stop 2 from the list, and then do the following: In the Stop position box, enter 100%.Click the button next to Color, and then click Black, Text 1, Lighter 50% (second row, second option from the left).To reproduce the animation effects on this slide, do the following:On the Animations tab, in the Animations group, click CustomAnimation. Select the line off the right edge of the slide. In the CustomAnimation task pane, do the following:Click AddEffect, point to Entrance, and then click MoreEffects. In the AddEntranceEffect dialog box, under Basic, click FlyIn.Select the animation effect (fly-in effect for the second line). Under Modify: Fly In,do the following:In the Start list, select After Previous.In the Direction list, select FromLeft.In the Speed list, select Fast.On the Home tab, in the Editing group, click Select, and then click Selection Pane.In the Selection and Visibility pane, select the first line you created (in the middle of the slide). In the CustomAnimation task pane, do the following:Click AddEffect, point to Entrance, and then click MoreEffects. In the AddEntranceEffect dialog box, under Basic, click FlyIn.Select the second animation effect (fly-in effect for the first line). Under Modify: Fly In,do the following:In the Start list, select AfterPrevious.In the Direction list, select FromRight.In the Speed list, select Fast.On the slide, select the picture. In the CustomAnimation task pane, do the following:Click AddEffect, point to Entrance, and then click MoreEffects. In the AddEntranceEffect dialog box, under Basic, click Wipe.Select the third animation effect (wipe effect for the picture). Under Modify: Wipe,do the following:In the Start list, select WithPrevious.In the Direction list, select FromRight.In the Speed list, select Fast.On the slide, select the text box. In the CustomAnimation task pane, do the following:Click AddEffect, point to Entrance, and then click MoreEffects. In the AddEntranceEffect dialog box, under Basic, clickFlyIn.Select the fourth animation effect (fly-in effect for the text box). Under Modify: Fly In,do the following:In the Start list, select WithPrevious.In the Direction list, select FromRight.In the Speed list, select Fast.
  14. Custom animation effects: line sweeps in picture and text(Basic)To reproduce the shape effects on this slide, do the following:On the Home tab, in theSlides group, click Layout, and then click Blank.On the Home tab, in the Drawing group, click Shapes, and then under Lines click Line (first option from the left).On the slide, press and hold SHIFT, and then drag to draw a straight, vertical line.Select the line. Under DrawingTools, on the Format tab, in the Size group, in the Shape Width box, enter 7.5”.Under DrawingTools, on the Format tab, in the ShapeStyles group, click the Format Shape dialog box launcher. In the Format Shape dialog box, click LineColor in the left pane. In the LineColor pane, select Solidline, click the button next to Color, and then under ThemeColors click Black, Text 1 (first row, second option from the left).Also in the Format Shape dialog box, click LineStyle in the left pane. In the LineStyle pane, in the Weight box, enter 2 pt.Under DrawingTools, on the Format tab, in the ShapeStyles group, click ShapeEffects, point to Glow, and then under GlowVariations click Accent color 1, 5 pt glow (first row, first option from the left). Under DrawingTools, on the Format tab, in the ShapeStyles group, click ShapeEffects, point to Glow, point to MoreGlowColors, and then under ThemeColors click White, Background 1 (first row, first option from the left).On the Home tab, in the Drawing group, click Arrange, point to Align, and then do the following:Click Align to Slide.Click AlignCenter.Click AlignMiddle.On the slide, select the line. On the Home tab, in the Clipboard group, click the arrow under Paste, and then click Duplicate.Drag the duplicate line slightly off the right edge of the slide.With the duplicate line still selected, on the Home tab, in the Drawing group, click Arrange, point to Align, and then do the following: Click Align to Slide. Click Align Middle.On the Insert tab, in the Illustrations group, click Picture. In the InsertPicture dialog box, select a picture, and then click Insert.On the slide, select the picture. Under Picture Tools, on the Format tab, in the bottom right corner of the Size group, click the Size and Position dialog box launcher. In the Size and Position dialog box, on the Size tab, resize or crop the picture as needed so that under Size and rotate, the Height box is set to 7.5” and the Width box is set to 5”. Resize the picture under Size and rotate by entering values into the Height and Width boxes. Crop the picture under Crop from by entering values into the Left, Right, Top, and Bottom boxes. On the Home tab, in the Drawing group, click Arrange, point to Align, and then do the following:Click Align to Slide.ClickAlignRight.ClickAlignMiddle.To reproduce the text effects on this slide, do the following:On the Insert tab, in the Illustrations group, click TextBox. On the slide, drag to draw a text box.Enter text in the text box, and then select the text. On the Home tab, in the Font group, do the following:In the Font list, select Arial.In the FontSize list, select 28.Click Bold.Click the button next to FontColor, and then under ThemeColors click White, Background 1 (first row, first option from the left).On the Home tab, in the Paragraph group, click AlignTextRight to align the text right in the text box. Drag the text box onto the left half of the slide.To reproduce the background effects on this slide, do the following:Right-click the slide background area, and then click Format Background. In the Format Background dialog box, click Fill in the left pane, select Gradient fill in the Fill pane, and then do the following:In the Type list, select Linear.Click the button next to Direction, and then click Linear Down (first row, second option from the left).Under Gradient stops, click Add or Remove until two stops appear in the drop-down list.Also under Gradient stops, customize the gradient stops that you added as follows:Select Stop 1 from the list, and then do the following:In the Stop position box, enter 40%.Click the button next to Color, and then click Black, Text 1 (first row, second option from the left).Select Stop 2 from the list, and then do the following: In the Stop position box, enter 100%.Click the button next to Color, and then click Black, Text 1, Lighter 50% (second row, second option from the left).To reproduce the animation effects on this slide, do the following:On the Animations tab, in the Animations group, click CustomAnimation. Select the line off the right edge of the slide. In the CustomAnimation task pane, do the following:Click AddEffect, point to Entrance, and then click MoreEffects. In the AddEntranceEffect dialog box, under Basic, click FlyIn.Select the animation effect (fly-in effect for the second line). Under Modify: Fly In,do the following:In the Start list, select After Previous.In the Direction list, select FromLeft.In the Speed list, select Fast.On the Home tab, in the Editing group, click Select, and then click Selection Pane.In the Selection and Visibility pane, select the first line you created (in the middle of the slide). In the CustomAnimation task pane, do the following:Click AddEffect, point to Entrance, and then click MoreEffects. In the AddEntranceEffect dialog box, under Basic, click FlyIn.Select the second animation effect (fly-in effect for the first line). Under Modify: Fly In,do the following:In the Start list, select AfterPrevious.In the Direction list, select FromRight.In the Speed list, select Fast.On the slide, select the picture. In the CustomAnimation task pane, do the following:Click AddEffect, point to Entrance, and then click MoreEffects. In the AddEntranceEffect dialog box, under Basic, click Wipe.Select the third animation effect (wipe effect for the picture). Under Modify: Wipe,do the following:In the Start list, select WithPrevious.In the Direction list, select FromRight.In the Speed list, select Fast.On the slide, select the text box. In the CustomAnimation task pane, do the following:Click AddEffect, point to Entrance, and then click MoreEffects. In the AddEntranceEffect dialog box, under Basic, clickFlyIn.Select the fourth animation effect (fly-in effect for the text box). Under Modify: Fly In,do the following:In the Start list, select WithPrevious.In the Direction list, select FromRight.In the Speed list, select Fast.
  15. Custom animation effects: line sweeps in picture and text(Basic)To reproduce the shape effects on this slide, do the following:On the Home tab, in theSlides group, click Layout, and then click Blank.On the Home tab, in the Drawing group, click Shapes, and then under Lines click Line (first option from the left).On the slide, press and hold SHIFT, and then drag to draw a straight, vertical line.Select the line. Under DrawingTools, on the Format tab, in the Size group, in the Shape Width box, enter 7.5”.Under DrawingTools, on the Format tab, in the ShapeStyles group, click the Format Shape dialog box launcher. In the Format Shape dialog box, click LineColor in the left pane. In the LineColor pane, select Solidline, click the button next to Color, and then under ThemeColors click Black, Text 1 (first row, second option from the left).Also in the Format Shape dialog box, click LineStyle in the left pane. In the LineStyle pane, in the Weight box, enter 2 pt.Under DrawingTools, on the Format tab, in the ShapeStyles group, click ShapeEffects, point to Glow, and then under GlowVariations click Accent color 1, 5 pt glow (first row, first option from the left). Under DrawingTools, on the Format tab, in the ShapeStyles group, click ShapeEffects, point to Glow, point to MoreGlowColors, and then under ThemeColors click White, Background 1 (first row, first option from the left).On the Home tab, in the Drawing group, click Arrange, point to Align, and then do the following:Click Align to Slide.Click AlignCenter.Click AlignMiddle.On the slide, select the line. On the Home tab, in the Clipboard group, click the arrow under Paste, and then click Duplicate.Drag the duplicate line slightly off the right edge of the slide.With the duplicate line still selected, on the Home tab, in the Drawing group, click Arrange, point to Align, and then do the following: Click Align to Slide. Click Align Middle.On the Insert tab, in the Illustrations group, click Picture. In the InsertPicture dialog box, select a picture, and then click Insert.On the slide, select the picture. Under Picture Tools, on the Format tab, in the bottom right corner of the Size group, click the Size and Position dialog box launcher. In the Size and Position dialog box, on the Size tab, resize or crop the picture as needed so that under Size and rotate, the Height box is set to 7.5” and the Width box is set to 5”. Resize the picture under Size and rotate by entering values into the Height and Width boxes. Crop the picture under Crop from by entering values into the Left, Right, Top, and Bottom boxes. On the Home tab, in the Drawing group, click Arrange, point to Align, and then do the following:Click Align to Slide.ClickAlignRight.ClickAlignMiddle.To reproduce the text effects on this slide, do the following:On the Insert tab, in the Illustrations group, click TextBox. On the slide, drag to draw a text box.Enter text in the text box, and then select the text. On the Home tab, in the Font group, do the following:In the Font list, select Arial.In the FontSize list, select 28.Click Bold.Click the button next to FontColor, and then under ThemeColors click White, Background 1 (first row, first option from the left).On the Home tab, in the Paragraph group, click AlignTextRight to align the text right in the text box. Drag the text box onto the left half of the slide.To reproduce the background effects on this slide, do the following:Right-click the slide background area, and then click Format Background. In the Format Background dialog box, click Fill in the left pane, select Gradient fill in the Fill pane, and then do the following:In the Type list, select Linear.Click the button next to Direction, and then click Linear Down (first row, second option from the left).Under Gradient stops, click Add or Remove until two stops appear in the drop-down list.Also under Gradient stops, customize the gradient stops that you added as follows:Select Stop 1 from the list, and then do the following:In the Stop position box, enter 40%.Click the button next to Color, and then click Black, Text 1 (first row, second option from the left).Select Stop 2 from the list, and then do the following: In the Stop position box, enter 100%.Click the button next to Color, and then click Black, Text 1, Lighter 50% (second row, second option from the left).To reproduce the animation effects on this slide, do the following:On the Animations tab, in the Animations group, click CustomAnimation. Select the line off the right edge of the slide. In the CustomAnimation task pane, do the following:Click AddEffect, point to Entrance, and then click MoreEffects. In the AddEntranceEffect dialog box, under Basic, click FlyIn.Select the animation effect (fly-in effect for the second line). Under Modify: Fly In,do the following:In the Start list, select After Previous.In the Direction list, select FromLeft.In the Speed list, select Fast.On the Home tab, in the Editing group, click Select, and then click Selection Pane.In the Selection and Visibility pane, select the first line you created (in the middle of the slide). In the CustomAnimation task pane, do the following:Click AddEffect, point to Entrance, and then click MoreEffects. In the AddEntranceEffect dialog box, under Basic, click FlyIn.Select the second animation effect (fly-in effect for the first line). Under Modify: Fly In,do the following:In the Start list, select AfterPrevious.In the Direction list, select FromRight.In the Speed list, select Fast.On the slide, select the picture. In the CustomAnimation task pane, do the following:Click AddEffect, point to Entrance, and then click MoreEffects. In the AddEntranceEffect dialog box, under Basic, click Wipe.Select the third animation effect (wipe effect for the picture). Under Modify: Wipe,do the following:In the Start list, select WithPrevious.In the Direction list, select FromRight.In the Speed list, select Fast.On the slide, select the text box. In the CustomAnimation task pane, do the following:Click AddEffect, point to Entrance, and then click MoreEffects. In the AddEntranceEffect dialog box, under Basic, clickFlyIn.Select the fourth animation effect (fly-in effect for the text box). Under Modify: Fly In,do the following:In the Start list, select WithPrevious.In the Direction list, select FromRight.In the Speed list, select Fast.
  16. Custom animation effects: line sweeps in picture and text(Basic)To reproduce the shape effects on this slide, do the following:On the Home tab, in theSlides group, click Layout, and then click Blank.On the Home tab, in the Drawing group, click Shapes, and then under Lines click Line (first option from the left).On the slide, press and hold SHIFT, and then drag to draw a straight, vertical line.Select the line. Under DrawingTools, on the Format tab, in the Size group, in the Shape Width box, enter 7.5”.Under DrawingTools, on the Format tab, in the ShapeStyles group, click the Format Shape dialog box launcher. In the Format Shape dialog box, click LineColor in the left pane. In the LineColor pane, select Solidline, click the button next to Color, and then under ThemeColors click Black, Text 1 (first row, second option from the left).Also in the Format Shape dialog box, click LineStyle in the left pane. In the LineStyle pane, in the Weight box, enter 2 pt.Under DrawingTools, on the Format tab, in the ShapeStyles group, click ShapeEffects, point to Glow, and then under GlowVariations click Accent color 1, 5 pt glow (first row, first option from the left). Under DrawingTools, on the Format tab, in the ShapeStyles group, click ShapeEffects, point to Glow, point to MoreGlowColors, and then under ThemeColors click White, Background 1 (first row, first option from the left).On the Home tab, in the Drawing group, click Arrange, point to Align, and then do the following:Click Align to Slide.Click AlignCenter.Click AlignMiddle.On the slide, select the line. On the Home tab, in the Clipboard group, click the arrow under Paste, and then click Duplicate.Drag the duplicate line slightly off the right edge of the slide.With the duplicate line still selected, on the Home tab, in the Drawing group, click Arrange, point to Align, and then do the following: Click Align to Slide. Click Align Middle.On the Insert tab, in the Illustrations group, click Picture. In the InsertPicture dialog box, select a picture, and then click Insert.On the slide, select the picture. Under Picture Tools, on the Format tab, in the bottom right corner of the Size group, click the Size and Position dialog box launcher. In the Size and Position dialog box, on the Size tab, resize or crop the picture as needed so that under Size and rotate, the Height box is set to 7.5” and the Width box is set to 5”. Resize the picture under Size and rotate by entering values into the Height and Width boxes. Crop the picture under Crop from by entering values into the Left, Right, Top, and Bottom boxes. On the Home tab, in the Drawing group, click Arrange, point to Align, and then do the following:Click Align to Slide.ClickAlignRight.ClickAlignMiddle.To reproduce the text effects on this slide, do the following:On the Insert tab, in the Illustrations group, click TextBox. On the slide, drag to draw a text box.Enter text in the text box, and then select the text. On the Home tab, in the Font group, do the following:In the Font list, select Arial.In the FontSize list, select 28.Click Bold.Click the button next to FontColor, and then under ThemeColors click White, Background 1 (first row, first option from the left).On the Home tab, in the Paragraph group, click AlignTextRight to align the text right in the text box. Drag the text box onto the left half of the slide.To reproduce the background effects on this slide, do the following:Right-click the slide background area, and then click Format Background. In the Format Background dialog box, click Fill in the left pane, select Gradient fill in the Fill pane, and then do the following:In the Type list, select Linear.Click the button next to Direction, and then click Linear Down (first row, second option from the left).Under Gradient stops, click Add or Remove until two stops appear in the drop-down list.Also under Gradient stops, customize the gradient stops that you added as follows:Select Stop 1 from the list, and then do the following:In the Stop position box, enter 40%.Click the button next to Color, and then click Black, Text 1 (first row, second option from the left).Select Stop 2 from the list, and then do the following: In the Stop position box, enter 100%.Click the button next to Color, and then click Black, Text 1, Lighter 50% (second row, second option from the left).To reproduce the animation effects on this slide, do the following:On the Animations tab, in the Animations group, click CustomAnimation. Select the line off the right edge of the slide. In the CustomAnimation task pane, do the following:Click AddEffect, point to Entrance, and then click MoreEffects. In the AddEntranceEffect dialog box, under Basic, click FlyIn.Select the animation effect (fly-in effect for the second line). Under Modify: Fly In,do the following:In the Start list, select After Previous.In the Direction list, select FromLeft.In the Speed list, select Fast.On the Home tab, in the Editing group, click Select, and then click Selection Pane.In the Selection and Visibility pane, select the first line you created (in the middle of the slide). In the CustomAnimation task pane, do the following:Click AddEffect, point to Entrance, and then click MoreEffects. In the AddEntranceEffect dialog box, under Basic, click FlyIn.Select the second animation effect (fly-in effect for the first line). Under Modify: Fly In,do the following:In the Start list, select AfterPrevious.In the Direction list, select FromRight.In the Speed list, select Fast.On the slide, select the picture. In the CustomAnimation task pane, do the following:Click AddEffect, point to Entrance, and then click MoreEffects. In the AddEntranceEffect dialog box, under Basic, click Wipe.Select the third animation effect (wipe effect for the picture). Under Modify: Wipe,do the following:In the Start list, select WithPrevious.In the Direction list, select FromRight.In the Speed list, select Fast.On the slide, select the text box. In the CustomAnimation task pane, do the following:Click AddEffect, point to Entrance, and then click MoreEffects. In the AddEntranceEffect dialog box, under Basic, clickFlyIn.Select the fourth animation effect (fly-in effect for the text box). Under Modify: Fly In,do the following:In the Start list, select WithPrevious.In the Direction list, select FromRight.In the Speed list, select Fast.
  17. Custom animation effects: line sweeps in picture and text(Basic)To reproduce the shape effects on this slide, do the following:On the Home tab, in theSlides group, click Layout, and then click Blank.On the Home tab, in the Drawing group, click Shapes, and then under Lines click Line (first option from the left).On the slide, press and hold SHIFT, and then drag to draw a straight, vertical line.Select the line. Under DrawingTools, on the Format tab, in the Size group, in the Shape Width box, enter 7.5”.Under DrawingTools, on the Format tab, in the ShapeStyles group, click the Format Shape dialog box launcher. In the Format Shape dialog box, click LineColor in the left pane. In the LineColor pane, select Solidline, click the button next to Color, and then under ThemeColors click Black, Text 1 (first row, second option from the left).Also in the Format Shape dialog box, click LineStyle in the left pane. In the LineStyle pane, in the Weight box, enter 2 pt.Under DrawingTools, on the Format tab, in the ShapeStyles group, click ShapeEffects, point to Glow, and then under GlowVariations click Accent color 1, 5 pt glow (first row, first option from the left). Under DrawingTools, on the Format tab, in the ShapeStyles group, click ShapeEffects, point to Glow, point to MoreGlowColors, and then under ThemeColors click White, Background 1 (first row, first option from the left).On the Home tab, in the Drawing group, click Arrange, point to Align, and then do the following:Click Align to Slide.Click AlignCenter.Click AlignMiddle.On the slide, select the line. On the Home tab, in the Clipboard group, click the arrow under Paste, and then click Duplicate.Drag the duplicate line slightly off the right edge of the slide.With the duplicate line still selected, on the Home tab, in the Drawing group, click Arrange, point to Align, and then do the following: Click Align to Slide. Click Align Middle.On the Insert tab, in the Illustrations group, click Picture. In the InsertPicture dialog box, select a picture, and then click Insert.On the slide, select the picture. Under Picture Tools, on the Format tab, in the bottom right corner of the Size group, click the Size and Position dialog box launcher. In the Size and Position dialog box, on the Size tab, resize or crop the picture as needed so that under Size and rotate, the Height box is set to 7.5” and the Width box is set to 5”. Resize the picture under Size and rotate by entering values into the Height and Width boxes. Crop the picture under Crop from by entering values into the Left, Right, Top, and Bottom boxes. On the Home tab, in the Drawing group, click Arrange, point to Align, and then do the following:Click Align to Slide.ClickAlignRight.ClickAlignMiddle.To reproduce the text effects on this slide, do the following:On the Insert tab, in the Illustrations group, click TextBox. On the slide, drag to draw a text box.Enter text in the text box, and then select the text. On the Home tab, in the Font group, do the following:In the Font list, select Arial.In the FontSize list, select 28.Click Bold.Click the button next to FontColor, and then under ThemeColors click White, Background 1 (first row, first option from the left).On the Home tab, in the Paragraph group, click AlignTextRight to align the text right in the text box. Drag the text box onto the left half of the slide.To reproduce the background effects on this slide, do the following:Right-click the slide background area, and then click Format Background. In the Format Background dialog box, click Fill in the left pane, select Gradient fill in the Fill pane, and then do the following:In the Type list, select Linear.Click the button next to Direction, and then click Linear Down (first row, second option from the left).Under Gradient stops, click Add or Remove until two stops appear in the drop-down list.Also under Gradient stops, customize the gradient stops that you added as follows:Select Stop 1 from the list, and then do the following:In the Stop position box, enter 40%.Click the button next to Color, and then click Black, Text 1 (first row, second option from the left).Select Stop 2 from the list, and then do the following: In the Stop position box, enter 100%.Click the button next to Color, and then click Black, Text 1, Lighter 50% (second row, second option from the left).To reproduce the animation effects on this slide, do the following:On the Animations tab, in the Animations group, click CustomAnimation. Select the line off the right edge of the slide. In the CustomAnimation task pane, do the following:Click AddEffect, point to Entrance, and then click MoreEffects. In the AddEntranceEffect dialog box, under Basic, click FlyIn.Select the animation effect (fly-in effect for the second line). Under Modify: Fly In,do the following:In the Start list, select After Previous.In the Direction list, select FromLeft.In the Speed list, select Fast.On the Home tab, in the Editing group, click Select, and then click Selection Pane.In the Selection and Visibility pane, select the first line you created (in the middle of the slide). In the CustomAnimation task pane, do the following:Click AddEffect, point to Entrance, and then click MoreEffects. In the AddEntranceEffect dialog box, under Basic, click FlyIn.Select the second animation effect (fly-in effect for the first line). Under Modify: Fly In,do the following:In the Start list, select AfterPrevious.In the Direction list, select FromRight.In the Speed list, select Fast.On the slide, select the picture. In the CustomAnimation task pane, do the following:Click AddEffect, point to Entrance, and then click MoreEffects. In the AddEntranceEffect dialog box, under Basic, click Wipe.Select the third animation effect (wipe effect for the picture). Under Modify: Wipe,do the following:In the Start list, select WithPrevious.In the Direction list, select FromRight.In the Speed list, select Fast.On the slide, select the text box. In the CustomAnimation task pane, do the following:Click AddEffect, point to Entrance, and then click MoreEffects. In the AddEntranceEffect dialog box, under Basic, clickFlyIn.Select the fourth animation effect (fly-in effect for the text box). Under Modify: Fly In,do the following:In the Start list, select WithPrevious.In the Direction list, select FromRight.In the Speed list, select Fast.
  18. Custom animation effects: shrink picture circle with text(Intermediate)To reproduce the picture effects on this slide, do the following:On the Home tab, in theSlides group, click Layout, and then click Blank.On the Insert tab, in the Illustrations group, click Picture. In the InsertPicture dialog box, select a picture, and then click Insert.On the slide, select the picture. Under PictureTools, on the Format tab, in the PictureStyles group, click PictureShape, and then under BasicShapes click Oval (first row, first option from the left).Select the picture-filled oval. Under Picture Tools, on the Format tab, in the bottom right corner of the Size group, click the Size and Position dialog box launcher. In the Size and Position dialog box, on the Size tab, resize or crop the picture as needed so that under Size and rotate, the Height box is set to 6” and the Width box is set to 6”. Resize the picture under Size and rotate by entering values into the Height and Width boxes. Crop the picture under Crop from by entering values into the Left, Right, Top, and Bottom boxes. Under PictureTools, on the Format tab, in the PictureStyles group, click PictureEffects, point to Glow, and then under GlowVariations click Accent color 1, 18 pt glow (fourth row, first option from the left).Under PictureTools, on the Format tab, in the PictureStyles group, click PictureEffects, point to Glow, point to More Glow Colors, and then under ThemeColors click White, Background 1 (first row, first option from the left).On the Home tab, in the Drawing group, click the Format Shape dialog box launcher. In the Format Picture dialog box, click Shadow in the left pane. In the Shadow pane, click the button next to Presets, under Inner click InsideDiagonalBottomLeft (third row, first option from the left), and then do the following:In the Transparency box, enter 50%.In the Blur box, enter 8 pt.In the Angle box, enter 135°.In the Distance box, enter 8 pt.On the Insert tab, in the Text group, click TextBox. On the slide, drag to draw a text box.Enter text, and then select the text. On the Home tab, in the Font group, do the following:In the Font list, select Candara.In the FontSize box, enter 30.Click the arrow next to FontColor, and then click Black, Text 1, Lighter 25% (fourth row, second option from the left).On the Home tab, in the Paragraph group, click AlignTextLeft.On the slide, select the text box. Under DrawingTools, on the Format tab, in the WordArt Styles group, click TextEffects, point to Reflection, and then under ReflectionVariations click TightReflection, touching (first row, first option from the left).Drag the text box onto the right half of the slide.With the text box still selected, on the Home tab, in the Drawing group, click Arrange, and then do the following:Point to Align, and then click Align to Slide.Point to Align, and then click Align Right.Point to Align, and then click Align Middle.Click Send to Back. To reproduce the animation effects on this slide, do the following:On the Animations tab, in the Animations group, click CustomAnimation. On the slide, select the picture. In CustomAnimation task pane, do the following:Click Add Effect, point to Entrance, and then click More Effects. In the Add Entrance Effect dialog box, under Basic, click Wheel.Select the animation effect (wheel effect for the picture). Under Modify: Wheel,do the following:In the Start list, select WithPrevious.In the Spokes list, select 1 Spoke.In the Speed list, select Medium. On the slide, select the picture. In CustomAnimation task pane, do the following:Click Add Effect, point to Entrance, and then click More Effects. In the Add Entrance Effect dialog box, under Subtle, click FadedZoom.Select the second animation effect (faded zoom effect for the picture). Under Modify: FadedZoom,do the following:In the Start list, select WithPrevious.In the Speed list, select Medium. On the slide, select the picture. In CustomAnimation task pane, do the following:Click Add Effect, point to Emphasis, and then click More Effects. In the Add Emphasis Effect dialog box, under Basic, click Grow/Shrink.Select the third animation effect (grow/shrink effect for the picture). Click the arrow to the right of the selected effect, and then click EffectOptions. In the Grow/Shrink dialog box, do the following:On the Effect tab, under Settings, do the following:In the Size list, in the Custom box, enter 95%, and then press ENTER.Select SmoothStart.Select SmoothEnd.Select Auto-reverse.On the Timing tab, do the following: In the Start list, select AfterPrevious. In the Speed box, enter 0.3 seconds. On the slide, select the picture. In CustomAnimation task pane, do the following:Click Add Effect, point to Emphasis, and then click More Effects. In the Add Emphasis Effect dialog box, under Basic, click Grow/Shrink.Select the fourth animation effect (grow/shrink effect for the picture). Under Grow/Shrink, do the following:In the Start list, select AfterPrevious.In the Size list, select Smaller.In the Speed list, select Medium. On the slide, select the picture. In CustomAnimation task pane, do the following:ClickAddEffect, point to MotionPaths, and then click Left.Select the fifth animation effect (left motion path for the picture). Under Modify: Left,do the following:In the Start list, select WithPrevious.In the Speed list, select Medium.On the slide, select the text box. In the CustomAnimation task pane, do the following:Click Add Effect, point to Entrance, and then click More Effects. In the Add Entrance Effect dialog box, under Subtle, select Fade.Select the sixth animation effect (fade effect for the text box). Click the arrow to the right of the selected effect, and then click Timing. In the Fade dialog box, on the Timing tab, do the following:In the Start list, select WithPrevious.In the Delay box, enter 1.5.In the Speed list, select 1 seconds (Fast).On the slide, select the text box. In CustomAnimation task pane, do the following:ClickAddEffect, point to MotionPaths, and then click Left.Select the seventh animation effect (left motion path for the text box). Under Modify: Left,do the following:In the Start list, select WithPrevious.In the Speed list, select Fast.On the slide, right–click the selected motion path for the text box, and then clickReversePathDirection. To reproduce the rectangle on this slide, do the following: On the Home tab, in theDrawing group, clickShapes, and then under Rectangles click Rectangle (first option from the left). On the slide, drag to draw a rectangle.Select the rectangle.Under DrawingTools, on the Format tab, in the Size group, do the following:In the ShapeHeight box, enter 1.54”.In theShapeWidth box, enter 10”.Under DrawingTools, on theFormat tab, in the ShapeStyles group, click the arrow next to ShapeOutline, and then click NoOutline.Under DrawingTools, on the Format tab, in the bottom right corner of the ShapeStyles group, click the FormatShape dialog box launcher. In the Format Shape dialog box, clickFill in the left pane, selectGradientfill in the Fill pane, and then do the following:In the Type list, select Linear.Click the button next to Direction, and then click Linear Right (first row, fourth option from the left). Under Gradient stops, click Add or Remove until two stops appear in the drop-down list.Also under Gradient stops, customize the gradient stops that you added as follows:Select Stop 1 from the list, and then do the following:In the Stop position box, enter 0%.Click the button next to Color, and then under Theme Colors click White, Background 1 (first row, first option from the left).In the Transparency box, enter 88%.Select Stop 2 from the list, and then do the following: In the Stop position box, enter 100%.Click the button next to Color, and then under Theme Colors click White, Background 1 (first row, first option from the left).In the Transparency box, enter 43%.On the Home tab, in the Drawinggroup, click Arrange, and then do the following:Point to Align, and then click Align to Slide. Point to Align, and then clickAlignMiddle.Point to Align, and then clickAlignCenter.Click Send to Back. To reproduce the background effects on this slide, do the following:Right-click the slide background area, and then click Format Background. In the Format Background dialog box, click Fill in the left pane, select Gradient fill in the Fill pane, and then do the following:In the Type list, select Radial.Click the button next to Direction, and then click From Center (third option from the left).Under Gradient stops, click Add or Remove until two stops appear in the drop-down list.Also under Gradient stops, customize the gradient stops that you added as follows:Select Stop 1 from the list, and then do the following:In the Stop position box, enter 0%.Click the button next to Color, and then under Theme Colors click White, Background 1 (first row, first option from the left).Select Stop 2 from the list, and then do the following: In the Stop position box, enter 100%.Click the button next to Color, and then under Theme Colors click Black, Text 1, Lighter 50% (second row, second option from the left).
  19. Custom animation effects: line sweeps in picture and text(Basic)To reproduce the shape effects on this slide, do the following:On the Home tab, in theSlides group, click Layout, and then click Blank.On the Home tab, in the Drawing group, click Shapes, and then under Lines click Line (first option from the left).On the slide, press and hold SHIFT, and then drag to draw a straight, vertical line.Select the line. Under DrawingTools, on the Format tab, in the Size group, in the Shape Width box, enter 7.5”.Under DrawingTools, on the Format tab, in the ShapeStyles group, click the Format Shape dialog box launcher. In the Format Shape dialog box, click LineColor in the left pane. In the LineColor pane, select Solidline, click the button next to Color, and then under ThemeColors click Black, Text 1 (first row, second option from the left).Also in the Format Shape dialog box, click LineStyle in the left pane. In the LineStyle pane, in the Weight box, enter 2 pt.Under DrawingTools, on the Format tab, in the ShapeStyles group, click ShapeEffects, point to Glow, and then under GlowVariations click Accent color 1, 5 pt glow (first row, first option from the left). Under DrawingTools, on the Format tab, in the ShapeStyles group, click ShapeEffects, point to Glow, point to MoreGlowColors, and then under ThemeColors click White, Background 1 (first row, first option from the left).On the Home tab, in the Drawing group, click Arrange, point to Align, and then do the following:Click Align to Slide.Click AlignCenter.Click AlignMiddle.On the slide, select the line. On the Home tab, in the Clipboard group, click the arrow under Paste, and then click Duplicate.Drag the duplicate line slightly off the right edge of the slide.With the duplicate line still selected, on the Home tab, in the Drawing group, click Arrange, point to Align, and then do the following: Click Align to Slide. Click Align Middle.On the Insert tab, in the Illustrations group, click Picture. In the InsertPicture dialog box, select a picture, and then click Insert.On the slide, select the picture. Under Picture Tools, on the Format tab, in the bottom right corner of the Size group, click the Size and Position dialog box launcher. In the Size and Position dialog box, on the Size tab, resize or crop the picture as needed so that under Size and rotate, the Height box is set to 7.5” and the Width box is set to 5”. Resize the picture under Size and rotate by entering values into the Height and Width boxes. Crop the picture under Crop from by entering values into the Left, Right, Top, and Bottom boxes. On the Home tab, in the Drawing group, click Arrange, point to Align, and then do the following:Click Align to Slide.ClickAlignRight.ClickAlignMiddle.To reproduce the text effects on this slide, do the following:On the Insert tab, in the Illustrations group, click TextBox. On the slide, drag to draw a text box.Enter text in the text box, and then select the text. On the Home tab, in the Font group, do the following:In the Font list, select Arial.In the FontSize list, select 28.Click Bold.Click the button next to FontColor, and then under ThemeColors click White, Background 1 (first row, first option from the left).On the Home tab, in the Paragraph group, click AlignTextRight to align the text right in the text box. Drag the text box onto the left half of the slide.To reproduce the background effects on this slide, do the following:Right-click the slide background area, and then click Format Background. In the Format Background dialog box, click Fill in the left pane, select Gradient fill in the Fill pane, and then do the following:In the Type list, select Linear.Click the button next to Direction, and then click Linear Down (first row, second option from the left).Under Gradient stops, click Add or Remove until two stops appear in the drop-down list.Also under Gradient stops, customize the gradient stops that you added as follows:Select Stop 1 from the list, and then do the following:In the Stop position box, enter 40%.Click the button next to Color, and then click Black, Text 1 (first row, second option from the left).Select Stop 2 from the list, and then do the following: In the Stop position box, enter 100%.Click the button next to Color, and then click Black, Text 1, Lighter 50% (second row, second option from the left).To reproduce the animation effects on this slide, do the following:On the Animations tab, in the Animations group, click CustomAnimation. Select the line off the right edge of the slide. In the CustomAnimation task pane, do the following:Click AddEffect, point to Entrance, and then click MoreEffects. In the AddEntranceEffect dialog box, under Basic, click FlyIn.Select the animation effect (fly-in effect for the second line). Under Modify: Fly In,do the following:In the Start list, select After Previous.In the Direction list, select FromLeft.In the Speed list, select Fast.On the Home tab, in the Editing group, click Select, and then click Selection Pane.In the Selection and Visibility pane, select the first line you created (in the middle of the slide). In the CustomAnimation task pane, do the following:Click AddEffect, point to Entrance, and then click MoreEffects. In the AddEntranceEffect dialog box, under Basic, click FlyIn.Select the second animation effect (fly-in effect for the first line). Under Modify: Fly In,do the following:In the Start list, select AfterPrevious.In the Direction list, select FromRight.In the Speed list, select Fast.On the slide, select the picture. In the CustomAnimation task pane, do the following:Click AddEffect, point to Entrance, and then click MoreEffects. In the AddEntranceEffect dialog box, under Basic, click Wipe.Select the third animation effect (wipe effect for the picture). Under Modify: Wipe,do the following:In the Start list, select WithPrevious.In the Direction list, select FromRight.In the Speed list, select Fast.On the slide, select the text box. In the CustomAnimation task pane, do the following:Click AddEffect, point to Entrance, and then click MoreEffects. In the AddEntranceEffect dialog box, under Basic, clickFlyIn.Select the fourth animation effect (fly-in effect for the text box). Under Modify: Fly In,do the following:In the Start list, select WithPrevious.In the Direction list, select FromRight.In the Speed list, select Fast.
  20. Custom animation effects: line sweeps in picture and text(Basic)To reproduce the shape effects on this slide, do the following:On the Home tab, in theSlides group, click Layout, and then click Blank.On the Home tab, in the Drawing group, click Shapes, and then under Lines click Line (first option from the left).On the slide, press and hold SHIFT, and then drag to draw a straight, vertical line.Select the line. Under DrawingTools, on the Format tab, in the Size group, in the Shape Width box, enter 7.5”.Under DrawingTools, on the Format tab, in the ShapeStyles group, click the Format Shape dialog box launcher. In the Format Shape dialog box, click LineColor in the left pane. In the LineColor pane, select Solidline, click the button next to Color, and then under ThemeColors click Black, Text 1 (first row, second option from the left).Also in the Format Shape dialog box, click LineStyle in the left pane. In the LineStyle pane, in the Weight box, enter 2 pt.Under DrawingTools, on the Format tab, in the ShapeStyles group, click ShapeEffects, point to Glow, and then under GlowVariations click Accent color 1, 5 pt glow (first row, first option from the left). Under DrawingTools, on the Format tab, in the ShapeStyles group, click ShapeEffects, point to Glow, point to MoreGlowColors, and then under ThemeColors click White, Background 1 (first row, first option from the left).On the Home tab, in the Drawing group, click Arrange, point to Align, and then do the following:Click Align to Slide.Click AlignCenter.Click AlignMiddle.On the slide, select the line. On the Home tab, in the Clipboard group, click the arrow under Paste, and then click Duplicate.Drag the duplicate line slightly off the right edge of the slide.With the duplicate line still selected, on the Home tab, in the Drawing group, click Arrange, point to Align, and then do the following: Click Align to Slide. Click Align Middle.On the Insert tab, in the Illustrations group, click Picture. In the InsertPicture dialog box, select a picture, and then click Insert.On the slide, select the picture. Under Picture Tools, on the Format tab, in the bottom right corner of the Size group, click the Size and Position dialog box launcher. In the Size and Position dialog box, on the Size tab, resize or crop the picture as needed so that under Size and rotate, the Height box is set to 7.5” and the Width box is set to 5”. Resize the picture under Size and rotate by entering values into the Height and Width boxes. Crop the picture under Crop from by entering values into the Left, Right, Top, and Bottom boxes. On the Home tab, in the Drawing group, click Arrange, point to Align, and then do the following:Click Align to Slide.ClickAlignRight.ClickAlignMiddle.To reproduce the text effects on this slide, do the following:On the Insert tab, in the Illustrations group, click TextBox. On the slide, drag to draw a text box.Enter text in the text box, and then select the text. On the Home tab, in the Font group, do the following:In the Font list, select Arial.In the FontSize list, select 28.Click Bold.Click the button next to FontColor, and then under ThemeColors click White, Background 1 (first row, first option from the left).On the Home tab, in the Paragraph group, click AlignTextRight to align the text right in the text box. Drag the text box onto the left half of the slide.To reproduce the background effects on this slide, do the following:Right-click the slide background area, and then click Format Background. In the Format Background dialog box, click Fill in the left pane, select Gradient fill in the Fill pane, and then do the following:In the Type list, select Linear.Click the button next to Direction, and then click Linear Down (first row, second option from the left).Under Gradient stops, click Add or Remove until two stops appear in the drop-down list.Also under Gradient stops, customize the gradient stops that you added as follows:Select Stop 1 from the list, and then do the following:In the Stop position box, enter 40%.Click the button next to Color, and then click Black, Text 1 (first row, second option from the left).Select Stop 2 from the list, and then do the following: In the Stop position box, enter 100%.Click the button next to Color, and then click Black, Text 1, Lighter 50% (second row, second option from the left).To reproduce the animation effects on this slide, do the following:On the Animations tab, in the Animations group, click CustomAnimation. Select the line off the right edge of the slide. In the CustomAnimation task pane, do the following:Click AddEffect, point to Entrance, and then click MoreEffects. In the AddEntranceEffect dialog box, under Basic, click FlyIn.Select the animation effect (fly-in effect for the second line). Under Modify: Fly In,do the following:In the Start list, select After Previous.In the Direction list, select FromLeft.In the Speed list, select Fast.On the Home tab, in the Editing group, click Select, and then click Selection Pane.In the Selection and Visibility pane, select the first line you created (in the middle of the slide). In the CustomAnimation task pane, do the following:Click AddEffect, point to Entrance, and then click MoreEffects. In the AddEntranceEffect dialog box, under Basic, click FlyIn.Select the second animation effect (fly-in effect for the first line). Under Modify: Fly In,do the following:In the Start list, select AfterPrevious.In the Direction list, select FromRight.In the Speed list, select Fast.On the slide, select the picture. In the CustomAnimation task pane, do the following:Click AddEffect, point to Entrance, and then click MoreEffects. In the AddEntranceEffect dialog box, under Basic, click Wipe.Select the third animation effect (wipe effect for the picture). Under Modify: Wipe,do the following:In the Start list, select WithPrevious.In the Direction list, select FromRight.In the Speed list, select Fast.On the slide, select the text box. In the CustomAnimation task pane, do the following:Click AddEffect, point to Entrance, and then click MoreEffects. In the AddEntranceEffect dialog box, under Basic, clickFlyIn.Select the fourth animation effect (fly-in effect for the text box). Under Modify: Fly In,do the following:In the Start list, select WithPrevious.In the Direction list, select FromRight.In the Speed list, select Fast.
  21. Custom animation effects: line sweeps in picture and text(Basic)To reproduce the shape effects on this slide, do the following:On the Home tab, in theSlides group, click Layout, and then click Blank.On the Home tab, in the Drawing group, click Shapes, and then under Lines click Line (first option from the left).On the slide, press and hold SHIFT, and then drag to draw a straight, vertical line.Select the line. Under DrawingTools, on the Format tab, in the Size group, in the Shape Width box, enter 7.5”.Under DrawingTools, on the Format tab, in the ShapeStyles group, click the Format Shape dialog box launcher. In the Format Shape dialog box, click LineColor in the left pane. In the LineColor pane, select Solidline, click the button next to Color, and then under ThemeColors click Black, Text 1 (first row, second option from the left).Also in the Format Shape dialog box, click LineStyle in the left pane. In the LineStyle pane, in the Weight box, enter 2 pt.Under DrawingTools, on the Format tab, in the ShapeStyles group, click ShapeEffects, point to Glow, and then under GlowVariations click Accent color 1, 5 pt glow (first row, first option from the left). Under DrawingTools, on the Format tab, in the ShapeStyles group, click ShapeEffects, point to Glow, point to MoreGlowColors, and then under ThemeColors click White, Background 1 (first row, first option from the left).On the Home tab, in the Drawing group, click Arrange, point to Align, and then do the following:Click Align to Slide.Click AlignCenter.Click AlignMiddle.On the slide, select the line. On the Home tab, in the Clipboard group, click the arrow under Paste, and then click Duplicate.Drag the duplicate line slightly off the right edge of the slide.With the duplicate line still selected, on the Home tab, in the Drawing group, click Arrange, point to Align, and then do the following: Click Align to Slide. Click Align Middle.On the Insert tab, in the Illustrations group, click Picture. In the InsertPicture dialog box, select a picture, and then click Insert.On the slide, select the picture. Under Picture Tools, on the Format tab, in the bottom right corner of the Size group, click the Size and Position dialog box launcher. In the Size and Position dialog box, on the Size tab, resize or crop the picture as needed so that under Size and rotate, the Height box is set to 7.5” and the Width box is set to 5”. Resize the picture under Size and rotate by entering values into the Height and Width boxes. Crop the picture under Crop from by entering values into the Left, Right, Top, and Bottom boxes. On the Home tab, in the Drawing group, click Arrange, point to Align, and then do the following:Click Align to Slide.ClickAlignRight.ClickAlignMiddle.To reproduce the text effects on this slide, do the following:On the Insert tab, in the Illustrations group, click TextBox. On the slide, drag to draw a text box.Enter text in the text box, and then select the text. On the Home tab, in the Font group, do the following:In the Font list, select Arial.In the FontSize list, select 28.Click Bold.Click the button next to FontColor, and then under ThemeColors click White, Background 1 (first row, first option from the left).On the Home tab, in the Paragraph group, click AlignTextRight to align the text right in the text box. Drag the text box onto the left half of the slide.To reproduce the background effects on this slide, do the following:Right-click the slide background area, and then click Format Background. In the Format Background dialog box, click Fill in the left pane, select Gradient fill in the Fill pane, and then do the following:In the Type list, select Linear.Click the button next to Direction, and then click Linear Down (first row, second option from the left).Under Gradient stops, click Add or Remove until two stops appear in the drop-down list.Also under Gradient stops, customize the gradient stops that you added as follows:Select Stop 1 from the list, and then do the following:In the Stop position box, enter 40%.Click the button next to Color, and then click Black, Text 1 (first row, second option from the left).Select Stop 2 from the list, and then do the following: In the Stop position box, enter 100%.Click the button next to Color, and then click Black, Text 1, Lighter 50% (second row, second option from the left).To reproduce the animation effects on this slide, do the following:On the Animations tab, in the Animations group, click CustomAnimation. Select the line off the right edge of the slide. In the CustomAnimation task pane, do the following:Click AddEffect, point to Entrance, and then click MoreEffects. In the AddEntranceEffect dialog box, under Basic, click FlyIn.Select the animation effect (fly-in effect for the second line). Under Modify: Fly In,do the following:In the Start list, select After Previous.In the Direction list, select FromLeft.In the Speed list, select Fast.On the Home tab, in the Editing group, click Select, and then click Selection Pane.In the Selection and Visibility pane, select the first line you created (in the middle of the slide). In the CustomAnimation task pane, do the following:Click AddEffect, point to Entrance, and then click MoreEffects. In the AddEntranceEffect dialog box, under Basic, click FlyIn.Select the second animation effect (fly-in effect for the first line). Under Modify: Fly In,do the following:In the Start list, select AfterPrevious.In the Direction list, select FromRight.In the Speed list, select Fast.On the slide, select the picture. In the CustomAnimation task pane, do the following:Click AddEffect, point to Entrance, and then click MoreEffects. In the AddEntranceEffect dialog box, under Basic, click Wipe.Select the third animation effect (wipe effect for the picture). Under Modify: Wipe,do the following:In the Start list, select WithPrevious.In the Direction list, select FromRight.In the Speed list, select Fast.On the slide, select the text box. In the CustomAnimation task pane, do the following:Click AddEffect, point to Entrance, and then click MoreEffects. In the AddEntranceEffect dialog box, under Basic, clickFlyIn.Select the fourth animation effect (fly-in effect for the text box). Under Modify: Fly In,do the following:In the Start list, select WithPrevious.In the Direction list, select FromRight.In the Speed list, select Fast.
  22. Custom animation effects: line sweeps in picture and text(Basic)To reproduce the shape effects on this slide, do the following:On the Home tab, in theSlides group, click Layout, and then click Blank.On the Home tab, in the Drawing group, click Shapes, and then under Lines click Line (first option from the left).On the slide, press and hold SHIFT, and then drag to draw a straight, vertical line.Select the line. Under DrawingTools, on the Format tab, in the Size group, in the Shape Width box, enter 7.5”.Under DrawingTools, on the Format tab, in the ShapeStyles group, click the Format Shape dialog box launcher. In the Format Shape dialog box, click LineColor in the left pane. In the LineColor pane, select Solidline, click the button next to Color, and then under ThemeColors click Black, Text 1 (first row, second option from the left).Also in the Format Shape dialog box, click LineStyle in the left pane. In the LineStyle pane, in the Weight box, enter 2 pt.Under DrawingTools, on the Format tab, in the ShapeStyles group, click ShapeEffects, point to Glow, and then under GlowVariations click Accent color 1, 5 pt glow (first row, first option from the left). Under DrawingTools, on the Format tab, in the ShapeStyles group, click ShapeEffects, point to Glow, point to MoreGlowColors, and then under ThemeColors click White, Background 1 (first row, first option from the left).On the Home tab, in the Drawing group, click Arrange, point to Align, and then do the following:Click Align to Slide.Click AlignCenter.Click AlignMiddle.On the slide, select the line. On the Home tab, in the Clipboard group, click the arrow under Paste, and then click Duplicate.Drag the duplicate line slightly off the right edge of the slide.With the duplicate line still selected, on the Home tab, in the Drawing group, click Arrange, point to Align, and then do the following: Click Align to Slide. Click Align Middle.On the Insert tab, in the Illustrations group, click Picture. In the InsertPicture dialog box, select a picture, and then click Insert.On the slide, select the picture. Under Picture Tools, on the Format tab, in the bottom right corner of the Size group, click the Size and Position dialog box launcher. In the Size and Position dialog box, on the Size tab, resize or crop the picture as needed so that under Size and rotate, the Height box is set to 7.5” and the Width box is set to 5”. Resize the picture under Size and rotate by entering values into the Height and Width boxes. Crop the picture under Crop from by entering values into the Left, Right, Top, and Bottom boxes. On the Home tab, in the Drawing group, click Arrange, point to Align, and then do the following:Click Align to Slide.ClickAlignRight.ClickAlignMiddle.To reproduce the text effects on this slide, do the following:On the Insert tab, in the Illustrations group, click TextBox. On the slide, drag to draw a text box.Enter text in the text box, and then select the text. On the Home tab, in the Font group, do the following:In the Font list, select Arial.In the FontSize list, select 28.Click Bold.Click the button next to FontColor, and then under ThemeColors click White, Background 1 (first row, first option from the left).On the Home tab, in the Paragraph group, click AlignTextRight to align the text right in the text box. Drag the text box onto the left half of the slide.To reproduce the background effects on this slide, do the following:Right-click the slide background area, and then click Format Background. In the Format Background dialog box, click Fill in the left pane, select Gradient fill in the Fill pane, and then do the following:In the Type list, select Linear.Click the button next to Direction, and then click Linear Down (first row, second option from the left).Under Gradient stops, click Add or Remove until two stops appear in the drop-down list.Also under Gradient stops, customize the gradient stops that you added as follows:Select Stop 1 from the list, and then do the following:In the Stop position box, enter 40%.Click the button next to Color, and then click Black, Text 1 (first row, second option from the left).Select Stop 2 from the list, and then do the following: In the Stop position box, enter 100%.Click the button next to Color, and then click Black, Text 1, Lighter 50% (second row, second option from the left).To reproduce the animation effects on this slide, do the following:On the Animations tab, in the Animations group, click CustomAnimation. Select the line off the right edge of the slide. In the CustomAnimation task pane, do the following:Click AddEffect, point to Entrance, and then click MoreEffects. In the AddEntranceEffect dialog box, under Basic, click FlyIn.Select the animation effect (fly-in effect for the second line). Under Modify: Fly In,do the following:In the Start list, select After Previous.In the Direction list, select FromLeft.In the Speed list, select Fast.On the Home tab, in the Editing group, click Select, and then click Selection Pane.In the Selection and Visibility pane, select the first line you created (in the middle of the slide). In the CustomAnimation task pane, do the following:Click AddEffect, point to Entrance, and then click MoreEffects. In the AddEntranceEffect dialog box, under Basic, click FlyIn.Select the second animation effect (fly-in effect for the first line). Under Modify: Fly In,do the following:In the Start list, select AfterPrevious.In the Direction list, select FromRight.In the Speed list, select Fast.On the slide, select the picture. In the CustomAnimation task pane, do the following:Click AddEffect, point to Entrance, and then click MoreEffects. In the AddEntranceEffect dialog box, under Basic, click Wipe.Select the third animation effect (wipe effect for the picture). Under Modify: Wipe,do the following:In the Start list, select WithPrevious.In the Direction list, select FromRight.In the Speed list, select Fast.On the slide, select the text box. In the CustomAnimation task pane, do the following:Click AddEffect, point to Entrance, and then click MoreEffects. In the AddEntranceEffect dialog box, under Basic, clickFlyIn.Select the fourth animation effect (fly-in effect for the text box). Under Modify: Fly In,do the following:In the Start list, select WithPrevious.In the Direction list, select FromRight.In the Speed list, select Fast.
  23. Custom animation effects: sparkle(Basic)To reproduce the text on this slide, do the following:On the Home tab, in the Slides group, click Layout, and then click Blank.On the Insert tab, in the Text group, click TextBox. On the slide, drag to draw a text box.Enter text and select it. On the Home tab, in the Font group, in the Font list select FranklinGothicHeavy, and then in the FontSize box, select 96 pt.On the Home tab, in the Paragraph group, click Center.Select the text box, and then under DrawingTools, on the Format tab, in the WordArtStyles group, click TextEffects, point to Reflection, and under ReflectionVariations select Tight Reflection, Touching (first row, the first option from the left).With the text box still selected, under DrawingTools, on the Format tab, in the bottom right corner of the WordArtStyles group, click the FormatTextEffects: Text Box dialog box launcher. In the FormatTextEffects dialog box, click TextFill in the left pane, select Gradient fill in the TextFill pane, and then do the following:Click the button next to Presetcolors, and then click Ocean (second row, second option from the left).In the Type list, select Linear.Click the button next to Direction, and then click LinearUp (second row, second option from the left).Also in the FormatTextEffects dialog box, click 3-DFormat in the left pane. In the 3-DFormat pane, under Bevel, click the button next to Top, and then under Bevel click Circle (first row, first option from the left). To reproduce the first star on this slide, do the following:On the Home tab, in the Drawing group, click Shapes, and then under Stars and Banners click 4-Point Star (first row, third option from the left). On the slide, drag to draw a star.On the slide, drag the star onto the top of the first letter (in the example slide, it is “S”) in the text box.With the star still selected, drag the yellow diamond adjustment handle down to make the points thinner.On the Home tab, in the bottom right corner in the Drawing group, click the FormatShape dialog box launcher. In the FormatShape dialog box, clickFill in the left pane, select Gradient fillin the Fill pane, and then do the following:In the Type list, select Radial.Click the button next to Direction, and then click From Center (third option from the left). Under Gradient stops, click Add or Remove until two stops appear in the drop-down list.Also under Gradient stops, customize the gradient stops that you added as follows:Select Stop 1 from the list, and then do the following:In the Stop position box, enter 0%.Click the button next to Color, and then under ThemeColors click White, Background 1 (first row, first option from the left). Select Stop 2 from the list, and then do the following: In the Stop position box, enter 100%.Click the button next to Color, and then under ThemeColors click White, Background 1 (first row, first option from the left). In the Transparency box, enter 100%.Also in the FormatShape dialog box, click LineColor in the left pane, and in the LineColor pane click Noline. UnderDrawingTools, on the Format tab, in the bottom right corner of the Size group, click the Size and Position dialog box launcher. In the Size and Position dialog box, on the Size tab, under Sizeand rotation do the following:In the Height box, enter 0.51”.In the Width box, enter 0.51”.In the Rotation box, enter 15°.To reproduce the other stars on this slide, do the following:On the slide, select the star. On the Home tab, in the Clipboard group, click the arrow under Paste, and then click Duplicate. On the slide, drag the second star until it slightly overlaps the edge of a letter in the text box.Change the size of the star in the Drawing Tools, on the Format tab, in the Size group.Repeat steps 1-3 for a total of five stars.To reproduce the animation effects on this slide, do the following:On the Animations tab, in the Animations group, click CustomAnimation.On the slide, select the first star from the left. In the CustomAnimation task pane, do the following:ClickAddEffect, point to Entrance, and then click MoreEffects. In the AddEntranceEffect dialog box, under Moderate, clickGrow & Turn.Select the animation effect (grow & turn entrance effect for the first star). Under Modify: Grow & Turn,do the following:In the Start list, select WithPrevious.In the Speed list, select VeryFast.On the slide, select the first star from the left. In the CustomAnimation task pane, do the following:Click AddEffect, point to Exit, and then click MoreEffects. In the AddExitEffect dialog box, under Moderate, click Grow & Turn.Select the second animation effect (grow & turn exit effect for the first star). Click the arrow to the right of the selected effect, and then click Effect Options. In the Grow & Turn dialog box, on the Timing tab, do the following:In the Start list, select WithPrevious.In the Delay box enter 0.7. In the Speed list, select 0.5 seconds (VeryFast).On the slide, select the second star from the left. In the CustomAnimation task pane, do the following:Click AddEffect, point to Entrance, and then click MoreEffects. In the AddEntranceEffect dialog box, under Moderate, click Grow & Turn.Select the third animation effect (grow & turn entrance effect for the second star). Click the arrow to the right of the selected effect, and then click Effect Options. In the Grow & Turn dialog box, on the Timing tab, do the following:In the Start list, select WithPrevious.In the Delay box enter 0.2. In the Speed list, select 0.5 seconds (VeryFast).On the slide, select the second star from the left. In the CustomAnimation task pane, do the following:Click AddEffect, point to Exit, and then click MoreEffects. In the AddExitEffect dialog box, under Moderate, click Grow & Turn.Select the fourth animation effect (grow & turn exit effect for the second star). Click the arrow to the right of the selected effect, and then click Effect Options. In the Grow & Turn dialog box, on the Timing tab, do the following:In the Start list, select WithPrevious.In the Delay box enter 0.9. In the Speed list, select 0.5 seconds (VeryFast).On the slide, select the third star from the left. In the CustomAnimation task pane, do the following:Click AddEffect, point to Entrance, and then click MoreEffects. In the AddEntranceEffect dialog box, under Moderate, click Grow & Turn.Select the fifth animation effect (grow & turn entrance effect for the third star). Click the arrow to the right of the selected effect, and then click Effect Options. In the Grow & Turn dialog box, on the Timing tab, do the following:In the Start list, select WithPrevious.In the Delay box enter 0.4. In the Speed list, select 0.5 seconds (VeryFast).On the slide, select the third star from the left. In the CustomAnimation task pane, do the following:Click AddEffect, point to Exit, and then click MoreEffects. In the AddExitEffect dialog box, under Moderate, click Grow & Turn.Select the sixth animation effect (grow & turn exit effect for the third star). Click the arrow to the right of the selected effect, and then click Effect Options. In the Grow & Turn dialog box, on the Timing tab, do the following:In the Start list, select WithPrevious.In the Delay box enter 1.1. In the Speed list, select 0.5 seconds (VeryFast).On the slide, select the fourth star from the left. In the CustomAnimation task pane, do the following:Click AddEffect, point to Entrance, and then click MoreEffects. In the AddEntranceEffect dialog box, under Moderate, click Grow & Turn.Select the seventh animation effect (grow & turn entrance effect for the fourth star). Click the arrow to the right of the selected effect, and then click Effect Options. In the Grow & Turn dialog box, on the Timing tab, do the following:In the Start list, select WithPrevious.In the Delay box enter 0.8. In the Speed list, select 0.5 seconds (VeryFast).On the slide, select the fourth star from the left. In the CustomAnimation task pane, do the following:Click AddEffect, point to Exit, and then click MoreEffects. In the AddExitEffect dialog box, under Moderate, click Grow & Turn.Select the eighth animation effect (grow & turn exit effect for the fourth star). Click the arrow to the right of the selected effect, and then click Effect Options. In the Grow & Turn dialog box, on the Timing tab, do the following:In the Start list, select WithPrevious.In the Delay box enter 1.4. In the Speed list, select 0.5 seconds (VeryFast).On the slide, select the fifth star from the left. In the CustomAnimation task pane, do the following:Click AddEffect, point to Entrance, and then click MoreEffects. In the AddEntranceEffect dialog box, under Moderate, click Grow & Turn.Select the ninth animation effect (grow & turn entrance effect for the fifth star). Click the arrow to the right of the selected effect, and then click Effect Options. In the Grow & Turn dialog box, on the Timing tab, do the following:In the Start list, select WithPrevious.In the Delay box enter 0.9. In the Speed list, select 0.5 seconds (VeryFast).On the slide, select the fifth star from the left. In the CustomAnimation task pane, do the following:Click AddEffect, point to Exit, and then click MoreEffects. In the AddExitEffect dialog box, under Moderate, click Grow & Turn.Select the 10th animation effect (grow & turn exit effect for the fifth star). Click the arrow to the right of the selected effect, and then click Effect Options. In the Grow & Turn dialog box, on the Timing tab, do the following:In the Start list, select WithPrevious.In the Delay box enter 1.5. In the Speed list, select 0.5 seconds (VeryFast).To reproduce the background effects on this slide, do the following:Right-click the slide background area, and then click Format Background. In the Format Background dialog box, click Fill in the left pane, select Gradient fill in the Fill pane, and then do the following:In the Type list, select Radial.Click the button next to Direction, and then click From Center (third option from the left). Under Gradient stops, click Add or Remove until two stops appear in the drop-down list.Also under Gradient stops, customize the gradient stops that you added as follows:Select Stop 1 from the list, and then do the following:In the Stop position box, enter 0%.Click the button next to Color, and then under ThemeColorsclick Black, Text 1, Lighter 35% (third row, second option from the left). Select Stop 2 from the list, and then do the following: In the Stop position box, enter 100%.Click the button next to Color, and then under ThemeColorsclick Black, Text 1 (first row, second option from the left).
  24. Custom animation effects: line sweeps in picture and text(Basic)To reproduce the shape effects on this slide, do the following:On the Home tab, in theSlides group, click Layout, and then click Blank.On the Home tab, in the Drawing group, click Shapes, and then under Lines click Line (first option from the left).On the slide, press and hold SHIFT, and then drag to draw a straight, vertical line.Select the line. Under DrawingTools, on the Format tab, in the Size group, in the Shape Width box, enter 7.5”.Under DrawingTools, on the Format tab, in the ShapeStyles group, click the Format Shape dialog box launcher. In the Format Shape dialog box, click LineColor in the left pane. In the LineColor pane, select Solidline, click the button next to Color, and then under ThemeColors click Black, Text 1 (first row, second option from the left).Also in the Format Shape dialog box, click LineStyle in the left pane. In the LineStyle pane, in the Weight box, enter 2 pt.Under DrawingTools, on the Format tab, in the ShapeStyles group, click ShapeEffects, point to Glow, and then under GlowVariations click Accent color 1, 5 pt glow (first row, first option from the left). Under DrawingTools, on the Format tab, in the ShapeStyles group, click ShapeEffects, point to Glow, point to MoreGlowColors, and then under ThemeColors click White, Background 1 (first row, first option from the left).On the Home tab, in the Drawing group, click Arrange, point to Align, and then do the following:Click Align to Slide.Click AlignCenter.Click AlignMiddle.On the slide, select the line. On the Home tab, in the Clipboard group, click the arrow under Paste, and then click Duplicate.Drag the duplicate line slightly off the right edge of the slide.With the duplicate line still selected, on the Home tab, in the Drawing group, click Arrange, point to Align, and then do the following: Click Align to Slide. Click Align Middle.On the Insert tab, in the Illustrations group, click Picture. In the InsertPicture dialog box, select a picture, and then click Insert.On the slide, select the picture. Under Picture Tools, on the Format tab, in the bottom right corner of the Size group, click the Size and Position dialog box launcher. In the Size and Position dialog box, on the Size tab, resize or crop the picture as needed so that under Size and rotate, the Height box is set to 7.5” and the Width box is set to 5”. Resize the picture under Size and rotate by entering values into the Height and Width boxes. Crop the picture under Crop from by entering values into the Left, Right, Top, and Bottom boxes. On the Home tab, in the Drawing group, click Arrange, point to Align, and then do the following:Click Align to Slide.ClickAlignRight.ClickAlignMiddle.To reproduce the text effects on this slide, do the following:On the Insert tab, in the Illustrations group, click TextBox. On the slide, drag to draw a text box.Enter text in the text box, and then select the text. On the Home tab, in the Font group, do the following:In the Font list, select Arial.In the FontSize list, select 28.Click Bold.Click the button next to FontColor, and then under ThemeColors click White, Background 1 (first row, first option from the left).On the Home tab, in the Paragraph group, click AlignTextRight to align the text right in the text box. Drag the text box onto the left half of the slide.To reproduce the background effects on this slide, do the following:Right-click the slide background area, and then click Format Background. In the Format Background dialog box, click Fill in the left pane, select Gradient fill in the Fill pane, and then do the following:In the Type list, select Linear.Click the button next to Direction, and then click Linear Down (first row, second option from the left).Under Gradient stops, click Add or Remove until two stops appear in the drop-down list.Also under Gradient stops, customize the gradient stops that you added as follows:Select Stop 1 from the list, and then do the following:In the Stop position box, enter 40%.Click the button next to Color, and then click Black, Text 1 (first row, second option from the left).Select Stop 2 from the list, and then do the following: In the Stop position box, enter 100%.Click the button next to Color, and then click Black, Text 1, Lighter 50% (second row, second option from the left).To reproduce the animation effects on this slide, do the following:On the Animations tab, in the Animations group, click CustomAnimation. Select the line off the right edge of the slide. In the CustomAnimation task pane, do the following:Click AddEffect, point to Entrance, and then click MoreEffects. In the AddEntranceEffect dialog box, under Basic, click FlyIn.Select the animation effect (fly-in effect for the second line). Under Modify: Fly In,do the following:In the Start list, select After Previous.In the Direction list, select FromLeft.In the Speed list, select Fast.On the Home tab, in the Editing group, click Select, and then click Selection Pane.In the Selection and Visibility pane, select the first line you created (in the middle of the slide). In the CustomAnimation task pane, do the following:Click AddEffect, point to Entrance, and then click MoreEffects. In the AddEntranceEffect dialog box, under Basic, click FlyIn.Select the second animation effect (fly-in effect for the first line). Under Modify: Fly In,do the following:In the Start list, select AfterPrevious.In the Direction list, select FromRight.In the Speed list, select Fast.On the slide, select the picture. In the CustomAnimation task pane, do the following:Click AddEffect, point to Entrance, and then click MoreEffects. In the AddEntranceEffect dialog box, under Basic, click Wipe.Select the third animation effect (wipe effect for the picture). Under Modify: Wipe,do the following:In the Start list, select WithPrevious.In the Direction list, select FromRight.In the Speed list, select Fast.On the slide, select the text box. In the CustomAnimation task pane, do the following:Click AddEffect, point to Entrance, and then click MoreEffects. In the AddEntranceEffect dialog box, under Basic, clickFlyIn.Select the fourth animation effect (fly-in effect for the text box). Under Modify: Fly In,do the following:In the Start list, select WithPrevious.In the Direction list, select FromRight.In the Speed list, select Fast.
  25. Custom animation effects: sparkle(Basic)To reproduce the text on this slide, do the following:On the Home tab, in the Slides group, click Layout, and then click Blank.On the Insert tab, in the Text group, click TextBox. On the slide, drag to draw a text box.Enter text and select it. On the Home tab, in the Font group, in the Font list select FranklinGothicHeavy, and then in the FontSize box, select 96 pt.On the Home tab, in the Paragraph group, click Center.Select the text box, and then under DrawingTools, on the Format tab, in the WordArtStyles group, click TextEffects, point to Reflection, and under ReflectionVariations select Tight Reflection, Touching (first row, the first option from the left).With the text box still selected, under DrawingTools, on the Format tab, in the bottom right corner of the WordArtStyles group, click the FormatTextEffects: Text Box dialog box launcher. In the FormatTextEffects dialog box, click TextFill in the left pane, select Gradient fill in the TextFill pane, and then do the following:Click the button next to Presetcolors, and then click Ocean (second row, second option from the left).In the Type list, select Linear.Click the button next to Direction, and then click LinearUp (second row, second option from the left).Also in the FormatTextEffects dialog box, click 3-DFormat in the left pane. In the 3-DFormat pane, under Bevel, click the button next to Top, and then under Bevel click Circle (first row, first option from the left). To reproduce the first star on this slide, do the following:On the Home tab, in the Drawing group, click Shapes, and then under Stars and Banners click 4-Point Star (first row, third option from the left). On the slide, drag to draw a star.On the slide, drag the star onto the top of the first letter (in the example slide, it is “S”) in the text box.With the star still selected, drag the yellow diamond adjustment handle down to make the points thinner.On the Home tab, in the bottom right corner in the Drawing group, click the FormatShape dialog box launcher. In the FormatShape dialog box, clickFill in the left pane, select Gradient fillin the Fill pane, and then do the following:In the Type list, select Radial.Click the button next to Direction, and then click From Center (third option from the left). Under Gradient stops, click Add or Remove until two stops appear in the drop-down list.Also under Gradient stops, customize the gradient stops that you added as follows:Select Stop 1 from the list, and then do the following:In the Stop position box, enter 0%.Click the button next to Color, and then under ThemeColors click White, Background 1 (first row, first option from the left). Select Stop 2 from the list, and then do the following: In the Stop position box, enter 100%.Click the button next to Color, and then under ThemeColors click White, Background 1 (first row, first option from the left). In the Transparency box, enter 100%.Also in the FormatShape dialog box, click LineColor in the left pane, and in the LineColor pane click Noline. UnderDrawingTools, on the Format tab, in the bottom right corner of the Size group, click the Size and Position dialog box launcher. In the Size and Position dialog box, on the Size tab, under Sizeand rotation do the following:In the Height box, enter 0.51”.In the Width box, enter 0.51”.In the Rotation box, enter 15°.To reproduce the other stars on this slide, do the following:On the slide, select the star. On the Home tab, in the Clipboard group, click the arrow under Paste, and then click Duplicate. On the slide, drag the second star until it slightly overlaps the edge of a letter in the text box.Change the size of the star in the Drawing Tools, on the Format tab, in the Size group.Repeat steps 1-3 for a total of five stars.To reproduce the animation effects on this slide, do the following:On the Animations tab, in the Animations group, click CustomAnimation.On the slide, select the first star from the left. In the CustomAnimation task pane, do the following:ClickAddEffect, point to Entrance, and then click MoreEffects. In the AddEntranceEffect dialog box, under Moderate, clickGrow & Turn.Select the animation effect (grow & turn entrance effect for the first star). Under Modify: Grow & Turn,do the following:In the Start list, select WithPrevious.In the Speed list, select VeryFast.On the slide, select the first star from the left. In the CustomAnimation task pane, do the following:Click AddEffect, point to Exit, and then click MoreEffects. In the AddExitEffect dialog box, under Moderate, click Grow & Turn.Select the second animation effect (grow & turn exit effect for the first star). Click the arrow to the right of the selected effect, and then click Effect Options. In the Grow & Turn dialog box, on the Timing tab, do the following:In the Start list, select WithPrevious.In the Delay box enter 0.7. In the Speed list, select 0.5 seconds (VeryFast).On the slide, select the second star from the left. In the CustomAnimation task pane, do the following:Click AddEffect, point to Entrance, and then click MoreEffects. In the AddEntranceEffect dialog box, under Moderate, click Grow & Turn.Select the third animation effect (grow & turn entrance effect for the second star). Click the arrow to the right of the selected effect, and then click Effect Options. In the Grow & Turn dialog box, on the Timing tab, do the following:In the Start list, select WithPrevious.In the Delay box enter 0.2. In the Speed list, select 0.5 seconds (VeryFast).On the slide, select the second star from the left. In the CustomAnimation task pane, do the following:Click AddEffect, point to Exit, and then click MoreEffects. In the AddExitEffect dialog box, under Moderate, click Grow & Turn.Select the fourth animation effect (grow & turn exit effect for the second star). Click the arrow to the right of the selected effect, and then click Effect Options. In the Grow & Turn dialog box, on the Timing tab, do the following:In the Start list, select WithPrevious.In the Delay box enter 0.9. In the Speed list, select 0.5 seconds (VeryFast).On the slide, select the third star from the left. In the CustomAnimation task pane, do the following:Click AddEffect, point to Entrance, and then click MoreEffects. In the AddEntranceEffect dialog box, under Moderate, click Grow & Turn.Select the fifth animation effect (grow & turn entrance effect for the third star). Click the arrow to the right of the selected effect, and then click Effect Options. In the Grow & Turn dialog box, on the Timing tab, do the following:In the Start list, select WithPrevious.In the Delay box enter 0.4. In the Speed list, select 0.5 seconds (VeryFast).On the slide, select the third star from the left. In the CustomAnimation task pane, do the following:Click AddEffect, point to Exit, and then click MoreEffects. In the AddExitEffect dialog box, under Moderate, click Grow & Turn.Select the sixth animation effect (grow & turn exit effect for the third star). Click the arrow to the right of the selected effect, and then click Effect Options. In the Grow & Turn dialog box, on the Timing tab, do the following:In the Start list, select WithPrevious.In the Delay box enter 1.1. In the Speed list, select 0.5 seconds (VeryFast).On the slide, select the fourth star from the left. In the CustomAnimation task pane, do the following:Click AddEffect, point to Entrance, and then click MoreEffects. In the AddEntranceEffect dialog box, under Moderate, click Grow & Turn.Select the seventh animation effect (grow & turn entrance effect for the fourth star). Click the arrow to the right of the selected effect, and then click Effect Options. In the Grow & Turn dialog box, on the Timing tab, do the following:In the Start list, select WithPrevious.In the Delay box enter 0.8. In the Speed list, select 0.5 seconds (VeryFast).On the slide, select the fourth star from the left. In the CustomAnimation task pane, do the following:Click AddEffect, point to Exit, and then click MoreEffects. In the AddExitEffect dialog box, under Moderate, click Grow & Turn.Select the eighth animation effect (grow & turn exit effect for the fourth star). Click the arrow to the right of the selected effect, and then click Effect Options. In the Grow & Turn dialog box, on the Timing tab, do the following:In the Start list, select WithPrevious.In the Delay box enter 1.4. In the Speed list, select 0.5 seconds (VeryFast).On the slide, select the fifth star from the left. In the CustomAnimation task pane, do the following:Click AddEffect, point to Entrance, and then click MoreEffects. In the AddEntranceEffect dialog box, under Moderate, click Grow & Turn.Select the ninth animation effect (grow & turn entrance effect for the fifth star). Click the arrow to the right of the selected effect, and then click Effect Options. In the Grow & Turn dialog box, on the Timing tab, do the following:In the Start list, select WithPrevious.In the Delay box enter 0.9. In the Speed list, select 0.5 seconds (VeryFast).On the slide, select the fifth star from the left. In the CustomAnimation task pane, do the following:Click AddEffect, point to Exit, and then click MoreEffects. In the AddExitEffect dialog box, under Moderate, click Grow & Turn.Select the 10th animation effect (grow & turn exit effect for the fifth star). Click the arrow to the right of the selected effect, and then click Effect Options. In the Grow & Turn dialog box, on the Timing tab, do the following:In the Start list, select WithPrevious.In the Delay box enter 1.5. In the Speed list, select 0.5 seconds (VeryFast).To reproduce the background effects on this slide, do the following:Right-click the slide background area, and then click Format Background. In the Format Background dialog box, click Fill in the left pane, select Gradient fill in the Fill pane, and then do the following:In the Type list, select Radial.Click the button next to Direction, and then click From Center (third option from the left). Under Gradient stops, click Add or Remove until two stops appear in the drop-down list.Also under Gradient stops, customize the gradient stops that you added as follows:Select Stop 1 from the list, and then do the following:In the Stop position box, enter 0%.Click the button next to Color, and then under ThemeColorsclick Black, Text 1, Lighter 35% (third row, second option from the left). Select Stop 2 from the list, and then do the following: In the Stop position box, enter 100%.Click the button next to Color, and then under ThemeColorsclick Black, Text 1 (first row, second option from the left).
  26. Custom animation effects: line sweeps in picture and text(Basic)To reproduce the shape effects on this slide, do the following:On the Home tab, in theSlides group, click Layout, and then click Blank.On the Home tab, in the Drawing group, click Shapes, and then under Lines click Line (first option from the left).On the slide, press and hold SHIFT, and then drag to draw a straight, vertical line.Select the line. Under DrawingTools, on the Format tab, in the Size group, in the Shape Width box, enter 7.5”.Under DrawingTools, on the Format tab, in the ShapeStyles group, click the Format Shape dialog box launcher. In the Format Shape dialog box, click LineColor in the left pane. In the LineColor pane, select Solidline, click the button next to Color, and then under ThemeColors click Black, Text 1 (first row, second option from the left).Also in the Format Shape dialog box, click LineStyle in the left pane. In the LineStyle pane, in the Weight box, enter 2 pt.Under DrawingTools, on the Format tab, in the ShapeStyles group, click ShapeEffects, point to Glow, and then under GlowVariations click Accent color 1, 5 pt glow (first row, first option from the left). Under DrawingTools, on the Format tab, in the ShapeStyles group, click ShapeEffects, point to Glow, point to MoreGlowColors, and then under ThemeColors click White, Background 1 (first row, first option from the left).On the Home tab, in the Drawing group, click Arrange, point to Align, and then do the following:Click Align to Slide.Click AlignCenter.Click AlignMiddle.On the slide, select the line. On the Home tab, in the Clipboard group, click the arrow under Paste, and then click Duplicate.Drag the duplicate line slightly off the right edge of the slide.With the duplicate line still selected, on the Home tab, in the Drawing group, click Arrange, point to Align, and then do the following: Click Align to Slide. Click Align Middle.On the Insert tab, in the Illustrations group, click Picture. In the InsertPicture dialog box, select a picture, and then click Insert.On the slide, select the picture. Under Picture Tools, on the Format tab, in the bottom right corner of the Size group, click the Size and Position dialog box launcher. In the Size and Position dialog box, on the Size tab, resize or crop the picture as needed so that under Size and rotate, the Height box is set to 7.5” and the Width box is set to 5”. Resize the picture under Size and rotate by entering values into the Height and Width boxes. Crop the picture under Crop from by entering values into the Left, Right, Top, and Bottom boxes. On the Home tab, in the Drawing group, click Arrange, point to Align, and then do the following:Click Align to Slide.ClickAlignRight.ClickAlignMiddle.To reproduce the text effects on this slide, do the following:On the Insert tab, in the Illustrations group, click TextBox. On the slide, drag to draw a text box.Enter text in the text box, and then select the text. On the Home tab, in the Font group, do the following:In the Font list, select Arial.In the FontSize list, select 28.Click Bold.Click the button next to FontColor, and then under ThemeColors click White, Background 1 (first row, first option from the left).On the Home tab, in the Paragraph group, click AlignTextRight to align the text right in the text box. Drag the text box onto the left half of the slide.To reproduce the background effects on this slide, do the following:Right-click the slide background area, and then click Format Background. In the Format Background dialog box, click Fill in the left pane, select Gradient fill in the Fill pane, and then do the following:In the Type list, select Linear.Click the button next to Direction, and then click Linear Down (first row, second option from the left).Under Gradient stops, click Add or Remove until two stops appear in the drop-down list.Also under Gradient stops, customize the gradient stops that you added as follows:Select Stop 1 from the list, and then do the following:In the Stop position box, enter 40%.Click the button next to Color, and then click Black, Text 1 (first row, second option from the left).Select Stop 2 from the list, and then do the following: In the Stop position box, enter 100%.Click the button next to Color, and then click Black, Text 1, Lighter 50% (second row, second option from the left).To reproduce the animation effects on this slide, do the following:On the Animations tab, in the Animations group, click CustomAnimation. Select the line off the right edge of the slide. In the CustomAnimation task pane, do the following:Click AddEffect, point to Entrance, and then click MoreEffects. In the AddEntranceEffect dialog box, under Basic, click FlyIn.Select the animation effect (fly-in effect for the second line). Under Modify: Fly In,do the following:In the Start list, select After Previous.In the Direction list, select FromLeft.In the Speed list, select Fast.On the Home tab, in the Editing group, click Select, and then click Selection Pane.In the Selection and Visibility pane, select the first line you created (in the middle of the slide). In the CustomAnimation task pane, do the following:Click AddEffect, point to Entrance, and then click MoreEffects. In the AddEntranceEffect dialog box, under Basic, click FlyIn.Select the second animation effect (fly-in effect for the first line). Under Modify: Fly In,do the following:In the Start list, select AfterPrevious.In the Direction list, select FromRight.In the Speed list, select Fast.On the slide, select the picture. In the CustomAnimation task pane, do the following:Click AddEffect, point to Entrance, and then click MoreEffects. In the AddEntranceEffect dialog box, under Basic, click Wipe.Select the third animation effect (wipe effect for the picture). Under Modify: Wipe,do the following:In the Start list, select WithPrevious.In the Direction list, select FromRight.In the Speed list, select Fast.On the slide, select the text box. In the CustomAnimation task pane, do the following:Click AddEffect, point to Entrance, and then click MoreEffects. In the AddEntranceEffect dialog box, under Basic, clickFlyIn.Select the fourth animation effect (fly-in effect for the text box). Under Modify: Fly In,do the following:In the Start list, select WithPrevious.In the Direction list, select FromRight.In the Speed list, select Fast.
  27. Custom animation effects: line sweeps in picture and text(Basic)To reproduce the shape effects on this slide, do the following:On the Home tab, in theSlides group, click Layout, and then click Blank.On the Home tab, in the Drawing group, click Shapes, and then under Lines click Line (first option from the left).On the slide, press and hold SHIFT, and then drag to draw a straight, vertical line.Select the line. Under DrawingTools, on the Format tab, in the Size group, in the Shape Width box, enter 7.5”.Under DrawingTools, on the Format tab, in the ShapeStyles group, click the Format Shape dialog box launcher. In the Format Shape dialog box, click LineColor in the left pane. In the LineColor pane, select Solidline, click the button next to Color, and then under ThemeColors click Black, Text 1 (first row, second option from the left).Also in the Format Shape dialog box, click LineStyle in the left pane. In the LineStyle pane, in the Weight box, enter 2 pt.Under DrawingTools, on the Format tab, in the ShapeStyles group, click ShapeEffects, point to Glow, and then under GlowVariations click Accent color 1, 5 pt glow (first row, first option from the left). Under DrawingTools, on the Format tab, in the ShapeStyles group, click ShapeEffects, point to Glow, point to MoreGlowColors, and then under ThemeColors click White, Background 1 (first row, first option from the left).On the Home tab, in the Drawing group, click Arrange, point to Align, and then do the following:Click Align to Slide.Click AlignCenter.Click AlignMiddle.On the slide, select the line. On the Home tab, in the Clipboard group, click the arrow under Paste, and then click Duplicate.Drag the duplicate line slightly off the right edge of the slide.With the duplicate line still selected, on the Home tab, in the Drawing group, click Arrange, point to Align, and then do the following: Click Align to Slide. Click Align Middle.On the Insert tab, in the Illustrations group, click Picture. In the InsertPicture dialog box, select a picture, and then click Insert.On the slide, select the picture. Under Picture Tools, on the Format tab, in the bottom right corner of the Size group, click the Size and Position dialog box launcher. In the Size and Position dialog box, on the Size tab, resize or crop the picture as needed so that under Size and rotate, the Height box is set to 7.5” and the Width box is set to 5”. Resize the picture under Size and rotate by entering values into the Height and Width boxes. Crop the picture under Crop from by entering values into the Left, Right, Top, and Bottom boxes. On the Home tab, in the Drawing group, click Arrange, point to Align, and then do the following:Click Align to Slide.ClickAlignRight.ClickAlignMiddle.To reproduce the text effects on this slide, do the following:On the Insert tab, in the Illustrations group, click TextBox. On the slide, drag to draw a text box.Enter text in the text box, and then select the text. On the Home tab, in the Font group, do the following:In the Font list, select Arial.In the FontSize list, select 28.Click Bold.Click the button next to FontColor, and then under ThemeColors click White, Background 1 (first row, first option from the left).On the Home tab, in the Paragraph group, click AlignTextRight to align the text right in the text box. Drag the text box onto the left half of the slide.To reproduce the background effects on this slide, do the following:Right-click the slide background area, and then click Format Background. In the Format Background dialog box, click Fill in the left pane, select Gradient fill in the Fill pane, and then do the following:In the Type list, select Linear.Click the button next to Direction, and then click Linear Down (first row, second option from the left).Under Gradient stops, click Add or Remove until two stops appear in the drop-down list.Also under Gradient stops, customize the gradient stops that you added as follows:Select Stop 1 from the list, and then do the following:In the Stop position box, enter 40%.Click the button next to Color, and then click Black, Text 1 (first row, second option from the left).Select Stop 2 from the list, and then do the following: In the Stop position box, enter 100%.Click the button next to Color, and then click Black, Text 1, Lighter 50% (second row, second option from the left).To reproduce the animation effects on this slide, do the following:On the Animations tab, in the Animations group, click CustomAnimation. Select the line off the right edge of the slide. In the CustomAnimation task pane, do the following:Click AddEffect, point to Entrance, and then click MoreEffects. In the AddEntranceEffect dialog box, under Basic, click FlyIn.Select the animation effect (fly-in effect for the second line). Under Modify: Fly In,do the following:In the Start list, select After Previous.In the Direction list, select FromLeft.In the Speed list, select Fast.On the Home tab, in the Editing group, click Select, and then click Selection Pane.In the Selection and Visibility pane, select the first line you created (in the middle of the slide). In the CustomAnimation task pane, do the following:Click AddEffect, point to Entrance, and then click MoreEffects. In the AddEntranceEffect dialog box, under Basic, click FlyIn.Select the second animation effect (fly-in effect for the first line). Under Modify: Fly In,do the following:In the Start list, select AfterPrevious.In the Direction list, select FromRight.In the Speed list, select Fast.On the slide, select the picture. In the CustomAnimation task pane, do the following:Click AddEffect, point to Entrance, and then click MoreEffects. In the AddEntranceEffect dialog box, under Basic, click Wipe.Select the third animation effect (wipe effect for the picture). Under Modify: Wipe,do the following:In the Start list, select WithPrevious.In the Direction list, select FromRight.In the Speed list, select Fast.On the slide, select the text box. In the CustomAnimation task pane, do the following:Click AddEffect, point to Entrance, and then click MoreEffects. In the AddEntranceEffect dialog box, under Basic, clickFlyIn.Select the fourth animation effect (fly-in effect for the text box). Under Modify: Fly In,do the following:In the Start list, select WithPrevious.In the Direction list, select FromRight.In the Speed list, select Fast.
  28. Custom animation effects: line sweeps in picture and text(Basic)To reproduce the shape effects on this slide, do the following:On the Home tab, in theSlides group, click Layout, and then click Blank.On the Home tab, in the Drawing group, click Shapes, and then under Lines click Line (first option from the left).On the slide, press and hold SHIFT, and then drag to draw a straight, vertical line.Select the line. Under DrawingTools, on the Format tab, in the Size group, in the Shape Width box, enter 7.5”.Under DrawingTools, on the Format tab, in the ShapeStyles group, click the Format Shape dialog box launcher. In the Format Shape dialog box, click LineColor in the left pane. In the LineColor pane, select Solidline, click the button next to Color, and then under ThemeColors click Black, Text 1 (first row, second option from the left).Also in the Format Shape dialog box, click LineStyle in the left pane. In the LineStyle pane, in the Weight box, enter 2 pt.Under DrawingTools, on the Format tab, in the ShapeStyles group, click ShapeEffects, point to Glow, and then under GlowVariations click Accent color 1, 5 pt glow (first row, first option from the left). Under DrawingTools, on the Format tab, in the ShapeStyles group, click ShapeEffects, point to Glow, point to MoreGlowColors, and then under ThemeColors click White, Background 1 (first row, first option from the left).On the Home tab, in the Drawing group, click Arrange, point to Align, and then do the following:Click Align to Slide.Click AlignCenter.Click AlignMiddle.On the slide, select the line. On the Home tab, in the Clipboard group, click the arrow under Paste, and then click Duplicate.Drag the duplicate line slightly off the right edge of the slide.With the duplicate line still selected, on the Home tab, in the Drawing group, click Arrange, point to Align, and then do the following: Click Align to Slide. Click Align Middle.On the Insert tab, in the Illustrations group, click Picture. In the InsertPicture dialog box, select a picture, and then click Insert.On the slide, select the picture. Under Picture Tools, on the Format tab, in the bottom right corner of the Size group, click the Size and Position dialog box launcher. In the Size and Position dialog box, on the Size tab, resize or crop the picture as needed so that under Size and rotate, the Height box is set to 7.5” and the Width box is set to 5”. Resize the picture under Size and rotate by entering values into the Height and Width boxes. Crop the picture under Crop from by entering values into the Left, Right, Top, and Bottom boxes. On the Home tab, in the Drawing group, click Arrange, point to Align, and then do the following:Click Align to Slide.ClickAlignRight.ClickAlignMiddle.To reproduce the text effects on this slide, do the following:On the Insert tab, in the Illustrations group, click TextBox. On the slide, drag to draw a text box.Enter text in the text box, and then select the text. On the Home tab, in the Font group, do the following:In the Font list, select Arial.In the FontSize list, select 28.Click Bold.Click the button next to FontColor, and then under ThemeColors click White, Background 1 (first row, first option from the left).On the Home tab, in the Paragraph group, click AlignTextRight to align the text right in the text box. Drag the text box onto the left half of the slide.To reproduce the background effects on this slide, do the following:Right-click the slide background area, and then click Format Background. In the Format Background dialog box, click Fill in the left pane, select Gradient fill in the Fill pane, and then do the following:In the Type list, select Linear.Click the button next to Direction, and then click Linear Down (first row, second option from the left).Under Gradient stops, click Add or Remove until two stops appear in the drop-down list.Also under Gradient stops, customize the gradient stops that you added as follows:Select Stop 1 from the list, and then do the following:In the Stop position box, enter 40%.Click the button next to Color, and then click Black, Text 1 (first row, second option from the left).Select Stop 2 from the list, and then do the following: In the Stop position box, enter 100%.Click the button next to Color, and then click Black, Text 1, Lighter 50% (second row, second option from the left).To reproduce the animation effects on this slide, do the following:On the Animations tab, in the Animations group, click CustomAnimation. Select the line off the right edge of the slide. In the CustomAnimation task pane, do the following:Click AddEffect, point to Entrance, and then click MoreEffects. In the AddEntranceEffect dialog box, under Basic, click FlyIn.Select the animation effect (fly-in effect for the second line). Under Modify: Fly In,do the following:In the Start list, select After Previous.In the Direction list, select FromLeft.In the Speed list, select Fast.On the Home tab, in the Editing group, click Select, and then click Selection Pane.In the Selection and Visibility pane, select the first line you created (in the middle of the slide). In the CustomAnimation task pane, do the following:Click AddEffect, point to Entrance, and then click MoreEffects. In the AddEntranceEffect dialog box, under Basic, click FlyIn.Select the second animation effect (fly-in effect for the first line). Under Modify: Fly In,do the following:In the Start list, select AfterPrevious.In the Direction list, select FromRight.In the Speed list, select Fast.On the slide, select the picture. In the CustomAnimation task pane, do the following:Click AddEffect, point to Entrance, and then click MoreEffects. In the AddEntranceEffect dialog box, under Basic, click Wipe.Select the third animation effect (wipe effect for the picture). Under Modify: Wipe,do the following:In the Start list, select WithPrevious.In the Direction list, select FromRight.In the Speed list, select Fast.On the slide, select the text box. In the CustomAnimation task pane, do the following:Click AddEffect, point to Entrance, and then click MoreEffects. In the AddEntranceEffect dialog box, under Basic, clickFlyIn.Select the fourth animation effect (fly-in effect for the text box). Under Modify: Fly In,do the following:In the Start list, select WithPrevious.In the Direction list, select FromRight.In the Speed list, select Fast.
  29. Custom animation effects: sparkle(Basic)To reproduce the text on this slide, do the following:On the Home tab, in the Slides group, click Layout, and then click Blank.On the Insert tab, in the Text group, click TextBox. On the slide, drag to draw a text box.Enter text and select it. On the Home tab, in the Font group, in the Font list select FranklinGothicHeavy, and then in the FontSize box, select 96 pt.On the Home tab, in the Paragraph group, click Center.Select the text box, and then under DrawingTools, on the Format tab, in the WordArtStyles group, click TextEffects, point to Reflection, and under ReflectionVariations select Tight Reflection, Touching (first row, the first option from the left).With the text box still selected, under DrawingTools, on the Format tab, in the bottom right corner of the WordArtStyles group, click the FormatTextEffects: Text Box dialog box launcher. In the FormatTextEffects dialog box, click TextFill in the left pane, select Gradient fill in the TextFill pane, and then do the following:Click the button next to Presetcolors, and then click Ocean (second row, second option from the left).In the Type list, select Linear.Click the button next to Direction, and then click LinearUp (second row, second option from the left).Also in the FormatTextEffects dialog box, click 3-DFormat in the left pane. In the 3-DFormat pane, under Bevel, click the button next to Top, and then under Bevel click Circle (first row, first option from the left). To reproduce the first star on this slide, do the following:On the Home tab, in the Drawing group, click Shapes, and then under Stars and Banners click 4-Point Star (first row, third option from the left). On the slide, drag to draw a star.On the slide, drag the star onto the top of the first letter (in the example slide, it is “S”) in the text box.With the star still selected, drag the yellow diamond adjustment handle down to make the points thinner.On the Home tab, in the bottom right corner in the Drawing group, click the FormatShape dialog box launcher. In the FormatShape dialog box, clickFill in the left pane, select Gradient fillin the Fill pane, and then do the following:In the Type list, select Radial.Click the button next to Direction, and then click From Center (third option from the left). Under Gradient stops, click Add or Remove until two stops appear in the drop-down list.Also under Gradient stops, customize the gradient stops that you added as follows:Select Stop 1 from the list, and then do the following:In the Stop position box, enter 0%.Click the button next to Color, and then under ThemeColors click White, Background 1 (first row, first option from the left). Select Stop 2 from the list, and then do the following: In the Stop position box, enter 100%.Click the button next to Color, and then under ThemeColors click White, Background 1 (first row, first option from the left). In the Transparency box, enter 100%.Also in the FormatShape dialog box, click LineColor in the left pane, and in the LineColor pane click Noline. UnderDrawingTools, on the Format tab, in the bottom right corner of the Size group, click the Size and Position dialog box launcher. In the Size and Position dialog box, on the Size tab, under Sizeand rotation do the following:In the Height box, enter 0.51”.In the Width box, enter 0.51”.In the Rotation box, enter 15°.To reproduce the other stars on this slide, do the following:On the slide, select the star. On the Home tab, in the Clipboard group, click the arrow under Paste, and then click Duplicate. On the slide, drag the second star until it slightly overlaps the edge of a letter in the text box.Change the size of the star in the Drawing Tools, on the Format tab, in the Size group.Repeat steps 1-3 for a total of five stars.To reproduce the animation effects on this slide, do the following:On the Animations tab, in the Animations group, click CustomAnimation.On the slide, select the first star from the left. In the CustomAnimation task pane, do the following:ClickAddEffect, point to Entrance, and then click MoreEffects. In the AddEntranceEffect dialog box, under Moderate, clickGrow & Turn.Select the animation effect (grow & turn entrance effect for the first star). Under Modify: Grow & Turn,do the following:In the Start list, select WithPrevious.In the Speed list, select VeryFast.On the slide, select the first star from the left. In the CustomAnimation task pane, do the following:Click AddEffect, point to Exit, and then click MoreEffects. In the AddExitEffect dialog box, under Moderate, click Grow & Turn.Select the second animation effect (grow & turn exit effect for the first star). Click the arrow to the right of the selected effect, and then click Effect Options. In the Grow & Turn dialog box, on the Timing tab, do the following:In the Start list, select WithPrevious.In the Delay box enter 0.7. In the Speed list, select 0.5 seconds (VeryFast).On the slide, select the second star from the left. In the CustomAnimation task pane, do the following:Click AddEffect, point to Entrance, and then click MoreEffects. In the AddEntranceEffect dialog box, under Moderate, click Grow & Turn.Select the third animation effect (grow & turn entrance effect for the second star). Click the arrow to the right of the selected effect, and then click Effect Options. In the Grow & Turn dialog box, on the Timing tab, do the following:In the Start list, select WithPrevious.In the Delay box enter 0.2. In the Speed list, select 0.5 seconds (VeryFast).On the slide, select the second star from the left. In the CustomAnimation task pane, do the following:Click AddEffect, point to Exit, and then click MoreEffects. In the AddExitEffect dialog box, under Moderate, click Grow & Turn.Select the fourth animation effect (grow & turn exit effect for the second star). Click the arrow to the right of the selected effect, and then click Effect Options. In the Grow & Turn dialog box, on the Timing tab, do the following:In the Start list, select WithPrevious.In the Delay box enter 0.9. In the Speed list, select 0.5 seconds (VeryFast).On the slide, select the third star from the left. In the CustomAnimation task pane, do the following:Click AddEffect, point to Entrance, and then click MoreEffects. In the AddEntranceEffect dialog box, under Moderate, click Grow & Turn.Select the fifth animation effect (grow & turn entrance effect for the third star). Click the arrow to the right of the selected effect, and then click Effect Options. In the Grow & Turn dialog box, on the Timing tab, do the following:In the Start list, select WithPrevious.In the Delay box enter 0.4. In the Speed list, select 0.5 seconds (VeryFast).On the slide, select the third star from the left. In the CustomAnimation task pane, do the following:Click AddEffect, point to Exit, and then click MoreEffects. In the AddExitEffect dialog box, under Moderate, click Grow & Turn.Select the sixth animation effect (grow & turn exit effect for the third star). Click the arrow to the right of the selected effect, and then click Effect Options. In the Grow & Turn dialog box, on the Timing tab, do the following:In the Start list, select WithPrevious.In the Delay box enter 1.1. In the Speed list, select 0.5 seconds (VeryFast).On the slide, select the fourth star from the left. In the CustomAnimation task pane, do the following:Click AddEffect, point to Entrance, and then click MoreEffects. In the AddEntranceEffect dialog box, under Moderate, click Grow & Turn.Select the seventh animation effect (grow & turn entrance effect for the fourth star). Click the arrow to the right of the selected effect, and then click Effect Options. In the Grow & Turn dialog box, on the Timing tab, do the following:In the Start list, select WithPrevious.In the Delay box enter 0.8. In the Speed list, select 0.5 seconds (VeryFast).On the slide, select the fourth star from the left. In the CustomAnimation task pane, do the following:Click AddEffect, point to Exit, and then click MoreEffects. In the AddExitEffect dialog box, under Moderate, click Grow & Turn.Select the eighth animation effect (grow & turn exit effect for the fourth star). Click the arrow to the right of the selected effect, and then click Effect Options. In the Grow & Turn dialog box, on the Timing tab, do the following:In the Start list, select WithPrevious.In the Delay box enter 1.4. In the Speed list, select 0.5 seconds (VeryFast).On the slide, select the fifth star from the left. In the CustomAnimation task pane, do the following:Click AddEffect, point to Entrance, and then click MoreEffects. In the AddEntranceEffect dialog box, under Moderate, click Grow & Turn.Select the ninth animation effect (grow & turn entrance effect for the fifth star). Click the arrow to the right of the selected effect, and then click Effect Options. In the Grow & Turn dialog box, on the Timing tab, do the following:In the Start list, select WithPrevious.In the Delay box enter 0.9. In the Speed list, select 0.5 seconds (VeryFast).On the slide, select the fifth star from the left. In the CustomAnimation task pane, do the following:Click AddEffect, point to Exit, and then click MoreEffects. In the AddExitEffect dialog box, under Moderate, click Grow & Turn.Select the 10th animation effect (grow & turn exit effect for the fifth star). Click the arrow to the right of the selected effect, and then click Effect Options. In the Grow & Turn dialog box, on the Timing tab, do the following:In the Start list, select WithPrevious.In the Delay box enter 1.5. In the Speed list, select 0.5 seconds (VeryFast).To reproduce the background effects on this slide, do the following:Right-click the slide background area, and then click Format Background. In the Format Background dialog box, click Fill in the left pane, select Gradient fill in the Fill pane, and then do the following:In the Type list, select Radial.Click the button next to Direction, and then click From Center (third option from the left). Under Gradient stops, click Add or Remove until two stops appear in the drop-down list.Also under Gradient stops, customize the gradient stops that you added as follows:Select Stop 1 from the list, and then do the following:In the Stop position box, enter 0%.Click the button next to Color, and then under ThemeColorsclick Black, Text 1, Lighter 35% (third row, second option from the left). Select Stop 2 from the list, and then do the following: In the Stop position box, enter 100%.Click the button next to Color, and then under ThemeColorsclick Black, Text 1 (first row, second option from the left).
  30. Custom animation effects: line sweeps in picture and text(Basic)To reproduce the shape effects on this slide, do the following:On the Home tab, in theSlides group, click Layout, and then click Blank.On the Home tab, in the Drawing group, click Shapes, and then under Lines click Line (first option from the left).On the slide, press and hold SHIFT, and then drag to draw a straight, vertical line.Select the line. Under DrawingTools, on the Format tab, in the Size group, in the Shape Width box, enter 7.5”.Under DrawingTools, on the Format tab, in the ShapeStyles group, click the Format Shape dialog box launcher. In the Format Shape dialog box, click LineColor in the left pane. In the LineColor pane, select Solidline, click the button next to Color, and then under ThemeColors click Black, Text 1 (first row, second option from the left).Also in the Format Shape dialog box, click LineStyle in the left pane. In the LineStyle pane, in the Weight box, enter 2 pt.Under DrawingTools, on the Format tab, in the ShapeStyles group, click ShapeEffects, point to Glow, and then under GlowVariations click Accent color 1, 5 pt glow (first row, first option from the left). Under DrawingTools, on the Format tab, in the ShapeStyles group, click ShapeEffects, point to Glow, point to MoreGlowColors, and then under ThemeColors click White, Background 1 (first row, first option from the left).On the Home tab, in the Drawing group, click Arrange, point to Align, and then do the following:Click Align to Slide.Click AlignCenter.Click AlignMiddle.On the slide, select the line. On the Home tab, in the Clipboard group, click the arrow under Paste, and then click Duplicate.Drag the duplicate line slightly off the right edge of the slide.With the duplicate line still selected, on the Home tab, in the Drawing group, click Arrange, point to Align, and then do the following: Click Align to Slide. Click Align Middle.On the Insert tab, in the Illustrations group, click Picture. In the InsertPicture dialog box, select a picture, and then click Insert.On the slide, select the picture. Under Picture Tools, on the Format tab, in the bottom right corner of the Size group, click the Size and Position dialog box launcher. In the Size and Position dialog box, on the Size tab, resize or crop the picture as needed so that under Size and rotate, the Height box is set to 7.5” and the Width box is set to 5”. Resize the picture under Size and rotate by entering values into the Height and Width boxes. Crop the picture under Crop from by entering values into the Left, Right, Top, and Bottom boxes. On the Home tab, in the Drawing group, click Arrange, point to Align, and then do the following:Click Align to Slide.ClickAlignRight.ClickAlignMiddle.To reproduce the text effects on this slide, do the following:On the Insert tab, in the Illustrations group, click TextBox. On the slide, drag to draw a text box.Enter text in the text box, and then select the text. On the Home tab, in the Font group, do the following:In the Font list, select Arial.In the FontSize list, select 28.Click Bold.Click the button next to FontColor, and then under ThemeColors click White, Background 1 (first row, first option from the left).On the Home tab, in the Paragraph group, click AlignTextRight to align the text right in the text box. Drag the text box onto the left half of the slide.To reproduce the background effects on this slide, do the following:Right-click the slide background area, and then click Format Background. In the Format Background dialog box, click Fill in the left pane, select Gradient fill in the Fill pane, and then do the following:In the Type list, select Linear.Click the button next to Direction, and then click Linear Down (first row, second option from the left).Under Gradient stops, click Add or Remove until two stops appear in the drop-down list.Also under Gradient stops, customize the gradient stops that you added as follows:Select Stop 1 from the list, and then do the following:In the Stop position box, enter 40%.Click the button next to Color, and then click Black, Text 1 (first row, second option from the left).Select Stop 2 from the list, and then do the following: In the Stop position box, enter 100%.Click the button next to Color, and then click Black, Text 1, Lighter 50% (second row, second option from the left).To reproduce the animation effects on this slide, do the following:On the Animations tab, in the Animations group, click CustomAnimation. Select the line off the right edge of the slide. In the CustomAnimation task pane, do the following:Click AddEffect, point to Entrance, and then click MoreEffects. In the AddEntranceEffect dialog box, under Basic, click FlyIn.Select the animation effect (fly-in effect for the second line). Under Modify: Fly In,do the following:In the Start list, select After Previous.In the Direction list, select FromLeft.In the Speed list, select Fast.On the Home tab, in the Editing group, click Select, and then click Selection Pane.In the Selection and Visibility pane, select the first line you created (in the middle of the slide). In the CustomAnimation task pane, do the following:Click AddEffect, point to Entrance, and then click MoreEffects. In the AddEntranceEffect dialog box, under Basic, click FlyIn.Select the second animation effect (fly-in effect for the first line). Under Modify: Fly In,do the following:In the Start list, select AfterPrevious.In the Direction list, select FromRight.In the Speed list, select Fast.On the slide, select the picture. In the CustomAnimation task pane, do the following:Click AddEffect, point to Entrance, and then click MoreEffects. In the AddEntranceEffect dialog box, under Basic, click Wipe.Select the third animation effect (wipe effect for the picture). Under Modify: Wipe,do the following:In the Start list, select WithPrevious.In the Direction list, select FromRight.In the Speed list, select Fast.On the slide, select the text box. In the CustomAnimation task pane, do the following:Click AddEffect, point to Entrance, and then click MoreEffects. In the AddEntranceEffect dialog box, under Basic, clickFlyIn.Select the fourth animation effect (fly-in effect for the text box). Under Modify: Fly In,do the following:In the Start list, select WithPrevious.In the Direction list, select FromRight.In the Speed list, select Fast.
  31. Custom animation effects: line sweeps in picture and text(Basic)To reproduce the shape effects on this slide, do the following:On the Home tab, in theSlides group, click Layout, and then click Blank.On the Home tab, in the Drawing group, click Shapes, and then under Lines click Line (first option from the left).On the slide, press and hold SHIFT, and then drag to draw a straight, vertical line.Select the line. Under DrawingTools, on the Format tab, in the Size group, in the Shape Width box, enter 7.5”.Under DrawingTools, on the Format tab, in the ShapeStyles group, click the Format Shape dialog box launcher. In the Format Shape dialog box, click LineColor in the left pane. In the LineColor pane, select Solidline, click the button next to Color, and then under ThemeColors click Black, Text 1 (first row, second option from the left).Also in the Format Shape dialog box, click LineStyle in the left pane. In the LineStyle pane, in the Weight box, enter 2 pt.Under DrawingTools, on the Format tab, in the ShapeStyles group, click ShapeEffects, point to Glow, and then under GlowVariations click Accent color 1, 5 pt glow (first row, first option from the left). Under DrawingTools, on the Format tab, in the ShapeStyles group, click ShapeEffects, point to Glow, point to MoreGlowColors, and then under ThemeColors click White, Background 1 (first row, first option from the left).On the Home tab, in the Drawing group, click Arrange, point to Align, and then do the following:Click Align to Slide.Click AlignCenter.Click AlignMiddle.On the slide, select the line. On the Home tab, in the Clipboard group, click the arrow under Paste, and then click Duplicate.Drag the duplicate line slightly off the right edge of the slide.With the duplicate line still selected, on the Home tab, in the Drawing group, click Arrange, point to Align, and then do the following: Click Align to Slide. Click Align Middle.On the Insert tab, in the Illustrations group, click Picture. In the InsertPicture dialog box, select a picture, and then click Insert.On the slide, select the picture. Under Picture Tools, on the Format tab, in the bottom right corner of the Size group, click the Size and Position dialog box launcher. In the Size and Position dialog box, on the Size tab, resize or crop the picture as needed so that under Size and rotate, the Height box is set to 7.5” and the Width box is set to 5”. Resize the picture under Size and rotate by entering values into the Height and Width boxes. Crop the picture under Crop from by entering values into the Left, Right, Top, and Bottom boxes. On the Home tab, in the Drawing group, click Arrange, point to Align, and then do the following:Click Align to Slide.ClickAlignRight.ClickAlignMiddle.To reproduce the text effects on this slide, do the following:On the Insert tab, in the Illustrations group, click TextBox. On the slide, drag to draw a text box.Enter text in the text box, and then select the text. On the Home tab, in the Font group, do the following:In the Font list, select Arial.In the FontSize list, select 28.Click Bold.Click the button next to FontColor, and then under ThemeColors click White, Background 1 (first row, first option from the left).On the Home tab, in the Paragraph group, click AlignTextRight to align the text right in the text box. Drag the text box onto the left half of the slide.To reproduce the background effects on this slide, do the following:Right-click the slide background area, and then click Format Background. In the Format Background dialog box, click Fill in the left pane, select Gradient fill in the Fill pane, and then do the following:In the Type list, select Linear.Click the button next to Direction, and then click Linear Down (first row, second option from the left).Under Gradient stops, click Add or Remove until two stops appear in the drop-down list.Also under Gradient stops, customize the gradient stops that you added as follows:Select Stop 1 from the list, and then do the following:In the Stop position box, enter 40%.Click the button next to Color, and then click Black, Text 1 (first row, second option from the left).Select Stop 2 from the list, and then do the following: In the Stop position box, enter 100%.Click the button next to Color, and then click Black, Text 1, Lighter 50% (second row, second option from the left).To reproduce the animation effects on this slide, do the following:On the Animations tab, in the Animations group, click CustomAnimation. Select the line off the right edge of the slide. In the CustomAnimation task pane, do the following:Click AddEffect, point to Entrance, and then click MoreEffects. In the AddEntranceEffect dialog box, under Basic, click FlyIn.Select the animation effect (fly-in effect for the second line). Under Modify: Fly In,do the following:In the Start list, select After Previous.In the Direction list, select FromLeft.In the Speed list, select Fast.On the Home tab, in the Editing group, click Select, and then click Selection Pane.In the Selection and Visibility pane, select the first line you created (in the middle of the slide). In the CustomAnimation task pane, do the following:Click AddEffect, point to Entrance, and then click MoreEffects. In the AddEntranceEffect dialog box, under Basic, click FlyIn.Select the second animation effect (fly-in effect for the first line). Under Modify: Fly In,do the following:In the Start list, select AfterPrevious.In the Direction list, select FromRight.In the Speed list, select Fast.On the slide, select the picture. In the CustomAnimation task pane, do the following:Click AddEffect, point to Entrance, and then click MoreEffects. In the AddEntranceEffect dialog box, under Basic, click Wipe.Select the third animation effect (wipe effect for the picture). Under Modify: Wipe,do the following:In the Start list, select WithPrevious.In the Direction list, select FromRight.In the Speed list, select Fast.On the slide, select the text box. In the CustomAnimation task pane, do the following:Click AddEffect, point to Entrance, and then click MoreEffects. In the AddEntranceEffect dialog box, under Basic, clickFlyIn.Select the fourth animation effect (fly-in effect for the text box). Under Modify: Fly In,do the following:In the Start list, select WithPrevious.In the Direction list, select FromRight.In the Speed list, select Fast.
  32. Custom animation effects: line sweeps in picture and text(Basic)To reproduce the shape effects on this slide, do the following:On the Home tab, in theSlides group, click Layout, and then click Blank.On the Home tab, in the Drawing group, click Shapes, and then under Lines click Line (first option from the left).On the slide, press and hold SHIFT, and then drag to draw a straight, vertical line.Select the line. Under DrawingTools, on the Format tab, in the Size group, in the Shape Width box, enter 7.5”.Under DrawingTools, on the Format tab, in the ShapeStyles group, click the Format Shape dialog box launcher. In the Format Shape dialog box, click LineColor in the left pane. In the LineColor pane, select Solidline, click the button next to Color, and then under ThemeColors click Black, Text 1 (first row, second option from the left).Also in the Format Shape dialog box, click LineStyle in the left pane. In the LineStyle pane, in the Weight box, enter 2 pt.Under DrawingTools, on the Format tab, in the ShapeStyles group, click ShapeEffects, point to Glow, and then under GlowVariations click Accent color 1, 5 pt glow (first row, first option from the left). Under DrawingTools, on the Format tab, in the ShapeStyles group, click ShapeEffects, point to Glow, point to MoreGlowColors, and then under ThemeColors click White, Background 1 (first row, first option from the left).On the Home tab, in the Drawing group, click Arrange, point to Align, and then do the following:Click Align to Slide.Click AlignCenter.Click AlignMiddle.On the slide, select the line. On the Home tab, in the Clipboard group, click the arrow under Paste, and then click Duplicate.Drag the duplicate line slightly off the right edge of the slide.With the duplicate line still selected, on the Home tab, in the Drawing group, click Arrange, point to Align, and then do the following: Click Align to Slide. Click Align Middle.On the Insert tab, in the Illustrations group, click Picture. In the InsertPicture dialog box, select a picture, and then click Insert.On the slide, select the picture. Under Picture Tools, on the Format tab, in the bottom right corner of the Size group, click the Size and Position dialog box launcher. In the Size and Position dialog box, on the Size tab, resize or crop the picture as needed so that under Size and rotate, the Height box is set to 7.5” and the Width box is set to 5”. Resize the picture under Size and rotate by entering values into the Height and Width boxes. Crop the picture under Crop from by entering values into the Left, Right, Top, and Bottom boxes. On the Home tab, in the Drawing group, click Arrange, point to Align, and then do the following:Click Align to Slide.ClickAlignRight.ClickAlignMiddle.To reproduce the text effects on this slide, do the following:On the Insert tab, in the Illustrations group, click TextBox. On the slide, drag to draw a text box.Enter text in the text box, and then select the text. On the Home tab, in the Font group, do the following:In the Font list, select Arial.In the FontSize list, select 28.Click Bold.Click the button next to FontColor, and then under ThemeColors click White, Background 1 (first row, first option from the left).On the Home tab, in the Paragraph group, click AlignTextRight to align the text right in the text box. Drag the text box onto the left half of the slide.To reproduce the background effects on this slide, do the following:Right-click the slide background area, and then click Format Background. In the Format Background dialog box, click Fill in the left pane, select Gradient fill in the Fill pane, and then do the following:In the Type list, select Linear.Click the button next to Direction, and then click Linear Down (first row, second option from the left).Under Gradient stops, click Add or Remove until two stops appear in the drop-down list.Also under Gradient stops, customize the gradient stops that you added as follows:Select Stop 1 from the list, and then do the following:In the Stop position box, enter 40%.Click the button next to Color, and then click Black, Text 1 (first row, second option from the left).Select Stop 2 from the list, and then do the following: In the Stop position box, enter 100%.Click the button next to Color, and then click Black, Text 1, Lighter 50% (second row, second option from the left).To reproduce the animation effects on this slide, do the following:On the Animations tab, in the Animations group, click CustomAnimation. Select the line off the right edge of the slide. In the CustomAnimation task pane, do the following:Click AddEffect, point to Entrance, and then click MoreEffects. In the AddEntranceEffect dialog box, under Basic, click FlyIn.Select the animation effect (fly-in effect for the second line). Under Modify: Fly In,do the following:In the Start list, select After Previous.In the Direction list, select FromLeft.In the Speed list, select Fast.On the Home tab, in the Editing group, click Select, and then click Selection Pane.In the Selection and Visibility pane, select the first line you created (in the middle of the slide). In the CustomAnimation task pane, do the following:Click AddEffect, point to Entrance, and then click MoreEffects. In the AddEntranceEffect dialog box, under Basic, click FlyIn.Select the second animation effect (fly-in effect for the first line). Under Modify: Fly In,do the following:In the Start list, select AfterPrevious.In the Direction list, select FromRight.In the Speed list, select Fast.On the slide, select the picture. In the CustomAnimation task pane, do the following:Click AddEffect, point to Entrance, and then click MoreEffects. In the AddEntranceEffect dialog box, under Basic, click Wipe.Select the third animation effect (wipe effect for the picture). Under Modify: Wipe,do the following:In the Start list, select WithPrevious.In the Direction list, select FromRight.In the Speed list, select Fast.On the slide, select the text box. In the CustomAnimation task pane, do the following:Click AddEffect, point to Entrance, and then click MoreEffects. In the AddEntranceEffect dialog box, under Basic, clickFlyIn.Select the fourth animation effect (fly-in effect for the text box). Under Modify: Fly In,do the following:In the Start list, select WithPrevious.In the Direction list, select FromRight.In the Speed list, select Fast.
  33. Custom animation effects: line sweeps in picture and text(Basic)To reproduce the shape effects on this slide, do the following:On the Home tab, in theSlides group, click Layout, and then click Blank.On the Home tab, in the Drawing group, click Shapes, and then under Lines click Line (first option from the left).On the slide, press and hold SHIFT, and then drag to draw a straight, vertical line.Select the line. Under DrawingTools, on the Format tab, in the Size group, in the Shape Width box, enter 7.5”.Under DrawingTools, on the Format tab, in the ShapeStyles group, click the Format Shape dialog box launcher. In the Format Shape dialog box, click LineColor in the left pane. In the LineColor pane, select Solidline, click the button next to Color, and then under ThemeColors click Black, Text 1 (first row, second option from the left).Also in the Format Shape dialog box, click LineStyle in the left pane. In the LineStyle pane, in the Weight box, enter 2 pt.Under DrawingTools, on the Format tab, in the ShapeStyles group, click ShapeEffects, point to Glow, and then under GlowVariations click Accent color 1, 5 pt glow (first row, first option from the left). Under DrawingTools, on the Format tab, in the ShapeStyles group, click ShapeEffects, point to Glow, point to MoreGlowColors, and then under ThemeColors click White, Background 1 (first row, first option from the left).On the Home tab, in the Drawing group, click Arrange, point to Align, and then do the following:Click Align to Slide.Click AlignCenter.Click AlignMiddle.On the slide, select the line. On the Home tab, in the Clipboard group, click the arrow under Paste, and then click Duplicate.Drag the duplicate line slightly off the right edge of the slide.With the duplicate line still selected, on the Home tab, in the Drawing group, click Arrange, point to Align, and then do the following: Click Align to Slide. Click Align Middle.On the Insert tab, in the Illustrations group, click Picture. In the InsertPicture dialog box, select a picture, and then click Insert.On the slide, select the picture. Under Picture Tools, on the Format tab, in the bottom right corner of the Size group, click the Size and Position dialog box launcher. In the Size and Position dialog box, on the Size tab, resize or crop the picture as needed so that under Size and rotate, the Height box is set to 7.5” and the Width box is set to 5”. Resize the picture under Size and rotate by entering values into the Height and Width boxes. Crop the picture under Crop from by entering values into the Left, Right, Top, and Bottom boxes. On the Home tab, in the Drawing group, click Arrange, point to Align, and then do the following:Click Align to Slide.ClickAlignRight.ClickAlignMiddle.To reproduce the text effects on this slide, do the following:On the Insert tab, in the Illustrations group, click TextBox. On the slide, drag to draw a text box.Enter text in the text box, and then select the text. On the Home tab, in the Font group, do the following:In the Font list, select Arial.In the FontSize list, select 28.Click Bold.Click the button next to FontColor, and then under ThemeColors click White, Background 1 (first row, first option from the left).On the Home tab, in the Paragraph group, click AlignTextRight to align the text right in the text box. Drag the text box onto the left half of the slide.To reproduce the background effects on this slide, do the following:Right-click the slide background area, and then click Format Background. In the Format Background dialog box, click Fill in the left pane, select Gradient fill in the Fill pane, and then do the following:In the Type list, select Linear.Click the button next to Direction, and then click Linear Down (first row, second option from the left).Under Gradient stops, click Add or Remove until two stops appear in the drop-down list.Also under Gradient stops, customize the gradient stops that you added as follows:Select Stop 1 from the list, and then do the following:In the Stop position box, enter 40%.Click the button next to Color, and then click Black, Text 1 (first row, second option from the left).Select Stop 2 from the list, and then do the following: In the Stop position box, enter 100%.Click the button next to Color, and then click Black, Text 1, Lighter 50% (second row, second option from the left).To reproduce the animation effects on this slide, do the following:On the Animations tab, in the Animations group, click CustomAnimation. Select the line off the right edge of the slide. In the CustomAnimation task pane, do the following:Click AddEffect, point to Entrance, and then click MoreEffects. In the AddEntranceEffect dialog box, under Basic, click FlyIn.Select the animation effect (fly-in effect for the second line). Under Modify: Fly In,do the following:In the Start list, select After Previous.In the Direction list, select FromLeft.In the Speed list, select Fast.On the Home tab, in the Editing group, click Select, and then click Selection Pane.In the Selection and Visibility pane, select the first line you created (in the middle of the slide). In the CustomAnimation task pane, do the following:Click AddEffect, point to Entrance, and then click MoreEffects. In the AddEntranceEffect dialog box, under Basic, click FlyIn.Select the second animation effect (fly-in effect for the first line). Under Modify: Fly In,do the following:In the Start list, select AfterPrevious.In the Direction list, select FromRight.In the Speed list, select Fast.On the slide, select the picture. In the CustomAnimation task pane, do the following:Click AddEffect, point to Entrance, and then click MoreEffects. In the AddEntranceEffect dialog box, under Basic, click Wipe.Select the third animation effect (wipe effect for the picture). Under Modify: Wipe,do the following:In the Start list, select WithPrevious.In the Direction list, select FromRight.In the Speed list, select Fast.On the slide, select the text box. In the CustomAnimation task pane, do the following:Click AddEffect, point to Entrance, and then click MoreEffects. In the AddEntranceEffect dialog box, under Basic, clickFlyIn.Select the fourth animation effect (fly-in effect for the text box). Under Modify: Fly In,do the following:In the Start list, select WithPrevious.In the Direction list, select FromRight.In the Speed list, select Fast.
  34. Custom animation effects: line sweeps in picture and text(Basic)To reproduce the shape effects on this slide, do the following:On the Home tab, in theSlides group, click Layout, and then click Blank.On the Home tab, in the Drawing group, click Shapes, and then under Lines click Line (first option from the left).On the slide, press and hold SHIFT, and then drag to draw a straight, vertical line.Select the line. Under DrawingTools, on the Format tab, in the Size group, in the Shape Width box, enter 7.5”.Under DrawingTools, on the Format tab, in the ShapeStyles group, click the Format Shape dialog box launcher. In the Format Shape dialog box, click LineColor in the left pane. In the LineColor pane, select Solidline, click the button next to Color, and then under ThemeColors click Black, Text 1 (first row, second option from the left).Also in the Format Shape dialog box, click LineStyle in the left pane. In the LineStyle pane, in the Weight box, enter 2 pt.Under DrawingTools, on the Format tab, in the ShapeStyles group, click ShapeEffects, point to Glow, and then under GlowVariations click Accent color 1, 5 pt glow (first row, first option from the left). Under DrawingTools, on the Format tab, in the ShapeStyles group, click ShapeEffects, point to Glow, point to MoreGlowColors, and then under ThemeColors click White, Background 1 (first row, first option from the left).On the Home tab, in the Drawing group, click Arrange, point to Align, and then do the following:Click Align to Slide.Click AlignCenter.Click AlignMiddle.On the slide, select the line. On the Home tab, in the Clipboard group, click the arrow under Paste, and then click Duplicate.Drag the duplicate line slightly off the right edge of the slide.With the duplicate line still selected, on the Home tab, in the Drawing group, click Arrange, point to Align, and then do the following: Click Align to Slide. Click Align Middle.On the Insert tab, in the Illustrations group, click Picture. In the InsertPicture dialog box, select a picture, and then click Insert.On the slide, select the picture. Under Picture Tools, on the Format tab, in the bottom right corner of the Size group, click the Size and Position dialog box launcher. In the Size and Position dialog box, on the Size tab, resize or crop the picture as needed so that under Size and rotate, the Height box is set to 7.5” and the Width box is set to 5”. Resize the picture under Size and rotate by entering values into the Height and Width boxes. Crop the picture under Crop from by entering values into the Left, Right, Top, and Bottom boxes. On the Home tab, in the Drawing group, click Arrange, point to Align, and then do the following:Click Align to Slide.ClickAlignRight.ClickAlignMiddle.To reproduce the text effects on this slide, do the following:On the Insert tab, in the Illustrations group, click TextBox. On the slide, drag to draw a text box.Enter text in the text box, and then select the text. On the Home tab, in the Font group, do the following:In the Font list, select Arial.In the FontSize list, select 28.Click Bold.Click the button next to FontColor, and then under ThemeColors click White, Background 1 (first row, first option from the left).On the Home tab, in the Paragraph group, click AlignTextRight to align the text right in the text box. Drag the text box onto the left half of the slide.To reproduce the background effects on this slide, do the following:Right-click the slide background area, and then click Format Background. In the Format Background dialog box, click Fill in the left pane, select Gradient fill in the Fill pane, and then do the following:In the Type list, select Linear.Click the button next to Direction, and then click Linear Down (first row, second option from the left).Under Gradient stops, click Add or Remove until two stops appear in the drop-down list.Also under Gradient stops, customize the gradient stops that you added as follows:Select Stop 1 from the list, and then do the following:In the Stop position box, enter 40%.Click the button next to Color, and then click Black, Text 1 (first row, second option from the left).Select Stop 2 from the list, and then do the following: In the Stop position box, enter 100%.Click the button next to Color, and then click Black, Text 1, Lighter 50% (second row, second option from the left).To reproduce the animation effects on this slide, do the following:On the Animations tab, in the Animations group, click CustomAnimation. Select the line off the right edge of the slide. In the CustomAnimation task pane, do the following:Click AddEffect, point to Entrance, and then click MoreEffects. In the AddEntranceEffect dialog box, under Basic, click FlyIn.Select the animation effect (fly-in effect for the second line). Under Modify: Fly In,do the following:In the Start list, select After Previous.In the Direction list, select FromLeft.In the Speed list, select Fast.On the Home tab, in the Editing group, click Select, and then click Selection Pane.In the Selection and Visibility pane, select the first line you created (in the middle of the slide). In the CustomAnimation task pane, do the following:Click AddEffect, point to Entrance, and then click MoreEffects. In the AddEntranceEffect dialog box, under Basic, click FlyIn.Select the second animation effect (fly-in effect for the first line). Under Modify: Fly In,do the following:In the Start list, select AfterPrevious.In the Direction list, select FromRight.In the Speed list, select Fast.On the slide, select the picture. In the CustomAnimation task pane, do the following:Click AddEffect, point to Entrance, and then click MoreEffects. In the AddEntranceEffect dialog box, under Basic, click Wipe.Select the third animation effect (wipe effect for the picture). Under Modify: Wipe,do the following:In the Start list, select WithPrevious.In the Direction list, select FromRight.In the Speed list, select Fast.On the slide, select the text box. In the CustomAnimation task pane, do the following:Click AddEffect, point to Entrance, and then click MoreEffects. In the AddEntranceEffect dialog box, under Basic, clickFlyIn.Select the fourth animation effect (fly-in effect for the text box). Under Modify: Fly In,do the following:In the Start list, select WithPrevious.In the Direction list, select FromRight.In the Speed list, select Fast.
  35. Custom animation effects: line sweeps in picture and text(Basic)To reproduce the shape effects on this slide, do the following:On the Home tab, in theSlides group, click Layout, and then click Blank.On the Home tab, in the Drawing group, click Shapes, and then under Lines click Line (first option from the left).On the slide, press and hold SHIFT, and then drag to draw a straight, vertical line.Select the line. Under DrawingTools, on the Format tab, in the Size group, in the Shape Width box, enter 7.5”.Under DrawingTools, on the Format tab, in the ShapeStyles group, click the Format Shape dialog box launcher. In the Format Shape dialog box, click LineColor in the left pane. In the LineColor pane, select Solidline, click the button next to Color, and then under ThemeColors click Black, Text 1 (first row, second option from the left).Also in the Format Shape dialog box, click LineStyle in the left pane. In the LineStyle pane, in the Weight box, enter 2 pt.Under DrawingTools, on the Format tab, in the ShapeStyles group, click ShapeEffects, point to Glow, and then under GlowVariations click Accent color 1, 5 pt glow (first row, first option from the left). Under DrawingTools, on the Format tab, in the ShapeStyles group, click ShapeEffects, point to Glow, point to MoreGlowColors, and then under ThemeColors click White, Background 1 (first row, first option from the left).On the Home tab, in the Drawing group, click Arrange, point to Align, and then do the following:Click Align to Slide.Click AlignCenter.Click AlignMiddle.On the slide, select the line. On the Home tab, in the Clipboard group, click the arrow under Paste, and then click Duplicate.Drag the duplicate line slightly off the right edge of the slide.With the duplicate line still selected, on the Home tab, in the Drawing group, click Arrange, point to Align, and then do the following: Click Align to Slide. Click Align Middle.On the Insert tab, in the Illustrations group, click Picture. In the InsertPicture dialog box, select a picture, and then click Insert.On the slide, select the picture. Under Picture Tools, on the Format tab, in the bottom right corner of the Size group, click the Size and Position dialog box launcher. In the Size and Position dialog box, on the Size tab, resize or crop the picture as needed so that under Size and rotate, the Height box is set to 7.5” and the Width box is set to 5”. Resize the picture under Size and rotate by entering values into the Height and Width boxes. Crop the picture under Crop from by entering values into the Left, Right, Top, and Bottom boxes. On the Home tab, in the Drawing group, click Arrange, point to Align, and then do the following:Click Align to Slide.ClickAlignRight.ClickAlignMiddle.To reproduce the text effects on this slide, do the following:On the Insert tab, in the Illustrations group, click TextBox. On the slide, drag to draw a text box.Enter text in the text box, and then select the text. On the Home tab, in the Font group, do the following:In the Font list, select Arial.In the FontSize list, select 28.Click Bold.Click the button next to FontColor, and then under ThemeColors click White, Background 1 (first row, first option from the left).On the Home tab, in the Paragraph group, click AlignTextRight to align the text right in the text box. Drag the text box onto the left half of the slide.To reproduce the background effects on this slide, do the following:Right-click the slide background area, and then click Format Background. In the Format Background dialog box, click Fill in the left pane, select Gradient fill in the Fill pane, and then do the following:In the Type list, select Linear.Click the button next to Direction, and then click Linear Down (first row, second option from the left).Under Gradient stops, click Add or Remove until two stops appear in the drop-down list.Also under Gradient stops, customize the gradient stops that you added as follows:Select Stop 1 from the list, and then do the following:In the Stop position box, enter 40%.Click the button next to Color, and then click Black, Text 1 (first row, second option from the left).Select Stop 2 from the list, and then do the following: In the Stop position box, enter 100%.Click the button next to Color, and then click Black, Text 1, Lighter 50% (second row, second option from the left).To reproduce the animation effects on this slide, do the following:On the Animations tab, in the Animations group, click CustomAnimation. Select the line off the right edge of the slide. In the CustomAnimation task pane, do the following:Click AddEffect, point to Entrance, and then click MoreEffects. In the AddEntranceEffect dialog box, under Basic, click FlyIn.Select the animation effect (fly-in effect for the second line). Under Modify: Fly In,do the following:In the Start list, select After Previous.In the Direction list, select FromLeft.In the Speed list, select Fast.On the Home tab, in the Editing group, click Select, and then click Selection Pane.In the Selection and Visibility pane, select the first line you created (in the middle of the slide). In the CustomAnimation task pane, do the following:Click AddEffect, point to Entrance, and then click MoreEffects. In the AddEntranceEffect dialog box, under Basic, click FlyIn.Select the second animation effect (fly-in effect for the first line). Under Modify: Fly In,do the following:In the Start list, select AfterPrevious.In the Direction list, select FromRight.In the Speed list, select Fast.On the slide, select the picture. In the CustomAnimation task pane, do the following:Click AddEffect, point to Entrance, and then click MoreEffects. In the AddEntranceEffect dialog box, under Basic, click Wipe.Select the third animation effect (wipe effect for the picture). Under Modify: Wipe,do the following:In the Start list, select WithPrevious.In the Direction list, select FromRight.In the Speed list, select Fast.On the slide, select the text box. In the CustomAnimation task pane, do the following:Click AddEffect, point to Entrance, and then click MoreEffects. In the AddEntranceEffect dialog box, under Basic, clickFlyIn.Select the fourth animation effect (fly-in effect for the text box). Under Modify: Fly In,do the following:In the Start list, select WithPrevious.In the Direction list, select FromRight.In the Speed list, select Fast.
  36. Custom animation effects: line sweeps in picture and text(Basic)To reproduce the shape effects on this slide, do the following:On the Home tab, in theSlides group, click Layout, and then click Blank.On the Home tab, in the Drawing group, click Shapes, and then under Lines click Line (first option from the left).On the slide, press and hold SHIFT, and then drag to draw a straight, vertical line.Select the line. Under DrawingTools, on the Format tab, in the Size group, in the Shape Width box, enter 7.5”.Under DrawingTools, on the Format tab, in the ShapeStyles group, click the Format Shape dialog box launcher. In the Format Shape dialog box, click LineColor in the left pane. In the LineColor pane, select Solidline, click the button next to Color, and then under ThemeColors click Black, Text 1 (first row, second option from the left).Also in the Format Shape dialog box, click LineStyle in the left pane. In the LineStyle pane, in the Weight box, enter 2 pt.Under DrawingTools, on the Format tab, in the ShapeStyles group, click ShapeEffects, point to Glow, and then under GlowVariations click Accent color 1, 5 pt glow (first row, first option from the left). Under DrawingTools, on the Format tab, in the ShapeStyles group, click ShapeEffects, point to Glow, point to MoreGlowColors, and then under ThemeColors click White, Background 1 (first row, first option from the left).On the Home tab, in the Drawing group, click Arrange, point to Align, and then do the following:Click Align to Slide.Click AlignCenter.Click AlignMiddle.On the slide, select the line. On the Home tab, in the Clipboard group, click the arrow under Paste, and then click Duplicate.Drag the duplicate line slightly off the right edge of the slide.With the duplicate line still selected, on the Home tab, in the Drawing group, click Arrange, point to Align, and then do the following: Click Align to Slide. Click Align Middle.On the Insert tab, in the Illustrations group, click Picture. In the InsertPicture dialog box, select a picture, and then click Insert.On the slide, select the picture. Under Picture Tools, on the Format tab, in the bottom right corner of the Size group, click the Size and Position dialog box launcher. In the Size and Position dialog box, on the Size tab, resize or crop the picture as needed so that under Size and rotate, the Height box is set to 7.5” and the Width box is set to 5”. Resize the picture under Size and rotate by entering values into the Height and Width boxes. Crop the picture under Crop from by entering values into the Left, Right, Top, and Bottom boxes. On the Home tab, in the Drawing group, click Arrange, point to Align, and then do the following:Click Align to Slide.ClickAlignRight.ClickAlignMiddle.To reproduce the text effects on this slide, do the following:On the Insert tab, in the Illustrations group, click TextBox. On the slide, drag to draw a text box.Enter text in the text box, and then select the text. On the Home tab, in the Font group, do the following:In the Font list, select Arial.In the FontSize list, select 28.Click Bold.Click the button next to FontColor, and then under ThemeColors click White, Background 1 (first row, first option from the left).On the Home tab, in the Paragraph group, click AlignTextRight to align the text right in the text box. Drag the text box onto the left half of the slide.To reproduce the background effects on this slide, do the following:Right-click the slide background area, and then click Format Background. In the Format Background dialog box, click Fill in the left pane, select Gradient fill in the Fill pane, and then do the following:In the Type list, select Linear.Click the button next to Direction, and then click Linear Down (first row, second option from the left).Under Gradient stops, click Add or Remove until two stops appear in the drop-down list.Also under Gradient stops, customize the gradient stops that you added as follows:Select Stop 1 from the list, and then do the following:In the Stop position box, enter 40%.Click the button next to Color, and then click Black, Text 1 (first row, second option from the left).Select Stop 2 from the list, and then do the following: In the Stop position box, enter 100%.Click the button next to Color, and then click Black, Text 1, Lighter 50% (second row, second option from the left).To reproduce the animation effects on this slide, do the following:On the Animations tab, in the Animations group, click CustomAnimation. Select the line off the right edge of the slide. In the CustomAnimation task pane, do the following:Click AddEffect, point to Entrance, and then click MoreEffects. In the AddEntranceEffect dialog box, under Basic, click FlyIn.Select the animation effect (fly-in effect for the second line). Under Modify: Fly In,do the following:In the Start list, select After Previous.In the Direction list, select FromLeft.In the Speed list, select Fast.On the Home tab, in the Editing group, click Select, and then click Selection Pane.In the Selection and Visibility pane, select the first line you created (in the middle of the slide). In the CustomAnimation task pane, do the following:Click AddEffect, point to Entrance, and then click MoreEffects. In the AddEntranceEffect dialog box, under Basic, click FlyIn.Select the second animation effect (fly-in effect for the first line). Under Modify: Fly In,do the following:In the Start list, select AfterPrevious.In the Direction list, select FromRight.In the Speed list, select Fast.On the slide, select the picture. In the CustomAnimation task pane, do the following:Click AddEffect, point to Entrance, and then click MoreEffects. In the AddEntranceEffect dialog box, under Basic, click Wipe.Select the third animation effect (wipe effect for the picture). Under Modify: Wipe,do the following:In the Start list, select WithPrevious.In the Direction list, select FromRight.In the Speed list, select Fast.On the slide, select the text box. In the CustomAnimation task pane, do the following:Click AddEffect, point to Entrance, and then click MoreEffects. In the AddEntranceEffect dialog box, under Basic, clickFlyIn.Select the fourth animation effect (fly-in effect for the text box). Under Modify: Fly In,do the following:In the Start list, select WithPrevious.In the Direction list, select FromRight.In the Speed list, select Fast.
  37. Custom animation effects: line sweeps in picture and text(Basic)To reproduce the shape effects on this slide, do the following:On the Home tab, in theSlides group, click Layout, and then click Blank.On the Home tab, in the Drawing group, click Shapes, and then under Lines click Line (first option from the left).On the slide, press and hold SHIFT, and then drag to draw a straight, vertical line.Select the line. Under DrawingTools, on the Format tab, in the Size group, in the Shape Width box, enter 7.5”.Under DrawingTools, on the Format tab, in the ShapeStyles group, click the Format Shape dialog box launcher. In the Format Shape dialog box, click LineColor in the left pane. In the LineColor pane, select Solidline, click the button next to Color, and then under ThemeColors click Black, Text 1 (first row, second option from the left).Also in the Format Shape dialog box, click LineStyle in the left pane. In the LineStyle pane, in the Weight box, enter 2 pt.Under DrawingTools, on the Format tab, in the ShapeStyles group, click ShapeEffects, point to Glow, and then under GlowVariations click Accent color 1, 5 pt glow (first row, first option from the left). Under DrawingTools, on the Format tab, in the ShapeStyles group, click ShapeEffects, point to Glow, point to MoreGlowColors, and then under ThemeColors click White, Background 1 (first row, first option from the left).On the Home tab, in the Drawing group, click Arrange, point to Align, and then do the following:Click Align to Slide.Click AlignCenter.Click AlignMiddle.On the slide, select the line. On the Home tab, in the Clipboard group, click the arrow under Paste, and then click Duplicate.Drag the duplicate line slightly off the right edge of the slide.With the duplicate line still selected, on the Home tab, in the Drawing group, click Arrange, point to Align, and then do the following: Click Align to Slide. Click Align Middle.On the Insert tab, in the Illustrations group, click Picture. In the InsertPicture dialog box, select a picture, and then click Insert.On the slide, select the picture. Under Picture Tools, on the Format tab, in the bottom right corner of the Size group, click the Size and Position dialog box launcher. In the Size and Position dialog box, on the Size tab, resize or crop the picture as needed so that under Size and rotate, the Height box is set to 7.5” and the Width box is set to 5”. Resize the picture under Size and rotate by entering values into the Height and Width boxes. Crop the picture under Crop from by entering values into the Left, Right, Top, and Bottom boxes. On the Home tab, in the Drawing group, click Arrange, point to Align, and then do the following:Click Align to Slide.ClickAlignRight.ClickAlignMiddle.To reproduce the text effects on this slide, do the following:On the Insert tab, in the Illustrations group, click TextBox. On the slide, drag to draw a text box.Enter text in the text box, and then select the text. On the Home tab, in the Font group, do the following:In the Font list, select Arial.In the FontSize list, select 28.Click Bold.Click the button next to FontColor, and then under ThemeColors click White, Background 1 (first row, first option from the left).On the Home tab, in the Paragraph group, click AlignTextRight to align the text right in the text box. Drag the text box onto the left half of the slide.To reproduce the background effects on this slide, do the following:Right-click the slide background area, and then click Format Background. In the Format Background dialog box, click Fill in the left pane, select Gradient fill in the Fill pane, and then do the following:In the Type list, select Linear.Click the button next to Direction, and then click Linear Down (first row, second option from the left).Under Gradient stops, click Add or Remove until two stops appear in the drop-down list.Also under Gradient stops, customize the gradient stops that you added as follows:Select Stop 1 from the list, and then do the following:In the Stop position box, enter 40%.Click the button next to Color, and then click Black, Text 1 (first row, second option from the left).Select Stop 2 from the list, and then do the following: In the Stop position box, enter 100%.Click the button next to Color, and then click Black, Text 1, Lighter 50% (second row, second option from the left).To reproduce the animation effects on this slide, do the following:On the Animations tab, in the Animations group, click CustomAnimation. Select the line off the right edge of the slide. In the CustomAnimation task pane, do the following:Click AddEffect, point to Entrance, and then click MoreEffects. In the AddEntranceEffect dialog box, under Basic, click FlyIn.Select the animation effect (fly-in effect for the second line). Under Modify: Fly In,do the following:In the Start list, select After Previous.In the Direction list, select FromLeft.In the Speed list, select Fast.On the Home tab, in the Editing group, click Select, and then click Selection Pane.In the Selection and Visibility pane, select the first line you created (in the middle of the slide). In the CustomAnimation task pane, do the following:Click AddEffect, point to Entrance, and then click MoreEffects. In the AddEntranceEffect dialog box, under Basic, click FlyIn.Select the second animation effect (fly-in effect for the first line). Under Modify: Fly In,do the following:In the Start list, select AfterPrevious.In the Direction list, select FromRight.In the Speed list, select Fast.On the slide, select the picture. In the CustomAnimation task pane, do the following:Click AddEffect, point to Entrance, and then click MoreEffects. In the AddEntranceEffect dialog box, under Basic, click Wipe.Select the third animation effect (wipe effect for the picture). Under Modify: Wipe,do the following:In the Start list, select WithPrevious.In the Direction list, select FromRight.In the Speed list, select Fast.On the slide, select the text box. In the CustomAnimation task pane, do the following:Click AddEffect, point to Entrance, and then click MoreEffects. In the AddEntranceEffect dialog box, under Basic, clickFlyIn.Select the fourth animation effect (fly-in effect for the text box). Under Modify: Fly In,do the following:In the Start list, select WithPrevious.In the Direction list, select FromRight.In the Speed list, select Fast.