
Recomendados
Mais conteúdo relacionado
Mais procurados
Mais procurados (20)
Destaque
Semelhante a 5 modificando macros-vbe
5 modificando macros-vbe
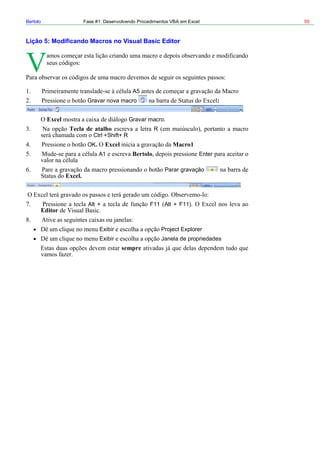
- 1. Bertolo Fase #1: Desenvolvendo Procedimentos VBA em Excel 55 Lição 5: Modificando Macros no Visual Basic Editor A5 Gravar nova macro : r Parar gravação Excel Gravar macro. Tecla de atalho R Ctrl +Shift+ R OK. Excel Macro1 A1 Bertolo Ente Excel. Alt + F11 Alt + F11). Editor Exibir Project Explorer Exibir Janela de propriedades sempre
- 2. Bertolo Lição #05 – Modificando Macros no Visual Basic Editor 56 Projeto – VBAProject Módulos sic tolo() elect "Bertolo" .Select + Módulos Módulos Módulo1 Módulo1. Editor de Visual Ba Sub Ber ' ' Bertolo Macro ' ' Atalho do teclado: Ctrl+Shift+R ' Range("A1").S ActiveCell.FormulaR1C1 = Range("A2") End Sub Excel
- 3. Bertolo Lições de VBA do Excel 57 Sub End Sub Macro1 ").Select -Range("A1 A1 Range ActiveCell.FormulaR1C1 = "Bertolo" - Bertolo ActiveCell.FormulaR1C1 A2. Bertolo A1 Enter b M ' Mac ' ' Atalho do teclado: Ctrl+Shift+R Ra ") Ac Range("B1").Select ActiveCell.FormulaR1C1 = "Catanduva, 07 de Julho de 2007" Range("C1").Select ActiveCell.FormulaR1C1 = "31-2-47-13" Range("D1").Select ActiveCell.FormulaR1C1 = "Festa do Peão" Range("E1").Select ActiveCell.FormulaR1C1 = "FAFICA" End Sub Excel Crtl + Shift + R, A1 Bertolo B1 Catanduva, 07 de Julho de 2007 C1 31-2-47-13 D1 Festa do Peão Range("A2").Select : Enter A2. Editor de Visual Basic Su acro1() ' ro1 Macro ' Macro gravada em 7/7/2007 por Bertolo ' nge("A1 .Select tiveCell.FormulaR1C1 = "Bertolo"
- 4. Bertolo Lição #05 – Modificando Macros no Visual Basic Editor 58 E FAFICA1 Arquivo Microsoft Excel Fechar e voltar ao Microsoft Excel (Alt +Q) barra de ferramentas Padrão, Microsoft Visual Basic Barra de Ferramentas de Acesso Rápido Visual Basi Ctrl + Shift + r Prática Gere uma Macro que escreva um no Código. Gere uma Macro que escreva um nome em uma célula e o Centralize. Observe Gere uma Macro que escreva um nome em uma célula e troque o tamanho d 20 pontos. Observe o Código. Trasladar-se a uma Célula Range("A1").Select Escrever em uma Célula Activecell.FormulaR1C1="Bertolo" Letra em Negrito Selection.Font.Bold = True Letra Cursiva (Itálico) Selection.Font.Italic = True Letra Sublinhada Selection.Font Central c Excel me em uma célula e o ponha em negrito e observe o o Código. a letra para .Underline = xlUnderlineStyleSingle izar o Texto With Selection .HorizontalAlignment = xlCenter End With Alinhar à esquerda With Selection
- 5. Bertolo Lições de VBA do Excel 59 .HorizontalAlignment = xlLeft End W eita A1"), Order1:=xlAscending, False, Orientation:=xlTopToBottom "A1"), Order1:=xlDescending, s, _ om:=1, MatchCase:=False, Orientation:=xlTopToBottom :=xlP rt ith Alinhar à Dir With Selection .HorizontalAlignment = xlRight End With Tipos de Letra (Fonte) With Selection.Font .Name = "AGaramond" End With Tamanho de Letra (Tamanho de Fonte) With Selection.Font .Size = 15 End With Copiar Selection.Copy Colar ActiveSheet.Paste Cortar Selection.Cut Ordenar Ascendente Selection.Sort Key1:=Range(" Header:=xlGuess, _ OrderCustom:=1, MatchCase:= Ordenar Descendente Selection.Sort Key1:=Range( Header:=xlGues OrderCust Buscar Cells.Find(What:="Bertolo", After:=ActiveCell, LookIn:=xlFormulas, LookAt _ art, SearchOrder:=xlByRows, SearchDirection:=xlNext, MatchCase:= _ False).Activate Inserir Arquivo Selection.EntireRow.Inse Eliminar Arquivo Selection.EntireRow.Delete Inserir Coluna Selection.EntireColumn.Insert Eliminar Coluna
- 6. Bertolo Lição #05 – Modificando Macros no Visual Basic Editor 60 Selection.EntireColumn.Delete Abrir uma Pasta Workbooks.Open Filename:="C:Meus documentosvideo safe 3.xls Gravar um Pasta ActiveWorkbook.SaveAs Filename:="C:Meus documentos FileFormat _ :=xlNormal, Password:="", WriteResPassword:="", ReadOnlyRecommended:= _ False, CreateBackup:=False Excel EXTERMÍNIO DO GRAVADOR DE MACRO " piscis.xls", Gravar nova macro nome da macro OK ilhaLayout da Página Opções de Plan Configurar Página Cabeçalho/rodapé
- 7. Bertolo Lições de VBA do Excel 61 vação pull down Parar gra Excel. Setup.PrintArea = "" PageSetup = "" Application.InchesToPoints(0.75) pplication.InchesToPoints(1) oPoints(0.5) n = Application.InchesToPoints(0.5) .PrintNotes = False Sub mudarConfiguracao() With ActiveSheet.PageSetup .PrintTitleRows = "" .PrintTitleColumns = "" End With ActiveSheet.Page With ActiveSheet. .LeftHeader = "" .CenterHeader = "" .RightHeader .LeftFooter = "" .CenterFooter = "" .RightFooter = "" .LeftMargin = Application.InchesToPoints(0.75) .RightMargin = .TopMargin = A .BottomMargin = Application.InchesToPoints(1) .HeaderMargin = Application.InchesT .FooterMargi .PrintHeadings = False .PrintGridlines = True
- 8. Bertolo Lição #05 – Modificando Macros no Visual Basic Editor 62 .PrintQuality = 300 .CenterHorizontally = False .CenterVertically = .Orientation = xlPor False trait xlPaperLetter tomatic .Draft = False .PaperSize = .FirstPageNumber = xlAu .Order = xlDownThenOver .BlackAndWhite = False .Zoom = 100 End With End Sub xlPortrait xlAutomatic xlPaperLetter Sub ShowConstantValue MsgBox xlPortrait End Sub todas PageSetup With With With F1 Settings() W PageSetup With ajuda Sub Change ith ActiveSheet.PageSetup .LeftHeader = "" .CenterHeader = "" .RightHeader = "" .LeftFooter = "" .CenterFooter = "" .RightFooter = ""
- 9. Bertolo Lições de VBA do Excel 63 End With End Sub LIMPANDO O CÓDIGO DO GRAVADOR D Sub Macro1() E MACRO ("A2").Select ActiveCell.FormulaR1C1 = "Descrição de Caso:" lect Selection.Borders(xlLeft).LineStyle = xlNone Selection.Borders(xlRight).LineStyle = xlNone Selection.Borders(xlTop).LineStyle = xlNone Selection.Borders(xlBottom).LineStyle = xlNone Selection.BorderAround Weight:=xlThin, _ ColorIndex:=xlAutomatic Range("A4").Select ActiveCell.FormulaR1C1 = "Nome do Arquivo" Range("C4").Select Selection.Borders(xlLeft).LineStyle = xlNone Selection.Borders(xlRight).LineStyle = xlNone Selection.Borders(xlTop).LineStyle = xlNone Selection.Borders(xlBottom).LineStyle = xlNone Selection.BorderAround Weight:=xlThin, _ ColorIndex:=xlAutomatic Range("A6").Select ActiveCell.FormulaR1C1 = "Nome da Planilha" Range("C6").Select Selection.Borders(xlLeft).LineStyle = xlNone Selection.Borders(xlRight).LineStyle = xlNone Selection.Borders(xlTop).LineStyle = xlNone Selection.Borders(xlBottom).LineStyle = xlNone Selection.BorderAround Weight:=xlThin, _ ColorIndex:=xlAutomatic End Sub Selects Sub A_Shorter_Macro() Range("A2").FormulaR1C1 = " Descrição de Caso:" Range("A4").FormulaR1C1 = " Nome do Arquivo " Range("A6").FormulaR1C1 = " Nome da Planilha " Range("C2, C4, C6").BorderAround Weight:=xlThin End Sub Range Range("C2").Se
- 10. Bertolo Lição #05 – Modificando Macros no Visual Basic Editor 64 Outro Exercício "VBATeste1.xls" Visual Basic Editor Alt + F11 Módulo1 janela de projeto Janela de Código. tiveCell.FormulaR1C1="34" "Arquivo/Imprimir/ Módulo Atual" Imprima esta página e siga as instruções passo a passo. web page Ac
- 11. Bertolo Lições de VBA do Excel 65 ActiveCell Act Ran Ran nge Seleção) ColorIndex 41 Pattern xlSolid. nge("A1").Interio nge("A1").Interior.Pattern = xlSolid Range("A1").Select iveCell.Value=34 Range("A2").Select ActiveCell.FormulaR1C1 = "55" ge("A2").Value=55 ge("A3").Select ActiveCell.FormulaR1C1 = "=R[-2]C+R[-1]C" Range("A3").Formula="=A1+A2" Ra ("A2").Select Selection.Font.ColorIndex = 3 Range("A2").Font.ColorIndex = 3 Range("A1").Select With Selection.Interior .ColorIndex = 41 .Pattern = xlSolid End With "With..End With" A1 ( A1 Selection.Interior Ra Ra r.ColorIndex = 41 :
- 12. Bertolo Lição #05 – Modificando Macros no Visual Basic Editor 66 Range("A3").Select With Selection.Font .Name = "Arial" .Size = 24 With...End With ub Macro1() ' Mac Range("A1").Select Ra R .Strikethrough = False .Superscript = False .Subscript = False .OutlineFont = False .Shadow = False .Underline = xlUnderlineStyleNone .ColorIndex = xlAutomatic End With " " Range("A3").Font.Size= 24 "Macro1" S ro1 Macro ' Macro gravada 27/5/2007 por Bertolo' ActiveCell.Value = 34 nge("A2").Value = 55 Range("A3").Formula = "=A1+A2" Range("A2").Font.ColorIndex = 3 ange("A1").Interior.ColorIndex = 41 Range("A1").Interior.Pattern = xlSolid Range("A3").Font.Size = 24 End Sub