

Recomendados
Mais conteúdo relacionado
Mais procurados
Mais procurados (19)
Destaque
Semelhante a Tuto 2
Semelhante a Tuto 2 (20)
Tuto 2
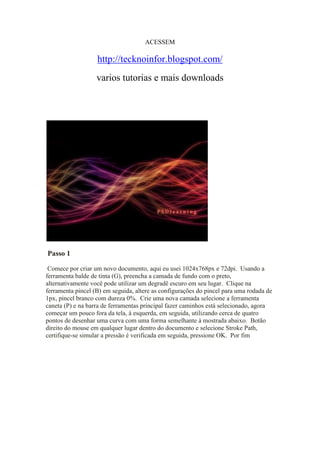
- 1. ACESSEM<br />http://tecknoinfor.blogspot.com/<br />varios tutorias e mais downloads<br />Step 1 Passo 1 <br />Start by creating a new document, here I used 1024x768px and 72dpi. Comece por criar um novo documento, aqui eu usei 1024x768px e 72dpi. Using the paint bucket tool (G) fill the background layer with black, alternatively you could use a dark gradient instead. Usando a ferramenta balde de tinta (G), preencha a camada de fundo com o preto, alternativamente você pode utilizar um degradê escuro em seu lugar. Click the brush tool (B) then change the settings of this brush to a 1px round, white brush with 0% hardness. Clique na ferramenta pincel (B) em seguida, altere as configurações do pincel para uma rodada de 1px, pincel branco com dureza 0%. Create a new layer then select the pen tool (P) and in the main toolbar make sure paths is selected, now start slightly outwith the canvas on the left then using about four points draw a curve with a similar shape to the one below. Crie uma nova camada selecione a ferramenta caneta (P) e na barra de ferramentas principal fazer caminhos está selecionado, agora começar um pouco fora da tela, à esquerda, em seguida, utilizando cerca de quatro pontos de desenhar uma curva com uma forma semelhante à mostrada abaixo. Right click anywhere inside the document then select stroke path, make sure simulate pressure is checked then hit OK. Botão direito do mouse em qualquer lugar dentro do documento e selecione Stroke Path, certifique-se simular a pressão é verificada em seguida, pressione OK. Lastly hit the Esc key twice to get rid of the path. Por fim pressione a tecla Esc duas vezes para se livrar do caminho. <br />Step 2 Passo 2 <br />Now hold Ctrl and click on the layer with this curve in it, in the layers panel, this should make a selection around the line. Agora pressione Ctrl e clique na camada com essa curva em que, no painel de camadas, isso deve fazer uma seleção em torno da linha. Next go edit>define brush preset and save that curve as a brush. Em seguida vá editar> definir pincel predefinido e guardar a curva como um pincel. You can now hide this layer by clicking the eye next to it in the layers panel. Agora você pode esconder essa camada clicando no olho ao lado dela no painel de camadas. Select the brush tool again then bring up the brush settings by going window>brushes. Selecione a ferramenta pincel novamente, em seguida, abrir as configurações de pincel vai escovas> janela. Choose the brush that you just made then use the same settings as below. Escolha a escova que você acabou de usar as mesmas configurações abaixo. <br />Step 3 Etapa 3 <br />Create a new layer to hold our lines. Crie uma nova camada para manter nossas linhas. Okay we now want to use this brush to create the lines in the picture so first drag from the left of the canvas to the right until you end up with something that resembles the image below. Ok, agora quer usar esse pincel para criar as linhas na imagem para arrastar primeiro à esquerda da tela para a direita até você acabar com algo que se assemelha a imagem abaixo. Not that each line is slightly different, this is because in settings we made it change angle and roundness. Não é que cada linha é um pouco diferente, é porque nas configurações nós fizemo-lo mudar o ângulo e redondeza. <br />Step 4 Etapa 4 <br />Now we will make the lines glow so right click on this layer in the layers panel then select blending options. Agora vamos fazer o brilho, clique em linhas tão certo sobre essa camada no painel Camadas, selecione as opções de mistura. Use the settings shown below for a drop shadow and an outer glow. Use as configurações abaixo de uma sombra e um brilho externo. Note that although we used a drop shadow we are still using it to create a glowing effect this is because we changed the blend mode of this effect from multiply to normal. Note que embora nós usamos uma sombra que ainda estamos a usá-lo para criar um efeito brilhante isto é porque nós mudamos o modo de mistura do efeito de multiplicar ao normal. <br />Step 5 Etapa 5 <br />Right click this layer then select duplicate layer to make an exact copy. Botão direito do mouse e selecione essa camada camada duplicada para fazer uma cópia exata. Now go into the blending options for this layer and the only thing we want to change is the gradient to the the other rainbow one because you will notice there are two different rainbow gradients, one has transparent edges and one doesn't. Agora vá para as opções de mistura para esta camada ea única coisa que queremos mudar é o gradiente para o arco-íris do outro, porque você vai notar que há dois gradientes diferentes do arco-íris, um tem as bordas transparentes e não se acredita. <br />Step 6 Passo 6 <br />Optionally now you can blend out some of the ends of these lines by either using the erasor tool on both layers or a better way to do it would be to put both these layers in a new group then create a layer mask a paint it out some parts. Opcionalmente, agora você pode misturar algumas das extremidades destas linhas ou usando a ferramenta erasor em camadas ou uma melhor maneira de fazer isso seria colocar estas duas camadas em um novo grupo, em seguida, criar uma máscara de uma camada de tinta que alguns peças. If your happy with your image then skip on over to the next step. Se estiver satisfeito com sua imagem, em seguida, saltar sobre sobre a próxima etapa. <br />Step 7 Passo 7 <br />Here I added some beads on the line, this can be done using the same technique from step 3 to step 5 except use a small 2px or 3px round brush instead of the brush that you made yourself. Aqui eu adicionei algumas contas na linha, isso pode ser feito usando a mesma técnica do passo 3 para a etapa 5, exceto usar uma pequena escova redonda ou 2px 3px em vez da escova que você fez a si mesmo. <br />Step 8 Passo 8 <br />Now create a new layer and select a large soft brush then change the foreground color to a bright color and brush some random shapes. Agora crie uma nova camada e selecione um pincel grande e macio, em seguida, mudar a cor para uma cor brilhante e pincel algumas formas aleatórias. Repeat this with a few diifferent colors to end up with an effect like this. Repita este procedimento com poucas cores diifferent para acabar com um efeito como este. <br />Step 9 Passo 9 <br />Next go filter>blur>gaussian blur and use a value of around 100px then change the blend mode of this layer to color. Depois vá até filtro> Desfoque> Desfoque Gaussiano e usar um valor de cerca de 100px então mudar o modo de blend da layer para cor. I'll let you decide what opacity this layer should be but I used about 50%. Vou deixar você decidir que a opacidade desta camada deve ser, mas eu usei cerca de 50%. <br />