SlideShare uma empresa Scribd logo
1 de 37
Baixar para ler offline
ESPAÑOL
ENGLISH
FRANÇAIS
PORTUGUÊS
ITALIANO
AIR CONDITIONER
REMOTE CONTROLLER ILLUSTRATION
APD-9CR PORTABLE COLD FUNC.
APD-12CR PORTABLE COLD FUNC.
APD-12HR PORTABLE HEATING PUMP
ACONDICIONADOR DE AIRE
ILUSTRACIÓN DEL TELEMANDO
APD-9CR PORTÁTIL SOLO FRÍO
APD-12CR PORTÁTIL SOLO FRÍO
APD-12HR PORTÁTIL BOMBA CALOR
CLIMATISEUR
ILLUSTRATION DE LA TÉLÉCOMMANDE
APD-9CR MOBILE FROID SEUL
APD-12CR MOBILE FROID SEUL
APD-12HR MOBILE POMPE À CHALEUR
AR CONDICIONADO
ILUSTRAÇÃO DO CONTROLO REMOTO
APD-9CR PORTÁTIL APENAS FRIO
APD-12CR PORTÁTIL APENAS FRIO
APD-12HR PORTÁTIL BOMBA DE CALOR
CONDIZIONATORE D’ARIA
ILLUSTRAZIONE DEL COMANDO A DISTANZA
APD-9CR PORTATILE SOLO FREDDO
APD-12CR PORTATILE SOLO FREDDO
APD-12HR PORTATILE POMPA DI CALORE
Lea este manual
En él encontrará muchos consejos útiles sobre cómo utilizar y mantener
correctamente su unidad de aire acondicionado. Si realiza una serie de sencillas
tareas de mantenimiento, se ahorrará mucho tiempo y dinero a lo largo de la
vida útil de su unidad. En la guía de resolución de problemas encontrará muchas
respuestas a problemas habituales. Si en primer lugar comprueba la tabla de
resolución de problemas, quizás no tenga que llamar al servicio técnico.
Read This Manual
Inside you will find many helpful hints on how to use and maintain your air
conditioner properly. Just a little preventative care on your part can save you a great
deal of time and money over the life of your air conditioner. You’ll find many answers
to common problems in the chart of troubleshooting tips. If you review the chart of
Troubleshooting Tips first, you may not need to call for service.
Veuillez lire ce manuel
Vous y trouverez de très nombreux conseils utiles pour installer et tester
correctement le climatiseur. Un minimum d’entretien préventif de votre part peut
vous faire économiser beaucoup de temps et d’argent pendant la durée de vie de
votre climatiseur. Vous trouverez de nombreuses réponses aux problèmes les plus
communs dans le tableau de la rubrique Conseils de dépannage. Si vous consultez
d’abord le tableau de la rubrique Conseils de dépannage, il ne vous faudra peut-être
pas appeler de réparateur.
Ler este Manual
No interior encontram-se muitos conselhos úteis sobre como utilizar e conservar
adequadamente este aparelho de ar condicionado. Apenas com alguns cuidados
preventivos, é possível economizar uma importante soma de tempo e dinheiro
durante toda a vida útil do aparelho. No quadro de conselhos para resolução de
problemas, poderão ser encontradas muitas respostas para os problemas mais
comuns. Consultando este quadro de Resolução de Problemas, poderá não ser
necessário chamar a assistência técnica.
Leggere il presente manuale
All’interno sono presenti molti consigli utili per l’uso e la manutenzione adeguati del
condizionatore d’aria. Basta qualche accorgimento preventivo per risparmiare una
gran quantità di tempo e denaro durante la vita del condizionatore d’aria. Nel grafico
della risoluzione dei problemi si trovano molte risposte a problemi comuni. Prima di
chiamare il servizio tecnico, consultare la sezione Risoluzione dei problemi.
El diseño y las especificaciones están sujetos a cambios sin previo
aviso a fin de mejorar el producto. Consulte al personal de ventas o al
fabricante para más detalles.
APD-9CR PORTÁTIL SOLO FRÍO
APD-12CR PORTÁTIL SOLO FRÍO
APD-12HR PORTÁTIL BOMBA CALOR
ACONDICIONADOR DE AIRE
ILUSTRACIÓN DEL TELEMANDO
Muchas gracias por elegir nuestro acondicionador de aire.
Por favor, antes de utilizarlo, lea atentamente este manual
del propietario.
ÍNDICE
Manejo del control remoto ..............................................................................2
Especificaciones del control remoto..............................................................3
Botones de funciones .................. ..................................................................4
Indicadores de la pantalla LCD ......................................................................6
Cómo utilizar los botones ...............................................................................7
Funcionemiento Automático...........................................................................7
Funcionamiento en modo Refrigeración/Calefacción/Ventilador................7
Funcionamiento en modo de deshumificación ............................................8
Funcionamiento de abanico............................................................................8
Funcionamiento Timer.....................................................................................9
Funcionamiento en modo económico ..........................................................12
Manejo del control remoto
Ubicación del control remoto.
- Utilice el control remoto a una distancia máxima de 8 metros
respecto al aparato y apunte hacia el receptor. Un pitido
confirma la recepción.
PRECAUCIÓN
- El acondicionador de aire no funcionará si hay cortinas, puertas u otros
obstáculos bloqueando la señal que envía el control remoto a la unidad
interior.
- Evite que caiga ningún tipo de líquido sobre el control remoto. No exponga
el telemando a la luz directa del sol ni a fuentes de calor.
- Si el receptor de infrarrojos de la unidad interior se expone a la luz directa
del sol, puede verse afectado el funcionamiento del acondicionador de aire.
Coloque cortinas para evitar que la luz directa del sol afecte al receptor.
- Si se producen interferencias con otros aparatos eléctricos, cambie de sitio
estos aparatos o póngase en contacto con su distribuidor local.
Sustitución de pilas
El control remoto funciona con dos pilas
(R03/LR03X2) instaladas en la parte trasera y protegidas
por una tapa.
(1) Para abrir la tapa, presiónela y deslícela.
(2) Extraiga las pilas antiguas e introduzca las nuevas
prestando especial atención a la colocación de los polos
(+) y.
(3) Vuelva a cerrar el compartimento deslizando la cubierta
hasta encajarla en su posición.
NOTA: Al retirar las pilas, el control remoto borra toda la
programación.
Una vez insertadas las pilas nuevas, se debe reprogramar
el control remoto.
1 2
PRECAUCIONES
- No mezcle pilas antiguas y nuevas ni pilas de diferentes tipos.
- No deje las pilas en el interior del control remoto si no va utilizarlo durante 2 o 3
meses.
- Tire las pilas gastadas en los contenedores especiales que encontrará en los
establecimientos.
Especificaciones del control remoto
Botones de funciones
Modelo RG51B1/(C)EU, RG51B14/(C)E,RG51B31/(C)E
RG51B/(C)EU, RG51B16/(C)E,RG51B31/(C)EU
RG51B17/(C)EU, RG51B18/(C)E,RG51B32/(C)EU
RG51B19/(C)E-M, RG51B20/(C)E,RG51B30/(C)EU
RG51B25/(C)E, RG51B26/(C)EU;RG51B27/(C)E,
RG51B30/(C)E.
Tensión nominal 3.0V(Pilas secas R03/LR03 2)
Tensión mínima de la
señal emisora de la
CPU
2.0V
Recepción de señal
Rango
8m
Entorno -5ºC 60ºC (-41ºC ~ 140ºF)
NOTA:
Visor de ajuste de temperatura:
Escala Celsius (C): RG51B14/(C)E, RG51B16/(C)E,RG51B18/(C)E,RG51B31/(C)
E,RG51B19/(C)E-M, RG51B20/(C)E,RG51B25/(C)E,RG51B27/(C)E,RG51B30/(C)E.
Escala Fahrenheit (F): RG51B/(C)EU, RG51B1/(C)EU, RG51B17/(C)EU,RG51B26/(C)EU,
RG51B30/(C)EU,RG51B32/(C)EU,RG51B31/(C)EU.
Funciones
Modos de funcionamiento: Modo AUTOMÁTICO, REFRIGERACIÓN, SECADO,
CALEFACCIÓN (excepto en los modelos 'sólo Refrigeración), y VENTILADOR.
2. Función de ajuste del temporizador en 24 horas.
3. Rango de ajuste de la temperatura interior: 17C~30 C(62OF~88OF).
4. Función completa de la LCD (pantalla de cristal líquido)
NOTA: Todas las imágenes que aparecen en este manual se incluyen únicamente
a modo explicativo. Su aire acondicionado puede ser ligeramente diferente. La
forma real es la importante.
Modelo: RG51B14/(C)E,
RG51B16/(C)E,
RG51B18/(C)E,
RG51B19/(C)E-M,
RG51B20/(C)E
RG51B31/(C)E
RG51B30/(C)E.
NOTA:
- Los modelos RG51B16/(C)E
,RG51B18/(C)E no disponen de
opción de OSCILACIÓN;
- Los modelos RG51B18/(C)E
,RG51B19/(C)E-M, RG51B20/(C)E no
disponen de pantalla LED.
- El modelo RG51B19/(C)E-M no
tiene la función MED FAN (ventilador
medio)
- En el modelo RG51B31/(C)E, el
botón ECONOMY (economía) se
ha sustituido por el botón SLEEP
(sueño).
- El modelo RG51B30/(C)E no tiene
las funciones MED FAN (ventilador
medio) y SWING.
1. Botón TEMP DOWN
Presione este botón para bajar la temperatura interna a
intervalos de 1ºC hasta 30 ºC.
2. Botón TEMP UP
Presione este botón para subir la temperatura interna a
intervalos de 1ºC hasta 17ºC.
3. Botón MODE
Cada vez que presione el botón, se selecciona
el modo de funcionamiento en el orden siguiente:
> AUTO > REFRIG. > SECADO > CAL.> VENT.
NOTA: El modo Calefacción sólo está disponible en los modelos
refrigeración y calefacción.
4. Botón SWING (en algunos modelos)
Se utiliza para detener o accionar el movimiento de la rejilla y
ajustar la dirección del flujo de aire.
5. Botón RESET
Cuando se pulsa el botón RESET, se cancelan todos los ajustes
actuales y el control remoto regresa a los ajustes iniciales.
6. Botón ON/OFF
La unidad se pone en marcha cuando se pulsa este botón y
deja de funcionar si se vuelve a pulsar.
7. Botón FAN SPEED (velocidad del ventilador)
Permite seleccionar la velocidad del ventilador:
> Auto -> Baja > Media > Alta
- Algunos modelos no tienen la función MED FAN
(ventilador medio).
8.Botón TIMER ON (temporizador de encendido)
Pulse este botón para activar la secuencia de encendido del
temporizador automático. Cada pulsación incrementa el tiempo
en intervalos de 30 minutos, hasta 10 horas, y luego a intervalos
de 1 hora hasta 24 horas. Para cancelar el ajuste de la hora de
encendido automático, sólo debe pulsar el botón hasta que el
ajuste de la hora sea 0.0.
9. Botón ECONOMY(SLEEP) (economía/sueño)
Seleccione esta función durante las horas de sueño.
Permite mantener la temperatura más confortable y ahorrar
energía. Esta función sólo está disponible en los modelos
REFRIGERACIÓN, CALEFACCIÓN o AUTOMÁTICO.
Modelo: RG51B25/(C)E;
RG51B27/(C)E.
NOTA:
El modelo RG51B25/(C)E no tiene la
función SWING.
3 4
Botones de función
(continuación)
Modelo: RG51B1/(C)EU,
Los modelos
RG51B/(C)EU,
RG51B26/(C)EU,
RG51B30/(C)EU,
RG51B32/(C)EU,
RG51B31/(C)EU.
NOTA: RG51B/(C)EU
no tienen los botones SWING y
FOLLOW ME (seguimiento); los
modelos RG51B1/(C)EU no tienen
botón FOLLOW ME (seguimiento);
Los modelos RG51B30/(C)EU no
tienen los botones SWING y FOLLOW
ME (seguimiento) ni la función MED
FAN (ventilador medio), y tienen el
botón SLEEP (sueño) en lugar del
botón ECONOMY (economía); Los
modelos RG51B32/(C)EU no tienen
el botón FOLLOW ME (seguimiento)
ni la función MED FAN (ventilador
medio), y tienen el botón SLEEP
(sueño) en lugar del botón ECONOMY
(economía); Los modelos RG51B31/
(C)EU no tienen botón FOLLOW ME
(seguimiento)
Indicador de MODO
Muestra el modo de funcionamiento seleccionado. Incluyendo
los modos AUTOMÁTICO, REFRIGERACIÓN, SECADO,
CALEFACCIÓN (sólo en modelos refrigeración y calefacción) y
VENTILADOR.
Indicador de transmisión
Este indicador de transmisión se ilumina cuando el control
remoto transmite señales a la unidad interior.
Indicador de Temperatura/Temporizador
Se mostrará el ajuste de la temperatura (de 17ºC a 30ºC) el
ajuste del temporizador (0~24h).
Si el modo de VENTILACIÓN está seleccionado, la pantalla
estará en blanco.
Indicador de ENCENDIDO/APAGADO
Aparecerá este indicador cuando la unidad esté en
funcionamiento.
Indicador de MODO (Modo VENTILADOR)
Indicador de la VELOCIDAD DEL VENTILADOR
Muestra la velocidad del ventilador seleccionada. AUTO,
HIGH, MED y LOW. La pantalla aparece en blanco cuando
la velocidad del ventilador es automática (AUTO). Si están
seleccionados los modos AUTOMÁTICO o SECADO, no se
mostrará ninguna señal en la pantalla.
NOTA: El modelo RG51B19/(C)E-M no tiene la función de
velocidad MED FAN (ventilador medio)
Modelo: RG51B17/(C)EU
NOTA: Con la unidad funcionando en modo SLEEP(sueño),
se cancelará si se presionan los botones ON/OFF
(encendido/apagado), FAN SPEED (velocidad del ventilador),
SLEEP(sueño) o MODE (modo).
10. Botón TIMER OFF (temporizador de apagado)
Pulse este botón para activar la secuencia de apagado del
temporizador automático. Cada pulsación incrementa el
tiempo en intervalos de 30 minutos, hasta 10 horas, y luego
a intervalos de 1 hora hasta 24 horas. Para cancelar el ajuste
de la hora de apagado automático, solo debe pulsar el botón
hasta que el ajuste de la hora sea 0.0.
11. Botón de BLOQUEO
Pulse este botón para bloquear todos los ajustes actuales,
el control remoto no aceptará ninguna operación salvo la de
bloqueo. Utilice el modo de BLOQUEO para evitar que se
modifiquen sus programaciones, accidentalmente. Utilice el
botón LOCK para cancelar la función de BLOQUEO. Cuando
la función de bloqueo esté activada, en la pantalla del control
remoto aparecerá el símbolo de una llave.
12. Botón pantalla LED
Pulse este botón para borrar la pantalla de la unidad interior y
vuélvalo a pulsar para iluminar la pantalla .
NOTA: RG51B18/(C)E ,RG51B19/(C)E-M,
Los modelos RG51B20/(C)E no tienen esta función.
13. Botón FOLLOW ME/TEMP SENSING (seguimiento
sensor de temperatura)
- Pulse este botón para iniciar la función FOLLOW ME.
- Cuando esta función está activada, en la pantalla del control
remoto se muestra la temperatura actual de la estancia.
El control remoto enviará esta señal al aire acondicionado
cada 3 minutos hasta que se pulse de nuevo el botón Follow
Me.
- La función SEGUIMIENTO no está disponible en los modos
SECADO y VENTILADOR.
- Si cambia el modo de funcionamiento o apaga la unidad, se
cancelará automáticamente la función Follow Me.
14. Botón ION (iones)
Al pulsar este botón, se activa el generador de iones, lo que
ayuda a eliminar el polen y las impurezas del aire.
Indicador de función FOLLOW ME (seguimiento)
Al presionar el botón FOLLOW ME/TEMP SENSING en modo
COOL (frío) o HEAT (calor), la función del sensor remoto se
activa y aparece este indicador.
Indicador de TEMPORIZADOR
Esta área de visualización muestra los ajustes del
temporizador. Si sólo está configurada la función de encendido
automático, en pantalla aparecerá TIMER ON. Si sólo está
configurada la función de apagado automático, en pantalla
aparecerá TIMER OFF. Y si están configuradas ambas
funciones, aparecerá TIMER ON OFF, que indica que usted ha
ajustado las horas de encendido y apagado automáticos.
Indicador de BLOQUEO
El visor de BLOQUEO aparece al pulsar el botón LOCK
. Pulse el botón LOCK para borrar la visualización de bloqueo.
Indicadores de la pantalla LCD
5 6
Funcionamiento en modo de deshumidificación
Asegúrese de que la unidad esté conectada y haya corriente
eléctrica. El piloto de FUNCIONAMIENTO se iluminará en el
panel de visualización de la unidad interior.
1. Pulse el botón MODE para seleccionar el modo SECADO.
2. Pulse el botón TEMP para ajustar la temperatura deseada.
La temperatura se puede ajustar dentro de un rango de
incrementos de 17ºC (62ºF)~ 30ºC en 1ºC(2ºF)
3. Pulse el botón ON/OFF para poner en marcha el aire
acondicionado.
NOTA
En modo Deshumidificación, no podrá seleccionar la velocidad
del ventilador. Ya se ha controlado automáticamente.
Funcionamiento swing (en algunos modelos)
Utilice el botón SWING para ajustar la dirección del flujo de aire.
1. Si pulsa el botón una vez y rápidamente, se activa la
función de ajuste de la dirección del flujo de aire. El ángulo de
movimiento de la rejilla es de 6° para cada pulsación del botón.
Mantenga pulsado el botón para colocar la rejilla en la posición
deseada.
NOTA: en algunos modelos, presione para iniciar solo la
función auto swing.
2. Si mantiene pulsado el botón SWING durante 2 segundos
más, se activa la función de oscilación automática de la rejilla.
La rejilla horizontal se moverá automáticamente hacia arriba y
abajo. Púlselo de nuevo para detenerla
.NOTA: Cuando el movimiento de la rejilla interfiere en el efecto
de refrigeración o calefacción del aire acondicionado, se
modifica automáticamente el movimiento de la rejilla.
Cómo utilizar los botones
Funcionamiento Automático
Asegúrese de que la unidad esté conectada y haya corriente
eléctrica. El piloto de FUNCIONAMIENTO se iluminará en el
panel de visualización de la unidad interior.
1. Utilice el botón MODE para seleccionar el modo
AUTOMÁTICO.
2. Pulse el botón TEMP para ajustar la temperatura deseada.
Esta temperatura debe estar comprendida entre 17ºC(62ºF)~
30ºC en incrementos de 1ºC (2ºF).
3. Pulse el botón ON/OFF para poner en marcha el aire
acondicionado.
NOTA
1. En modo Auto, el aire acondicionado seleccionará de forma
lógica el modo Cooling (refrigeración), Fan (ventilador), Heating
(calefacción) y Dehumidifying (deshumidificador) mediante la
captación de la diferencia entre la temperatura ambiente real de
la habitación y la temperatura establecida en el control remoto.
2. En modo Automático, no podrá seleccionar la velocidad del
ventilador. Ya se ha controlado automáticamente.
3. Si el modo Auto no le resulta cómodo, puede seleccionar el
modo que desee manualmente.
Funcionamiento en modo Refrigeración/Calefacción/
Ventilador
Asegúrese de que la unidad esté conectada y haya corriente
eléctrica.
1. Utilice el botón MODE para seleccionar el modo
REFRIGERACIÓN, CALEFACCIÓN (sólo para modelos
refrigeración y calefacción) o VENTILADOR.
2. Pulse el botón TEMP para ajustar la temperatura deseada.
La temperatura se puede establecer en un rango de 3. Pulse el
botón FAN SPEED para seleccionar la velocidad del ventilador:
Auto (automática), Low (baja), Med (media) o High (alta).
4. Pulse el botón ON/OFF para poner en marcha el aire
acondicionado. 17ºC ~ 3ºC a intervalos de 1ºC.
NOTA
En el modo VENTILADOR, la temperatura de ajuste no se
muestra en el control remoto y usted no puede controlar la
temperatura de la estancia. En este caso, sólo se pueden llevar
a cabo los pasos 1, 3 y 4
7 8
Funcionamiento Timer
Pulse el botón TIMER ON para ajustar la hora de puesta en
marcha automática de la unidad. Y presione el botón TIMER
OFF para ajustar la hora de apagado automático de la unidad.
Para ajustar la hora de encendido automático.
1. Pulse el botón TIMER ON. El control remoto muestra TIMER
ON y en la pantalla LCD aparecen la última hora programada
para encender la unidad y una “h”. Ahora se puede reajustar
la hora de apagado automático para PONER EN MARCHA el
funcionamiento.
2. Pulse de nuevo TIMER ON para ajustar la hora de encendido
automático. Cada pulsación del botón incrementa el tiempo en
intervalos de 30 minutos, hasta 10 horas, y luego a intervalos de
1 hora hasta 24 horas.
3. Al activar el temporizador de encendido (TIMER ON), habrá
un retraso de medio segundo antes de que el control remoto
transmita la señal al aire acondicionado. Luego, tras unos 2
segundos, desaparece la “h” y vuelve a aparecer la temperatura
de ajuste en la pantalla LCD.
Para ajustar la hora de apagado automático.
1. Pulse el botón TIMER OFF. El control remoto muestra
TIMER OFF y en la pantalla LCD la última hora programada
para apagar la unidad y una “h”. Ahora se puede reajustar la
hora de apagado automático para PONER EN MARCHA el
funcionamiento.
2. Presione de nuevo el botón TIMER OFF (temporizador de
apagado) para ajustar la hora de apagado automático deseada.
Cada pulsación del botón incrementa el tiempo en intervalos de
30 minutos, hasta 10 horas, y luego a intervalos de 1 hora hasta
24 horas.
3. Tras ajustar el TEMPORIZADOR DE APAGADO, transcurrirá
medio segundo antes de que el control remoto transmita la
señal a la unidad de aire acondicionado. Luego, tras unos 2
segundos, desaparece la “h” y vuelve a aparecer la temperatura
de ajuste en la pantalla LCD.
Ejemplo de programación del temporizador
TIMER ON
(Operación de encendido automático)
La función TIMER ON resulta útil para encender
automáticamente la unidad antes de volver a casa. El
acondicionador de aire empezará a funcionar automáticamente
a la hora programada.
Ejemplo:
Para encender el aire acondicionado 6 horas después.
1. Pulse el botón TIMER ON, aparecerán en pantalla la última
hora programada para encender la unidad y una “h”.
2. Pulse TIMER ON para visualizar “6:0h” en la pantalla TIMER
ON del control remoto.
3. Espere unos 3 segundos y en la pantalla digital aparecerá la
temperatura. Ahora la función ya está activada.
IMPORTANTE
La hora de funcionamiento efectivo ajustada por el control remoto para el temporizador se limita a
los ajustes siguientes: 0.5, 1.0, 1.5, 2.0, 2.5, 3.0, 3.5, 4.0, 4.5, 5.0, 5.5, 6.0, 6.5, 7.0, 7.5, 8.0, 8.5,
9.0, 9.5, 10, 11, 12, 13, 14, 15,16,17, 18, 19, 20, 21, 22, 23 y 24.
9 10
TEMPORIZADOR ACTIVADO/DESACTIVADO
(Funcionamiento de encendido/apagado)
Esta función resulta útil para encender el aire acondicionado
antes de despertarse y apagarlo cuando salga de casa.
Ejemplo:
Para encender el aire acondicionado 2 horas después del ajuste
y apagarlo 5 horas después del ajuste.
1. Pulse el botón TIMER ON.
2. Pulse de nuevo el botón TIMER ON para visualizar 2,0 h en
la pantalla TIMER ON.
3. Pulse el botón TIMER OFF.
4. Pulse de nuevo el botón TIMER OFF para visualizar 5.0 h en
la pantalla TIMER OFF.
5. Espere a que el control remoto muestre la temperatura de
ajuste.
PRECAUCIÓN
El ajuste d el temporizador (TIMER ON o TIMER OFF) en
secuencia se produce directamente tras activar primero la hora
de ajuste.
Funcionamiento en modo AHORRO (EN REPOSO)
Al presionar el botón ECONOMY se activará la función de
funcionamiento económico, la temperatura establecida se
elevará (refrigeración) o se reducirá (calefacción) en 1ºC
durante los próximos 30 minutos y otro grado más en los 30
minutos siguientes. Esta nueva temperatura se mantendrá
durante 6 horas (en algunos modelos 7) antes de volver a la
temperatura seleccionada previamente. (NOTA: en algunos
modelos, la temperatura establecida aumentará (refrigeración)
o descenderá (calefacción) en 1ºC cada hora, durante 2 horas.
Esta nueva temperatura se mantendrá durante 5 horas y
luego se apagará la unidad.)
NOTA: La función ECONOMY/SLEEP sólo está disponible en
los modos de refrigeración, calefacción y automático.
TIMER OFF
(Operación de apagado automático)
La función TIMER OFF resulta útil para apagar
automáticamente la unidad tras irse a dormir.
El acondicionador de aire se detendrá automáticamente a la
hora fijada.
Ejemplo:
Para apagar el aire acondicionado 10 horas después.
1. Pulse el botón TIMER OFF, aparecerán en pantalla la última
hora programada para apagar la unidad y una “h”.
2. Pulse TIMER OFF para visualizar “10h” enla pantalla TIMER
OFF del control remoto.
3. Espere unos 3 segundos y en la pantalla digital aparecerá la
temperatura. Ahora la función ya está activada.
TEMPORIZADOR COMBINADO
(Ajustar los temporizadores de apagado y encendido
simultáneamente)
TEMPORIZADOR ACTIVADO/DESACTIVADO
(Funcionamiento de encendido/apagado)
Esta función le resultará útil cuando quiera apagar al
acondicionador de aire después de irse a la cama y volverlo a
encender por la mañana cuando se levante o cuando regrese a
casa.
Ejemplo:
Para apagar el aire acondicionado 2 horas después del ajuste y
encenderlo de nuevo 10 horas después del ajuste.
1. Pulse el botón TIMER OFF.
2. Pulse de nuevo el botón TIMER OFF para visualizar 2.0 h en
la pantalla TIMER OFF.
3. Pulse el botón TIMER ON.
4. Pulse de nuevo el botón TIMER ON para visualizar 10 h en la
pantalla TIMER ON.
5. Espere a que el control remoto muestre la temperatura de
ajuste.
11 12
The design and specifications are subject to change without prior notice
for product improvement. Consult with the sales agency or manufacturer
for details.
APD-9CR PORTABLE COLD FUNC.
APD-12CR PORTABLE COLD FUNC.
APD-12HR PORTABLE HEATING PUMP
AIR CONDITIONER
REMOTE CONTROLLER ILLUSTRATION
Thank you very much for purchasing our air conditioner.
Please read this owner’s manual carefully before using your
air conditioner.
CONTENTS
Handling the remote controller ..............................................................16
Remote controller Specifications...........................................................17
Function buttons .................. ..................................................................18
Indicators on LCD ...................................................................................20
How to use the buttons ..........................................................................21
Auto operation.........................................................................................21
Cooling/Heating/Fan operation..............................................................21
Dehumidifying operation .......................................................................22
Swing operation......................................................................................22
Timer operation.......................................................................................23
ECONOMY operation .............................................................................26
Handling the remote controller
Location of the remote controller.
- Use the remote controller within a distance of 8 meters from
the appliance, pointing it towards the receiver. Reception is
confirmed by a beep.
CAUTIONS
- The air conditioner will not operate if curtains, doors or other materials
block the signals from the remote controller to the indoor unit.
- Prevent any liquid from falling into the remote controller. Do not expose the
remote controller to direct sunlight or heat.
- If the infrared signal receiver on the indoor unit is exposed to direct
sunlight, the air conditioner may not function properly. Use curtains to
prevent the sunlight from falling on the receiver.
- If other electrical appliances react to the remote controller. either move
these appliances or consult your local dealer.
Replacing batteries
The remote controller is powed by two dry
batteries(R03/LR03X2) housed in the rear
part and protected by a cover.
(1) Remove the cover by pressing and sliding off.
(2) Remove the old batteries and insert the new
batteries,placing the(+) and (-) ends correctly.
(3) Reattach the cover by sliding it back into
position.
NOTE: When the batteries are removed, the
remote controller erases all programming.
After inserting new batteries, the remote
controller must be reprogrammed.
15 16
CAUTIONS
- Do not mix old and new batteries or batteries of a different type.
- Do not leave the batteries in the remote controller if it is not going
to be used for 2 or 3 months.
- Dispose of the old batteries in the special containers to be found
in the sales outlets.
Remote Controller Specifications
Function buttons
Model RG51B1/(C)EU, RG51B14/(C)E,RG51B31/(C)E
RG51B/(C)EU, RG51B16/(C)E,RG51B31/(C)EU
RG51B17/(C)EU, RG51B18/(C)E,RG51B32/(C)EU
RG51B19/(C)E-M, RG51B20/(C)E,RG51B30/(C)EU
RG51B25/(C)E, RG51B26/(C)EU;RG51B27/(C)E,
RG51B30/(C)E.
Rated Voltage 3.0V(Dry batteries R03/LR03 2)
Lowest Voltage of
CPU Emitting Signal
2.0V
Signal Receiving
Range
8m
Environment -5ºC 60ºC(-41ºC ~ 140ºF)
NOTE:
Temperature setting display:
Celsius scale( C): RG51B14/(C)E, RG51B16/(C)E,RG51B18/(C)E,RG51B31/(C)
E,RG51B19/(C)E-M, RG51B20/(C)E,RG51B25/(C)E,RG51B27/(C)E,RG51B30/(C)
E.
Fahrenheit scale( F): RG51B/(C)EU, RG51B1/(C)EU, RG51B17/(C)EU,RG51B26/
(C)EU, RG51B30/(C)EU,RG51B32/(C)EU,RG51B31/(C)EU.
Perfomance Feature
Operating Mode: AUTO, COOL, DRY, HEAT(Cooling only model without), and FAN.
2. Timer Setting Function in 24 hours.
3. Indoor Setting Temperature Range : 17C~30 C(62OF~88OF).
4. Full function of LCD (Liquid Crystal Display)
NOTE: All the illustrations in this manual are for explanation purpose only. Your air
conditioner may be slightly different.The actual shape shall prevail.
Model: RG51B14/(C)E,
RG51B16/(C)E,
RG51B18/(C)E,
RG51B19/(C)E-M,
RG51B20/(C)E
RG51B31/(C)E
RG51B30/(C)E.
NOTE:
- RG51B16/(C)E ,RG51B18/(C)E
models have no SWING feature;
- RG51B18/(C)E ,RG51B19/(C)
E-M, RG51B20/(C)E models
have no LED DISPLAY feature.
- RG51B19/(C)E-M model has no
MED FAN feature.
- RG51B31/(C)E model
ECONOMY button is instead of
SLEEP button.
- RG51B30/(C)E model has no
MED FAN and SWING features
1. TEMP DOWN Button
Push this button to decrease the indoor temperature
setting in 1ºC(2ºF) increments to 30ºC(88ºF).
2. TEMP UP Button
Push this button to increase the indoor temperature
setting in 1ºC(2ºF) increments to 17ºC(62ºF).
3. MODE Button
Each time the button is pressed, the operation
mode is selected in the sequence of the following:
> AUTO > COOL > DRY > HEAT > FAN
NOTE: Heat mode is for Cooling & Heating models only.
4. SWING Button(on some models)
Used to stop or start louver movement and
set the desired up/down airflow direction.
5. RESET Button
Once the recessed RESET button is pressed,
all of the current settings will be cancelled
and the controller will return to the initial settings.
6. ON/OFF Button
Operation starts when this button is pressed
and stops when the button is pressed again.
7. FAN SPEED Button
Used to select the fan speed in four steps:
> Auto -> Low > Med > High
- Some models have no MED FAN feature.
8.TIMER ON Button
Press this button to activate the Auto-on time setting.
Each press will increase the time setting in 30 minutes
increments, up to 10 hours, then at 1 hour increments up
to 24 hours. To cancel the Auto-on time setting, just press
the button until
the time setting is 0.0.
9. ECONOMY(SLEEP) Button
Select this function during the sleeping time. It can
maintain the most comfortable temperature and save
energy. This function is available on COOL, HEAT or
AUTO mode only .
Model: RG51B25/(C)E;
RG51B27/(C)E.
NOTE:
RG51B25/(C)E model has no
SWING feature.
17 18
Function buttons (continued)
Model: RG51B1/(C)EU,
RG51B/(C)EU,
RG51B26/(C)EU,
RG51B30/(C)EU,
RG51B32/(C)EU,
RG51B31/(C)EU.
NOTE: RG51B/(C)EU models
have no SWING and FOLLOW
ME buttons ;RG51B1/(C)EU
models have no FOLLOW ME
button; RG51B30/(C)EU models
have no SWING ,FOLLOW
ME buttons and MED FAN
feature,and SLEEP button instead
of ECONOMY button; RG51B32/
(C)EU models have no FOLLOW
ME button and MED FAN
feature,and SLEEP button instead
of ECONOMY button;RG51B31/
(C)EU models have on FOLLOW
ME button.
MODE display
Displays the current selected mode. Including AUTO,
COOL, DRY, HEAT (cooling & heating models only)and
FAN.
Transmission Indiscator
This transmission indicator will light when remote
controller transmits signals to the indoor unit.
Temp./Timer display
The temperature setting (from 17OC(62O F) to
30OC(88OF)) or timer setting (0~24h) will be displayed.
If FAN mode is selected, there will be no display.
ON/OFF display
This indicator will be displayed when the unit is
operating.
MODE display (FAN mode)
FAN SPEED display
Displays the selected fan speed: AUTO, HIGH, MED
and LOW. Nothing displays when the fan speed is
selected in AUTO speed. When AUTO or DRY Mode is
selected, there will be no signals displayed.
NOTE: RG51B19/(C)E-M model has no MED FAN speed
feature.
Model: RG51B17/(C)EU
NOTE: While the unit is running under SLEEP mode,
it would be cancelled if ON/OFF, FAN SPEED, SLEEP
or MODE button is pressed.
10. TIMRT OFF Button
Press this button to activate the Auto-off time
setting. Each press will increase the time setting
in 30 minutes increments, up to 10 hours, then at
1 hour increments up to 24 hours. To cancel the
Auto-off time setting, just press the button until
the time setting is 0.0.
11. LOCK Button
Press this recessed button to lock all current
settings, and the remote controller will not accept
any operation except that of the LOCK. Use the
LOCK mode when you want to prevent settings
from being changed accidentally. Press the LOCK
button again to cancel the LOCK function. A lock
symbol will appear on the remote controller display
when the lock function is activated.
12. LED Display Button
Press this button to clear the display on the
indoor unit, press it again to light the display .
NOTE: RG51B18/(C)E ,RG51B19/(C)E-M,
RG51B20/(C)E models have no this feature.
13. FOLLOW ME/TEMP SENSING Button
- Press this button to initiate FOLLOW ME function.
- When the Follow Me function is activated, the
remote display is actual temperature at its location.
The remote control will send this signal to the air
conditioner every 3 minutes interval until press
the Follow Me button again.
- The Follow Me function is not available under
DRY and FAN mode.
- Switch the operation mode or turn off the unit will
cancel the follow me function automatically.
14. ION Button
When push this button, the ion generator is
energized and will help to remove pollen and
impurities from the air.
FOLLOW ME display
When pressing FOLLOW ME/TEMP SENSING button
in COOL or HEAT mode, the remote sensing function is
activated and this indicator displays
TIMER display
This display area shows the settings of the TIMER.
That is, if only the Auto-on time function is set, it will
display TIMER ON. If only the Auto-off time function
is set, it will display TIMER OFF. If both functions are
set, it will display TIMER ON OFF which indicates you
have chosen both the Auto-on time and Auto-off time.
LOCK indiscator
LOCK display is displayed when pushing the LOCK
button. Push the LOCK button to clear display.
Indicators on LCD
19 20
Dehumidifying operation
Ensure the unit is plugged in and power is available. The
OPERATION indicator on the display panel of the indoor
unit illuminates.
1. Press the MODE button to select DRY mode.
2. Press the TEMP button to set the desired temperature.
The temperature can be set within a range of increments.
3. Press the ON/OFF button to start the air conditioner.
17ºC (62ºF)~ 30ºC in 1ºC(2ºF)
NOTE
In the Dehumidifying mode, you can not switch
the fan speed. It has already been automatically
controlled.
Swing operation(on some models)
Use the SWING button to adjust the Up/Down airflow
direction .
1. When press the button once and quickly, the air flow
direction setting feature of the louver is activated. The
moving angle of the louver is 6o for each press. Keep
pressing the button to move the louver to the desired
position.
NOTE:On some models press it to initiate the Auto
swing feature only.
2. If keep pressing the SWING button without releasing
for 2 more seconds, the auto swing feature of the louver
is activated. The horizontal louver would swing up/down
automatically.
Press it again to stop
.
NOTE
When the louver swing or move to a position which would
affect the cooling and heating effect of the air conditioner,
it would automatically change the swing/ moving
direction.
How to use the buttons
Auto operation
Ensure the unit is plugged in and power is available. The
OPERATION indicator on the display panel of the indoor
unit illuminates.
1. Press the MODE button to select Auto.
2. Press the TEMP button to set the desired temperature.
The temperature can be set within a range of
17ºC(62ºF)~ 30ºC in 1 C(2ºF) increments.
3. Press the ON/OFF button to start the air conditioner.
NOTE
1. In the Auto mode, the air conditioner can logically
choose the mode of Cooling, Fan, Heating and
Dehumidifying by sensing the difference between the
actual ambient room temperature and the set
temperature on the remote controller.
2. In the Auto mode, you can not switch the fan speed.
It has already been automatically controlled.
3. If the Auto mode is not comfortable for you , the
desired mode can be selected manually.
Cooling /Heating/Fan operation
Ensure the unit is plugged in and power is available.
1. Press the MODE button to select COOL, HEAT,
(cooling & heating models only) or FAN mode.
2. Press the TEMP button to set the desired
temperature. The temperature can be set within a range
of 3. Press the FAN SPEED button to select the fan
speed in four steps- Auto, Low, Med,or High.
4. Press the ON/OFF button to start the air conditioner.
17ºC(62ºF)~ 3ºC in 1ºC(2ºF) increments.
NOTE
In the FAN mode, the setting temperature is not
displayed in the remote controller and you are not able
to control the room temperature either. In this case, only
step 1, 3 and 4 may be performed
21 22
Timer operation
Press the TIMER ON button can set the auto-on time of
the unit. And press the TIMER OFF button can set the
auto-off time of the unit.
To set the Auto-on time.
1. Press the TIMER ON button. The remote controller
shows TIMER ON, the last Auto-on setting time and
the signal “h” will be shown on the LCD display area.
Now it is ready to reset the Auto-on time to START the
operation.
2. Push the TIMER ON button again to set desired
Auto-on time. Each time you press the button, the time
increases in 30 minutes increments, up to 10 hours, then
at 1 hour increments up to 24 hours.
3. After setting the TIMER ON ,there will be a onehalf
second delay before the remote controller transmits the
signal to the air conditioner. Then, after approximately
another 2 seconds, the signal “h” will disappear and
the set temperature will re-appear on the LCD display
window.
To set the Auto-off time.
1. Press the TIMER OFF button. The remote controller
shows TIMER OFF, the last Auto-off setting time and
the signal “h” will be shown on the LCD display area.
Now it is ready to reset the Auto-off time to START the
operation.
2. Push the TIMER OFF button again to set desired
Auto-off time. Each time you press the button, the time
increases in 30 minutes increments, up to 10 hours, then
at 1 hour increments up to 24 hours.
3. After setting the TIMER OFF ,there will be a onehalf
second delay before the remote controller transmits the
signal to the air conditioner. Then, after approximately
another 2 seconds, the signal “h” will disappear and
the set temperature will re-appear on the LCD display
window.
Example of Timer setting
TIMER ON
(Auto-on Operation)
The TIMER ON feature is useful when you want the
unit to turn on automatically before say when you
return home. The air conditioner will automatically start
operating at the set time.
Example:
To start the air conditioner in 6 hours.
1. Press the TIMER ON button, the last setting of starting
operation time and the signal “h” will show on the display
area.
2. Press the TIMER ON button to display “6:0h” on the
TIMER ON display of the remote controller.
3. Wait for about 3 seconds and the digital display area
will show the temperature again. Now this function is
activated.
IMPORTANT
The effective operation time set by the remote controller for the timer function is limited
to the following settings: 0.5, 1.0, 1.5, 2.0, 2.5, 3.0, 3.5, 4.0, 4.5, 5.0, 5.5, 6.0, 6.5, 7.0,
7.5, 8.0, 8.5, 9.0, 9.5, 10, 11, 12, 13, 14, 15,16,17, 18, 19, 20, 21, 22, 23 and 24.
23 24
TIMER ON TIMER OFF
(Off Start Stop operation)
This feature is useful when you want to start the air
conditioner before you wake up and stop it after you
leave the house.
Example:
To start the air conditioner 2 hours after setting, and stop
it 5 hours after setting.
1. Press the TIMER ON button.
2. Press the TIMER ON button again to display 2.0h on
the TIMER ON display.
3. Press the TIMER OFF button.
4. Press the TIMER OFF button again to display 5.0h on
the TIMER OFF display.
5. Wait for the remote control to display the setting
temperature.
CAUTION
The timer setting(TIMER ON or TIMER OFF) that in
sequence occurs directly after the set time will be
activated first.
ECONOMY(SLEEP) operation
When you press the ECONOMY button, the economic
running function will be activated, the set temperature will
increase(cooling) or decrease(heating) by 1oC(2oF) over
the next 30 minutes and by another 1oC(2oF) after an
additional 30 minutes.This new temperature will be
maintained for 6 (on some models 7 ) hours before it
returns to the originally selected temperature.(NOTE:On
some models, the set temperature will increase (cooling)
or decrease (heating) by 1oC(2oF) per hour for 2 hours.
This new temperature will be maintained for 5 hours ,
then the unit is off.)
NOTE: The ECONOMY/SLEEP function is only available
under Cooling, Heating and AUTO operation.
TIMER OFF
(Auto-off Operation)
The TIMER OFF feature is useful when you want
the unit to turn off automatically after you go to bed.
The air conditioner will stop automatically at the set
time.
Example:
To stop the air conditioner in 10 hours.
1. Press the TIMER OFF button, the last setting of
stopping operation time and the signal “h” will show on
the display area.
2. Press the TIMER OFF button to display “10h” on the
TIMER OFF display of the remote controller.
3. Wait for about 3 seconds and the digital display area
will show the temperature again. Now this function is
activated.
COMBINED TIMER
(Setting both ON and OFF timers simultaneoulsy)
TIMER OFF TIMER ON
(On Stop Start operation)
This feature is useful when you want to stop the air
conditioner after you go to bed, and start it again in the
morning when you wake up or when you return home.
Example:
To stop the air conditioner 2 hours after setting and start
it again 10 hours after setting.
1. Press the TIMER OFF button.
2. Press the TIMER OFF button again to display 2.0h on
the TIMER OFF display.
3. Press the TIMER ON button.
4. Press the TIMER ON button again to display 10h on
the TIMER ON display.
5. Wait for the remote control to display the setting
temperature.
25 26
Le design ainsi que les spécifications sont sujets à des changements
sans préavis destinées à l'amélioration du produit. Veuillez consulter
votre point de vente ou le fabricant pour plus de détails.
APD-9CR MOBILE FROID SEUL
APD-12CR MOBILE FROID SEUL
APD-12HR MOBILE POMPE À CHALEUR
CLIMATISEUR
ILLUSTRATION DE LA TÉLÉCOMMANDE
Merci d’avoir acheté notre climatiseur.
Veuillez lire soigneusement ce manuel du propriétaire avant
d'utiliser votre climatiseur.
TABLE DES MATIÈRES
Utilisation de la télécommande .........................................................................30
Spécifications de la télécommande...................................................................31
Boutons de fonction .................. ........................................................................32
Indicateurs sur l’écran LCD ...............................................................................34
Utilisation des touches ......................................................................................35
Mode AUTOMATIQUE..........................................................................................35
Mode Climatisation/Chauffage/Ventilateur........................................................35
Mode DÉSHUMIDIFICATION ..............................................................................36
Opération de balayage........................................................................................36
Fonctionnement de la minuterie........................................................................37
MODE ECONOMIE ..............................................................................................40
Utilisation de la télécommande
Emplacement de la télécommande.
- Veuillez utiliser la télécommande en vous tenant dans un rayon de 8 mètres
de l'appareil, et en la dirigeant vers le récepteur. La réception est confirmée
par un signal sonore.
ATTENTION
- Le climatiseur ne fonctionnera pas si des rideaux, des portes ou autres objets bloquent les
signaux envoyés par la télécommande à l'unité intérieure.
- Empêchez tout liquide de tomber dans la télécommande. N'exposez pas la télécommande à la
lumière directe du soleil ou à une source de chaleur.
- Si le récepteur de signal infrarouge de l'unité intérieure est exposé à la lumière directe du
soleil, il se peut que le climatiseur ne fonctionne pas correctement. Utilisez empêcher que le
récepteur soit exposé aux rayons du soleil.
- Si d'autres appareils électriques réagissent à la télécommande, veuillez soit déplacer ces
appareils, soit consulter votre revendeur local.
Remplacement des piles
La télécommande est alimentée par deux piles sèches
(R03/LR03X2). Elles se trouvent dans la partie arrière
et elles sont protégées par un couvercle.
(1) Retirez le couvercle en appuyant dessus et en le faisant glisser
en arrière.
(2) Retirer les piles usagées et remplacez-les par de nouvelles
plies, en respectant les polarités (+) et (-).
(3) Remettez le couvercle du compartiment à
piles.
REMARQUE: lorsque vous retirez les piles, la
télécommande efface toutes les programmations dont elle disposait.
Après avoir remplacé les piles, une nouvelle
programmation de la télécommande sera nécessaire.
29 30
PRECAUTIONS
- Ne pas mélanger les piles usagées et les piles nouvelles ni les piles de différents types.
- Ne laissez pas les piles dans la télécommande si vous n’allez pas
l’utiliser pendant 2 ou 3 mois.
- Veuillez vous débarrasser des piles usagées en les déposant dans
les récipients spéciaux que vous trouverez dans les commerces.
Spécifications de la télécommande
Boutons de fonction
Modèle RG51B1/(C)EU, RG51B14/(C)E,RG51B31/(C)E
RG51B/(C)EU, RG51B16/(C)E,RG51B31/(C)EU
RG51B17/(C)EU, RG51B18/(C)E,RG51B32/(C)EU
RG51B19/(C)E-M, RG51B20/(C)E,RG51B30/(C)EU
RG51B25/(C)E, RG51B26/(C)EU; RG51B27/(C)E,
RG51B30/(C)E.
Tension nominale 3.0V(Piles sèches R03/LR03 2)
Tension la plus basse du
signal d’émission de l’
UC
2,0 V
Réception de signal
Intervalle
8 m
Environnement -5ºC 60ºC (-41ºC ~ 140ºF)
REMARQUE:
Affichage du réglage de la température :
Échelle Celsius (C) : RG51B14/(C)E, RG51B16/(C)E,RG51B18/(C)E,RG51B31/(C)E,RG51B19/(C)E-M,
RG51B20/(C)E,RG51B25/(C)E,RG51B27/(C)E,RG51B30/(C)E.
Échelle Fahrenheit (F) : RG51B/(C)EU, RG51B1/(C)EU, RG51B17/(C)EU,RG51B26/(C)EU, RG51B30/
(C)EU,RG51B32/(C)EU,RG51B31/(C)EU.
Caractéristique des Performances
Mode de fonctionnement : AUTOMATIQUE, CLIMATISATION, SÉCHAGE, CHAUFFAGE (les modèles à
climatisation seule ne disposent pas de cette fonction), et VENTILATEUR.
2. Fonction de réglage du Timer sur 24 heures.
3. Intervalle de réglage de la température intérieure : 17C~30 C(62OF~88OF).
4. Pleine Fonction complète de l’écran d'affichage à cristaux liquides (LCD)
REMARQUE: toutes les images de ce manuel sont exposées à titre explicatif uniquement. Votre
climatiseur peut être légèrement différent. La forme réelle prévaudra.
Modèle: RG51B14/(C)E,
RG51B16/(C)E,
RG51B18/(C)E,
RG51B19/(C)E-M,
RG51B20/(C)E
RG51B31/(C)E
RG51B30/(C)E.
REMARQUE :
- Les modèles RG51B16/(C)E
,RG51B18/(C)E ne disposent pas de la
fonction SWING (oscillation);
- Les modèles RG51B18/(C)E
,RG51B19/(C)E-M, RG51B20/(C)E ne
disposent pas d’ÉCRAN D’AFFICHAGE
à cristaux liquides (LED).
- Le modèle RG51B19/(C)E-M
RG51B19/(C) ne dispose pas de l’option
MED FAN (ventilateur moyen).
- Sur le modèle RG51B31/(C)E, le
bouton ECONOMY (ÉCONOMIE)
remplace le bouton SLEEP (SOMMEIL).
- Le modèle RG51B30/(C)E ne dispose
pas des caractéristiques MED FAN
(VENTILATEUR MOYEN) et SWING
(OSCILLATION)
1. Bouton TEMP DOWN (BAISSER TEMPÉRATURE)
Appuyez sur ce bouton pour diminuer la température intérieure
par crans de 1°C (2°F) jusqu’à 30°C (88°F).
2. Touche TEMP UP
Appuyez sur ce bouton pour augmenter la température
intérieure par crans de 1°C (2°F) à 17°C (62°F).
3. Bouton
Chaque fois que vous appuierez sur le bouton,
le mode d'opération sera sélectionné dans l'ordre suivant :
> AUTO > CLIM. > SÉCHAGE > CHAUF. > VENT.
REMARQUE: Le mode chauffage ne concerne que les modèles
avec Climatisation et Chauffage.
4. Bouton d'OSCILLATION (sur certains modèles)
On l’utilise pour arrêter ou démarrer
le mouvement du volet et pour sélectionner la direction du flux
de l'air que l’on souhaite (vers le haut ou vers le bas.
5. Bouton
Lorsque l’on appuie sur le bouton RESET (alors qu’il était
enfoncé)
, tous les réglages courants sont annulés et le contrôleur revient
à ses réglages d’origine.
6. Bouton
L'opération commence lorsque ce bouton est pressé et elle
s'arrête lorsque l’on appuie dessus de nouveau.
7. Bouton FAN SPEED (vitesse du ventilateur)
On s’en sert pour sélectionner la vitesse du ventilateur en quatre
étapes :
> Auto -> Faible > Moyenne > Élevée
- Certains modèles ne proposent pas l’option MED FAN (vitesse
ventilateur moyenne)
8.Bouton TIMER ON (minuterie
Appuyez sur cette touche pour activer la séquence d’allume
automatique. Chaque pression fera avancer le réglage de
l’heure par plages de 30 minutes, et ce, jusqu'à arriver à un
total de 10 heures. Ensuite, l’avance se fera par plages d’une
heure jusqu'à ce que l’on atteigne les 24 heures. Pour annuler le
réglage de l’heure de Démarrage
Automatique, il vous suffira d’appuyer sur le bouton jusqu'à ce
que le réglage affiche 0.0.
9. Bouton ECONOMY(SLEEP) (économie (sommeil))
Sélectionnez cette fonction pendant vos heures de sommeil.
Cette fonction peut maintenir la température la plus agréable
dans la pièce et économiser de l'énergie. Cette fonction n’est
disponible que dans les modes CLIMATISATION, CHAUFFAGE
ou AUTOMATIQUE.
Modèle : RG51B25/(C)E;
RG51B27/(C)E.
REMARQUE :
le modèle de RG51B25/(C)E ne dispose
pas de la fonction SWING (oscillation).
31 32
Boutons de fonction (suite)
Modèle: RG51B1/(C)EU,
RG51B/(C)EU,
RG51B26/(C)EU,
RG51B30/(C)EU,
RG51B32/(C)EU,
RG51B31/(C)EU.
REMARQUE: Les modèles RG51B/
(C)EU
ne disposent pas des boutons SWING
(oscillation) et FOLLOW ME (suivez-
moi); les modèles RG51B1/(C)EU ne
disposent pas du bouton FOLLOW ME
(suivez-moi); Les modèles RG51B30/
(C)EU ne disposent pas des boutons
SWING (oscillation) et FOLLOW ME
(suivez-moi) et ne proposent pas
l’option MED FAN (vitesse ventilateur
moyenne), et proposent le bouton
SLEEP (sommeil) à la place du bouton
ECONOMY (économie) ; Les modèles
RG51B32/(C)EU ne disposent pas du
bouton FOLLOW ME (suivez-moi) et ne
proposent pas l’option MED FAN (vitesse
ventilateur moyenne), et le bouton
SLEEP (sommeil) remplace le bouton
ECONOMY (économie); les modèles
RG51B31/(C)EU ne disposent pas du
bouton FOLLOW ME (suivez-moi).
Affichage du MODE
Affiche le mode sélectionné en cours. Cela comprend les
modes AUTO, CLIMATISATION, SÉCHAGE, CHAUFFAGE (ne
concerne que les modèles avec refroidissement et chauffage)
et VENTILATEUR.
Indicateur de Transmission
Ce témoin indicateur de transmission s’allume
lorsque la télécommande transmet des signaux à l’unité
intérieure.
Affichage de la Température / du Programmateur
Le réglage de la température (de 17°C (62°F) à 30°C (88°F))
ou le réglage du programmateur (0~24h) s’affichera.
Si le mode de VENTILATEUR est sélectionné, rien ne
s’affichera.
Affichage ON / OFF
Cet indicateur s’affichera lorsque l'unité est en fonctionnement.
Affichage du MODE (Mode VENTILATEUR)
Affichage VITESSE DU VENTILATEUR
Affiche la vitesse sélectionnée du ventilateur : AUTO, HIGH,
MED e LOW. Rien ne s’affiche lorsque la vitesse du ventilateur
est sélectionnée en mode de vitesse AUTOMATIQUE. Lorsque
le mode AUTOMATIQUE ou SÉCHAGE est sélectionné, rien
ne s’affiche.
REMARQUE: Le modèle RG51B19/(C)E-M ne propose pas la
fonction MED FAN speed (vitesse ventilateur moyenne).
Modèle: RG51B17/(C)EU
REMARQUE: Lorsque l'unité fonctionne en mode SLEEP
(sommeil) mode,
la fonction sera annulée si l’on appuie sur une des touches
suivantes : ON/OFF (marche-arrêt), FAN SPEED (vitesse
ventilateur), SLEEP
(sommeil) ou MODE.
10. Bouton TIMER OFF (minuterie arrêtée)
Appuyez sur cette touche pour activer la séquence d’arrêt
automatique. Chaque pression fera avancer le réglage de
l’heure par plages de 30 minutes, et ce, jusqu'à arriver à un
total de 10 heures. Ensuite, l’avance se fera par plages d’une
heure jusqu'à ce que l’on atteigne les 24 heures. Pour annuler
le réglage de l’heure d’Arrêt Automatique, il vous suffira
d’appuyer sur le bouton jusqu'à ce que le réglage affiche 0.0.
11. Bouton LOCK (verrouillage)
Appuyez sur ce bouton qui est enfoncé afin de verrouiller
tous les réglages courants. À ce moment là, la télécommande
n'acceptera aucune opération sauf celles qui ont été
VERROUILLÉES. Utilisez le mode de VERROUILLAGE
quand vous voulez éviter que les réglages ne soient modifiés
par accident. Appuyer sur le bouton LOCK de nouveau pour
annuler la fonction de VERROUILLAGE. Un symbole de verrou
apparaîtra sur l’écran de la télécommande lorsque la fonction
de verrouillage est activée.
12. Bouton LED Display (affichage LED)
Appuyez sur ce bouton afin d’effacer l’affichage sur l'unité
intérieure, puis appuyez de nouveau dessus pour éclairer
l'affichage .
REMARQUE: RG51B18/(C)E ,RG51B19/(C)E-M,
Les modèles de RG51B20/(C)E ne disposent pas de cette
caractéristique.
13. Bouton FOLLOW ME/TEMP SENSING
- Appuyez sur ce bouton pour lancer la fonction SUIVEZ-MOI.
- Lorsque la fonction SUIVEZ-MOI est activée, l'affichage de la
télécommande montre la température réelle à l’endroit où elle
se trouve.
La télécommande enverra ce signal au clim
atiseur toutes les 3 minutes jusqu'à ce que vous appuyez sur
le bouton Follow Me (suivez-moi) de nouveau.
- La fonction SUIVEZ-MOI n'est pas disponible dans les modes
SÉCHAGE et VENTILATEUR.
- Si vous changez le mode de fonctionnement ou si vous
arrêtez l'unité, cela annulera la fonction SUIVEZ-MOI
automatiquement.
14. Bouton ION
En appuyant sur ce bouton, le générateur d'ions sera activé
et contribuera à retirer le pollen et les impuretés de l'air.
Affichage FOLLOW ME (suivez-moi)
En appuyant sur le bouton FOLLOW ME/TEMP SENSING
(suivez-moi/détection de température) en mode COOL ou
HEAT (froid ou chaud), la fonction de télédétection est activée
et l’écran d’affichage indique
Affichage TIMER (minuterie)
Cet affichage indique les réglages du TIMER.
C'est-à-dire, s’il n’y a que la fonction de démarrage
automatique qui est réglée, l’affichage indiquera TIMER ON
(Programmateur Allumé). S’il n’y a que la fonction d’arrêt
automatique (Auto-off) qui est réglée, l’affichage indiquera
TIMER OFF (Programmateur Éteint). Si les deux fonctions sont
réglées, l’affichage indiquera TIMER ON OFF (Programmateur
Marche Arrêt), ce qui indique que les fonctions de démarrage
automatique et d’arrêt automatique ont été sélectionnées.
Indicateur LOCK (verrou)
Affichage de VERROUILLAGE s'affiche en appuyant sur
la touche LOCK. Appuyez sur la touche LOCK à nouveau pour
effacer l’affichage en cours.
Indicateurs sur l’écran LCD
33 34
Mode DÉSHUMIDIFICATION
Veillez à ce que l'unité soit bien branchée et à qu’il y ait du
courant. Le voyant OPERATION sur le panneau d’affichage de
l’unité intérieure s’allume.
1. Appuyez sur la touche MODE pour sélectionner SÉCHAGE.
2. Appuyez sur la touche TEMP pour régler la température
souhaitée. Il est possible de régler la température par paliers.
3. Appuyez sur la touche ON/OFF pour démarrer le climatiseur.
17ºC (62ºF)~ 30ºC à 1ºC(2ºF)
REMARQUE
En mode Déshumidificateur, vous ne pouvez
pas changer la vitesse du ventilateur. Elle est réglée
automatiquement.
Opération d'oscillation (sur certains modèles)
Utilisez le bouton SWING pour régler la direction du flux de l'air
(vers le haut ou vers le bas).
1. En appuyant sur le bouton une fois et rapidement, vous
activerez le dispositif permettant de diriger la direction du souffle
de l’air par l’orientation du volet. La variation de l’inclinaison du
volet est de 6° à chaque pression. Continuez à appuyer sur le
bouton pour déplacer le volet jusqu’à ce qu’il atteigne la position
souhaitée.
NOTE : sur certains modèles, appuyez sur le bouton pour lancer
le mode oscillation
automatique seulement.
2. Si vous continuez à appuyer sur le bouton SWING sans
le lâcher pendant 2 secondes supplémentaires, le dispositif
automatique d'oscillation du volet s’activera. Le volet horizontal
oscillera de haut en bas de façon automatique.
Appuyez dessus de nouveau pour arrêter
.
REMARQUE
Lorsque le volet bascule ou se met dans une position qui
pourrait affecter l’effet de refroidissement et l'effet thermique
du climatiseur, il changera automatiquement de mouvement
d'oscillation/de sens de mouvement.
Utilisation des touches
Mode AUTOMATIQUE
Veillez à ce que l'unité soit bien branchée et à qu’il y ait du
courant. Le voyant OPERATION sur le panneau d’affichage de
l’unité intérieure s’allume.
1. Utilisez la touche MODE pour sélectionner le mode Auto.
2. Appuyez sur la touche TEMP pour régler la température
souhaitée. Il est possible de régler la température dans
une plage comprise entre 17ºC (62ºF) et ~ 30ºC avec des
augmentations d’1ºC (2ºF).
3. Appuyez sur la touche ON/OFF pour démarrer le climatiseur.
REMARQUE
1. En mode automatique, le climatiseur peut sélectionner de
façon logique
le mode Refroidissement, Ventilateur, Chauffage et
Déshumidification en sentant la différence entre la
température ambiante réelle et la température réglée sur la
télécommande.
2. En mode Automatique, vous ne pouvez pas changer la
vitesse du ventilateur.
Elle est réglée automatiquement.
3. Si le mode AUTOMATIQUE n’est pas confortable,
le mode souhaité peut être sélectionné manuellement.
Mode Climatisation/Chauffage/Ventilateur
Veillez à ce que l'unité soit bien branchée et à qu’il y ait du
courant.
1. Appuyez sur le bouton MODE pour sélectionner le mode
COOL (froid), HEAT (chaud),
(modèles refroidissement et de chauffage uniquement) ou le
mode FAN (ventilateur).
2. Appuyez sur la touche TEMP pour régler la température
souhaitée.
Il est possible de régler la température peut être placée dans
une marge de 3. Appuyer sur le bouton FAN SPEED pour
sélectionner la vitesse du ventilateur en quatre étapes Auto,
Low, Med, ou High (Auto, Basse, Moyenne, ou Élevée).
4. Appuyez sur la touche ON/OFF pour démarrer le climatiseur.
le ~ 17°C (62°F) 3°C dans 1°C (2°F) incrémente.
REMARQUE
En mode VENTILATEUR, la température
réglée n'est pas affichée sur la télécommande et vous ne
pourrez pas régler la température ambiante non plus. Dans ce
cas, vous ne pourrez réaliser que les étapes 1, 3 et 4
35 36
Fonctionnement de la minuterie
Pressez la touche TIMER ON pour régler l’heure de démarrage
automatique de l’unité. Et pressez le TIMER OFF pour régler
l’heure d’arrêt auto de l’unité.
Pour régler l’Heure d’Acctionnement automatique (Auto-on
time).
1. Pressez la touche TIMER ON. La télécommande affiche
TIMER ON (Programmateur en marche). La dernière heure de
démarrage automatique et la lettre "h" s’afficheront sur la zone
d'affichage LCD. Maintenant le dispositif est prêt pour la remise
à zéro de l'heure d’Arrêt automatique de démarrage.
2. Appuyez sur la touche TIMER ON de nouveau pour régler
l’heure de Démarrage automatique. À chaque pression sur le
bouton, l’heure avance de 30 minutes, jusqu'à atteindre les 10
heures. Ensuite, on effectuera des sauts d’une heure jusqu’à
arriver à 24 heures.
3. Après réglé TIMER ON (minuterie en marche), il y aura un
retard d’une demi-
seconde avant que la télécommande transmette le signal au
climatiseur. Puis, après encore environ 2 secondes, la lettre
"h" disparaîtra et la température réglée réapparaîtra sur l’écran
d'affichage à cristaux liquides.
Pour régler l’Heure d’Arrêt automatique (Auto-off time).
1. Pressez la touche TIMER OFF. La télécommande affiche
TIMER OFF (Programmateur arrêté). La dernière heure d’Arrêt
automatique et la lettre "h" apparaitront sur l’écran LCD.
Maintenant le dispositif est prêt pour la remise à zéro de l'heure
d’Arrêt automatique de démarrage.
2. Appuyez de nouveau sur le bouton TIMER OFF (arrêt
minuterie) afin de régler l’heure
d’arrêt Automatique souhaitée. À chaque pression sur le bouton,
l’heure avance de 30 minutes, jusqu'à atteindre les 10 heures.
Ensuite, on effectuera des sauts d’une heure jusqu’à arriver à
24 heures.
3. Une fois le Timer off réglé, une demi
seconde s’écoulera avant que la télécommande transmette
le signal à la télécommande. Puis, après encore environ 2
secondes, la lettre "h" disparaîtra et la température réglée
réapparaîtra sur l’écran d'affichage à cristaux liquides.
Exemple de réglage de minuterie
TIMER ON
(Allumage Automatique)
Cette fonction PROGRAMMATEUR EN MARCHE vous sera
utile lorsque vous souhaitez que la climatisation s'allume
automatiquement avant de rentrez chez vous. Le climatiseur
démarre automatiquement à l'heure programmée.
Exemple :
Pour que le climatiseur s’allume 2 heures après.
1. Appuyez sur le bouton TIMER ON. Le dernier réglage
d’heure de démarrage et la lettre "h" s’afficheront sur l’écran de
visualisation.
2. Appuyez sur le bouton TIMER ON, afin d’afficher “6h” sur
l’écran d’affichage PROGRAMMATEUR EN MARCHE de la
télécommande.
3. Attendez pendant environ 3 secondes et l’écran d’affichage
numérique fera apparaitre la température de nouveau.
Maintenant, cette fonction a été activée.
IMPORTANT
L’heure de mise en route effective réglée par la télécommande concernant les fonctions du
programmateur se limite aux réglages suivants : 0.5, 1.0, 1.5, 2.0, 2.5, 3.0, 3.5, 4.0, 4.5, 5.0, 5.5,
6.0, 6.5, 7.0, 7.5, 8.0, 8.5, 9.0, 9.5, 10, 11, 12, 13, 14, 15,16,17, 18, 19, 20, 21, 22, 23 et 24.
37 38
TIMER ON TIMER OFF
(Démarrage de l'opération Marche Arrêt)
Ce dispositif est utile lorsque vous souhaitez que le climatiseur
s’allume avant votre réveil ou qu’il s’arrête après votre départ.
Exemple :
Pour que le climatiseur s’allume 2 heures après le réglage, et
pour qu’il s’arrête 5 heures après le réglage.
1. Pressez la touche TIMER ON.
2. Appuyez sur le bouton TIMER ON de nouveau, afin de voir
apparaître 2,0 h sur l’écran d’affichage PROGRAMMATEUR EN
MARCHE.
3. Pressez la touche TIMER OFF.
4. Appuyez sur le bouton TIMER OFF de nouveau, afin de voir
apparaître 5,0.0 h sur l’affichage PROGRAMMATEUR ARRÊTÉ.
5. Attendez que la télécommande affiche la température réglée.
ATTENTION
Le réglage du programmateur (PROGRAMMATEUR EN
MARCHE ou P
ROGRAMMATEUR ARRÊTÉ) qui se produit dans l'ordre
directement après l’heure programmée sera activé en premier.
Mode ÉCONOMIE (SOMMEIL)
Lorsque vous appuyez sur le bouton ECONOMY (économie), la
fonction de mode économie sera activée, la température réglée
augmentera (refroidissement) ou diminuera (chauffage) de 1 °C
(2 °F) pendant des 30 minutes suivantes et d’un autre 1 °C (2
°F)après
30 minutes supplémentaires. Cette nouvelle température
sera maintenue pendant 6 heures (pendant 7 heures pour
certains modèles) avant de revenir à la température choisie à
l'origine. (NOTE : sur certains modèles, la température réglée
augmentera (refroidissement) ou diminuera (chauffage) de 1 °C
(2 °F)par heure pendant 2 heures. Cette nouvelle température
sera maintenue pendant 5 heures,
puis l'unité s’éteindra.)
REMARQUE: La fonction ÉCONOMIE/ SOMMEIL n’est
disponible que dans les modes de, Chauffage, Climatisationet
en mode AUTOMATIQUE.
TIMER OFF
(Arrêt Automatique)
La fonction PROGRAMMATEUR ARRÊTÉ est utile lorsque
vous souhaitez que l'unité s'éteigne automatiquement après que
vous vous soyez couché.
Le climatiseur s'arrête automatiquement à l'heure
programmée.
Exemple :
Pour arrêter le climatiseur 10 heures après.
1. Appuyez sur le bouton TIMER OFF, le dernier réglage d'heure
d’arrêt et la lettre “h” apparaîtront sur l’écran d’affichage.
2. Appuyez sur le bouton TIMER OFF, afin d’afficher “10h”
surl’écran d’affichage PROGRAMMATEUR ARRÊTÉ de la
télécommande.
3. Attendez pendant environ 3 secondes et l’écran d’affichage
numérique fera apparaitre la température de nouveau.
Maintenant, cette fonction a été activée.
MINUTERIE COMBINÉE
(Réglage des deux minuteries marche et arrêt simultanément)
TIMER OFF TIMER ON
(Marche - Arrêt – Démarrage de l'opération)
Cette fonction est utile si vous voulez arrêter le
climatiseur quand vous allez vous coucher et le redémarrer le
matin quand vous vous réveillez ou quand vous revenez chez
vous.
Exemple :
Pour arrêter le climatiseur 2 heures après le réglage et pour qu’il
redémarre 10 heures après le réglage.
1. Pressez la touche TIMER OFF.
2. Appuyez sur le bouton TIMER OFF de nouveau, afin de voir
apparaître 2.0 h sur l’affichage PROGRAMMATEUR ARRÊTÉ.
3. Pressez la touche TIMER ON.
4. Appuyez sur le bouton TIMER ON de nouveau, afin de voir
apparaître 10 h sur l’écran d’affichage PROGRAMMATEUR EN
MARCHE.
5. Attendez que la télécommande affiche la température réglée.
39 40
O design e especificações estão sujeitos a alterações sem aviso prévio
para efeitos de melhoria do produto. Consulte a agência de vendas ou o
fabricante para mais pormenores.
APD-9CR PORTÁTIL APENAS FRIO
APD-12CR PORTÁTIL APENAS FRIO
APD-12HR PORTÁTIL BOMBA DE CALOR
AR CONDICIONADO
ILUSTRAÇÃO DO CONTROLO REMOTO
Muito obrigado por adquirir o nosso ar condicionado.
Leia atentamente este Manual do Utilizador antes de
utilizar o seu ar condicionado.
ÍNDICE
Utilização do controlo remoto .........................................................................44
Especificações do controlo remoto.................................................................45
Teclas de função ...............................................................................................46
Indicadores no LCD ..........................................................................................48
Como utilizar as teclas .....................................................................................49
Operação AUTO.................................................................................................49
Função Arrefecimento/Aquecimento/Ventilador.............................................49
Operação DESUMIDIFICAÇÃO ........................................................................50
Função Oscilação..............................................................................................50
Operação temporizador.....................................................................................51
Função ECONOMIA ..........................................................................................54
Utilização do controlo remoto
Localização do controlo remoto.
- Use o controlo remoto dentro de uma distância de 8 metros
do aparelho, apontando-o para o receptor. A recepção é
confirmada por um bip.
PRECAUÇÃO
- O ar condicionado não funcionará caso cortinas, portas ou outros materiais
bloqueiem os sinais do controlo remoto da unidade interior.
- Evite a entrada de qualquer líquido no controlo remoto. Não exponha o
controlo remoto à luz solar directa ou a calor.
- Se o receptor dos sinais infravermelhos do aparelho interior estiver exposto à
luz solar directa, o ar condicionado poderá não funcionar correctamente. Utilize
cortinas para impedir que a luz do sol atinja o receptor.
- Caso outros aparelhos eléctricos reajam com o controlo remoto, pode
deslocar estes aparelhos ou consultar o seu revendedor local.
Substituir as pilhas
O controlo remoto é alimentado por duas
pilhas(R03/LR03X2) instaladas na parte traseira
e protegidas por uma tampa.
(1) Remova a tampa premindo-a e deslizando-a.
(2) Remova as pilhas antigas e introduza as pilhas
novas
, colocando correctamente os pólos (+) e (-).
(3) Recoloque a tampa, deslizando-a de volta para a
sua posição
.
NOTA: Quando as pilhas são removidas, o
controlo remoto apaga todas as programações.
Depois de introduzir as novas pilhas, o controlo
remoto tem que ser reprogramado.
43 44
PRECAUÇÕES
- Não misture pilhas usadas e novas ou pilhas de um tipo diferente.
- Não deixe as pilhas no controlo remoto caso não preveja
utilizá-lo durante 2 ou 3 meses.
- Deite fora as pilhas gastas nos recipientes especiais que podem ser encontrados em diversos pontos
de venda.
Especificações do controlo remoto
Teclas de função
Modelo RG51B1/(C)EU, RG51B14/(C)E,RG51B31/(C)E
RG51B/(C)EU, RG51B16/(C)E,RG51B31/(C)EU
RG51B17/(C)EU, RG51B18/(C)E,RG51B32/(C)EU
RG51B19/(C)E-M, RG51B20/(C)E,RG51B30/(C)EU
RG51B25/(C)E, RG51B26/(C)EU;RG51B27/(C)E,
RG51B30/(C)E.
Tensão nominal 3.0V(Pilhas R03/LR03 2)
Tensão Mais Baixa do
Sinal Emitido pelo
CPU
2.0V
Recepção de Sinal
Amplitude
8m
Ambiente -5ºC 60ºC (-41ºC ~ 140ºF)
NOTA:
Visor ajuste da temperatura:
Escala Celsius (C): RG51B14/(C)E, RG51B16/(C)E,RG51B18/(C)E,RG51B31/(C)E,RG51B19/(C)E-M,
RG51B20/(C)E,RG51B25/(C)E,RG51B27/(C)E,RG51B30/(C)E.
Escala Fahrenheit (F): RG51B/(C)EU, RG51B1/(C)EU, RG51B17/(C)EU,RG51B26/(C)EU, RG51B30/(C)
EU,RG51B32/(C)EU,RG51B31/(C)EU.
Característica de Desempenho
Modo de funcionamento: AUTO, ARREFECIMENTO, SECAGEM, AQUECIMENTO (não existente no
modelo só arrefecimento) e VENTILADOR.
2. Programação do Temporizador sobre 24 horas.
3. Amplitude de Programação de Temperatura Interior: 17C~30 ºC (62ºF~88ºF).
4. Função completa de LCD (Liquid Crystal Display - Ecrã de Cristais Líquidos)
NOTA: Todas as imagens deste manual têm apenas uma finalidade explicativa. O seu ar condicionado
pode ser ligeiramente diferente. A forma real irá prevalecer.
Modelo: RG51B14/(C)E,
RG51B16/(C)E,
RG51B18/(C)E,
RG51B19/(C)E-M,
RG51B20/(C)E
RG51B31/(C)E
RG51B30/(C)E.
NOTA:
- Os modelos RG51B16/(C)
E ,RG51B18/(C)E não possuem
SWING;
- Os modelos RG51B18/(C)E
,RG51B19/(C)E-M, RG51B20/(C)
E não possuem a característica de
ECRÃ LED.
- O modelo RG51B19/(C)E-M não
possui a função de VENTILADOR
MED.
- O modelo RG51B31/(C)E possui o
botão ECONOMIA em vez do botão
INACTIVIDADE.
- O modelo RG51B30/(C)E não possui
as funções de VENTILADOR MED e
SWING.
1. Tecla TEMP DOWN
Prima este botão para diminuir a definição da temperatura
interior em incrementos de 1ºC (2ºF) a 30ºC (88ºF).
2. Tecla TEMP UP
Prima este botão para aumentar a definição da temperatura
interior em incrementos de 1ºC (2ºF) a 17ºC(62ºF).
3. Botão
Cada vez que o botão é premido, o modo de operação
é seleccionado na sequência do seguinte:
> AUTO > ARREF. > SEC. > AQUEC. > VENTIL.
NOTA: Modo de aquecimento apenas para os modelos
Arrefecimento & Aquecimento.
4. Botão SWING (apenas em alguns modelos)
Utilizado para parar ou iniciar o movimento da grelha de
ventilação e
definir a direcção do fluxo de ar para cima/para baixo.
5. Botão
Quando o botão recuado RESET é premido, todas as actuais
definições serão canceladas e o controlador regressará à
definição inicial.
6. Botão
A operação começa quando este botão é premido e pára
quando o botão é premido novamente.
7. Botão VELOCIDADE VENTILADOR
Utilizado para seleccionar a velocidade da ventoinha em quatro
passos:
> Auto -> Baixa > Méd. > Alta
- Alguns modelos não possuem a função de VENTILADOR
MED.
8.Botão TEMPORIZADOR LIGADO
Prima este botão para activar a definição do tempo de ligação
automática. Cada pressão aumentará o tempo definido em
aumentos de 30 minutos, até 10 horas, e depois em aumentos
de 1 hora após 24 horas. Para cancelar a definição do tempo de
ligação automática, basta
pressionar o botão até que a definição de tempo seja 0.0.
9. Botão ECONOMIA (INACTIVIDADE)
Seleccione esta função durante o período de inactividade.
Pode manter a temperatura mais confortável e poupar energia.
Esta função está disponível em modo só ARREFECIMENTO,
AQUECIMENTO ou AUTO.
Modelo: RG51B25/(C)E;
RG51B27/(C)E.
NOTA:
O modelo RG51B25/(C)E não possui a
função de SWING.
45 46
Botões de função (continuação)
Modelo: RG51B1/(C)EU,
RG51B/(C) UE,
RG51B26/(C)EU,
RG51B30/(C)EU,
RG51B32/(C)EU,
RG51B31/(C)EU.
NOTA: Os modelos RG51B/(C)UE
não possuem os botões SWING e
FOLLOW ME; os modelos RG51B1/
(C)UE não possuem o botão FOLLOW
ME; Os modelos RG51B30/(C)UE não
possuem os botões SWING, FOLLOW
ME e e a função de VENTILADOR
MED, e o botão INACTIVIDADE
em vez do botão ECONOMIA; Os
modelos RG51B32/(C)UE não
possuem o botão FOLLOW ME e
e a função de VENTILADOR MED,
e o botão INACTIVIDADE em vez
do botão ECONOMIA; os modelos
RG51B31/(C)UE não possuem o
botão FOLLOW ME.
Visor de MODO
Exibe o modo de operação seleccionado. Incluindo AUTO,
ARREFECIMENTO, SECAGEM, AQUECIMENTO (só nos
modelos de arrefecimento e aquecimento) e VENTILADOR.
Indicador de Transmissão
Este indicador de transmissão irá acender-se quando o
controlo remoto transmitir sinais à unidade interior.
Visor Temperatura/Timer
A definição de temperatura (de 17°C (62°F) a
30°C (88°F)) ou a definição do temporizador (0~24h) será
indicada.
Caso o modo do VENTILADOR esteja seleccionado, não será
apresentada nenhuma indicação.
Indicador LIGADO/DESLIGADO
Este indicador será apresentado quando a unidade estiver em
funcionamento.
Visor de MODO (Modo VENTILADOR)
Indicador da VELOCIDADE DA VENTOINHA
Indica a velocidade seleccionada do ventilador: AUTO, HIGH,
MED e LOW. Não se apresenta nada quando a velocidade do
ventilador está seleccionada em velocidade AUTO. Quando
o Modo AUTO ou SECO está seleccionado, não haverá
apresentação de nenhuns sinais.
NOTA: O modelo RG51B19/(C)E-M não possui não possui a
função de VENTILADOR MED.
Modelo: RG51B17/(C)EU
NOTA: Enquanto o aparelho estiver a funcionar no modo
INACTIVIDADE, este será cancelado quando o botão ON/OFF,
VELOCIDADE VENTILADOR, SUSPENSO ou MODO seja
premido.
10. Botão TEMPORIZADOR DESLIGADO
Prima este botão para activar a definição do tempo de
desligamento automático. Cada pressão aumentará o tempo
definido em incrementos de 30 minutos, até 10 horas, e depois
em incrementos de 1 hora após 24 horas. Para cancelar a
definição do tempo de desligamento automático, basta premir
o botão até que o tempo definido seja 0.0.
11. Botão BLOQUEIO
Prima este botão recuado para bloquear todas as actuais
definições, e o controlo remoto não aceitará qualquer
operação excepto a do BLOQUEIO. Use o modo BLOQUEIO
quando pretende evitar alterações acidentais das definições.
Premir novamente o botão BLOQUEIO para anular a função
BLOQUEIO. Um símbolo de fechadura aparecerá no visor do
controlo remoto quando a função de bloqueio está activada.
12. Botão ECRÃ LED
Prima este botão para limpar o visor na unidade interior,
prima-o novamente para iluminar o visor.
NOTA: RG51B18/(C)E ,RG51B19/(C)E-M,
Os modelos RG51B20/(C)E não possuem esta característica.
13. Botão FOLLOW ME/TEMP SENSING
- Prima este botão para iniciar a função FOLLOW ME.
- Quando a função Follow Me (Siga-me) é activada, a
apresentação remota indica a temperatura real no seu local.
O controlo remoto enviará este sinal ao ar condicionado a
cada intervalo de 3 minutos até que prima o botão Follow Me
novamente.
- A função Follow Me não se encontra disponível no modo
SECAGEM e VENTILADOR.
- Mudar para o modo de funcionamento ou desligar a unidade
cancelará a função Follow Me automaticamente.
14. Botão IÃO
Ao premir este botão, o gerador de iões é alimentado e
ajudará a remover o pólen e as impurezas do ar.
Visor de FOLLOW ME
Ao premir o botão FOLLOW ME/TEMP SENSING no modo
ARREFECIMENTO ou AQUECIMENTO, a função de detecção
remota é activada e apresenta este indicador
Visor do TEMPORIZADOR
Esta zona do visor mostra as programações do
TEMPORIZADOR. Isto é, caso apenas a função de ligação
automática esteja definida, irá indicar TEMPORIZADOR
LIGADO. Caso a função de desligamento automático esteja
definida, TEMPORIZADOR DESLIGADO será indicado.
Caso ambas as funções estejam definidas, irá apresentar
TEMPORIZADOR ON OFF, que indica que seleccionou ambas
as funções de ligação automática e desligamento automático.
Indicador BLOQUEIO
O indicador BLOQUEIO é apresentado ao premir o botão
BLOQUEIO. Premir de novo a tecla LOCK para limpar o
mostrador.
Indicadores no LCD
47 48
Operação DESUMIDIFICAÇÃO
Certifique-se de que a unidade está ligada e que existe corrente
eléctrica disponível. A luz OPERATION do painel da unidade
interior acende-se.
1. Premir a tecla MODE para seleccionar SECAGEM.
2. Premir a tecla TEMP para programar a temperatura desejada.
A temperatura pode ser definida dentro de um intervalo de
incrementos.
3. Premir a tecla ON/OFF para ligar o ar condicionado.
17ºC (62ºF)~ 30ºC in 1ºC(2ºF)
NOTA
No modo de Desumidificação não pode alterar
a velocidade do ventilador. Esta já foi automaticamente
controlada.
Funcionamento de Swing (em apenas alguns modelos)
Use o botão SWING para ajustar a direcção do fluxo de ar para
cima/para baixo.
1. Quando premir o botão uma vez e rapidamente, a
funcionalidade de definição da direcção do fluxo da grelha de
respiração é activada. O ângulo de movimento da grelha de
ventilação é 6º por cada pressão. Mantenha o botão premido
para mover a grelha de ventilação para a posição desejada.
NOTA: Em determinados modelos, este botão só pode ser
premido para inciar a função de swing automático.
2. Se mantiver o botão SWING premido sem o libertar
durante mais de 2 segundos, a funcionalidade de deslocação
automática da grelha de ventilação é activada. A grelha
horizontal irá deslocar-se automaticamente para cima/para
baixo.
Prima-o novamente para parar
.
NOTA
Quando a grelha de ventilação balouça ou se desloca para
uma posição que poderia afectar o efeito de arrefecimento e
aquecimento do ar condicionado,
esta alterará automaticamente a direcção de balouço/
deslocação.
Como utilizar as teclas
Operação AUTO
Certifique-se de que a unidade está ligada e que existe corrente
eléctrica disponível. O indicador FUNCIONAMENTO no painel
da unidade interior acende-se.
1. Prima o botão MODO para seleccionar AUTO.
2. Prima o botão TEMP para programar a temperatura
desejada. A temperatura pode ser ajustada dentro de um
intervalo de 17ºC (62ºF) ~ 30ºC em incrementos de 1ºC.
3. Prima o botão ON/OFF para ligar o ar condicionado.
NOTA
1. No modo Auto, o ar condicionado pode logicamente
escolher o modo de Arrefecimento, Ventilador, Aquecimento
e desumidificação ao detectar a diferença entre a real
temperatura ambiente da divisão e a temperatura definida no
controlo remoto.
2. No modo Auto, não pode alterar a velocidade do ventilador.
Esta já foi controlada automaticamente.
3. Se o modo AUTO não for confortável para si, o modo
pretendido pode ser seleccionado manualmente.
Função Arrefecimento/Aquecimento/Ventilador
Certifique-se de que a unidade está ligada e que existe corrente
eléctrica disponível.
1. Prima o botão MODO para seleccionar ARREFECIMENTO,
AQUECIMENTO,
(só nos modelos de arrefecimento e aquecimento) ou
VENTILADOR.
2. Prima o botão TEMP para definir a temperatura desejada.
A temperatura pode ser definida dentro de um intervalo de 3.
Prima o botão FAN SPEED para seleccionar a velocidade do
ventilador em quatro passos – Auto, Baixa, Méd ou Alta.
4. Premir a tecla ON/OFF para ligar o ar condicionado.
17ºC (62ºF)~ 3ºC em incrementos de 1ºC (2ºF).
NOTA
No modo VENTILADOR, a temperatura definida não é
indicada no controlo remoto e também não poderá controlar a
temperatura ambiente da divisão. Neste caso, apenas as etapas
1, 3 e 4 podem ser realizadas
49 50
Operação temporizador
Prima o botão TIMER ON para programar a hora de ligação
automática do aparelho. Prima o botão TIMER OFF para
programar a hora de desligamento automático do aparelho.
Definir o activação automático.
1. Premir a tecla TIMER ON. O controlo remoto apresenta
TIMER ON, a última definição do tempo de ligação automática
e o sinal “h” serão apresentados na área de apresentação do
LCD. Agora está pronto para restaurar o tempo de activação
automático para COMEÇAR a operação.
2. Prima o botão TIMER ON novamente para definir o tempo de
ligação automática desejado. Cada vez que pressiona o botão,
o tempo aumenta em aumentos de 30 minutos, até 10 horas, e
depois em aumentos de 1 hora até 24 horas.
3. Depois de definir TIMER ON, haverá um atraso de meio
segundo antes do controlo remoto transmitir o sinal para o
ar condicionado. Então, após aproximadamente outros 2
segundos, o sinal “h” desaparecerá e a temperatura definida
reaparecerá na janela de apresentação do LCD.
Definir o desligamento automático.
1. Premir a tecla TIMER OFF. O controlo remoto apresenta
TIMER OFF, a última definição de desligamento automático
e o sinal “h” serão apresentados na área de apresentação do
LCD. Agora está pronto para restaurar o tempo de desligamento
automático para COMEÇAR a operação.
2. Prima o botão TIMER OFF novamente para definir a hora de
desligamento automático desejada. Cada vez que pressiona o
botão, o tempo aumenta em aumentos de 30 minutos, até 10
horas, e depois em aumentos de 1 hora até 24 horas.
3. Depois de definir TIMER OFF, haverá um atraso de meio
segundo
antes do controlo remoto transmitir o sinal para o ar
condicionado. Então, após aproximadamente outros 2
segundos, o sinal “h” desaparecerá e a temperatura definida
reaparecerá na janela de apresentação do LCD.
Exemplo de definição do Temporizador
TIMER ON
(Operação de ligação automático)
A funcionalidade TIMER ON é útil quando pretender que a
unidade ligue automaticamente antes de regressar a casa,
por exemplo. O ar condicionado iniciará automaticamente o
funcionamento à hora programada.
Exemplo:
Para ligar o ar condicionado em 6 horas.
1. Prima o botão TIMER ON, a última definição do tempo de
ligação do funcionamento e o sinal “h” serão apresentados na
área do visor.
2. Prima o botão TIMER ON para indicar “6:0h” no visor TIMER
ON do controlo remoto.
3. Espere aproximadamente 3 segundos e a área de
apresentação digital mostrará a temperatura novamente. Agora
esta função é activada.
IMPORTANTE
A definição eficaz do tempo de funcionamento realizada pelo controlo remoto para a função do
temporizador está limitada às seguintes definições. 0.5, 1.0, 1.5, 2.0, 2.5, 3.0, 3.5, 4.0, 4.5, 5.0,
5.5, 6.0, 6.5, 7.0, 7.5, 8.0, 8.5, 9.0, 9.5, 10, 11, 12, 13, 14, 15,16,17, 18, 19, 20, 21, 22, 23 e 24.
51 52
TIMER ON -» TIMER OFF
(Operação ligada -► Parar -► Iniciar)
Esta função é útil quando pretender ligar o ar condicionado
antes de acordar e e desligá-lo depois de sair de casa.
Exemplo:
Para ligar o ar condicionado 2 horas após a definição, e pará-lo
5 horas após a definição.
1. Premir a tecla TIMER ON.
2. Prima o botão TIMER ON novamente para apresentar 2,0h
no indicador de TIMER ON.
3. Premir a tecla TIMER OFF.
4. Prima o botão TIMER OFF novamente para apresentar 5.0h
no indicador de TIMER OFF.
5. Aguarde que o controlo remoto apresente a temperatura
definida.
PRECAUÇÃO
A definição do temporizador (TIMER ON ou TIMER OFF) que
ocorre em
sequência directamente depois da hora definida, será activada
primeiro.
Operação de ECONOMIA (INACTIVIDADE)
Quando prime o botão ECONOMIA, a função de funcionamento
económico será activada, a temperatura definida irá aumentar
(arrefecimento) ou diminuir (arrefecimento) em 1ºC(2ºF) durante
os próximos 30 minutos e outro 1ºC (2ºF) após
30 minutos adicionais. Esta nova temperatura será mantida
durante 6 (nalguns modelos 7) horas antes de regressar à
temperatura originalmente seleccionada. (Nota: Nalguns
modelos, a temperatura definida irá aumentar (arrefecimento)
ou diminuir (aquecimento) em 1ºC (2ºF) por hora durante 2
horas. Esta nova temperatura será mantida durante 5 horas
e, em seguida, a unidade desliga-se.)
NOTA: A função POUPANÇA/INACTIVIDADE só se encontra
disponível no funcionamento de Arrefecimento, Aquecimento e
AUTO.
TIMER OFF
(Operação de desligamento automático)
A funcionalidade TIMER OFF é útil quando pretende
desligar a unidade automaticamente depois de ir para a cama.
O ar condicionado parará automaticamente depois do tempo
definido.
Exemplo:
Para o ar condicionado em 10 horas.
1. Prima o botão TIMER OFF, a última definição do tempo de
desligamento da operação e o sinal “h” serão apresentados na
área de apresentação.
2. Prima o botão TIMER OFF para indicar “10h” no visor TIMER
OFF do controlo remoto.
3. Espere aproximadamente 3 segundos e a área de
apresentação digital mostrará a temperatura novamente. Agora
esta função é activada.
TEMPORIZADOR COMBINADO
(A definir os temporizadores ON e OFF simultaneamente)
TIMER OFF -* TIMER ON
(Operação Ligar – Parar – Iniciar)
Esta função é útil quando se pretende desligar o ar
condicionado depois de ir dormir e ligá-lo novamente de manhã
ao acordar ou quando regressa a casa.
Exemplo:
Para desligar o ar condicionado 2 horas depois da definição e
começar novamente 10 horas após a definição.
1. Premir a tecla TIMER OFF.
2. Prima o botão TIMER OFF novamente para apresentar 2.0h
no indicador de TIMER OFF.
3. Premir a tecla TIMER ON.
4. Prima o botão TIMER ON novamente para apresentar 10h no
indicador de TIMER ON.
5. Aguarde que o controlo remoto apresente a temperatura
definida.
53 54
Il design e le specifiche possono essere modificati senza preavviso
per miglioramenti. Consultare l'agenzia di vendita o il fabbricante per
informazioni dettagliate.
APD-9CR PORTATILE SOLO FREDDO
APD-12CR PORTATILE SOLO FREDDO
APD-12HR PORTATILE POMPA DI CALORE
CONDIZIONATORE D'ARIA
ILLUSTRAZIONE DEL COMANDO A DISTANZA
Vi ringraziamo per aver acquistato il nostro condizionatore d'aria.
Preghiamo di leggere attentamente il manuale per l'utente prima di
utilizzare il condizionatore d'aria.
INDICE
Manipolazione del telecomando ......................................................................58
Specifiche del telecomando..............................................................................59
Pulsanti funzione .................. ............................................................................60
Indicatori dell'LCD .............................................................................................62
Uso dei pulsanti .................................................................................................63
Funzionamento AUTO........................................................................................63
Funzionamento Raffreddamento/Riscaldamento/Ventilator.e.......................63
Funzionamento deumidificazione ...................................................................64
Funzionamento dell'oscillazione......................................................................64
Funzionamento del timer...................................................................................65
Funzionamento ECONOMY ..............................................................................68
Manipolazione del telecomando
Ubicazione del telecomando.
- Usare il telecomando entro una distanza di 8 metri dall'apparecchio,
puntandolo verso il ricevitore. La ricezione viene confermata da un segnale
acustico.
PRECAUZIONI
- Il condizionatore d'aria non funziona se tende, porte o altro materiale bloccano il segnale che,
proveniente dal telecomando, arriva all'unità interna.
- Evitare che sul telecomando cadano liquidi. Non esporre il telecomando alla luce diretta del
sole o al calore.
- Se il ricevitore a segnali infrarossi dell'unità interna viene
esposto alla luce diretta del sole, il condizionatore potrebbe non funzionare correttamente.
Usare delle tende per evitare che il ricevitore venga esposto alla luce solare.
- Se altri apparecchi elettrici reagiscono al telecomando, spostarli o consultare il proprio
rifornitore locale.
Sostituzione delle batterie
Il telecomando è alimentato con due batterie a secco (R03/LR03X2)
situate nella parte posteriore e protette con un coperchio.
(1) Rimuovere il coperchio premendo e facendolo scivolare.
(2) Rimuovere le vecchie batterie ed inserire quelle nuova, facendo
attenzione alla posizione dei poli (+) e (-).
(3) Situare nuovamente il coperchio facendolo scivolare alla sua
posizione originale.
NOTA: Quando si rimuovono le batterie, viene cancellata tutta la
programmazione del telecomando.
Quando si inseriscono le batterie nuove, il telecomando deve essere
riprogrammato.
57 58
PRECAUZIONI
- Non utilizzare batterie nuove insieme a batterie vecchie o di tipo diverso.
- Non lasciare le batterie nel telecomando se non si prevede di non utilizzarlo per 2 o 3 mesi.
- Eliminare le batterie vecchie utilizzando i contenitori speciali che si trovano nei punti vendita.
Specifiche del telecomando
Pulsanti funzione
Modello RG51B1/(C)EU, RG51B14/(C)E,RG51B31/(C)E
RG51B/(C)EU, RG51B16/(C)E,RG51B31/(C)EU
RG51B17/(C)EU, RG51B18/(C)E,RG51B32/(C)EU
RG51B19/(C)E-M, RG51B20/(C)E,RG51B30/(C)EU
RG51B25/(C)E, RG51B26/(C)EU;RG51B27/(C)E,
RG51B30/(C)E.
Tensione nominale 3.0V(Batterie a secco R03/LR03 2)
Tensione minima di
emissione del segnale
CPU
2.0V
Portata di ricezione del
segnale
8m
Ambiente -5ºC 60ºC (-41ºC ~ 140ºF)
NOTA:
Display impostazioni temperatura:
Scala Celsius (ºC): RG51B14/(C)E, RG51B16/(C)E,RG51B18/(C)E,RG51B31/(C)E,RG51B19/(C)E-M,
RG51B20/(C)E,RG51B25/(C)E,RG51B27/(C)E,RG51B30/(C)E.
Scala Fahrenheit (ºF): RG51B/(C)EU, RG51B1/(C)EU, RG51B17/(C)EU,RG51B26/(C)EU, RG51B30/(C)
EU,RG51B32/(C)EU,RG51B31/(C)EU.
Caratteristiche delle prestazioni
Modalità di funzionamento: AUTO, RAFFREDDAMENTO, ASCIUGATURA, RISCALDAMENTO (Solo in
modelli senza funzione di raffreddamento) e VENTILATORE.
2. Funzione impostazione Timer in 24 ore.
3. Impostazione intervallo temperatura interna : 17C~30 ºC(62 ºF~88 ºF).
4. Funzioni complete dell'LCD (display a cristalli liquidi)
NOTA: Tutte le immagini del presente manuale sono a titolo puramente illustrativo. Il condizionatore
d'aria che ha acquistato potrebbe essere leggermente diverso. La forma attuale è prevalente.
Modello: RG51B14/(C)E,
RG51B16/(C)E,
RG51B18/(C)E,
RG51B19/(C)E-M,
RG51B20/(C)E
RG51B31/(C)E
RG51B30/(C)E.
NOTA:
- RG51B16/(C)E ,RG51B18/(C)E non
dispongono dei SWING;
- I modelli RG51B18/(C)E ,RG51B19/
(C)E-M, RG51B20/(C)E non
dispongono di DISPLAY a LED.
- Il modello RG51B19/(C)E-M non
dispone della funzione MED FAN.
- Il modello RG51B31/(C)E dispone
del pulsante ECONOMY invece del
pulsante SLEEP.
- Il modello RG51B30(C)E non
dispone delle funzioni MED FAN e
SWING.
1. Pulsante TEMP DOWN
Premere questo pulsante per diminuire la temperatura interna
ed impostarla su 30 ºC (88 ºF) in incrementi di 1 °C (2 ºF).
2. Pulsante TEMP UP
Premere questo pulsante per aumentare la temperatura interna
ed impostarla su 17 ºC (62 ºF) in incrementi di 1 °C (2 ºF).
3. Pulsante MODE
Ogni volta che si preme questo pulsante, si seleziona
la modalità operativa nella sequenza specificata di seguito:
> AUTO > RAFF. > ASCIUG. > RISCAL. > VENT
NOTA: Modalità riscaldamento presente solo su modelli a
raffreddamento e riscaldamento.
4. Pulsante SWING (su alcuni modelli)
Usata per arrestare o avviare il movimento della feritoia ed
impostare la direzione del flusso d'aria verso l'alto o verso il
basso, come si desidera.
5. Pulsante RESET
Dopo aver premuto il pulsante RESET, tutte le impostazioni
attuali vengono cancellate ed il controller torna alle sue iniziali.
6. Pulsante ON/OFF
Il funzionamento comincia premendo questo pulsante e si
arresta quando il pulsante viene premuto nuovamente.
7. Pulsante FAN SPEED
Usato per selezionare la velocità della ventola in quattro passi:
> Auto -> Bassa > Med. > Alta
- Alcuni modelli non dispongono della funzione MED FAN.
8.Pulsante TIMER ON
Premere questo pulsante per attivare le impostazioni
automatiche. Ogni volta che viene premuto il pulsante
aumenterà l'impostazione del tempo di 30 minuti, fino a 10 ore,
quindi ad incrementi di 1 ora fino a 24 ore. Per cancellare le
impostazioni di accensione automatico basta premere il pulsante
fino a quando l'impostazione del tempo non si trova su 0.0.
9. Pulsante ECONOMY (SLEEP)
Selezionare questa funzione mentre si dorme. Può mantenere
la temperatura adeguata e risparmiare energia. Questa
funzione è disponibile esclusivamente sui modelli con modalità
RAFFREDDAMENTO, RISCALDAMENTO o AUTO.
Modello: RG51B25/(C)E;
RG51B27/(C)E.
NOTA:
Il modello RG51B25/(C)E non dispone
della funzione SWING.
59 60
Pulsanti funzione (continua)
Modello: RG51B1/(C)EU,
RG51B/(C)EU,
RG51B26/(C)EU,
RG51B30/(C)EU,
RG51B32/(C)EU,
RG51B31/(C)EU.
NOTA: I modelli RG51B/(C)EU
non dispongono dei pulsanti SWING
e FOLLOW ME; il modello RG51B1/
(C)EU non dispone del pulsante
FOLLOW ME; il modello RG51B30/(C)
EU non dispone dei pulsanti SWING,
FOLLOW ME e della funzione MED
FAN, è dotato del pulsante SLEEP
al posto del pulsante ECONOMY; il
modello RG51B32/(C)EU non dispone
del pulsante FOLLOW ME e della
funzione MED FAN, è dotato del
pulsante SLEEP al posto del pulsante
ECONOMY; il modello RG51B31/(C)
EU è dotato del pulsante FOLLOW
ME.
Display MODALITÀ
Visualizza la modalità selezionata attualmente. Incluse le
modalità AUTO, RAFFREDDAMENTO, ASCIUGATURA,
RISCALDAMENTO (solo sui modelli con raffreddamento e
riscaldamento) e VENTILATORE.
Indicatore di trasmissione
Questa spia della trasmissione si illumina quando il
telecomando trasmette segnali all'unità interna.
Display di Temp./Timer
Vengono visualizzati la temperatura impostata (da 17°C (62°F)
a 30°C (88°F)) oppure il timer impostato (0~24h).
Se è selezionata la modalità VENTILAZIONE non viene
visualizzato.
Display ON/OFF
Questa spia indica se l'unità è in funzione.
Display MODALITÀ (Modalità VENTILATORE)
Visualizzazione della VELOCITÀ DEL VENTILATORE
Visualizza la velocità selezionata del ventilatore: AUTO, HIGH,
MED e LOW. Non viene visualizzato niente quando la velocità
del ventilatore è impostata su AUTO. Quando sono selezionate
le modalità AUTO o DRY, non viene mostrato nessun segnale.
NOTA: Il modello RG51B19/(C)E-M non dispone della funzione
di velocità MED FAN.
Modello: RG51B17/(C)EU
NOTA: Quando l'unità funziona in modalità SLEEP,
questa verrà cancellata se viene premuto il pulsante ON/OFF,
FAN SPEED, SLEEP
o MODE.
10. Pulsante TIMER OFF
Premere questo pulsante per attivare le impostazioni di
spegnimento automatico. Ogni volta che viene premuto il
pulsante aumenterà l'impostazione del tempo di 30 minuti,
fino a 10 ore, quindi ad incrementi di 1 ora fino a 24 ore. Per
cancellare le impostazioni di spegnimento automatico basta
premere il pulsante fino a quando l'impostazione del tempo
non si trova su 0.0.
11. Pulsante LOCK
Premere questo pulsante incassato per bloccare tutte le
funzioni impostate attualmente, in questa condizione il
telecomando non accetterà nessuna operazione diversa da
LOCK. Usare la modalità LOCK quando si desidera evitare
che le impostazioni vengano modificate accidentalmente.
Premere nuovamente il pulsante LOCK per cancellare la
funzione. LOCK. Il simbolo di un lucchetto verrà visualizzato
sul telecomando indicando che la funzione di blocco è attivata.
12. Pulsante LED Display
Premere questo pulsante per azzerare il display dell'unità
interna, premerlo nuovamente per illuminare il display.
NOTA: RG51B18/(C)E ,RG51B19/(C)E-M,
Il modello RG51B20/(C)E non dispone di questa funzione.
13. Pulsante FOLLOW ME/TEMP SENSING
- Premere questo pulsante per iniziare la funzione FOLLOW
ME.
- Quando la funzione Follow Me è attivata, sul telecomando
viene visualizzata la temperatura nella posizione in cui si trova.
Il telecomando invia il segnale al condizionatore ogni 3 minuti
prima di premere nuovamente il pulsante Follow Me.
- La funzione Follow Me non è disponibile quando sono in uso
le modalità DRY e FAN.
- Quando viene cambiata la modalità di funzionamento o
quando l'unità viene spenta la funzione follow me si cancellerà
automaticamente.
14. Pulsante ION
Quando viene premuto questo pulsante, viene alimentato il
generatore agli ioni per rimuovere polline e impurità dall'aria.
Display FOLLOW ME
Quando si preme il pulsante FOLLOW ME/TEMP SENSING in
modalità COOL o HEAT, la funzione di rilevamento a distanza
viene attivata e l'indicatore si attiva
Display TIMER
Questa zona del display indica le impostazioni del TIMER.
Se è impostata solo la funzione tempo Auto-on, viene
visualizzato TIMER ON. Se è impostata solo la funzione tempo
Auto-off, viene visualizzato TIMER OFF. Se sono selezionate
entrambe le funzioni, verrà visualizzato TIMER ON OFF, che
indica che sono state scelte entrambe le modalità Auto-on ed
Auto-off.
Indicatore LOCK
Il BLOCCO del display appare premendo il pulsante LOCK.
Premere il pulsante LOCK per cancellare la visualizzazione.
Indicatori dell'LCD
61 62
Funzionamento DEUMIDIFICAZIONE
Assicurarsi che l'unità sia collegata e che l'alimentazione sia
disponibile. La Indicatore del FUNZIONAMENTO sul display
dell'unità interna si accende.
1. Premere il pulsante MODE per selezionare ASCIUGATURA.
2. Premere il pulsante TEMP per impostare la temperatura
desiderata. La temperatura può essere impostata entro una
intervallo di incrementi 17ºC (62ºF)~ 30ºC a 1ºC(2ºF).
3. Premere il pulsante ON/OFF per accendere il condizionatore
d'aria.
NOTA
In modalità Deumidificazione, non è
possibile modificare la velocità del ventilatore. Verrà controllata
automaticamente.
Funzione Swing (su alcuni modelli)
Usare il pulsante SWING per regolare la direzione del flusso
dell'aria verso l'alto e verso il basso.
1. Quando si preme il pulsante una volta rapidamente, viene
attivata la funzione impostazione della direzione del flusso
dell'aria della feritoia. L'angolo di oscillazione della feritoia è di
6º ogni volta che viene premuto il pulsante. Mantenere premuto
il pulsante per spostare la feritoia alla direzione desiderata.
NOTA: su alcuni modelli premere questo pulsante solo per
iniziare la funzione di oscillazione.
2. Se viene mantenuto il pulsante SWING senza rilasciarlo
per più di 2 secondi, viene attivata la funzione di oscillazione
automatica della feritoia. La feritoia orizzontale oscillerà verso
l'alto e verso il basso automaticamente.
Premere nuovamente per arrestare
.
NOTA
Quando la feritoia oscilla o si sposta verso una posizione che
potrebbe influire sull'effetto di raffreddamento o riscaldamento
del condizionatore, la direzione dell'oscillazione/spostamento
cambia automaticamente.
Uso dei pulsanti
Funzionamento AUTO
Assicurarsi che l'unità sia collegata e che l'alimentazione sia
disponibile. L’Indicatore del FUNZIONAMENTO sul display
dell'unità interna si accende.
1. Premere il pulsante MODE per selezionare Auto.
2. Premere il pulsante TEMP per impostare la temperatura
desiderata. La temperatura può essere impostata in un intervallo
tra 17ºC (62ºF) ~ 30ºC in incrementi di 1°C (2ºF).
3. Premere il pulsante ON/OFF per accendere il condizionatore
d'aria.
NOTA
1. In modalità automatica, il condizionatore d'aria può scegliere
in modo logico la modalità di raffreddamento, ventilazione,
riscaldamento e deumidificazione rilevando la differenza tra la
temperatura ambientale attuale della camera e la temperatura
impostata nel telecomando.
2. In modalità Auto, non è possibile modificare la velocità del
ventilatore. Verrà controllata automaticamente.
3. Se la modalità Auto non risulta comoda, è possibile
selezionare manualmente la modalità desiderata.
Funzionamento Raffreddamento/Riscaldamento/Ventilatore
Assicurarsi che l'unità sia collegata e che l'alimentazione sia
disponibile.
1. Premere il pulsante MODE per selezionare le modalità AUTO,
HEAT (solo sui modelli con raffreddamento e riscaldamento) e
FAN.
2. Premere il pulsante TEMP per impostare la temperatura
desiderata.
La temperatura può essere impostata in un intervallo di 17 ºC
(62 ºF) ~ 3 ºC in incrementi di 1 ºC (2 ºF). Premere il pulsante
FAN SPEED per selezionare la velocità del ventilatore in quattro
passi: Auto, Low, Med o High.
4. Premere il pulsante ON/OFF per accendere il condizionatore
d'aria.
NOTA
Nella modalità VENTILATORE, la temperatura impostata non
viene visualizzata sul telecomando e non è possibile controllare
la temperatura della stanza. In questo caso possono essere
realizzati solo i passi 1, 3 e 4.
63 64
Control remoto de AC - Manual de usuario

Mais conteúdo relacionado

Semelhante a Control remoto de AC - Manual de usuario

Manual Quadro de Comando para Compact Line Sodramar
Manual Quadro de Comando para Compact Line SodramarManual Quadro de Comando para Compact Line Sodramar
Manual Quadro de Comando para Compact Line SodramarCottage Casa E Lazer
 
025.0947-0-025.0940-0-Manual-Compressor-de-Pistao-Schulz-Pratic-Air-CSA-7.5-2...
025.0947-0-025.0940-0-Manual-Compressor-de-Pistao-Schulz-Pratic-Air-CSA-7.5-2...025.0947-0-025.0940-0-Manual-Compressor-de-Pistao-Schulz-Pratic-Air-CSA-7.5-2...
025.0947-0-025.0940-0-Manual-Compressor-de-Pistao-Schulz-Pratic-Air-CSA-7.5-2...DaniloDonizeteCndido
 
Xcmg sq12 zk3q service manual
Xcmg sq12 zk3q service manualXcmg sq12 zk3q service manual
Xcmg sq12 zk3q service manualManoela Rios
 
Manual Ar Condicionado Springer Duo
Manual Ar Condicionado Springer DuoManual Ar Condicionado Springer Duo
Manual Ar Condicionado Springer DuoPolo Ar
 
Manual-de-Instrucoes-Z31Y_r0.pdf
Manual-de-Instrucoes-Z31Y_r0.pdfManual-de-Instrucoes-Z31Y_r0.pdf
Manual-de-Instrucoes-Z31Y_r0.pdfDanielMdena
 
Picinas de Vinil - Show de Piscinas
Picinas de Vinil - Show de PiscinasPicinas de Vinil - Show de Piscinas
Picinas de Vinil - Show de PiscinasShow de Piscinas
 
Corp conjugado manual
Corp conjugado manualCorp conjugado manual
Corp conjugado manualbene piscinas
 
Trabalho instrumentação ii (4)
Trabalho instrumentação ii (4)Trabalho instrumentação ii (4)
Trabalho instrumentação ii (4)Tuane Paixão
 
Trabalho instrumentação ii (4)
Trabalho instrumentação ii (4)Trabalho instrumentação ii (4)
Trabalho instrumentação ii (4)Tuane Paixão
 
Manual de manutenção de caminhões eletrônicos
Manual de manutenção de caminhões eletrônicosManual de manutenção de caminhões eletrônicos
Manual de manutenção de caminhões eletrônicosMarcelo Auler
 

Semelhante a Control remoto de AC - Manual de usuario (20)

Manual Quadro de Comando para Compact Line Sodramar
Manual Quadro de Comando para Compact Line SodramarManual Quadro de Comando para Compact Line Sodramar
Manual Quadro de Comando para Compact Line Sodramar
 
Chiller
ChillerChiller
Chiller
 
Catalogo coel
Catalogo coelCatalogo coel
Catalogo coel
 
Manual at 12000
Manual at 12000 Manual at 12000
Manual at 12000
 
025.0947-0-025.0940-0-Manual-Compressor-de-Pistao-Schulz-Pratic-Air-CSA-7.5-2...
025.0947-0-025.0940-0-Manual-Compressor-de-Pistao-Schulz-Pratic-Air-CSA-7.5-2...025.0947-0-025.0940-0-Manual-Compressor-de-Pistao-Schulz-Pratic-Air-CSA-7.5-2...
025.0947-0-025.0940-0-Manual-Compressor-de-Pistao-Schulz-Pratic-Air-CSA-7.5-2...
 
Xcmg sq12 zk3q service manual
Xcmg sq12 zk3q service manualXcmg sq12 zk3q service manual
Xcmg sq12 zk3q service manual
 
Manual Ar Condicionado Springer Duo
Manual Ar Condicionado Springer DuoManual Ar Condicionado Springer Duo
Manual Ar Condicionado Springer Duo
 
Manual-de-Instrucoes-Z31Y_r0.pdf
Manual-de-Instrucoes-Z31Y_r0.pdfManual-de-Instrucoes-Z31Y_r0.pdf
Manual-de-Instrucoes-Z31Y_r0.pdf
 
Picinas de Vinil - Show de Piscinas
Picinas de Vinil - Show de PiscinasPicinas de Vinil - Show de Piscinas
Picinas de Vinil - Show de Piscinas
 
Fire
FireFire
Fire
 
5nk1 ipoolzz
5nk1 ipoolzz5nk1 ipoolzz
5nk1 ipoolzz
 
Mu climatizadores 280108
Mu climatizadores 280108Mu climatizadores 280108
Mu climatizadores 280108
 
Corp conjugado manual
Corp conjugado manualCorp conjugado manual
Corp conjugado manual
 
01 manual instruções
01 manual instruções01 manual instruções
01 manual instruções
 
SIMBOLOGIA
SIMBOLOGIASIMBOLOGIA
SIMBOLOGIA
 
Refrigerador boletim técnico brm crm
Refrigerador boletim técnico brm crmRefrigerador boletim técnico brm crm
Refrigerador boletim técnico brm crm
 
Atc
AtcAtc
Atc
 
Trabalho instrumentação ii (4)
Trabalho instrumentação ii (4)Trabalho instrumentação ii (4)
Trabalho instrumentação ii (4)
 
Trabalho instrumentação ii (4)
Trabalho instrumentação ii (4)Trabalho instrumentação ii (4)
Trabalho instrumentação ii (4)
 
Manual de manutenção de caminhões eletrônicos
Manual de manutenção de caminhões eletrônicosManual de manutenção de caminhões eletrônicos
Manual de manutenção de caminhões eletrônicos
 

Control remoto de AC - Manual de usuario

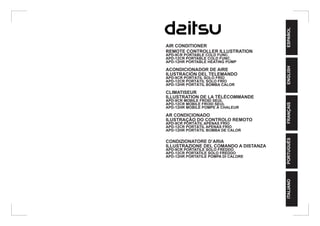
  • 1. ESPAÑOL ENGLISH FRANÇAIS PORTUGUÊS ITALIANO AIR CONDITIONER REMOTE CONTROLLER ILLUSTRATION APD-9CR PORTABLE COLD FUNC. APD-12CR PORTABLE COLD FUNC. APD-12HR PORTABLE HEATING PUMP ACONDICIONADOR DE AIRE ILUSTRACIÓN DEL TELEMANDO APD-9CR PORTÁTIL SOLO FRÍO APD-12CR PORTÁTIL SOLO FRÍO APD-12HR PORTÁTIL BOMBA CALOR CLIMATISEUR ILLUSTRATION DE LA TÉLÉCOMMANDE APD-9CR MOBILE FROID SEUL APD-12CR MOBILE FROID SEUL APD-12HR MOBILE POMPE À CHALEUR AR CONDICIONADO ILUSTRAÇÃO DO CONTROLO REMOTO APD-9CR PORTÁTIL APENAS FRIO APD-12CR PORTÁTIL APENAS FRIO APD-12HR PORTÁTIL BOMBA DE CALOR CONDIZIONATORE D’ARIA ILLUSTRAZIONE DEL COMANDO A DISTANZA APD-9CR PORTATILE SOLO FREDDO APD-12CR PORTATILE SOLO FREDDO APD-12HR PORTATILE POMPA DI CALORE
  • 2. Lea este manual En él encontrará muchos consejos útiles sobre cómo utilizar y mantener correctamente su unidad de aire acondicionado. Si realiza una serie de sencillas tareas de mantenimiento, se ahorrará mucho tiempo y dinero a lo largo de la vida útil de su unidad. En la guía de resolución de problemas encontrará muchas respuestas a problemas habituales. Si en primer lugar comprueba la tabla de resolución de problemas, quizás no tenga que llamar al servicio técnico. Read This Manual Inside you will find many helpful hints on how to use and maintain your air conditioner properly. Just a little preventative care on your part can save you a great deal of time and money over the life of your air conditioner. You’ll find many answers to common problems in the chart of troubleshooting tips. If you review the chart of Troubleshooting Tips first, you may not need to call for service. Veuillez lire ce manuel Vous y trouverez de très nombreux conseils utiles pour installer et tester correctement le climatiseur. Un minimum d’entretien préventif de votre part peut vous faire économiser beaucoup de temps et d’argent pendant la durée de vie de votre climatiseur. Vous trouverez de nombreuses réponses aux problèmes les plus communs dans le tableau de la rubrique Conseils de dépannage. Si vous consultez d’abord le tableau de la rubrique Conseils de dépannage, il ne vous faudra peut-être pas appeler de réparateur. Ler este Manual No interior encontram-se muitos conselhos úteis sobre como utilizar e conservar adequadamente este aparelho de ar condicionado. Apenas com alguns cuidados preventivos, é possível economizar uma importante soma de tempo e dinheiro durante toda a vida útil do aparelho. No quadro de conselhos para resolução de problemas, poderão ser encontradas muitas respostas para os problemas mais comuns. Consultando este quadro de Resolução de Problemas, poderá não ser necessário chamar a assistência técnica. Leggere il presente manuale All’interno sono presenti molti consigli utili per l’uso e la manutenzione adeguati del condizionatore d’aria. Basta qualche accorgimento preventivo per risparmiare una gran quantità di tempo e denaro durante la vita del condizionatore d’aria. Nel grafico della risoluzione dei problemi si trovano molte risposte a problemi comuni. Prima di chiamare il servizio tecnico, consultare la sezione Risoluzione dei problemi.
  • 3. El diseño y las especificaciones están sujetos a cambios sin previo aviso a fin de mejorar el producto. Consulte al personal de ventas o al fabricante para más detalles. APD-9CR PORTÁTIL SOLO FRÍO APD-12CR PORTÁTIL SOLO FRÍO APD-12HR PORTÁTIL BOMBA CALOR ACONDICIONADOR DE AIRE ILUSTRACIÓN DEL TELEMANDO Muchas gracias por elegir nuestro acondicionador de aire. Por favor, antes de utilizarlo, lea atentamente este manual del propietario.
  • 4. ÍNDICE Manejo del control remoto ..............................................................................2 Especificaciones del control remoto..............................................................3 Botones de funciones .................. ..................................................................4 Indicadores de la pantalla LCD ......................................................................6 Cómo utilizar los botones ...............................................................................7 Funcionemiento Automático...........................................................................7 Funcionamiento en modo Refrigeración/Calefacción/Ventilador................7 Funcionamiento en modo de deshumificación ............................................8 Funcionamiento de abanico............................................................................8 Funcionamiento Timer.....................................................................................9 Funcionamiento en modo económico ..........................................................12 Manejo del control remoto Ubicación del control remoto. - Utilice el control remoto a una distancia máxima de 8 metros respecto al aparato y apunte hacia el receptor. Un pitido confirma la recepción. PRECAUCIÓN - El acondicionador de aire no funcionará si hay cortinas, puertas u otros obstáculos bloqueando la señal que envía el control remoto a la unidad interior. - Evite que caiga ningún tipo de líquido sobre el control remoto. No exponga el telemando a la luz directa del sol ni a fuentes de calor. - Si el receptor de infrarrojos de la unidad interior se expone a la luz directa del sol, puede verse afectado el funcionamiento del acondicionador de aire. Coloque cortinas para evitar que la luz directa del sol afecte al receptor. - Si se producen interferencias con otros aparatos eléctricos, cambie de sitio estos aparatos o póngase en contacto con su distribuidor local. Sustitución de pilas El control remoto funciona con dos pilas (R03/LR03X2) instaladas en la parte trasera y protegidas por una tapa. (1) Para abrir la tapa, presiónela y deslícela. (2) Extraiga las pilas antiguas e introduzca las nuevas prestando especial atención a la colocación de los polos (+) y. (3) Vuelva a cerrar el compartimento deslizando la cubierta hasta encajarla en su posición. NOTA: Al retirar las pilas, el control remoto borra toda la programación. Una vez insertadas las pilas nuevas, se debe reprogramar el control remoto. 1 2
  • 5. PRECAUCIONES - No mezcle pilas antiguas y nuevas ni pilas de diferentes tipos. - No deje las pilas en el interior del control remoto si no va utilizarlo durante 2 o 3 meses. - Tire las pilas gastadas en los contenedores especiales que encontrará en los establecimientos. Especificaciones del control remoto Botones de funciones Modelo RG51B1/(C)EU, RG51B14/(C)E,RG51B31/(C)E RG51B/(C)EU, RG51B16/(C)E,RG51B31/(C)EU RG51B17/(C)EU, RG51B18/(C)E,RG51B32/(C)EU RG51B19/(C)E-M, RG51B20/(C)E,RG51B30/(C)EU RG51B25/(C)E, RG51B26/(C)EU;RG51B27/(C)E, RG51B30/(C)E. Tensión nominal 3.0V(Pilas secas R03/LR03 2) Tensión mínima de la señal emisora de la CPU 2.0V Recepción de señal Rango 8m Entorno -5ºC 60ºC (-41ºC ~ 140ºF) NOTA: Visor de ajuste de temperatura: Escala Celsius (C): RG51B14/(C)E, RG51B16/(C)E,RG51B18/(C)E,RG51B31/(C) E,RG51B19/(C)E-M, RG51B20/(C)E,RG51B25/(C)E,RG51B27/(C)E,RG51B30/(C)E. Escala Fahrenheit (F): RG51B/(C)EU, RG51B1/(C)EU, RG51B17/(C)EU,RG51B26/(C)EU, RG51B30/(C)EU,RG51B32/(C)EU,RG51B31/(C)EU. Funciones Modos de funcionamiento: Modo AUTOMÁTICO, REFRIGERACIÓN, SECADO, CALEFACCIÓN (excepto en los modelos 'sólo Refrigeración), y VENTILADOR. 2. Función de ajuste del temporizador en 24 horas. 3. Rango de ajuste de la temperatura interior: 17C~30 C(62OF~88OF). 4. Función completa de la LCD (pantalla de cristal líquido) NOTA: Todas las imágenes que aparecen en este manual se incluyen únicamente a modo explicativo. Su aire acondicionado puede ser ligeramente diferente. La forma real es la importante. Modelo: RG51B14/(C)E, RG51B16/(C)E, RG51B18/(C)E, RG51B19/(C)E-M, RG51B20/(C)E RG51B31/(C)E RG51B30/(C)E. NOTA: - Los modelos RG51B16/(C)E ,RG51B18/(C)E no disponen de opción de OSCILACIÓN; - Los modelos RG51B18/(C)E ,RG51B19/(C)E-M, RG51B20/(C)E no disponen de pantalla LED. - El modelo RG51B19/(C)E-M no tiene la función MED FAN (ventilador medio) - En el modelo RG51B31/(C)E, el botón ECONOMY (economía) se ha sustituido por el botón SLEEP (sueño). - El modelo RG51B30/(C)E no tiene las funciones MED FAN (ventilador medio) y SWING. 1. Botón TEMP DOWN Presione este botón para bajar la temperatura interna a intervalos de 1ºC hasta 30 ºC. 2. Botón TEMP UP Presione este botón para subir la temperatura interna a intervalos de 1ºC hasta 17ºC. 3. Botón MODE Cada vez que presione el botón, se selecciona el modo de funcionamiento en el orden siguiente: > AUTO > REFRIG. > SECADO > CAL.> VENT. NOTA: El modo Calefacción sólo está disponible en los modelos refrigeración y calefacción. 4. Botón SWING (en algunos modelos) Se utiliza para detener o accionar el movimiento de la rejilla y ajustar la dirección del flujo de aire. 5. Botón RESET Cuando se pulsa el botón RESET, se cancelan todos los ajustes actuales y el control remoto regresa a los ajustes iniciales. 6. Botón ON/OFF La unidad se pone en marcha cuando se pulsa este botón y deja de funcionar si se vuelve a pulsar. 7. Botón FAN SPEED (velocidad del ventilador) Permite seleccionar la velocidad del ventilador: > Auto -> Baja > Media > Alta - Algunos modelos no tienen la función MED FAN (ventilador medio). 8.Botón TIMER ON (temporizador de encendido) Pulse este botón para activar la secuencia de encendido del temporizador automático. Cada pulsación incrementa el tiempo en intervalos de 30 minutos, hasta 10 horas, y luego a intervalos de 1 hora hasta 24 horas. Para cancelar el ajuste de la hora de encendido automático, sólo debe pulsar el botón hasta que el ajuste de la hora sea 0.0. 9. Botón ECONOMY(SLEEP) (economía/sueño) Seleccione esta función durante las horas de sueño. Permite mantener la temperatura más confortable y ahorrar energía. Esta función sólo está disponible en los modelos REFRIGERACIÓN, CALEFACCIÓN o AUTOMÁTICO. Modelo: RG51B25/(C)E; RG51B27/(C)E. NOTA: El modelo RG51B25/(C)E no tiene la función SWING. 3 4
  • 6. Botones de función (continuación) Modelo: RG51B1/(C)EU, Los modelos RG51B/(C)EU, RG51B26/(C)EU, RG51B30/(C)EU, RG51B32/(C)EU, RG51B31/(C)EU. NOTA: RG51B/(C)EU no tienen los botones SWING y FOLLOW ME (seguimiento); los modelos RG51B1/(C)EU no tienen botón FOLLOW ME (seguimiento); Los modelos RG51B30/(C)EU no tienen los botones SWING y FOLLOW ME (seguimiento) ni la función MED FAN (ventilador medio), y tienen el botón SLEEP (sueño) en lugar del botón ECONOMY (economía); Los modelos RG51B32/(C)EU no tienen el botón FOLLOW ME (seguimiento) ni la función MED FAN (ventilador medio), y tienen el botón SLEEP (sueño) en lugar del botón ECONOMY (economía); Los modelos RG51B31/ (C)EU no tienen botón FOLLOW ME (seguimiento) Indicador de MODO Muestra el modo de funcionamiento seleccionado. Incluyendo los modos AUTOMÁTICO, REFRIGERACIÓN, SECADO, CALEFACCIÓN (sólo en modelos refrigeración y calefacción) y VENTILADOR. Indicador de transmisión Este indicador de transmisión se ilumina cuando el control remoto transmite señales a la unidad interior. Indicador de Temperatura/Temporizador Se mostrará el ajuste de la temperatura (de 17ºC a 30ºC) el ajuste del temporizador (0~24h). Si el modo de VENTILACIÓN está seleccionado, la pantalla estará en blanco. Indicador de ENCENDIDO/APAGADO Aparecerá este indicador cuando la unidad esté en funcionamiento. Indicador de MODO (Modo VENTILADOR) Indicador de la VELOCIDAD DEL VENTILADOR Muestra la velocidad del ventilador seleccionada. AUTO, HIGH, MED y LOW. La pantalla aparece en blanco cuando la velocidad del ventilador es automática (AUTO). Si están seleccionados los modos AUTOMÁTICO o SECADO, no se mostrará ninguna señal en la pantalla. NOTA: El modelo RG51B19/(C)E-M no tiene la función de velocidad MED FAN (ventilador medio) Modelo: RG51B17/(C)EU NOTA: Con la unidad funcionando en modo SLEEP(sueño), se cancelará si se presionan los botones ON/OFF (encendido/apagado), FAN SPEED (velocidad del ventilador), SLEEP(sueño) o MODE (modo). 10. Botón TIMER OFF (temporizador de apagado) Pulse este botón para activar la secuencia de apagado del temporizador automático. Cada pulsación incrementa el tiempo en intervalos de 30 minutos, hasta 10 horas, y luego a intervalos de 1 hora hasta 24 horas. Para cancelar el ajuste de la hora de apagado automático, solo debe pulsar el botón hasta que el ajuste de la hora sea 0.0. 11. Botón de BLOQUEO Pulse este botón para bloquear todos los ajustes actuales, el control remoto no aceptará ninguna operación salvo la de bloqueo. Utilice el modo de BLOQUEO para evitar que se modifiquen sus programaciones, accidentalmente. Utilice el botón LOCK para cancelar la función de BLOQUEO. Cuando la función de bloqueo esté activada, en la pantalla del control remoto aparecerá el símbolo de una llave. 12. Botón pantalla LED Pulse este botón para borrar la pantalla de la unidad interior y vuélvalo a pulsar para iluminar la pantalla . NOTA: RG51B18/(C)E ,RG51B19/(C)E-M, Los modelos RG51B20/(C)E no tienen esta función. 13. Botón FOLLOW ME/TEMP SENSING (seguimiento sensor de temperatura) - Pulse este botón para iniciar la función FOLLOW ME. - Cuando esta función está activada, en la pantalla del control remoto se muestra la temperatura actual de la estancia. El control remoto enviará esta señal al aire acondicionado cada 3 minutos hasta que se pulse de nuevo el botón Follow Me. - La función SEGUIMIENTO no está disponible en los modos SECADO y VENTILADOR. - Si cambia el modo de funcionamiento o apaga la unidad, se cancelará automáticamente la función Follow Me. 14. Botón ION (iones) Al pulsar este botón, se activa el generador de iones, lo que ayuda a eliminar el polen y las impurezas del aire. Indicador de función FOLLOW ME (seguimiento) Al presionar el botón FOLLOW ME/TEMP SENSING en modo COOL (frío) o HEAT (calor), la función del sensor remoto se activa y aparece este indicador. Indicador de TEMPORIZADOR Esta área de visualización muestra los ajustes del temporizador. Si sólo está configurada la función de encendido automático, en pantalla aparecerá TIMER ON. Si sólo está configurada la función de apagado automático, en pantalla aparecerá TIMER OFF. Y si están configuradas ambas funciones, aparecerá TIMER ON OFF, que indica que usted ha ajustado las horas de encendido y apagado automáticos. Indicador de BLOQUEO El visor de BLOQUEO aparece al pulsar el botón LOCK . Pulse el botón LOCK para borrar la visualización de bloqueo. Indicadores de la pantalla LCD 5 6
  • 7. Funcionamiento en modo de deshumidificación Asegúrese de que la unidad esté conectada y haya corriente eléctrica. El piloto de FUNCIONAMIENTO se iluminará en el panel de visualización de la unidad interior. 1. Pulse el botón MODE para seleccionar el modo SECADO. 2. Pulse el botón TEMP para ajustar la temperatura deseada. La temperatura se puede ajustar dentro de un rango de incrementos de 17ºC (62ºF)~ 30ºC en 1ºC(2ºF) 3. Pulse el botón ON/OFF para poner en marcha el aire acondicionado. NOTA En modo Deshumidificación, no podrá seleccionar la velocidad del ventilador. Ya se ha controlado automáticamente. Funcionamiento swing (en algunos modelos) Utilice el botón SWING para ajustar la dirección del flujo de aire. 1. Si pulsa el botón una vez y rápidamente, se activa la función de ajuste de la dirección del flujo de aire. El ángulo de movimiento de la rejilla es de 6° para cada pulsación del botón. Mantenga pulsado el botón para colocar la rejilla en la posición deseada. NOTA: en algunos modelos, presione para iniciar solo la función auto swing. 2. Si mantiene pulsado el botón SWING durante 2 segundos más, se activa la función de oscilación automática de la rejilla. La rejilla horizontal se moverá automáticamente hacia arriba y abajo. Púlselo de nuevo para detenerla .NOTA: Cuando el movimiento de la rejilla interfiere en el efecto de refrigeración o calefacción del aire acondicionado, se modifica automáticamente el movimiento de la rejilla. Cómo utilizar los botones Funcionamiento Automático Asegúrese de que la unidad esté conectada y haya corriente eléctrica. El piloto de FUNCIONAMIENTO se iluminará en el panel de visualización de la unidad interior. 1. Utilice el botón MODE para seleccionar el modo AUTOMÁTICO. 2. Pulse el botón TEMP para ajustar la temperatura deseada. Esta temperatura debe estar comprendida entre 17ºC(62ºF)~ 30ºC en incrementos de 1ºC (2ºF). 3. Pulse el botón ON/OFF para poner en marcha el aire acondicionado. NOTA 1. En modo Auto, el aire acondicionado seleccionará de forma lógica el modo Cooling (refrigeración), Fan (ventilador), Heating (calefacción) y Dehumidifying (deshumidificador) mediante la captación de la diferencia entre la temperatura ambiente real de la habitación y la temperatura establecida en el control remoto. 2. En modo Automático, no podrá seleccionar la velocidad del ventilador. Ya se ha controlado automáticamente. 3. Si el modo Auto no le resulta cómodo, puede seleccionar el modo que desee manualmente. Funcionamiento en modo Refrigeración/Calefacción/ Ventilador Asegúrese de que la unidad esté conectada y haya corriente eléctrica. 1. Utilice el botón MODE para seleccionar el modo REFRIGERACIÓN, CALEFACCIÓN (sólo para modelos refrigeración y calefacción) o VENTILADOR. 2. Pulse el botón TEMP para ajustar la temperatura deseada. La temperatura se puede establecer en un rango de 3. Pulse el botón FAN SPEED para seleccionar la velocidad del ventilador: Auto (automática), Low (baja), Med (media) o High (alta). 4. Pulse el botón ON/OFF para poner en marcha el aire acondicionado. 17ºC ~ 3ºC a intervalos de 1ºC. NOTA En el modo VENTILADOR, la temperatura de ajuste no se muestra en el control remoto y usted no puede controlar la temperatura de la estancia. En este caso, sólo se pueden llevar a cabo los pasos 1, 3 y 4 7 8
  • 8. Funcionamiento Timer Pulse el botón TIMER ON para ajustar la hora de puesta en marcha automática de la unidad. Y presione el botón TIMER OFF para ajustar la hora de apagado automático de la unidad. Para ajustar la hora de encendido automático. 1. Pulse el botón TIMER ON. El control remoto muestra TIMER ON y en la pantalla LCD aparecen la última hora programada para encender la unidad y una “h”. Ahora se puede reajustar la hora de apagado automático para PONER EN MARCHA el funcionamiento. 2. Pulse de nuevo TIMER ON para ajustar la hora de encendido automático. Cada pulsación del botón incrementa el tiempo en intervalos de 30 minutos, hasta 10 horas, y luego a intervalos de 1 hora hasta 24 horas. 3. Al activar el temporizador de encendido (TIMER ON), habrá un retraso de medio segundo antes de que el control remoto transmita la señal al aire acondicionado. Luego, tras unos 2 segundos, desaparece la “h” y vuelve a aparecer la temperatura de ajuste en la pantalla LCD. Para ajustar la hora de apagado automático. 1. Pulse el botón TIMER OFF. El control remoto muestra TIMER OFF y en la pantalla LCD la última hora programada para apagar la unidad y una “h”. Ahora se puede reajustar la hora de apagado automático para PONER EN MARCHA el funcionamiento. 2. Presione de nuevo el botón TIMER OFF (temporizador de apagado) para ajustar la hora de apagado automático deseada. Cada pulsación del botón incrementa el tiempo en intervalos de 30 minutos, hasta 10 horas, y luego a intervalos de 1 hora hasta 24 horas. 3. Tras ajustar el TEMPORIZADOR DE APAGADO, transcurrirá medio segundo antes de que el control remoto transmita la señal a la unidad de aire acondicionado. Luego, tras unos 2 segundos, desaparece la “h” y vuelve a aparecer la temperatura de ajuste en la pantalla LCD. Ejemplo de programación del temporizador TIMER ON (Operación de encendido automático) La función TIMER ON resulta útil para encender automáticamente la unidad antes de volver a casa. El acondicionador de aire empezará a funcionar automáticamente a la hora programada. Ejemplo: Para encender el aire acondicionado 6 horas después. 1. Pulse el botón TIMER ON, aparecerán en pantalla la última hora programada para encender la unidad y una “h”. 2. Pulse TIMER ON para visualizar “6:0h” en la pantalla TIMER ON del control remoto. 3. Espere unos 3 segundos y en la pantalla digital aparecerá la temperatura. Ahora la función ya está activada. IMPORTANTE La hora de funcionamiento efectivo ajustada por el control remoto para el temporizador se limita a los ajustes siguientes: 0.5, 1.0, 1.5, 2.0, 2.5, 3.0, 3.5, 4.0, 4.5, 5.0, 5.5, 6.0, 6.5, 7.0, 7.5, 8.0, 8.5, 9.0, 9.5, 10, 11, 12, 13, 14, 15,16,17, 18, 19, 20, 21, 22, 23 y 24. 9 10
  • 9. TEMPORIZADOR ACTIVADO/DESACTIVADO (Funcionamiento de encendido/apagado) Esta función resulta útil para encender el aire acondicionado antes de despertarse y apagarlo cuando salga de casa. Ejemplo: Para encender el aire acondicionado 2 horas después del ajuste y apagarlo 5 horas después del ajuste. 1. Pulse el botón TIMER ON. 2. Pulse de nuevo el botón TIMER ON para visualizar 2,0 h en la pantalla TIMER ON. 3. Pulse el botón TIMER OFF. 4. Pulse de nuevo el botón TIMER OFF para visualizar 5.0 h en la pantalla TIMER OFF. 5. Espere a que el control remoto muestre la temperatura de ajuste. PRECAUCIÓN El ajuste d el temporizador (TIMER ON o TIMER OFF) en secuencia se produce directamente tras activar primero la hora de ajuste. Funcionamiento en modo AHORRO (EN REPOSO) Al presionar el botón ECONOMY se activará la función de funcionamiento económico, la temperatura establecida se elevará (refrigeración) o se reducirá (calefacción) en 1ºC durante los próximos 30 minutos y otro grado más en los 30 minutos siguientes. Esta nueva temperatura se mantendrá durante 6 horas (en algunos modelos 7) antes de volver a la temperatura seleccionada previamente. (NOTA: en algunos modelos, la temperatura establecida aumentará (refrigeración) o descenderá (calefacción) en 1ºC cada hora, durante 2 horas. Esta nueva temperatura se mantendrá durante 5 horas y luego se apagará la unidad.) NOTA: La función ECONOMY/SLEEP sólo está disponible en los modos de refrigeración, calefacción y automático. TIMER OFF (Operación de apagado automático) La función TIMER OFF resulta útil para apagar automáticamente la unidad tras irse a dormir. El acondicionador de aire se detendrá automáticamente a la hora fijada. Ejemplo: Para apagar el aire acondicionado 10 horas después. 1. Pulse el botón TIMER OFF, aparecerán en pantalla la última hora programada para apagar la unidad y una “h”. 2. Pulse TIMER OFF para visualizar “10h” enla pantalla TIMER OFF del control remoto. 3. Espere unos 3 segundos y en la pantalla digital aparecerá la temperatura. Ahora la función ya está activada. TEMPORIZADOR COMBINADO (Ajustar los temporizadores de apagado y encendido simultáneamente) TEMPORIZADOR ACTIVADO/DESACTIVADO (Funcionamiento de encendido/apagado) Esta función le resultará útil cuando quiera apagar al acondicionador de aire después de irse a la cama y volverlo a encender por la mañana cuando se levante o cuando regrese a casa. Ejemplo: Para apagar el aire acondicionado 2 horas después del ajuste y encenderlo de nuevo 10 horas después del ajuste. 1. Pulse el botón TIMER OFF. 2. Pulse de nuevo el botón TIMER OFF para visualizar 2.0 h en la pantalla TIMER OFF. 3. Pulse el botón TIMER ON. 4. Pulse de nuevo el botón TIMER ON para visualizar 10 h en la pantalla TIMER ON. 5. Espere a que el control remoto muestre la temperatura de ajuste. 11 12
  • 10. The design and specifications are subject to change without prior notice for product improvement. Consult with the sales agency or manufacturer for details. APD-9CR PORTABLE COLD FUNC. APD-12CR PORTABLE COLD FUNC. APD-12HR PORTABLE HEATING PUMP AIR CONDITIONER REMOTE CONTROLLER ILLUSTRATION Thank you very much for purchasing our air conditioner. Please read this owner’s manual carefully before using your air conditioner.
  • 11. CONTENTS Handling the remote controller ..............................................................16 Remote controller Specifications...........................................................17 Function buttons .................. ..................................................................18 Indicators on LCD ...................................................................................20 How to use the buttons ..........................................................................21 Auto operation.........................................................................................21 Cooling/Heating/Fan operation..............................................................21 Dehumidifying operation .......................................................................22 Swing operation......................................................................................22 Timer operation.......................................................................................23 ECONOMY operation .............................................................................26 Handling the remote controller Location of the remote controller. - Use the remote controller within a distance of 8 meters from the appliance, pointing it towards the receiver. Reception is confirmed by a beep. CAUTIONS - The air conditioner will not operate if curtains, doors or other materials block the signals from the remote controller to the indoor unit. - Prevent any liquid from falling into the remote controller. Do not expose the remote controller to direct sunlight or heat. - If the infrared signal receiver on the indoor unit is exposed to direct sunlight, the air conditioner may not function properly. Use curtains to prevent the sunlight from falling on the receiver. - If other electrical appliances react to the remote controller. either move these appliances or consult your local dealer. Replacing batteries The remote controller is powed by two dry batteries(R03/LR03X2) housed in the rear part and protected by a cover. (1) Remove the cover by pressing and sliding off. (2) Remove the old batteries and insert the new batteries,placing the(+) and (-) ends correctly. (3) Reattach the cover by sliding it back into position. NOTE: When the batteries are removed, the remote controller erases all programming. After inserting new batteries, the remote controller must be reprogrammed. 15 16
  • 12. CAUTIONS - Do not mix old and new batteries or batteries of a different type. - Do not leave the batteries in the remote controller if it is not going to be used for 2 or 3 months. - Dispose of the old batteries in the special containers to be found in the sales outlets. Remote Controller Specifications Function buttons Model RG51B1/(C)EU, RG51B14/(C)E,RG51B31/(C)E RG51B/(C)EU, RG51B16/(C)E,RG51B31/(C)EU RG51B17/(C)EU, RG51B18/(C)E,RG51B32/(C)EU RG51B19/(C)E-M, RG51B20/(C)E,RG51B30/(C)EU RG51B25/(C)E, RG51B26/(C)EU;RG51B27/(C)E, RG51B30/(C)E. Rated Voltage 3.0V(Dry batteries R03/LR03 2) Lowest Voltage of CPU Emitting Signal 2.0V Signal Receiving Range 8m Environment -5ºC 60ºC(-41ºC ~ 140ºF) NOTE: Temperature setting display: Celsius scale( C): RG51B14/(C)E, RG51B16/(C)E,RG51B18/(C)E,RG51B31/(C) E,RG51B19/(C)E-M, RG51B20/(C)E,RG51B25/(C)E,RG51B27/(C)E,RG51B30/(C) E. Fahrenheit scale( F): RG51B/(C)EU, RG51B1/(C)EU, RG51B17/(C)EU,RG51B26/ (C)EU, RG51B30/(C)EU,RG51B32/(C)EU,RG51B31/(C)EU. Perfomance Feature Operating Mode: AUTO, COOL, DRY, HEAT(Cooling only model without), and FAN. 2. Timer Setting Function in 24 hours. 3. Indoor Setting Temperature Range : 17C~30 C(62OF~88OF). 4. Full function of LCD (Liquid Crystal Display) NOTE: All the illustrations in this manual are for explanation purpose only. Your air conditioner may be slightly different.The actual shape shall prevail. Model: RG51B14/(C)E, RG51B16/(C)E, RG51B18/(C)E, RG51B19/(C)E-M, RG51B20/(C)E RG51B31/(C)E RG51B30/(C)E. NOTE: - RG51B16/(C)E ,RG51B18/(C)E models have no SWING feature; - RG51B18/(C)E ,RG51B19/(C) E-M, RG51B20/(C)E models have no LED DISPLAY feature. - RG51B19/(C)E-M model has no MED FAN feature. - RG51B31/(C)E model ECONOMY button is instead of SLEEP button. - RG51B30/(C)E model has no MED FAN and SWING features 1. TEMP DOWN Button Push this button to decrease the indoor temperature setting in 1ºC(2ºF) increments to 30ºC(88ºF). 2. TEMP UP Button Push this button to increase the indoor temperature setting in 1ºC(2ºF) increments to 17ºC(62ºF). 3. MODE Button Each time the button is pressed, the operation mode is selected in the sequence of the following: > AUTO > COOL > DRY > HEAT > FAN NOTE: Heat mode is for Cooling & Heating models only. 4. SWING Button(on some models) Used to stop or start louver movement and set the desired up/down airflow direction. 5. RESET Button Once the recessed RESET button is pressed, all of the current settings will be cancelled and the controller will return to the initial settings. 6. ON/OFF Button Operation starts when this button is pressed and stops when the button is pressed again. 7. FAN SPEED Button Used to select the fan speed in four steps: > Auto -> Low > Med > High - Some models have no MED FAN feature. 8.TIMER ON Button Press this button to activate the Auto-on time setting. Each press will increase the time setting in 30 minutes increments, up to 10 hours, then at 1 hour increments up to 24 hours. To cancel the Auto-on time setting, just press the button until the time setting is 0.0. 9. ECONOMY(SLEEP) Button Select this function during the sleeping time. It can maintain the most comfortable temperature and save energy. This function is available on COOL, HEAT or AUTO mode only . Model: RG51B25/(C)E; RG51B27/(C)E. NOTE: RG51B25/(C)E model has no SWING feature. 17 18
  • 13. Function buttons (continued) Model: RG51B1/(C)EU, RG51B/(C)EU, RG51B26/(C)EU, RG51B30/(C)EU, RG51B32/(C)EU, RG51B31/(C)EU. NOTE: RG51B/(C)EU models have no SWING and FOLLOW ME buttons ;RG51B1/(C)EU models have no FOLLOW ME button; RG51B30/(C)EU models have no SWING ,FOLLOW ME buttons and MED FAN feature,and SLEEP button instead of ECONOMY button; RG51B32/ (C)EU models have no FOLLOW ME button and MED FAN feature,and SLEEP button instead of ECONOMY button;RG51B31/ (C)EU models have on FOLLOW ME button. MODE display Displays the current selected mode. Including AUTO, COOL, DRY, HEAT (cooling & heating models only)and FAN. Transmission Indiscator This transmission indicator will light when remote controller transmits signals to the indoor unit. Temp./Timer display The temperature setting (from 17OC(62O F) to 30OC(88OF)) or timer setting (0~24h) will be displayed. If FAN mode is selected, there will be no display. ON/OFF display This indicator will be displayed when the unit is operating. MODE display (FAN mode) FAN SPEED display Displays the selected fan speed: AUTO, HIGH, MED and LOW. Nothing displays when the fan speed is selected in AUTO speed. When AUTO or DRY Mode is selected, there will be no signals displayed. NOTE: RG51B19/(C)E-M model has no MED FAN speed feature. Model: RG51B17/(C)EU NOTE: While the unit is running under SLEEP mode, it would be cancelled if ON/OFF, FAN SPEED, SLEEP or MODE button is pressed. 10. TIMRT OFF Button Press this button to activate the Auto-off time setting. Each press will increase the time setting in 30 minutes increments, up to 10 hours, then at 1 hour increments up to 24 hours. To cancel the Auto-off time setting, just press the button until the time setting is 0.0. 11. LOCK Button Press this recessed button to lock all current settings, and the remote controller will not accept any operation except that of the LOCK. Use the LOCK mode when you want to prevent settings from being changed accidentally. Press the LOCK button again to cancel the LOCK function. A lock symbol will appear on the remote controller display when the lock function is activated. 12. LED Display Button Press this button to clear the display on the indoor unit, press it again to light the display . NOTE: RG51B18/(C)E ,RG51B19/(C)E-M, RG51B20/(C)E models have no this feature. 13. FOLLOW ME/TEMP SENSING Button - Press this button to initiate FOLLOW ME function. - When the Follow Me function is activated, the remote display is actual temperature at its location. The remote control will send this signal to the air conditioner every 3 minutes interval until press the Follow Me button again. - The Follow Me function is not available under DRY and FAN mode. - Switch the operation mode or turn off the unit will cancel the follow me function automatically. 14. ION Button When push this button, the ion generator is energized and will help to remove pollen and impurities from the air. FOLLOW ME display When pressing FOLLOW ME/TEMP SENSING button in COOL or HEAT mode, the remote sensing function is activated and this indicator displays TIMER display This display area shows the settings of the TIMER. That is, if only the Auto-on time function is set, it will display TIMER ON. If only the Auto-off time function is set, it will display TIMER OFF. If both functions are set, it will display TIMER ON OFF which indicates you have chosen both the Auto-on time and Auto-off time. LOCK indiscator LOCK display is displayed when pushing the LOCK button. Push the LOCK button to clear display. Indicators on LCD 19 20
  • 14. Dehumidifying operation Ensure the unit is plugged in and power is available. The OPERATION indicator on the display panel of the indoor unit illuminates. 1. Press the MODE button to select DRY mode. 2. Press the TEMP button to set the desired temperature. The temperature can be set within a range of increments. 3. Press the ON/OFF button to start the air conditioner. 17ºC (62ºF)~ 30ºC in 1ºC(2ºF) NOTE In the Dehumidifying mode, you can not switch the fan speed. It has already been automatically controlled. Swing operation(on some models) Use the SWING button to adjust the Up/Down airflow direction . 1. When press the button once and quickly, the air flow direction setting feature of the louver is activated. The moving angle of the louver is 6o for each press. Keep pressing the button to move the louver to the desired position. NOTE:On some models press it to initiate the Auto swing feature only. 2. If keep pressing the SWING button without releasing for 2 more seconds, the auto swing feature of the louver is activated. The horizontal louver would swing up/down automatically. Press it again to stop . NOTE When the louver swing or move to a position which would affect the cooling and heating effect of the air conditioner, it would automatically change the swing/ moving direction. How to use the buttons Auto operation Ensure the unit is plugged in and power is available. The OPERATION indicator on the display panel of the indoor unit illuminates. 1. Press the MODE button to select Auto. 2. Press the TEMP button to set the desired temperature. The temperature can be set within a range of 17ºC(62ºF)~ 30ºC in 1 C(2ºF) increments. 3. Press the ON/OFF button to start the air conditioner. NOTE 1. In the Auto mode, the air conditioner can logically choose the mode of Cooling, Fan, Heating and Dehumidifying by sensing the difference between the actual ambient room temperature and the set temperature on the remote controller. 2. In the Auto mode, you can not switch the fan speed. It has already been automatically controlled. 3. If the Auto mode is not comfortable for you , the desired mode can be selected manually. Cooling /Heating/Fan operation Ensure the unit is plugged in and power is available. 1. Press the MODE button to select COOL, HEAT, (cooling & heating models only) or FAN mode. 2. Press the TEMP button to set the desired temperature. The temperature can be set within a range of 3. Press the FAN SPEED button to select the fan speed in four steps- Auto, Low, Med,or High. 4. Press the ON/OFF button to start the air conditioner. 17ºC(62ºF)~ 3ºC in 1ºC(2ºF) increments. NOTE In the FAN mode, the setting temperature is not displayed in the remote controller and you are not able to control the room temperature either. In this case, only step 1, 3 and 4 may be performed 21 22
  • 15. Timer operation Press the TIMER ON button can set the auto-on time of the unit. And press the TIMER OFF button can set the auto-off time of the unit. To set the Auto-on time. 1. Press the TIMER ON button. The remote controller shows TIMER ON, the last Auto-on setting time and the signal “h” will be shown on the LCD display area. Now it is ready to reset the Auto-on time to START the operation. 2. Push the TIMER ON button again to set desired Auto-on time. Each time you press the button, the time increases in 30 minutes increments, up to 10 hours, then at 1 hour increments up to 24 hours. 3. After setting the TIMER ON ,there will be a onehalf second delay before the remote controller transmits the signal to the air conditioner. Then, after approximately another 2 seconds, the signal “h” will disappear and the set temperature will re-appear on the LCD display window. To set the Auto-off time. 1. Press the TIMER OFF button. The remote controller shows TIMER OFF, the last Auto-off setting time and the signal “h” will be shown on the LCD display area. Now it is ready to reset the Auto-off time to START the operation. 2. Push the TIMER OFF button again to set desired Auto-off time. Each time you press the button, the time increases in 30 minutes increments, up to 10 hours, then at 1 hour increments up to 24 hours. 3. After setting the TIMER OFF ,there will be a onehalf second delay before the remote controller transmits the signal to the air conditioner. Then, after approximately another 2 seconds, the signal “h” will disappear and the set temperature will re-appear on the LCD display window. Example of Timer setting TIMER ON (Auto-on Operation) The TIMER ON feature is useful when you want the unit to turn on automatically before say when you return home. The air conditioner will automatically start operating at the set time. Example: To start the air conditioner in 6 hours. 1. Press the TIMER ON button, the last setting of starting operation time and the signal “h” will show on the display area. 2. Press the TIMER ON button to display “6:0h” on the TIMER ON display of the remote controller. 3. Wait for about 3 seconds and the digital display area will show the temperature again. Now this function is activated. IMPORTANT The effective operation time set by the remote controller for the timer function is limited to the following settings: 0.5, 1.0, 1.5, 2.0, 2.5, 3.0, 3.5, 4.0, 4.5, 5.0, 5.5, 6.0, 6.5, 7.0, 7.5, 8.0, 8.5, 9.0, 9.5, 10, 11, 12, 13, 14, 15,16,17, 18, 19, 20, 21, 22, 23 and 24. 23 24
  • 16. TIMER ON TIMER OFF (Off Start Stop operation) This feature is useful when you want to start the air conditioner before you wake up and stop it after you leave the house. Example: To start the air conditioner 2 hours after setting, and stop it 5 hours after setting. 1. Press the TIMER ON button. 2. Press the TIMER ON button again to display 2.0h on the TIMER ON display. 3. Press the TIMER OFF button. 4. Press the TIMER OFF button again to display 5.0h on the TIMER OFF display. 5. Wait for the remote control to display the setting temperature. CAUTION The timer setting(TIMER ON or TIMER OFF) that in sequence occurs directly after the set time will be activated first. ECONOMY(SLEEP) operation When you press the ECONOMY button, the economic running function will be activated, the set temperature will increase(cooling) or decrease(heating) by 1oC(2oF) over the next 30 minutes and by another 1oC(2oF) after an additional 30 minutes.This new temperature will be maintained for 6 (on some models 7 ) hours before it returns to the originally selected temperature.(NOTE:On some models, the set temperature will increase (cooling) or decrease (heating) by 1oC(2oF) per hour for 2 hours. This new temperature will be maintained for 5 hours , then the unit is off.) NOTE: The ECONOMY/SLEEP function is only available under Cooling, Heating and AUTO operation. TIMER OFF (Auto-off Operation) The TIMER OFF feature is useful when you want the unit to turn off automatically after you go to bed. The air conditioner will stop automatically at the set time. Example: To stop the air conditioner in 10 hours. 1. Press the TIMER OFF button, the last setting of stopping operation time and the signal “h” will show on the display area. 2. Press the TIMER OFF button to display “10h” on the TIMER OFF display of the remote controller. 3. Wait for about 3 seconds and the digital display area will show the temperature again. Now this function is activated. COMBINED TIMER (Setting both ON and OFF timers simultaneoulsy) TIMER OFF TIMER ON (On Stop Start operation) This feature is useful when you want to stop the air conditioner after you go to bed, and start it again in the morning when you wake up or when you return home. Example: To stop the air conditioner 2 hours after setting and start it again 10 hours after setting. 1. Press the TIMER OFF button. 2. Press the TIMER OFF button again to display 2.0h on the TIMER OFF display. 3. Press the TIMER ON button. 4. Press the TIMER ON button again to display 10h on the TIMER ON display. 5. Wait for the remote control to display the setting temperature. 25 26
  • 17. Le design ainsi que les spécifications sont sujets à des changements sans préavis destinées à l'amélioration du produit. Veuillez consulter votre point de vente ou le fabricant pour plus de détails. APD-9CR MOBILE FROID SEUL APD-12CR MOBILE FROID SEUL APD-12HR MOBILE POMPE À CHALEUR CLIMATISEUR ILLUSTRATION DE LA TÉLÉCOMMANDE Merci d’avoir acheté notre climatiseur. Veuillez lire soigneusement ce manuel du propriétaire avant d'utiliser votre climatiseur.
  • 18. TABLE DES MATIÈRES Utilisation de la télécommande .........................................................................30 Spécifications de la télécommande...................................................................31 Boutons de fonction .................. ........................................................................32 Indicateurs sur l’écran LCD ...............................................................................34 Utilisation des touches ......................................................................................35 Mode AUTOMATIQUE..........................................................................................35 Mode Climatisation/Chauffage/Ventilateur........................................................35 Mode DÉSHUMIDIFICATION ..............................................................................36 Opération de balayage........................................................................................36 Fonctionnement de la minuterie........................................................................37 MODE ECONOMIE ..............................................................................................40 Utilisation de la télécommande Emplacement de la télécommande. - Veuillez utiliser la télécommande en vous tenant dans un rayon de 8 mètres de l'appareil, et en la dirigeant vers le récepteur. La réception est confirmée par un signal sonore. ATTENTION - Le climatiseur ne fonctionnera pas si des rideaux, des portes ou autres objets bloquent les signaux envoyés par la télécommande à l'unité intérieure. - Empêchez tout liquide de tomber dans la télécommande. N'exposez pas la télécommande à la lumière directe du soleil ou à une source de chaleur. - Si le récepteur de signal infrarouge de l'unité intérieure est exposé à la lumière directe du soleil, il se peut que le climatiseur ne fonctionne pas correctement. Utilisez empêcher que le récepteur soit exposé aux rayons du soleil. - Si d'autres appareils électriques réagissent à la télécommande, veuillez soit déplacer ces appareils, soit consulter votre revendeur local. Remplacement des piles La télécommande est alimentée par deux piles sèches (R03/LR03X2). Elles se trouvent dans la partie arrière et elles sont protégées par un couvercle. (1) Retirez le couvercle en appuyant dessus et en le faisant glisser en arrière. (2) Retirer les piles usagées et remplacez-les par de nouvelles plies, en respectant les polarités (+) et (-). (3) Remettez le couvercle du compartiment à piles. REMARQUE: lorsque vous retirez les piles, la télécommande efface toutes les programmations dont elle disposait. Après avoir remplacé les piles, une nouvelle programmation de la télécommande sera nécessaire. 29 30
  • 19. PRECAUTIONS - Ne pas mélanger les piles usagées et les piles nouvelles ni les piles de différents types. - Ne laissez pas les piles dans la télécommande si vous n’allez pas l’utiliser pendant 2 ou 3 mois. - Veuillez vous débarrasser des piles usagées en les déposant dans les récipients spéciaux que vous trouverez dans les commerces. Spécifications de la télécommande Boutons de fonction Modèle RG51B1/(C)EU, RG51B14/(C)E,RG51B31/(C)E RG51B/(C)EU, RG51B16/(C)E,RG51B31/(C)EU RG51B17/(C)EU, RG51B18/(C)E,RG51B32/(C)EU RG51B19/(C)E-M, RG51B20/(C)E,RG51B30/(C)EU RG51B25/(C)E, RG51B26/(C)EU; RG51B27/(C)E, RG51B30/(C)E. Tension nominale 3.0V(Piles sèches R03/LR03 2) Tension la plus basse du signal d’émission de l’ UC 2,0 V Réception de signal Intervalle 8 m Environnement -5ºC 60ºC (-41ºC ~ 140ºF) REMARQUE: Affichage du réglage de la température : Échelle Celsius (C) : RG51B14/(C)E, RG51B16/(C)E,RG51B18/(C)E,RG51B31/(C)E,RG51B19/(C)E-M, RG51B20/(C)E,RG51B25/(C)E,RG51B27/(C)E,RG51B30/(C)E. Échelle Fahrenheit (F) : RG51B/(C)EU, RG51B1/(C)EU, RG51B17/(C)EU,RG51B26/(C)EU, RG51B30/ (C)EU,RG51B32/(C)EU,RG51B31/(C)EU. Caractéristique des Performances Mode de fonctionnement : AUTOMATIQUE, CLIMATISATION, SÉCHAGE, CHAUFFAGE (les modèles à climatisation seule ne disposent pas de cette fonction), et VENTILATEUR. 2. Fonction de réglage du Timer sur 24 heures. 3. Intervalle de réglage de la température intérieure : 17C~30 C(62OF~88OF). 4. Pleine Fonction complète de l’écran d'affichage à cristaux liquides (LCD) REMARQUE: toutes les images de ce manuel sont exposées à titre explicatif uniquement. Votre climatiseur peut être légèrement différent. La forme réelle prévaudra. Modèle: RG51B14/(C)E, RG51B16/(C)E, RG51B18/(C)E, RG51B19/(C)E-M, RG51B20/(C)E RG51B31/(C)E RG51B30/(C)E. REMARQUE : - Les modèles RG51B16/(C)E ,RG51B18/(C)E ne disposent pas de la fonction SWING (oscillation); - Les modèles RG51B18/(C)E ,RG51B19/(C)E-M, RG51B20/(C)E ne disposent pas d’ÉCRAN D’AFFICHAGE à cristaux liquides (LED). - Le modèle RG51B19/(C)E-M RG51B19/(C) ne dispose pas de l’option MED FAN (ventilateur moyen). - Sur le modèle RG51B31/(C)E, le bouton ECONOMY (ÉCONOMIE) remplace le bouton SLEEP (SOMMEIL). - Le modèle RG51B30/(C)E ne dispose pas des caractéristiques MED FAN (VENTILATEUR MOYEN) et SWING (OSCILLATION) 1. Bouton TEMP DOWN (BAISSER TEMPÉRATURE) Appuyez sur ce bouton pour diminuer la température intérieure par crans de 1°C (2°F) jusqu’à 30°C (88°F). 2. Touche TEMP UP Appuyez sur ce bouton pour augmenter la température intérieure par crans de 1°C (2°F) à 17°C (62°F). 3. Bouton Chaque fois que vous appuierez sur le bouton, le mode d'opération sera sélectionné dans l'ordre suivant : > AUTO > CLIM. > SÉCHAGE > CHAUF. > VENT. REMARQUE: Le mode chauffage ne concerne que les modèles avec Climatisation et Chauffage. 4. Bouton d'OSCILLATION (sur certains modèles) On l’utilise pour arrêter ou démarrer le mouvement du volet et pour sélectionner la direction du flux de l'air que l’on souhaite (vers le haut ou vers le bas. 5. Bouton Lorsque l’on appuie sur le bouton RESET (alors qu’il était enfoncé) , tous les réglages courants sont annulés et le contrôleur revient à ses réglages d’origine. 6. Bouton L'opération commence lorsque ce bouton est pressé et elle s'arrête lorsque l’on appuie dessus de nouveau. 7. Bouton FAN SPEED (vitesse du ventilateur) On s’en sert pour sélectionner la vitesse du ventilateur en quatre étapes : > Auto -> Faible > Moyenne > Élevée - Certains modèles ne proposent pas l’option MED FAN (vitesse ventilateur moyenne) 8.Bouton TIMER ON (minuterie Appuyez sur cette touche pour activer la séquence d’allume automatique. Chaque pression fera avancer le réglage de l’heure par plages de 30 minutes, et ce, jusqu'à arriver à un total de 10 heures. Ensuite, l’avance se fera par plages d’une heure jusqu'à ce que l’on atteigne les 24 heures. Pour annuler le réglage de l’heure de Démarrage Automatique, il vous suffira d’appuyer sur le bouton jusqu'à ce que le réglage affiche 0.0. 9. Bouton ECONOMY(SLEEP) (économie (sommeil)) Sélectionnez cette fonction pendant vos heures de sommeil. Cette fonction peut maintenir la température la plus agréable dans la pièce et économiser de l'énergie. Cette fonction n’est disponible que dans les modes CLIMATISATION, CHAUFFAGE ou AUTOMATIQUE. Modèle : RG51B25/(C)E; RG51B27/(C)E. REMARQUE : le modèle de RG51B25/(C)E ne dispose pas de la fonction SWING (oscillation). 31 32
  • 20. Boutons de fonction (suite) Modèle: RG51B1/(C)EU, RG51B/(C)EU, RG51B26/(C)EU, RG51B30/(C)EU, RG51B32/(C)EU, RG51B31/(C)EU. REMARQUE: Les modèles RG51B/ (C)EU ne disposent pas des boutons SWING (oscillation) et FOLLOW ME (suivez- moi); les modèles RG51B1/(C)EU ne disposent pas du bouton FOLLOW ME (suivez-moi); Les modèles RG51B30/ (C)EU ne disposent pas des boutons SWING (oscillation) et FOLLOW ME (suivez-moi) et ne proposent pas l’option MED FAN (vitesse ventilateur moyenne), et proposent le bouton SLEEP (sommeil) à la place du bouton ECONOMY (économie) ; Les modèles RG51B32/(C)EU ne disposent pas du bouton FOLLOW ME (suivez-moi) et ne proposent pas l’option MED FAN (vitesse ventilateur moyenne), et le bouton SLEEP (sommeil) remplace le bouton ECONOMY (économie); les modèles RG51B31/(C)EU ne disposent pas du bouton FOLLOW ME (suivez-moi). Affichage du MODE Affiche le mode sélectionné en cours. Cela comprend les modes AUTO, CLIMATISATION, SÉCHAGE, CHAUFFAGE (ne concerne que les modèles avec refroidissement et chauffage) et VENTILATEUR. Indicateur de Transmission Ce témoin indicateur de transmission s’allume lorsque la télécommande transmet des signaux à l’unité intérieure. Affichage de la Température / du Programmateur Le réglage de la température (de 17°C (62°F) à 30°C (88°F)) ou le réglage du programmateur (0~24h) s’affichera. Si le mode de VENTILATEUR est sélectionné, rien ne s’affichera. Affichage ON / OFF Cet indicateur s’affichera lorsque l'unité est en fonctionnement. Affichage du MODE (Mode VENTILATEUR) Affichage VITESSE DU VENTILATEUR Affiche la vitesse sélectionnée du ventilateur : AUTO, HIGH, MED e LOW. Rien ne s’affiche lorsque la vitesse du ventilateur est sélectionnée en mode de vitesse AUTOMATIQUE. Lorsque le mode AUTOMATIQUE ou SÉCHAGE est sélectionné, rien ne s’affiche. REMARQUE: Le modèle RG51B19/(C)E-M ne propose pas la fonction MED FAN speed (vitesse ventilateur moyenne). Modèle: RG51B17/(C)EU REMARQUE: Lorsque l'unité fonctionne en mode SLEEP (sommeil) mode, la fonction sera annulée si l’on appuie sur une des touches suivantes : ON/OFF (marche-arrêt), FAN SPEED (vitesse ventilateur), SLEEP (sommeil) ou MODE. 10. Bouton TIMER OFF (minuterie arrêtée) Appuyez sur cette touche pour activer la séquence d’arrêt automatique. Chaque pression fera avancer le réglage de l’heure par plages de 30 minutes, et ce, jusqu'à arriver à un total de 10 heures. Ensuite, l’avance se fera par plages d’une heure jusqu'à ce que l’on atteigne les 24 heures. Pour annuler le réglage de l’heure d’Arrêt Automatique, il vous suffira d’appuyer sur le bouton jusqu'à ce que le réglage affiche 0.0. 11. Bouton LOCK (verrouillage) Appuyez sur ce bouton qui est enfoncé afin de verrouiller tous les réglages courants. À ce moment là, la télécommande n'acceptera aucune opération sauf celles qui ont été VERROUILLÉES. Utilisez le mode de VERROUILLAGE quand vous voulez éviter que les réglages ne soient modifiés par accident. Appuyer sur le bouton LOCK de nouveau pour annuler la fonction de VERROUILLAGE. Un symbole de verrou apparaîtra sur l’écran de la télécommande lorsque la fonction de verrouillage est activée. 12. Bouton LED Display (affichage LED) Appuyez sur ce bouton afin d’effacer l’affichage sur l'unité intérieure, puis appuyez de nouveau dessus pour éclairer l'affichage . REMARQUE: RG51B18/(C)E ,RG51B19/(C)E-M, Les modèles de RG51B20/(C)E ne disposent pas de cette caractéristique. 13. Bouton FOLLOW ME/TEMP SENSING - Appuyez sur ce bouton pour lancer la fonction SUIVEZ-MOI. - Lorsque la fonction SUIVEZ-MOI est activée, l'affichage de la télécommande montre la température réelle à l’endroit où elle se trouve. La télécommande enverra ce signal au clim atiseur toutes les 3 minutes jusqu'à ce que vous appuyez sur le bouton Follow Me (suivez-moi) de nouveau. - La fonction SUIVEZ-MOI n'est pas disponible dans les modes SÉCHAGE et VENTILATEUR. - Si vous changez le mode de fonctionnement ou si vous arrêtez l'unité, cela annulera la fonction SUIVEZ-MOI automatiquement. 14. Bouton ION En appuyant sur ce bouton, le générateur d'ions sera activé et contribuera à retirer le pollen et les impuretés de l'air. Affichage FOLLOW ME (suivez-moi) En appuyant sur le bouton FOLLOW ME/TEMP SENSING (suivez-moi/détection de température) en mode COOL ou HEAT (froid ou chaud), la fonction de télédétection est activée et l’écran d’affichage indique Affichage TIMER (minuterie) Cet affichage indique les réglages du TIMER. C'est-à-dire, s’il n’y a que la fonction de démarrage automatique qui est réglée, l’affichage indiquera TIMER ON (Programmateur Allumé). S’il n’y a que la fonction d’arrêt automatique (Auto-off) qui est réglée, l’affichage indiquera TIMER OFF (Programmateur Éteint). Si les deux fonctions sont réglées, l’affichage indiquera TIMER ON OFF (Programmateur Marche Arrêt), ce qui indique que les fonctions de démarrage automatique et d’arrêt automatique ont été sélectionnées. Indicateur LOCK (verrou) Affichage de VERROUILLAGE s'affiche en appuyant sur la touche LOCK. Appuyez sur la touche LOCK à nouveau pour effacer l’affichage en cours. Indicateurs sur l’écran LCD 33 34
  • 21. Mode DÉSHUMIDIFICATION Veillez à ce que l'unité soit bien branchée et à qu’il y ait du courant. Le voyant OPERATION sur le panneau d’affichage de l’unité intérieure s’allume. 1. Appuyez sur la touche MODE pour sélectionner SÉCHAGE. 2. Appuyez sur la touche TEMP pour régler la température souhaitée. Il est possible de régler la température par paliers. 3. Appuyez sur la touche ON/OFF pour démarrer le climatiseur. 17ºC (62ºF)~ 30ºC à 1ºC(2ºF) REMARQUE En mode Déshumidificateur, vous ne pouvez pas changer la vitesse du ventilateur. Elle est réglée automatiquement. Opération d'oscillation (sur certains modèles) Utilisez le bouton SWING pour régler la direction du flux de l'air (vers le haut ou vers le bas). 1. En appuyant sur le bouton une fois et rapidement, vous activerez le dispositif permettant de diriger la direction du souffle de l’air par l’orientation du volet. La variation de l’inclinaison du volet est de 6° à chaque pression. Continuez à appuyer sur le bouton pour déplacer le volet jusqu’à ce qu’il atteigne la position souhaitée. NOTE : sur certains modèles, appuyez sur le bouton pour lancer le mode oscillation automatique seulement. 2. Si vous continuez à appuyer sur le bouton SWING sans le lâcher pendant 2 secondes supplémentaires, le dispositif automatique d'oscillation du volet s’activera. Le volet horizontal oscillera de haut en bas de façon automatique. Appuyez dessus de nouveau pour arrêter . REMARQUE Lorsque le volet bascule ou se met dans une position qui pourrait affecter l’effet de refroidissement et l'effet thermique du climatiseur, il changera automatiquement de mouvement d'oscillation/de sens de mouvement. Utilisation des touches Mode AUTOMATIQUE Veillez à ce que l'unité soit bien branchée et à qu’il y ait du courant. Le voyant OPERATION sur le panneau d’affichage de l’unité intérieure s’allume. 1. Utilisez la touche MODE pour sélectionner le mode Auto. 2. Appuyez sur la touche TEMP pour régler la température souhaitée. Il est possible de régler la température dans une plage comprise entre 17ºC (62ºF) et ~ 30ºC avec des augmentations d’1ºC (2ºF). 3. Appuyez sur la touche ON/OFF pour démarrer le climatiseur. REMARQUE 1. En mode automatique, le climatiseur peut sélectionner de façon logique le mode Refroidissement, Ventilateur, Chauffage et Déshumidification en sentant la différence entre la température ambiante réelle et la température réglée sur la télécommande. 2. En mode Automatique, vous ne pouvez pas changer la vitesse du ventilateur. Elle est réglée automatiquement. 3. Si le mode AUTOMATIQUE n’est pas confortable, le mode souhaité peut être sélectionné manuellement. Mode Climatisation/Chauffage/Ventilateur Veillez à ce que l'unité soit bien branchée et à qu’il y ait du courant. 1. Appuyez sur le bouton MODE pour sélectionner le mode COOL (froid), HEAT (chaud), (modèles refroidissement et de chauffage uniquement) ou le mode FAN (ventilateur). 2. Appuyez sur la touche TEMP pour régler la température souhaitée. Il est possible de régler la température peut être placée dans une marge de 3. Appuyer sur le bouton FAN SPEED pour sélectionner la vitesse du ventilateur en quatre étapes Auto, Low, Med, ou High (Auto, Basse, Moyenne, ou Élevée). 4. Appuyez sur la touche ON/OFF pour démarrer le climatiseur. le ~ 17°C (62°F) 3°C dans 1°C (2°F) incrémente. REMARQUE En mode VENTILATEUR, la température réglée n'est pas affichée sur la télécommande et vous ne pourrez pas régler la température ambiante non plus. Dans ce cas, vous ne pourrez réaliser que les étapes 1, 3 et 4 35 36
  • 22. Fonctionnement de la minuterie Pressez la touche TIMER ON pour régler l’heure de démarrage automatique de l’unité. Et pressez le TIMER OFF pour régler l’heure d’arrêt auto de l’unité. Pour régler l’Heure d’Acctionnement automatique (Auto-on time). 1. Pressez la touche TIMER ON. La télécommande affiche TIMER ON (Programmateur en marche). La dernière heure de démarrage automatique et la lettre "h" s’afficheront sur la zone d'affichage LCD. Maintenant le dispositif est prêt pour la remise à zéro de l'heure d’Arrêt automatique de démarrage. 2. Appuyez sur la touche TIMER ON de nouveau pour régler l’heure de Démarrage automatique. À chaque pression sur le bouton, l’heure avance de 30 minutes, jusqu'à atteindre les 10 heures. Ensuite, on effectuera des sauts d’une heure jusqu’à arriver à 24 heures. 3. Après réglé TIMER ON (minuterie en marche), il y aura un retard d’une demi- seconde avant que la télécommande transmette le signal au climatiseur. Puis, après encore environ 2 secondes, la lettre "h" disparaîtra et la température réglée réapparaîtra sur l’écran d'affichage à cristaux liquides. Pour régler l’Heure d’Arrêt automatique (Auto-off time). 1. Pressez la touche TIMER OFF. La télécommande affiche TIMER OFF (Programmateur arrêté). La dernière heure d’Arrêt automatique et la lettre "h" apparaitront sur l’écran LCD. Maintenant le dispositif est prêt pour la remise à zéro de l'heure d’Arrêt automatique de démarrage. 2. Appuyez de nouveau sur le bouton TIMER OFF (arrêt minuterie) afin de régler l’heure d’arrêt Automatique souhaitée. À chaque pression sur le bouton, l’heure avance de 30 minutes, jusqu'à atteindre les 10 heures. Ensuite, on effectuera des sauts d’une heure jusqu’à arriver à 24 heures. 3. Une fois le Timer off réglé, une demi seconde s’écoulera avant que la télécommande transmette le signal à la télécommande. Puis, après encore environ 2 secondes, la lettre "h" disparaîtra et la température réglée réapparaîtra sur l’écran d'affichage à cristaux liquides. Exemple de réglage de minuterie TIMER ON (Allumage Automatique) Cette fonction PROGRAMMATEUR EN MARCHE vous sera utile lorsque vous souhaitez que la climatisation s'allume automatiquement avant de rentrez chez vous. Le climatiseur démarre automatiquement à l'heure programmée. Exemple : Pour que le climatiseur s’allume 2 heures après. 1. Appuyez sur le bouton TIMER ON. Le dernier réglage d’heure de démarrage et la lettre "h" s’afficheront sur l’écran de visualisation. 2. Appuyez sur le bouton TIMER ON, afin d’afficher “6h” sur l’écran d’affichage PROGRAMMATEUR EN MARCHE de la télécommande. 3. Attendez pendant environ 3 secondes et l’écran d’affichage numérique fera apparaitre la température de nouveau. Maintenant, cette fonction a été activée. IMPORTANT L’heure de mise en route effective réglée par la télécommande concernant les fonctions du programmateur se limite aux réglages suivants : 0.5, 1.0, 1.5, 2.0, 2.5, 3.0, 3.5, 4.0, 4.5, 5.0, 5.5, 6.0, 6.5, 7.0, 7.5, 8.0, 8.5, 9.0, 9.5, 10, 11, 12, 13, 14, 15,16,17, 18, 19, 20, 21, 22, 23 et 24. 37 38
  • 23. TIMER ON TIMER OFF (Démarrage de l'opération Marche Arrêt) Ce dispositif est utile lorsque vous souhaitez que le climatiseur s’allume avant votre réveil ou qu’il s’arrête après votre départ. Exemple : Pour que le climatiseur s’allume 2 heures après le réglage, et pour qu’il s’arrête 5 heures après le réglage. 1. Pressez la touche TIMER ON. 2. Appuyez sur le bouton TIMER ON de nouveau, afin de voir apparaître 2,0 h sur l’écran d’affichage PROGRAMMATEUR EN MARCHE. 3. Pressez la touche TIMER OFF. 4. Appuyez sur le bouton TIMER OFF de nouveau, afin de voir apparaître 5,0.0 h sur l’affichage PROGRAMMATEUR ARRÊTÉ. 5. Attendez que la télécommande affiche la température réglée. ATTENTION Le réglage du programmateur (PROGRAMMATEUR EN MARCHE ou P ROGRAMMATEUR ARRÊTÉ) qui se produit dans l'ordre directement après l’heure programmée sera activé en premier. Mode ÉCONOMIE (SOMMEIL) Lorsque vous appuyez sur le bouton ECONOMY (économie), la fonction de mode économie sera activée, la température réglée augmentera (refroidissement) ou diminuera (chauffage) de 1 °C (2 °F) pendant des 30 minutes suivantes et d’un autre 1 °C (2 °F)après 30 minutes supplémentaires. Cette nouvelle température sera maintenue pendant 6 heures (pendant 7 heures pour certains modèles) avant de revenir à la température choisie à l'origine. (NOTE : sur certains modèles, la température réglée augmentera (refroidissement) ou diminuera (chauffage) de 1 °C (2 °F)par heure pendant 2 heures. Cette nouvelle température sera maintenue pendant 5 heures, puis l'unité s’éteindra.) REMARQUE: La fonction ÉCONOMIE/ SOMMEIL n’est disponible que dans les modes de, Chauffage, Climatisationet en mode AUTOMATIQUE. TIMER OFF (Arrêt Automatique) La fonction PROGRAMMATEUR ARRÊTÉ est utile lorsque vous souhaitez que l'unité s'éteigne automatiquement après que vous vous soyez couché. Le climatiseur s'arrête automatiquement à l'heure programmée. Exemple : Pour arrêter le climatiseur 10 heures après. 1. Appuyez sur le bouton TIMER OFF, le dernier réglage d'heure d’arrêt et la lettre “h” apparaîtront sur l’écran d’affichage. 2. Appuyez sur le bouton TIMER OFF, afin d’afficher “10h” surl’écran d’affichage PROGRAMMATEUR ARRÊTÉ de la télécommande. 3. Attendez pendant environ 3 secondes et l’écran d’affichage numérique fera apparaitre la température de nouveau. Maintenant, cette fonction a été activée. MINUTERIE COMBINÉE (Réglage des deux minuteries marche et arrêt simultanément) TIMER OFF TIMER ON (Marche - Arrêt – Démarrage de l'opération) Cette fonction est utile si vous voulez arrêter le climatiseur quand vous allez vous coucher et le redémarrer le matin quand vous vous réveillez ou quand vous revenez chez vous. Exemple : Pour arrêter le climatiseur 2 heures après le réglage et pour qu’il redémarre 10 heures après le réglage. 1. Pressez la touche TIMER OFF. 2. Appuyez sur le bouton TIMER OFF de nouveau, afin de voir apparaître 2.0 h sur l’affichage PROGRAMMATEUR ARRÊTÉ. 3. Pressez la touche TIMER ON. 4. Appuyez sur le bouton TIMER ON de nouveau, afin de voir apparaître 10 h sur l’écran d’affichage PROGRAMMATEUR EN MARCHE. 5. Attendez que la télécommande affiche la température réglée. 39 40
  • 24. O design e especificações estão sujeitos a alterações sem aviso prévio para efeitos de melhoria do produto. Consulte a agência de vendas ou o fabricante para mais pormenores. APD-9CR PORTÁTIL APENAS FRIO APD-12CR PORTÁTIL APENAS FRIO APD-12HR PORTÁTIL BOMBA DE CALOR AR CONDICIONADO ILUSTRAÇÃO DO CONTROLO REMOTO Muito obrigado por adquirir o nosso ar condicionado. Leia atentamente este Manual do Utilizador antes de utilizar o seu ar condicionado.
  • 25. ÍNDICE Utilização do controlo remoto .........................................................................44 Especificações do controlo remoto.................................................................45 Teclas de função ...............................................................................................46 Indicadores no LCD ..........................................................................................48 Como utilizar as teclas .....................................................................................49 Operação AUTO.................................................................................................49 Função Arrefecimento/Aquecimento/Ventilador.............................................49 Operação DESUMIDIFICAÇÃO ........................................................................50 Função Oscilação..............................................................................................50 Operação temporizador.....................................................................................51 Função ECONOMIA ..........................................................................................54 Utilização do controlo remoto Localização do controlo remoto. - Use o controlo remoto dentro de uma distância de 8 metros do aparelho, apontando-o para o receptor. A recepção é confirmada por um bip. PRECAUÇÃO - O ar condicionado não funcionará caso cortinas, portas ou outros materiais bloqueiem os sinais do controlo remoto da unidade interior. - Evite a entrada de qualquer líquido no controlo remoto. Não exponha o controlo remoto à luz solar directa ou a calor. - Se o receptor dos sinais infravermelhos do aparelho interior estiver exposto à luz solar directa, o ar condicionado poderá não funcionar correctamente. Utilize cortinas para impedir que a luz do sol atinja o receptor. - Caso outros aparelhos eléctricos reajam com o controlo remoto, pode deslocar estes aparelhos ou consultar o seu revendedor local. Substituir as pilhas O controlo remoto é alimentado por duas pilhas(R03/LR03X2) instaladas na parte traseira e protegidas por uma tampa. (1) Remova a tampa premindo-a e deslizando-a. (2) Remova as pilhas antigas e introduza as pilhas novas , colocando correctamente os pólos (+) e (-). (3) Recoloque a tampa, deslizando-a de volta para a sua posição . NOTA: Quando as pilhas são removidas, o controlo remoto apaga todas as programações. Depois de introduzir as novas pilhas, o controlo remoto tem que ser reprogramado. 43 44
  • 26. PRECAUÇÕES - Não misture pilhas usadas e novas ou pilhas de um tipo diferente. - Não deixe as pilhas no controlo remoto caso não preveja utilizá-lo durante 2 ou 3 meses. - Deite fora as pilhas gastas nos recipientes especiais que podem ser encontrados em diversos pontos de venda. Especificações do controlo remoto Teclas de função Modelo RG51B1/(C)EU, RG51B14/(C)E,RG51B31/(C)E RG51B/(C)EU, RG51B16/(C)E,RG51B31/(C)EU RG51B17/(C)EU, RG51B18/(C)E,RG51B32/(C)EU RG51B19/(C)E-M, RG51B20/(C)E,RG51B30/(C)EU RG51B25/(C)E, RG51B26/(C)EU;RG51B27/(C)E, RG51B30/(C)E. Tensão nominal 3.0V(Pilhas R03/LR03 2) Tensão Mais Baixa do Sinal Emitido pelo CPU 2.0V Recepção de Sinal Amplitude 8m Ambiente -5ºC 60ºC (-41ºC ~ 140ºF) NOTA: Visor ajuste da temperatura: Escala Celsius (C): RG51B14/(C)E, RG51B16/(C)E,RG51B18/(C)E,RG51B31/(C)E,RG51B19/(C)E-M, RG51B20/(C)E,RG51B25/(C)E,RG51B27/(C)E,RG51B30/(C)E. Escala Fahrenheit (F): RG51B/(C)EU, RG51B1/(C)EU, RG51B17/(C)EU,RG51B26/(C)EU, RG51B30/(C) EU,RG51B32/(C)EU,RG51B31/(C)EU. Característica de Desempenho Modo de funcionamento: AUTO, ARREFECIMENTO, SECAGEM, AQUECIMENTO (não existente no modelo só arrefecimento) e VENTILADOR. 2. Programação do Temporizador sobre 24 horas. 3. Amplitude de Programação de Temperatura Interior: 17C~30 ºC (62ºF~88ºF). 4. Função completa de LCD (Liquid Crystal Display - Ecrã de Cristais Líquidos) NOTA: Todas as imagens deste manual têm apenas uma finalidade explicativa. O seu ar condicionado pode ser ligeiramente diferente. A forma real irá prevalecer. Modelo: RG51B14/(C)E, RG51B16/(C)E, RG51B18/(C)E, RG51B19/(C)E-M, RG51B20/(C)E RG51B31/(C)E RG51B30/(C)E. NOTA: - Os modelos RG51B16/(C) E ,RG51B18/(C)E não possuem SWING; - Os modelos RG51B18/(C)E ,RG51B19/(C)E-M, RG51B20/(C) E não possuem a característica de ECRÃ LED. - O modelo RG51B19/(C)E-M não possui a função de VENTILADOR MED. - O modelo RG51B31/(C)E possui o botão ECONOMIA em vez do botão INACTIVIDADE. - O modelo RG51B30/(C)E não possui as funções de VENTILADOR MED e SWING. 1. Tecla TEMP DOWN Prima este botão para diminuir a definição da temperatura interior em incrementos de 1ºC (2ºF) a 30ºC (88ºF). 2. Tecla TEMP UP Prima este botão para aumentar a definição da temperatura interior em incrementos de 1ºC (2ºF) a 17ºC(62ºF). 3. Botão Cada vez que o botão é premido, o modo de operação é seleccionado na sequência do seguinte: > AUTO > ARREF. > SEC. > AQUEC. > VENTIL. NOTA: Modo de aquecimento apenas para os modelos Arrefecimento & Aquecimento. 4. Botão SWING (apenas em alguns modelos) Utilizado para parar ou iniciar o movimento da grelha de ventilação e definir a direcção do fluxo de ar para cima/para baixo. 5. Botão Quando o botão recuado RESET é premido, todas as actuais definições serão canceladas e o controlador regressará à definição inicial. 6. Botão A operação começa quando este botão é premido e pára quando o botão é premido novamente. 7. Botão VELOCIDADE VENTILADOR Utilizado para seleccionar a velocidade da ventoinha em quatro passos: > Auto -> Baixa > Méd. > Alta - Alguns modelos não possuem a função de VENTILADOR MED. 8.Botão TEMPORIZADOR LIGADO Prima este botão para activar a definição do tempo de ligação automática. Cada pressão aumentará o tempo definido em aumentos de 30 minutos, até 10 horas, e depois em aumentos de 1 hora após 24 horas. Para cancelar a definição do tempo de ligação automática, basta pressionar o botão até que a definição de tempo seja 0.0. 9. Botão ECONOMIA (INACTIVIDADE) Seleccione esta função durante o período de inactividade. Pode manter a temperatura mais confortável e poupar energia. Esta função está disponível em modo só ARREFECIMENTO, AQUECIMENTO ou AUTO. Modelo: RG51B25/(C)E; RG51B27/(C)E. NOTA: O modelo RG51B25/(C)E não possui a função de SWING. 45 46
  • 27. Botões de função (continuação) Modelo: RG51B1/(C)EU, RG51B/(C) UE, RG51B26/(C)EU, RG51B30/(C)EU, RG51B32/(C)EU, RG51B31/(C)EU. NOTA: Os modelos RG51B/(C)UE não possuem os botões SWING e FOLLOW ME; os modelos RG51B1/ (C)UE não possuem o botão FOLLOW ME; Os modelos RG51B30/(C)UE não possuem os botões SWING, FOLLOW ME e e a função de VENTILADOR MED, e o botão INACTIVIDADE em vez do botão ECONOMIA; Os modelos RG51B32/(C)UE não possuem o botão FOLLOW ME e e a função de VENTILADOR MED, e o botão INACTIVIDADE em vez do botão ECONOMIA; os modelos RG51B31/(C)UE não possuem o botão FOLLOW ME. Visor de MODO Exibe o modo de operação seleccionado. Incluindo AUTO, ARREFECIMENTO, SECAGEM, AQUECIMENTO (só nos modelos de arrefecimento e aquecimento) e VENTILADOR. Indicador de Transmissão Este indicador de transmissão irá acender-se quando o controlo remoto transmitir sinais à unidade interior. Visor Temperatura/Timer A definição de temperatura (de 17°C (62°F) a 30°C (88°F)) ou a definição do temporizador (0~24h) será indicada. Caso o modo do VENTILADOR esteja seleccionado, não será apresentada nenhuma indicação. Indicador LIGADO/DESLIGADO Este indicador será apresentado quando a unidade estiver em funcionamento. Visor de MODO (Modo VENTILADOR) Indicador da VELOCIDADE DA VENTOINHA Indica a velocidade seleccionada do ventilador: AUTO, HIGH, MED e LOW. Não se apresenta nada quando a velocidade do ventilador está seleccionada em velocidade AUTO. Quando o Modo AUTO ou SECO está seleccionado, não haverá apresentação de nenhuns sinais. NOTA: O modelo RG51B19/(C)E-M não possui não possui a função de VENTILADOR MED. Modelo: RG51B17/(C)EU NOTA: Enquanto o aparelho estiver a funcionar no modo INACTIVIDADE, este será cancelado quando o botão ON/OFF, VELOCIDADE VENTILADOR, SUSPENSO ou MODO seja premido. 10. Botão TEMPORIZADOR DESLIGADO Prima este botão para activar a definição do tempo de desligamento automático. Cada pressão aumentará o tempo definido em incrementos de 30 minutos, até 10 horas, e depois em incrementos de 1 hora após 24 horas. Para cancelar a definição do tempo de desligamento automático, basta premir o botão até que o tempo definido seja 0.0. 11. Botão BLOQUEIO Prima este botão recuado para bloquear todas as actuais definições, e o controlo remoto não aceitará qualquer operação excepto a do BLOQUEIO. Use o modo BLOQUEIO quando pretende evitar alterações acidentais das definições. Premir novamente o botão BLOQUEIO para anular a função BLOQUEIO. Um símbolo de fechadura aparecerá no visor do controlo remoto quando a função de bloqueio está activada. 12. Botão ECRÃ LED Prima este botão para limpar o visor na unidade interior, prima-o novamente para iluminar o visor. NOTA: RG51B18/(C)E ,RG51B19/(C)E-M, Os modelos RG51B20/(C)E não possuem esta característica. 13. Botão FOLLOW ME/TEMP SENSING - Prima este botão para iniciar a função FOLLOW ME. - Quando a função Follow Me (Siga-me) é activada, a apresentação remota indica a temperatura real no seu local. O controlo remoto enviará este sinal ao ar condicionado a cada intervalo de 3 minutos até que prima o botão Follow Me novamente. - A função Follow Me não se encontra disponível no modo SECAGEM e VENTILADOR. - Mudar para o modo de funcionamento ou desligar a unidade cancelará a função Follow Me automaticamente. 14. Botão IÃO Ao premir este botão, o gerador de iões é alimentado e ajudará a remover o pólen e as impurezas do ar. Visor de FOLLOW ME Ao premir o botão FOLLOW ME/TEMP SENSING no modo ARREFECIMENTO ou AQUECIMENTO, a função de detecção remota é activada e apresenta este indicador Visor do TEMPORIZADOR Esta zona do visor mostra as programações do TEMPORIZADOR. Isto é, caso apenas a função de ligação automática esteja definida, irá indicar TEMPORIZADOR LIGADO. Caso a função de desligamento automático esteja definida, TEMPORIZADOR DESLIGADO será indicado. Caso ambas as funções estejam definidas, irá apresentar TEMPORIZADOR ON OFF, que indica que seleccionou ambas as funções de ligação automática e desligamento automático. Indicador BLOQUEIO O indicador BLOQUEIO é apresentado ao premir o botão BLOQUEIO. Premir de novo a tecla LOCK para limpar o mostrador. Indicadores no LCD 47 48
  • 28. Operação DESUMIDIFICAÇÃO Certifique-se de que a unidade está ligada e que existe corrente eléctrica disponível. A luz OPERATION do painel da unidade interior acende-se. 1. Premir a tecla MODE para seleccionar SECAGEM. 2. Premir a tecla TEMP para programar a temperatura desejada. A temperatura pode ser definida dentro de um intervalo de incrementos. 3. Premir a tecla ON/OFF para ligar o ar condicionado. 17ºC (62ºF)~ 30ºC in 1ºC(2ºF) NOTA No modo de Desumidificação não pode alterar a velocidade do ventilador. Esta já foi automaticamente controlada. Funcionamento de Swing (em apenas alguns modelos) Use o botão SWING para ajustar a direcção do fluxo de ar para cima/para baixo. 1. Quando premir o botão uma vez e rapidamente, a funcionalidade de definição da direcção do fluxo da grelha de respiração é activada. O ângulo de movimento da grelha de ventilação é 6º por cada pressão. Mantenha o botão premido para mover a grelha de ventilação para a posição desejada. NOTA: Em determinados modelos, este botão só pode ser premido para inciar a função de swing automático. 2. Se mantiver o botão SWING premido sem o libertar durante mais de 2 segundos, a funcionalidade de deslocação automática da grelha de ventilação é activada. A grelha horizontal irá deslocar-se automaticamente para cima/para baixo. Prima-o novamente para parar . NOTA Quando a grelha de ventilação balouça ou se desloca para uma posição que poderia afectar o efeito de arrefecimento e aquecimento do ar condicionado, esta alterará automaticamente a direcção de balouço/ deslocação. Como utilizar as teclas Operação AUTO Certifique-se de que a unidade está ligada e que existe corrente eléctrica disponível. O indicador FUNCIONAMENTO no painel da unidade interior acende-se. 1. Prima o botão MODO para seleccionar AUTO. 2. Prima o botão TEMP para programar a temperatura desejada. A temperatura pode ser ajustada dentro de um intervalo de 17ºC (62ºF) ~ 30ºC em incrementos de 1ºC. 3. Prima o botão ON/OFF para ligar o ar condicionado. NOTA 1. No modo Auto, o ar condicionado pode logicamente escolher o modo de Arrefecimento, Ventilador, Aquecimento e desumidificação ao detectar a diferença entre a real temperatura ambiente da divisão e a temperatura definida no controlo remoto. 2. No modo Auto, não pode alterar a velocidade do ventilador. Esta já foi controlada automaticamente. 3. Se o modo AUTO não for confortável para si, o modo pretendido pode ser seleccionado manualmente. Função Arrefecimento/Aquecimento/Ventilador Certifique-se de que a unidade está ligada e que existe corrente eléctrica disponível. 1. Prima o botão MODO para seleccionar ARREFECIMENTO, AQUECIMENTO, (só nos modelos de arrefecimento e aquecimento) ou VENTILADOR. 2. Prima o botão TEMP para definir a temperatura desejada. A temperatura pode ser definida dentro de um intervalo de 3. Prima o botão FAN SPEED para seleccionar a velocidade do ventilador em quatro passos – Auto, Baixa, Méd ou Alta. 4. Premir a tecla ON/OFF para ligar o ar condicionado. 17ºC (62ºF)~ 3ºC em incrementos de 1ºC (2ºF). NOTA No modo VENTILADOR, a temperatura definida não é indicada no controlo remoto e também não poderá controlar a temperatura ambiente da divisão. Neste caso, apenas as etapas 1, 3 e 4 podem ser realizadas 49 50
  • 29. Operação temporizador Prima o botão TIMER ON para programar a hora de ligação automática do aparelho. Prima o botão TIMER OFF para programar a hora de desligamento automático do aparelho. Definir o activação automático. 1. Premir a tecla TIMER ON. O controlo remoto apresenta TIMER ON, a última definição do tempo de ligação automática e o sinal “h” serão apresentados na área de apresentação do LCD. Agora está pronto para restaurar o tempo de activação automático para COMEÇAR a operação. 2. Prima o botão TIMER ON novamente para definir o tempo de ligação automática desejado. Cada vez que pressiona o botão, o tempo aumenta em aumentos de 30 minutos, até 10 horas, e depois em aumentos de 1 hora até 24 horas. 3. Depois de definir TIMER ON, haverá um atraso de meio segundo antes do controlo remoto transmitir o sinal para o ar condicionado. Então, após aproximadamente outros 2 segundos, o sinal “h” desaparecerá e a temperatura definida reaparecerá na janela de apresentação do LCD. Definir o desligamento automático. 1. Premir a tecla TIMER OFF. O controlo remoto apresenta TIMER OFF, a última definição de desligamento automático e o sinal “h” serão apresentados na área de apresentação do LCD. Agora está pronto para restaurar o tempo de desligamento automático para COMEÇAR a operação. 2. Prima o botão TIMER OFF novamente para definir a hora de desligamento automático desejada. Cada vez que pressiona o botão, o tempo aumenta em aumentos de 30 minutos, até 10 horas, e depois em aumentos de 1 hora até 24 horas. 3. Depois de definir TIMER OFF, haverá um atraso de meio segundo antes do controlo remoto transmitir o sinal para o ar condicionado. Então, após aproximadamente outros 2 segundos, o sinal “h” desaparecerá e a temperatura definida reaparecerá na janela de apresentação do LCD. Exemplo de definição do Temporizador TIMER ON (Operação de ligação automático) A funcionalidade TIMER ON é útil quando pretender que a unidade ligue automaticamente antes de regressar a casa, por exemplo. O ar condicionado iniciará automaticamente o funcionamento à hora programada. Exemplo: Para ligar o ar condicionado em 6 horas. 1. Prima o botão TIMER ON, a última definição do tempo de ligação do funcionamento e o sinal “h” serão apresentados na área do visor. 2. Prima o botão TIMER ON para indicar “6:0h” no visor TIMER ON do controlo remoto. 3. Espere aproximadamente 3 segundos e a área de apresentação digital mostrará a temperatura novamente. Agora esta função é activada. IMPORTANTE A definição eficaz do tempo de funcionamento realizada pelo controlo remoto para a função do temporizador está limitada às seguintes definições. 0.5, 1.0, 1.5, 2.0, 2.5, 3.0, 3.5, 4.0, 4.5, 5.0, 5.5, 6.0, 6.5, 7.0, 7.5, 8.0, 8.5, 9.0, 9.5, 10, 11, 12, 13, 14, 15,16,17, 18, 19, 20, 21, 22, 23 e 24. 51 52
  • 30. TIMER ON -» TIMER OFF (Operação ligada -► Parar -► Iniciar) Esta função é útil quando pretender ligar o ar condicionado antes de acordar e e desligá-lo depois de sair de casa. Exemplo: Para ligar o ar condicionado 2 horas após a definição, e pará-lo 5 horas após a definição. 1. Premir a tecla TIMER ON. 2. Prima o botão TIMER ON novamente para apresentar 2,0h no indicador de TIMER ON. 3. Premir a tecla TIMER OFF. 4. Prima o botão TIMER OFF novamente para apresentar 5.0h no indicador de TIMER OFF. 5. Aguarde que o controlo remoto apresente a temperatura definida. PRECAUÇÃO A definição do temporizador (TIMER ON ou TIMER OFF) que ocorre em sequência directamente depois da hora definida, será activada primeiro. Operação de ECONOMIA (INACTIVIDADE) Quando prime o botão ECONOMIA, a função de funcionamento económico será activada, a temperatura definida irá aumentar (arrefecimento) ou diminuir (arrefecimento) em 1ºC(2ºF) durante os próximos 30 minutos e outro 1ºC (2ºF) após 30 minutos adicionais. Esta nova temperatura será mantida durante 6 (nalguns modelos 7) horas antes de regressar à temperatura originalmente seleccionada. (Nota: Nalguns modelos, a temperatura definida irá aumentar (arrefecimento) ou diminuir (aquecimento) em 1ºC (2ºF) por hora durante 2 horas. Esta nova temperatura será mantida durante 5 horas e, em seguida, a unidade desliga-se.) NOTA: A função POUPANÇA/INACTIVIDADE só se encontra disponível no funcionamento de Arrefecimento, Aquecimento e AUTO. TIMER OFF (Operação de desligamento automático) A funcionalidade TIMER OFF é útil quando pretende desligar a unidade automaticamente depois de ir para a cama. O ar condicionado parará automaticamente depois do tempo definido. Exemplo: Para o ar condicionado em 10 horas. 1. Prima o botão TIMER OFF, a última definição do tempo de desligamento da operação e o sinal “h” serão apresentados na área de apresentação. 2. Prima o botão TIMER OFF para indicar “10h” no visor TIMER OFF do controlo remoto. 3. Espere aproximadamente 3 segundos e a área de apresentação digital mostrará a temperatura novamente. Agora esta função é activada. TEMPORIZADOR COMBINADO (A definir os temporizadores ON e OFF simultaneamente) TIMER OFF -* TIMER ON (Operação Ligar – Parar – Iniciar) Esta função é útil quando se pretende desligar o ar condicionado depois de ir dormir e ligá-lo novamente de manhã ao acordar ou quando regressa a casa. Exemplo: Para desligar o ar condicionado 2 horas depois da definição e começar novamente 10 horas após a definição. 1. Premir a tecla TIMER OFF. 2. Prima o botão TIMER OFF novamente para apresentar 2.0h no indicador de TIMER OFF. 3. Premir a tecla TIMER ON. 4. Prima o botão TIMER ON novamente para apresentar 10h no indicador de TIMER ON. 5. Aguarde que o controlo remoto apresente a temperatura definida. 53 54
  • 31. Il design e le specifiche possono essere modificati senza preavviso per miglioramenti. Consultare l'agenzia di vendita o il fabbricante per informazioni dettagliate. APD-9CR PORTATILE SOLO FREDDO APD-12CR PORTATILE SOLO FREDDO APD-12HR PORTATILE POMPA DI CALORE CONDIZIONATORE D'ARIA ILLUSTRAZIONE DEL COMANDO A DISTANZA Vi ringraziamo per aver acquistato il nostro condizionatore d'aria. Preghiamo di leggere attentamente il manuale per l'utente prima di utilizzare il condizionatore d'aria.
  • 32. INDICE Manipolazione del telecomando ......................................................................58 Specifiche del telecomando..............................................................................59 Pulsanti funzione .................. ............................................................................60 Indicatori dell'LCD .............................................................................................62 Uso dei pulsanti .................................................................................................63 Funzionamento AUTO........................................................................................63 Funzionamento Raffreddamento/Riscaldamento/Ventilator.e.......................63 Funzionamento deumidificazione ...................................................................64 Funzionamento dell'oscillazione......................................................................64 Funzionamento del timer...................................................................................65 Funzionamento ECONOMY ..............................................................................68 Manipolazione del telecomando Ubicazione del telecomando. - Usare il telecomando entro una distanza di 8 metri dall'apparecchio, puntandolo verso il ricevitore. La ricezione viene confermata da un segnale acustico. PRECAUZIONI - Il condizionatore d'aria non funziona se tende, porte o altro materiale bloccano il segnale che, proveniente dal telecomando, arriva all'unità interna. - Evitare che sul telecomando cadano liquidi. Non esporre il telecomando alla luce diretta del sole o al calore. - Se il ricevitore a segnali infrarossi dell'unità interna viene esposto alla luce diretta del sole, il condizionatore potrebbe non funzionare correttamente. Usare delle tende per evitare che il ricevitore venga esposto alla luce solare. - Se altri apparecchi elettrici reagiscono al telecomando, spostarli o consultare il proprio rifornitore locale. Sostituzione delle batterie Il telecomando è alimentato con due batterie a secco (R03/LR03X2) situate nella parte posteriore e protette con un coperchio. (1) Rimuovere il coperchio premendo e facendolo scivolare. (2) Rimuovere le vecchie batterie ed inserire quelle nuova, facendo attenzione alla posizione dei poli (+) e (-). (3) Situare nuovamente il coperchio facendolo scivolare alla sua posizione originale. NOTA: Quando si rimuovono le batterie, viene cancellata tutta la programmazione del telecomando. Quando si inseriscono le batterie nuove, il telecomando deve essere riprogrammato. 57 58
  • 33. PRECAUZIONI - Non utilizzare batterie nuove insieme a batterie vecchie o di tipo diverso. - Non lasciare le batterie nel telecomando se non si prevede di non utilizzarlo per 2 o 3 mesi. - Eliminare le batterie vecchie utilizzando i contenitori speciali che si trovano nei punti vendita. Specifiche del telecomando Pulsanti funzione Modello RG51B1/(C)EU, RG51B14/(C)E,RG51B31/(C)E RG51B/(C)EU, RG51B16/(C)E,RG51B31/(C)EU RG51B17/(C)EU, RG51B18/(C)E,RG51B32/(C)EU RG51B19/(C)E-M, RG51B20/(C)E,RG51B30/(C)EU RG51B25/(C)E, RG51B26/(C)EU;RG51B27/(C)E, RG51B30/(C)E. Tensione nominale 3.0V(Batterie a secco R03/LR03 2) Tensione minima di emissione del segnale CPU 2.0V Portata di ricezione del segnale 8m Ambiente -5ºC 60ºC (-41ºC ~ 140ºF) NOTA: Display impostazioni temperatura: Scala Celsius (ºC): RG51B14/(C)E, RG51B16/(C)E,RG51B18/(C)E,RG51B31/(C)E,RG51B19/(C)E-M, RG51B20/(C)E,RG51B25/(C)E,RG51B27/(C)E,RG51B30/(C)E. Scala Fahrenheit (ºF): RG51B/(C)EU, RG51B1/(C)EU, RG51B17/(C)EU,RG51B26/(C)EU, RG51B30/(C) EU,RG51B32/(C)EU,RG51B31/(C)EU. Caratteristiche delle prestazioni Modalità di funzionamento: AUTO, RAFFREDDAMENTO, ASCIUGATURA, RISCALDAMENTO (Solo in modelli senza funzione di raffreddamento) e VENTILATORE. 2. Funzione impostazione Timer in 24 ore. 3. Impostazione intervallo temperatura interna : 17C~30 ºC(62 ºF~88 ºF). 4. Funzioni complete dell'LCD (display a cristalli liquidi) NOTA: Tutte le immagini del presente manuale sono a titolo puramente illustrativo. Il condizionatore d'aria che ha acquistato potrebbe essere leggermente diverso. La forma attuale è prevalente. Modello: RG51B14/(C)E, RG51B16/(C)E, RG51B18/(C)E, RG51B19/(C)E-M, RG51B20/(C)E RG51B31/(C)E RG51B30/(C)E. NOTA: - RG51B16/(C)E ,RG51B18/(C)E non dispongono dei SWING; - I modelli RG51B18/(C)E ,RG51B19/ (C)E-M, RG51B20/(C)E non dispongono di DISPLAY a LED. - Il modello RG51B19/(C)E-M non dispone della funzione MED FAN. - Il modello RG51B31/(C)E dispone del pulsante ECONOMY invece del pulsante SLEEP. - Il modello RG51B30(C)E non dispone delle funzioni MED FAN e SWING. 1. Pulsante TEMP DOWN Premere questo pulsante per diminuire la temperatura interna ed impostarla su 30 ºC (88 ºF) in incrementi di 1 °C (2 ºF). 2. Pulsante TEMP UP Premere questo pulsante per aumentare la temperatura interna ed impostarla su 17 ºC (62 ºF) in incrementi di 1 °C (2 ºF). 3. Pulsante MODE Ogni volta che si preme questo pulsante, si seleziona la modalità operativa nella sequenza specificata di seguito: > AUTO > RAFF. > ASCIUG. > RISCAL. > VENT NOTA: Modalità riscaldamento presente solo su modelli a raffreddamento e riscaldamento. 4. Pulsante SWING (su alcuni modelli) Usata per arrestare o avviare il movimento della feritoia ed impostare la direzione del flusso d'aria verso l'alto o verso il basso, come si desidera. 5. Pulsante RESET Dopo aver premuto il pulsante RESET, tutte le impostazioni attuali vengono cancellate ed il controller torna alle sue iniziali. 6. Pulsante ON/OFF Il funzionamento comincia premendo questo pulsante e si arresta quando il pulsante viene premuto nuovamente. 7. Pulsante FAN SPEED Usato per selezionare la velocità della ventola in quattro passi: > Auto -> Bassa > Med. > Alta - Alcuni modelli non dispongono della funzione MED FAN. 8.Pulsante TIMER ON Premere questo pulsante per attivare le impostazioni automatiche. Ogni volta che viene premuto il pulsante aumenterà l'impostazione del tempo di 30 minuti, fino a 10 ore, quindi ad incrementi di 1 ora fino a 24 ore. Per cancellare le impostazioni di accensione automatico basta premere il pulsante fino a quando l'impostazione del tempo non si trova su 0.0. 9. Pulsante ECONOMY (SLEEP) Selezionare questa funzione mentre si dorme. Può mantenere la temperatura adeguata e risparmiare energia. Questa funzione è disponibile esclusivamente sui modelli con modalità RAFFREDDAMENTO, RISCALDAMENTO o AUTO. Modello: RG51B25/(C)E; RG51B27/(C)E. NOTA: Il modello RG51B25/(C)E non dispone della funzione SWING. 59 60
  • 34. Pulsanti funzione (continua) Modello: RG51B1/(C)EU, RG51B/(C)EU, RG51B26/(C)EU, RG51B30/(C)EU, RG51B32/(C)EU, RG51B31/(C)EU. NOTA: I modelli RG51B/(C)EU non dispongono dei pulsanti SWING e FOLLOW ME; il modello RG51B1/ (C)EU non dispone del pulsante FOLLOW ME; il modello RG51B30/(C) EU non dispone dei pulsanti SWING, FOLLOW ME e della funzione MED FAN, è dotato del pulsante SLEEP al posto del pulsante ECONOMY; il modello RG51B32/(C)EU non dispone del pulsante FOLLOW ME e della funzione MED FAN, è dotato del pulsante SLEEP al posto del pulsante ECONOMY; il modello RG51B31/(C) EU è dotato del pulsante FOLLOW ME. Display MODALITÀ Visualizza la modalità selezionata attualmente. Incluse le modalità AUTO, RAFFREDDAMENTO, ASCIUGATURA, RISCALDAMENTO (solo sui modelli con raffreddamento e riscaldamento) e VENTILATORE. Indicatore di trasmissione Questa spia della trasmissione si illumina quando il telecomando trasmette segnali all'unità interna. Display di Temp./Timer Vengono visualizzati la temperatura impostata (da 17°C (62°F) a 30°C (88°F)) oppure il timer impostato (0~24h). Se è selezionata la modalità VENTILAZIONE non viene visualizzato. Display ON/OFF Questa spia indica se l'unità è in funzione. Display MODALITÀ (Modalità VENTILATORE) Visualizzazione della VELOCITÀ DEL VENTILATORE Visualizza la velocità selezionata del ventilatore: AUTO, HIGH, MED e LOW. Non viene visualizzato niente quando la velocità del ventilatore è impostata su AUTO. Quando sono selezionate le modalità AUTO o DRY, non viene mostrato nessun segnale. NOTA: Il modello RG51B19/(C)E-M non dispone della funzione di velocità MED FAN. Modello: RG51B17/(C)EU NOTA: Quando l'unità funziona in modalità SLEEP, questa verrà cancellata se viene premuto il pulsante ON/OFF, FAN SPEED, SLEEP o MODE. 10. Pulsante TIMER OFF Premere questo pulsante per attivare le impostazioni di spegnimento automatico. Ogni volta che viene premuto il pulsante aumenterà l'impostazione del tempo di 30 minuti, fino a 10 ore, quindi ad incrementi di 1 ora fino a 24 ore. Per cancellare le impostazioni di spegnimento automatico basta premere il pulsante fino a quando l'impostazione del tempo non si trova su 0.0. 11. Pulsante LOCK Premere questo pulsante incassato per bloccare tutte le funzioni impostate attualmente, in questa condizione il telecomando non accetterà nessuna operazione diversa da LOCK. Usare la modalità LOCK quando si desidera evitare che le impostazioni vengano modificate accidentalmente. Premere nuovamente il pulsante LOCK per cancellare la funzione. LOCK. Il simbolo di un lucchetto verrà visualizzato sul telecomando indicando che la funzione di blocco è attivata. 12. Pulsante LED Display Premere questo pulsante per azzerare il display dell'unità interna, premerlo nuovamente per illuminare il display. NOTA: RG51B18/(C)E ,RG51B19/(C)E-M, Il modello RG51B20/(C)E non dispone di questa funzione. 13. Pulsante FOLLOW ME/TEMP SENSING - Premere questo pulsante per iniziare la funzione FOLLOW ME. - Quando la funzione Follow Me è attivata, sul telecomando viene visualizzata la temperatura nella posizione in cui si trova. Il telecomando invia il segnale al condizionatore ogni 3 minuti prima di premere nuovamente il pulsante Follow Me. - La funzione Follow Me non è disponibile quando sono in uso le modalità DRY e FAN. - Quando viene cambiata la modalità di funzionamento o quando l'unità viene spenta la funzione follow me si cancellerà automaticamente. 14. Pulsante ION Quando viene premuto questo pulsante, viene alimentato il generatore agli ioni per rimuovere polline e impurità dall'aria. Display FOLLOW ME Quando si preme il pulsante FOLLOW ME/TEMP SENSING in modalità COOL o HEAT, la funzione di rilevamento a distanza viene attivata e l'indicatore si attiva Display TIMER Questa zona del display indica le impostazioni del TIMER. Se è impostata solo la funzione tempo Auto-on, viene visualizzato TIMER ON. Se è impostata solo la funzione tempo Auto-off, viene visualizzato TIMER OFF. Se sono selezionate entrambe le funzioni, verrà visualizzato TIMER ON OFF, che indica che sono state scelte entrambe le modalità Auto-on ed Auto-off. Indicatore LOCK Il BLOCCO del display appare premendo il pulsante LOCK. Premere il pulsante LOCK per cancellare la visualizzazione. Indicatori dell'LCD 61 62
  • 35. Funzionamento DEUMIDIFICAZIONE Assicurarsi che l'unità sia collegata e che l'alimentazione sia disponibile. La Indicatore del FUNZIONAMENTO sul display dell'unità interna si accende. 1. Premere il pulsante MODE per selezionare ASCIUGATURA. 2. Premere il pulsante TEMP per impostare la temperatura desiderata. La temperatura può essere impostata entro una intervallo di incrementi 17ºC (62ºF)~ 30ºC a 1ºC(2ºF). 3. Premere il pulsante ON/OFF per accendere il condizionatore d'aria. NOTA In modalità Deumidificazione, non è possibile modificare la velocità del ventilatore. Verrà controllata automaticamente. Funzione Swing (su alcuni modelli) Usare il pulsante SWING per regolare la direzione del flusso dell'aria verso l'alto e verso il basso. 1. Quando si preme il pulsante una volta rapidamente, viene attivata la funzione impostazione della direzione del flusso dell'aria della feritoia. L'angolo di oscillazione della feritoia è di 6º ogni volta che viene premuto il pulsante. Mantenere premuto il pulsante per spostare la feritoia alla direzione desiderata. NOTA: su alcuni modelli premere questo pulsante solo per iniziare la funzione di oscillazione. 2. Se viene mantenuto il pulsante SWING senza rilasciarlo per più di 2 secondi, viene attivata la funzione di oscillazione automatica della feritoia. La feritoia orizzontale oscillerà verso l'alto e verso il basso automaticamente. Premere nuovamente per arrestare . NOTA Quando la feritoia oscilla o si sposta verso una posizione che potrebbe influire sull'effetto di raffreddamento o riscaldamento del condizionatore, la direzione dell'oscillazione/spostamento cambia automaticamente. Uso dei pulsanti Funzionamento AUTO Assicurarsi che l'unità sia collegata e che l'alimentazione sia disponibile. L’Indicatore del FUNZIONAMENTO sul display dell'unità interna si accende. 1. Premere il pulsante MODE per selezionare Auto. 2. Premere il pulsante TEMP per impostare la temperatura desiderata. La temperatura può essere impostata in un intervallo tra 17ºC (62ºF) ~ 30ºC in incrementi di 1°C (2ºF). 3. Premere il pulsante ON/OFF per accendere il condizionatore d'aria. NOTA 1. In modalità automatica, il condizionatore d'aria può scegliere in modo logico la modalità di raffreddamento, ventilazione, riscaldamento e deumidificazione rilevando la differenza tra la temperatura ambientale attuale della camera e la temperatura impostata nel telecomando. 2. In modalità Auto, non è possibile modificare la velocità del ventilatore. Verrà controllata automaticamente. 3. Se la modalità Auto non risulta comoda, è possibile selezionare manualmente la modalità desiderata. Funzionamento Raffreddamento/Riscaldamento/Ventilatore Assicurarsi che l'unità sia collegata e che l'alimentazione sia disponibile. 1. Premere il pulsante MODE per selezionare le modalità AUTO, HEAT (solo sui modelli con raffreddamento e riscaldamento) e FAN. 2. Premere il pulsante TEMP per impostare la temperatura desiderata. La temperatura può essere impostata in un intervallo di 17 ºC (62 ºF) ~ 3 ºC in incrementi di 1 ºC (2 ºF). Premere il pulsante FAN SPEED per selezionare la velocità del ventilatore in quattro passi: Auto, Low, Med o High. 4. Premere il pulsante ON/OFF per accendere il condizionatore d'aria. NOTA Nella modalità VENTILATORE, la temperatura impostata non viene visualizzata sul telecomando e non è possibile controllare la temperatura della stanza. In questo caso possono essere realizzati solo i passi 1, 3 e 4. 63 64