
Recomendados
Mais conteúdo relacionado
Mais procurados
Mais procurados (17)
Destaque
Destaque (16)
Semelhante a Screenshots of School Magazine Contents Page
Semelhante a Screenshots of School Magazine Contents Page (20)
Mais de asmediakirbyholsgrove
Mais de asmediakirbyholsgrove (16)
Último
Último (20)
Screenshots of School Magazine Contents Page
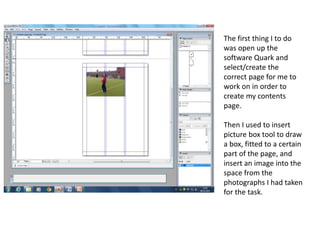
- 1. The first thing I to do was open up the software Quark and select/create the correct page for me to work on in order to create my contents page. Then I used to insert picture box tool to draw a box, fitted to a certain part of the page, and insert an image into the space from the photographs I had taken for the task.
- 2. When inserting text I had to type it up into a Microsoft Word document first before putting it straight onto my page. I wouldn’t use any bold fonts, colours or sizes yet because the typography of text could be edited better once I had inserted the text from the Word document onto my contents page.
- 5. Here I started to create and edit the main heading for my contents page. I experimented with a range of fonts, sizes and colours to find the right one that I thought suited my magazine best.
- 8. By this point, I began to add more detail onto my contents page to make it look more authentic. I used different bold colours that I would like as my colour scheme and used them in certain areas of my work. I also added in more images to fill some of the space on my contents page so that it didn’t look too boring being filled with all words and magazine content.
- 10. This is the final result of what my School Magazine Contents Page looked like after working on it in my media lessons, using the professional software, Quark.