Class materials for teaching the basic use of Arduino with LED, button, debouncing concept and Serial output. These materials were originally used in Startathon 2016.
The code is available here. https://github.com/SustainableLivingLab/intro-to-arduino
2. Components/Software check
• Laptop loaded with Arduino IDE
• Whole Hackpack or at least
• Arduino Uno
• Breadboard
• USB cable
• LED
• Button
• 220 ohm resistor
• 10k ohm resistor
• At least a few jumper wires
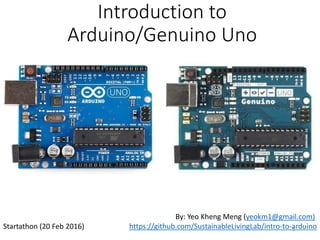
3. Why the 2 names?
• Different branding
• Arduino (sold in USA)
• Genuino (sold everywhere else)
• Some disagreements between the founders
• Uno boards from both brands are otherwise identical
5. Digital Logic Levels
• Logic HIGH = True = ON = +5V / +3.3V
• Logic LOW = False = OFF = 0V
• +5V for Arduino Uno
• +3.3V may be used by other devices
6. Analog signal
• Analog signals are smooth and continuous
• Can be positive and/or negative or both
• Signals will be converted by analog-to-digital converter (ADC)
in Arduino before use
• Arduino’s resolution is 10bits: 210 = 1024
• Range: 0 – 5V >>>> 0 – 1024
𝑅𝑒𝑠𝑢𝑙𝑡 =
𝑆𝑜𝑢𝑟𝑐𝑒 𝑉𝑜𝑙𝑡𝑎𝑔𝑒
𝑀𝑎𝑥 𝐿𝑜𝑔𝑖𝑐 𝑉𝑜𝑙𝑡𝑎𝑔𝑒 (5𝑉)
∗ 1024
7. Breadboard
• Your main prototyping component
• Continuous lines indicate those holes are connected
together
• Horizontal usually for power
• Convention: Red for +, Black/Blue for -
• Vertical for your components
8. Now we come to the Arduino
• Programmable board
• Use program code to:
• Receive signal inputs from pins
• Control signal outputs of pins
9. Ex 1: Blink onboard LED
• Sanity check, verifies if working
• Arduino hardware
• Arduino IDE settings
• Arduino IDE settings
• Arduino board: Arduino/Gemuino Uno
• Port: Depends on your machine
• Click “Upload” button (2nd from left)
• Understand source code
• Onboard LED blinks at 1 second intervals
Exercise objectives:
1. Use an example
2. Understand Arduino
code format
3. Concept of pins
4. Output to pin
5. Upload code
10. Create new Arduino file
1. Create folder on desktop
2. File -> New
3. Name program filename same as folder name
• Example: myblinker.ino
11. Ex 2: Blink external LED
• 220ohm resistor is to prevent too much
current from flowing -> Damage LED
• Arduino IDE instructions
1. Copy-paste Blink example to your
new file
2. Change Pin number 13 > 12
Exercise objectives:
1. Basic wiring up of breadboard
2. Creating your own Arduino sketch
12. Ex 3: Button adjusts LED state
• We will now try to toggle the LED
whenever button is pressed
• 10k ohm pull-down resistor
• Ensures button pin is LOW when button is
not pressed -> Not floating
• Prevents short circuit when button is
pressed
• Execute the code in Ex3
• Does the LED toggle as expected?
• Why?
Exercise objectives:
1. Retrieving input
2. Prevent floating pin
3. If-else branching
13. Ex 4: Debouncing
• Now lets try some code to solve this problem
Exercise objectives:
1. Long datatype
2. Debouncing
3. millis() function
4. Use of &&
• Debouncing:
• Accept only one input within
certain time period
14. Ex 5: Blink LED 3x on button press
• Blink LED 3x with blink separation of 100ms
Exercise objectives:
1. For - loop
15. Ex 6: Serial Port Debugging
• Useful debugging tool
• Let’s print out something when button is pressed
• Print the steps.
• Good practice to print “Arduino Ready” at end of setup()
• Tools -> Serial Monitor
• Ensure baud rate eg. 9600 match what you place in code
Exercise objectives:
1. Print Data over Serial