SlideShare uma empresa Scribd logo
1 de 6
Baixar para ler offline
Vectorizing images
Welcome to CorelDRAW®, a comprehensive vector-based drawing and graphic-design program for
the graphics professional.


In this tutorial, you will trace a bitmap image to convert it to a vector image. Bitmaps are composed
of pixels; they are useful if you want to achieve a photographic quality image with complex color
gradients or bitmap effects. Vector images, on the other hand, are composed of lines and curves,
which are easy to manipulate as individual objects. In this project, you will vectorize a logo,
converting it from a bitmap to a vector image, and then you will replace the text of the logo without
affecting the rest of the image.


What you will learn
In this tutorial, you will learn how to

•   import images
•   trace bitmaps
•   draw shapes
•   ungroup objects
•   delete objects
•   type text on a path
•   use the Pick tool
•   use the Ellipse tool
•   use the Text tool
•   use the Smart fill tool
•   use the Object manager docker


Page 1 of 6                                                                    CorelDRAW tutorial
Tutorial: Vectorizing images


Tracing the bitmap
First, you will import the bitmap into CorelDRAW. Then, you will trace the bitmap using the
Corel® PowerTRACE feature.

When you use the PowerTRACE feature to trace a bitmap, you can preview and adjust the results.
The PowerTRACE feature offers several preset styles. Each preset style is a collection of settings
that are appropriate for the specific type of bitmap you want to trace (for example, line art or a high-
quality photo image). In this case, you will use the Detailed Logo preset style, but you will make some
adjustments to the preset style to achieve optimum results.


To import the bitmap
1 Click File menu     New to create a new document.

2 On the property bar, make sure that the units of measurement are inches                          .

3 In the Paper width and height boxes on the property bar, type 5" for the width and 5" for the
  height, and press Enter.
4 Click File menu     Import.
5 Choose the folder Program filesCorelCorelDRAW Graphics Suite 13LanguagesENTutorials
  Sample files.
6 Choose the filename logo.tif.
7 Click Import.
8 Press Enter to center the graphic on the page.


To trace the bitmap
1 Click Bitmap menu       Trace bitmap     Detailed logo.
2 Choose the following settings:
   •   Type of image: Detailed logo
   •   Smoothing: 25
   •   Detail: set at default
   •   Color mode: RGB
   •   Delete original image: checked
   •   Remove background: checked
   •   Automatically choose color: selected
   •   Remove color from entire image: not checked
   The Before and after preview setting lets you view the original bitmap and the traced image
   side by side.


Page 2 of 6                                                                      CorelDRAW tutorial
Tutorial: Vectorizing images


   You can view the traced image in a larger window, or view the outline over the image by
   selecting Large preview or Wireframe overlay from the Preview drop-down list in the upper-
   left corner of the window. The image below shows the wireframe preview.


3 When you are done adjusting the settings, click OK.


Replacing the text
If you are not satisfied with the traced text, or if you want to change the text or its background, you
can replace the text and the text background without affecting the rest of the image.

The traced logo is a group of individual objects. To edit them separately, you will first ungroup the
objects that make up the logo. Then, you will delete the text and the text background objects, and
replace them with new objects. To make the text slightly curved, you will create a path and type the
text along the path.


To delete individual objects
1 Open the Object manager docker.
   If the Object manager docker is open but hidden behind another docker, click the Object
   manager tab to display it. If the Object manager docker is not open, click Window menu
   Dockers Object manager.
2 Make sure the image is selected.

Page 3 of 6                                                                      CorelDRAW tutorial
Tutorial: Vectorizing images


3 Click Arrange menu       Ungroup to ungroup the objects.
   The individual, ungrouped objects are displayed in the Object manager docker. All the objects
   are selected.
4 Click outside the image to deselect all the objects.
5 Marquee-select the text and the text background.
   To marquee-select the objects, drag diagonally with the Pick tool to enclose the objects in a
   marquee box with a dotted outline.
6 Press the Delete key.


To create the text background

1 In the toolbox, click the Smart fill tool        .

2 In the Fill options area on the property bar, choose a color from the Fill color picker              .
   You will use this color for the new text background. In the example below, white was chosen for
   the new background.
3 Click in the image where the text background used to be to create a new background object.


To create the text

1 In the toolbox, click the Ellipse tool       .
2 Click and drag in the image to create an ellipse, as shown below.
   In the example below, the ellipse is colored red for illustration purposes. The ellipse color is
   black by default.
3 If you want to adjust the size of the ellipse, drag one of the square selection handles.

4 If you want to adjust the position of the ellipse, click the Pick tool    in the toolbox, and drag
  the ellipse to a new position.


5 In the toolbox, click the Text tool      .
6 Point to the outside edge of the ellipse. When the pointer changes to the letter A with a curve
   below it    , click and type the text you want.


Page 4 of 6                                                                      CorelDRAW tutorial
Tutorial: Vectorizing images


   You can type new text for the logo, or retype the old text. In this example, the same text was
   used.
7 Click the Pick tool.
   The text is now selected as an object. A red diamond appears at the beginning of the text; it
   controls the position of the text along the path.
8 Choose a font and a font size on the property bar.

9 On the property bar, click the Mirror horizontally and Mirror vertically buttons                     .
   Because the text was created along the outside of the path, mirroring the text vertically creates a
   mirror image of the text on the inside of the path. Mirroring the text horizontally then recovers the
   text to its original form, reversing the mirror effect while keeping the text on the inside of the
   path. The order in which you click the two buttons does not affect the final result.
10 Drag the red diamond to position the text.


11 Select the ellipse and right-click the No color swatch       in the color palette.
   This makes the ellipse invisible, while keeping it available for future editing of the text.
   Your traced logo is now complete.


Page 5 of 6                                                                        CorelDRAW tutorial
Tutorial: Vectorizing images


From here ...
You can explore CorelDRAW on your own, or you can learn more by completing other
CorelTUTOR™ tutorials.

For more information about the topics and tools discussed in this tutorial, refer to the Help. To access
CorelDRAW Help, click Help menu Help topics.


Copyright 2002 - 2005 Corel Corporation. All rights reserved. All trademarks or registered
trademarks are the property of their respective companies.


Page 6 of 6                                                                       CorelDRAW tutorial

Mais conteúdo relacionado

Mais procurados

How to Create Shadow in photoshop cs6 - Photoshop Tutorial
How to Create Shadow in photoshop  cs6 - Photoshop Tutorial How to Create Shadow in photoshop  cs6 - Photoshop Tutorial
How to Create Shadow in photoshop cs6 - Photoshop Tutorial CPZ Media
 
Adobe Illustrator CS6 - Magic paintbrush howto
Adobe Illustrator CS6 - Magic paintbrush howtoAdobe Illustrator CS6 - Magic paintbrush howto
Adobe Illustrator CS6 - Magic paintbrush howtoRafael Felipe Santos
 
How to Create Realistic Eyeballs in Photoshop
How to Create Realistic Eyeballs in PhotoshopHow to Create Realistic Eyeballs in Photoshop
How to Create Realistic Eyeballs in PhotoshopMetrodesk
 
Session 2.2 photoshop interface
Session 2.2   photoshop interfaceSession 2.2   photoshop interface
Session 2.2 photoshop interfaceJohn Josef Jimenez
 
DID Unit 5 - Illustrator Basics
DID Unit 5 - Illustrator BasicsDID Unit 5 - Illustrator Basics
DID Unit 5 - Illustrator BasicsMrLawler
 
Photoshop layers
Photoshop layersPhotoshop layers
Photoshop layersMarche Ygar
 
Adobe Photoshop CS6 tutorial 2013
Adobe Photoshop CS6 tutorial 2013Adobe Photoshop CS6 tutorial 2013
Adobe Photoshop CS6 tutorial 2013Jessie Doan
 
Presentation on Photoshop Tools By Batra Computer Centre
Presentation on Photoshop Tools By Batra Computer CentrePresentation on Photoshop Tools By Batra Computer Centre
Presentation on Photoshop Tools By Batra Computer CentreBatra Computer Centre
 
Intro to Adobe Illustrator Vector Concepts
Intro to Adobe Illustrator Vector ConceptsIntro to Adobe Illustrator Vector Concepts
Intro to Adobe Illustrator Vector ConceptsKaitlin Hanger, Ph.D.
 
Adobe Photoshop Toolbar Introduction
Adobe Photoshop Toolbar IntroductionAdobe Photoshop Toolbar Introduction
Adobe Photoshop Toolbar IntroductionSidrah Noor
 
Introduction to photoshop
Introduction to photoshopIntroduction to photoshop
Introduction to photoshopReymart Canuel
 
Adobe Illustrator Basics
Adobe Illustrator BasicsAdobe Illustrator Basics
Adobe Illustrator BasicsChris Maxwell
 
Abstract Halloween Tutorial
Abstract Halloween TutorialAbstract Halloween Tutorial
Abstract Halloween Tutorialstephonsimeon
 
Adobe illustrator cs6
Adobe illustrator cs6Adobe illustrator cs6
Adobe illustrator cs6Ila Azmil
 
Basic Photoshop Tutorial
Basic Photoshop TutorialBasic Photoshop Tutorial
Basic Photoshop TutorialMarc Dy
 
Intro to Adobe Illustrator
Intro to Adobe IllustratorIntro to Adobe Illustrator
Intro to Adobe IllustratorDUSPviz
 

Mais procurados (20)

How to Create Shadow in photoshop cs6 - Photoshop Tutorial
How to Create Shadow in photoshop  cs6 - Photoshop Tutorial How to Create Shadow in photoshop  cs6 - Photoshop Tutorial
How to Create Shadow in photoshop cs6 - Photoshop Tutorial
 
Adobe Illustrator CS6 - Magic paintbrush howto
Adobe Illustrator CS6 - Magic paintbrush howtoAdobe Illustrator CS6 - Magic paintbrush howto
Adobe Illustrator CS6 - Magic paintbrush howto
 
Adobe Photoshop: Painting Tools
Adobe Photoshop: Painting ToolsAdobe Photoshop: Painting Tools
Adobe Photoshop: Painting Tools
 
How to Create Realistic Eyeballs in Photoshop
How to Create Realistic Eyeballs in PhotoshopHow to Create Realistic Eyeballs in Photoshop
How to Create Realistic Eyeballs in Photoshop
 
Session 2.2 photoshop interface
Session 2.2   photoshop interfaceSession 2.2   photoshop interface
Session 2.2 photoshop interface
 
Adobe Photoshop Tools
Adobe Photoshop ToolsAdobe Photoshop Tools
Adobe Photoshop Tools
 
DID Unit 5 - Illustrator Basics
DID Unit 5 - Illustrator BasicsDID Unit 5 - Illustrator Basics
DID Unit 5 - Illustrator Basics
 
Photoshop layers
Photoshop layersPhotoshop layers
Photoshop layers
 
Photoshop
PhotoshopPhotoshop
Photoshop
 
Adobe Photoshop CS6 tutorial 2013
Adobe Photoshop CS6 tutorial 2013Adobe Photoshop CS6 tutorial 2013
Adobe Photoshop CS6 tutorial 2013
 
Presentation on Photoshop Tools By Batra Computer Centre
Presentation on Photoshop Tools By Batra Computer CentrePresentation on Photoshop Tools By Batra Computer Centre
Presentation on Photoshop Tools By Batra Computer Centre
 
Intro to Adobe Illustrator Vector Concepts
Intro to Adobe Illustrator Vector ConceptsIntro to Adobe Illustrator Vector Concepts
Intro to Adobe Illustrator Vector Concepts
 
Adobe Photoshop Toolbar Introduction
Adobe Photoshop Toolbar IntroductionAdobe Photoshop Toolbar Introduction
Adobe Photoshop Toolbar Introduction
 
Introduction to photoshop
Introduction to photoshopIntroduction to photoshop
Introduction to photoshop
 
Adobe ps color palettes
Adobe ps color palettesAdobe ps color palettes
Adobe ps color palettes
 
Adobe Illustrator Basics
Adobe Illustrator BasicsAdobe Illustrator Basics
Adobe Illustrator Basics
 
Abstract Halloween Tutorial
Abstract Halloween TutorialAbstract Halloween Tutorial
Abstract Halloween Tutorial
 
Adobe illustrator cs6
Adobe illustrator cs6Adobe illustrator cs6
Adobe illustrator cs6
 
Basic Photoshop Tutorial
Basic Photoshop TutorialBasic Photoshop Tutorial
Basic Photoshop Tutorial
 
Intro to Adobe Illustrator
Intro to Adobe IllustratorIntro to Adobe Illustrator
Intro to Adobe Illustrator
 

Semelhante a dr_4

CorelDraw%20Tutorial%203
CorelDraw%20Tutorial%203CorelDraw%20Tutorial%203
CorelDraw%20Tutorial%203tutorialsruby
 
CorelDraw%20Tutorial%203
CorelDraw%20Tutorial%203CorelDraw%20Tutorial%203
CorelDraw%20Tutorial%203tutorialsruby
 
Managing Visual Design in Axure
Managing Visual Design in AxureManaging Visual Design in Axure
Managing Visual Design in AxureFred Beecher
 
Adobe illustrator cs6
Adobe illustrator cs6Adobe illustrator cs6
Adobe illustrator cs6ilaazmil2
 
Adobe illustrator cs6
Adobe illustrator cs6Adobe illustrator cs6
Adobe illustrator cs6Ila Azmil
 
A Data Processing Presentation on Graphics
A Data Processing Presentation on GraphicsA Data Processing Presentation on Graphics
A Data Processing Presentation on GraphicsEjiro Ndifereke
 
Adobe illustrator cs4 tutorial
Adobe illustrator cs4 tutorial Adobe illustrator cs4 tutorial
Adobe illustrator cs4 tutorial Agung Yuwono
 
Sketchup-Handbook.pdf
Sketchup-Handbook.pdfSketchup-Handbook.pdf
Sketchup-Handbook.pdfAhmad Maher
 
coreldrawX7_qucik_guide
coreldrawX7_qucik_guidecoreldrawX7_qucik_guide
coreldrawX7_qucik_guideSalah Ali
 
Adobe photoshop cs6
Adobe photoshop cs6Adobe photoshop cs6
Adobe photoshop cs6Ila Azmil
 
Adobe photoshop cs6
Adobe photoshop cs6Adobe photoshop cs6
Adobe photoshop cs6ilaazmil2
 
Adobe photoshop cs6 tutorial
Adobe photoshop cs6 tutorialAdobe photoshop cs6 tutorial
Adobe photoshop cs6 tutorialAgung Yuwono
 

Semelhante a dr_4 (20)

Tutorial Coreldraw_3
Tutorial Coreldraw_3Tutorial Coreldraw_3
Tutorial Coreldraw_3
 
CorelDraw%20Tutorial%203
CorelDraw%20Tutorial%203CorelDraw%20Tutorial%203
CorelDraw%20Tutorial%203
 
CorelDraw%20Tutorial%203
CorelDraw%20Tutorial%203CorelDraw%20Tutorial%203
CorelDraw%20Tutorial%203
 
Managing Visual Design in Axure
Managing Visual Design in AxureManaging Visual Design in Axure
Managing Visual Design in Axure
 
Create logo
Create logoCreate logo
Create logo
 
dr_3
dr_3dr_3
dr_3
 
dr_3
dr_3dr_3
dr_3
 
Adobe illustrator cs6
Adobe illustrator cs6Adobe illustrator cs6
Adobe illustrator cs6
 
Adobe illustrator cs6
Adobe illustrator cs6Adobe illustrator cs6
Adobe illustrator cs6
 
Adobe illustrator basics
Adobe illustrator basicsAdobe illustrator basics
Adobe illustrator basics
 
A Data Processing Presentation on Graphics
A Data Processing Presentation on GraphicsA Data Processing Presentation on Graphics
A Data Processing Presentation on Graphics
 
Tutorial Coreldraw_2
Tutorial Coreldraw_2Tutorial Coreldraw_2
Tutorial Coreldraw_2
 
dr_1
dr_1dr_1
dr_1
 
dr_1
dr_1dr_1
dr_1
 
Adobe illustrator cs4 tutorial
Adobe illustrator cs4 tutorial Adobe illustrator cs4 tutorial
Adobe illustrator cs4 tutorial
 
Sketchup-Handbook.pdf
Sketchup-Handbook.pdfSketchup-Handbook.pdf
Sketchup-Handbook.pdf
 
coreldrawX7_qucik_guide
coreldrawX7_qucik_guidecoreldrawX7_qucik_guide
coreldrawX7_qucik_guide
 
Adobe photoshop cs6
Adobe photoshop cs6Adobe photoshop cs6
Adobe photoshop cs6
 
Adobe photoshop cs6
Adobe photoshop cs6Adobe photoshop cs6
Adobe photoshop cs6
 
Adobe photoshop cs6 tutorial
Adobe photoshop cs6 tutorialAdobe photoshop cs6 tutorial
Adobe photoshop cs6 tutorial
 

Mais de tutorialsruby

<img src="../i/r_14.png" />
<img src="../i/r_14.png" /><img src="../i/r_14.png" />
<img src="../i/r_14.png" />tutorialsruby
 
TopStyle Help & <b>Tutorial</b>
TopStyle Help & <b>Tutorial</b>TopStyle Help & <b>Tutorial</b>
TopStyle Help & <b>Tutorial</b>tutorialsruby
 
The Art Institute of Atlanta IMD 210 Fundamentals of Scripting <b>...</b>
The Art Institute of Atlanta IMD 210 Fundamentals of Scripting <b>...</b>The Art Institute of Atlanta IMD 210 Fundamentals of Scripting <b>...</b>
The Art Institute of Atlanta IMD 210 Fundamentals of Scripting <b>...</b>tutorialsruby
 
<img src="../i/r_14.png" />
<img src="../i/r_14.png" /><img src="../i/r_14.png" />
<img src="../i/r_14.png" />tutorialsruby
 
<img src="../i/r_14.png" />
<img src="../i/r_14.png" /><img src="../i/r_14.png" />
<img src="../i/r_14.png" />tutorialsruby
 
Standardization and Knowledge Transfer – INS0
Standardization and Knowledge Transfer – INS0Standardization and Knowledge Transfer – INS0
Standardization and Knowledge Transfer – INS0tutorialsruby
 
0047ecaa6ea3e9ac0a13a2fe96f4de3bfd515c88f5d90c1fae79b956363d7f02c7fa060269
0047ecaa6ea3e9ac0a13a2fe96f4de3bfd515c88f5d90c1fae79b956363d7f02c7fa0602690047ecaa6ea3e9ac0a13a2fe96f4de3bfd515c88f5d90c1fae79b956363d7f02c7fa060269
0047ecaa6ea3e9ac0a13a2fe96f4de3bfd515c88f5d90c1fae79b956363d7f02c7fa060269tutorialsruby
 
BloggingWithStyle_2008
BloggingWithStyle_2008BloggingWithStyle_2008
BloggingWithStyle_2008tutorialsruby
 
BloggingWithStyle_2008
BloggingWithStyle_2008BloggingWithStyle_2008
BloggingWithStyle_2008tutorialsruby
 
cascadingstylesheets
cascadingstylesheetscascadingstylesheets
cascadingstylesheetstutorialsruby
 
cascadingstylesheets
cascadingstylesheetscascadingstylesheets
cascadingstylesheetstutorialsruby
 

Mais de tutorialsruby (20)

<img src="../i/r_14.png" />
<img src="../i/r_14.png" /><img src="../i/r_14.png" />
<img src="../i/r_14.png" />
 
TopStyle Help & <b>Tutorial</b>
TopStyle Help & <b>Tutorial</b>TopStyle Help & <b>Tutorial</b>
TopStyle Help & <b>Tutorial</b>
 
The Art Institute of Atlanta IMD 210 Fundamentals of Scripting <b>...</b>
The Art Institute of Atlanta IMD 210 Fundamentals of Scripting <b>...</b>The Art Institute of Atlanta IMD 210 Fundamentals of Scripting <b>...</b>
The Art Institute of Atlanta IMD 210 Fundamentals of Scripting <b>...</b>
 
<img src="../i/r_14.png" />
<img src="../i/r_14.png" /><img src="../i/r_14.png" />
<img src="../i/r_14.png" />
 
<img src="../i/r_14.png" />
<img src="../i/r_14.png" /><img src="../i/r_14.png" />
<img src="../i/r_14.png" />
 
Standardization and Knowledge Transfer – INS0
Standardization and Knowledge Transfer – INS0Standardization and Knowledge Transfer – INS0
Standardization and Knowledge Transfer – INS0
 
xhtml_basics
xhtml_basicsxhtml_basics
xhtml_basics
 
xhtml_basics
xhtml_basicsxhtml_basics
xhtml_basics
 
xhtml-documentation
xhtml-documentationxhtml-documentation
xhtml-documentation
 
xhtml-documentation
xhtml-documentationxhtml-documentation
xhtml-documentation
 
CSS
CSSCSS
CSS
 
CSS
CSSCSS
CSS
 
0047ecaa6ea3e9ac0a13a2fe96f4de3bfd515c88f5d90c1fae79b956363d7f02c7fa060269
0047ecaa6ea3e9ac0a13a2fe96f4de3bfd515c88f5d90c1fae79b956363d7f02c7fa0602690047ecaa6ea3e9ac0a13a2fe96f4de3bfd515c88f5d90c1fae79b956363d7f02c7fa060269
0047ecaa6ea3e9ac0a13a2fe96f4de3bfd515c88f5d90c1fae79b956363d7f02c7fa060269
 
0047ecaa6ea3e9ac0a13a2fe96f4de3bfd515c88f5d90c1fae79b956363d7f02c7fa060269
0047ecaa6ea3e9ac0a13a2fe96f4de3bfd515c88f5d90c1fae79b956363d7f02c7fa0602690047ecaa6ea3e9ac0a13a2fe96f4de3bfd515c88f5d90c1fae79b956363d7f02c7fa060269
0047ecaa6ea3e9ac0a13a2fe96f4de3bfd515c88f5d90c1fae79b956363d7f02c7fa060269
 
HowTo_CSS
HowTo_CSSHowTo_CSS
HowTo_CSS
 
HowTo_CSS
HowTo_CSSHowTo_CSS
HowTo_CSS
 
BloggingWithStyle_2008
BloggingWithStyle_2008BloggingWithStyle_2008
BloggingWithStyle_2008
 
BloggingWithStyle_2008
BloggingWithStyle_2008BloggingWithStyle_2008
BloggingWithStyle_2008
 
cascadingstylesheets
cascadingstylesheetscascadingstylesheets
cascadingstylesheets
 
cascadingstylesheets
cascadingstylesheetscascadingstylesheets
cascadingstylesheets
 

Último

Leverage Zilliz Serverless - Up to 50X Saving for Your Vector Storage Cost
Leverage Zilliz Serverless - Up to 50X Saving for Your Vector Storage CostLeverage Zilliz Serverless - Up to 50X Saving for Your Vector Storage Cost
Leverage Zilliz Serverless - Up to 50X Saving for Your Vector Storage CostZilliz
 
SAP Build Work Zone - Overview L2-L3.pptx
SAP Build Work Zone - Overview L2-L3.pptxSAP Build Work Zone - Overview L2-L3.pptx
SAP Build Work Zone - Overview L2-L3.pptxNavinnSomaal
 
Vertex AI Gemini Prompt Engineering Tips
Vertex AI Gemini Prompt Engineering TipsVertex AI Gemini Prompt Engineering Tips
Vertex AI Gemini Prompt Engineering TipsMiki Katsuragi
 
From Family Reminiscence to Scholarly Archive .
From Family Reminiscence to Scholarly Archive .From Family Reminiscence to Scholarly Archive .
From Family Reminiscence to Scholarly Archive .Alan Dix
 
DevoxxFR 2024 Reproducible Builds with Apache Maven
DevoxxFR 2024 Reproducible Builds with Apache MavenDevoxxFR 2024 Reproducible Builds with Apache Maven
DevoxxFR 2024 Reproducible Builds with Apache MavenHervé Boutemy
 
WordPress Websites for Engineers: Elevate Your Brand
WordPress Websites for Engineers: Elevate Your BrandWordPress Websites for Engineers: Elevate Your Brand
WordPress Websites for Engineers: Elevate Your Brandgvaughan
 
Anypoint Exchange: It’s Not Just a Repo!
Anypoint Exchange: It’s Not Just a Repo!Anypoint Exchange: It’s Not Just a Repo!
Anypoint Exchange: It’s Not Just a Repo!Manik S Magar
 
Tampa BSides - Chef's Tour of Microsoft Security Adoption Framework (SAF)
Tampa BSides - Chef's Tour of Microsoft Security Adoption Framework (SAF)Tampa BSides - Chef's Tour of Microsoft Security Adoption Framework (SAF)
Tampa BSides - Chef's Tour of Microsoft Security Adoption Framework (SAF)Mark Simos
 
CloudStudio User manual (basic edition):
CloudStudio User manual (basic edition):CloudStudio User manual (basic edition):
CloudStudio User manual (basic edition):comworks
 
DSPy a system for AI to Write Prompts and Do Fine Tuning
DSPy a system for AI to Write Prompts and Do Fine TuningDSPy a system for AI to Write Prompts and Do Fine Tuning
DSPy a system for AI to Write Prompts and Do Fine TuningLars Bell
 
How AI, OpenAI, and ChatGPT impact business and software.
How AI, OpenAI, and ChatGPT impact business and software.How AI, OpenAI, and ChatGPT impact business and software.
How AI, OpenAI, and ChatGPT impact business and software.Curtis Poe
 
Hyperautomation and AI/ML: A Strategy for Digital Transformation Success.pdf
Hyperautomation and AI/ML: A Strategy for Digital Transformation Success.pdfHyperautomation and AI/ML: A Strategy for Digital Transformation Success.pdf
Hyperautomation and AI/ML: A Strategy for Digital Transformation Success.pdfPrecisely
 
Streamlining Python Development: A Guide to a Modern Project Setup
Streamlining Python Development: A Guide to a Modern Project SetupStreamlining Python Development: A Guide to a Modern Project Setup
Streamlining Python Development: A Guide to a Modern Project SetupFlorian Wilhelm
 
Human Factors of XR: Using Human Factors to Design XR Systems
Human Factors of XR: Using Human Factors to Design XR SystemsHuman Factors of XR: Using Human Factors to Design XR Systems
Human Factors of XR: Using Human Factors to Design XR SystemsMark Billinghurst
 
Connect Wave/ connectwave Pitch Deck Presentation
Connect Wave/ connectwave Pitch Deck PresentationConnect Wave/ connectwave Pitch Deck Presentation
Connect Wave/ connectwave Pitch Deck PresentationSlibray Presentation
 
Are Multi-Cloud and Serverless Good or Bad?
Are Multi-Cloud and Serverless Good or Bad?Are Multi-Cloud and Serverless Good or Bad?
Are Multi-Cloud and Serverless Good or Bad?Mattias Andersson
 
TrustArc Webinar - How to Build Consumer Trust Through Data Privacy
TrustArc Webinar - How to Build Consumer Trust Through Data PrivacyTrustArc Webinar - How to Build Consumer Trust Through Data Privacy
TrustArc Webinar - How to Build Consumer Trust Through Data PrivacyTrustArc
 
Commit 2024 - Secret Management made easy
Commit 2024 - Secret Management made easyCommit 2024 - Secret Management made easy
Commit 2024 - Secret Management made easyAlfredo García Lavilla
 
Story boards and shot lists for my a level piece
Story boards and shot lists for my a level pieceStory boards and shot lists for my a level piece
Story boards and shot lists for my a level piececharlottematthew16
 

Último (20)

Leverage Zilliz Serverless - Up to 50X Saving for Your Vector Storage Cost
Leverage Zilliz Serverless - Up to 50X Saving for Your Vector Storage CostLeverage Zilliz Serverless - Up to 50X Saving for Your Vector Storage Cost
Leverage Zilliz Serverless - Up to 50X Saving for Your Vector Storage Cost
 
SAP Build Work Zone - Overview L2-L3.pptx
SAP Build Work Zone - Overview L2-L3.pptxSAP Build Work Zone - Overview L2-L3.pptx
SAP Build Work Zone - Overview L2-L3.pptx
 
Vertex AI Gemini Prompt Engineering Tips
Vertex AI Gemini Prompt Engineering TipsVertex AI Gemini Prompt Engineering Tips
Vertex AI Gemini Prompt Engineering Tips
 
From Family Reminiscence to Scholarly Archive .
From Family Reminiscence to Scholarly Archive .From Family Reminiscence to Scholarly Archive .
From Family Reminiscence to Scholarly Archive .
 
DevoxxFR 2024 Reproducible Builds with Apache Maven
DevoxxFR 2024 Reproducible Builds with Apache MavenDevoxxFR 2024 Reproducible Builds with Apache Maven
DevoxxFR 2024 Reproducible Builds with Apache Maven
 
WordPress Websites for Engineers: Elevate Your Brand
WordPress Websites for Engineers: Elevate Your BrandWordPress Websites for Engineers: Elevate Your Brand
WordPress Websites for Engineers: Elevate Your Brand
 
Anypoint Exchange: It’s Not Just a Repo!
Anypoint Exchange: It’s Not Just a Repo!Anypoint Exchange: It’s Not Just a Repo!
Anypoint Exchange: It’s Not Just a Repo!
 
Tampa BSides - Chef's Tour of Microsoft Security Adoption Framework (SAF)
Tampa BSides - Chef's Tour of Microsoft Security Adoption Framework (SAF)Tampa BSides - Chef's Tour of Microsoft Security Adoption Framework (SAF)
Tampa BSides - Chef's Tour of Microsoft Security Adoption Framework (SAF)
 
CloudStudio User manual (basic edition):
CloudStudio User manual (basic edition):CloudStudio User manual (basic edition):
CloudStudio User manual (basic edition):
 
DSPy a system for AI to Write Prompts and Do Fine Tuning
DSPy a system for AI to Write Prompts and Do Fine TuningDSPy a system for AI to Write Prompts and Do Fine Tuning
DSPy a system for AI to Write Prompts and Do Fine Tuning
 
How AI, OpenAI, and ChatGPT impact business and software.
How AI, OpenAI, and ChatGPT impact business and software.How AI, OpenAI, and ChatGPT impact business and software.
How AI, OpenAI, and ChatGPT impact business and software.
 
Hyperautomation and AI/ML: A Strategy for Digital Transformation Success.pdf
Hyperautomation and AI/ML: A Strategy for Digital Transformation Success.pdfHyperautomation and AI/ML: A Strategy for Digital Transformation Success.pdf
Hyperautomation and AI/ML: A Strategy for Digital Transformation Success.pdf
 
Streamlining Python Development: A Guide to a Modern Project Setup
Streamlining Python Development: A Guide to a Modern Project SetupStreamlining Python Development: A Guide to a Modern Project Setup
Streamlining Python Development: A Guide to a Modern Project Setup
 
Human Factors of XR: Using Human Factors to Design XR Systems
Human Factors of XR: Using Human Factors to Design XR SystemsHuman Factors of XR: Using Human Factors to Design XR Systems
Human Factors of XR: Using Human Factors to Design XR Systems
 
Connect Wave/ connectwave Pitch Deck Presentation
Connect Wave/ connectwave Pitch Deck PresentationConnect Wave/ connectwave Pitch Deck Presentation
Connect Wave/ connectwave Pitch Deck Presentation
 
Are Multi-Cloud and Serverless Good or Bad?
Are Multi-Cloud and Serverless Good or Bad?Are Multi-Cloud and Serverless Good or Bad?
Are Multi-Cloud and Serverless Good or Bad?
 
E-Vehicle_Hacking_by_Parul Sharma_null_owasp.pptx
E-Vehicle_Hacking_by_Parul Sharma_null_owasp.pptxE-Vehicle_Hacking_by_Parul Sharma_null_owasp.pptx
E-Vehicle_Hacking_by_Parul Sharma_null_owasp.pptx
 
TrustArc Webinar - How to Build Consumer Trust Through Data Privacy
TrustArc Webinar - How to Build Consumer Trust Through Data PrivacyTrustArc Webinar - How to Build Consumer Trust Through Data Privacy
TrustArc Webinar - How to Build Consumer Trust Through Data Privacy
 
Commit 2024 - Secret Management made easy
Commit 2024 - Secret Management made easyCommit 2024 - Secret Management made easy
Commit 2024 - Secret Management made easy
 
Story boards and shot lists for my a level piece
Story boards and shot lists for my a level pieceStory boards and shot lists for my a level piece
Story boards and shot lists for my a level piece
 

dr_4

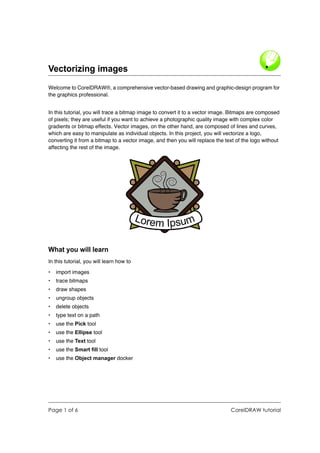
  • 1. Vectorizing images Welcome to CorelDRAW®, a comprehensive vector-based drawing and graphic-design program for the graphics professional. In this tutorial, you will trace a bitmap image to convert it to a vector image. Bitmaps are composed of pixels; they are useful if you want to achieve a photographic quality image with complex color gradients or bitmap effects. Vector images, on the other hand, are composed of lines and curves, which are easy to manipulate as individual objects. In this project, you will vectorize a logo, converting it from a bitmap to a vector image, and then you will replace the text of the logo without affecting the rest of the image. What you will learn In this tutorial, you will learn how to • import images • trace bitmaps • draw shapes • ungroup objects • delete objects • type text on a path • use the Pick tool • use the Ellipse tool • use the Text tool • use the Smart fill tool • use the Object manager docker Page 1 of 6 CorelDRAW tutorial
  • 2. Tutorial: Vectorizing images Tracing the bitmap First, you will import the bitmap into CorelDRAW. Then, you will trace the bitmap using the Corel® PowerTRACE feature. When you use the PowerTRACE feature to trace a bitmap, you can preview and adjust the results. The PowerTRACE feature offers several preset styles. Each preset style is a collection of settings that are appropriate for the specific type of bitmap you want to trace (for example, line art or a high- quality photo image). In this case, you will use the Detailed Logo preset style, but you will make some adjustments to the preset style to achieve optimum results. To import the bitmap 1 Click File menu New to create a new document. 2 On the property bar, make sure that the units of measurement are inches . 3 In the Paper width and height boxes on the property bar, type 5" for the width and 5" for the height, and press Enter. 4 Click File menu Import. 5 Choose the folder Program filesCorelCorelDRAW Graphics Suite 13LanguagesENTutorials Sample files. 6 Choose the filename logo.tif. 7 Click Import. 8 Press Enter to center the graphic on the page. To trace the bitmap 1 Click Bitmap menu Trace bitmap Detailed logo. 2 Choose the following settings: • Type of image: Detailed logo • Smoothing: 25 • Detail: set at default • Color mode: RGB • Delete original image: checked • Remove background: checked • Automatically choose color: selected • Remove color from entire image: not checked The Before and after preview setting lets you view the original bitmap and the traced image side by side. Page 2 of 6 CorelDRAW tutorial
  • 3. Tutorial: Vectorizing images You can view the traced image in a larger window, or view the outline over the image by selecting Large preview or Wireframe overlay from the Preview drop-down list in the upper- left corner of the window. The image below shows the wireframe preview. 3 When you are done adjusting the settings, click OK. Replacing the text If you are not satisfied with the traced text, or if you want to change the text or its background, you can replace the text and the text background without affecting the rest of the image. The traced logo is a group of individual objects. To edit them separately, you will first ungroup the objects that make up the logo. Then, you will delete the text and the text background objects, and replace them with new objects. To make the text slightly curved, you will create a path and type the text along the path. To delete individual objects 1 Open the Object manager docker. If the Object manager docker is open but hidden behind another docker, click the Object manager tab to display it. If the Object manager docker is not open, click Window menu Dockers Object manager. 2 Make sure the image is selected. Page 3 of 6 CorelDRAW tutorial
  • 4. Tutorial: Vectorizing images 3 Click Arrange menu Ungroup to ungroup the objects. The individual, ungrouped objects are displayed in the Object manager docker. All the objects are selected. 4 Click outside the image to deselect all the objects. 5 Marquee-select the text and the text background. To marquee-select the objects, drag diagonally with the Pick tool to enclose the objects in a marquee box with a dotted outline. 6 Press the Delete key. To create the text background 1 In the toolbox, click the Smart fill tool . 2 In the Fill options area on the property bar, choose a color from the Fill color picker . You will use this color for the new text background. In the example below, white was chosen for the new background. 3 Click in the image where the text background used to be to create a new background object. To create the text 1 In the toolbox, click the Ellipse tool . 2 Click and drag in the image to create an ellipse, as shown below. In the example below, the ellipse is colored red for illustration purposes. The ellipse color is black by default. 3 If you want to adjust the size of the ellipse, drag one of the square selection handles. 4 If you want to adjust the position of the ellipse, click the Pick tool in the toolbox, and drag the ellipse to a new position. 5 In the toolbox, click the Text tool . 6 Point to the outside edge of the ellipse. When the pointer changes to the letter A with a curve below it , click and type the text you want. Page 4 of 6 CorelDRAW tutorial
  • 5. Tutorial: Vectorizing images You can type new text for the logo, or retype the old text. In this example, the same text was used. 7 Click the Pick tool. The text is now selected as an object. A red diamond appears at the beginning of the text; it controls the position of the text along the path. 8 Choose a font and a font size on the property bar. 9 On the property bar, click the Mirror horizontally and Mirror vertically buttons . Because the text was created along the outside of the path, mirroring the text vertically creates a mirror image of the text on the inside of the path. Mirroring the text horizontally then recovers the text to its original form, reversing the mirror effect while keeping the text on the inside of the path. The order in which you click the two buttons does not affect the final result. 10 Drag the red diamond to position the text. 11 Select the ellipse and right-click the No color swatch in the color palette. This makes the ellipse invisible, while keeping it available for future editing of the text. Your traced logo is now complete. Page 5 of 6 CorelDRAW tutorial
  • 6. Tutorial: Vectorizing images From here ... You can explore CorelDRAW on your own, or you can learn more by completing other CorelTUTOR™ tutorials. For more information about the topics and tools discussed in this tutorial, refer to the Help. To access CorelDRAW Help, click Help menu Help topics. Copyright 2002 - 2005 Corel Corporation. All rights reserved. All trademarks or registered trademarks are the property of their respective companies. Page 6 of 6 CorelDRAW tutorial