
Recomendados
Mais conteúdo relacionado
Mais procurados
Mais procurados (17)
Destaque
Semelhante a Course lab 2_guide_eng
Semelhante a Course lab 2_guide_eng (20)
Course lab 2_guide_eng
- 1. CourseLab 2.3 User Manual COURSELAB 2.3 USER MANUAL .......................................................................................................................... 1 1. INTRODUCTION ................................................................................................................................................... 6 1.1. PREREQUISITES ................................................................................................................................................... 6 1.2. SYSTEM REQUIREMENTS .................................................................................................................................... 6 2. COURSELAB OVERVIEW................................................................................................................................... 7 2.1. ABOUT COURSELAB ........................................................................................................................................... 7 2.2. COMPLIANCE TO STANDARDS ............................................................................................................................. 7 3. E-LEARNING COURSE ........................................................................................................................................ 8 3.1. WHAT IS E-LEARNING COURSE? ......................................................................................................................... 8 3.2. E-LEARNING COURSE STRUCTURE: LEARNING MODULES, CHAPTERS ............................................................... 8 3.2.1. Learning Module........................................................................................................................................ 8 3.2.2. Folder......................................................................................................................................................... 9 3.3. LEARNING MODULE STRUCTURE: SLIDE, FRAME ............................................................................................... 9 3.3.1. Slide ........................................................................................................................................................... 9 3.3.2. Frame ....................................................................................................................................................... 10 3.4. SPECIAL SLIDES: TITLE-SLIDE, MASTER-SLIDE ................................................................................................ 10 3.4.1. Title-Slide ................................................................................................................................................. 10 3.4.2. Master-Slide ............................................................................................................................................. 10 4. CREATING LEARNING COURSE – FROM CONCEPTION TO PUBLISHING ....................................... 11 4.1. COURSE SCENARIO. THINGS TO CONSIDER. ...................................................................................................... 11 4.2. CREATE NEW LEARNING COURSE .................................................................................................................... 12 4.3. EDITING MODULE ............................................................................................................................................. 13 4.3.1. Editing Module Design Settings ............................................................................................................... 13 4.3.2. Editing Title-Slide .................................................................................................................................... 16 4.3.3. Editing Master-Slide ................................................................................................................................ 16 4.3.4. Editing Slide ............................................................................................................................................. 17 4.3.4.1. Name of a Slide .................................................................................................................................................. 17 4.3.4.2. Slide ID .............................................................................................................................................................. 17 4.3.4.3. Select the Master-Slide for the Slide .................................................................................................................. 18 4.3.4.4. Slide Content ...................................................................................................................................................... 19 4.3.4.5. Slide Comments ................................................................................................................................................. 19 4.3.4.6. Slide Transition .................................................................................................................................................. 19 4.3.5. Create and remove Slides. Change the order of Slides ............................................................................ 20 4.3.6. Module and Slide Preview ....................................................................................................................... 20 4.4. ADD MODULES. CHANGE THE ORDER OF MODULES. ........................................................................................ 21 4.5. ADD FOLDERS .................................................................................................................................................. 21 4.7. PUBLISH COURSE .............................................................................................................................................. 22 4.7.1. Module runtime settings ........................................................................................................................... 23 4.7.2. Course runtime settings ........................................................................................................................... 25 4.7.3. Wizard “Course Publication” ................................................................................................................. 26 5. OBJECTS ............................................................................................................................................................... 28 5.1. OBJECT AND OBJECT POSITIONING WITHIN A FRAME ........................................................................................ 28 5.2. TYPES OF OBJECTS: INTERNAL AND COMPLEX ................................................................................................. 28 5.3. INTERNAL OBJECTS .......................................................................................................................................... 29 5.3.1. Text Box ................................................................................................................................................... 29 5.3.1.1. Inserting Text Box .............................................................................................................................................. 29 5.3.1.2. Editing Text. Editing Modes .............................................................................................................................. 29 5.3.1.3. Insert a Table into Text....................................................................................................................................... 30 5.3.1.3. Insert a Picture into Text .................................................................................................................................... 32 5.3.2. Pictures .................................................................................................................................................... 32 5.3.2.1. Inserting Picture ................................................................................................................................................. 32
- 2. 5.3.2.2. Valid Graphic File Formats ........................................................................................................................... 32 5.3.2.3. Change the Size of Picture ................................................................................................................................. 34 5.3.2.4. Optimizing Pictures ............................................................................................................................................ 35 5.3.3. Section “Clip Art” ................................................................................................................................... 35 5.4. AUTOSHAPES.................................................................................................................................................... 35 5.5. COMPLEX OBJECTS ........................................................................................................................................... 36 5.5.1. External Elements .................................................................................................................................... 36 5.5.1.1. “External File” Object ........................................................................................................................................ 36 5.5.1.2. External URL ..................................................................................................................................................... 37 5.5.1.3. IFRAME ............................................................................................................................................................. 37 Object Methods .......................................................................................................................................................... 39 5.5.2. Popup Windows ....................................................................................................................................... 39 5.5.2.1. “Relief” Popup Window ..................................................................................................................................... 39 Object Events ............................................................................................................................................................. 40 5.5.2.2. “Standard” Popup Window ................................................................................................................................ 41 Object Events ............................................................................................................................................................. 42 5.5.3. Balloons ................................................................................................................................................... 42 5.5.3.1. “Simple” Balloon ............................................................................................................................................... 42 5.5.3.2. “Standard” Balloon............................................................................................................................................. 43 5.5.3.3. “Convex” Balloon .............................................................................................................................................. 44 5.5.3.4. “Gradient” Balloon ............................................................................................................................................. 45 5.5.3.5. “Think” Balloon ................................................................................................................................................. 46 5.5.4. Design Elements....................................................................................................................................... 47 5.5.4.1. Gradient areas ..................................................................................................................................................... 47 5.5.4.2. Click Area .......................................................................................................................................................... 48 Object Methods .......................................................................................................................................................... 48 5.5.4.3. Notifier ............................................................................................................................................................... 49 5.5.5. Title-Slide Objects.................................................................................................................................... 51 5.5.5.1. Start Module Button ........................................................................................................................................... 51 5.5.5.2. Title-Slide Popup................................................................................................................................................ 52 5.5.6. Rich Media objects ................................................................................................................................... 53 5.5.6.1. Flash-Movie ....................................................................................................................................................... 53 Object Methods .......................................................................................................................................................... 54 5.5.6.2. Shockwave-movie .............................................................................................................................................. 54 5.5.6.3. Video Clip .......................................................................................................................................................... 55 Object Events ............................................................................................................................................................. 57 Object Methods .......................................................................................................................................................... 58 Object Specific Properties .......................................................................................................................................... 58 5.5.6.4. Java Applet ......................................................................................................................................................... 59 5.5.7. Navigation Objects................................................................................................................................... 61 5.5.7.1. Navigation Menu ................................................................................................................................................ 61 Object Methods .......................................................................................................................................................... 62 Object Specific Properties .......................................................................................................................................... 62 5.5.7.2. Current Position.................................................................................................................................................. 62 Object Specific Properties .......................................................................................................................................... 63 5.5.7.3. “Contents” tab .................................................................................................................................................... 63 Object Methods .......................................................................................................................................................... 66 Object Specific Properties .......................................................................................................................................... 66 5.5.7.4. “Help” tab........................................................................................................................................................... 66 Object Methods .......................................................................................................................................................... 68 Object Specific Properties .......................................................................................................................................... 68 5.5.7.5. “Calculator” tab .................................................................................................................................................. 69 Object Methods .......................................................................................................................................................... 71 Object Specific Properties .......................................................................................................................................... 71 5.5.7.6. “Settings” tab...................................................................................................................................................... 71 Object Methods .......................................................................................................................................................... 75 Object Specific Properties .......................................................................................................................................... 75 5.5.7.7. “About” tab ........................................................................................................................................................ 75 Object Methods .......................................................................................................................................................... 77 Object Specific Properties .......................................................................................................................................... 78 5.5.7.8. “Next” Button ..................................................................................................................................................... 78 Object Methods .......................................................................................................................................................... 79 Object Specific Properties .......................................................................................................................................... 79 5.5.7.9. “Previous” Button............................................................................................................................................... 79 Object Methods .......................................................................................................................................................... 80 Object Specific Properties .......................................................................................................................................... 81 5.5.7.10. Slide Name ....................................................................................................................................................... 81 Object Specific Properties .......................................................................................................................................... 81 5.5.7.11. “Sound” Button ................................................................................................................................................ 82 2
- 3. Object Methods .......................................................................................................................................................... 83 Object Specific Properties .......................................................................................................................................... 83 5.5.7.12. “Close Module” Button .................................................................................................................................... 83 5.5.7.13. “Replay Slide” Button ...................................................................................................................................... 84 Object Methods .......................................................................................................................................................... 85 Object Specific Properties .......................................................................................................................................... 85 5.5.7.14. “Simple” Progress Bar ...................................................................................................................................... 85 5.5.7.15. “Extended” Progress Bar .................................................................................................................................. 87 5.5.7.16. “Help” Popup Window ..................................................................................................................................... 88 Object Methods .......................................................................................................................................................... 90 Object Specific Properties .......................................................................................................................................... 90 5.5.7.17. “Contents” Popup Window .............................................................................................................................. 91 Object Methods .......................................................................................................................................................... 93 Object Specific Properties .......................................................................................................................................... 93 5.5.7.18. Frame Navigator ............................................................................................................................................... 94 5.5.7.19. Comments Object ............................................................................................................................................. 95 5.5.7.20. Comments Tab Object ...................................................................................................................................... 96 5.5.8. Characters ............................................................................................................................................... 98 5.5.8.1. “Agent” Character .............................................................................................................................................. 98 5.5.8.2. “Talking Head” Character ................................................................................................................................ 101 5.5.9. Lists ........................................................................................................................................................ 106 5.5.9.1. Bulleted List ..................................................................................................................................................... 106 Object Events ........................................................................................................................................................... 111 Object Methods ........................................................................................................................................................ 111 Object Specific Properties ........................................................................................................................................ 112 5.5.9.2. “Simple” List .................................................................................................................................................... 112 Object Events ........................................................................................................................................................... 117 Object Methods ........................................................................................................................................................ 117 Object Specific Properties ........................................................................................................................................ 118 5.5.9.3. “Standard” List ................................................................................................................................................. 118 Object Events ........................................................................................................................................................... 121 Object Methods ........................................................................................................................................................ 121 Object Specific Properties ........................................................................................................................................ 122 5.5.9.4. “Standard” Block-List ...................................................................................................................................... 122 5.5.9.5. “Standard” List Item ......................................................................................................................................... 123 5.5.9.6. “Simple” List Item............................................................................................................................................ 123 5.5.10. Text Boxes ............................................................................................................................................ 124 5.5.10.1. Shadow Text Box ........................................................................................................................................... 124 5.5.10.2. “Relief” Text Box ........................................................................................................................................... 127 Object Events ........................................................................................................................................................... 129 Object Methods ........................................................................................................................................................ 129 5.5.10.3. “Simple” Text Box ......................................................................................................................................... 129 Object Events ........................................................................................................................................................... 131 Object Methods ........................................................................................................................................................ 131 5.5.11. Form Controls...................................................................................................................................... 132 5.5.11.1. Text Field ....................................................................................................................................................... 132 Object Events ........................................................................................................................................................... 133 Object Methods ........................................................................................................................................................ 133 Object Specific Properties ........................................................................................................................................ 133 5.5.11.2. Hidden Text Field ........................................................................................................................................... 134 Object Events ........................................................................................................................................................... 135 Object Methods ........................................................................................................................................................ 135 Object Specific Properties ........................................................................................................................................ 135 5.5.11.3. Text Area ........................................................................................................................................................ 136 Object Events ........................................................................................................................................................... 137 Object Methods ........................................................................................................................................................ 138 Object Specific Properties ........................................................................................................................................ 138 5.5.11.4. CheckBox ....................................................................................................................................................... 138 Object Events ........................................................................................................................................................... 139 Object Methods ........................................................................................................................................................ 140 Object Specific Properties ........................................................................................................................................ 140 5.5.11.5. Group of Radio Buttons.................................................................................................................................. 140 Object Events ........................................................................................................................................................... 142 Object Methods ........................................................................................................................................................ 142 Object Specific Properties ........................................................................................................................................ 142 5.5.11.6. Drop-down Menu ........................................................................................................................................... 142 Object Events ........................................................................................................................................................... 144 Object Methods ........................................................................................................................................................ 144 Object Specific Properties ........................................................................................................................................ 144 3
- 4. 5.5.11.7. Button ............................................................................................................................................................. 145 5.5.12. Simulations........................................................................................................................................... 146 5.5.12.1. “Task controller” object ................................................................................................................................. 146 5.5.12.2. “Test Structure” object ................................................................................................................................... 151 5.5.12.3. “Results by selections” object ........................................................................................................................ 152 5.5.13. Questions ............................................................................................................................................. 154 5.5.13.1. Object Single Choice Question....................................................................................................................... 154 Object Events ........................................................................................................................................................... 160 Object Specific Properties ........................................................................................................................................ 161 5.5.13.2. Object “Multiple Select Question” ................................................................................................................. 162 Object Events ........................................................................................................................................................... 168 Object Specific Properties ........................................................................................................................................ 169 5.5.13.3. Object “Ordered Items Question” ................................................................................................................... 170 Object Events ........................................................................................................................................................... 176 Object Specific Properties ........................................................................................................................................ 177 5.5.13.4. Object “Numeric Fill-in-Blank Question” ...................................................................................................... 178 Object Events ........................................................................................................................................................... 184 Object Specific Properties ........................................................................................................................................ 185 5.5.13.5. Object “Text Fill-in-Blank Question”............................................................................................................. 186 5.5.13.5. Object “Text Fill-in-Blank Question”............................................................................................................. 186 Object Events ........................................................................................................................................................... 192 Object Specific Properties ........................................................................................................................................ 193 5.5.13.6. Object “Matching Pairs Question” ................................................................................................................. 194 5.5.13.6. Object “Matching Pairs Question” ................................................................................................................. 194 Object Events ........................................................................................................................................................... 200 Object Specific Properties ........................................................................................................................................ 201 5.5.14. Tests ..................................................................................................................................................... 202 5.5.14.1. Test ................................................................................................................................................................. 202 Object Events ........................................................................................................................................................... 210 Object Specific Properties ........................................................................................................................................ 211 5.5.14.2. Current Results ............................................................................................................................................... 212 Object Methods ........................................................................................................................................................ 213 Object Specific Properties ........................................................................................................................................ 213 5.5.14.3. Results by objectives ...................................................................................................................................... 214 Object Methods ........................................................................................................................................................ 215 5.6. SCENARIOS ..................................................................................................................................................... 216 5.7. CURSORS ........................................................................................................................................................ 216 6. HANDLING OBJECTS ...................................................................................................................................... 219 6.1. COMMON SETTINGS OF ALL OBJECTS. OBJECT ALLOCATION WITHIN A FRAME. .............................................. 219 6.1.1. Object’s background and border color. Opacity. .................................................................................. 219 6.1.2. Sizing and Scaling. ................................................................................................................................. 220 6.1.3. Rotating Object ...................................................................................................................................... 220 6.1.4. Object position within a Frame and permission to move object. ........................................................... 221 6.1.5. Modifying common settings for the group of the objects. ...................................................................... 222 6.1.6. Aligning Objects..................................................................................................................................... 222 6.1.7. Distributing Objects evenly ................................................................................................................................. 222 6.1.8. Changing Objects Z-Order .................................................................................................................................. 223 6.2. EFFECTS. CONTROLLING DISPLAY TIME. ......................................................................................................... 224 6.2.1. Objects display time. Timeline Panel. .................................................................................................... 224 6.2.2. Object entry and exit effects ................................................................................................................... 225 6.3. BINDING SOUNDS TO OBJECTS ........................................................................................................................ 226 6.4. OBJECT PROPERTIES ....................................................................................................................................... 227 6.4.1. Common Object Properties .................................................................................................................... 227 6.4.2. Specific Object Properties ..................................................................................................................... 228 7. MULTIFRAME ANIMATION .......................................................................................................................... 229 7.1. USING FRAMES ............................................................................................................................................... 229 7.2. FRAME DISPLAY TIME ..................................................................................................................................... 229 8. ACTIONS AND EVENTS .................................................................................................................................. 231 8.1. “EVENT – ACTION” MECHANISM .................................................................................................................... 231 8.2. EVENTS GENERATED BY THE COURSELAB PLAYER ........................................................................................ 231 8.2.1. Slide and Frame Events ......................................................................................................................... 231 8.2.2. Events common to all objects ................................................................................................................. 232 8.3. OBJECT CUSTOM EVENTS ............................................................................................................................... 233 4
- 5. 8.4. ACTIONS ......................................................................................................................................................... 233 8.4.1. Variables and object properties in action parameters ........................................................................... 233 8.4.2. Built-in actions ....................................................................................................................................... 233 8.4.2.1. Execution actions ............................................................................................................................................. 234 EXTERNAL URL ................................................................................................................................................... 234 RETURN ................................................................................................................................................................. 234 ROTATE - START .................................................................................................................................................. 234 ROTATE - STOP ..................................................................................................................................................... 234 CALL ....................................................................................................................................................................... 235 MOVE - START ...................................................................................................................................................... 235 MOVE - STOP......................................................................................................................................................... 236 SOUND.................................................................................................................................................................... 236 METHOD ................................................................................................................................................................ 237 NAVIGATION ........................................................................................................................................................ 237 GOTO ...................................................................................................................................................................... 237 DISPLAY ................................................................................................................................................................ 238 MSGBOX ................................................................................................................................................................ 238 8.4.2.2. Service Actions ................................................................................................................................................ 238 IF ... ELSE ............................................................................................................................................................... 238 DELAY .................................................................................................................................................................... 239 VARIABLE ............................................................................................................................................................. 239 CHECKHIT ............................................................................................................................................................. 239 SEQUENTIALLY ................................................................................................................................................... 240 TIMER ..................................................................................................................................................................... 240 FOR ......................................................................................................................................................................... 240 8.4.2.3. Using JavaScript ............................................................................................................................................... 240 8.4.2.3.1. Action JAVASCRIPT .............................................................................................................................. 240 8.4.2.3.2. Including JavaScript in module.js files..................................................................................................... 240 8.4.2.4. Actions with scores and statuses ...................................................................................................................... 240 SET SCORE ............................................................................................................................................................ 240 SET COMPLETION STATUS ................................................................................................................................ 241 SET SUCCESS STATUS ........................................................................................................................................ 241 IF SUCCESS STATUS ............................................................................................................................................ 241 9. SCORES ............................................................................................................................................................... 243 9.1. OBJECTIVES .................................................................................................................................................... 243 9.2. RULES ............................................................................................................................................................. 244 10. SCREEN CAPTURE AND CREATING SIMULATIONS OF OTHER APPLICATIONS....................... 245 10.1. WHAT NEEDS TO BE DONE PRIOR TO RECORDING THE SIMULATION? ............................................................. 245 10.2. SCREEN CAPTURE WIZARD........................................................................................................................... 245 10.3. MODIFY PARAMETERS SETTINGS WHILE IN CAPTURE MODE .......................................................................... 246 10.4. CAPTURE FRAMES ........................................................................................................................................ 246 10.5. SPECIAL CAPTURE MODE............................................................................................................................... 246 10.6. EDITING CAPTURED FRAMES ......................................................................................................................... 247 11. IMPORT MICROSOFT POWERPOINT PRESENTATIONS .................................................................... 248 5
- 6. 1. Introduction 1.1. Prerequisites This manual assumes that intended audience already has working knowledge of Microsoft Windows® operating system and its basic operations, such as handling files and folders, interactions with Dialogs and Menus and has general computer skills such as using Mouse and Keyboard. Graphics, audio, video, and other rich-media objects are external to the CourseLab system therefore we will not go over the details of editing them. For any additional information on these subjects, please refer to the corresponding software vendor’s documentation. 1.2. System Requirements Minimum system requirements for working with CourseLab: • Microsoft® Windows® 2000/XP/2003; • Internet Explorer 6.0 or higher; • 50MB hard drive space; Minimum system requirements for viewing learning modules: • Microsoft® Windows® 98, Me, NT 4.0, 2000, XP, 2003 (limited support of Microsoft® Windows® 95 *), and Linux; • Internet Explorer 5.0 (Internet Explorer 5.5 or higher recommended), Mozilla FireFox 1.0 or higher, Netscape® 7.2 or higher, limited support** of Opera 9.0 and higher and Safari 3.0 (Win) and higher; • JavaScript enabled; • XML support enabled (Microsoft® XML Parser 3.0 or higher recommended for Internet Explorer***). * Microsoft® XML Parser 3.0 cannot be installed on Microsoft® Windows® 95 system therefore no data will be transferred from the Learning Module to the Learning Management System using AICC protocols. ** Some effects may not work *** Due to the lack of Microsoft® XML Parser 3.0 component some of the objects in Learning Module may malfunction in Internet Explorer. 6
- 7. 2. CourseLab Overview 2.1. About CourseLab CourseLab is a powerful, yet easy-to-use, e-learning authoring system that offers programming- free WYSIWYG environment for creating high-quality interactive e-learning content which can be published on the Internet, Learning Management Systems (LMS), CD-ROMS and other devices. Key features of CourseLab: • WYSIWYG (What You See Is What You Get) environment for creating and managing high-quality interactive e-learning content. • No HTML or other programming skills required. • Object-oriented Model allows constructing e-Learning content of almost any complexity just as easy as you put together the building blocks. • Scenario feature enables building complex multi-object interactions with one mouse click. • Interface based on an Open Object Model enables to easily extend and enhance existing libraries of objects and templates including those created by the user. • Built-in test creation capabilities. • Embedded mechanisms for objects’ animation. • Add any rich-media content like Macromedia® Flash®, Shockwave®, Java®, and video in different formats. • Easy inserting and synchronization of sound files. • Import PowerPoint® presentations into the learning material (requires optiona PowerPoint Import Pack). • Screen capture mechanism, which enables emulating functionality of different software (requires optional Screen Capture Pack). • Simple intuitive action description language. • Access to additional functionality of the Course Player for advanced users via JavaScript. • No Java® required for Course Player. 2.2. Compliance to Standards Learning modules created using CourseLab are compliant to the following e-Learning standards: • AICC (http://www.aicc.org/ ) • SCORM 1.2 (http://www.adlnet.org/ ) • SCORM 2004 (SCORM 1.3) (http://www.adlnet.org/ ) 7
- 8. 3. E-Learning Course 3.1. What is e-Learning Course? E-Learning Course encapsulates structured, thematically self-contained learning material, which can be distributed to the learner throughout Internet or using memory devices. Typically, the e-Learning Course accommodates self learning material, but unlike book or manual provides the following: • Powerful multimedia content − graphics, animation and other rich-media material (audio and video in different formats, Flash-movie, Java applications and others). • Interaction – presentation of the learning material may depend on the actions taken by the user. • Different options for assessing and evaluating gathered knowledge (tests, exercises). Incorporation of e-Learning Course into the Learning Management System and intercommunication between them enables the most efficient management of the overall learning process. Within Learning Management System the e-Learning Course is considered as an independent learning unit, which can be assigned for assessing the level of learning. Upon completion of e- Learning Course various reports could be generated by the Learning Management System. From the educational methodology perspective e-Learning Course corresponds to any conventional Learning Course – assuming that e-Learning Course encloses all the necessary self- educational learning material and tests for controlling and evaluating apprehension of the learning material. 3.2. E-Learning Course Structure: Learning Modules, Chapters E-Learning Course consists of structured sets of Learning Modules. Depending on structure of learning content modules can be grouped into Chapters. Chapters can be arranged using the hierarchy Chapters structure. 3.2.1. Learning Module Learning Module is a fundamental building block of the Course hierarchy representing the set of author-structured Slides. During the learning process the learner is led from one Slide to another sequentially, which is default behavior. If desired, author of the learning Module can define different order of the Slides appearance (for example depending on the result of the test). Learning Module can be used for educational purposes (in this case consists of learning material only), besides that, Learning Module can be employed for assessing of the learned lessons (can contain tests and exercises). It is a common practice to combine both learning material and tests in one single Learning Module: In this case upon completion of the learning material learner is tested within the same Learning Module. 8
- 9. In the Learning Management System the Learning Module is one of the component of the Learning Course and the only dynamic structural unit; system collects information regarding completion of the Learning Module. When processing information about status of all Learning Modules, the system changes the completion state of not only the particular sections of the Course but also Learning Course itself with accordance to the rules defined in the particular Learning Management System. From the educational methodology point of view Learning Module corresponds to lesson or lecture – meaning it supposed to have thematically coherent and completed learning material. 3.2.2. Folder Learning Modules created in CourseLab can be thematically combined in Folders. Folders can be grouped within other Folders resulting in complicated Course hierarchy structure. Although there is no limitation for number of Folders and number of sub Folders within a Folder, it is strongly recommended to avoid using too complex hierarchy structure. The reason is that you do not mean to discourage student from pursuing this Course just because the structure of that Course is too hard to apprehend. Within Learning Management System the Folder is usually displayed as a folder containing Learning Modules and/or other Folders. The Folder for the distance Learning System is a structural entity/unit. There is no information regarding state of the Folder transmitted to the System from the Learning Modules. The system is making changes to the state of the Folders based on state information of its Learning Modules and other Folders. From the educational methodology point of view Folder can be represented as a series of thematically grouped lectures or lessons. 3.3. Learning Module Structure: Slide, Frame 3.3.1. Slide Slide (Interactive page) is the main building block of Learning Module. Slides are used by the author to place learning material, tests, and exercises. The order of Slide correlation is predefined by the author. Slide itself consists of Frames. Depending on complicity the number of Frames can vary (e.g. using animation, software simulation etc. can significantly increase the number of Frames). Any Slide has at least one Frame. Slides are not accessible by the Learning Management System individually. The Learning Module is the smallest system managed unit. From the educational methodology perspective Slide can be employed for expressing single point of view (thought or idea) with regards to the Learning Module. 9
- 10. 3.3.2. Frame Frame is the smallest structural unit of the Learning Module. In order to create a Learning Module author uses Frames as the foundation for objects. Even though there is no limitation for the number of Frames within a Slide, we recommend not to exceed 30-40 Frames per Slide otherwise the time elapsed for loading up the Slide could be inconveniently slow. Similar to Slides, Frames are not accessible by the Learning Management System individually. The Learning Module is the smallest system managed unit. From the educational methodology perspective Frame is not a self-containing unit - it is rather component of the Slide. 3.4. Special Slides: Title-Slide, Master-Slide Every Module contains the Special Slides: Title- Slide and Master-Slide (one or several). 3.4.1. Title-Slide Title-Slide is an introductory part of the Learning Module which appears on the PC screen right after launching Learning Module. Along with the introductory page the system loads the main part of module on the background, which makes it convenient for user. Important! During display of the Title-Slide introduction the main code for the module is not loaded yet, therefore, not all the complex objects will be displayed. Thus only text, pictures, and special objects “Start Module”button and “Title-Slide Popup” window can be used when editing the Title- Slide. 3.4.2. Master-Slide All the Slides for the Learning Module are created on top of the Master-Slide. The Master slide is the slide that contains elements that are common to all or several slides: Navigation Objects within a Module, Help, etc. There is no limit for the number of Master-Slides and hypothetically each Slide with assessment content might have a Master-Slide, but this is rather inefficient and must be avoided. Practically, one Master-Slide should be enough. 10
- 11. 4. Creating Learning Course – from conception to publishing 4.1. Course Scenario. Things to consider. The following should be taken under consideration while creating Learning Course: Thematic Presentation of the Learning Course must be strictly consistent. Stay focused. There is no need to pause – do not follow the usual teaching approach of blending some funny story into the studying material. Student himself will set the right pace to absorb the material. Do not provide too many alternatives. A tree-like Course structure is rather disadvantageous if compared to linear type Course. It sends learners different directions therefore some parallel paths of the tree-like structure are in jeopardy of not being revealed at all. The only exception for using more complex structure is in case you need to provide an example, which is relevant to the Main Objective. Note, this example should be just be an additional illustration to the learning material and could be skipped causing no damage to the overall learning process. And again, if above mentioned example is an essential part of the main course, the linear Course structure should be taken into consideration. Ideally, learner should be able to go through the entire Course only by pressing “Next” button. Specifics of delivering Learning Material - pieces of the Learning Material should be reasonably sized. Break down the Learning Material into chunks of learning content. Build the clear hierarchy structure. If learning material is extensive, break it down into Modules with respect to thematic coherence – clear and consistent story lines and content. It is not recommended to group more than one learning subject into one Module; better use more Modules in the Course than overload the Modules with different learning subjects. Use thematic coherence inside each Module to distribute learning assessment into the Slides. One Topic per Slide. The learning material in the Course is divided into the Slides. Although there is a thematic relationship among the slides we do not recommend using several slides for covering a single learning Topic. Ideally, use only one Topic per Slide. Reverse situation: overloading the Slide with several related Topics is not recommended either. Most likely the student will remember none of these concurrent Topics. Not to exaggerate, it does not necessarily mean that entire learning material within one big Topic should be fit into one slide; in many cases it is simply impossible. It is essential that the theme within one slide is clearly outlined, consistent, and not overlapping with other topics. Use Interactive Multimedia features Utilize multimedia illustrations and graphics. E-Learning has a huge advantage over conventional learning since e-Learning introduces multimedia content. Animated schemes or Flash-movie is often more comprehensive than lengthy descriptions and should be used to full extent to explore the Topic within a Slide. Learn as you practice. Allow audience to interact with the system as it significantly improves the process of memorizing the learning material. E-Learning is interactive by its nature, thus use this potential to the full extent. Where appropriate, enable onscreen actions to demonstrate different results by manipulating with parameters. Use quizzes. 11
- 12. 4.2. Create New Learning Course Start CourseLab. On “Start Page” screen select “Create New Course” (in case the CourseLab is already running, go to menu File – New – Course, or select “New Course” icon, or use Ctrl- Shift-N key combination). New Course Wizard is opened. Click “Next” button to start creating new Course. On the next page of the Wizard: • Insert Course name • Specify folder where Course files will be located (if it does not exist, it will be created automatically) and press “Next” button. NOTE: Unlike naming the Course, where any symbols can be used, when naming the Course Folder, it is not recommended to use special characters (@, #, $, ^, %, &, *, and quotation marks). 12
- 13. By default, every created Course contains single Module by default (you can add as many Modules as you want later). On the next page of the Wizard: • insert name of the first Module, • Select Module design template and press “Next” button. NOTE: No restrictions on using special symbols when naming Module. Course is created. Press “Finish” button to finish working on the “New Course” wizard. Later on you may add more modules to the Course, as well as Folders. 4.3. Editing Module 4.3.1. Editing Module Design Settings You may change every new Module’s width and height, change default font for every text insertion, Module’s color palette, as well as prefixes of identifiers for Slides, Frames and other objects if necessary. To do that select menu Module – Design Settings or use Alt-F7 key combination. 13
- 14. Module’s width and height can be changed according to your vision of Module layout. However, since Modules have fixed width and height, you should always consider users display resolution as main limitation – your Course should fit into the smallest display. Built-in CourseLab Module templates are designed to fit into 800x600 pixels (750x530 and 792x536 templates) and 1024x768 pixels (1018x682 templates) display resolutions. Also, keep in mind that changing Module’s width and height might require further adjustment of Title-Slide and Master-Slide for this Module. Thus, change these settings only when absolutely necessary. Module’s color palette is designed to save time when selecting filling colors and contains frequently used colors for this Module. Module is not limited by the number of selected pallette colors – you can always use standard color picker instead. 14
- 15. Identifiers for Slides, Frames and other objects should not be changed without worthy reason. IMPORTANT! Prefixes for object identifiers must contain only Latin alphabet letters, numbers and underscore character (they must not start with a digit though). Usually, the most frequent change is a change of default font. 15
- 16. 4.3.2. Editing Title-Slide To turn on Title-Slide editing mode use View – Title sub-menu or corresponding quick switching button in the Slide’s Panel. You may change picture, add Logo, insert Module name and instructions prior to presenting Module (for example, using “Title- Slide Popup” window object), and so on. If necessary, you may modify the look of “Start Module” button. “Start Module” button can be displayed in two ways: Inactive (displayed from the moment system starts loading the Module until Module is loaded) and Active (displayed when the code for the Module is loaded) – arrange the necessary pictures in your Graphic Editor and change corresponding pictures using “Properties” context Menu option. LIMITATION: Title-Slide appears on the screen before the browser loads all of the run- time files necessary for Module and Objects functionality, therefore only the limited number of the objects such as pictures, text boxes, auto shapes, and special objects “Start Module” button and “Title-Slide Popup” window, which do not require run-time files, can be employed. Links, banners, animation effects and other events are not functioning on Title-Slide. Except for mentioned above WYSIWYG editing mode is used for editing Title-Slide. 4.3.3. Editing Master-Slide To turn on Master-Slide’s editing mode use View – Master sub- menu or quick switching button in the Slide’s Panel. If required, change pictures on the Master-Slide, add common Slides background picture, insert Logo, specify Module’s name, and so on. The appearance of the objects on the Master-Slide can be modified with respect to overall design of the Module. LIMITATION: Since Master-Slide is backround for many other Slides, therefore links, animation effects, and events are disabled on the Master-Slide. Besides, there is a limitation on using Objects: you can use only pictures, text boxes, auto shapes and special objects from the “Navigation” folder. All other Master-Slide editing features are based on WYSIWYG editing mode. 16
- 17. 4.3.4. Editing Slide To turn on regular Slide’s editing mode use View – Normal sub-menu or quick switching button in the Slide’s Panel. The following settings of the Slide can be edited: • Name of the Slide • Slide ID • Select the Master-Slide for the Slide • Content of the Slide • Slide Comments • Next Slide transition settings 4.3.4.1. Name of a Slide Usually, the name of a Slide reflects the main topic of a Slide. The name of a Slide appears on every Frame of this Slide (in case Master-Slide has a corresponding object “Slide Name”, which enables display of this text). Besides that, the name of a Slide is mentioned in the table of contents of the Module (again, if Master-Slide contain the corresponding “Contents” objects) even if the name is not displayed on the Slide itself. By default, newly created Slide is titled as “Untitled”. In order to change the name of a Slide, right click on Slide icon in Slides panel and choose Rename option from Context menu. There are no limitations for naming a Slide. NOTE: The newly edited name of a Slide will not be displayed in edit mode; but it will be visible in the viewing mode. 4.3.4.2. Slide ID Compared to Slide Name the Slide ID is used for internal programming purposes only (establishing relationship among the Slides, enabling process of Slide transition, etc.). By default CourseLab sets Slide ID automatically to every new Slide and usually there’s no need to change 17
- 18. it. In case you need to change Slide ID, right click on icon of desired Slide in the Slide Panel and select Identifier option from the context menu. Please be aware that: • Slide ID must contain only Latin alphabet letters, numbers and underscore character (ID must not start with a digit). • Change of the Slide ID may require revision and adjustment of all corresponding actions and relationship for this Slide. • ID must be unique for all Slides, Frames, and Objects within a Module – two Slides of the same Module can not share the same ID (upon attempt of changing Slide’s ID the entered data is automatically validated for uniqueness). 4.3.4.3. Select the Master-Slide for the Slide As it was previously mentioned the Learning Module may contain several Master-Slides. You can modify Master-Slide which is the background for associated Slide while in editing mode: right click on the Slide from the Slide Panel and select Master option from the context menu. In the popup window make a selection of desired Master-Slide. By default, when the Module is created, first created Slide is linked to the first Master-Slide from the list of Module’s Master-Slides, regardless of number of Master-Slides for this Module. Later, every newly created Slide is based on the Master-Slide, which is associated with the previous Slide. For example, the foundation for new Slide 11 will be the Master-Slide of Slide 10. 18
- 19. 4.3.4.4. Slide Content To insert pictures, texts, and objects into the Frame of the Slide, Insert – Picture, Insert – Text Box, and Insert – Object sub-menus can be used, or corresponding Panel buttons. Complex objects can be inserted directly from the library of the objects either by double-clicking on the selected objects or by dragging and dropping the object into the working area. Please refer to the Object allocation section of this document for more details on the specifics of object allocation. 4.3.4.5. Slide Comments Slide Comments is additional text that can be attached to the Slide. It can contain author's comments and remarks to the Slide, or comments to the Slide that imported from PowerPoint presentation. Slide Comments is not part of viewable Slide area, and it is not an object, therefore it cannot be displayed as usual text object. Special objects are used to display comments to learner (please refer to Complex Objects - Navigation section of this document). To add or edit comments to the Slide right click on the Slide icon in the Slide Panel and select Comments option from the context menu. RichText editing window will appear. Edit the text. 4.3.4.6. Slide Transition By default, it is assumed that transition to the next Slide will be performed by click on the “Next” button or by other user- activated navigation actions. Apparently, this is the most common situation when the user is in control of the timing for observing the Slide. But there are instances when timing must be set to transition to the next Slide regardless of the action from the user. In order to change default transition settings, right click on the target Slide icon from the Slide Panel and select Advance option from the context menu. In the open window modify “Wait for Action” setting to “Immediate”. Transition to the next Slide will occur 19
- 20. automatically right after all the elements for the current Slide have been displayed. Please refer to the “Actions” section of this document for other methods of programming Slide transitions. 4.3.5. Create and remove Slides. Change the order of Slides Once the Module is created – it already contains one Slide. To add a new Slide on the Insert menu select New Slide (or use Ctrl–M shortcut keys), otherwise, right click on Slide Panel and select New Slide from the context menu. Note, that new Slide will be placed right after currently selected Slide vs. being placed to the last position from the list of Slides. You can always adjust position of the Slide: left click on the icon representing the Slide that you would like move and drag this Slide to the desired location while holding down the left mouse button. To delete a Slide select the Slide you want to delete and press Del key. Alternatively, on the Edit menu, select Delete Slide or use Delete Slide from the Slide’s context menu. Remember, that you can always reverse Slide deletion by using Undo under Edit menu. 4.3.6. Module and Slide Preview While editing, it is always possible to preview what the Learning Module will look like on Web Browser. For viewing of the entire Module select Module – View Module (or press F5 key, or press corresponding button on toolbar). Module will be loaded into the separate browser window, which is limited by width and height according to the size of the Learning Module configured for viewing from the beginning. For Slide preview select Module – View Slide sub-menu (or press Shift-F5). Module will be loaded into the separate Browser Window which is limited by width and height according to the size of the Learning Module and will automatically transition into the selected Slide for display. 20
- 21. 4.4. Add Modules. Change the order of Modules. Upon creation of new Learning Course, it contains only single Module. In case it is not enough, you can add required number of Modules and group them into the Folders. To add new Module to the Course you can either select File – New – Module sub-menu (or use Ctrl-N shortcut keys), or use context menu by right clicking on the name of the Course from the “Course” panel. Add required number of Modules and fill them with the learning content. To change Module’s order do the following: in the Course panel drag Module with the mouse button to the parent element (Course or Folder). Dragged Module will be placed at the end of the list of Modules. 4.5. Add Folders 21
- 22. Upon creation of new Learning Course, it contains only single Module, which is not placed in the Folder. As the number of the Modules increases, it might be necessary to group Modules into the Folders. To add new Folder to the Course you can either select File – New – Folder sub-menu or use context menu by right clicking on the name of the Course from the “Course” panel. Add required number of Folders and fill them with the Modules. To change Folder’s order do the following: in the Course panel drag Folder with the mouse button to the parent element (Course or Folder). Dragged Folder will be placed at the end of the list. 4.7. Publish Course After completing of all editing tasks Course should be published. Publishing Course - creation fully functional standalone (separate from CourseLab) version of the Learning Course intended for use on CD, in the Learning Management System and so on. During publishing only those elements which are required for displaying the Course are copied into the separate folder from the folder containing the editable version of the Course, also some other elements added which are not used for editing, but require for Course display. The editable version of the Course during publishing remains unchanged. Depending on the prospective usage there are different choices of Course publishing: • for Launching from the CD • For distribution in the Learning Management System, which supports AICC standard • For distribution in the Learning Management System, which supports SCORM 1.2 standard • For distribution in the Learning Management System, which supports SCORM 2004 standard Sequence of the publishing steps as follows: • Specify runtime settings for each Module • Specify Course runtime settings • Launch “Publish Course” wizard 22
- 23. 4.7.1. Module runtime settings Prior to publishing it is necessary to specify runtime settings for each Module in the Course: Select Module – Runtime Settings sub-menu. “Module Properties” dialog window opens up. In most cases LMS needs Module ID, Module Name and Module Description to represent the Module to the user. The actual name of the Module in CourseLab will be used in LMS as is (will be inserted in metadata files automatically). To define Module ID and Description select “General” tab and fill in “Identifier” and “Description” fields under “Module identification in LMS” section. Identifier is a short Module ID, which will be used in the Learning Management System. Description – brief informal description of the Course, which will be used within Learning Management System in the Module card. 23
- 24. Use “Checks” tab to specify software components that need to be checked for availability on student’s computer prior to launching Module. For example, if you have inserted sound files or video clip in AVI format, it will be useful to check if Windows Media Player is installed on student’s computer. Use “Runtime” tab to specify some extra execution parameters. Specifying parameters in the “Objectives” and “Rules” tabs is described in greater details in the Score section. 24
- 25. 4.7.2. Course runtime settings Prior to publishing, it is necessary to specify runtime settings for the Course. Select File – Course runtime settings sub-menu. “Course Properties” dialog window opens up. In most cases LMS needs Course ID, Course Name and Course Description to represent the Course to the user. The actual name of the Course in CourseLab will be used in LMS as is (will be inserted in metadata files automatically). To define Course ID and Description fill in “Identifier” and “Description” fields under “Course identification in LMS” section. Identifier – short Course ID, which will be used in the Learning Management System. Description – brief informal description of the Course, which will be used within Learning Management System in the Course card. 25
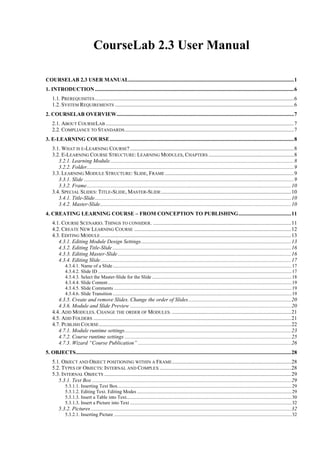
- 26. 4.7.3. Wizard “Course Publication” Select File – Publish Course sub-menu to start Course publishing. Follow wizard instructions to complete publishing. Select desired publication type - standard compliant package or folder for CD. In case one of the LMS publishing options was selected CourseLab will generate ZIP archive, structured according to selected standard (AICC or SCORM). In case “Publishing for CD” option was selected CourseLab will generate folder set with autorun.html. Autorun.html is very simple HTML file that cannot be edited in CourseLab – you can adjust it to your design in any HTML editor. 26
- 27. Select name of the package (or CD folder) and location, where it will be saved. Click th “Next” button and wait until the course is published. 27
- 28. 5. Objects 5.1. Object and Object positioning within a Frame Object is the basic element of CourseLab, the building “brick” of the Learning Module. You may construct the Learning Module of any complexity by employing various Objects and building relationships among them. When you insert the Object of any shape into the Frame it is placed into the Rectangular Placeholder. You can change size and orientation of this Rectangular Placeholder. There are 3 types of Objects allocation within the Rectangular Placeholder: • Object that can automatically adjust its size to the size of Rectangular Placeholder (For example, pictures, and AutoShapes are always resizing height and width to fit the Rectangular Placeholder), • Object that can resize by itself (autofit to contents depending, for example, on the amount of the text) • fixed-size Object 5.2. Types of Objects: Internal and Complex Two main types of Objects are used in the CourseLab for building up learning Module: internal and complex. Internal Objects are the primary and most frequently used Objects; they are built into the CourseLab. In fact, you can create entire learning Module by utilizing only internal Objects such as: • text boxes (can include text, tables, pictures) • pictures and autoshapes Since these types of Objects are the most commonly used, the access to the Editor menu is very simple - editing buttons are conveniently located on the toolbar. Complex Objects are external to CourseLab and loaded into the CourseLab using the Open Object Interface. For presentations of software execution the special object Cursor can also be employed. 28
- 29. 5.3. Internal Objects 5.3.1. Text Box Text Box – embedded into the editor object, which is used for creating areas within a Frame with formatted text and tables. 5.3.1.1. Inserting Text Box You can add Text Box to a Frame as follows: click on “Insert” menu option and select “Text Box”, or choose “Text Box” icon from the toolbar. Area of text appears on the Slide with “Enter Text” instruction on it. Alternatively, copy the desired text to Clipboard using any text editor and paste it right into the Frame. This insertion method is more convenient to use in many cases. 5.3.1.2. Editing Text. Editing Modes Using left mouse button, double click on Text Box or use “Edit text” option from the context menu to open text editing window. By default, text editing window opens up in Rich Text Format mode where you can edit text just like in any other conventional text editor: modify font, style, size, specify different format settings for paragraphs and lists, and so on. The edited text is automatically converted into HTML code, which will eventually be placed into the learning Module. Those who are familiar with HTML coding can switch to HTML mode by selecting “Edit HTML” button (right button in the bottom buttons row). 29
- 30. 5.3.1.3. Insert a Table into Text To insert a table, click on “Insert Table” button in text editing window (selected on the picture below). In opened Insert Table dialog screen, specify the number of columns and rows and other parameters. 30
- 31. After pressing “OK” button table appears in the text editing screen. You can insert text into the cells while in editing mode. Use “Table Properties” option from the context menu (right-click within table’s border) in case you need to modify settings for already inserted table. Note, that there are buttons to quickly insert and delete rows and columns. They are located right next to the “Insert Table” button. Use “Cell Properties” option from the context menu to modify settings for the single cell. 31
- 32. 5.3.1.3. Insert a Picture into Text If necessary, you can insert a picture right inside the text. While in editing mode, press “Insert Picture” button (selected on the picture below) and locate the file of the picture to insert. 5.3.2. Pictures CourseLab enables insertion of the graphics created by any graphic editor tool into the learning module, although CourseLab itself does not support graphic editing. 5.3.2.1. Inserting Picture To insert picture into Frame of the learning Module you can either choose “Picture” sub-menu within “Insert” menu or use “Insert Picture From File” icon on the toolbar. Locate the picture you need to insert and press “Open” button. Picture will be inserted into the Frame and file itself will be copied into the “Images” folder of current learning Module. In case file being copied already exists, the User will be prompted to cancel file overwriting. LIMITATION: Since Learning Modules can be further used on Internet, all file names of the pictures should be web-safe, in particular it is recommended to use letters and numbers of Latin alphabet only; no spaces and no special characters. 5.3.2.2. Valid Graphic File Formats Any internet-friendly graphic file formats can be used in the learning course. With respect to the fact that learning courses can be used on the Internet, it is highly recommended to select only graphic files of the small size therefore only compressed graphic formats such as GIF, JPG, and PNG are recommended. Each format has some advantages and disadvantages, which should be taken under consideration when selecting format. Below is the brief overview of these formats. 32