1. Documentary Process
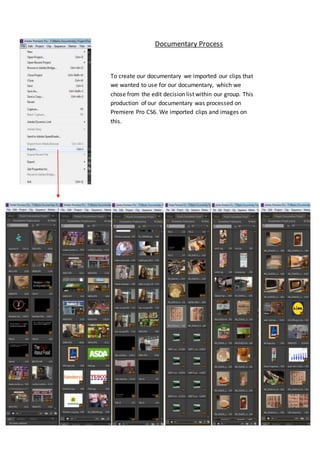
To create our documentary we imported our clips that
we wanted to use for our documentary, which we
chose from the edit decision list within our group. This
production of our documentary was processed on
Premiere Pro CS6. We imported clips and images on
this.
2. This is our title sequence, which lasted 20 seconds long. We added the clips by dragging them then
apply ‘control t’ to transform the size to what looked right. When we created the title sequence we
used the razor tool to get the right precise cut of the clips, this software also allowed us to zoom in
when to become more precise and give the best result. We used this technique throughout the whole
documentary. Zooming helped avoid help unnecessary jumpcuts which we used the razor tool. We
listened to the clip afterwards to make sure it was right for the cuts.
We added text by pressing ‘control t’ which gave us this option above therefore we
inserted it. We only used this tool in the title sequence.
3. We changed the filter on the title sequence to give an effect to show contrast between the clips and
text to engaged the audience to attract their attention because our topic was formal and very
important. We double clicked the clip so it gave us an option of adding an effect of black and which we
applied by clicking the ’FX’ box. This effect was applied to all the clips throughout the title sequence to
create a dramatic atmosphere.
4. Moreover we used the software Adobe After Effect to add fade effects for example
which we used in our title sequence this meant we used key points of the fading
process and this also allowed us to change the opacity level from high to low. It
portrayed clear and stands out. To apply this effect, in our group we used YouTube to
help and fully understand the techniques which are required.
5. However, when we crated the section of the voxpox all the questions
were removed by using the razor tool therefore it just became quick and
snappy. This was required for all the voxpox.
6. In total we had 9 tracks for our audio and which helped us understand what is happening in the
documentary and it has been explained in the background the importance of healthy eating for
example. To create our audio we had to record our voiceover in the ICE radio room, which was
then applied simply by dragging below the clips. We listened very closely to see what needed to
be cut from the clips by using the razor tool and zoom tool, this was used throughout the
documentary. Afterwards we placed each section in between interviews and cuts.
7. JPEG from photoshop and inserted it as an image to go along with the script. On
photoshop we emerged them together then cropped them to become two separate
images.
These images were created on photoshop however we wanted them appear on
the screen to portray our theme with voiceover in the background. We had to
drag them over and change the time. This allowed us the drag them above each
other which meant they would appear on the screen one after each other.
8. Lastly during the creation of our documentary this tool
was very important because it allowed us remove
irrelevant background sound of certain clips. It also
allowed us to hide other clips which were playing at the
same time which meant we can only here the voiceover
for example.