1. SBS COSMOS REFRIGERATOR 07.11.2018 / REV NO: 01
1
Sensitivity: Public
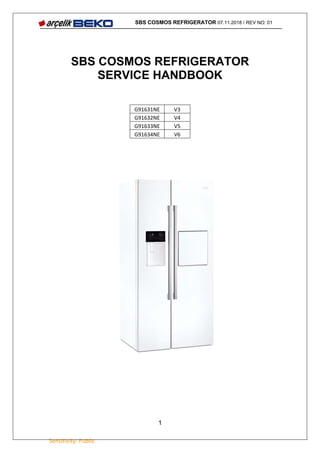
SBS COSMOS REFRIGERATOR
SERVICE HANDBOOK
G91631NE V3
G91632NE V4
G91633NE V5
G91634NE V6
2. SBS COSMOS REFRIGERATOR 07.11.2018 / REV NO: 01
2
Sensitivity: Public
Contents
1. PRODUCTION CODE-SALES CODE EXPLANATIONS......................................... 6
2. REVISION HISTORY................................................................................................... 10
3. GENERAL SAFETY WARNINGS.............................................................................. 11
3.1. FOR PRODUCTS WITH WATER DISPENSER ................................................................... 12
3.2. INTENDED USE........................................................................................................... 12
3.3. CHILD SAFETY........................................................................................................... 13
3.4. COMPLIANCE WITH WEEE DIRECTIVE AND DISPOSING OF THE WASTE PRODUCT...... 13
3.5. PACKAGE INFORMATION............................................................................................ 13
3.6. DISPOSAL OF THE WASTE PRODUCT ........................................................................... 13
4. GENERAL APPEARANCE OF THE PRODUCT..................................................... 14
4.1. GENERAL DIMENSIONS OF THE PRODUCT.................................................................. 15
4.2. MAXIMUM OPENED VIEW OF THE PRODUCT ............................................................. 16
5. INSTALLATION ........................................................................................................... 17
5.1. HANDLING INSTRUCTIONS......................................................................................... 17
5.2. HANDLING INSTRUCTIONS......................................................................................... 17
5.3. APPROPRIATE INSTALLATION LOCATION ................................................................... 18
5.4. INSTALLING THE PLASTIC WEDGES ............................................................................ 18
5.5. ELECTRIC CONNECTION............................................................................................. 18
5.6. ADJUSTMENT OF LEGS............................................................................................... 19
6. WATER CONNECTION .............................................................................................. 19
6.1. CONNECTING WATER PIPE TO THE JUG....................................................................... 19
6.2. CONNECTING WATER PIPE TO THE REFRIGERATOR (USE OF DRAGON FILTER)............ 21
6.3. CONNECTING THE WATER PIPE TO THE COLD WATER MAINS LINE .............................. 22
6.4. CONNECTION OF THE INLINE (EXTERNAL) FILTER...................................................... 23
7. PRODUCT USE ............................................................................................................. 24
7.1. GENERAL OPERATING PRINCIPLE.............................................................................. 25
8. OPERATION OF THE PRODUCT............................................................................. 26
8.1. INDICATOR PANEL V3/V4/V5.................................................................................... 26
8.2. USING THE WATER DISPENSER................................................................................... 28
8.3. BEFORE YOU START USING THE ICE/WATER DISPENSER ............................................. 29
8.4. USE OF DOOR-IN-DOOR COVER ................................................................................. 31
9. GAS FLOW DIAGRAM AND PARTS........................................................................ 32
9.1. COOLING SYSTEM PARTS ........................................................................................... 33
10. ELECTRONIC AND CONTROL SYSTEM........................................................... 34
11. ELECTRONIC SYSTEM.......................................................................................... 37
11.1. VERSION 3 / 4 / 5 .................................................................................................... 37
11.1.1. U4 board .......................................................................................................... 38
11.1.2. Electric Circuit Diagram ................................................................................. 40
11.1.3. Omnia Tests...................................................................................................... 41
11.2. SERVICE TEST ........................................................................................................... 42
11.2.1. V3 Service Test................................................................................................. 42
3. SBS COSMOS REFRIGERATOR 07.11.2018 / REV NO: 01
3
Sensitivity: Public
12. ATTACHMENT/DETACHMENT PROCESSES OF THE COMPONENTS..... 50
12.1. HANDLE GROUPS ...................................................................................................... 51
12.1.1. Beko/Arçelik handle group............................................................................... 51
12.1.2. Teka handle group............................................................................................ 52
12.1.3. Kuppers handle group / Round profile aluminum handle group ..................... 54
12.1.4. Smeg handle group........................................................................................... 56
12.2. DISPLAY GROUP................................................................................................... 57
12.2.1. Beko Display group.......................................................................................... 57
12.3. ICE POURING MOUTH GROUP........................................................................... 58
12.3.1. Beko ice pouring mouth group......................................................................... 58
12.4. CONTAINER GROUP ............................................................................................ 59
12.4.1. Beko container group....................................................................................... 60
12.4.2. Microswitch...................................................................................................... 61
12.5. CRENEL .................................................................................................................. 61
12.5.1. Beko crenel....................................................................................................... 61
12.6. WATER DISPENSER ILLUMINATION LED BOARD........................................ 61
12.6.1. Beko Light conducting LED board................................................................... 61
12.6.2. Arçelik/Blomberg light conducting LED board ............................................... 62
12.7. TRIGGER SILICON PART ............................................................................................. 62
12.8. DOOR-IN-DOOR (DID) COVER GROUP ....................................................................... 63
12.9. DOOR-IN-DOOR SEALS ....................................................................................... 64
12.9.1. Door-in-Door seal............................................................................................ 64
12.10. REED SWITCH GROUPS.......................................................................................... 64
12.10.1. Fridge/Freezer reed switch groups.............................................................. 64
12.11. UPPER HINGE COVER GROUP ................................................................................. 65
12.12. 60-GALLON DOOR SHELF ...................................................................................... 67
12.13. EGG HOLDER......................................................................................................... 67
12.14. 100-GALLON DOOR SHELF.................................................................................... 68
12.15. FREEZER DOOR SHELF GROUP................................................................................ 68
12.16. UPPER HINGE ........................................................................................................ 69
12.16.1. Upper hinge left............................................................................................ 69
12.16.2. Upper hinge right......................................................................................... 70
12.17. FREEZER LEFT DOOR.............................................................................................. 70
12.18. FRIDGE RIGHT DOOR.............................................................................................. 71
12.19. POINTS TO KEEP IN MIND WHEN REMOVING AND INSTALLING THE DOORS ............. 72
12.20. FRIDGE AND FREEZER DOOR SEALS ....................................................................... 73
12.21. LOWER HINGE GROUP RIGHT/LEFT....................................................................... 73
12.22. DOOR PULLER MECHANISM WITH STOPPER ............................................................ 74
12.23. MAIN BOARD COVER ............................................................................................. 75
12.24. COMMUNICATION CABLE............................HATA! YER İŞARETİ TANIMLANMAMIŞ.
12.25. ADDITIONAL BOARD...................................HATA! YER İŞARETİ TANIMLANMAMIŞ.
12.26. ULVI BOARD...............................................HATA! YER İŞARETİ TANIMLANMAMIŞ.
12.27. PIPE HOLDER ......................................................................................................... 76
12.28. QUICK FIT.............................................................................................................. 76
12.29. WATER PIPE (8MM) ............................................................................................... 77
12.30. REAR COVER GROUP.............................................................................................. 77
12.31. WATER VALVE ...................................................................................................... 78
12.32. EVAPORATION CONTAINER GROUP ........................................................................ 79
12.33. DC_PANASONIC CONDENSER FAN ........................................................................ 80
12.34. RETURN PIPE PROTECTION RUBBER ....................................................................... 81
4. SBS COSMOS REFRIGERATOR 07.11.2018 / REV NO: 01
4
Sensitivity: Public
12.35. SERVICE PIPE......................................................................................................... 82
12.36. COMPRESSOR ........................................................................................................ 82
12.37. TERMINAL COVER ................................................................................................. 85
12.38. PTC RELAY (COMBO UNIT ).................................................................................. 86
12.39. CAPACITOR ........................................................................................................... 86
12.40. MAINS CABLE GROUP ............................................................................................ 87
12.41. REAR LEG PLATE ................................................................................................... 88
12.42. WATER DRAIN GROUP .......................................................................................... 88
12.43. FRIDGE CRISPER GROUPS ....................................................................................... 89
12.44. FREEZER DRAWER GROUPS.................................................................................... 89
12.45. FRIDGE-FREEZER GLASS SHELF GROUPS ................................................................ 90
12.46. FRIDGE/FREEZER /RAIL GROUPS............................................................................. 91
12.47. FRIDGE ILLUMINATION GLASS GROUP SHORT/LONG............................................... 92
12.48. WATER FILTER HEAD AND BYPASS COVER............................................................. 93
12.49. WATER RESERVOIR ............................................................................................... 94
12.50. BLUE LIGHT GLASS................................................................................................ 95
12.51. ICE STOCK CONTAINER GROUP............................................................................... 96
12.52. ICE MAKING AREA CONNECTIONS .......................................................................... 97
12.53. ICEMATIC GROUP................................................................................................... 97
12.54. EVA COVER PLUG .................................................................................................. 98
12.55. COVER GROUP OF FRIDGE EVA............................................................................... 99
12.56. IONIZER............................................................................................................... 100
12.57. THERMAL FUSE.................................................................................................... 101
12.58. FINNED EVAPORATOR.......................................................................................... 101
12.59. SENSOR COVERS .................................................................................................. 102
13. FAILURE ERROR CODES.................................................................................... 103
13.1. E0 FREEZER AIR SENSOR ERROR.............................................................................. 104
13.2. E1FREEZER EVAPORATOR SENSOR ERROR .............................................................. 105
13.3. E2 FRIDGE EVAPORATOR SENSOR ERROR ................................................................ 106
13.4. E3 FRIDGE AIR SENSOR ERROR ................................................................................ 107
13.5. E4 FREEZER DEFROST HEATER ERROR..................................................................... 108
13.6. E8 ICEMATIC AIR SENSOR ERROR............................................................................. 109
13.7. E9 ICEMATIC MOTOR ERROR ................................................................................... 110
13.8. E13 CYCLIC FREEZER FAN ERROR ........................................................................... 111
13.9. E15 CYCLIC CONDENSER FAN ERROR ...................................................................... 112
13.10. COOLING FAILURE DUE TO ELECTRICAL ISSUES ................................................... 113
13.11. FREEZING ERROR DUE TO ELECTRICAL ISSUES..................................................... 114
14. TROUBLESHOOTING........................................................................................... 115
14.1. REFRIGERATOR IS NOT RUNNING ............................................................................. 115
14.2. CONDENSATION ON THE FRIDGE COMPARTMENT..................................................... 116
14.3. COMPRESSOR IS NOT RUNNING ................................................................................ 117
14.4. REFRIGERATOR IS RUNNING VERY FREQUENTLY OR FOR A VERY LONG TIME........... 118
14.5. THE TEMPERATURES ARE TOO LOW ......................................................................... 119
14.6. THE REFRIGERATOR IS RUNNING NOISILY ................................................................ 120
14.7. NOISE COMES FROM EVAPORATOR FAN MOTOR ....................................................... 121
14.8. NOISE COMES FROM CONDENSER FAN MOTOR. ........................................................ 122
14.9. NOISE COMES FROM REFRIGERATOR........................................................................ 123
14.10. CONDENSATION ON THE INNER WALLS OF REFRIGERATOR .................................. 124
14.11. CONDENSATION ON THE OUTSIDE OF THE REFRIGERATOR ................................... 125
5. SBS COSMOS REFRIGERATOR 07.11.2018 / REV NO: 01
5
Sensitivity: Public
14.12. THE DOORS ARE NOT CLOSING............................................................................. 126
14.13. REFRIGERATOR DOES MAKE ICE .......................................................................... 127
14.14. WATER CANNOT BE OBTAINED FROM THE WATER DISPENSER.............................. 128
14.15. ICE CUBES OR CRUSHED ICE CANNOT BE TAKEN FROM THE WATER DISPENSER .... 129
14.16. CONDENSATION IN THE FORM OF DROPS ARE OBSERVED ON THE WATER DISPENSER
AREA 130
15. DEALER MODE...................................................................................................... 131
15.1. V0..................................................................HATA! YER İŞARETİ TANIMLANMAMIŞ.
15.2. V1/V2............................................................HATA! YER İŞARETİ TANIMLANMAMIŞ.
15.3. V3/V4..................................................................................................................... 131
16. MAINTENANCE AND CLEANING..................................................................... 132
6. SBS COSMOS REFRIGERATOR 07.11.2018 / REV NO: 01
6
Sensitivity: Public
1. PRODUCTION CODE-SALES CODE EXPLANATIONS
V3 – G91631NE: Icematic is on the left door.
7. SBS COSMOS REFRIGERATOR 07.11.2018 / REV NO: 01
7
Sensitivity: Public
V4 – G91632NE: Icematic is on the left door and Door-in-Door is on the right door.
8. SBS COSMOS REFRIGERATOR 07.11.2018 / REV NO: 01
8
Sensitivity: Public
V5 – G91633NE: Icematic is on the left door and Door-in-Door and glass water tank
is on the right door.
9. SBS COSMOS REFRIGERATOR 07.11.2018 / REV NO: 01
9
Sensitivity: Public
V6 – G91634NE: Icematic is on the left door and glass water tank is on the right door.
10. SBS COSMOS REFRIGERATOR 07.11.2018 / REV NO: 01
10
Sensitivity: Public
2. REVISION HISTORY
NO REVISION DATE
00 First edition: SBS Cosmos refrigerator service manual. 10.04.2014
01 Product versions are divided 10.06.2014
02
U4 MAIN INSTALLATION S4 DISPLAY
WATER FILTER TIMER ACTIVATION SINGLE POINT COURSE ADDED 07.11.2018
03
04
05
06
07
08
09
10
11. SBS COSMOS REFRIGERATOR 07.11.2018 / REV NO: 01
11
Sensitivity: Public
3. GENERAL SAFETY WARNINGS
Children should not play with the device. Cleaning and user maintenance actions
should not be performed by the children unless they are supervised by someone.
If the product is faulty , it should not be operated before it is repaired by the
authorized service! Risk of electric shock!
Connect the product to a grounded socket which is being protected by a fuse
conforming to the values on the Type Label. Always have a qualified electrician to
make the grounding installation. If the machine is used without grounding which
conform to the local regulations, our company will not be liable for any damages
which may arise.
Unplug the product if it is not in use.
Never wash the product by spraying or pouring water on it! Risk of electric shock!
Never touch the plug with wet hands! Do not grab the power cord to unplug the
machine, always unplug it by holding its plug.
If the outlet is loose, never plug the device into the outlet.
Never connect your refrigerator to electricity-saving systems. These systems will
damage the device.
Product should be disconnected during its installation, maintenance, cleaning and
repair works.
Installation and repair works should always be performed by Authorized Service
agents. Manufacturer cannot be held liable for the damages which are attributable to
the procedures performed by unauthorized persons.
Do not eat the cone ice cream, ice cubes, etc. right after they are taken from the
freezer compartment! This may cause frostbite in your mouth!
Do not touch frozen food by wet hands! They may stick to your hands!
Do not put the bottled and canned liquid beverages in the freezer compartment. They
may burst!
Never use vapor and vaporized cleaning materials in cleaning and defrosting
processes of your refrigerator. Vapor might get in contact with the electrical parts of
your refrigerator and cause short circuit or electric shock!
Do not use mechanical devices or other methods other than those recommended by
the manufacturer to accelerate defrosting process.
Never use the parts on refrigerator such as its door and drawers as a means of
support or step. Otherwise, you may cause the product to tip over or parts of it get
damaged.
Do not damage the cooling circuit, where the refrigerant is circulating, with cutting or
drilling tools. The refrigerant that might blow out when the gas channels of the
evaporator, pipe extensions or surface coatings are punctured may cause skin
irritations and eye injuries.
Do not cover or block the ventilation holes in the refrigerator with any material.
Place the beverages with higher proofs tightly closed and vertically.
Do not use pressurized flammable gaseous sprays near the product to avoid the risk
of a potential fire or explosion.
Do not store the flammable products or products containing flammable gases (spray,
etc.) and explosive substances in the refrigerator.
Do not place containers with liquid on top of the product. If water splashes onto an
electrical part, this may cause electric shocks or risk of fire.
Do not store the products that need a precise temperature control (vaccines, heat-
sensitive medicine, scientific materials, etc.) in the refrigerator.
If you will not operate the product for a long period of time, unplug and unload the
food in it.
If the product is equipped with blue light, do not look into it by optical appliances.
Exposing the product to rain, snow, sun and wind is dangerous with respect to
12. SBS COSMOS REFRIGERATOR 07.11.2018 / REV NO: 01
12
Sensitivity: Public
electrical safety.
For the products with mechanical control (thermostat), wait for 5 minutes to re-plug
the product if it is unplugged.
Do not overload the product. It may fall when the door is opened and may harm you
or damage the product. Similar problems may occur in case of putting things on the
product.
If the product's door is equipped with a handle, do not pull by the handle when
changing the place of the product. The handle may be dislocated.
Make sure your hands or other parts of your body are not entrapped between the
movable parts inside the product.
1.1. HCA warning
If the product has a refrigeration system containing R600a gas, make sure that the
refrigeration system and piping are not damaged during usage and transportation.
This gas is flammable. If the refrigeration system is damaged, keep the product away
from potential fire sources that may cause it to catch fire and immediately ventilate
the room in which the unit is placed.
Ignore this warning if the product is equipped with a cooling system that
contains R134a.
You can see the gas used in manufacturing of the product on the rating plate
that is located on the inner left part of it.
WARNING: Never dispose of the product in fire.
3.1. For products with water dispenser
Pressure of the supply water must be minimum 1 bar. Pressure of the supply water
must be maximum 8 bars.
Use only drinking water.
3.2. Intended use
This product is for domestic use only. It is not for commercial purposes or it should
not be used out of its intended use.
The product should only be used for the preservation of the food.
Manufacturer shall not accept any liability due to any damage arising from wrong use
or handling.
Service life of the product you purchased is 10 years. This is the period of time when
the spare parts are made available in order for the product to operate as specified.
13. SBS COSMOS REFRIGERATOR 07.11.2018 / REV NO: 01
13
Sensitivity: Public
3.3. Child safety
Packaging materials may be dangerous for the children. Keep packaging materials in
a safe place away from reach of the children.
Electrical appliances are dangerous for children. When the product is operating, keep
the children away from it and do not let them tamper with the device.
If the door has a lock, keep the key away from reach of the children.
3.4. Compliance with WEEE Directive and disposing of the waste product
This product does not contain the harmful and prohibited substances which are
specified in the “Directive for Controlling Waste Electrical and Electronic Equipment’’
issued by the Ministry of Environment and Urban Planning. It complies with the
WEEE Directive. This product has been manufactured from high quality parts and
materials which are recyclable and reusable materials. For this reason, do not discard
this product with the domestic products and other wastes at the end of its service life.
Take the product to a collection point for the recycling of the electric and electronic
equipment. Ask these collection points to the local administration in your region. Help
contribute to the protection of environment and conservation of the natural resources
by delivering the used products to the recycling points. Before disposing of your
appliance, cut out its power cord and if there are any locks on the door, make them
inoperable for children’s safety.
3.5. Package information
Packaging of the product was manufactured from the recyclable materials in
accordance with our national legislation. Do not dispose the package waste along
with the domestic waste or other wastes, take them to the collection points which are
specified by the local authorities.
3.6. Disposal of the waste product
This product has been manufactured from high quality parts and materials which are
recyclable and reusable materials. For this reason, do not discard this product with
the domestic products and other wastes at the end of its service life. Take the product
to a collection point for the recycling of the electric and electronic equipment. Ask
these collection points to the local administration in your region. Help contribute to the
protection of environment and conservation of the natural resources by delivering the
used products to the recycling points. Children’s safety before disposing of the
product
Important!
Attaching a Different Plug
As the colors of the wires in the power cable of the appliance might not match with the color
codes defining the terminals in your plug, proceed as follows:
1. Attach the green-yellow or yellow colored wire (ground) to the terminal in the plug which
is marked with ‘E’, bearing symbol or is in green and yellow, or only green color.
2. Attach the blue (Neutral) wire to the terminal in the plug which is marked with ‘N’ or is in
black color.
3. Attach the brown (Phase) wire to the terminal in the plug which is marked with ‘L’ or is in
red color. In alternative plugs, a 13-Ampere fuse must be attached to the plug or the
adapter in the mains plug box.
14. SBS COSMOS REFRIGERATOR 07.11.2018 / REV NO: 01
14
Sensitivity: Public
4. GENERAL APPEARANCE OF THE PRODUCT
1-Freezer Compartment 10- Chiller compartment
2- Fridge Compartment 11- Blue light
3-Fan 12- Freezer food compartments
4- Butter and cheese sections 13- Door shelves
5- Glass shelves 14- Odor filter
6- Door shelves and egg holder 15- Ice Box assembly
7- Minibar accessory 16- Ice stock container
8- Odor filter 17- Icematic Decorative Cover
9- Adjustable legs
*OPTIONAL
Figures that take place in this manual are schematic and may not correspond exactly with
the product. If the relevant parts are not included in the product you have purchased, then it
is valid for these parts.
15. SBS COSMOS REFRIGERATOR 07.11.2018 / REV NO: 01
15
Sensitivity: Public
4.1. General Dimensions of the Product
Width x Height x Depth: 908 x 1790 x 30.73 in (incl. the rear support wedge, excl.
the handle)
Product Outer Dimensions
16. SBS COSMOS REFRIGERATOR 07.11.2018 / REV NO: 01
16
Sensitivity: Public
4.2. Maximum Opened View of the Product
17. SBS COSMOS REFRIGERATOR 07.11.2018 / REV NO: 01
17
Sensitivity: Public
5. INSTALLATION
5.1. Handling Instructions
1. This appliance should be transported only in upright position. Delivery package should not
be damaged during transportation.
2. If the appliance is to be transported in horizontal position, it should only be leaned towards
right-hand side when you are facing the front of the appliance. After bringing it to upright
position, it should be left for at least 4 hours without being operated in order to have it settled.
3. Failure to obey above instructions may result in damage on the appliance. In case of
failure to obey these instructions, producer shall not be held responsible.
4. The appliance must be protected against rain, humidity and other atmospheric effects.
5. Pay attention not to damage your floor, the pipes, wall coverings and etc., when installing
your appliance. The appliance should not be carried by pulling by the door or door handle.
6. Discharge the water in the drain tray before moving the appliance. For detailed
information, see “Cleaning and Maintenance” section in the operation manual.
Do not sit on or climb to the appliance since the design of the appliance is not suitable for
such actions.
You may injure yourself or damage the appliance.
IMPORTANT! To prevent cutting or damaging the power cable, make sure that the cable
is not pinched under the appliance during and after moving it.
5.2. Handling Instructions
1. Volume of the room where the product will be installed should not be less than 10 cubic
meters.
2. Do not install the appliance in a cold room where the temperature may fall below 10°C at
nights and/or especially in winter season.
This refrigerator/deep freezer has been designed to operate in ambient temperatures
between 10°C and +43°C. For this reason, in case of installing the appliance in a cold place
without heating facility (e.g. garage outside the house), it will not operate and the freezer
compartment will get warmer which will end up with decreased preserving times for frozen
foods.
3. Do not install the appliance near ovens or radiators or under direct sunlight since they will
cause the appliance operate more difficultly. In case of placing the appliance near a heat
source or freezer, make sure that the following minimum clearances are provided.
From ovens: 50 mm (2")
From radiators: 400 mm (12")
From freezers: 25 mm (1")
From the wall: 50 mm (2")
4. Insert the 2 plastic wedges supplied in a pouch in the refrigerator onto the rear ventilation
cover as illustrated in the following figure. To do this, remove the screws on it and attach the
screws given in the same pouch. Plastic wedges will provide the required distance between
your refrigerator and the wall in order to allow the air circulation.
18. SBS COSMOS REFRIGERATOR 07.11.2018 / REV NO: 01
18
Sensitivity: Public
5.3. Appropriate installation location
WARNING: If the door of the room in which the refrigerator shall be
installed is too narrow for the passage of product, doors of the unit
should be removed and passed through in a horizontal position.
Install your product to a place that allows ease of use.
Your product should be installed at least 30 cm away from heat sources such as
hobs, ovens, central heaters and stoves and at least 5 cm away from electrical ovens.
It should not be exposed to humidity and direct sunlight after installation.
There must be appropriate air circulation around your product in order to achieve an
efficient operation. If the refrigerator is to be placed in a recess in the wall, there must
be at least 5 cm clearance with the ceiling and side walls.
Do not place the product on materials such as carpet or rugs.
Place the refrigerator on a flat surface to avoid any jolts.
Do not install the product in the environments where the temperature falls below
10°C.
If two coolers are to be installed side by side, there should be at
least 4 cm distance between them.
5.4. Installing the plastic wedges
Plastic wedges are used in order to maintain the clearance that shall provide the air
circulation between the product and the wall. Insert the 2 plastic wedges supplied with the
product onto the rear ventilation cover as illustrated in the figures. In order to attach the
wedges, remove the screws on the product and use the screws found in the same pouch
with the wedges.
5.5. Electric connection
Connect the product to a grounded socket which is protected by a fuse conforming to the
19. SBS COSMOS REFRIGERATOR 07.11.2018 / REV NO: 01
19
Sensitivity: Public
values on the Type Label. If the machine is used without grounding which conform to the
local regulations, our company will not be liable for any damages which may arise.
• The connection must be in compliance with national regulations.
• The power cable plug should be easily accessible after installation.
• Voltage and allowable fuse protection are specified in the rating plate affixed to the inner
part of the device. If the current value of the fuse in your house does correspond to the
values specified in its rating plate, request a licensed electrician to connect an appropriate
fuse.
• The specified voltage must be equal to your mains voltage.
• Do not connect to the extension cables or multiple outlets.
WARNING: Damaged power cords should be replaced by an
Authorized Service agent.
WARNING: If the product fails, it should not be operated without
being repaired. Risk of electric shock!
5.6. Adjustment of legs
If the product stands in an unbalanced way in the place you installed it, adjust its legs. Taking
help from someone to slightly lift the refrigerator will help you and facilitate this process.
WARNING: First disconnect the electrical connection of the
product. When the legs are adjusted, the product should not be
plugged in. There is risk of electric shock!
6. WATER CONNECTION
You can connect the refrigerator to a jug or directly to supply water depending on its model.
In order to make this connection, first you have to connect the water pipe to your refrigerator.
6.1. Connecting water pipe to the jug
To connect water to the refrigerator from the jug, a water pump is needed. Connect one end
of the water pipe coming out of the procured pump to the refrigerator as described below.
To let the pump reach to the desired efficiency, wait for 2-3
minutes after starting it.
20. SBS COSMOS REFRIGERATOR 07.11.2018 / REV NO: 01
20
Sensitivity: Public
You may also refer to the user manual of the pump while making
the water connection.
There is no need to use water filter if a jug is to be used.
After water connection is made, it is necessary to discharge the
air retained in the system. Otherwise, proper water flow cannot
be ensured.
1 2 3
4 5
Attach one end of the water pipe into the water pipe inlet of the pump and the other
end to the water valve (Picture 5).
Tighten the union to avoid any water leakage as illustrated in Picture 4. To make sure
that the union is tightened, you can use pliers or pipe wrench.
Attach the vacuum apparatus of the water pump into the jug.
After completing the connection, plug in and run the pump.
water
valve
water pump
inlet:
21. SBS COSMOS REFRIGERATOR 07.11.2018 / REV NO: 01
21
Sensitivity: Public
6.2. Connecting water pipe to the refrigerator (use of Dragon filter)
You can tighten the union by using a pipe wrench or pliers to avoid
water leakage.
1 2 3
4 5 6
7
Press on the “Ice Off” button on the screen. Push the bypass cover in Picture 3 in the
direction of arrow to remove.
Remove the water valve union seen in Picture 1 and attach it to the water pipe and
tighten the union.
Water filter is grouped as shown in Picture 6.
22. SBS COSMOS REFRIGERATOR 07.11.2018 / REV NO: 01
22
Sensitivity: Public
WARNING: Make sure that the “Ice Off” mode is active before
taking out the by-pass cover.
WARNING: Water filter cleans some foreign particles contained in
the water. It does not purify the water from microorganisms.
WARNING: “Ice Off” button must always be pressed during replacement of
the water filter or when installing the by-pass cover.
It is normal that a few drops of water drip after the cover has been taken out.
Water filter should be replaced every 6 months. Remove the water filter and
install the bypass cover as shown in the figure when you replace the water
filter or when it will no longer be used. Make sure that the “Ice Off” mode is
active before taking out the filter.
6.3. Connecting the water pipe to the cold water mains line
If you will use the refrigerator by connecting it to the mains cold water supply, you need to
connect a standard 1/2" valve fitting to the mains cold water supply in your house.
WARNING: Secure the water pipe to suitable points by means of
the clips supplied to avoid any damage or displacement or
accidental disconnection.
WARNING: After turning on the water valve, make sure that there
is no leakage at both connection points of the water pipe. In case
of a leak, turn off the valve immediately and tighten all joints again
using a pipe wrench or pliers.
WARNING: Make sure that standard 1/2" valve fitting fed by cold
mains water supply is available and is turned off fully.
1 2 3
Remove the water valve union as in Picture 1 and reattach it to the water valve by
installing it onto the water pipe.
Remove the tap adaptor and attach the union instead as in Picture 2.
Connect the standard 1/2" valve connection fitting to the union.
To be connected to
the cold water line
23. SBS COSMOS REFRIGERATOR 07.11.2018 / REV NO: 01
23
Sensitivity: Public
6.4. Connection of the inline (external) filter
External filter group which is given in the product is attached to an area near the
water mains as shown in the picture.
It is important that the filter stands upright as illustrated.
By attaching one end of the pipe into the water valve and the other end to the mains
inlet, water can be supplied directly from the mains.
WARNING: Water filter must be held upright as shown in the
figure. It is important to properly attach the filter to water inlet and
water outlet.
After attaching the filter, do not use the first 3-4 glasses of water.
WARNING: Never mount the filter onto the refrigerator. Otherwise,
refrigerant pipes may be punctured!
UNION
FITTING TO
BE
CONNECTED
TO THE TAP
24. SBS COSMOS REFRIGERATOR 07.11.2018 / REV NO: 01
24
Sensitivity: Public
7. PRODUCT USE
For air circulation in the place where the refrigerator is located, necessary clearance should
be allocated under, top, right and left of the unit.
As the water inlet is at the rear side of the refrigerator for products equipped with water
dispenser, make sure that the hose is not kinked or squeezed.
If the refrigerator is equipped with an Icematic supplied from mains, area required for the
mains system should be reserved.
Plug your refrigerator always into a grounded socket. Pay attention not to damage the power
cable during transportation.
Do not place devices such as radiators, heaters and etc. close to the refrigerator.
The place where the refrigerator will be placed should be at an appropriate distance to the
place of mains connection.
Refrigerator should not be exposed to direct sunlight.
Floor balance adjustment should be made according to the installation point of refrigerator.
Adequate area should be allocated in order to open the doors of the refrigerator comfortably.
Position of the refrigerator should be appropriate for servicing and maintenance.
Do not use the refrigerator on wet floors. There is the risk of electric shock.
25. SBS COSMOS REFRIGERATOR 07.11.2018 / REV NO: 01
25
Sensitivity: Public
7.1. General Operating Principle
SBS Cosmos Electronic NF refrigerator is a microprocessor-controlled, no-frost refrigerator
with two compartments, namely the fridge, freezer compartments. All functions and
temperature controls of the refrigerator are made in accordance with the desire of the user
thanks to the microprocessor. The software in the microprocessor controls the cooling and
water system elements (compressor, fans, heaters, valves, icebox, solenoids, ice crusher
motor and ionizer, etc.) of the refrigerator. Cooling of the refrigerator is provided by circulating
the air in it continuously for the Freezer and the FF separately over the evaporators by means
of the fan. No frosting or icing occurs inside the usable areas of no-frost refrigerators as it does
in conventional refrigerators. The frosting that occurs on the evaporator which is out of the
usable area is melted by means of heaters automatically activated under the control of the
microprocessor at certain intervals to be determined by the control algorithm. Thus, the snow
and the ice accumulated on the evaporator are melted without making any operation by the
user to enable the refrigerator operate more efficiently.
26. SBS COSMOS REFRIGERATOR 07.11.2018 / REV NO: 01
26
Sensitivity: Public
8. OPERATION OF THE PRODUCT
8.1. Indicator panel V3/V4/V5
Touch screen panel allows you to make temperature settings and control other functions of
the refrigerator without needing to open its door. Press on the relevant buttons for function
settings.
1- Economy Mode indicator
2- Freezer Compartment Temperature Indicator
3- Quick Cool Function indicator
4- Fridge Compartment Temperature Indicator
5- Filter Change Warning indicator *
6- Vacation Function indicator
7- Key lock indicator
8- Vacation button
9- Cancel Filter Change Warning button/Key lock button
10- Fridge Compartment Temperature Setting Indicator
11- Quick Cool button
12- Error Status indicator
13- Quick Freeze/Eco Fuzzy button
14- Freezer Compartment Temperature Setting Indicator
15- Quick Freeze Function indicator
16- Display on-off button
17- Ice making on-off button
18- Water, crushed ice, ice cubes selection button
19- Water, crushed ice, ice cubes indicator
20- Display on-off indicator
21- Ice making on-off indicator
22- Eco-Fuzzy function indicator
Figures that take place in this instruction manual are schematic and may not
correspond exactly with your product.
27. SBS COSMOS REFRIGERATOR 07.11.2018 / REV NO: 01
27
Sensitivity: Public
1. Economy Mode indicator
Indicates that the refrigerator is running in energy-saving mode. This indicator will be on if the
Freezer Compartment temperature is set to -18 or the energy-saving cooling is being
performed with Eco-Extra function.
2. Freezer Compartment Temperature indicator
It indicates the temperature set for Freezer compartment.
3. Quick Cool Function indicator
Indicates that the Quick Cool function is active. Use this function when you place fresh food
into the fridge compartment or when you need to cool your food quickly. When this function is
active, the refrigerator will be active for 1 hours. To cancel the function, press Quick Cool
button.
4. Fridge Compartment Temperature indicator
Indicates the temperature set for the Fridge compartment.
5. Filter Change Warning indicator
When the filter usage time has elapsed, filter change warning indicator starts to illuminate.
6. Vacation Function indicator
Indicates that the vacation function is active. When the vacation function is active, “- -“
appears on the temperature indicator of the Fridge compartment and no active cooling is
performed in the fridge compartment. In this function, it is not appropriate to keep food in the
fridge compartment. Other compartments will be cooled in accordance with the temperatures
set for them. To cancel the function, press vacation button.
7. Key Lock Indicator
Use this function if you do not want your refrigerator temperature settings changed. Press on
keylock button to activate this function.
8. Vacation button
Press on this button briefly to activate vacation function. To cancel the function, press
keylock button.
9. Cancel Filter Change Warning button
Filter of your refrigerator must be replaced every 6 months. If you apply instructions in
section 3.12, your refrigerator calculates this time automatically and the Filter Change
Warning indicator illuminates when the filter usage time has elapsed.
10. Fridge Compartment Temperature Setting button
Every time this button is pressed, temperature of the fridge compartment changes as 8,7,
6,5, 4,3,2,1 8... respectively. Press this button to adjust the fridge compartment temperature
to any desired setting.
11. Quick Cool button
Press on this button to activate the Quick Cool function. To cancel the function, press the
same button again.
12. Error Status indicator
If the refrigerator does not cool adequately or if there is a sensor failure, Error Status
indicator will be activated.
When this indicator is active, Freezer Compartment Temperature Indicator will display "E"
and Fridge Compartment Temperature Indicator will display numbers such as "1,2,3…".
These numbers on the indicator provides information
about the error to the service personnel.
13. Quick Freeze button
Press on this button to activate the Quick Freeze function. To cancel the function, press the
same button again.
28. SBS COSMOS REFRIGERATOR 07.11.2018 / REV NO: 01
28
Sensitivity: Public
14. Freezer Compartment Temperature Setting button
Press this button to set the temperature of the freezer compartment to -18,-19,-20,-21,-22,-
23,-24, -18... respectively. Press this button to adjust the freezer compartment temperature
to any desired setting.
15. Quick Freeze Function indicator
It indicates that the Fast Freeze function is active.
16. Display on-off button
It is used to switch on and off the display lights.
17. Ice-making on-off button
It is used to stop or maintain the ice-making process in the refrigerator.
18. Water, crushed ice, ice cubes selection button
Press this button obtain water, crushed ice or ice cubes from the water dispenser. Then take
ice or water according to your preference by pushing the trigger.
19. Water, crushed ice, ice cubes indicator
Then water, crushed ice or ice cubes indicator illuminates according to your preferred option.
20. Display on-off indicator
An indicator light will be on according to whether the display is on or off.
21. Ice-making on-off indicator
An indicator light will be on according to whether ice-making is active or not. Use this function
when you place fresh food into the freezer compartment or when you need ice. When this
function is active, refrigerator will run uninterruptedly a certain period of time.
22. Eco-Fuzzy Mode indicator
Illuminates solidly when Eco-Fuzzy mode is selected.
8.2. Using the water dispenser
It is normal for the first few glasses of water taken from the dispenser to be
warm.
In cases where the water dispenser has not been used for a long period of
time, first few glasses of water should be drained from the dispenser to get
fresh water.
12 hours must pass from the first installation before cold water can be obtained.
Just push the trigger to obtain water.
You can obtain water, ice cube and crushed ice from the water dispenser according to your
preference.
1 2
29. SBS COSMOS REFRIGERATOR 07.11.2018 / REV NO: 01
29
Sensitivity: Public
8.3. Before you start using the ice/water dispenser
A separate pump should be used if the water pressure drops below 1 bar or a jug is being
used.
Water system of the refrigerator should be connected to the cold water line. It
should not be connected to hot water line.
No water may be obtained in the initial operation of the refrigerator. This is due
to the air contained in the system. To discharge air from the system, press
dispenser latch for a period of 1 to 2 minutes until water comes from the
Dispenser. Water flow may be irregular at the beginning. Water flow will be
normalized after the air in the system is discharged.
12 hours should pass from the first installation of the refrigerator before cold
water can be obtained.
1-2 days should be waited in order to complete the ice-making process to the
desired amount.
Water mains pressure must be between 1-8 bars for the smooth operation of
ice/water dispenser. You can verify by checking whether 1 glass of water (100
cc) can be filled in 10 seconds.
The first 10 glasses of water should not be consumed.
Approximately 12 hours must pass to obtain ice or cold water from the ice/water
dispenser for the first time. If there is not enough ice in the ice dispenser, ice
may not be obtained from ice dispenser.
The first 30 ice cubes should not be consumed.
Always use the water filter when a jug is not being used.
When the filter is used for the first time, first few glasses of water may come
blurred. Therefore, first few glasses of water should not be consumed.
First 1-2 glasses of water may be warm when ice/water dispenser was not used
for a long time.
If a power cut or a temporary failure occurs during the operation of the
refrigerator, some ice may melt and freeze again. In this case, ice pieces may
stick to each other. If the power cut or failure lasts for a long time, ice may melt
and cause water leakage. If you experience such a problem, empty the ice in the
ice container and clean the ice container.
If you will use the Ice Off function, empty the ice retained in the ice container. If
ice is kept in the ice container, ice pieces may stick to each other.
Water system installation of the refrigerator must be performed by authorized
service.
30. SBS COSMOS REFRIGERATOR 07.11.2018 / REV NO: 01
30
Sensitivity: Public
If mains connection will be performed, use the mains line which is best in terms
of potable water quality.
Water system of the product is designed to work with water only. Do not use
beverages such as soft drinks and/or fruit juices in the water system.
In cases where refrigerator is not going to be used for a long time due to
reasons such as vacation, etc. cancel its water connection.
Do not attempt to disassemble the ice container group.
Do not attempt to clean the ice container group without first removing it out of
the refrigerator.
Water coming out of the water dispenser may be blurred at the initial use of the
filter.
When taking water from the dispenser with a glass, remove the glass 1 second
after you stopped pushing the trigger. In this way, water dripping from the
system will be avoided to drip onto the tray.
31. SBS COSMOS REFRIGERATOR 07.11.2018 / REV NO: 01
31
Sensitivity: Public
8.4. Use of Door-in-Door cover
DID cover group
1 2 3
Door-in-door opens and closes in arrow's direction as shown in the pictures.
When the door-in-door is fully open as in the picture 3; heavy weights should not be
loaded onto it except bottles, pitchers, glasses, etc.
6.6. Transportation of the product
1. Before handling the product, unplug it.
2. Remove its water connections.
3. Shelves, accessories, crisper and etc. in your refrigerator must be fastened securely by
adhesive tape before repackaging.
Packaging must be tied with tapes and strong ropes and the rules of
transportation printed on the package must be followed.
Original packaging and foam materials should be kept to be used for the
transportation of the device.
WARNING: Packaging materials may be dangerous for the children. Keep
packaging materials in a safe place away from reach of the children.
32. SBS COSMOS REFRIGERATOR 07.11.2018 / REV NO: 01
32
Sensitivity: Public
9. GAS FLOW DIAGRAM AND PARTS
33. SBS COSMOS REFRIGERATOR 07.11.2018 / REV NO: 01
33
Sensitivity: Public
9.1. Cooling system parts
Part name
1 Compressor/N51121Y
2 Flange Heater
3 Coil Condenser
4 Dryer
5 Capillary tube
6 Freezer evaporator
7 Fresh Food evaporator
8 Return pipe
34. SBS COSMOS REFRIGERATOR 07.11.2018 / REV NO: 01
34
Sensitivity: Public
10.ELECTRONIC AND CONTROL SYSTEM
Component
1 Compressor
2 Defrost heater
3 Freezer fan
4 Condenser fan
5 Sensors (Frz Eva, Frz Air, FF Eva, FF Air, Icematic)
6 Fresh Food Fan
7 Flange Heater
8 Thermal fuse
9 PTC relay
10 Thermic
11 Door reed switch (FRZ, FF)
12 DC Illumination card
13 Ionizer
14 Blue led board (optional)
15 Water valve group (inlet, water, ice)
16 Icematic motor
17 Ice selector motor
18 Ice lid motor
19 Ice lid heater
20 Water dispenser key (microswitch)
21 Ice pipe heater
22 Water dispenser heater
23 Ice crusher motor
24 Supply line filter
25 Capacitor
26 Electronic control board
27 Indicator board
28 Reed switch
Compressor: Coolant gas circulation is enabled by the compressor. Electric supply is made
via a protective thermal. The auxiliary coil which is activated for a short time during first
startup of the compressor is deactivated by PTC.
Freezer fan motor (Freezer Compartment Fan Motor): It is mounted on the inner body of
refrigerator behind the rear cover of evaporator. It ensures circulation of the freezer
compartment air in the freezer compartment by passing it continuously over the evaporator.
35. SBS COSMOS REFRIGERATOR 07.11.2018 / REV NO: 01
35
Sensitivity: Public
Condenser fan motor: It is located at the bottom of the cabin. It prevents excessive heating
of the condenser and drops condensation pressure to increase the efficiency of the fridge. It
runs when the compressor starts and stops when it stops.
Sensors: Its resistance decreases as the temperature rises. Sensors on the refrigerator body
detect the temperature of their surrounding area and transmit this to the electronic control
board.
Freezer sensor (Freezer Compartment Sensor): It detects the temperature in the freezer
compartment and transmits this to the microprocessor. Values taken from this sensor are
compared with the cut-in and cut-out values of the temperature set for the freezer
compartment to run or stop the compressor and the freezer compartment fan motor.
FF sensor (Fridge Compartment Sensor): It detects the temperature in the fridge
compartment and transmits this to the microprocessor. Values taken from this sensor are
compared with the cut-in and cut-out values of the temperature set for the fridge compartment
to run or stop the compressor, the fridge compartment fan motor and the fridge compartment
rear wall heater.
FF Eva sensor (Fridge Compartment Eva Sensor): It is used to detect the tail Evaporator
temperature of the Fridge compartment
Defrost sensor: It is located on the evaporator at the capillary outlet. It detects the
temperature on the evaporator and transmits this to the microprocessor. Defrost is terminated
according to the temperatures received from this sensor.
Freezer defrost heater: The heater under the freezer evaporator is activated and
deactivated by the electronic card at times of defrost. Thus, it periodically defrosts icing
accumulated on the evaporator.
Flange Heater: It is used to prevent perspiration on the contact surface of Freezer Door
seals.
Thermal fuse: It is located on the evaporator. It cuts the current to the heater to deactivate
the defrost heater in order to prevent the defrost heater remain activated continuously and
cause damage on the refrigerator, environment and foods inside. Thermal fuse is disposable
and therefore it must be replaced once it is blown.
PTC relay: Its resistance increases as the temperature rises. It ensures primary startup of
the compressor by activating the compressor's auxiliary coil, then it deactivates the auxiliary
coil by being heated with the current flowing over it.
Thermic: It is a component that opens the circuit when heated. It opens the circuit at a
certain temperature and cuts the current to the compressor in order to protect the compressor
coils against excessive heating. When the temperature of the compressor drops below a
certain value, it re-completes the circuit to operate the compressor.
Door reed switch: FRZ door reed switch is located on the FRZ door hinge cover, and FF
door reed switch is located on the FF door hinge cover. FRZ switch is normally closed circuit.
When the FRZ door is opened, it is open-circuited and a signal goes to the board. Thus, FRZ
lamp illuminates and the fan stops if it is running. If necessary, it runs again when the door is
closed. FF switch is also normally closed circuit. When the FF door is opened, it is open-
circuited and a signal goes to the board. Thus, FF lamp illuminates and the fan stops if it is
running. When the door is closed, lamps turns off and the fan starts running if necessary.
36. SBS COSMOS REFRIGERATOR 07.11.2018 / REV NO: 01
36
Sensitivity: Public
FF Illumination: One unit of 12V DC LED board is used for the illumination of the fridge
compartment. This LED board is activated by the board when the fridge compartment door is
opened.
Electronic Control Board: The control board is placed in the plastic box towards the rear
wall on the upper plate of the refrigerator. FRZ is used as the main board which controls the
electronic systems which are controlled by the display on the door.
Icematic sensor: It is a sensor with flexible body under the icebox. It detects freezing of the
water in the icebox and transmits this to the microprocessor. Thus the motor of the icematic
starts to run according to the temperatures detected from the sensor.
Icematic Sensor: It is used to detect the ice quantity in the icebox of the icematic accessory in
the Freezer compartment.
Icematic motor: It ensures pouring of the ice formed in the icebox into the ice container. Ice
formation is determined with the information received from the icematic sensor; icebox motor
is activated according to the time of ice formation and the ices are poured into the ice
container. Icematic arm detects when the ice container is full and it does not pour more ice
into the ice container than its capacity.
Water valve: Water valve group allows sending of the water taken from the mains supply or
from a jug by means of a pump to the water dispenser and to the icebox.
Ice crusher motor: It drives the accumulated ice in the ice container towards its outlet to help
taking the ice. When ice is needed from the dispenser, the ice crusher motor drives the ice
towards the mouth of the dispenser.
Motor for ice type: Motor runs to prevent passing of the ice through the blade when ice cube
is selected and the ices sliding from the ice container towards the dispenser are poured into
the dispenser without being broken directly.
Motor to open the ice lid: When cube or broken ice is selected, flap lid is opened to pour the
ice from the container into the dispenser. This lid is opened by running of the relevant motor.
When the trigger is released, motor runs inversely and the lid is closed.
Ice lid heater: It is on the surface of the ice lid where the freezer compartment and ambient
temperature encounter. It prevents perspiration.
Water dispenser heater: It electrically transmits pushing of the water dispenser trigger to the
control board and ensures performing of the selected function.
Blue light LED board: Blue light LEDs are used to ensure longer preservation of vegetables.
It is located near the filter housing at the lower left part of FF compartment together with the
ionizer.
Ionizer: It periodically spreads ions into the FF compartment in order to clean the air of this
compartment. It is located near the filter housing at the lower left part of FF compartment
together with the blue light LED board.
Reed switch: It gives the door open warning. It is located on the upper hinge covers. It is
activated and deactivated by means of the magnets on the door.
37. SBS COSMOS REFRIGERATOR 07.11.2018 / REV NO: 01
37
Sensitivity: Public
11.ELECTRONIC SYSTEM
11.1. VERSION 3 / 4 / 5
FRZ FAN, COND FAN, FF FAN, BLUE RAY, FF
ILLUMINATION, FRZ ILLUMINATION
ICE SELECTOR MOTOR, ICE LID MOTOR, ICE
POURING MOTOR, ICE SWITCH, ICE SENSOR
ENERGY OUTPUTS OF 220V AC
REFRIGERATOR ELECTRICAL COMPONENTS
AC 220V INPUT
DOOR REED
SWITCH
INPUTS
DISPLAY
ENERGY
OUTPUT
SENSOR
INPUTS
38. SBS COSMOS REFRIGERATOR 07.11.2018 / REV NO: 01
38
Sensitivity: Public
11.1.1. U4 board
Analog (LV)
INPUT Ice Sensor KN4-14,15
KN4
INPUT Ice Switch KN4-9,10
Analog (LV)
INPUT Fridge door switch KN9-1,2
KN9
INPUT Freezer door switch KN9-4,5
I/O type
I/O I/O name ID
Connector
name
Analog (LV)
INPUT Fridge Air Sensor KN6-1,2
KN6
INPUT Fridge Eva Sensor KN6-3,4
INPUT Freezer Air Sensor KN6-5,6
INPUT Freezer Eva Sensor KN6-7,8
39. SBS COSMOS REFRIGERATOR 07.11.2018 / REV NO: 01
39
Sensitivity: Public
220V AC
INPUT Line KN5-1
KN5
INPUT Neutral KN5-3
OUTPUT Compressor KN5-4
OUTPUT Frz Defrost Heater KN5-5
OUTPUT FF Heater KN5-6
OUTPUT Ionizer KN5-7
OUTPUT Main Water Valve KN5-8
OUTPUT Water Pipe Heater KN5-9
OUTPUT Water Valve KN5-10
OUTPUT Ice Valve KN5-11
INPUT Dispenser Switch KN5-13
220V AC OUTPUT Ice Crusher Motor KN7-1 KN7
12V DC OUTPUT
Ice Motor KN4-7.8
KN4
Ice lid motor KN4-3.4
Ice selection motor KN4-1.2
12V DC OUTPUT
Freezer Fan KN10-1.20.3
KN10
Condenser Fan KN10-4.50.6
FF Fan KN10-7
Blue Ray KN10-11
FF Illumination KN10-12.13
FRZ Illumination KN10-14
GND KN10-9.15
5V DC OUTPUT Display Inputs-Outputs KN12-1.7 KN12
40. SBS COSMOS REFRIGERATOR 07.11.2018 / REV NO: 01
40
Sensitivity: Public
11.1.2. Electric Circuit Diagram
41. SBS COSMOS REFRIGERATOR 07.11.2018 / REV NO: 01
41
Sensitivity: Public
11.1.3. Omnia Tests
Time Measurement Component to be Controlled
0.5 2,3 FF Heater
0.4 4.2 FF Fan
4.4 6.2 Ionizer
4.4 6.2 Blue Ray
6.4 8,2 Defrost Heater
6,6 10,2 Frz Fan
10,4 12,2 FF Illumination
12.4 14.2 FRZ Illumination
14.4 16,2 Icematic Valveı
14,6 18.2 Condenser Fan
18,3 20,1 Water Pipe Heater
20,3 Compressor
Note: Once the power is supplied, display version-revision info and then control board version-
revision info is shown on the display.
9.5. Hot start condition:
If Freezer Eva >= +10C and Fridge Eva>= +10C, compressor keeps running after the
production test.
If not, compressor stops after the production test and main cooling cycle begins.
42. SBS COSMOS REFRIGERATOR 07.11.2018 / REV NO: 01
42
Sensitivity: Public
11.2. Service Test
11.2.1. V3 Service Test
9.6. Service Test
The S4 display board we use in the refrigerator has nine-key system. Set values are shown
on the display.
Step 1: To switch to the password entrance screen the Display and Vacation buttons are
pressed for 2 sec in the first 60 sec.
Service test is entered by pressing the freezer set button for 4 times consecutively.
Service Mode
(2 sec.)
43. SBS COSMOS REFRIGERATOR 07.11.2018 / REV NO: 01
43
Sensitivity: Public
Once entered in the service test, icons work for ON for 0.5 sec. and OFF for 0.5 sec. as shown below.
Once any button is pressed, Step 1 is terminated.
Step 2: First display software version info is shown on the FF compartment and the revision info is shown on
the FRZ compartment.
It is pressed for 4 times.
44. SBS COSMOS REFRIGERATOR 07.11.2018 / REV NO: 01
44
Sensitivity: Public
When any key is pressed, control board version info is shown on the FF compartment and the
revision info is shown on the FRZ compartment.
NOTE: To see updated version revision info, control board and display technical drawings
should be checked.
Step 3: When any button is pressed, sensor is started to be shown. Sensor display is as
follows.
FH: Fridge Air
FE:Fridge Eva
rH; Freezer Air
rE: Freezer Eva
IS: Icematic Sensor
CA:0 Fridge
CA: 1 Freezeı-
View 1 (Value-Sensor) :
Sensor value and sensor code
FRZ compartment -sensor
value, FF compartment:
FRZ compartment sensor value,
FF compartment:
View 2 (Value-Cabin) :
Sensor value and Cabin abbriv. "CA"
View 3 (Value-Cabin Code) :
Sensor value and cabin code
CA: Cabin
45. SBS COSMOS REFRIGERATOR 07.11.2018 / REV NO: 01
45
Sensitivity: Public
Switch between sensors can be made by pressing Fridge Set button in forward direction and
Quick Fridge button in backward direction.
When Display and Vacation buttons are shortly pressed simultaneously, setting mode switches
between reading, concurrent on/off of fans and illuminations, component driving, water intake
time, and dispenser light time after each press.
Step 4: Concurrent on/off of fans and illuminations: When Frz Set button is pressed, FF Fan,
Frz Fan, Condenser Fan, FF Illumination, Frz Illumination, Blue Ray components are turned
on or off.
On/Off
46. SBS COSMOS REFRIGERATOR 07.11.2018 / REV NO: 01
46
Sensitivity: Public
Display and Vacation buttons are shortly pressed simultaneously to switch to the component driving step.
On: Component runs,
OFF: Component stops.
Component Selection
backward direction
Component On/Off
Component Selection
forward direction
Component Name Component Code Component Component Code
FF Fan FF Water Valveı dU
FF Heater FO Ice Valve bU
Ionizer Io Water Pipe Sb
Blue Ray bA Ice Selector IS
FF Illumination FL Ice Shutter IH
Frz Fan rF Ice Pusher İP
Frz Eva Heater rE Condenser Fan CF
Frz Illumination rL Compressor Co
Icematic Ir
Main Water Valve AU
1*: icematic pouring direction,
*2*:icematic correction direction,
''OF'': icematic Off
Component Selection
When Icematic 'Ir' is selected, Icematic is rotated in pouring direction by selecting '1' using FRZ Set button and in the correction direction
when '2' is selected.
Pressing OFF stops icematic motor
Fan speed Component Selection
Fan off
47. SBS COSMOS REFRIGERATOR 07.11.2018 / REV NO: 01
47
Sensitivity: Public
Service Mode Termination:
Following conditions cause to exit from the service test:
Power failure
Pressing long on FRZ Set and FF Set buttons
simultaneously
Operating in service test for 30 minutes
Setting Dispenser light On time; between 1sec
and 7.5sec
Setting Icematic water intake time:
Between 1sec and 7.5sec
Setting Button
Setting Button
48. SBS COSMOS REFRIGERATOR 07.11.2018 / REV NO: 01
48
Sensitivity: Public
U4 MAIN BOARD S4 DISPLAY
WATER FILTER TIMER ACTIVATION
50. SBS COSMOS REFRIGERATOR 07.11.2018 / REV NO: 01
50
Sensitivity: Public
12.ATTACHMENT/DETACHMENT PROCESSES OF THE COMPONENTS
12.1. Handle Groups
12.1.1. Beko/Arçelik handle group
Service numbers used:
972 Freezer and fridge door handles
Fix and lock the handle group to the support as shown in the picture. Reverse the
process in order to remove the handle easily from its place.
51. SBS COSMOS REFRIGERATOR 07.11.2018 / REV NO: 01
52
Sensitivity: Public
12.1.2. Teka handle group
Service numbers used:
1546 Fridge handles
1547 Freezer handles
Arçelik handle group is as illustrated in Picture 1.
Separate the fridge handle plastic parts with a knife, etc. as shown in Picture 2 and
remove by pulling downwards.
Separate the freezer handle plastic parts with a knife, etc. as shown in Picture 2 and
remove by pulling upwards.
Remove 10 pcs of 3x10 PT screws used in the fridge and freezer handles by attaching
the torque bit to the chargeable gun, as shown in Picture 4.
Remove the fridge handle tabs by pushing them upwards from their slots in the door
plate.
Remove the freezer handle tabs by pushing them downwards from their slots in
the door plate.
52. SBS COSMOS REFRIGERATOR 07.11.2018 / REV NO: 01
54
Sensitivity: Public
12.1.3. Kuppers handle group / Round profile aluminum handle group
Service numbers used:
1422 Fridge/Freezer handles
876 intermediate elements (ensuring the connection between the handle and the door)
277 intermediate element plugs
Blomberg handle group
Blomberg handle group is as illustrated in Picture 1.
Remove the 4 screw plugs with a knife, etc.
Remove 4 pcs of 3.9x20 PT countersunk screws used in the fridge and freezer handles
by attaching the star bit to the chargeable gun, as shown in Picture 4.
Remove 4 pcs M4 spiral form screws used in the intermediate element by attaching the
torque bit to the chargeable gun, as shown in Picture 5.
Round profile aluminum handle
53. SBS COSMOS REFRIGERATOR 07.11.2018 / REV NO: 01
55
Sensitivity: Public
Removal/installation of the round profile aluminum handle group is same with the
Blomberg handle group.
1 2 3
54. SBS COSMOS REFRIGERATOR 07.11.2018 / REV NO: 01
56
Sensitivity: Public
12.1.4. Smeg handle group
Service numbers used:
238 Fridge/Freezer handles
Smeg handle group is as illustrated in Picture 1.
Remove the 4 screws by using Allen wrench as illustrated in Picture 4 and 5.
Remove the Smeg handle from the screws as illustrated in Picture 6.
Remove 4 screws used in the Fridge and Freezer handles by attaching the flat bit to
the chargeable gun.
55. SBS COSMOS REFRIGERATOR 07.11.2018 / REV NO: 01
57
Sensitivity: Public
12.2. DISPLAY GROUP
12.2.1. Beko Display group
Used service number: 840
The display group is fixed to the door with the tabs.
Release the display from the 2 tabs at the bottom by using a flat tipped screwdriver and
pull it to the front.
Remove the socket connection.
56. SBS COSMOS REFRIGERATOR 07.11.2018 / REV NO: 01
58
Sensitivity: Public
12.3. ICE POURING MOUTH GROUP
12.3.1. Beko ice pouring mouth group
Used service number: 1668
1
2 3
4 5
Socket
connection
57. SBS COSMOS REFRIGERATOR 07.11.2018 / REV NO: 01
59
Sensitivity: Public
6 7
It is hidden behind the left door display group.
Remove the water pipe upwards.
Remove the blue cable fitting coming from the flap shown in Picture 3.
Remove the Ice shutter socket as shown in Picture 5.
Remove 2 pcs of 4x16 inox magnetic Phillips screws at right and left sides by attaching
the star bit to the chargeable gun, as shown in Picture 4.
Remove the feeder at the two sides by pulling the ice pouring mouth downwards, as
shown in Picture 6.
Details passing
through the body at
two sides
58. SBS COSMOS REFRIGERATOR 07.11.2018 / REV NO: 01
60
Sensitivity: Public
CONTAINER GROUP .
12.412.4.1. Beko container group
Used service number: 1405
1 2
3 4
5 6
Remove the purple and blue terminal inputs connected to the microswitch shown in
Picture 1.
Remove 1 pc of 4x16 inox magnetic screw in the container’s upper left corner, by
attaching the star bit to the chargeable gun.
Flex the 2 tabs at the right and left side of the container by means of a tool such as a
knife and remove the container, as shown in Picture 3.
remove the
container by flexing
it from the side tabs
59. SBS COSMOS REFRIGERATOR 07.11.2018 / REV NO: 01
61
Sensitivity: Public
12.4.2. Microswitch
Used service number: 1264
1 2 3
It operates by contact with the trigger in the microswitch container group.
Remove the purple and blue cable inputs shown in Picture 1.
Pull and remove the microswitch by flexing the tab which holds the microswitch
upwards as in Picture 2.
12.5. CRENEL
12.5.1. Beko crenel
Used service number: 1622
It is used in the container group.
Remove by either using a flat tipped screwdriver, as shown in the picture, or pushing to
the rear corners.
12.6. WATER DISPENSER ILLUMINATION LED BOARD
12.6.1. Beko Light conducting LED board
Used service number: 1408
60. SBS COSMOS REFRIGERATOR 07.11.2018 / REV NO: 01
62
Sensitivity: Public
Remove 1 electronic board screw by using a Phillips screwdriver.
Remove the socket connection.
Beko LED board is assembled behind the display group.
12.6.2. Arçelik/Blomberg light conducting LED board
Used service number: 1408
Remove 1 electronic board screw by using a Phillips screwdriver.
Remove the socket connection.
Arcelik LED board is assembled behind the container trigger.
12.7. Trigger silicon part
Used service number: 1187
It is used in the Icematic group and Container group.
It is used to suppress the noise. Remove by pulling.
61. SBS COSMOS REFRIGERATOR 07.11.2018 / REV NO: 01
63
Sensitivity: Public
12.8. Door-in-Door (DID) cover group
Service numbers used:
1267 Beko DID cover group
Beko DID cover group
Pull the spring inside using a screwdriver through the hole on the right part of DID cover
as in Picture 2 and and pull the pin out of its housing on the right of DID.
After taking out the pin on the left side, remove DID from its place.
62. SBS COSMOS REFRIGERATOR 07.11.2018 / REV NO: 01
64
Sensitivity: Public
12.9. DOOR-IN-DOOR SEALS
12.9.1. Door-in-Door seal
Used service number: 1268
1 2
Attach the decorative seal cornerwise when replacing it with a new one.
Make sure that the seal seats firmly into the channels and the seal surface is flat.
12.10. Reed Switch Groups
12.10.1. Fridge/Freezer reed switch groups
Service numbers used:
1221 magnetic
1643 magnetic cover
1 2
gasket
63. SBS COSMOS REFRIGERATOR 07.11.2018 / REV NO: 01
65
Sensitivity: Public
3
It is used in the door open warning system. It switches on and off the lights.
Remove the magnet cover as illustrated in Picture 1 by using a flat-tipped screwdriver.
Pull and remove the magnet shown in Picture 2.
The magnet located in the fridge and freezer door’s upper covers interacts with the
reed switch board on the upper hinge covers.
12.11. Upper Hinge cover group
Service numbers used:
1679 hinge cover group right
110 hinge cover group left
789 reed switch board
64. SBS COSMOS REFRIGERATOR 07.11.2018 / REV NO: 01
66
Sensitivity: Public
1 2
3 4
Remove the PT 4.2x25 screws of the hinge cover by using a Phillips screwdriver.
Release the hinge cover tab as in the diagram.
Remove the reed switch board socket fitting by opening the cover as shown in Picture
3.
Remove 2 board screws of the reed switch board by using a Phillips screwdriver.
65. SBS COSMOS REFRIGERATOR 07.11.2018 / REV NO: 01
67
Sensitivity: Public
12.12. 60-Gallon Door shelf
Used service number: 255
1 2
4 pieces are used on the fridge door.
Remove it upwards as shown in Picture 2.
12.13. Egg Holder
Used service number: 218
2 egg holders with a capacity of 10 eggs is used in each product.
The right door is used for 60-gallon shelf.
66. SBS COSMOS REFRIGERATOR 07.11.2018 / REV NO: 01
68
Sensitivity: Public
12.14. 100-Gallon Door Shelf
Service numbers used:
838 Fridge left door 100-gallon shelf
1 2
1 piece is used in the lowest part of the fridge door.
Remove upwards.
12.15. Freezer door shelf group
Service numbers used:
214 Beko freezer shelves
1 2
Freezer door shelves are used in 2 pieces.
Remove upwards.
67. SBS COSMOS REFRIGERATOR 07.11.2018 / REV NO: 01
69
Sensitivity: Public
12.16. Upper Hinge
12.16.1. Upper hinge left
Used service number: 1636
1 2
3 4
First remove the upper hinge cover and then remove 2 pcs of PT (3x5) screws by
attaching the star bit to the chargeable gun.
Remove the reed switch socket and other socket connections as shown in Picture 4
and 5.
Remove M 4x5.5 screw fixing the earth cable by attaching the star bit to the chargeable
gun.
Remove 3 pcs of M 5x18 spiral screws of the upper hinge by attaching a torque bit to
the chargeable gun.
68. SBS COSMOS REFRIGERATOR 07.11.2018 / REV NO: 01
70
Sensitivity: Public
12.16.2. Upper hinge right
Used service number: 1637
Difference of the upper right hinge from the upper left hinge is that it does not have
display cable.
Remove the socket connections.
Remove 3 pcs of M 5x18 spiral screws of the upper hinge by attaching a torque bit to
the chargeable gun.
12.17. Freezer left door
Used service number: 966
1 2
69. SBS COSMOS REFRIGERATOR 07.11.2018 / REV NO: 01
71
Sensitivity: Public
3 4
Remove socket connections shown in Picture 2.
Remove M 4x5.5 screw fixing the earth cable by attaching the star bit to the chargeable
gun.
Remove the water hose connections at the bottom of cabin in Picture 3. (2 water pipes
are used in the products with icematic on freezer left door only).
Remove 3 pcs of M 5x18 spiral screws of the upper hinge by attaching a torque bit to
the chargeable gun.
Lift the door upwards as shown in Picture 4 to remove it from the lower hinge pin.
12.18. Fridge right door
Used service number: 967
1 2
Remove the socket connections shown in Picture 1.
Remove M 4x5.5 screw fixing the earth cable by attaching the star bit to the chargeable
gun.
Remove 3 pcs of M 5x18 spiral screws of the upper hinge by attaching a torque bit to
the chargeable gun.
Lift the door upwards as shown in Picture 3 and remove it from the middle hinge pin.
70. SBS COSMOS REFRIGERATOR 07.11.2018 / REV NO: 01
72
Sensitivity: Public
12.19. Points to keep in mind when removing and installing the doors
During doors’ installation, care should be paid to the alignment of corners,
installing handles on the same axis as well as the door ranges.
Corners and
handles must be at
the same level.
Distance between
doors: 7mm
71. SBS COSMOS REFRIGERATOR 07.11.2018 / REV NO: 01
73
Sensitivity: Public
When doors are being adjusted, make sure that the ground stabilization adjustment
has been performed.
12.20. Fridge and Freezer door seals
Service numbers used:
252 Fridge right/left seal
251 Freezer right/left seal
Remove the door seals without damaging them as shown in the picture.
When the door seals are attached, first the corners should be fixed. There should
be no stretching or curved deformation on the seals. It should be airtight when
the doors of the product are closed.
12.21. Lower Hinge Group Right/Left
Service numbers used:
606 left lower hinge
607 right lower hinge
15 adjustable leg
72. SBS COSMOS REFRIGERATOR 07.11.2018 / REV NO: 01
74
Sensitivity: Public
1 2
When the lower hinges are being replaced, product should not be fully laid down to
avoid oil leakage to the system; it should be tilted to a 40-45° on average and the lower
hinge procedures should be performed in this position.
Remove 2 pcs of M 5x20 spiral screws by attaching a torque bit to the chargeable gun.
12.22. Door puller mechanism with stopper
Service numbers used:
1755 left mechanism
1756 right mechanism
1 2
73. SBS COSMOS REFRIGERATOR 07.11.2018 / REV NO: 01
75
Sensitivity: Public
3
It is found at the lower covers of the fresh food and freezer doors.
Remove 2 pcs of 4x13 inox magnetic screws by attaching the star bit to the chargeable
gun, as shown in Picture 1.
Remove the parts shown in Pictures 2 and 3.
12.23. Main board cover
Used service number: 827
Remove 5 pcs of PT 4x12 screws by using a Phillips screwdriver.
Service warning plate is on the inner part of the cover.
BEARING
WITH
STOPPER
DOOR
PULLER
SPRING
PLASTIC
STOPPER
METAL
STOPPER
74. SBS COSMOS REFRIGERATOR 07.11.2018 / REV NO: 01
76
Sensitivity: Public
When intervening the electronic boards, they should always be
controlled by taking measures such as ESD protected wrist strap,
heel protector, etc.
12.24. Pipe holder
Used service number: 1204
It ensures the water pipes passing over the back wall of the product to stay neatly.
Flex it by using a flat-tipped screwdriver and remove it from its housing at the back wall.
12.25. Quick fit
Used service number: 1514
Water pipe passing through water dispenser container of the fridge’s left door is
attached to the water pipe coming from the water valve by means of quick fit.
75. SBS COSMOS REFRIGERATOR 07.11.2018 / REV NO: 01
77
Sensitivity: Public
12.26. Water pipe (8mm)
Used service number: 1182
1 2
8 mm water pipe coming from the water valve is attached to the 6.35mm pipe by means
of quick fit.
There are 2 quick fits at the lower part of the cabin (cabin bottom). 6.35mm pipe
connected with 8mm pipe is connected to the water dispenser. 6.35mm pipe coming
from the valve and connected to the blue pipe with quick fit goes to icematic inlet.
12.27. Rear cover group
Used service number: 831
1
6.35mm pipe
0.31in pipe
76. SBS COSMOS REFRIGERATOR 07.11.2018 / REV NO: 01
78
Sensitivity: Public
2
Remove 8 pcs of PT 3.9x12 screws of the rear cover group by using a Phillips
screwdriver.
12.28. Water valve
Used service number: 1181
1 2
3 4
Remove 1 piece of PT 3.9x12 screw of the water valve by using a Phillips screwdriver.
Slightly lift the water valve upwards. Remove the notch shown in Picture 2 from its
housing.
77. SBS COSMOS REFRIGERATOR 07.11.2018 / REV NO: 01
79
Sensitivity: Public
Remove the socket connections.
Water pipes are connected to the water valve with Quick Fit.
Cable connections are as shown in picture 2D.
12.29. Evaporation container group
Used service number: 1498
BLACK BLACK
BLACK
BLACK
BLACK
BLUE
BLUE
BLUE
BLACK
YELLO
W
YELLO
W
PINK
BLUE
PURPL
E
WHITE WHITE
A VIEW
78. SBS COSMOS REFRIGERATOR 07.11.2018 / REV NO: 01
80
Sensitivity: Public
1
2 3
Remove 2 pcs of PT 4x12 screws of the evaporation container group by using a Phillips
screwdriver.
Flex the notches marked with red in Picture 3 and remove the evaporation container
group from the rear leg plate.
12.30. DC_Panasonic Condenser fan
Service numbers used:
1705 condenser fan
1353 fan blade
836 evaporation container
53 Coil condenser
coil
condenser
Condenser
fan
evaporation
container
79. SBS COSMOS REFRIGERATOR 07.11.2018 / REV NO: 01
81
Sensitivity: Public
1
2 3
Remove 1 piece of PT 4x16 screw of the coil condenser by using a Phillips screwdriver.
Remove 3 pcs of delta PT K4x20 screws by using a Phillips screwdriver.
Remove the fan from its housing.
Do not damage the wings when attaching the fan blade (propeller).
12.31. Return pipe protection rubber
80. SBS COSMOS REFRIGERATOR 07.11.2018 / REV NO: 01
82
Sensitivity: Public
Used service number: 995
It is assembled on the return pipe.
12.32. Service pipe
Service numbers used:
125 service pipe plastered
125A service pipe L=60mm
12.33. Compressor
dryer
Bitumin
ous return
pipe
heater
pipe
L=60mm
service
pipe service
pipe
copper
adaptor
pipe
Coil
condenser
pipe
81. SBS COSMOS REFRIGERATOR 07.11.2018 / REV NO: 01
83
Sensitivity: Public
Service numbers used:
30 compressor
33 compressor buffers
32 sleeve
1
2
dryer
Bitumin
return
pipe
heater
pipe
L=60mm
service
pipe
copper
adaptor
pipe
Coil
condenser
pipe
service
pipe
Bitumin
compressor buffers (at
4 corners)
82. SBS COSMOS REFRIGERATOR 07.11.2018 / REV NO: 01
84
Sensitivity: Public
3
In the compressor replacement process, first discharge the R600 gas (cutting the
service pipe) in the system.
Make sure to wait for a while and that gas is fully discharged since
it is flammable.
When the compressor is to be replaced, remove 4 Allen screws.
Compressor buffers and the sleeve are assembled with the compressor screws.
When the compressor is replaced or refrigeration system is opened
for any reason, gels in the dryer may lose their properties since
humidity, etc. may penetrate into the system. Dryer should be
replaced definitely for this reason.
In the fusing process of the compressor pipes, soft solder weld with acetylene+gas
flux mixture is used.
For this, 8004 alloy yellow weld rod, blowpipe is used.
Gloves and protective goggles should also be used for security purposes.
Welding points; condenser is numbered as 1, copper adaptor lower point as 9, upper
point as 9A, dryer as 2, dryer lower point as 5, service pipe as 10.
83. SBS COSMOS REFRIGERATOR 07.11.2018 / REV NO: 01
85
Sensitivity: Public
12.34. Terminal cover
Service numbers used:
31 terminal cover
1431 terminal group
1 2
3
Remove the terminal cover as illustrated in Pictures 1 and 2 by using a flat-tipped
screwdriver.
Remove the terminal group from the compressor inlet as illustrated in Picture 3.
84. SBS COSMOS REFRIGERATOR 07.11.2018 / REV NO: 01
86
Sensitivity: Public
12.35. PTC Relay (Combo unit )
Service numbers used:
43 combo unit (PTC Relay)
44 thermic protector
Combo unit and thermic protector are used at the lateral part of the compressor.
When the temperature increases, thermic trips and disconnects the circuit and stops
the operation of the refrigerator.
12.36. Capacitor
Used service number: 48
Capacitor is assembled behind the compressor.
Release it from the bottom tabs by turning to right and left, and remove.
combo
unit
thermic
85. SBS COSMOS REFRIGERATOR 07.11.2018 / REV NO: 01
87
Sensitivity: Public
12.37. Mains cable group
Used service number: 38
Note: Mains cable may vary according to the country it is used.
1 2
Mains cable is assembled to the PTC relay as illustrated.
When the mains cable is replaced, assemble them as shown in Picture 2.
grounding
brown cable blue
cable
BLACK
(SOCKETED CABLE)
GREEN YELLOW
(SOCKETED
CABLE)
GREEN YELLOW
(MAINS CABLE)
BLUE
(MAINS CABLE)
BROWN
(MAINS CABLE)
BROWN
(CAPACITOR)
BLUE
(CAPACITOR)
GREEN YELLOW
(GROUNDING CABLE)
BLUE
(SOCKETED CABLE)
BROWN
(SOCKETED CABLE)
86. SBS COSMOS REFRIGERATOR 07.11.2018 / REV NO: 01
88
Sensitivity: Public
12.38. Rear leg plate
Used service number: 1661
Remove 4 rear leg plate screws by using a box wrench.
12.39. Water Drain Group
Used service number: 854B
1 2
.
Pipes are intertwined to each other.
87. SBS COSMOS REFRIGERATOR 07.11.2018 / REV NO: 01
89
Sensitivity: Public
12.40. Fridge crisper groups
Service numbers used:
1039 0°compartment body
1040 0°compartment cover
369 fridge crisper group (blue ray glass)
378 Fridge crisper body (long)
326 Fridge crisper cover
1
1 0° compartment groups are used in the fresh food section.
2 crisper groups are used under the 0° compartment of the fresh food section of the
product. Blue ray glass is located behind the crisper body in the upper part.
12.41. Freezer drawer groups
Service numbers used:
88. SBS COSMOS REFRIGERATOR 07.11.2018 / REV NO: 01
90
Sensitivity: Public
327 freezer drawer body
1054 freezer drawer cover
1 upper drawer group and 1 middle drawer groups are used in the freezer compartment
of the product.
12.42. Fridge-freezer glass shelf groups
Service numbers used:
863A Freezer long glass shelf group
863B Freezer narrow glass shelf group
863C Fridge long glass shelf group
863D Fridge narrow glass shelf group
863E Fridge crisper-top glass shelf group
1 2
89. SBS COSMOS REFRIGERATOR 07.11.2018 / REV NO: 01
91
Sensitivity: Public
4 long glass shelf groups and 2 glass shelf groups are used in the freezer compartment
of the product.
4 long glass shelf groups and 1 narrow and 1 crisper-top glass shelf groups are used
in the fridge compartment of the product.
12.43. Fridge/freezer /rail groups
Service numbers used:
367 Deep rail group right
366 Deep rail group left
961 Narrow rail group right
962 Narrow rail group left
90. SBS COSMOS REFRIGERATOR 07.11.2018 / REV NO: 01
92
Sensitivity: Public
3 4
10 rails are used in total in the product at the right and left.
Remove 1 piece of PT 4x19 screw by attaching a star bit to the chargeable gun.
Pull the rail forwards and remove it as illustrated in Pictures 3 and 4.
12.44. Fridge illumination glass group short/long
Service numbers used:
1722 Fridge illumination board holder
1662 Fridge illumination group long
1399 Fridge illumination LED board long
1642 Fridge illumination glass long
1663 Freezer illumination group long
1 2 3
91. SBS COSMOS REFRIGERATOR 07.11.2018 / REV NO: 01
93
Sensitivity: Public
4
In the fridge compartment 2 short and 2 long illumination glass groups are used on the
left and right.
Remove it by using a flat-tipped screwdriver as illustrated in Picture 1.
Remove socket connection as shown in Picture 3.
Pull out and remove the socket connection.
12.45. Water filter head and bypass cover
Service numbers used:
1193 water filter head
1192 bypass cover
1 2 3
LED board
Illumination glass
board holder
92. SBS COSMOS REFRIGERATOR 07.11.2018 / REV NO: 01
94
Sensitivity: Public
4 5
Remove the water pipes of the water filter cover.
Pull the bypass cover to the front and remove it.
Remove 1 piece of PT 4x16 screw by using a Phillips screwdriver.
Remove it from the filter hanger pin shown in Picture 4.
12.46. Water reservoir
Service numbers used:
1029 Water reservoir group
3
bypass
cover
water
filter head
93. SBS COSMOS REFRIGERATOR 07.11.2018 / REV NO: 01
95
Sensitivity: Public
Remove the quick fit to which 8mm pipe is connected.
Remove 2 piece of PT 4x19 screw by attaching a star bit to the chargeable gun.
12.47. Blue light glass
Used service number: 1164
.
Remove the blue light glass by using a flat-tipped screwdriver.
94. SBS COSMOS REFRIGERATOR 07.11.2018 / REV NO: 01
96
Sensitivity: Public
12.48. Ice stock container group
Service numbers used:
1474 Ice stock container group
1175 Icematic decorative cover
Icematic group is located in the upper part of the freezer door.
95. SBS COSMOS REFRIGERATOR 07.11.2018 / REV NO: 01
97
Sensitivity: Public
Hold the ice stock container group by the handles at sides to move upwards and
remove it.
Move the icematic decorative cover upwards and remove it.
While replacing the ice stock container, care should be paid not to coincide the motor
rotation group steps with each other.
12.49. Ice making area connections
Service numbers used:
1084 Icematic socket cover
Unscrew the phillips screw on the right of the socket cover.
Remove the socket cover backwards to remove it.
12.50. Icematic group
Service numbers used:
96. SBS COSMOS REFRIGERATOR 07.11.2018 / REV NO: 01
98
Sensitivity: Public
809 icematic group
1188 icematic motor
1 piece of PT 4x16 phillips screw in the middle is removed as shown in Picture 1.
Move upwards and pull out the ice drive group as illustrated in Picture 2.
12.51. Eva cover plug
Used service number: 51
Remove the plug by using a thin-edged apparatus.
97. SBS COSMOS REFRIGERATOR 07.11.2018 / REV NO: 01
99
Sensitivity: Public
12.52. Cover group of fridge eva
Used service number: 1659
1 2
3 4
Remove 4 pcs of PT 4x19 screws marked in Picture 1 by using a Phillips screwdriver.
Slightly pull and remove the eva cover.
Remove fan socket in Picture 3.
98. SBS COSMOS REFRIGERATOR 07.11.2018 / REV NO: 01
100
Sensitivity: Public
12.53. Ionizer
Used service number: 1124
1 2 3
It is used behind the fridge eva cover.
Remove the ionizer socket connection.
Remove 1 piece of PT 4x12 screw by attaching a star bit to the chargeable gun.
10.91. Carbon filter and its cover
Service numbers used:
640 carbon filter cover
960 carbon filter
1 2 3
Carbon filter and its cover are found at the bottom of the fresh food eva cover.
Remove the cover by using a thin-edged apparatus.
Carbon filter is assembled to the cover.
99. SBS COSMOS REFRIGERATOR 07.11.2018 / REV NO: 01
101
Sensitivity: Public
12.54. Thermal fuse
Used service number: 716
1 2
It is assembled to the finned eva return pipe behind the freezer/joker eva cover groups.
The tab on the thermal fuse is hooked to the return pipe and assembled to the 10-pcs
socket as shown in Picture 1.
12.55. Finned evaporator
Service numbers used:
713 finned evaporator
881 finned evaporator group
100. SBS COSMOS REFRIGERATOR 07.11.2018 / REV NO: 01
102
Sensitivity: Public
12.56. Sensor covers
Used service number: 1439
Fridge
1 2 3
Freezer
4
Remove the sensor covers by using a thin-edged apparatus.
When attaching the sensor covers, take care of their directions in the picture.
101. SBS COSMOS REFRIGERATOR 07.11.2018 / REV NO: 01
103
Sensitivity: Public
13.FAILURE ERROR CODES
ERROR
CODE
ERROR DEFINITION
E0 Freezer Compartment Air Sensor Error
E1 Freezer Compartment Evaporator Sensor Error
E2 Fridge Compartment Evaporator Sensor Error
E3 Fridge Compartment Air Sensor Error
E4 Freezer Compartment Defrost Heater Error
E8 Icematic Air Sensor Error
E9 Icematic Failure
E13 Speed Frz Fan Error
E15 Speed Condenser Fan Error
Warning icon High Temperature Error
- Cooling failure due to electrical issues
- Freezing error due to electrical issues
102. SBS COSMOS REFRIGERATOR 07.11.2018 / REV NO: 01
104
Sensitivity: Public
13.1. E0 Freezer air sensor error
103. SBS COSMOS REFRIGERATOR 07.11.2018 / REV NO: 01
105
Sensitivity: Public
13.2. E1Freezer evaporator sensor Error
104. SBS COSMOS REFRIGERATOR 07.11.2018 / REV NO: 01
106
Sensitivity: Public
13.3. E2 Fridge evaporator sensor error
105. SBS COSMOS REFRIGERATOR 07.11.2018 / REV NO: 01
107
Sensitivity: Public
13.4. E3 Fridge air sensor error
106. SBS COSMOS REFRIGERATOR 07.11.2018 / REV NO: 01
108
Sensitivity: Public
13.5. E4 Freezer defrost heater error
107. SBS COSMOS REFRIGERATOR 07.11.2018 / REV NO: 01
109
Sensitivity: Public
13.6. E8 Icematic air sensor error
108. SBS COSMOS REFRIGERATOR 07.11.2018 / REV NO: 01
110
Sensitivity: Public
13.7. E9 Icematic motor error
109. SBS COSMOS REFRIGERATOR 07.11.2018 / REV NO: 01
111
Sensitivity: Public
13.8. E13 Cyclic freezer fan error
110. SBS COSMOS REFRIGERATOR 07.11.2018 / REV NO: 01
112
Sensitivity: Public
13.9. E15 Cyclic condenser fan error
111. SBS COSMOS REFRIGERATOR 07.11.2018 / REV NO: 01
113
Sensitivity: Public
13.10. Cooling failure due to electrical issues
112. SBS COSMOS REFRIGERATOR 07.11.2018 / REV NO: 01
114
Sensitivity: Public
13.11. Freezing error due to electrical issues
113. SBS COSMOS REFRIGERATOR 07.11.2018 / REV NO: 01
115
Sensitivity: Public
14.TROUBLESHOOTING
14.1. Refrigerator is not running
Is the fuse of the
refrigerator
socket or the
main fuse blown?
YES
NO
Check
the fuse.
Refrigerator
does not
operate.
Is the refrigerator
properly plugged
in?
Plug in the
refrigerator.
Start the
refrigerator.
114. SBS COSMOS REFRIGERATOR 07.11.2018 / REV NO: 01
116
Sensitivity: Public
14.2. Condensation on the fridge compartment
CAUSES OF
CONDENSATION
POINTS TO BE
CONSIDERED
Very cold
ambient
conditions.
Switching the Set mode
to even colder mode.
Opening and
closing the
door too
frequently.
Decreasing the time the
door left open and using
it less frequently.
Set positionon of the
refrigerator is switched to a
colder degree and the unit is
operated accordingly.
Storage of
foods in
open
containers.
The food stored in open
containers should be
covered appropriately.
Refrigerator doors should not
be left open and they should
not be forgotten open.
Leaving the
door ajar
Condensation bon
the (MULTIZONE
or COOLSELECT)
side wall of the
fridge
compartment
Very humid
ambient
conditions.
Opening the door less
frequently.
115. SBS COSMOS REFRIGERATOR 07.11.2018 / REV NO: 01
117
Sensitivity: Public
14.3. Compressor is not running
POINTS TO BE
CONSIDERED
Refrigerator will start running
approximately after 6 minutes.
This is normal for a full-automatically
defrosting refrigerator. Defrosting
cycle occurs periodically.
The fridge is in defrost cycle.
Make sure that the plug is
properly fit into the socket.
Compress
or is not
running.
CAUSES
Protective thermic of the compressor will
blow out during sudden power failures or
plug-out plug-ins as the refrigerant pres
in the cooling system of the refrigerator
has not been balanced yet.
Your refrigerator is not plugged
in the socket.
116. SBS COSMOS REFRIGERATOR 07.11.2018 / REV NO: 01
118
Sensitivity: Public
14.4. Refrigerator is running very frequently or for a very long time
Refrigerator operates very
frequently or very long.
This is normal.
Operation times of the
refrigerators may change
according to their volumes.
YES
Volume of the
refrigerator may be
large.
NO
This is normal.
Operation time of the
refrigerator may last longer in
order for it to catch appropriate
thermostat values in high
temperatures.
YES
NO
This is normal. Cooling down of the
refrigerator completely may last
longer. Hot food causes the
refrigerator to run longer until they
reach the safe storage temperature.
The refrigerator might have
been plugged in recently or
might have been loaded with
food.
YES
NO
The warm air that has entered into the
refrigerator causes the refrigerator to run
for longer periods.
Frequency of opening and closing the
doors also affects the operation time.
Doors might have been
opened frequently or left ajar
for a long time.
NO
Door seals may be
damaged, dirty or may not
be fully functional.
Seals must
be changed
The ambient
room temperature
might be high.
117. SBS COSMOS REFRIGERATOR 07.11.2018 / REV NO: 01
119
Sensitivity: Public
14.5. The temperatures are too low
The
temperatures
are too low
YES YES
Adjust the Fresh food
compartment temperature to a
warmer degree and check.
Problem is
solved
NO NO
Freezer compartment's
temperature is very
low while Fresh food
compartment’s
temperature is
sufficient.
Fresh food compartment's
temperature is very low
while Freezer
compartment’s
temperature is sufficient.
Freezer
compartment's
temperature is
adjusted to a very low
value.
Fresh food
compartment's
temperature is
adjusted to a very low
value.
Adjust the Freezer
compartment temperature to
a warmer degree and check.
Seal is checked and
clogging or gas
leakage in the gas flow
system, if any, will be
checked.
Seal is checked and
clogging or gas
leakage in the gas flow
system, if any, will be
checked.
118. SBS COSMOS REFRIGERATOR 07.11.2018 / REV NO: 01
120
Sensitivity: Public
14.6. The refrigerator is running noisily
Refrigerator
operates noisily.
The operation
sound changes
when the
refrigerator is
running.
There is a ticking
noise from the
refrigerator.
Shakes or
noise is
heard.
The operating performance
characteristics of the
refrigerator may change
according to the changes in
the ambient temperature.
This noise comes from the
selenoid valve of the
refrigerator. Selenoid valve
functions for the purpose of
coolant passage through a
compartmentı called
MULTIZONE/COOL
SELECT compartment
which can be adjusted to
different temperatures, and
performing cooling
functions.
Ground stabilization adjustment
is not appropriate or there are
things on the refrigerator.
Adjust the stabilization
of the refrigerator to the
ground it is placed on
and take away things
on its top, if any.
This is normal and
is not a fault cause.
119. SBS COSMOS REFRIGERATOR 07.11.2018 / REV NO: 01
121
Sensitivity: Public
14.7. Noise comes from evaporator fan motor
Evaporator fan
motor makes
noise
Eva cover is opened and fan
is checked, replace iit if it is
skewed and if there is risk of
rubbing.
YES
Fan motor’s blade may
be skewed.
NO
YES
Fan motor is fixed onto the rubber
wedges. It might not have been fixed
properly.
NO
Fan motor's cable
may be touching
the blade
Open the Eva cover
and correct the
cable.
YES
NO
If the rpm value is high,
fan motor operates with
a buzzing sound.
Replace the fan motor.
Fan motor rotation
speed (rpm value) will
be checked.
Place the fan motor to
the rubber wedges.