Why Teams call analytics are critical to your entire business
Sz804 720 p&1200p_pen mini dv user manual_20110622
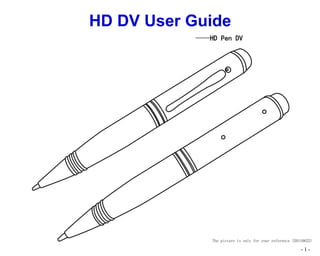
1. HD DV User Guide
——HD Pen DV
The picture is only for your reference (20110622)
-1-
2. Menu
1. Production introduction .......................................................................................................................................................................................................... 3
2. Structure outline ..................................................................................................................................................................................................................... 3
3. Status indicator light description ............................................................................................................................................................................................ 5
4. Operation guide ...................................................................................................................................................................................................................... 7
4.1. Power on/off.................................................................................................................................................................................................................... 7
4.2. Working mode switch ..................................................................................................................................................................................................... 7
4.3. HD video shooting .......................................................................................................................................................................................................... 9
4.4. Fine voice recording ....................................................................................................................................................................................................... 9
4.5. Photo taking .................................................................................................................................................................................................................. 10
4.6. Motion detection video recording ................................................................................................................................................................................. 11
4.7. Removable disk............................................................................................................................................................................................................. 11
4.8. Charging and sustainably supplying power with external power source ...................................................................................................................... 12
4.9. PC tools......................................................................................................................................................................................................................... 13
4.10. Computer camera........................................................................................................................................................................................................ 14
4.11. Setting the date and time............................................................................................................................................................................................. 14
4.12. Encrypt and decrypt the removable disk..................................................................................................................................................................... 15
4.13. Set the parameters....................................................................................................................................................................................................... 19
4.14. Reset the device .......................................................................................................................................................................................................... 20
5. Related data .......................................................................................................................................................................................................................... 21
6. Warning ................................................................................................................................................................................................................................ 21
-2-
3. 1. Production introduction
Before using the product, please carefully read the user guide and operate the camera strictly under the user guide
operation instructions.
Thank you for choosing our product. As a camera and recorder all in one machine, it has many practical functions. It will certainly bring you with
brand new customer experience with its fashionable external design, stable and excellent quality, and multifunction. Is your essential tools.
Functions of this camera:
1. Encrypt the removable disk, prevents unauthorized file access and protects
yours privacy.
2. High definition video recording, Can recording video of 1600 x 1200.
3. It is a carry-on recorder to record high-quality sounds, important meetings and
business negotiations.
4. It is digital camera, can shot HD picture of 2M – 12M pix.
5. It is a PC camera used for holding online video meetings or video chat.
6. It is a portable disk easy to carry electronic document materials with yourself,
convenient and practical.
7. Good ball pen, easy to writing and recording.
Features of this camera: multifunction, multi-use, fashionable external design, excellent shooting effect, small and portable, easy to use, stable
and reliable, quick to response, data encrypted high safety etc.
The camera can be used in: landscape shooting, snap photography, emergency record, slice of life record, leisure and entertainment activities
record, sports record, teaching supplement record, family security monitoring, criminal investigation evidence taking , landscape shooting, our
door exploration record, memory aids, etc.
2. Structure outline
-3-
4. The picture is only for your reference
No Item Description
1 Camera To obtain image signal.
2 USB interface To link data line or power line.
3 Mode Switch Change mode switch, switch operating mode.
On and off It is a multifunctional button, with different function at different mode, including: on, off, start shooting,
4
button/operating button stop shooting, start recording, stop recording, photograph etc.
Installed three indicator lights: red, green, and blue; different compound mode indicates different
5 Status indicator light
status.
6 Reset button Used to reset the device.
7 Ball pen For writing.
8 Mic Used to catch the audio signals.
-4-
5. 3. Status indicator light description
Normal Recording Mode:
Left Right
Number Indicator Status or mode description
Not link red, long on: indicates the standby status of video mode.
red
charger red, slow flash: indicates the video shooting is on.
1. Video mode
red, quick flash: indicates memory is full, malfunction,
red + green + Link charger
no-decryption or unknown breakdown.
Not link
blue
2. Voice recording charger blue, long on: indicates the standby status of voice recording mode.
mode blue, slow flash: indicates the voice recording is on.
blue + green Link charger
+
Not link
red + blue red + blue, long on: indicates the standby status of photo mode.
charger
3. Photo mode red + blue, slow flash: indicates one picture is taken, and is under
red + blue
+ Link charger processing.
+ green
-5-
6. Motion Detect Video Recording Mode:
Left Right
Number Indicator Status or mode description
Not link red +blue, slow flash: indicates motion detection is on, and analyses
red + blue
Motion detection charger whether image is moving.
mode red + blue red + blue ——> red slow flash: indicates that camera is triggered by
+ Link charger
+ green motion image and starts shooting.
Important specification for green light
Green long on: Indicates that the charging is finished.
Green slow flash: Indicates that charging is on.
Green quick flash: indicates a low battery, and will be turned down soon. Please charge the battery as
soon as possible.
Attention:
No matter green lamp combines with any lamp, it only has the function indicating battery status or
green
external power source status, and it has no other functions. Please do not get confused about its
functions.
As camera links the charger or computer, green lamp starts operating charging indication. When it is not
finished, green lamp slow flash; when it’s finished charging, green lamp will be always on.
As the camera does not link charger or computer, it will quick flash to tell you battery power is not enough
when battery is running out. Please charge it as soon as possible.
-6-
7. 4. Operation guide
4.1. Power on/off
Graphical representation: Operating approach: Attention:
Power on: The startup of this machine is similar to
a. In the case of power off, press the button for 3 that of computer with a startup course,
seconds and then release, power is on, then the never make any operation during this
green light flicker and the watch enter the course till the startup is completed. The
initialization state. time duration of startup initialization
b. After successfully start up, the Green lamp is off. depends on the capacity of memory.
Device power is on.
If the product is working when you turn
Power off: off it, The system will automatically save
a. Press OFF for about 6 seconds, all indicator lights the files being recorded at present and
Back view are off and the device is off. power off.
4.2. Working mode switch
Graphical representation: Operating approach: Attention:
Switch recording mode: Only in standby situation, you can switch
When the mode switch at right side: camera mode. When the camera is
In standby situation, long press Operation key 3 shooting, that is when the working
seconds, switch working mode in turn as follows: situation indicator light is flickering,
please stop shooting first.
Video recording
(red)
Photo mode Voice recording
Back view (red+blue) (blue)
-7-
8. Normal Recording Mode ——> Motion
Detect Video Recording Mode:
When the mode switch is located at Left side, the work
mode change to motion detect video recording mode.
When the mode is being changed, the red and blue
LEDs will flash fastly.
After the mode changed, the device start detecting
motion image.The red and blue LEDs will
simultaneously flicker.
Left Right
Motion Detect Video Recording Mode——>
Normal Recording Mode:
When the mode switch is located at Right side, the
work mode change to normal recording mode.
When the mode is being changed, the red and blue
LEDs will flash fastly.
After the mode changed, the device enter the normal
video recording mode .The red LED will on.
Left Right
-8-
9. 4.3. HD video shooting
Graphical representation: Operating approach: Attention:
Before using this function, it should be first switched to In order to guarantee the size and safety
video shooting mode. Under this mode, the of the shooting profile, the system will
indicator lamp is red. spontaneously save profile every once in
Start video shooting: a while, and continue video shooting.
when the red lamp is long on, it indicates that the Automatic segmentation of time is
camera is at the standby status for video shooting. factory default, please consult local
Press operating button in short time and start shooting. distributors.
As the camera starts shooting, red lamp will slowly Please ensure that camera is not
flash in regular period. blocked, watch body upright and stable,
Stop shooting: 50cm distance from the record items or
When the red lamp is slowly flashing in regular period, persons in the sufficient lighting
it indicates that the camera is at the video shooting environment in order to get correct
mode. At this time if pressing the operating button in direction, natural color, distinct pictures
short time, you can stop the camera from shooting. and stable images. Do not shelter the
Top View After camera stops shooting, the red lamp will switch pickup part of microphone in order to get
from flashing status to long on status. clear voice recording.
4.4. Fine voice recording
Graphical representation: Operating approach: Attention:
Before using this function, you should switch working In order to guarantee the size and safety
mode to voice recording mode. Under voice of the shooting profile, the system will
recording mode, the correspondent indicator light is spontaneously save profile every once in
blue . a while, and continue video shooting.
Start recording: Automatic segmentation of time is
When the blue lamp in long on, it indicates that the factory default, please consult local
camera is at the standby of voice recording mode. distributors.
Press the operation button in short time can start
Top View recording. blue lamp will flicker slowly in regular period Do not shelter the pickup part of
if camera starts recording. microphone in order to get clear voice
-9-
10. Stop recording: recording.
When the blue lamp is slowly flashing in regular
period, it indicates that the camera is at the voice
recording mode. At this time if pressing the operating
button in short time, you can stop the camera from
recording. After camera stops recording, the blue lamp
will switch from flickering status to long on status.
4.5. Photo taking
Graphical representation: Operating approach: Attention:
Before applying this function, you should switch the Photo processing time varies from
working mode to photo taking mode; under this different pixel settings. The higher the
mode, the indicator lights are red + blue. pixel is, the longer the processing takes,
so does the flickering. Setting method
taking photos: for photo taking pixel, please refer to
When red and blue are long on at the same time, it parameter setting in the end of this
indicates that the camera is at the standby status for manual.
photo taking. Press operating button one time for one Please ensure that camera is not
picture. Every time taking a photo, red and blue lights blocked, watch body upright and stable,
start flickering simultaneously. When flickering stops, 50cm distance from the record items or
photo taking is finished. persons in the sufficient lighting
environment in order to get correct
direction, natural color, distinct pictures
Top View
and stable images.
- 10 -
11. 4.6. Motion detection video recording
Graphical representation: Operating approach: Attention:
Before applying this function, user should switch the in order to detect the real time motion
Back elevation working mode to motion detection mode. Under condition for image objective, system will
this mode, the correspondent indicator lights are red + save the profile every once in a while
blue. and continue detecting images.
Start detecting image: Automatic segmentation of time is
When camera detecting image, red and blue lamps factory default, please consult local
will simultaneously flicker. distributors.
Start shooting: Please ensure that camera is not
When image objective motion range exceeds some blocked, watch body upright and stable,
extent, camera can detect and start shooting 50cm distance from the record items or
automatically. After a while, camera stops shooting and persons in the sufficient lighting
continues detecting the motion object. If exceeding environment in order to get correct
certain extent, camera will continue to start a new direction, natural color, distinct pictures
shooting. and stable images. Do not shelter the
Indicator light is red flickering when it is shooting. pickup part of microphone in order to get
clear voice recording.
4.7. Removable disk
Graphical representation: Operating approach: Attention:
The camera has the function of removable disk, you can According to computer configuration or
use it as USB flash drive. Under the condition of system difference, computer cannot
removable disk linking properly, you can access the always detect removable -disk function
removable disk. as soon as you link it with computer. If
Video: This folder is used to save video in the camera. not enter this mode, please remove the
Voice: this folder is used to save voice recording. device, and link it to the computer once
Picture: this folder is used to save camera shooting again. The function can only support
photos. WINDOWS system for the time being.
When removable disk functioning normally, red light If you want to disconnect device with
indicates data communication status. If it is exchanging computer, please uninstall the product
data, red light will flicker slowly; if no data exchanging, in proper way.
red light will be long on.
- 11 -
12. 4.8. Charging and sustainably supplying power with external power source
Graphical representation: Operating approach: Attention:
Charging: This unit is built in with high capacity
Link it to computer USB or charger, you can charge polymer lithium battery without memory
the camera. effect, which may be charged during
When linking computer USB or charger, the green use. But for the first five times of use,
indicator light will be on and offer charging please run out the battery power and
information. then charge to the full to activate the
Battery is charging—green light slowly flicker with highest capacity of battery and obtain
uniform velocity. the standard working hours; to maximize
Battery has finished charging—green light will the battery power storage capacity,
always be on. please continue to charge for 30 minutes
- 12 -
13. to 1 hour when the indicator lamp
External direct current power supply indicates the full charging status upon
continually: charging every time. Please make sure
When linking the charger, camera can work while that the power supply complies with the
charging and you need not worry about the battery standard USB power supply
running out. specifications.
If you need to supply direct current power supply
through computer USB as camera working power
supply, please uninstall devices (uninstall in operating
system but not pull out the data link), then you can
operate shooting.
4.9. PC tools
The camera carries PC setting tools to set camera date and time, enter the pc camera,
encrypt and decrypt the removable disk. The approach to operate PC tools:
a. Insert the camera to computer USB interface and wait for computer to detect the
device.
b. After successful linking with computer, open MY COMPUTER and you will find two
new devices: one is Disk Tools CD-ROM and the other is removable disk, and PC setting tools
are stored in those new CD-ROM.
c. Double click the CD-ROM lock-shape icon to open setting tools. Setting tools are as follows:
attention: Due to the fact that some computer installing antivirus program, it forbids CD-ROM
autorun function. Under this condition, you cannot operate setting tools by double click icon. You
can click the mouse right button to open the CD-ROM and run the setting tools directly. The name of setting tool is <DiskTools>.
- 13 -
14. 4.10. Computer camera
Graphical representation: Operating approach: Attention:
When camera is at this mode, you can chat with According to computer configuration or
friends on the internet or conduct web conference with system difference, computer cannot
colleagues. You can also take sticker photos and other always detect camera function as soon
novel applications though third party WINDOWS as you link it with computer. If camera
software. The approach to enter computer camera mode does not show up accidentally but
mode: enter removable disk mode, please
Connect the device to computer, open setting tool, remove the camera, and link it to the
click <switch to Pc-camera> button to Pc-camera computer once again. The computer
mode. camera can only support WINDOWS
During PCCAM normal functioning, red light indicates system for the time being.
data communication status; if you is using camera, If you want to disconnect camera with
red light will slowly flicker, if not using camera function computer, please uninstall the product
red light is long on. in proper way.
4.11. Setting the date and time
You can set the date and time property as follows:
a. Open setting tool, click <Adjust Date & Time> button and open setting window.
b. Set the time according to your needs.
1). year month and date setting: You can input the time or click the right pull down arrow to
open date and time setting panel.
2). Hour, minute and second setting: You can input the time
3). Time adjusting: after adjusting the date and time, click this button to enable the setting to take
effect. Save the setting date and time to camera. synchronically.
- 14 -
15. 4.12. Encrypt and decrypt the removable disk
Create password:
You can set the password for the removable disk to protect your profile effectively. Under the condition
that other know nothing about the password, they cannot see and edit your data. Cryptographic
security can effectively protect your privacy for civil-use products.
a. Open setting tools, double click <set password> and open password setting window.
b. Input password and confirm password in the password input box, make sure the password is the
same twice you inputs in the input box.
c. input according to tips: new password and prompt questions and answers for password.
- 15 -
16. Attention:
<New password> is the one you want to set; <Confirm password> is the one consistent with the one you filled in the new password column;
<Password question> is for helping you recall password and it is up to you. When you forget the password, you can decrypt the encryptted
disk according to the <Password question> for password and fill in the <Password answer> and reset the password which is easy for you to
memorize. When setting password to the watch.
After setting the password, security protection takes effect and you need to keep the password din mind. If you forget the setting, you can only
operate password resetting and have to lose all data in the removable disk.
Encryption grade can only reach ordinary level and cannot prevent some high-tech decryption invasion and password cracking.
Access removable disk that
has already encrypted:
For the encrypted removable disk,
you need to access by inputting the
right password otherwise system
will offer prompt as the right:
Approach for decrypting:
a. Run the setting tools, open password input box.
b. Input the correct password, decrypt the removable disk that has been encrypted. After finishing decryption, you can open the
removable disk and read-write the data inside.
c. If you does not input the correct password, you will not be able to access removable disk.
Change password:
Log-in removable disk with correct password and then open setting tools, double click password changing , camera will popup password input
box, please input the correct old password.
- 16 -
17. Attention: the new password must be identical with the confirmed password. Other considerations refer to Create password.
Clear password:
If you does not want to input password every time read the removable disk,
you can clear the password that was set before. The premise of clearing the
password is that you have to log-in removable disk with correct password and
then you can apply the function to clear password.
After clearing the password, your removable disk information will not be
protected any longer and other can easily read and write the data inside.
There are two ways to clear the password, First approach, don’t input new
password in the modify password window. Second approach, input correct
answer of the password question, clear the password.
- 17 -
18. If you forgetting the password setting, please use the password resetting function:
If you forget the password and the answer that was set in removable disk, you can use the password resetting function and reset password for
the removable disk. After finishing the resetting, you needs to format the removable disk.
Attention:
After using the password resetting function, data in removable
disk will be lost. Please be cautious about this.
If using password resetting function, you cannot open the
removable disk, then it maybe the card’s problem or it is
encrypted on other products.
- 18 -
19. 4.13. Set the parameters
The camera is multifunctional, among those functions many parameters are able to be set according to your
needs. Parameter setting is placed in SETUP.INI profile under removable disk root directory. Open the profile,
you can edit the parameters.
the profile is automatically generated, even if you delete the files in removable disk, it will automatically
generate again and set the parameters as default. For each parameter, their connotation and options available
are as follows:
Item Default Available setting value Remarks
Yes: If setting it as parameter, during the video shooting,
and voice recording, indicator lights will auto hide after 20
seconds. Short press any button once and the status light is
on for confirming camera status or new operation.
LedAutoSleep No No / Yes
No: If setting it as parameter, the indicator light will not auto
hide.
Yes: If setting it as parameter, when removable disk is full
during shooting process, camera will automatically delete
the earliest profile in the removable disk and spare enough
memory space to continue shooting new profile.
No: If setting it as parameter, when the disk space is
CycleRecord No No / Yes
running out during shooting, camera will automatically stop
shooting, red light quickly flicker, and automatically turn off
the camera.(under the condition of linking to a charger,
camera will offer malfunctioning prompt all the time and the
camera will stay on. )
Yes: If setting it as parameter, the new shooting video file
will be with date and time watermark on the lower right
Timestamp Yes No / Yes
corner and indicates the date and time when the video is
shooting.
- 19 -
20. No: If setting it as parameter, the new shooting video file will
not be with date and time watermark.
Photo taking pixel setting, for example, if setting pixel as
200, the photo taking pixel will be 2 million pixel,
CameraImageSize 200 200 / 500 / 800 / 1200 distinguishability will be 1600*1200; likewise, if setting
parameter as 1200, the photo taking pixel will be 12 million
pixel,
Video resolution setting.
VideoImageSize 0 0 / 1280 / 1600 0 and 1280 means: 1280 x 720. 30fps
1600 means: 1600 x 1200. 15fps
4.14. Reset the device
Graphic representation: Operating approach:
If your product cannot respond any operation, you need reset the device. please use the suitable
non-metallic tool to push the reset button.
- 20 -
21. 5. Related data
Item Parameters
Video format AVI
Video encoding M-JPEG
Video resolution 1280 x 720 / 1600 x 1200
Picture format JPG
Picture resolution 2M – 12M
Player software Player software carried by the operating system or mainstream software
Format of sound recording MP3
System supported Windows me/2000/xp/2003/7
Charge pressure DC-5V
Interface type 4 Pin USB
Storage support Nand flash
Battery type high-capacity lithium polymer
6. Warning
Application: Please strictly abide relevant regulations and laws. This product should not be used for any illegal purposes. The user is
fully responsible for its using purpose.
Battery: If do not use this recording function after long time, please charged it fully before using.
File security: This product is not a professional storage device. It does not guarantee the integrity and security of saved files. Please
back up your important documents on the computer or other storage device timely.
Video quality: This product is not a professional video recording device. It Does not guarantee the effect of the video file to have the
professional quality
Operating temperature: 0—40°C. For the extension of life, it is best used at room temperature.
Environment brightness: Do not expose the camera directly to strong light, such as the sun light, to avoid damage to optical devices.
Cleaning: Do not use it under the environment with high dust density to avoid the contamination of camera lens or other components.
- 21 -