How to Enhance Your Bathroom Lighting
•Transferir como PPTX, PDF•
1 gostou•711 visualizações

Before your next D.I.Y. home improvement project, you'll want to learn about one of the key elements in any renovation project - Lighting. Whether you're making updates to an existing room or gutting out a room and starting from scratch, you'll get the most out of your investment by investing time in your lighting design. Learn more: http://blog.smartdraw.com/how-to-enhance-your-bathroom-lighting/

Recomendados
Recomendados
Mais conteúdo relacionado
Mais de SmartDraw Software
Mais de SmartDraw Software (16)
Último
Último (20)
How to Enhance Your Bathroom Lighting
- 1. How to Enhance Your Bathroom Lighting
- 2. Lighting Your Home Bathroom lighting slowly eases you from sleep to awake, allows you to complete your daily grooming rituals, and can comfort you as you unwind after a long day. But bathroom lighting can be neglected, and a poorly lit bathroom can be a dim way to start your day. In this week's post, I'll share with you what we learned about lighting during our two most recent home renovation projects. Keep in mind that this information can be applied to lighting in any room in your home. If you'd like to learn about our renovation projects you can read, "3 'Must Have's' for Planning Your Bathroom Renovation" and "12 Remodeling Tips for Your Master Bath Retreat." This presentation is inspired by the SmartDraw Blog post entitled, “How to Enhance Your Bathroom Lighting.” To view the full blog posting go to http://blog.smartdraw.com/
- 3. Know the Size of the Space SmartDraw Tip: To automatically calculate the area of a room, first select the room. Navigate to the Design Ribbon, select Dimensions. In the Show Dimensions dialogue box, navigate to the Area Display section. You have the following three options: The Area of the Shape, The Width and Height of the Shape, or None. Click OK. 1 2
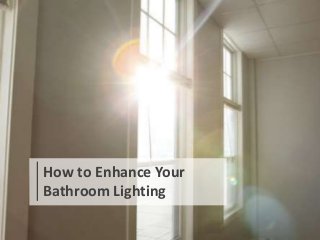
- 4. Keep in Mind Where Your Natural Light Comes From Take note of where the windows are located and how much light is let in. Pay attention to large plants or trees that may partially block the sun's natural rays. It's also important to consider both daytime and nighttime lighting when choosing lights. Just outside our guest bath we have two large palm trees. Fortunately, the morning sunlight has no problem brightening up the room. On the other hand, our master bath receives afternoon light. In comparison, our master bath has more lighting than the guest bath to compensate for the amount of light and the size of the room.
- 5. Customize Lighting to Your Unique Preferences SmartDraw Tip: There are a number of Template Categories available in SmartDraw. They can easily be accessed from the Category Screen when you first open SmartDraw. This particular diagram was built upon an existing sample diagram found in the Healthcare Category. To save time, I simply entered the search criteria of "eye" in the Search field and pressed the Enter key. Using the Previous and Next navigation arrows, I scrolled through the sample diagrams until I discovered the appropriate diagram. Whether I'm stumbling to use the restroom in the middle of the night or getting up early for my morning workout, I've always dreaded turning on the lights in the bathroom after going from a room of complete darkness. In the dark, our eyes dilate to take in as much light as possible in order to see. Depending on whether we've close our blackout shades in our master bedroom, the amount of time it takes for my eyes to adjust varies.
- 6. Customize Lighting to Your Unique Preferences (continued) SmartDraw Tip: You can easily apply effects, such as a shadow, to any object within a diagram. First, select the object you wish to modify. In the Home Ribbon, select the Effects control. Then, navigate to the type of effect you wish to apply to the object. In this case, I selected Shadow which then displayed a sub-menu from which to select the appropriate option. Our solution was to customize the lighting as well as the lighting controls in our master bathroom. I may be a morning person but that doesn't mean I don't need time to adjust and get oriented. With that in mind, we designed the light switches in ascending order from the doorway. When I get up, I just reach for the first light switch located closest to the door.
- 7. LIGHT LAYERING Multiple light sources balances a room by minimizing shadows and glare, while adding dimension and depth. We used light layering to maximize the appearance and functionality of the space. Here are the floor plan diagrams that enabled us to easily explain to our contractors: where we'd like the lighting to be installed as well as how it should be wired to the light switch panel. SmartDraw Tip: You my notice that the light in the diagram is transparent. To achieve this, select the object you wish to make transparent. In the Home Ribbon, select the Fill control. Navigate to the Transparency bar in the Fill drop-down menu. Select the appropriate percentage. Repeat the process until you achieve your desired level of transparency.
- 8. Task Lighting SmartDraw Tip: Arrows not only provide direction they also function as labels. To prevent the arrows from snapping into place, lock the object(s) in the diagram or create them in a different layer. I chose to lock objects. First, select the object or objects you with to lock. Then, right + click to display the menu. In the menu, select Lock Object. In the Home Ribbon, select Line. In the Line drop-down menu, select Line. Draw the line in the Work Area. Navigate to the Home Ribbon's Shape Style group, select Line. In the Line drop-down menu you will have the option to select the type of arrowhead(s). Task lighting adds brightness to areas of the room where daily tasks are performed. It prevents eyestrain and enhances clarity to tasks such as shaving and applying make-up. Effective task lighting should be free of glare and shadows. Through the use of the vanity lighting and the combined night light and light provided by the ventilation fan we were able to achieve proper task lighting.
- 9. Ambient Lighting Ambient, or general, lighting provides an area with overall illumination. We incorporated ambient lighting by installing recessed lights. They provide a comfortable level of brightness without glare. One term you'll hear when shopping for your recessed lighting is "trim." Trim refers to the visible part of the light and should reflect your individual style. First, we selected the size. Trims range from 3" to 6" in diameter. The size of the trim is personal preference; however, larger sized trims are able to produce broader amount of light. Smaller trims are less conspicuous and are considered to be a more modern contemporary look. We decided to install (1) 6" and (2) 4" lensed trims since they are designed to protect the bulb and the interior of the housing from moisture or taking direct hits of water.
- 10. Accent Lighting Accent, or directional, lighting is used to highlight certain objects or features. It's not meant as a focal point but rather to work without being seen. Our accent lighting was provided by the vanity lights installed directly above each mirrored medicine cabinet.
- 11. Lighting in Our New Master Bath Retreat All the time and energy spent in the design and layering of lights was worth it. We absolutely love our new master bath retreat.
- 12. Do You Have a Story to Share? How do you use SmartDraw? I'd love to hear your story. I'm always intrigued to find out how other members of the SmartDraw community are using it. Send me an email at rjbitner@smartdraw.com
- 13. With a M.Ed. in Human Resource Development and Organizational Behavior, RuthJoy has become a trusted advisor and educator working with mid-market to global organizations providing change management and user adoption strategy services for more than 15 years. As the Director of Learning and Organizational Development of SmartDraw Software she continues to coach and mentor professionals from non-profits to Fortune 500 companies. An unashamed perfectionist and absolute “SmartDraw Addict,” she discovers innovative ways to use diagrams in her day-to-day activities to increase productivity and efficiency for herself as well as her clients. About RuthJoy R. Bitner, M.Ed.
- 14. Leave a comment and subscribe to http://blog.smartdraw.com/ Email support@smartdraw.com 800-768-3729 (toll-free) or 858-225-3300 Monday – Friday 6:00 am to 5:00 pm PST Follow SmartDraw Learn More About SmartDraw