
Recomendados
Mais conteúdo relacionado
Último
Último (20)
Destaque
Destaque (20)
Reating thumbnails with php using the gd library
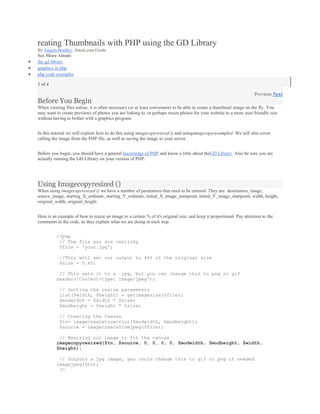
- 1. reating Thumbnails with PHP using the GD Library By Angela Bradley, About.com Guide See More About: the gd library graphics in php php code examples 1 of 4 Previous Next Before You Begin When viewing files online, it is often necessary (or at least convenient) to be able to create a thumbnail image on the fly. You may want to create previews of photos you are linking to, or perhaps resize photos for your website to a more user friendly size without having to bother with a graphics program. In this tutorial we will explore how to do this using imagecopyresized () and usingimagecopyresampled. We will also cover calling the image from the PHP file, as well as saving the image to your server. Before you begin, you should have a general knowledge of PHP and know a little about theGD Library. Also be sure you are actually running the GD Library on your version of PHP. Using Imagecopyresized () When using imagecopyresized () we have a number of parameters that need to be entered. They are: destination_image, source_image, starting_X_ordinate, starting_Y_ordinate, initial_X_image_startpoint, initial_Y_image_startpoint, width, height, original_width, original_height. Here is an example of how to resize an image to a certain % of it's original size, and keep it proportional. Pay attention to the comments in the code, as they explain what we are doing in each step. <?php // The file you are resizing $file = 'your.jpg'; //This will set our output to 45% of the original size $size = 0.45; // This sets it to a .jpg, but you can change this to png or gif header('Content-type: image/jpeg'); // Setting the resize parameters list($width, $height) = getimagesize($file); $modwidth = $width * $size; $modheight = $height * $size; // Creating the Canvas $tn= imagecreatetruecolor($modwidth, $modheight); $source = imagecreatefromjpeg($file); // Resizing our image to fit the canvas imagecopyresized($tn, $source, 0, 0, 0, 0, $modwidth, $modheight, $width, $height); // Outputs a jpg image, you could change this to gif or png if needed imagejpeg($tn); ?>
- 2. Using Imagecopyresampled () If you need a good quality reduction, and imagecopyresized () doesn't look nice enough, you may have better luck with imagecopyresampled (). The parameters you need to define inimagecopyresampled () are: destination_image, source_image, starting_X_ordinate, starting_Y_ordinate, initial_X_image_startpoint, initial_Y_image_startpoint, width, height, original_width, original_height. Here is an example of how to use imagecopyresampled (). If you are having trouble understanding, be sure to pay attention to the comments in the code, they explain everything that is going on in each step. <?php // The file you are resizing $file = 'yourfile.jpg'; //This will set our output to 45% of the original size $size = 0.45; // This sets it to a .jpg, but you can change this to png or gif header('Content-type: image/jpeg'); // Setting the resize parameters list($width, $height) = getimagesize($file); $modwidth = $width * $size; $modheight = $height * $size; // Resizing the Image $tn = imagecreatetruecolor($modwidth, $modheight); $image = imagecreatefromjpeg($file); imagecopyresampled($tn, $image, 0, 0, 0, 0, $modwidth, $modheight, $width, $height); // Outputting a .jpg, you can make this gif or png if you want //notice we set the quality (third value) to 100 imagejpeg($tn, null, 100); ?> Using The Thumbnail Images To use your thumbnail images you have two options: you can call the .php file directly, or you can save the new image you created. If you are using the .php file directly, you must be sure that nothing else is sent to the browser from the PHP file (text for example), that would keep it from being read as an image. You can link it the same way you would link any other graphic: <imgsrc="http://www.my_site.com/my_thumbnail_program.php"> You can also save the image through the imagejpeg () function (or gif or png.) Below is an example of how you would do this: <?php //Name you want to save your file as $save = 'myfile.jpg'; $file = 'original.jpg'; echo "Creating file: $save"; $size = 0.45; header('Content-type: image/jpeg') ; list($width, $height) = getimagesize($file) ; $modwidth = $width * $size; $modheight = $height * $size; $tn = imagecreatetruecolor($modwidth, $modheight) ; $image = imagecreatefromjpeg($file) ;
- 3. imagecopyresampled($tn, $image, 0, 0, 0, 0, $modwidth, $modheight, $width, $height) ; // Here we are saving the .jpg, you can make this gif or png if you want //the file name is set above, and the quality is set to 100% imagejpeg($tn, $save, 100) ; ?> This code saves the thumbnailed file onto your server as whatever you specified($save). You can then call this new graphic file directly, and do not need the PHP again once the image file has been created. PHP Thumbnail Image creation script Creating thumbnail images is a very common requirement. Many scripts use this to create thumbnails of uploaded images or any stored images. We will learn how to create thumbnail images while uploading images to the server. Please read the tutorials on file upload when register_global is off to know how to upload files to the server with necessary permissions in PHP 5. The file ( or image ) will be first uploaded to a directory and then one thumbnail image will be created in a different directory. So for creating the thumbnail we will check the file extension ( it is gif or jpeg image ) but to keep the script simple we are not checking here the file size. So if the file size is to be restricted then file size validation is to be added. You can see how the file size checking is done in file upload tutorial. This script is tested with PHP 5.2.6 with register_global is OFF. Please update your script if you have downloaded the old version of this. <FORM ENCTYPE="multipart/form-data" ACTION="addimgck.php" METHOD=POST> Upload this file: <INPUT NAME="userfile" TYPE="file"> <INPUT TYPE="submit" VALUE="Send File"></FORM> We will now see the addimgck.php file and check the code to create the thumbnail image. We will upload the file to the upimg directory and check to see if file upload is successful or not. // Below lines are to display file name, temp name and file type , you can use them for testing your script only////// echo "File Name: ".$_FILES[userfile][name]."<br>"; echo "tmp name: ".$_FILES[userfile][tmp_name]."<br>"; echo "File Type: ".$_FILES[userfile][type]."<br>"; echo "<br><br>";
- 4. /////////////////////////////////////////////////////////////////////////// $add="upimg/".$_FILES[userfile][name]; // the path with the file name where the file will be stored, upload is the directory name. //echo $add; if(move_uploaded_file ($_FILES[userfile][tmp_name],$add)){ echo "Successfully uploaded the mage"; chmod("$add",0777); }else{echo "Failed to upload file Contact Site admin to fix the problem"; exit;} Now the image is uploaded to the directory and from that image we will create thumbnail image of it. We will first set the height and width of the thumbnail images to be generated. Then we will check the type of the file and now we are checking for file type of gif and jpeg and if the image is not of this type then we are terminating the script giving an error message. ///////// Start the thumbnail generation////////////// $n_width=100; // Fix the width of the thumb nail images $n_height=100; // Fix the height of the thumb nail imaage $tsrc="thimg/".$_FILES[userfile][name]; // Path where thumb nail image will be stored //echo $tsrc; if (!($_FILES[userfile][type] =="image/pjpeg" OR $_FILES[userfile][type]=="image/gif")){echo "Your uploaded file must be of JPG or GIF. Other file types are not allowed<BR>"; exit;} Now let us start with gif file thumb nail image creation. We will first read the height and width of the uploaded image and then resize it to our thumbnail image size. Note that in some GD library support GIF version is not included so to check that we have used one if condition and accordingly used jpeg support. We will be using imagecreatetruecolor to retain the actual color combination of the main picture. //////////// Starting of GIF thumb nail creation/////////// if (@$_FILES[userfile][type]=="image/gif") { $im=ImageCreateFromGIF($add); $width=ImageSx($im); // Original picture width is stored $height=ImageSy($im); // Original picture height is stored
- 5. $newimage=imagecreatetruecolor($n_width,$n_height); imageCopyResized($newimage,$im,0,0,0,0,$n_width,$n_height,$width,$height); if (function_exists("imagegif")) { Header("Content-type: image/gif"); ImageGIF($newimage,$tsrc); } elseif (function_exists("imagejpeg")) { Header("Content-type: image/jpeg"); ImageJPEG($newimage,$tsrc); } chmod("$tsrc",0777); }////////// end of gif file thumb nail creation////////// ////////////// starting of JPG thumb nail creation////////// if($_FILES[userfile][type]=="image/pjpeg"){ $im=ImageCreateFromJPEG($add); $width=ImageSx($im); // Original picture width is stored $height=ImageSy($im); // Original picture height is stored $newimage=imagecreatetruecolor($n_width,$n_height); imageCopyResized($newimage,$im,0,0,0,0,$n_width,$n_height,$width,$height); ImageJpeg($newimage,$tsrc); chmod("$tsrc",0777); } //////////////// End of JPG thumb nail creation ////////// Same way we can add other graphics format like BMP, PNG etc to the system Download the ZIP file here thumbnail.zip