Airbrush Tutorial - Scorpio
•
1 gostou•884 visualizações

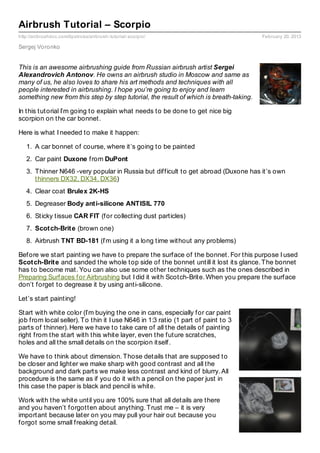
This is an awesome airbrushing guide from Russian airbrush artist Sergei Alexandrovich Antonov. He owns an airbrush studio in Moscow and same as many of us, he also loves to share his art methods and techniques with all people interested in airbrushing. I hope you’re going to enjoy and learn something new from this step by step tutorial, the result of which is breath-taking.

Recomendados
Recomendados
Mais conteúdo relacionado
Semelhante a Airbrush Tutorial - Scorpio
Semelhante a Airbrush Tutorial - Scorpio (20)
Airbrush Tutorial - Scorpio
- 1. Airbrush Tutorial – Scorpio http://airbrushdoc.com/tipstricks/airbrush- tutorial- scorpio/ February 20, 2013 Sergej Voronko This is an awesome airbrushing guide from Russian airbrush artist Sergei Alexandrovich Antonov. He owns an airbrush studio in Moscow and same as many of us, he also loves to share his art methods and techniques with all people interested in airbrushing. I hope you’re going to enjoy and learn something new from this step by step tutorial, the result of which is breath-taking. In this tutorial I’m going to explain what needs to be done to get nice big scorpion on the car bonnet. Here is what I needed to make it happen: 1. A car bonnet of course, where it’s going to be painted 2. Car paint Duxone from DuPont 3. Thinner N646 -very popular in Russia but difficult to get abroad (Duxone has it’s own thinners DX32, DX34, DX36) 4. Clear coat Brulex 2K-HS 5. Degreaser Body ant i-silicone ANTISIL 770 6. Sticky tissue CAR FIT (for collecting dust particles) 7. Scot ch-Brit e (brown one) 8. Airbrush TNT BD-181 (I’m using it a long time without any problems) Before we start painting we have to prepare the surface of the bonnet. For this purpose I used Scot ch-Brit e and sanded the whole top side of the bonnet untill it lost its glance. The bonnet has to become mat. You can also use some other techniques such as the ones described in Preparing Surfaces for Airbrushing but I did it with Scotch-Brite. When you prepare the surface don’t forget to degrease it by using anti-silicone. Let’s start painting! Start with white color (I’m buying the one in cans, especially for car paint job from local seller). To thin it I use N646 in 1:3 ratio (1 part of paint to 3 parts of thinner). Here we have to take care of all the details of painting right from the start with this white layer, even the future scratches, holes and all the small details on the scorpion itself. We have to think about dimension. Those details that are supposed to be closer and lighter we make sharp with good contrast and all the background and dark parts we make less contrast and kind of blurry. All procedure is the same as if you do it with a pencil on the paper just in this case the paper is black and pencil is white. Work with the white until you are 100% sure that all details are there and you haven’t forgotten about anything. Trust me – it is very important because later on you may pull your hair out because you forgot some small freaking detail.
- 2. Don’t forget to periodically take care of paint dust with the sticky tissue. Also after we have finished with white we use the tissue again and degreaser also. After that we continue with light and regular blue colors. Again reduced in ratio 1:3 that coverage of paint will be minimal and it will work like transparent paint. These colors have to be laid in proper order. First we lay softly light blue and only then regular blue. It has to be similar to the next picture. Again don’t forget about the tissue.
- 4. Now it’s time to add some red. With this color we want to lighten up the scorpion from the underneath. This will make a nice effect. The color is reduced the same way as we did before. Now spraying this color to the actual epicenter of the action we should lightly overspray the scorpion edges and also the edges of the ripped metal. Do I have to remind you about the tissue? After red it is time for yellow. Pour some into your airbrush (also reduced 1:3) and add few drops of white to kind of dim out the yellow. Stir and spray onto scorpion exactly as it is on the picture. Tissue? Then we add a bit of red into cup (use the one you reduced before), stir it and there you go it has to become orange. With this color we are actually giving the scorpion a tone and on dark parts by making them more colored the image gets its form and dimensions. Don’t forget to leave few stains for further rust.
- 6. Now we mix red, blue and a bit of white to get purple color. We add this color only to the tail and body and we do not touch the legs.
- 7. After the basic colors are laid of we take black and orange and mix it to get almost black brown. This color has to be transparent. This is the detailing of the scorpion, the final dimensions, shadows, scratches, dents, holes and all the possible details. With the same color we connect the shapes of the painting with the bonnet itself to make it as whole piece. One of the latest steps is to use white again. This time reduced in 1:5 ratio it will become really transparent. This color is now used to underline the most glittering areas of the painting. Be careful here because there is more thinner in that paint as usual and if you accidentally pull the trigger more than you need the big amount of thinner in one place will affect the already laid layers of paint. As result of such reaction you will have a crater in your paint. After that we have to use all the colors we have used in all the steps before and dim the white a bit so it will look more deep and natural.
- 8. This is it, all that is left to do is clear coat, polishing and fitting the bonnet back in place. Here is my finished scorpion.
- 9. Ант онов Сергей Александрович – http://www.cliaksa.ru/
- 10. Nice, huh? I think that this will push every Ford Scorpio owners to create something similar. My thoughts were a bit different – “what a pity that I sold my Scorpio just a month ago?”. ;) BTW don’t forget to share, like a tell your friends. Fire Ref erence Pack - part 2 A second part of fire reference, but this time it's in a bet... Who Airbrushes Toilet Seat s? You may remember that some time ago (well it was really long... Airbrush Recommendat ion The weather outside is rainy so now I have some time to writ... Alexandar Paunkovic Airbrush He didn't ask to post his gallery here, it's been me who has...