Final Cut Pro X Weynand Certification Lesson 9
•Transferir como PPTX, PDF•
1 gostou•2,305 visualizações

Final Cut Pro X Weynand Certification Lesson 9

Recomendados
Recomendados
Mais conteúdo relacionado
Mais procurados
Mais procurados (20)
Destaque
Destaque (12)
Semelhante a Final Cut Pro X Weynand Certification Lesson 9
Semelhante a Final Cut Pro X Weynand Certification Lesson 9 (20)
Mais de Samuel Edsall
Mais de Samuel Edsall (16)
Último
Último (20)
Final Cut Pro X Weynand Certification Lesson 9
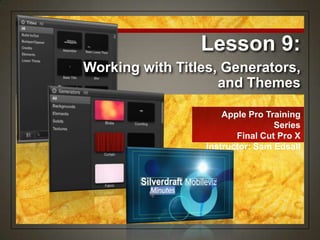
- 1. Apple Pro Training Series Final Cut Pro X Instructor: Sam Edsall Working with Titles, Generators, and Themes Lesson 9:
- 2. Working with Titles, Generators, and Themes • Use the Title Browser • Add a lower third • Make changes in the Inspector • Import still images to bumpers & opens • Work with generators • Explore title themes Goals
- 3. Titles • All projects, from the simplest to the most complex, require titles of some sort. • Titles provide information. • What are we about to see? Who created what we are about to see? Who is starring? • Titles can also be an expression of the film‟s style. • Animated title above a background of colorful, whirling shapes vs. large white text set against a stark black background. Why we need them
- 4. Titles Browser • Titles have been sorted into categories and subcategories to make them easier to find. • Build In‟s and Outs • There‟s a custom title you can build from scratch. Preformatted titles
- 5. Preparing the Project Start up the FCP External Drive: Find your APTS FCP X drive and double click to start it up.
- 6. Preparing the Project Load up Lesson 9: From the APTS FCP X drag the Lesson 9 folder to the top under the external drive. Put any other lesson back inside the lesson projects folder.
- 7. Preparing the Project Back up and load: In the Lesson 9 folder, duplicate Fairly Legal and name it Fairly Legal_BACKUP. Open Fairly Legal_BACKUP into the Timeline and play the project.
- 8. Titles Browser Open the Titles Browser: In the toolbar, click the Titles Browser button.
- 9. Titles Browser • Opens with the All category selected • Lower right shows total number of titles available What you see • Build In/Out • Bumper/Opener • Credits • Elements • Lower thirds Other categories
- 10. How Titles are Applied • The title is a separate storyline on top of the primary storyline • Independent of whatever arrangement of clips are made to the primary storyline As a Storyline Clip • So text is attached to a particular clip • If that clip moves in the timeline, the text also moves As a Connected Clip
- 11. How Titles are Applied • Text acts like a video clip • Alpha channel looks black since there‟s nothing under the text As an inserted or appended clip on the primary storyline • 4 seconds • Some titles are longer Default duration of most titles
- 12. Load Text to the Storyline In the Build In/Out category, find and skim Ornate. Drag the clip to the very beginning of the timeline When you see the blue insertion line, release it. The title clip icon is purple. Play the clip.
- 13. Ways to Add Titles Drag them into place directly on the timeline or as a connected clip Position play head, select title, click on Connect, Insert or Append edit in the toolbar • Or use the keyboard shortcuts Q,W, EPosition play head, double-click on the title in the Browser Connect edit text to timeline
- 14. Turn on Title Safe Position the play head on the title clip, so you can see the title in the Viewer. From the menu bar, choose View > Show Title/Action Safe Zones.
- 15. Action Safe / Title Safe • The recorded frame size of broadcast video is actually larger than the viewable area of a television monitor. Why they‟re there • Inner box • All text will appear on any television monitor when the show is broadcast. Title safe • Outer box • All action is visible to the home viewer. Action safe
- 16. Edit the Title In the Viewer, double- click Title to highlight the text with a blue overlay. Type Fairly Legal, press Esc (Escape), and play the clip. -- „Esc‟ tells FCP you‟re done typing.
- 17. Edit the Title If necessary, double- click the title to select the text. Move the pointer over the position button and when you see the pointer with a position tool attached, reposition if you‟d rather place the text elsewhere.
- 18. Connect Edit a Title In the Timeline, position the play head at about the 00:00:10:07 mark. In the Browser, double- click Ornate. -- This time, the title is added as a connected clip, its position dictated by the play head.
- 19. Edit a Title In the Viewer, double- click Title. Type Bridges and press Esc. Play the project through the first two title clips.
- 20. Change a Title’s Duration In the Timeline, click the right side of the title clip. Drag left until the trim information box reads 3:00 -01:00 -- Leaves a title with a three- second duration.
- 21. The Lower Third • Appears in the lower third of the screen to provide information. The most common title • The FCP X lower thirds come in one or two text fields. • Some have a background or are animated; others not so. • You can modify all of them to fit need and style. Different flavors
- 22. Check out some Lower Thirds In the Titles Browser, click the category Lower Thirds and skim Clouds and Echo to see their animated behaviors in the Viewer.
- 23. Check out some Lower Thirds Skim over the Overlap thumbnail and press the Spacebar to play the title animation. Press the Spacebar again to stop it.
- 24. Add a Lower Third In the Timeline, place the play head at about 00:00:15:11 Double-click Overlap to add it as a connected clip. Play the clip.
- 25. Edit the Lower Third In the Viewer, double- click the Name field and type Starring Then double-click the Description field and type Sarah Shahi Press Esc and then play the clip. (Shift /)
- 26. Reusing Your Titles • Tweak out a title the way you like • Size, font, colors • Copy and use it like a template • Paste the title at other parts of your project, then edit the text. Like anything else – Copy then Paste
- 27. Edit the Lower Third In the Timeline, select the Overlap text clip and press Command-C. -- You can also choose Edit > Copy. Press Command-V at play head positions: 00:00:20:11 & 00:00:30:23
- 28. Edit the Lower Third Select the fourth title clip and double- click Starring in the Viewer to highlight it, and then type Guest Starring. Select the entire 2nd field by dragging over it and type Gerald McRaney. Hmm… a bit of a problem…
- 29. Edit the Lower Third In the Viewer, drag a highlight over Guest Starring. Drag the position button and position the field just inside the left title safe boundary. -- Hold Shift while dragging to constrain the movement to one axis.
- 30. Edit the Lower Third Reposition the Gerald McRaney text: Highlight it and drag its position button until the name just clears the inside right title safe boundary. -- Hold Shift while dragging to constrain the movement to one axis.
- 31. Edit the Lower Third Select the last title clip and, in the first highlighted field, type Directed by In the second field, type Peter Markle --Move the text as needed to fit within the safe title zone.
- 32. TV Text Rules • Big enough to read easily Size • Usually san serif • Serif font OK if size is big enough to clearly see the serifs in the font Font • Usually simple with a heavy weight • Keep style consistent within your project • Too many text styles makes the project look uneven Style
- 33. Match Text Styles Within a Project In the Timeline, select the first Ornate title. Click the Inspector button in the toolbar -- or press Command-4 Click the Title button.
- 34. Text Inspector • Build In and a Build Out animation • The font • Snell Roundhand • Bold • Size of 179 • The color is white. Title window
- 35. Using the Timeline Index to track down titles Open the Timeline Index, and, at the bottom, click the Titles button. When the list appears, select the Starring title. -- play head hops to beginning of title
- 36. Using the Inspector to modify text In the Inspector, click the Text button. In the Viewer, double- click Starring Open the Basic pane if necessary by clicking Show.
- 37. Using the Inspector to modify text In the Text Inspector, click the Font pop-up menu and choose Snell Roundhand, and Bold from the options to the right of the font.
- 38. Using the Inspector to modify text Do the same thing to Sarah Shahi‟s name to Snell Roundhand Bold. Change size to 126. -- If her name no longer appears within the title safe zone, reposition the field within the boundary.
- 39. Copying Text Parameters • Try to keep font, size and color consistent in your project • Save a style • Save a color sample Keeping things equal
- 40. Copying Text Parameters In the Timeline, position the play head over the last title. Select the „Directed by‟ in the last title.
- 41. Copying Text Parameters In the Inspector hide the Basic parameters and show the Face parameters. Click the color tile to open the Colors window. --The current red in use appears at the top of the Colors window
- 42. Copying Text Parameters To save this color, in the Colors window, drag from the horizontal swatch to a small box in the drawer at the bottom of the window. Close the Colors window.
- 43. Copying Text Parameters In the Timeline, select the opening text clip. In the Viewer, double-click Fairly to highlight it, and then drag to select just the first letter, F. In the Face parameters, click the color tile to open the Colors window, and click the saved red tile in the bottom drawer.
- 44. Adding Bumpers & Credits • Brief, stand-alone pieces that start or end a segment in a show. Bumpers • Names of those involved in the production. Credits
- 45. Adding Bumpers & Credits In the Project Library, duplicate the Mobileviz Minutes to your HD Open the project and play the first few seconds. -- notice the 3-second gap at the beginning acting as a
- 46. Adding Bumpers & Credits In the Titles Browser, select the Bumper/Opener category. Locate Slide in the subcategory Cinema. Skim the Slide bumper.
- 47. Timeline Clip or Connected Clip? • The text clip is all you see • Any alpha elements will appear black Timeline Clip • Text on top of video • Any alpha elements will allow the video to show through Connected Clip
- 48. Adding Bumpers & Credits Drag Slide onto the gap clip in the Timeline. When you see the plus sign, release the mouse. From the shortcut menu, choose Replace From Start, then play the clip.
- 49. Replace vs. Replace From Start • Text clip will load at its default length of 5 ½ seconds. Replace • Text clip will load and fill the duration of the gap clip. Replace From Start
- 50. Adding Bumpers & Credits In the Timeline, move the play head through the Slide clip until all three text fields appear separately. In the Viewer, double- click the word Title and type Silverdraft.
- 51. Adding Bumpers & Credits In the Viewer, double- click Subtitle and type Mobileviz. In the last field, double- click and type Minutes.
- 52. Adding Bumpers & Credits Highlight the word Minutes. In the Text Inspector, drag the Size slider to 124 to make the word larger. In the Viewer, drag the position button of all three words so they fit within the Viewer.
- 53. Change the Bumper Style In the Inspector, click the Title button. Click the Color pop-up menu, and choose Gray. Click the Shape pop-up menu, and choose Squares, then play the clip.
- 54. Scrolling (Rolls) • Credits rolling upwards • Against a black background • Alpha effect over video Scrolling Section
- 55. Create a Scroll From the Credits category in the Titles Browser, select the Scrolling title. Drag Scrolling title to the end of the timeline.
- 56. Edit the Scroll In the Timeline, select the Scrolling clip. In the Viewer, double-click Title and type Credits. Change the credits so they read • Directed By You • Produced By Him • Edited By Her
- 57. Edit the Scroll Add more lines: In the Text Inspector, scroll down to the very end of the credits list, at the end of the last word, Description, and press Return. Press Tab to line up the cursor with the other text, and type Name. Press Tab again and type DESCRIPTION
- 58. Do a Little Find & Replace With the Scrolling clip still selected, choose Edit > Find and Replace Title Text. Enter Description in the Find field and (your name) in the Replace field. Click the “Search in” pop-up menu and choose Selected Title. In the search criteria on the right, select Match Case and Whole Words, and then click Replace All.
- 59. Video Generators • Creates a visual layer for composite effects • Video over generator • Text over generator Generators • Backgrounds, elements, solids, textures Categories
- 60. Creating a Video Generator In the toolbar, click the Generators Browser button, and choose the All category. In the Timeline, press Home (Fn ) to move the play head to the beginning of the project. Insert the Counting generator from the Elements category into the primary storyline.
- 61. Creating a Video Generator In the Generator Inspector, click the color tile and, from the Colors window, choose the red you saved in an earlier step. • Start 10.0 • End 1.0 • Decimals 0 • Minimum Digits 1.0 Play the clip.
- 62. Spiff up the Credits From the Solids category, drag the Vivid generator below the Credits clip so it sits right next to the final audio clip. Trim the end of the Vivid clip so the duration is the same as the credits. Play these clips together.
- 63. Time code Overlays • Handy tool • When screening work, the director can easily identify spots that need changing Why it‟s there
- 64. Create a Time code Overlay From the Project Library in the Lesson 9 folder, duplicate the „I think‟ project to your HD. Open it in the Timeline and play it.
- 65. Create a Time code Overlay From the Elements category, drag the Time code generator and connect it to the start of the project. Select the End point of the Time code clip, and press End (Fn ) to jump to the end of the project. Extend the End point to the play head location by pressing Shift-X.
- 66. Create a Time code Overlay From the Elements category, drag the Time code generator and connect it to the start of the project. Select the End point of the Time code clip, and press End (Fn ) to jump to the end of the project. Extend the End point to the play head location by pressing Shift-X.
- 67. Placeholder Clip • Better than a gap clip • Only sets the duration of the clip that will replace it • Placeholder can tell you what the clip will be • Entered from the Inspector What goes here
- 68. Create a Placeholder Clip From the Generators Browser, drag Placeholder to the gap clip in the primary storyline. When the plus sign appears, release the mouse and, from the pop-up menu, choose Replace From Start.
- 69. Create a Placeholder Clip With the Placeholder clip selected in the Timeline, choose the Generator Inspector and enter the following. Enable View Notes by selecting the checkbox. • Framing: Close-up • People: One • Gender: Men • Background: None • Sky: None
- 70. Create a Placeholder Clip In the Text Inspector, highlight the text field and type Guy in dark room.
- 71. Using Themes • Titles and transitions with a similar effect or theme • Provides unity to the effects used in your project Themes
- 72. Adding a Theme In the Project Library, duplicate the ZTH_Force vs Brown project to your HD. Open the project into the Timeline, and play the project.
- 73. Adding a Theme Click the Themes Browser button. In the Sports category of Titles, skim Team and then insert it at the very beginning of the project. Play the clip
- 74. Modifying the Theme Shift-Command-I to choose Import Files. In the Browser, navigate to FCPX Book Files > Imports > ZTH Stills, and select the two images. -- Add to Existing Event -- Choose Zero to Hero -- Copy Files to Final Cut Events folder
- 75. Modifying the Theme With the Team clip selected in the Timeline, open the Inspector. Click the Title button. Click the LT Drop Zone and then click the still image of Antron Brown in the Event Browser.
- 76. Modifying the Theme In the Inspector, click the RT Drop Zone, then click the image of John Force.
- 77. Modifying the Theme In the Logo Image Type field, click the up/down arrows and choose Non- square. Press Apply Clip when done.
- 78. Modifying the Theme In the Viewer, double-click the word Team on the left and type Antron Brown. Double-click Team on the right and type John Force. Press Esc when done.
- 79. Shortcuts in Lesson 9 • Change DurationControl D • Import FileShift Command I • CopyCommand C • PasteCommand V • Open/Close Inspector windowCommand 4
- 80. Apple Pro Training Series Final Cut Pro X Instructor: Sam Edsall Working with Titles, Generators, and Themes Lesson 9: