Final Cut Pro 7 Certification Lesson 7
•Transferir como PPTX, PDF•
0 gostou•590 visualizações

Final Cut Pro 7 Lesson 7 from the Weynand certification text.

Recomendados
Recomendados
Mais conteúdo relacionado
Mais procurados
Mais procurados (20)
Destaque
Semelhante a Final Cut Pro 7 Certification Lesson 7
Semelhante a Final Cut Pro 7 Certification Lesson 7 (20)
Mais de Samuel Edsall
Mais de Samuel Edsall (20)
Último
Último (20)
Final Cut Pro 7 Certification Lesson 7
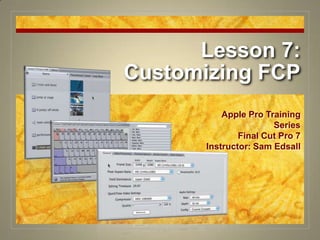
- 1. Lesson 7: Customizing FCP Apple Pro Training Series Final Cut Pro 7 Instructor: Sam Edsall
- 2. Preparing the Project In Final Cut Pro, open FCP7 Book Files > Lessons > Lesson 7 Project. An Offline Files dialog will appear.
- 6. Reconnect Media Get connected: In the Offline Files window select ‘Reconnect’
- 7. Reconnect Media Get connected: In the Reconnect Files window select ‘Locate’
- 8. Reconnect Media Get connected: Navigate to the FCP7 Book Files > Media > Quest > Quest Clips folder. Click the AQE Trailer SVO 022509- 2 file and then click Open.
- 9. Reconnect Media Save your Project: Once all the clips have been reconnected, save your project as something else.
- 11. Playing Multiple Formats Try it out: In the Timeline, click the Show Reel sequence tab and play this sequence. Three formats: HDV, Apple ProRes 422 ( LT) , Apple ProRes 422 ( Proxy Two frame rates: 23.98 and 29.97 fps.
- 12. Checking Clip Format Have a closer look: Click off all the clips so nothing is selected. Control click on ‘sham slam’. From the shortcut menu choose ‘Item Properties > Format’ Check out the settings then close the window.
- 13. Clip vs. Sequence Settings
- 14. Checking Sequence Format Have a closer look: With the ‘Show Reel’ sequence tab active, select ‘Sequence > Settings’ The sequence setting is HDV 1080i60, the same as the ‘sham slam’ clip.
- 15. Checking Sequence Format Have a closer look: In the Timeline, Control-click the first Leverage video clip, Eliot reacts- 2, and choose Item Properties > Format. -- Apple ProRes 422 ( LT) format -- Video rate is 23.98 fps -- Frame size is 960 x 720.
- 16. Changing Sequence Settings Lets make some changes: Press Command 0 to bring up the Sequence Settings window.
- 17. Changing Sequence Settings Making some changes: Click on Timeline Options tab. In the ‘Starting Timecode’ field enter ‘2:00:00:00’ for 2 hours.
- 18. Working with Master Clips
- 19. Name Changes
- 20. Master Clip Making some changes: Click on the ‘Show Reel’ sequence and select the ‘sham slam’ clip. Select View > Reveal Master Clip This opens the bin where the clip came from in the Browser. The sequence clip in the Timeline is an affiliate of the master clip in the Browser.
- 21. Master Clip Making some changes: Click in the name area of the ‘sham slam; clip. And change the name to ‘whales tails’. Notice the name changes to the clip in the Timeline and also to the 1st clip in the ‘Believe News’ sequence.
- 22. Working with Master Clips
- 23. Change Me Back Making some changes: Control click on ‘whales tails’ in the Browser. Choose Rename > Clip to Match File Clip name returns to ‘sham slam’
- 24. Finding the Media File
- 25. Finding Media Files Have a look: In the Browser, select the ‘jump at stage’ clip. Choose View > Reveal in Finder. (Can also Control click) Looking here you can see if there are other files you could use that were not imported into your project.
- 26. Finding the Media File
- 27. Finding Media Files Find the source: In the Browser, select the ‘trainer on belly’ subclip. Choose View > Reveal in Finder. (Can also Control click) The Finder opens with ‘J and L circle’ selected.
- 29. Finding Match Frame In the Timeline, position the playhead at the first frame of the whale cu feeding clip. Press F to search for the matching frame in the master clip from the Browser.
- 30. Browser Columns
- 31. Sorting Columns Sort it out: In the Browser, close all open bins, and reveal the contents of the Believe News bin. To enlarge the window to see more columns, click the Browser’s zoom button.
- 32. Sorting Clips Sort it out: The downward Arrow = sorted from A to Z To reverse the sort order, click the Name column heading. Click the heading again to return to the ascending sort order.
- 33. Browser Columns
- 34. Browser Columns Select the ‘_SA_Favorite Behavior’ clip and scroll to the Log Note column. Click in the column and type in ‘Steve’ Log another clip: CTRL click ‘S Show Open’ and select ‘Steve’
- 35. Browser Columns
- 36. Browser Columns Click the + icon in the Browser window to make it big. Drag the Good column to the left and release it just after the Name Column. Drag the Log Note column left so it follows the Good column.
- 37. Browser Columns
- 38. Browser Columns Control-click on the Good column and select ‘Show Thumbnail’ Click on a clip and drag across the thumbnail to scrub through the clip’s content.
- 39. Finding Stuff
- 40. Finding Stuff Reset the layout: Press Control U to restore the default layout. Control click on ‘Thumbnail’ column and choose ‘Logging Columns’ Close all the Bins in the Browser.
- 41. Finding Stuff Find Stuff: Press Command F. In the Text field type in ‘sham slam’ and click ‘Find Next’ The Bin where the clip is opens and the clip is highlighted.
- 42. Finding Stuff
- 43. Finding Stuff Find Stuff: Click the Leverage Promo sequence tab and make sure the playhead is at the head of the sequence. Press Command- F. In the Find window, enter sophie in the Find field and click Find All to find all the clips that have sophie in their name. This could come in handy if say you need to adjust the audio levels of all these clips at the same time.
- 44. Button Bars and Shortcuts
- 45. Button Bars and Shortcuts
- 46. Make a Shortcut Choose Tools > Keyboard Layout > Customize In the lower left, click the lock to allow changes.
- 47. Make a Shortcut We will make a shortcut to import a folder: -- import file = Command I -- let’s make it Shift Command I On the keyboard click on the shift-cmdkey to highlight them.
- 48. Make a Shortcut Open the File Menu disclosure triangle to display the commands and select Import Folder…
- 49. Make a Shortcut Drag the Import Folder… icon over the I key on the keyboard and release the mouse. Close the keyboard. Click File > Import > Folder -- the new shortcut!
- 50. Button Bars
- 51. Make a Shortcut Click in the search field at the top of the commands list and type ‘Bin’ Select the ‘New Bin’ icon and drag to the Browser between the two button tabs. Type Export and add the Export QuickTime Movie & Export using QuickTime Conversion to the Browser Control-click each new icon and color code it if you like.
- 52. Saving Layouts
- 53. Saving Layouts Save a Column setting in your Browser: In your Browser, drag the columns in the order you want. Control-click on on any column heading other than Name and select ‘Save Column Layout’ and give it a name.
- 54. Saving Layouts Save a Window Layout setting: Arrange the windows the way you would like them, complete with your shortcut buttons. Choose ‘Window > Arrange > Save Window Layout’ and give it a name.
- 55. User Preferences
- 56. Set Some Prefs General Window: Change the level of undo’s from 10 to 30. In the Autosave Vault save a copy every 15 minutes for a total of 30 for each project. Work in different formats? Turn on ‘Prompt for settings on New Project’
- 57. Homework Assignment Create a custom layout: Click on Tools > Button List (this is another way to load shortcuts). Drag the following shortcuts to the Browser window from the button list File Menu. - New Bin - Import Files - Export QuickTime Movie - Export Using QuickTime Conversion
- 58. Homework Assignment Create a custom layout: Color-code the buttons any way you wish, but the two export buttons should be the same color. Add a spacer between the ‘Add Bin’ and ‘Import Files’ and another spacer between the ‘Import Files’ and ‘Export QuickTime Movie’ icons.
- 59. Homework Assignment Take a picture of your custom layout: In the Spotlight type ‘Grab’ to open the Grab utility. Choose ‘Capture > Selection’ and select around your new Browser shortcuts to take a snapshot. Save the snapshot to your desktop as (your name Lesson 7) On Western Online send an Email to me and attach your picture to the Email. (no iTunes U this time)
- 60. Lesson 7: Customizing FCP Apple Pro Training Series Final Cut Pro 7 Instructor: Sam Edsall