Progressive addition lenses
•Transferir como PPTX, PDF•
93 gostaram•26,386 visualizações

This document discusses progressive lenses, including their history, types, features, markings, fitting process, advantages, and disadvantages. It provides details on: - The four main types of lenses - single vision, bifocals, trifocals, and progressive addition lenses. - Key features of progressive lenses, including having multiple focal points that change continuously across the lens rather than distinct segments. - Important temporary and permanent markings on progressive lenses used in fitting, including the fitting cross, distance reference circle, and lateral locator lines. - The process of accurately relocating the fitting cross from temporary to permanent markings to ensure proper positioning over the pupil.

Recomendados
Mais conteúdo relacionado
Mais procurados
Mais procurados (20)
Semelhante a Progressive addition lenses
Semelhante a Progressive addition lenses (20)
Último
Último (20)
Progressive addition lenses
- 2. OBJECTIVES • Details of progressive lenses. • Types of progressive lenses. • Progressive markings. • Fitting error and alignment and also the types of bi-focals
- 3. INTRODUCTION • The very first Progressive lens was invented by Bernard Maitenaz, from the French company Essel, in the year 1959 –known as Varilux lens . • A progressive addition lens has more than one focal point or dioptric powers, without the need to switch lenses. • Progressive lenses can be called progressive addition lenses (PAL), progressive power lenses (PPL).
- 4. • Based on the number of focal points, ophthalmic lenses are divided into four types Single vision lenses Bifocals Trifocals Progressive addition lens
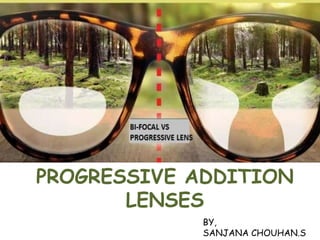
- 5. • SINGLE VISION LENSES - Corrects only one vision at a time . (Single focal point) • BIFOCALS – Corrects two vision, Distance and near.(Two focal points) • TRIFOCALS – Corrects three vision, distance, near and intermediate.(Three focal points) • PROGESSIVE – Corrects different distances.(Many focal points)
- 7. FEATURE OF A PROGRESSIVE LENS • A progressive lens provides visual compensation at all distances namely Far, Distances and Near. • It has a lens that changes its dioptric power continuously, starting at its geometric centre and gradually progressing its dioptre value. • The progression of power occurs in an optically pure progression corridor.
- 8. • By “Pure” it is meant that there are no astigmatic aberrations in the peripheral zones of the lens . • The progression corridor starts few millimetre (mm) below the fitting cross and keeps progressing until it reaches the near visual field .
- 9. • At the lateral zones the astigmatic aberration zones are present, where vision is not totally clear . • The aspheric lens design is responsible for the power progression of PALS and has different radii of curvature. • It is made up of multiple focal points due to change in its radius of curvature.
- 11. PROGRESSIVE LENS DESIGNS • Hard design • Soft design
- 12. TEMPORARY MARKINGS Distance reference circle: • This is the identification circle used to check the distance lens power. • It should be crossed checked with the lensometer or focimetry. Fitting cross: • It should be located exactly at the center of the patients pupil. • It is used to measure the MPD(monocular pupillary distance) and fitting height.
- 13. Prism reference circle: • This is the point which is used to check the amount of prism in the lens. Near reference circle: • This marking is used to check the near vision power. • It should be verified with the lensometer.
- 14. Small horizontal locater: • This indicator should be level with the prism reference point. • This mainly helps the surfacing lab markers to mount the lenses and check the position of horizontality. • The horizontality precision can even be spotted easily with the naked eye.
- 17. PERMANENT MARKING Lateral circles: • There are two small lateral circles that are used to relocate the temporary markings and they are positioned exactly 34 mm apart one each on the nasal and temporal sides. • Lens logo and material code: • The lens type is identified with the help of lens logo. • The material coat helps us to identify the type of lens material.
- 18. • E.g: In case of 1.5 index the lens logo is followed by no.6 and in case of polycarbonate lens, a letter P is seen. • This logo is nasally located. Addition power: • This is located below the temporal locator • We can read the addition power directly from the lens by using the lensometer.
- 19. DETAILS OF LENS MARKING Central fitting cross: • The central fitting cross is marked with the ink • Mounted in the frame as per the center of the customers pupil. • It is a temporary marking. • The marking can be wiped off with isopropyl alcohol.
- 20. RELOCATING THE FITTING CROSS • A template is provided by the manufacturer for the progressive lenses. • By placing the lens on the template marking sure to align the 2 lateral traces in the horizontal direction and mark the fitting cross.
- 22. • The wearer should be looking straight ahead with the head in the straight up while the measurements are being taken. • The fitting cross is placed exactly at the pupillary center. • If these precautions are not taken it will lead to inaccurate measurements.
- 23. ADVANTAGES • Improved appearance • Complete range of working distance • NO JUMP effect • Thinner and lighter • No need to switch lenses • No dividing line
- 24. DISADVANTAGES • Peripheral aberrations • Adaptation problems • More critical fitting required • More expensive
- 25. Guess the markings ???
- 26. THANK YOU