FULL NIGHT — 9999894380 Call Girls In Jagat Puri | Delhi
Brake booster
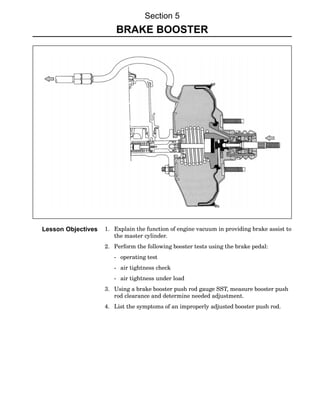
1. Section 5
BRAKE BOOSTER
Lesson Objectives 1. Explain the function of engine vacuum in providing brake assist to
the master cylinder.
2. Perform the following booster tests using the brake pedal:
− operating test
− air tightness check
− air tightness under load
3. Using a brake booster push rod gauge SST, measure booster push
rod clearance and determine needed adjustment.
4. List the symptoms of an improperly adjusted booster push rod.
2. Section 5
Brake Booster The brake booster is designed to create a greater braking force from a
minimum pedal effort, using a difference in atmospheric pressure and
the engine’s manifold vacuum. It increases the pedal force 2 to 4 times
depending on the size of the diaphragm. The brake booster is located
between the brake pedal and the master cylinder.
When pressure is applied to the brake pedal, pressure is exerted on the
booster air valve. With pressure created by the booster the master
cylinder is applied. Should the booster malfunction, the normal
mechanical braking force of the master cylinder is maintained.
Construction The brake booster consists of the body, booster piston, piston return
spring, reaction mechanism, and control valve mechanism.
The body is divided into a constant pressure chamber and a variable
pressure chamber. The chambers are separated from each other by a
diaphragm. The control valve mechanism regulates the pressure inside
the variable pressure chamber.
Single Diaphragm
Booster
The body is divided into a
constant pressure chamber
and a variable pressure
chamber separated from
each other by a diaphragm.
42 LEXUS Technical Training
3. Brake Booster
Basic Booster The basic principle of the brake booster is pressure differential. When
Operation vacuum is applied to both sides of the piston, the piston is pushed to
the right by the spring and remains there.
Control Valve Closed
When vacuum is applied
to both sides of the piston,
the piston is pushed to
the right by the spring.
When atmospheric air is allowed into chamber B the piston starts to
compress the spring, due to the difference in pressure, and moves to
the left. This causes the piston rod to move the piston of the master
cylinder, generating hydraulic pressure.
Control Valve Open
When atmospheric air is
allowed into chamber (A),
the piston starts to compress
the spring due to the
difference in pressure.
Booster Air Valve In the OFF position, the Air Valve (connected to the Valve Operating
Operation Rod) is pulled to the right by the Air Valve Return Spring. The Control
Valve is pushed to the left by the Control Valve Spring. This causes the
Air Valve to contact the Control Valve. Therefore, the atmospheric air
that passes through the air cleaner element is prevented from entering
the Variable Pressure Chamber.
4. Section 5
The piston’s Vacuum Valve is separated from the Control Valve in this
position, providing an opening between passage A and passage B. Since
there is always vacuum in the Constant Pressure Chamber, the
opening allows vacuum into the Variable Pressure Chamber. As a
result, the piston is pushed to the right by the piston return spring.
Booster Air Valve
Brakes Not Applied
The Vacuum Valve is open
allowing vacuum on both
sides of the booster piston.
In the ON position, when the brake pedal is depressed, the Valve
Operating Rod pushes the Air Valve to the left. The Control Valve
which is pushed against the Air Valve by the Control Valve Spring,
moves to the left until it touches the Vacuum Valve. This blocks off the
opening between passage A and passage B (Constant Pressure
Chamber (A) and Variable Pressure Chamber (B)).
Booster Air Valve
Brakes Applied
The vacuum valve is closed,
cutting off the vacuum
source to the variable
pressure chamber.
44 LEXUS Technical Training
5. Brake Booster
As the Air Valve moves further to the left, it moves away from the
Control Valve. This allows atmospheric pressure to enter the Variable
Pressure Chamber through passage B. The pressure difference between
the Constant Pressure Chamber and the Variable Pressure Chamber
causes the piston to move to the left. This, in turn, causes the Reaction
Disc to move the Booster Push Rod to the left and exert braking force.
Booster Air Valve
Brakes Applied
Air Valve opens allowing
atmospheric air to enter the
variable pressure chamber.
Released When the brake pedal is released, the Valve Operating Rod and the Air
Position Valve are moved to the right by the Air Valve Return Spring and
reaction force of the master cylinder. This movement causes the Air
Valve to contact the Control Valve, blocking atmospheric pressure from
the Variable Pressure Chamber. At the same time, the Air Valve also
retracts the Control Valve Spring. The Control Valve moves away from
the Vacuum Valve, connecting passage A with passage B.
This allows atmospheric pressure from the Variable Pressure Chamber
to flow into the Constant Pressure Chamber. The pressure difference is
eliminated between the two chambers and the piston is pushed back to
the right by the Diaphragm/Piston Return Spring. The booster returns
to the released position.
6. Section 5
Booster Air Valve
Released Position
Pressure equalizes in the
two chambers and the air
valve is closed.
Lack Of Vacuum If vacuum fails to act on the brake booster, for any reason, there will be
no difference in pressure between the Constant Pressure Chamber and
the Variable Pressure Chamber. When the brake is in the OFF"
position, the piston is returned to the right by the Piston Return
Spring.
When the brake pedal is depressed, the Valve Operating Rod advances
to the left and pushes the Air Valve, Reaction Disc, and Booster Push
Rod. This movement causes the master cylinder piston to apply braking
force to the brake system, maintaining brake system operation.
Booster Air Valve
No Vacuum
Although the booster loses
self-energizing force when
vacuum is lost, it
still generates hydraulic
pressure mechanically
and can maintain brake
system operation.
46 LEXUS Technical Training
7. Brake Booster
Tandem Brake The tandem type brake booster is a compact and extremely powerful
Booster unit having two Constant Pressure Chambers and two Variable
Pressure Chambers. A Piston separates each variable and constant
pressure chamber. With two pistons incorporated into this design, a
large surface area provides additional boost while taking up less space.
When the brakes are not applied the Air Valve and Valve Operating
Rod are pushed to the right by the tension of the Air Valve Return
Spring, and stop when they contact the Valve Stopper Key. Since the
Air Valve pushes the Control Valve back toward the right, the passage
through which atmospheric air from the air cleaner element enters the
booster, is closed. Since the Vacuum Valve and the Control Valve are
not in contact with each other, pressure is equalized between the two
chambers through passage (A) and passage (B).
Therefore, vacuum is applied to both the Constant Pressure Chambers
and the Variable Pressure Chambers; so, there is no difference in
pressure between the chambers on both sides of the piston.
Tandem Brake
Booster
The tandem type
brake booster is a
compact and extremely
powerful unit having two
vacuum chambers.
8. Section 5
Brakes Applied When the brake pedal is depressed, both the Valve Operating Rod and Air
Valve are pushed to the left together. As a result, the Control Valve and
Vacuum Valve come into contact with each other, closing passages (A) and
(B) (the constant pressure chamber and variable pressure chamber).
Next, the Air Valve moves away from the Control Valve, and
atmospheric air from the air cleaner element passes through passage
(B) and enters the Variable Pressure Chamber. This generates a
pressure difference between the Variable Pressure Chamber and the
Constant Pressure Chamber, and the pistons move to the left.
The forces applied by the pistons, which occur due to the pressure
difference, are transmitted to the Reaction Disc via the Valve Body. They
are further transmitted to the Booster Push Rod, becoming the booster
output force. The combined surface area of pistons No. 1 and No. 2,
multiplied by the pressure difference between the Constant Pressure
Chamber and Variable Pressure Chamber, equals the booster output force.
Tandem Brake
Booster - Brakes
Applied
The operation of the air
valve and booster is the
same as the single
diaphragm booster.
48 LEXUS Technical Training
9. Brake Booster
Booster Diagnosis The following steps are taken to diagnose the brake booster.
Operating Check With the engine stopped, depress the brake pedal normally, several
times. The brake pedal must be depressed before the engine is started
in order to remove vacuum from the booster.
With the brake pedal depressed start the engine. When the engine is
started, vacuum is created and operates the booster. This causes the
brake pedal to go down.
If the brake pedal goes down slightly, the booster is operating normally.
If the brake pedal does not move, the booster is not receiving manifold
vacuum, or is malfunctioning.
Booster Operating
Check
The brake pedal should sink
when the engine starts.
10. Section 5
Air Tightness Check Start the engine and let it run for one or two minutes, then shut it off.
Now step on the brake pedal several times, applying normal pressure.
Be sure to wait about five seconds between each depression of the
pedal. If the brake pedal reserve distance increases every time the
pedal is depressed, the booster has good air tightness.
Booster Air
Tightness Check
Pedal reserve distance
increases with successive
pedal depressions.
The brake pedal reserve distance changes every time the pedal is
depressed, because the vacuum that is stored in the booster is reduced
every time the brake pedal is depressed.
The brake pedal reserve distance will not change if the Check Valve is
defective. The check valve is located on the vacuum booster body or
between the booster body and the source of engine vacuum. It’s purpose
is to act as a one−way valve and seal vacuum in the booster to provide at
least two power assist stops should the engine stop running. To check
the Check Valve and vacuum hose piping use the following procedure:
• Remove the vacuum hose and valve from the booster.
• Block the valve with a finger and start the engine.
• A strong vacuum should be felt if the piping and valve are
operating.
• The vacuum must remain unchanged for approximately one minute
after the engine is stopped.
Lack of vacuum indicates a malfunction in the check valve or the
vacuum hose piping. If the vacuum appears normal, there may be a
problem in the booster itself.
50 LEXUS Technical Training
11. Brake Booster
Air Tightness Test Depress the brake pedal when the engine is running, then stop the
Under Load engine and wait for about 30 seconds. If the brake pedal position does
not change, the brake booster is functioning normally. It is defective if
the brake pedal moves up.
The brake pedal reserve distance remains unchanged because vacuum
is maintained in the Constant Pressure Chamber.
Booster Air Tightness
Under Load
Stop the engine with the
brake pedal depressed, the
brake pedal should maintain
the same height for more
than 30 seconds.
12. Section 5
Booster The Booster Push Rod projects from the front of the Brake Booster and
Push Rod activates the master cylinder. The push rod is adjustable and the
clearance must be checked any time the master cylinder or booster is
Adjustment replaced. This is required to ensure the correct gap between the master
cylinder piston and the booster push rod.
Problems can occur if the push rod is improperly adjusted:
• If the gap is too small, it may cause brake drag and premature
brake wear.
• If the gap is too large, it may cause brake delay and reduced pedal
reserve distance.
Prior to making the adjustment:
• Check the brake pedal freeplay to ensure the booster is not
partially applied.
• Make the adjustment with the engine running to ensure the booster
has vacuum. The booster body will change shape when a vacuum is
applied and may reduce the clearance.
Booster Push
Rod Gauge
The push rod is adjustable
and the clearance must be
checked any time the master
cylinder is replaced.
Adjusting Procedure:
1. Place a new gasket on the flange of the master cylinder. Set the
push rod gauge over the end of the master cylinder with the
rounded end of the tool plunger toward the piston.
2. Push the plunger down until it just touches the bottom of the
piston bore.
3. Turn the gauge over and set the flat plunger end of the gauge on
the booster and over the push rod. There should be no clearance
between the booster push rod and the plunger.
4. Adjust the booster push rod if necessary. (If the brake pedal is
depressed to expose the adjustment nut, be sure to start the engine
before checking the adjusted clearance.)
52 LEXUS Technical Training
13. Brake Booster
Alternate Method for The preferred method of adjustment is the Booster Push Rod Gauge
Booster Adjustment procedure just described. If the special service tool is not available the
measurement procedure described here can be used to ensure a
calculated clearance prior to installation of the master cylinder.
In this procedure, measure the distance between the bottom of the bore
in the master cylinder primary piston to the top of the flange gasket
using a depth micrometer or vernier caliper.
1. Measure from the rim of the cylinder bore to the new gasket on the
flange, (measurement A")
2. Measure from the rim of the cylinder bore to the bottom of the bore
in the primary piston, (measurement B")
3. Subtract A from B will give the depth of the piston bore from the
master cylinder flange gasket, (measurement C")
Alternate
Measurement Method
If the Booster Push Rod
Gauge is not available,
use a vernier
caliper to establish
proper clearance.
Next, measure the height of the booster push rod.
1. Place a precision straight edge across the face of the booster body
adjacent to the push rod.
2. Measure from the top of the straight edge to the top of the push rod.
(measurement D")
3. Measure the width of the straight edge, (measurement E")
4. Subtract measurement D" from E" will give the height of the push
rod. (measurement F")
5. Clearance is determined by subtracting F" from C".
6. Adjust the push rod to obtain approximately 0.1 mm to 0.5 mm
clearance.
14. Section 5
WORKSHEET 5-1 (ON-CAR)
Brake Pedal Measurement
Vehicle Year/Prod. Date Engine Transmission
In this Worksheet you will practice the procedure for measuring pedal height, pedal free play and pedal reserve
distance.
Tools and Equipment:
• Measuring tape.
• Assortment of open-end wrenches.
• Feeler gauge.
• Trim removal tool.
Pedal Height:
1. Pull the carpet down from the bulkhead to the foot well to reveal the asphalt melt sheet, (remove sill plate or
trim as needed)
2. Using the measuring tape, measure at a right angle from the brake pedal pad to the melt sheet.
3. Record your measurement in the box below.
Measured Brake Pedal
Specification Pass/Fail
Height
1. Is the brake pedal height adjustable? If yes, explain how.
2. What effect would a low pedal height have on the brake system? Explain your answer.
54 LEXUS Technical Training
15. Brake Booster
Brake Pedal Freeplay:
1. Stop the engine and depress the brake pedal several times until there is no vacuum in the booster.
2. Depress the pedal by hand until the beginning of resistance is felt. Record this measurement below.
Measured Brake Pedal
Specification Pass/Fail
Freeplay
1. Why is the vacuum booster depleted before checking brake pedal freeplay?
2. If brake pedal freeplay is less than specification, what possible adjustment should be checked?
Brake Pedal Reserve Distance:
1. Release the parking brake.
2. With the engine running, depress the pedal with approximately 110 pounds of force.
3. Measure the pedal reserve distance at a right angle from the pedal pad to the melt sheet.
Measured Brake Pedal
Specification Pass/Fail
Reserve Distance
1. If the brake pedal height is within specification but pedal reserve distance is insufficient, list several
possible causes?
2. Is brake pedal reserve distance adjustable? If yes, explain.
16. Section 5
WORKSHEET 5-2 (ON-CAR)
Booster Push Rod Adjustment
Vehicle Year/Prod. Date Engine Transmission
Worksheet Objectives
In this Worksheet you will practice the procedure for measuring booster push rod to master cylinder clearance.
Tools and Equipment:
• Depth Micrometer.
• Straight Edge.
• Push Rod Gauge. (SST 09737-00010)
• 10mm combination wrench.
• Tubing Wrench set.
• Plugs for master cylinder ports.
Preparation:
• With the engine off, pump the brake pedal several times to reduce vacuum in the booster.
• Loosen and remove the brake tubes from the master cylinder.
• Remove the master cylinder from the brake booster.
Measurement: (Using the special service tool)
1. Place a new gasket on the master cylinder.
2. Centering the Push Rod Gauge pin over the master cylinder piston and position the gauge on the gasket of
the master cylinder.
3. Lower the pin into the piston until it lightly touches the bottom of the bore.
4. Start the engine and turn the opposite end of the gauge and center the head of the pin over the booster push rod.
5. Adjust the push rod as needed to ensure no gap between the push rod and the head of the pin.
6. Turn the engine OFF, deplete the vacuum in the booster by depressing the brake pedal several times.
7. Place the gauge over the booster push rod and push the pin toward the push rod. Did it move? Why?
56 LEXUS Technical Training
17. Brake Booster
Measurement: (Using the depth gauge)
• Place a new gasket on the master cylinder.
• Using a depth micrometer measure from the rim flange of the cylinder bore to the new gasket. This is
measurement A.
• Using a depth micrometer measure from the rim flange of the cylinder bore to the bottom of the piston bore.
This is measurement B.
• Place a straight edge over the brake booster gasket mating surface.
• Measure from the top side of the straight edge to the top of the booster push rod. This is measurement C.
• Subtract measurement C from the width of the straight edge to get measurement F. (push rod height)
Summary:
1. Using the measurements below, calculate the push rod clearance.
A =13.76 mm
B = 20.8 mm
D = 28.5 mm
E = 35.5 mm
2. List two occasions when this adjustment should be done.
3. What difference is there between performing the adjustment with the engine running and not running?
4. If the push rod was too long, what is the most likely result?
5. If the push rod is too short (the clearance between the push rod and master cylinder piston is too great),
what is the most likely result?