SlideShare uma empresa Scribd logo
1 de 16
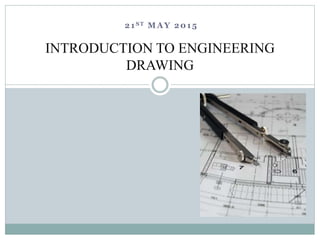
21ST MAY 2015
INTRODUCTION TO ENGINEERING
DRAWING
G R O U P M E M B E R S :
1 . M D . R O K I B U L H A Q U E ( 2 0 1 4 3 3 4 0 6 2 )
2 . S H A R I F M U K T A D I R H O S S A I N C H O W D H U R Y ( 2 0 1 4 3 3 4 0 6 1 )
3 . S A T Y E N M A Z U M D E R ( 2 0 1 4 3 3 4 0 6 3 )
Welcome
to
Presentation of Group “P”
Objectives
 To get primary concepts of Engineering Drawing.
 To know the necessity of Engineering Drawing.
 To know about the equipments used in Engineering Drawing.
 To know various signs, lines and dimensions.
 To know about Orthogonal view.
 To know about Sectional view.
 To know about Auxiliary view.
Introductions:
Drawing is the basic from of communication in technology and Industry. It expresses
ideas and conveys specific information by means on geometric shapes lines and
dimensions. It is a universal language that improves communications and eliminates
costly errors of interpretation with drawing conventions. Engineering drawing is the main
method of communication between all parsons concerned with the design and
manufacturing of components.
What is Engineering Drawing??
A graphical language to convey graphically the ideas and
information necessary for the construction or analysis of
machines, structures, or systems by geometric shapes
lines and dimensions.
Equipments for Engineering Drawing
•Drawing Paper
•T-Squares
•Set-Squares
•Pencil Sharpeners
•Erasers
•Pencil Compasses
•Dividers
•Drawing Pencil
•Scotch Tape
Fig. Equipments for Engineering Drawing
Lines Used in Drawing
In engineering drawing there are used
different kinds of line.
Some of them are given-
Fig. Lines
Type of Graphical Projection
Today We are describing three types of projection
1. Orthographic View.
2. Sectional View.
3. Auxiliary View
Orthographic View
Orthographic projection of a
method of representing the exact
shape of an object by dropping
perpendiculars from two or more
sides of the objects to planes,
generally at right angles to each
other, collectively, the views on
these planes described the object
completely. Fig. Orthographic View (1)
In orthographic projection, three views are
normally drawn. The three chosen views
may be any of the six hypothetical faces of
the object. Normally we use;
•Front View
•Top View
•Right hand side view
Fig. Orthographic View (2)
Sectional View
Sectional views, commonly
called sections, are used to
show interior detail that is too
complicated to be shown clearly
and dimensioned by the
traditional orthographic views
and hidden lines.
Fig. Sectional view
Overview of Sectional Projection
• Sections are used to show interior details clearly.
• A cutting-plane line shows where object was cut to obtain the section view.
• Cross hatching in the section view shows the solid surface of the object which
were cut through to produce the section.
• Section views may replace standard views.
Fig. Symbolic section lining
Fig. Sectional Cutting plane line
Symbolic section lining
Auxiliary View
Auxiliary view is a orthographic view which is used to show the true
shape of features that are not parallel to any of the principal planes of
projection.
•Auxiliary views are orthographic views taken
from a direction of sight other than top,
front, right side, left side, bottom, or rear.
Purpose of Auxiliary View
Purposes of Auxiliary Views
•Show the true size and shape of a surface.
•Show the true angle between two surface.
•To give clear view of that plane which is not parallel the common planes.
Thank you
That brings us to the end
of our presentation,
Thank you for your time.

Mais conteúdo relacionado

Mais procurados

Engineering Drawing: Chapter 01 introduction
Engineering Drawing: Chapter 01 introductionEngineering Drawing: Chapter 01 introduction
Engineering Drawing: Chapter 01 introduction
mokhtar
 
Engineering drawing-part-1
Engineering drawing-part-1Engineering drawing-part-1
Engineering drawing-part-1
musadoto
 

Mais procurados (20)

How to read engineering drawings
How to read engineering drawingsHow to read engineering drawings
How to read engineering drawings
 
Engineering drawing graphics
Engineering drawing graphics Engineering drawing graphics
Engineering drawing graphics
 
Introduction to engineering graphics
Introduction to engineering graphicsIntroduction to engineering graphics
Introduction to engineering graphics
 
Engineering Drawing: Chapter 01 introduction
Engineering Drawing: Chapter 01 introductionEngineering Drawing: Chapter 01 introduction
Engineering Drawing: Chapter 01 introduction
 
Introduction to engineering graphics
Introduction to engineering graphicsIntroduction to engineering graphics
Introduction to engineering graphics
 
CIVIL Engineering Drawing by haseeb muhammad
CIVIL Engineering Drawing by haseeb muhammadCIVIL Engineering Drawing by haseeb muhammad
CIVIL Engineering Drawing by haseeb muhammad
 
Line Types In Engineering Drawing
Line Types In Engineering DrawingLine Types In Engineering Drawing
Line Types In Engineering Drawing
 
Engineering drawing-part-1
Engineering drawing-part-1Engineering drawing-part-1
Engineering drawing-part-1
 
Orthographic Projection
Orthographic ProjectionOrthographic Projection
Orthographic Projection
 
sectional views
sectional viewssectional views
sectional views
 
Lettering and lines presentation
Lettering and lines presentationLettering and lines presentation
Lettering and lines presentation
 
Dimensioning
DimensioningDimensioning
Dimensioning
 
Engineering graphics
Engineering graphicsEngineering graphics
Engineering graphics
 
Engineering drawing chapter 01 introduction
Engineering drawing chapter 01 introductionEngineering drawing chapter 01 introduction
Engineering drawing chapter 01 introduction
 
Notes-Engineering-Graphics-and-Design-1-.pdf
Notes-Engineering-Graphics-and-Design-1-.pdfNotes-Engineering-Graphics-and-Design-1-.pdf
Notes-Engineering-Graphics-and-Design-1-.pdf
 
Engineering drawing unit 1-snist
Engineering drawing unit 1-snistEngineering drawing unit 1-snist
Engineering drawing unit 1-snist
 
Chapter 3 multiview drawings
Chapter 3 multiview drawingsChapter 3 multiview drawings
Chapter 3 multiview drawings
 
Drawing presentation 2015 2016
Drawing presentation 2015 2016Drawing presentation 2015 2016
Drawing presentation 2015 2016
 
Orthographic projection exercises
Orthographic projection exercisesOrthographic projection exercises
Orthographic projection exercises
 
Technical Drawing
Technical DrawingTechnical Drawing
Technical Drawing
 

Destaque

2015, INNO company presentation, TOOLS FOR ARCHITECTS
2015, INNO company presentation, TOOLS FOR ARCHITECTS2015, INNO company presentation, TOOLS FOR ARCHITECTS
2015, INNO company presentation, TOOLS FOR ARCHITECTS
Elena Airas
 
Kedua 2002
Kedua 2002Kedua 2002
Kedua 2002
mokhtar
 
Third grade room redesign
Third grade room redesignThird grade room redesign
Third grade room redesign
Katie Joy
 
The architect s_scale_11
The architect s_scale_11The architect s_scale_11
The architect s_scale_11
BCAarchitecture
 
Engineering Drawing : Class 02
Engineering Drawing : Class 02Engineering Drawing : Class 02
Engineering Drawing : Class 02
Suhaimi Said
 
Engineering Drawing: Chapter 13 roles of engineering drawing
Engineering Drawing: Chapter 13  roles of engineering drawingEngineering Drawing: Chapter 13  roles of engineering drawing
Engineering Drawing: Chapter 13 roles of engineering drawing
mokhtar
 
Engineering drawing & graphics
Engineering drawing & graphicsEngineering drawing & graphics
Engineering drawing & graphics
uppals
 
Engineering Drawing: Chapter 02 using drawing tools
Engineering Drawing: Chapter 02 using drawing toolsEngineering Drawing: Chapter 02 using drawing tools
Engineering Drawing: Chapter 02 using drawing tools
mokhtar
 
AR101 -POLIBRIGED ( PERTOLONGAN CEMAS)
AR101 -POLIBRIGED ( PERTOLONGAN CEMAS)AR101 -POLIBRIGED ( PERTOLONGAN CEMAS)
AR101 -POLIBRIGED ( PERTOLONGAN CEMAS)
mokhtar
 
Engineering drawing-course-book
Engineering drawing-course-bookEngineering drawing-course-book
Engineering drawing-course-book
kishorereddy_btech
 

Destaque (20)

Engineering drawing
Engineering drawingEngineering drawing
Engineering drawing
 
2015, INNO company presentation, TOOLS FOR ARCHITECTS
2015, INNO company presentation, TOOLS FOR ARCHITECTS2015, INNO company presentation, TOOLS FOR ARCHITECTS
2015, INNO company presentation, TOOLS FOR ARCHITECTS
 
Kedua 2002
Kedua 2002Kedua 2002
Kedua 2002
 
Third grade room redesign
Third grade room redesignThird grade room redesign
Third grade room redesign
 
Engineering drawing 1 UniKL LDD 10303
Engineering drawing  1 UniKL LDD 10303Engineering drawing  1 UniKL LDD 10303
Engineering drawing 1 UniKL LDD 10303
 
Engineering Drawing basics.ppt
Engineering Drawing basics.pptEngineering Drawing basics.ppt
Engineering Drawing basics.ppt
 
The architect s_scale_11
The architect s_scale_11The architect s_scale_11
The architect s_scale_11
 
Structural analysis & design i
Structural analysis & design iStructural analysis & design i
Structural analysis & design i
 
Engineering Drawing : Class 02
Engineering Drawing : Class 02Engineering Drawing : Class 02
Engineering Drawing : Class 02
 
Engineering Drawing: Chapter 13 roles of engineering drawing
Engineering Drawing: Chapter 13  roles of engineering drawingEngineering Drawing: Chapter 13  roles of engineering drawing
Engineering Drawing: Chapter 13 roles of engineering drawing
 
Engineering drawing & graphics
Engineering drawing & graphicsEngineering drawing & graphics
Engineering drawing & graphics
 
Engineering Drawing: Chapter 02 using drawing tools
Engineering Drawing: Chapter 02 using drawing toolsEngineering Drawing: Chapter 02 using drawing tools
Engineering Drawing: Chapter 02 using drawing tools
 
Chapter 01 introduction final
Chapter 01 introduction finalChapter 01 introduction final
Chapter 01 introduction final
 
Introduction to Engineering drawing and Graphics
Introduction to Engineering drawing and GraphicsIntroduction to Engineering drawing and Graphics
Introduction to Engineering drawing and Graphics
 
Engineering Drawing : Class 01
Engineering Drawing : Class 01Engineering Drawing : Class 01
Engineering Drawing : Class 01
 
AR101 -POLIBRIGED ( PERTOLONGAN CEMAS)
AR101 -POLIBRIGED ( PERTOLONGAN CEMAS)AR101 -POLIBRIGED ( PERTOLONGAN CEMAS)
AR101 -POLIBRIGED ( PERTOLONGAN CEMAS)
 
Chapter 01 introduction
Chapter 01 introductionChapter 01 introduction
Chapter 01 introduction
 
Dimensioning rules in engineering drawing
Dimensioning rules in engineering drawingDimensioning rules in engineering drawing
Dimensioning rules in engineering drawing
 
Engineering drawing-course-book
Engineering drawing-course-bookEngineering drawing-course-book
Engineering drawing-course-book
 
Engineering drawing for beginners
Engineering drawing for beginnersEngineering drawing for beginners
Engineering drawing for beginners
 

Semelhante a Introduction to engineering drawing

GE2221-Engineering-Graphics_Course-Materials.pptx
GE2221-Engineering-Graphics_Course-Materials.pptxGE2221-Engineering-Graphics_Course-Materials.pptx
GE2221-Engineering-Graphics_Course-Materials.pptx
karthiksmp
 
BASIC ENGINEERING DRAWING.ppt
BASIC ENGINEERING DRAWING.pptBASIC ENGINEERING DRAWING.ppt
BASIC ENGINEERING DRAWING.ppt
JMAK2
 
Dimensioning, scales, lines and multiple projections
Dimensioning, scales, lines and multiple projectionsDimensioning, scales, lines and multiple projections
Dimensioning, scales, lines and multiple projections
Akash Patel
 

Semelhante a Introduction to engineering drawing (20)

Drawing reading and measurements
Drawing reading and measurementsDrawing reading and measurements
Drawing reading and measurements
 
INTERPRET DRAWING AND PLANS Carpentry.pptx
INTERPRET   DRAWING AND PLANS Carpentry.pptxINTERPRET   DRAWING AND PLANS Carpentry.pptx
INTERPRET DRAWING AND PLANS Carpentry.pptx
 
GE2221-Engineering-Graphics_Course-Materials.pptx
GE2221-Engineering-Graphics_Course-Materials.pptxGE2221-Engineering-Graphics_Course-Materials.pptx
GE2221-Engineering-Graphics_Course-Materials.pptx
 
engineering_drawing.ppt
engineering_drawing.pptengineering_drawing.ppt
engineering_drawing.ppt
 
BASIC ENGINEERING DRAWING.ppt
BASIC ENGINEERING DRAWING.pptBASIC ENGINEERING DRAWING.ppt
BASIC ENGINEERING DRAWING.ppt
 
AutoCAD Viva voce.pdf
AutoCAD Viva voce.pdfAutoCAD Viva voce.pdf
AutoCAD Viva voce.pdf
 
Engineering Graphics PPT.pdf
Engineering Graphics PPT.pdfEngineering Graphics PPT.pdf
Engineering Graphics PPT.pdf
 
Engineering graphics
Engineering graphicsEngineering graphics
Engineering graphics
 
Ed ass 2013
Ed ass 2013Ed ass 2013
Ed ass 2013
 
Dimensioning, scales, lines and multiple projections
Dimensioning, scales, lines and multiple projectionsDimensioning, scales, lines and multiple projections
Dimensioning, scales, lines and multiple projections
 
Blueprint reading
Blueprint readingBlueprint reading
Blueprint reading
 
Chapter 2 start
Chapter 2 startChapter 2 start
Chapter 2 start
 
mechanical engineering drawing
mechanical engineering drawing mechanical engineering drawing
mechanical engineering drawing
 
Engineering Drawing
Engineering DrawingEngineering Drawing
Engineering Drawing
 
Engineering drawing.edited
Engineering drawing.editedEngineering drawing.edited
Engineering drawing.edited
 
Lecture_Introduction to Technical Drawing (5th April).ppt
Lecture_Introduction to Technical Drawing (5th April).pptLecture_Introduction to Technical Drawing (5th April).ppt
Lecture_Introduction to Technical Drawing (5th April).ppt
 
CAD Exp 1.pdf
CAD Exp 1.pdfCAD Exp 1.pdf
CAD Exp 1.pdf
 
CAD Exp 1 (1).pdf
CAD Exp 1 (1).pdfCAD Exp 1 (1).pdf
CAD Exp 1 (1).pdf
 
Engineering Graphics - Introduction PPT
Engineering Graphics - Introduction PPTEngineering Graphics - Introduction PPT
Engineering Graphics - Introduction PPT
 
drafting notes.pdf
drafting notes.pdfdrafting notes.pdf
drafting notes.pdf
 

Último

Standard vs Custom Battery Packs - Decoding the Power Play
Standard vs Custom Battery Packs - Decoding the Power PlayStandard vs Custom Battery Packs - Decoding the Power Play
Standard vs Custom Battery Packs - Decoding the Power Play
Epec Engineered Technologies
 
Cara Menggugurkan Sperma Yang Masuk Rahim Biyar Tidak Hamil
Cara Menggugurkan Sperma Yang Masuk Rahim Biyar Tidak HamilCara Menggugurkan Sperma Yang Masuk Rahim Biyar Tidak Hamil
Cara Menggugurkan Sperma Yang Masuk Rahim Biyar Tidak Hamil
Cara Menggugurkan Kandungan 087776558899
 
XXXXXXXXXXXXXXXXXXXXXXXXXXXXXXXXXXXXXXXXXXXXXXXXXXXX
XXXXXXXXXXXXXXXXXXXXXXXXXXXXXXXXXXXXXXXXXXXXXXXXXXXXXXXXXXXXXXXXXXXXXXXXXXXXXXXXXXXXXXXXXXXXXXXXXXXXXXXX
XXXXXXXXXXXXXXXXXXXXXXXXXXXXXXXXXXXXXXXXXXXXXXXXXXXX
ssuser89054b
 
Integrated Test Rig For HTFE-25 - Neometrix
Integrated Test Rig For HTFE-25 - NeometrixIntegrated Test Rig For HTFE-25 - Neometrix
Integrated Test Rig For HTFE-25 - Neometrix
Neometrix_Engineering_Pvt_Ltd
 
"Lesotho Leaps Forward: A Chronicle of Transformative Developments"
"Lesotho Leaps Forward: A Chronicle of Transformative Developments""Lesotho Leaps Forward: A Chronicle of Transformative Developments"
"Lesotho Leaps Forward: A Chronicle of Transformative Developments"
mphochane1998
 

Último (20)

Online food ordering system project report.pdf
Online food ordering system project report.pdfOnline food ordering system project report.pdf
Online food ordering system project report.pdf
 
Moment Distribution Method For Btech Civil
Moment Distribution Method For Btech CivilMoment Distribution Method For Btech Civil
Moment Distribution Method For Btech Civil
 
Standard vs Custom Battery Packs - Decoding the Power Play
Standard vs Custom Battery Packs - Decoding the Power PlayStandard vs Custom Battery Packs - Decoding the Power Play
Standard vs Custom Battery Packs - Decoding the Power Play
 
Hostel management system project report..pdf
Hostel management system project report..pdfHostel management system project report..pdf
Hostel management system project report..pdf
 
Engineering Drawing focus on projection of planes
Engineering Drawing focus on projection of planesEngineering Drawing focus on projection of planes
Engineering Drawing focus on projection of planes
 
kiln thermal load.pptx kiln tgermal load
kiln thermal load.pptx kiln tgermal loadkiln thermal load.pptx kiln tgermal load
kiln thermal load.pptx kiln tgermal load
 
Wadi Rum luxhotel lodge Analysis case study.pptx
Wadi Rum luxhotel lodge Analysis case study.pptxWadi Rum luxhotel lodge Analysis case study.pptx
Wadi Rum luxhotel lodge Analysis case study.pptx
 
Computer Networks Basics of Network Devices
Computer Networks  Basics of Network DevicesComputer Networks  Basics of Network Devices
Computer Networks Basics of Network Devices
 
COST-EFFETIVE and Energy Efficient BUILDINGS ptx
COST-EFFETIVE  and Energy Efficient BUILDINGS ptxCOST-EFFETIVE  and Energy Efficient BUILDINGS ptx
COST-EFFETIVE and Energy Efficient BUILDINGS ptx
 
FEA Based Level 3 Assessment of Deformed Tanks with Fluid Induced Loads
FEA Based Level 3 Assessment of Deformed Tanks with Fluid Induced LoadsFEA Based Level 3 Assessment of Deformed Tanks with Fluid Induced Loads
FEA Based Level 3 Assessment of Deformed Tanks with Fluid Induced Loads
 
A CASE STUDY ON CERAMIC INDUSTRY OF BANGLADESH.pptx
A CASE STUDY ON CERAMIC INDUSTRY OF BANGLADESH.pptxA CASE STUDY ON CERAMIC INDUSTRY OF BANGLADESH.pptx
A CASE STUDY ON CERAMIC INDUSTRY OF BANGLADESH.pptx
 
Unit 4_Part 1 CSE2001 Exception Handling and Function Template and Class Temp...
Unit 4_Part 1 CSE2001 Exception Handling and Function Template and Class Temp...Unit 4_Part 1 CSE2001 Exception Handling and Function Template and Class Temp...
Unit 4_Part 1 CSE2001 Exception Handling and Function Template and Class Temp...
 
Employee leave management system project.
Employee leave management system project.Employee leave management system project.
Employee leave management system project.
 
Unleashing the Power of the SORA AI lastest leap
Unleashing the Power of the SORA AI lastest leapUnleashing the Power of the SORA AI lastest leap
Unleashing the Power of the SORA AI lastest leap
 
Cara Menggugurkan Sperma Yang Masuk Rahim Biyar Tidak Hamil
Cara Menggugurkan Sperma Yang Masuk Rahim Biyar Tidak HamilCara Menggugurkan Sperma Yang Masuk Rahim Biyar Tidak Hamil
Cara Menggugurkan Sperma Yang Masuk Rahim Biyar Tidak Hamil
 
Block diagram reduction techniques in control systems.ppt
Block diagram reduction techniques in control systems.pptBlock diagram reduction techniques in control systems.ppt
Block diagram reduction techniques in control systems.ppt
 
XXXXXXXXXXXXXXXXXXXXXXXXXXXXXXXXXXXXXXXXXXXXXXXXXXXX
XXXXXXXXXXXXXXXXXXXXXXXXXXXXXXXXXXXXXXXXXXXXXXXXXXXXXXXXXXXXXXXXXXXXXXXXXXXXXXXXXXXXXXXXXXXXXXXXXXXXXXXX
XXXXXXXXXXXXXXXXXXXXXXXXXXXXXXXXXXXXXXXXXXXXXXXXXXXX
 
School management system project Report.pdf
School management system project Report.pdfSchool management system project Report.pdf
School management system project Report.pdf
 
Integrated Test Rig For HTFE-25 - Neometrix
Integrated Test Rig For HTFE-25 - NeometrixIntegrated Test Rig For HTFE-25 - Neometrix
Integrated Test Rig For HTFE-25 - Neometrix
 
"Lesotho Leaps Forward: A Chronicle of Transformative Developments"
"Lesotho Leaps Forward: A Chronicle of Transformative Developments""Lesotho Leaps Forward: A Chronicle of Transformative Developments"
"Lesotho Leaps Forward: A Chronicle of Transformative Developments"
 

Introduction to engineering drawing

  • 1. 21ST MAY 2015 INTRODUCTION TO ENGINEERING DRAWING
  • 2. G R O U P M E M B E R S : 1 . M D . R O K I B U L H A Q U E ( 2 0 1 4 3 3 4 0 6 2 ) 2 . S H A R I F M U K T A D I R H O S S A I N C H O W D H U R Y ( 2 0 1 4 3 3 4 0 6 1 ) 3 . S A T Y E N M A Z U M D E R ( 2 0 1 4 3 3 4 0 6 3 ) Welcome to Presentation of Group “P”
  • 3. Objectives  To get primary concepts of Engineering Drawing.  To know the necessity of Engineering Drawing.  To know about the equipments used in Engineering Drawing.  To know various signs, lines and dimensions.  To know about Orthogonal view.  To know about Sectional view.  To know about Auxiliary view.
  • 4. Introductions: Drawing is the basic from of communication in technology and Industry. It expresses ideas and conveys specific information by means on geometric shapes lines and dimensions. It is a universal language that improves communications and eliminates costly errors of interpretation with drawing conventions. Engineering drawing is the main method of communication between all parsons concerned with the design and manufacturing of components.
  • 5. What is Engineering Drawing?? A graphical language to convey graphically the ideas and information necessary for the construction or analysis of machines, structures, or systems by geometric shapes lines and dimensions.
  • 6. Equipments for Engineering Drawing •Drawing Paper •T-Squares •Set-Squares •Pencil Sharpeners •Erasers •Pencil Compasses •Dividers •Drawing Pencil •Scotch Tape Fig. Equipments for Engineering Drawing
  • 7. Lines Used in Drawing In engineering drawing there are used different kinds of line. Some of them are given- Fig. Lines
  • 8. Type of Graphical Projection Today We are describing three types of projection 1. Orthographic View. 2. Sectional View. 3. Auxiliary View
  • 9. Orthographic View Orthographic projection of a method of representing the exact shape of an object by dropping perpendiculars from two or more sides of the objects to planes, generally at right angles to each other, collectively, the views on these planes described the object completely. Fig. Orthographic View (1)
  • 10. In orthographic projection, three views are normally drawn. The three chosen views may be any of the six hypothetical faces of the object. Normally we use; •Front View •Top View •Right hand side view Fig. Orthographic View (2)
  • 11. Sectional View Sectional views, commonly called sections, are used to show interior detail that is too complicated to be shown clearly and dimensioned by the traditional orthographic views and hidden lines. Fig. Sectional view
  • 12. Overview of Sectional Projection • Sections are used to show interior details clearly. • A cutting-plane line shows where object was cut to obtain the section view. • Cross hatching in the section view shows the solid surface of the object which were cut through to produce the section. • Section views may replace standard views.
  • 13. Fig. Symbolic section lining Fig. Sectional Cutting plane line Symbolic section lining
  • 14. Auxiliary View Auxiliary view is a orthographic view which is used to show the true shape of features that are not parallel to any of the principal planes of projection. •Auxiliary views are orthographic views taken from a direction of sight other than top, front, right side, left side, bottom, or rear.
  • 15. Purpose of Auxiliary View Purposes of Auxiliary Views •Show the true size and shape of a surface. •Show the true angle between two surface. •To give clear view of that plane which is not parallel the common planes.
  • 16. Thank you That brings us to the end of our presentation, Thank you for your time.