
Recomendados
Mais conteúdo relacionado
Mais procurados
Presonus studiolive24.4.2 manual_en_1
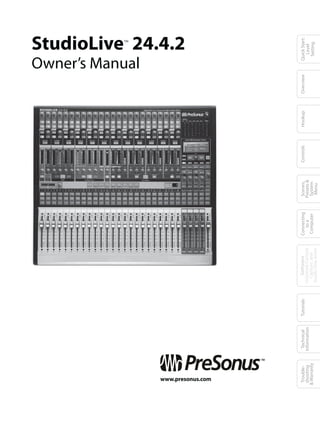
- 1. ™ Owner’s Manual StudioLive 24.4.2 www.presonus.com ™ Trouble- Technical Tutorials Software Connecting Scenes, Controls Hookup Overview Quick Start: shooting Information Universal Control, to a Presets & Level & Warranty Capture, and Computer System Setting Studio One Artist Menu
- 2. 0 Mandatory Stuff PreSonus StudioLive™ 24.4.2 Owner’s Manual Table of Contents 02 0.1 Important Safety Instructions 4.7.2 Talkback System 45 Quick Start: Quick Start: 0.1 Important Safety Instructions 0.2 Table of Contents Setting Setting Level Level 4.7.3 2 Track In 46 The exclamation point within an equilateral triangle is intended 12. Use only with the cart, stand, tripod, bracket, or table 4.7.4 Solo Bus 47 to alert the user to the presence of important operating and specified by the manufacturer or sold with this apparatus. StudioLive 24.4.2 4.7.5 Monitor Bus 48 maintenance (servicing) instructions in this manual. When a cart is used, use caution when moving the cart/ 1.0 Quick Start 5 4.8 Digital Effects | Master Control 49 apparatus combination to avoid injury from tip-over. Overview Overview The lightning flash with arrowhead symbol within an equilateral 4.8.1 The Digital FX (Effects) Menu 49 triangle is intended to alert the user to the presence of 13. Unplug this apparatus during lightning storms or 2.0 Overview 7 4.8.2 Digital Effects Library 51 uninsulated “dangerous” voltage within the product’s enclosure that may when unused for long periods of time. 2.1 Introduction 7 be of sufficient magnitude to constitute a risk of electric shock to humans. 14. Servicing is required when the apparatus has been damaged in 2.2 Summary of StudioLive™ 24.4.2 Hardware 5.0 Scenes, Presets, and the CAUTION: TO REDUCE THE RISK OF ELECTRIC SHOCK, DO NOT any way, such as if a power-supply cord or plug is damaged; or Features 8 System Menu 52 Hookup Hookup REMOVE THE COVER. NO USER-SERVICEABLE PARTS INSIDE. REFER liquid has been spilled, or objects have fallen, into the apparatus; 2.3 Summary of Capture™ Software Features 9 5.1 Creating and Recalling a Scene 52 SERVICING TO QUALIFIED PERSONNEL. or if the apparatus has been exposed to rain or moisture, does not 2.4 Summary of StudioOne™ Artist Software 5.2 Saving and Loading Channel Presets 55 operate normally, or has been dropped. All PreSonus products in Features 9 CAUTION: To reduce the risk of electric shock, do not expose this 5.2.1 Channel Presets Library 56 the USA should be serviced at the PreSonus factory in Baton Rouge, 2.5 Summary of Virtual StudioLive™ Software appliance to rain and moisture. The apparatus shall not be 5.3 Graphic Equalizers 57 Louisiana. If your StudioLive requires a repair, contact techsupport@ Features 10 Controls Controls exposed to dripping or splashing liquids and no object filled with presonus.com to arrange for a return-authorization number. 2.6 What is in the Box 11 5.4 System Menu 59 liquids, such as vases, shall be placed on the apparatus. Customers outside the USA should contact their local distributor. Your CAUTION: These service instructions are for use by qualified distributor’s contact information is available at www.presonus.com. 3.0 Hookup 12 6.0 Connecting to a Computer 62 service personnel only. To reduce the risk of electric shock, do not 6.1 System Requirements 62 15. The apparatus shall be connected to a Mains power outlet 3.1 Rear-Panel Connections 12 perform any servicing other than that contained in the operation Presets & Presets & 6.2 Installation for Windows 63 Scenes, Scenes, with a protective grounding/earthing connection. System System 3.2 Basic Hookup Diagram 17 Menu Menu instructions. Repairs must be performed by qualified service personnel. 16. Where the Mains plug or an appliance coupler 3.3 Typical Band Hookup 18 6.3 Installation for Mac OS X 64 1. Read these instructions. 6.4 Using the StudioLive as an is used as the disconnect device, the disconnect 3.4 Typical Church Hookup 20 2. Keep these instructions. device shall remain readily operable. Audio Interface 65 3.5 Typical Recording Hookup 22 6.4.1 Using the StudioLive with Popular Audio Connecting Connecting CXomputer Computer 3. Heed all warnings. Applications 65 4.0 Controls 24 to a to a EU Directives on the Protection of the 6.4.2 FireWire Sends and Returns 66 4. Follow all instructions. Environment and Other Euro Stuff 4.1 The Fat Channel 24 6.4.3 Using Plug-In Effects As Inserts 68 5. Do not use this apparatus near water. 4.1.1 Select Buttons, Meters and the Fat Channel 24 RoHS This product is compliant with the EU Directive 2002/95/ 6.4.4 Advanced WDM Features (PC only) 69 4.1.2 What You Can Process with the Fat Channel Universal Control, 6. Clean only with dry a cloth. EG for the Restriction of the use of Certain Hazardous Substances in Universal Control, Studio One Artist Studio One Artist and FireWire Sends 25 6.4.5 Configuring the StudioLive For Core Audio Capture, and Capture, and Electrical and Electronic Equipment. No lead (Pb), cadmium (Cd), Software Software 7. Do not block any ventilation openings. Install in (Mac Only) 70 mercury (Hg), hexavalent chromium (Cr+6), PBB or PBDE is intentionally 4.1.3 Fat Channel: Dynamics Processing and EQ 26 accordance with the manufacturer’s instructions. added to this device. Any traces of impurities of these substances 4.1.4 Fat Channel Panning and Stereo Link 35 7.0 Software: Universal Control, 8. Do not install near any heat sources, such as radiators, heat registers, contained in the parts are below the RoHS specified threshold levels. 4.1.5 Fat Channel: Output Assignments 36 Capture, and Studio One stoves, or other apparatus (including amplifiers) that produce heat. Artist DAW 72 REACh This product is compliant with the European Union Directive 4.1.6 Copying, Loading, and Storing Fat Channel 9. Do not defeat the safety purpose of the polarized or grounding- EC1907/206 for the Registration, Evaluation, Authorization, and Settings 36 7.1 Universal Control 72 Tutorials Tutorials type plug. A polarized plug has two blades, with one wider than Restriction of chemicals (REACh) and contains none or less than 0.1% of 4.2 Metering 37 7.1.1 Universal Control: Launch Window 73 the other. A grounding-type plug has two blades and a third the chemicals listed as hazardous chemicals in the REACh regulation. 4.2.1 StudioLive Metering Controls 37 grounding prong. The wide blade and the third prong are provided 7.2 VSL: Virtual Studio Live 76 WEEE As with the disposal of all old electrical and electronic 4.3 Input Channel Strip 38 for your safety. If the provided plug does not fit into your outlet, 7.2.1 VSL: Browser 77 equipment, this product is not to be treated as 4.3.1 Input Channel Controls 38 Information consult an electrician for replacement of the obsolete outlet. 7.2.2 VSL: Overview Tab 80 Technical Information regular household waste. Instead it shall be handed 4.4 Aux Sends 40 Technical 10. Protect the power cord from being walked on or pinched, over to the applicable collection point for the 7.2.3 VSL: Channel Tab 82 4.4.1 Analog Aux Send Controls 40 particularly at plugs, convenience receptacles, and recycling of electrical and electronic equipment. 7.2.4 Loading Scenes and Presets from VSL 82 4.4.2 Internal Aux Send Controls 42 the point where they exit from the apparatus. 7.2.5 VSL: GEQ Tab 84 CE This product complies with the European Union Council Directives 4.5 Subgroups 43 7.2.6 VSL: Setup Tab 85 & Warranty 11. Use only attachments/accessories specified by PreSonus. and Standards relating to electromagnetic compatibility (EMC shooting Trouble- 4.5.1 Subgroup Controls 43 & Warranty shooting Trouble- Directive 89/336/EEC) and the Low Voltage Directive (73/23/EEC). 7.2.7 Enabling Lockout Mode 86 4.6 Main Output Bus 44 7.2.8 Remotely Controlling StudioLive with VSL 87 4.7 Master Section 45 7.3 Capture 88 4.7.1 Aux Inputs A and B 45 2 3
- 3. 02 Table of Contents PreSonus StudioLive™ 24.4.2 Owner’s Manual Quick Start: Level Setting 1 7.0 Software: Universal Control, 8.4.2 Effects Group 147 Quick Start: Quick Start: 1.0 Quick Start SettIng Setting Capture, and Studio One 8.5 Aux Bus Mixing 149 Level Level Artist DAW Continued 8.5.1 Monitor Mixing 149 Before you begin, there are a few general rules of 8.5.2 Effects Processing 150 thumb that we recommend you follow: 7.3.1 What is Capture? 88 8.6 Digital Effects 152 Always turn the Main fader and both the Monitor and Phones knobs 7.3.2 Start Page 89 Overview Overview 8.6.1 Reverb 152 in the Monitor section down before making connections. Before 7.3.3 The Session Page 90 8.6.2 Delay 153 plugging or unplugging a microphone while other channels are 7.3.4 The Edit Window 92 active, mute the channel to which you are connecting. 8.7 Level-Setting Procedure in Detail 153 7.3.5 Getting Started in Capture 93 8.8 The Solo Bus 154 Your faders should be set on or near the “U” mark whenever possible. The “U” 7.3.6 Recording in Capture 96 8.8.1 Using the Solo Bus for Monitoring 154 indicates unity gain, meaning the signal is neither boosted nor attenuated. If the Hookup Hookup 7.3.7 Editing in Capture 97 main output of your StudioLive is too high or too low when your faders are at or 8.8.2 Destructive Soloing 155 7.3.8 Capture Session Navigation 100 near unity, you can use the output-level knob on the rear panel of the StudioLive 8.8.3 Using Solo in Place (SIP) to Set Up a Mix 155 to adjust the level up or down until you have achieved the optimal volume. 7.3.9 Mixing in Capture 101 8.9 Cascading Two StudioLive 24.4.2s 156 7.3.10 Capture Key Commands 106 Do not allow your inputs to clip. Watch the level meters; when the LEDs near 8.9.1 Configuring Multiple Units 156 Controls Controls 7.3.11 Capture Applications and Scenarios 108 the Clip mark, the top LED will illuminate, indicating that the analog-to-digital 8.9.2 Aux Mixing with Cascaded Mixers 157 converters are in danger of being overdriven. Overdriving the converters 7.4 Studio One Artist Quick Start 112 8.9.3 Internal Effects Buses 157 will cause digital distortion, which sounds terrible. The XMAX™ preamps 7.4.1 Installation and Authorization 112 8.9.4 Subgroups: To Merge or Not to Merge 158 in your StudioLive provide plenty of headroom; take advantage of it. 7.4.2 Enabling the Audio Driver 115 8.9.5 Scene Store and Recall 158 Your P.A. and studio equipment should be powered on in the following order: 7.4.3 Configuring Your MIDI Devices 115 Presets & Presets & Scenes, Scenes, System System Menu Menu 8.9.6 Copy and Load 158 7.4.4 Creating a New Song 118 A. Sound sources (keyboards, direct boxes, microphones, 8.9.7 Local Versus Merged Buses and Inputs 159 etc.) connected to the StudioLive inputs 7.4.5 Creating Audio Tracks 120 7.4.6 Creating MIDI Tracks 121 9.0 Technical Information 160 B. StudioLive 24.4.2 Connecting Connecting 7.4.7 Adding Virtual Instruments and Plug-in Effects Computer computer to Your Song 122 9.1 Specifications 160 C. Computer (if applicable) to a to a 9.2 Channel Presets 164 D. Power amplifiers or powered monitors 8.0 Tutorials 125 9.3 Digital Effects Library 165 When it’s time to power down, your system should 8.1 Microphone Types 125 9.4 Block Diagram 166 be turned off in the reverse order. Universal Control, Universal Control, Studio One Artist Studio One Artist 8.1.1 Condenser 125 Capture, and 10.0 Troubleshooting and Capture, and Now that you know what not to do, let’s get some audio going! Software Software 8.1.2 Dynamic 125 Warranty 170 8.1.3 USB Microphones and Other Types 125 8.1.4 Microphone Placement 126 10.1 Troubleshooting 170 10.2 PreSonus StudioLive 24.4.2 1 8.2 A Brief Tutorial on Dynamics Processing 129 Limited Warranty 172 8.2.1 Common Questions Regarding Dynamics Processing 129 2 Tutorials Tutorials 8.2.2 Types of Dynamic Processing 130 8.2.3 Compression Settings: Some Starting Points 135 2 Information 8.2.4 Corresponding Frequencies for Equal-Tempered Technical Information Technical Scale 137 8.3 Equalizers 138 1. Grab a microphone and a mic cable and plug them 8.3.1 What is an EQ? 138 into the StudioLive’s Channel 1 mic input. 8.3.2 Equalization Settings: How to Find the Best & Warranty and Leave the Rest 140 shooting Trouble- & Warranty 2. Connect the Main Outs (TRS or XLR) of your Studio Live shooting Trouble- 8.3.3 General EQ Suggestions 143 to your power amplifier or powered monitors. 8.4 Subgroup Mixing 146 8.4.1 Instrument Groups 146 4 5
- 4. 1 Quick Start: Level Setting PreSonus StudioLive™ 24.4.2 Owner’s Manual Overview 2 Introduction 2.1 Quick Start: Quick Start: 3. If you’re using passive speakers, connect them to 2.0 Overview Setting Setting Level Level your power amplifier using speaker cable. 2.1 Introduction 4. Bring down all the faders on your StudioLive to the ∞ setting. Make sure that the Trim knob on Channel 1 is all the way counter-clockwise. Overview Overview 5. Plug your StudioLive into a power outlet and turn it on. 6. If your microphone requires phantom power, engage the 48V button on Channel 1 of your StudioLive. Hookup Hookup 7. Turn on your amplifier or powered monitors. 8. Press the Input button in the Meter section. Controls Controls 9. Speak or sing into your microphone at about the same volume as during the upcoming performance. Turn the trim knob on Channel 1 clockwise while watching the first meter in the Fat Channel. Adjust the Channel 1 trim knob Presets & Presets & Scenes, Scenes, until a little more than half of the green LEDs are lighting up. The System System Menu Menu red LED at the top of the meter should never light up! 10. Press the Select button on Channel 1 and move the Channel 1 fader up until it reaches "U" (unity gain). Connecting Connecting Computer Computer to a to a 11. Press the Main button in the Assign section of the Fat Channel so that it is illuminated. This routes the channel to the main output bus. Thank you for purchasing the PreSonus StudioLive™ 24.4.2. PreSonus Audio Electronics has designed the StudioLive utilizing high-grade components to 12. Bring up the Main fader until you can comfortably listen Universal Control, ensure optimum performance that will last a lifetime. Loaded with 24 high- Universal Control, Studio One Artist Studio One Artist to your microphone through your speakers. Capture, and Capture, and headroom, XMAX™ microphone preamplifiers; a built-in 32x26 FireWire recording Software Software and playback engine; Fat Channel processing with 4-band EQs, compressors, 13. With Channel 1 selected, you can use the Fat Channel limiters, and expander/gates; DSP effects; 10 aux buses; 4 subgroups; extensive to add dynamics processing and EQ. LED metering; mixer save/recall; channel-strip save/recall/copy/paste; For more detailed level-setting procedures and talkback; and more, StudioLive breaks new boundaries for music performance techniques, refer to Section 8.7 on page 144. and production. All you need is a compatible computer with a FireWire connection, a few microphones and cables, speakers, and your instruments, Tutorials Tutorials 5 and you are ready to record in the studio or in front of a live audience! 9 We encourage you to contact us at 1+225-216-7887 (in the U.S. Central Time Zone) with any questions or comments you may have regarding the Information PreSonus StudioLive. PreSonus Audio Electronics is committed to constant Technical 6 Information Technical product improvement, and we value your suggestions highly. We believe 8 the best way to achieve our goal of constant product improvement is by 13 listening to the real experts, our valued customers. We appreciate the 11 support you have shown us through the purchase of this product. & Warranty shooting Trouble- & Warranty We suggest that you use this manual to familiarize yourself with shooting Trouble- the features, applications, and correct connection procedures for 10 12 your StudioLive before trying to connect it to a computer. This will 4 help you avoid problems during installation and setup. 6 7
- 5. 2 Overview PreSonus StudioLive™ 24.4.2 Owner’s Manual Overview 2 2.2 Summary of StudioLive 24.4.2 hardware features Summary of Capture software features 2.3 2.3 Summary of Capture™ software features Quick Start: Quick Start: Thank you, once again, for buying our product. We are Setting Setting Level Level confident that you will enjoy your StudioLive! Included with your StudioLive is Capture, a digital-audio multitracking The StudioLive™ 24.4.2 performance and recording digital mixer is a fully application designed to make recording quick and easy to set up and loaded professional digital mixer, combined with a complete 32x26 FireWire operate. Perfect for live recording and for mixing your audio in real time to a recording system. Racks of processing effects—including compressor, limiter, stereo audio file, Capture software was designed to interface perfectly with Overview Overview gate, four-band parametric EQ, reverb and delay—are available on every StudioLive 24.4.2, allowing instant setup and recording of performances. input channel, subgroup, aux, and main mix, delivering total control in a In addition to recording the 24 channels of the StudioLive 24.4.2, Capture compact, rugged steel chassis. The StudioLive 24.4.2 includes Capture™, a also allows you to record a single stereo track from the StudioLive’s main fully integrated live recording software by PreSonus, allowing you to record output, one pair of subgroup outputs, or a pair of aux sends, giving you every performance and rehearsal with a few clicks of your mouse. the option to record your main mix or create a separate recording mix. Hookup Hookup Intuitive, flexible, and powerful, StudioLive revolutionizes music You can arm all 26 tracks to record with the click of a single button. production, opening endless creative possibilities. Please consult the Capture user manual for complete instructions. 2.2 Summary of StudioLive 24.4.2 hardware features 26x26 multitrack recording application 24-bit/48 kHz sampling rate Record with two mouse clicks Controls Controls 24 Class A XMAX microphone preamplifiers Essential editing suite (copy, cut, paste, splice, resize) 24 line-level inputs Peak LED-style meter bridge with clip indicators 10 auxiliary buses Marker placement and recall Presets & Presets & Scenes, Scenes, System System Menu Menu 4 subgroups Export between marker High-definition analog-to-digital converters (118 dB dynamic range) Record stereo mix from StudioLive mixer Unlimited-headroom, 32-bit floating-point, digital mixing and effects processing Import/export .wav, .aiff, or OpenTL files Connecting Connecting Computer Computer 32x26 FireWire digital recording interface with two FireWire 400 (IEEE 1394) ports 2.4 Summary of StudioOne™ Artist software features to a to a Scene automation with load/save/recall of all settings All PreSonus audio interfaces include PreSonus Studio One Artist recording Fat Channel with: software, which comes with over 4 GB of plug-ins, loops, and samples, giving you everything you need for music recording and production. The Studio Universal Control, High-pass filter Universal Control, Studio One Artist Studio One Artist One Artist Quick Start Guide is located in Section 4.1 of this manual. You will Capture, and Capture, and Compressor Software Software find a complete user manual on the Studio One Artist installation DVD. Limiter Expander/Gate Unlimited track count, inserts, and sends 4-band fully parametric EQ 20 high-quality native plug-ins: amp modeling (Ampire), delay (Analog Delay, Pan Beat Delay), distortions (Redlight Dist), dynamics processing (Channel Strip, Load/save Compressor, Gate, Expander, Limiter, Tricomp), equalizer (Channel Strip, Pro EQ), Tutorials Tutorials 2 master DSP effects (reverb and delay with Load and Save) modulation (Autofilter, Chorus, Flange, Phaser, X-Trem), reverb (MixVerb, Room Reverb), and utility (Binaural Pan, Mixtool, Phase Meter, Spectrum Meter, Tuner) 100 mm long-throw faders Over 4 GB of loops, samples, and instruments, featuring: Presence Military-grade quick-touch buttons virtual sample player, Impact virtual drum machine, SampleOne virtual Information Technical Information Fast-acting LED meters sampler, Mojito virtual analog-modeled subtractive synthesizer Technical Talkback communication system Innovative and intuitive MIDI mapping Rugged steel chassis Powerful drag-and-drop functionality for faster workflow & Warranty PreSonus Capture™ multitrack-recording software Mac OS X® and Windows® compatible shooting Trouble- & Warranty shooting Trouble- Compatible with Cubase, Digital Performer, Logic, Nuendo, Sonar, Studio One, and others PC and Mac® compatible 8 9
- 6. 2 Overview PreSonus StudioLive™ 24.4.2 Owner’s Manual Overview 2 2.5 Summary of Virtual StudioLive software features What is in the box 2.6 2.5 Summary of Virtual StudioLive software features 2.6 What is in the box Quick Start: Quick Start: Setting Setting Level Level The Virtual StudioLive application is completely integrated with In addition to this manual, your StudioLive package contains the following: your StudioLive 24.4.2. VSL is a highly advanced editor/librarian and control panel. Because of the continuous bidirectional communication PreSonus StudioLive 24.4.2 digital recording and between your StudioLive and VSL, whatever you do on the StudioLive‘s performance mixer Overview Overview control surface will be reflected in VSL and vice versa. Easy drag-and-drop workflow Drag presets directly to channels Drag parts of presets directly to components in the Fat Channel Hookup Hookup Adjust the Fat Channel gate, compressor, and EQ plus the graphic EQ and effects Quickly drop entire Scenes to the mixer for instant recall of all channel, effects, and graphic EQ settings Controls Controls Load effects quickly by simply dragging presets into the GUI Makes StudioLive as easy to use as Studio One Use the mouse to quickly assign channels to multiple buses, mute, solo, etc. Timestamped backups of the entire board Presets & Presets & Scenes, Scenes, System System Menu Menu 6’ (1.8 m) 6-pin-to-6-pin FireWire 400 cable Preset Management 6' (1.8 m) 6-pin-to-9-pin FireWire 400-to-800 cable Store and organize presets on your computer, then transfer them to your mixer for that night’s gig Connecting Connecting Create presets on the road, store them to the mixer, then drag them to Computer Computer your preset pool the next time you’re connected to the computer to a to a Reorder presets in mixer memory; easily order presets IEC power cord to best fit your workflow for the gig Share presets with friends; drag presets out of the browser and Universal Control, email, IM, or disk-swap presets with other StudioLive owners Universal Control, Studio One Artist Studio One Artist Capture, and Capture, and Software Software Mixer Overview See all of the most-used parameters on the mixer at once See the state of all Fat Channel settings at once StudioLive Software Library containing See all aux mixes at once PreSonus StudioLive Artist program DVD plus gigabytes of third-party content See the current effects and parameter settings PreSonus Capture™ CD with demo Sessions Tutorials Tutorials See graphic equalizer settings PreSonus Virtual StudioLive and Universal Control CD Information Technical Information Technical & Warranty shooting Trouble- & Warranty shooting Trouble- 10 11