

Recomendados
Recomendados
Mais conteúdo relacionado
Mais procurados
Mais procurados (20)
Destaque
Destaque (18)
Semelhante a MTM3 Leo Valenzuela
Semelhante a MTM3 Leo Valenzuela (20)
Mais de Nomer Adona
Mais de Nomer Adona (20)
Último
Último (20)
MTM3 Leo Valenzuela
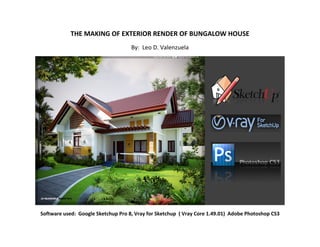
- 1. THE MAKING OF EXTERIOR RENDER OF BUNGALOW HOUSE By: Leo D. Valenzuela Software used: Google Sketchup Pro 8, Vray for Sketchup ( Vray Core 1.49.01) Adobe Photoshop CS3
- 2. MODELING After long hours of 3D modeling, here is the finished model without texture.
- 3. And here is the finished model with texture, most of texture.
- 4. Now that I’m done with modeling and texturing, I can now proceed to setting the lighting in my scene. This is the one of the most important part if you want to achieve a good realistic rendering. I change the face style from “shaded with texture” to “shaded” for me to have a clear view on how the lighting creates shadows in the scene.
- 5. Now I’m satisfied with result of my lighting, I will proceed now to my camera setting. I back my scene to be in a normal view (man’s eye view). I change te face style from “shaded” to “wireframe”. It helps me to see the horizon line (the red line) in the scene. After determining the horizon line, create and save the scene.
- 6. Here is the final scene of this 3d model with texture.
- 7. TEXTURING AND MATERIALS SETTING I will show you the materials setting i used in this model, together I attached texture, diffuse, bump, displacement maps. Window glass setting 1.1 Add reflection layer and add Fresnel map,
- 9. Concrete groove texture setting 1.1 Add reflection layer and add Fresnel map
- 10. Concrete groove texture Bump Map
- 11. Wood Material 1.1 Add reflection layer and add Fresnel map
- 13. VRAY RENDER SETTING My rendering engine is Vray core 1.49.01. This is the render setting. I usually used when it comes to exterior rendering. This setting is based on the default setting. I just change the other parameter.
- 19. RAW RENDER
- 20. POST – PRODUCTION This is my workflow in Post-production and I use Photoshop Cs3. i learned my style by visiting some forums about photo enhancement. I hope this tips and tricks of mine serves as an additional knowledge in your skills in Photoshop. Image below is my rendered image saved in png format .as you can see it has no background.
- 21. I want this image to be my sky background.
- 22. I place the sky background layer behind the rendered image.
- 23. Now adjust the brightness and contrast of your sky background and raw render image. Click the background image layer and hit CTRL+M (curves) just like the image below.
- 24. Now I add some entourage like plants and trees (PNG FORMAT) in render image to become nice the scene and photo realistic image.
- 25. ‘ Right click the layer then go to Layer>Merge Down or hit CTRL+E to combine all layer in Photoshop .
- 26. I want the colors of my image to be more lively , we can now proceed to color balancing. Hit CRTL+B, under tone balance, click the Shadows. Then try to play the colors (this depends on your taste).
- 27. Hit CTRL+M (curves) again to add contrast and brightness in the image
- 28. Adding Vignette on your image adds drama and makes it more photo realistic. There are 2 ways to d this effect. 1st go to Flitter>Distort>Lens Correction… Then you can adjust the amount of vignette effect.
- 29. Don’t give too much Chromatic Aberration effect because it will destroy your rendered image. In this image, below shows my settings in Chromatic Aberration The last part of my post-production. I add frames, and my signature logo for presentation. (optional) you can hit CRTL+M (curve) again if you still want to adjust the brightness and contrast of your image.
- 30. Created by: Leo Dimaano Valenzuela leodvalenzuela@yahoo.com