Word presentation ict1b
•Transferir como PPTX, PDF•
2 gostaram•1,126 visualizações

Microsoft Word is a general-purpose word processing program that offers a variety of features for writing simple documents such as memos and letters. It allows users to insert tables, change font styles and sizes, align text, and format paragraphs. The Word interface includes tabs, groups of commands, and a ribbon to access common formatting and editing tools.

Recomendados
Mais conteúdo relacionado
Mais procurados
Mais procurados (20)
Semelhante a Word presentation ict1b
Semelhante a Word presentation ict1b (20)
Último
Último (20)
Word presentation ict1b
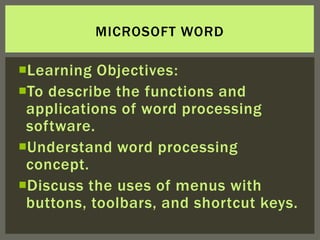
- 1. MICROSOFT WORD Learning Objectives: To describe the functions and applications of word processing software. Understand word processing concept. Discuss the uses of menus with buttons, toolbars, and shortcut keys.
- 2. MICROSOFT WORD • Is a general-purpose word processing program that of fers a variety of features from writing simple documents, such as memos and letters.
- 3. CLICK ON THE START BUTTON, POINT TO ALL PROGRAMS THEN MICROSOFT OFFICE AND CLICK ON MICROSOFT OFFICE WORD 2007 The first screen that you will see, is a new blank document. This is the most important part of the Word window. It's where you'll perform all your work, such as typing data.
- 4. Knowing The Word 2007 Screen Elements... "DISCOVER THE WORD 2007 SCREEN ELEMENTS AND ITS FUNCTIONS"
- 5. TO KNOW THE WORD 2007 SCREEN ELEMENTS Office button: When clicked, this button opens the Office menu, from which you can open, save, print, and exit as well as the Word Options button that enables you to change Word’s default settings. Quick Access Toolbar: A small toolbar next to the Office button contains shortcuts for some of the most common commands such as Save, Undo, and Redo buttons. You also can customize quick access toolbar. Ribbon: A combination of old versions menu bar and toolbar, arranged into a series of tabs ranging from Home through View. Each tab contains buttons, lists, and commands. Name box: Displays the address of the current data where you
- 7. TO KNOW THE WORD 2007 SCREEN ELEMENTS Work area/: This area contains all the data you type. Zoom control: Use to zoom the word screen in or out by dragging the slider. Insertion point: shows where text will appear when you start typing. View button: shows the king of view you want on your screen. Minimize/maximize/button: this button is where you resize the window. Scroll bar: move the screen up and down or left or right to display desired area on the screen. Close button: closes the open application. Close window button: closes the open file while leaving the application active.
- 8. WithWord 2007's user interface is based on the ribbon, which is a bar across the top of the window that contains tabbed pages of commands and icons/buttons. With the Ribbon, it shows you all the most commonly used options needed to perform a particular Word task and you just click on it to take action.
- 9. Here are some important terms related to Word 2007 ribbon: • Ribbon: The whole bar, including all of the tabs. • Office Button: On the far left side of the Ribbon, the Office Button lets you perform tasks that are common across many Office applications. • Quick Access Toolbar: Located on top of the Excel screen beside the Office Button. • Tab: Excel's main tasks are brought together and display all the commands commonly needed. Clicking a tab name once activates the tab.
- 10. Here are some important terms related to Word 2007 Ribbon: • Group: A section of a tab that organizes related command buttons into subtasks. For example, the Home tab has the following groups: Clipboard, Font, Alignment, Number, Styles, Cells, and Editing. • Dialog box launcher: A small icon in the bottom-right corner of a group, from which you can open a dialog box related to that group.
- 11. To understand tabs on the Word 2007 Ribbon • Home: Use this tab when creating, formatting, and editing a word document. • Insert: Use this tab when adding particular elements (including graphics, PivotTables, charts, hyperlinks, and headers and footers) to a document. • Page Layout: Use this tab when preparing a document for printing or reordering graphics on the sheet.
- 12. To understand tabs on the Word 2007 ribbon • Formulas: Use this tab when adding formulas and functions to a spreadsheet or checking a worksheet for formula errors. • Data: Use this tab when importing, querying, outlining, and subtotaling the data placed into a worksheet's data list. • Review: Use this tab when proofing, protecting, and marking up a document for review by others. • View: Use this tab when changing the display of the document area and the data it contains.
- 13. To add options to the Status Bar Right-click the Status Bar to bring up the Customize Status Bar menu. • Click to select the options you want, click again if you do not want the item displayed. • When finished, click anywhere on the document to close the menu To remove options from the Status Bar • Right-click on the status bar and click on any option that you wish to remove from the status bar. • The menu's options are enabled (selected) when a check mark appears next to them and vice- versa.
- 14. To speed up your data entry • Enter key: Pressing the key will enters the data and moves the text down to the next line. • Tab key: Pressing the key will enters the data and moves the text 5 spaces to the left. • Arrow keys: Pressing the key will enters the data and moves the text to the direction of the specific arrow key pressed. • Esc key: Pressing the key will cancels the current data entry.
- 15. "Save a Document? And Backup Copy…" Yes, you can either save the document in your computer hard drive or other device such as handy/flash drive. If you never save the file, you will be unable to view the file in the future. Once saved, you can re-open the file for viewing or editing. Although Word AutoRecover feature may recover your unsaved file, you should never rely on Word AutoRecover feature. Saving your work frequently is a good idea.
- 16. To save a Document (first time) • From Office Button, click Save OR • Click the Save button on the Quick Access Toolbar. From the Save As dialog box displayed, ensure that you browse to the folder/disk drive that you would like to save the file. • Enter the file name in the File name: text box. The file name can be up to 255 characters in length. • Click on the Save button.
- 17. TO SAVE A BACKUP COPY (Subsequent Times) From the Office Button, point to Save As and click MS Word document. Enter a name in the File name: text box. Click on the Save button.
- 18. TO CLOSE A FILE • From the Office Button, click Close. • You will be asked if you wish to save any changes you have made to the file. Click YES to save the document OR click NO to ignore (without saving) the changes OR click CANCEL to cancel the operation To conclude, you have two choices for saving a document file: Save As - this choice allows you to save your document file with a new name and choose the location to save the file. Save - this option updates the word file with your most recent changes. If you use Save on a new file that hasn't been saved before, it has the same effect as Save As.
- 19. From the Colors dialog box displayed, choose a color and click OK. To change the text color • Highlight the text that you want to change color. • From the Home tab, in the Font group, point to the Font Color icon. • Click the arrow just to the right of the Font Color icon. You'll see some colors appear. • Select a color just like you did for the background color of the cell.
- 20. How to Change the Word document Background or Text Color? "Changing the Word Document Color - The Easy Way" • Actually you can change the color of any data in your document. • Once you have the data formatted in a different color, just do the same thing for some other document. • You can choose a contrasting color for the background to add more effects to your Word Document.
- 21. To change the Word document color background • Highlight the text that you want to alter. • From the Home tab, in the Font group, point to the Fill Color icon. • Click the arrow just to the right of the Fill Color icon. You'll see some colors appear: • Move your mouse over any of the colors and the cells will change automatically. You can then see what the new color looks like. • Click with the left mouse button to set the color you want. If you don't like any of the colors displayed, click on More Colors option.
- 22. From the Colors dialog box displayed, choose a color and click OK. To change the text color • Highlight the text that you want to change color. • From the Home tab, in the Font group, point to the Font Color icon. • Click the arrow just to the right of the Font Color icon. You'll see some colors appear. • Select a color just like you did for the background color of the cell.
- 23. Easily Getting Help with Word 2007 Help Feature! "Excel 2007 Help - Solving your Word Hassle!" • This Help information is available by clicking the question mark icon in the upper-right corner of Word window. Or, just press F1 key to displays Word Help in a new window. • This page will guide you how to use the Word 2007 help feature effectively. So, if you encounter any problem while using the Word 2007, you can use this Help topic to solve your problem.
- 24. To get help in Word 2007 • Click on the Microsoft Office Word Help icon (top-right of the screen with question mark icon) OR press F1. • The Word Help window is displayed. Word attempts to use your Internet connection to update its topics. • The various ranges of help topics are displayed. You can click on any topic to get help. As an example, click on the What's new link. You will see the following. • You can click on any link topics and continue reading the particular topic. • When you have finished experimenting, close the Word Help window.
- 25. To print a help topic • Display an item of interest within the Word Help window. • Click on the Print icon displayed within the Word Help toolbar. This will print the current page.
- 26. Discover The Excel Cell Alignment Options “Word Alignment - Effectively Used the Formatting Options Available in Word 2007" The options allow you to change alignment of the text in a document, text orientation, merge several cells together and so on. For more alignment options, you can click on the Alignment group dialog box launcher to display the Format Cells dialog box.
- 27. To align data between the left and right sides of a cell • Select the cell, or cells, you wish to align. • On the Home tab, in the Alignment group, click the Align Text Left icon to align data with the left edge of the data. • Click on the Center icon to center data in the document. • Click on the Align Text Right icon to align data with the right edge of the document.
- 28. To align data between the top and bottom of a data • Select the data, you wish to align. • On the Home tab, in the Alignment group, click the Top Align icon to align data in the top position of the document. • Click on the Middle Align icon to centralized data vertically in the document. • Click the Bottom Align icon to align data in the bottom position of the document.
- 29. To change the orientation of data • Select the data you wish to change. • On the Home tab, in the Alignment group, click the Orientation icon. You will see a drop down menu allowing you to format the cell orientation. • Select any one of the command. Experiment with applying some of the other orientation effects.
- 30. ADDING HEADER AND FOOTER TO THE DOCUMENT 2007 SPREADSHEETS “Word Header and Footer: How to Add it to the Word 2007 ?" • Normally we type in descriptive text to add information to a document such as titles, dates, page numbers, etc. • A header or footer can appear in three locations on the page. It can be in the top/bottom left corner, the center, and the right corner of the page. • With the latest version of Word 2007, it is much simpler to add a header and/or footer to your document.
- 31. TO VIEW HEADER AND FOOTER • Headers and footers are not visible in the normal worksheet view. • You can use the Page Layout view to see the headers and footers. • To view a header or footer before printing the document, use the Print Preview option (Office button - Print). TO EDIT THE WORD HEADER AND FOOTER • From the View tab, in the Workbook Views group, click the Page Layout icon. • Edit or change the elements in the header or footer as you wish. • When finish, just press the Esc key and save your work.
- 32. CREATING AND FORMATTING TABLES How to insert a Table inWord 2007? Formatting the Word 2007 Table As You Needs!
- 33. How to insert a Table in Word 2007? Word 2007 Table: How to Create and Use the Table Feature in Word 2007?" For example, if each row contains information about an employee, the columns can contain data such as name, employee number, hire date, salary, department, and so on. There are three ways to create a table in Word 2007, and each method has its purpose. 1) Use Insert Table dialog box 2) Use Table icon 3) Draw the table
- 34. TO CREATE A TABLE WITH INSERT TABLE DIALOG BOX Open a new document in the Insert tab, in the Tables group, click on the Table icon. OR press Ctrl + T. From the Create Table dialog box displayed, Word tries to guess the range, and whether the table has a header row. Most of the time, it guesses correctly. If not, make your corrections by click and drag the ranges to create the table. Click OK.
- 35. Font: is a group of characters (letters, numbers, symbols etc.)that is designed in a certain way. It has its own specific names that identify them. Font size: is the size of the characters, as they will appear on your printed document page.
- 36. Horizontal alignment- determines the appearance and orientation of the edges of the paragraph. Vertical alignment- determines the position of the paragraph relative to the top and bottom margins.
- 37. Double click the text to highlight one text. Triple click the word to highlight the sentence. Click the mouse from beginning and drag to end of the text you want to highlight, then release the mouse.
- 38. Line spacing- is the distance from one line of text to the next. Paragraph spacing- determines the amount of space above and below the paragraph.