Radiography clinical updates - session one
•
7 gostaram•3,737 visualizações

clinical radiography

Recomendados
Mais conteúdo relacionado
Mais procurados
Mais procurados (20)
Destaque
Semelhante a Radiography clinical updates - session one
Semelhante a Radiography clinical updates - session one (20)
Último
Último (20)
Radiography clinical updates - session one
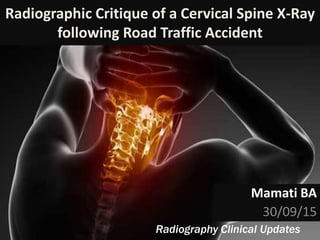
- 1. Radiographic Critique of a Cervical Spine X-Ray following Road Traffic Accident Mamati BA 30/09/15 Radiography Clinical Updates
- 2. OBJECTIVES 1. Request form Analysis 2. Justification of the procedure 3. Optimization of the exposure 4. Radiographic image critique 5. Conclusion
- 3. REQUEST FORM ANALYSIS • 34 year old female. • History of Road Traffic Accident . • Referred for cervical spine x-ray. • To rule out fracture of the cervical spine and dislocation. • Patient presented herself walking with no cervical collar. • She complained of neck pain.
- 4. JUSTIFICATION OF THE PROCEDURE • Neck injuries range from simple neck pain, to quadriplegia, or even death. • The spinal cord injury occurs at the time of trauma in 85% of patients and as a late complication in 15%. • The initial post-injury period is critical with regard to neurologic recovery or deterioration. Delayed recognition of an injury or improper stabilization of the cervical spine may lead to irreversible spinal cord injury and permanent neurologic damage. • Plain films (AP,LAT, Open Mouth) provide the quickest way to survey the cervical spine. • These three views do not require the patient to move his neck. • In this case , the views done were Cervical spine AP and Lat. • NOTE: C7/T1 demonstration
- 5. OPTIMISATION OF THE PROCEDURE • The single most important radiographic examination of the acutely injured cervical spine is the horizontal-beam lateral radiograph that is obtained before patient is moved. This film should be obtained and examined before any other films are taken. All 7 cervical vertebrae and C7-T1 junction must be visualized because the cervicothoracic junction is a common place for traumatic injury
- 6. Cont.. In all cervical spine views, a moving or a stationary grid must be used (lateral is an exception, where an air-gap technique is generally used). Minimum KVp range is (70 - 80) KVp. Optimal exposure is required to show soft tissue as well as proper bone density of the entire cervical spine. A small focus improves image detail. Collimation must strictly be applied in all projections. Exposure on fully suspended expiration
- 7. Corresponding LevelLandmark Cervical 1Mastoid process (skull)1. Cervical 5Thyroid cartilage2. Cervical 7Vertebral prominence3. Thoracic 2-3Suprasternal notch4. Thoracic 4-5Sternal angle (2 inch below notch)5. Thoracic 7 (3 – 4 inches below jugular notch) Inferior angle of the scapula6. Thoracic 9-10Xyphoid process7. Lumber 2-3Inferior costal margin8. Lumber 4-5Iliac crest9. Sacral 1-2Anterior superior iliac spine10. Distal coccyxGreater trochanter11. 2.5 cm inferior to distal coccyxSymphysis public12. Positioning Bony Landmarks
- 8. Landmarks
- 9. POSITIONING • ERECT, The patient is side on to the bucky/IR (usually left side is closest to the IR, however if the patient has torticollis, a wry neck, then direct the central ray to the inner, concave side) • Position the midsagittal plane so that it is parallel to the IR • Position the interpupillary line so that it is perpendicular to the IR (in an erect patient, this will also be parallel to the floor) • Raise the chin slighlty, so that the mandible does not superimposed the cervical spine • SUPINE, Position the patient so that the bucky/IR is along one side (usually the left side is closest to the IR) • Position the midsagittal plane so that it is parallel to the IR. If the patient is on a barouche, then this is easily achieved by moving the bed. Position the interpupillary line so that it is perpendicular to the IR • Only raise the chin slightly if the possibility of spinal injury has been ruled out, so that the mandible does not superimpose over the cervical spine • Traction on arms may be required to see T1
- 10. Radiographic Image Critique of the Cervical Spine • Align the mid-sagittal plane (MSP) to the vertically directed central ray (CR). The CR is angled 15-20 degrees cephalic. A properly angled CR will open the intervertebral disk spaces and project the spinous processes near the inferior intervertebral disk space. • All of T1 through C3 must be demonstrated. This can be accomplished by extending the chin, or by tube angulation. Trauma imaging protocol does not permit the repositioning of the cervical spine by rotating, extension, or flexion. • The lateral margins including the skin lines must be demonstrated. A transverse field size of no less than 6 inches is recommended, and the position marker placed 3 or more inches from the cassette center. • Radiographic technique must be adequate to evaluate the vertebral bodies, spinous processes, articular pillars, and trabecular pattern of bone. For the AP view the optimal kVp range is between 70-80.
- 11. PACEMAN • (P) - Position: – Is the patient in the correct position? – Is the patient rotated? – Does the image correctly show any needed joint spaces? • (A) - Area: – Is enough of the area being filmed covered? eg: In an abdominal film is pubic symphysis to diaphragms covered? – Have you exposed an area that is not required? • (C) - Collimation: – Is the image properly collimated? eg is four way collimation seen on an extremities film? • (E) - Exposure: – Were the exposure factors set correctly? – Does the image show the correct contrast and density? – Are there any factors that need to be changed to produce a better image? (M) - Markers: Have markers been placed on the image? Are they correctly identifying left and right? (A) - Aesthetics: Is the image nice to look at? Is it centered on the film? Is there four way collimation? (N) - Name: Does the image correctly identify the patient? Does it have any other relevant identification details? eg episode number or department labels?
- 12. PACEMAN • Positioning No rotation is evidenced by The posterior vertebral bodies are superimposed (see notes below) – The zygopophyseal joints are seen open – No tilt is evidenced by The intervertebral disc spaces of the cervical spine are all open (see notes below) • No superimposition of the mandible over the cervical spine • Area Covered All of the cervical vertebrae are shown, including spinous processes and the C7-T1 joint space and 1/3 of T1. Also the anterior soft tissue of the neck and airway are seen. Collimation Centre: C4 Shutter A: Open to show the EAMs superioly and the C7-T1 joint space and 1/3 of T1 inferiorly Shutter B: Open to show the soft tissue of the neck anteriorly, and the spinous processes of the cervical spine posteriorly Exposure Sufficient contrast and density to show the anterior soft tissue of the neck, including the airway. Minimal patient motion and sufficient contrast and density to show sharp, clear cortical margins and bony trabecular markings of the cervical vertebrae
- 13. Image critique LATERAL VIEW AP VIEW
- 14. The 5 lines of stability 1. Prevertebral (anterior) soft tissue 2. Anterior vertebral bodies 3. Posterior vertebral bodies 4. Spino-lamina line 5. Tips of spinous processes
- 16. CONCLUSION • Vertebrae to be visualized are from T1 through C3. • The lateral margins of the skin must be included on all AP cervical spine views. • Adequate radiographic technique to evaluate for fractures, jumped facets, and alignment of the lateral margins of the vertebrae.
- 17. References 1. https://www.med-ed.virginia.edu/courses/rad/cspine searched on 29 Sept 2015. 2. https://www.ceessentials.net/article20.html#apCSpine searched on 29 Sept 2015. 3. Bontrager L. Kenneth, ( )Text book of radiographic positioning and related anatomy;5th, 6th edition. 4. http://www.sor.org/system/files/article/201109/022_Michael_Fell_C_Spine_Articl e.pdf. searched on 29 Sept 2015. 5. http://www.ouh.nhs.uk/services/referrals/radiology/documents/justification- guidelines.pdf searched on 29 Sept 2015. 6. http://backtochiropractic.net/PDF/X-Ray%20Guidelines.pdf searched on 29 Sept 2015. 7. http://emedicine.medscape.com/article/397563-overview searched on 29 Sept 2015. 8. http://regionsemstudentworkshops.pbworks.com/w/page/14153858/C- spine%20workshop. searched on 30 Sept 2015. 9. http://www.wikiradiography.net/page/Cervical+Spine+-++Lateral searched on 30 Sept 2015.