SlideShare uma empresa Scribd logo
1 de 10
Baixar para ler offline
Lenn Tilley
            Manual quadrocopter build   Jan Folens
                                        Olivier De Bie

dinsdag 22 januari 13
Components

       • First of all it is important to know which components you need and what they
         are. This site is a good reference.


       • Here you can find a useful tool to see if it is possible to fly, if you have enough
         power etc.


       • On the next slide you can see which parts we’ve selected.


dinsdag 22 januari 13
Components

       • Here you can find a list of the components we used:
             ✦   5 motors : Turnigy D2836/9 950KV Brushless Outrunner Motor - 23A max
             ✦   1 charger for lipo :Turnigy Accucel-6 50W 6A Balancer/Charger w/ accessories
             ✦   1 Transmitter and 8ch receiver : Turnigy 9X 9Ch Transmitter w/ Module & 8ch Receiver (Mode 1) (v2
                 Firmware)

             ✦   2 batteries : Turnigy 2200mAh 3S 30C Lipo Pack
             ✦   4 ESC motor controllers : Turnigy Multistar 30 Amp Multi-rotor Brushless ESC 2-4S
             ✦   1 safety bag for charging lipo betteries : Lithium Polymer Charge Pack 18x22cm Sack
             ✦   1 Lipo alarm : On Board Lipoly Low Voltage Alarm (2s~4s)
             ✦   3 sets of 4 propellers : 10x4.5 SF Props 2pc Standard Rotation/2 pc RH Rotation (Blue)
             ✦   1 breadboard with components : Flight controller based on arduino with 6 DOF imu soldered


dinsdag 22 januari 13
Components


dinsdag 22 januari 13
Step 1:Frame

       • Before you can start with connecting all of your components you need to
         build a frame. We builded our own frame. The files for the laser cutter are
         available here.


       • This is the frame you will get if you build our frame.


dinsdag 22 januari 13
Step 2: Mounting the parts

       • Here you can see a video where we mount all the parts to the frame


       • Invoegen van filmpje waarbij we de onderdelen op het frame plaatsen


dinsdag 22 januari 13
Step 3: Connecting all parts

       • Schematics of the connected parts


dinsdag 22 januari 13
Step 4: Uploading the software

       • To upload a program to the arduino breadboard we need the arduino
         software.
       • You also need the multiwii software.
       • Adjusting the code trough the multiwii config file. You can find information
         about this process here.


dinsdag 22 januari 13
Step 5: Preparing the parts

       • Setting up the transmitter and receiver
       • Bounding the transmitter (Turnigy 9x 9Ch Transmitter) with the receiver
         (Turnigy 9X8C-V2 8-channel receiver)
       • explanation about the system setting of the transmitter (turnigy DX9)
       • Initialise and programming the ESC’s
       • Programming the ESC's with the remote control. You repeat this step for
         every ESC connected with a motor.
       • Final settings and calibration trough multiwii GUI.
       • For calibration and adding functions to the program you can use the multiwii
         GUI. Here you can find a detailed description. Make sure your sensors are
         defined good. You can change them in the program by adding a “-” or delete
         it in the config.ino file of the arduino program.


dinsdag 22 januari 13
Step 5: Test flight

       • Now you are ready for your first test flight.


       • If he flies smooth. We can start the PID regulation process. This process is
         described in this movie.


dinsdag 22 januari 13

Mais conteúdo relacionado

Semelhante a Quadrocopter build manual

ECET 3640 Group 2 Project Report
ECET 3640 Group 2 Project ReportECET 3640 Group 2 Project Report
ECET 3640 Group 2 Project ReportLogan Isler
 
Oscilloscopes and Scan Tools
Oscilloscopes and Scan ToolsOscilloscopes and Scan Tools
Oscilloscopes and Scan ToolsPraneel Chand
 
AAeon-Aop-8070.pdf
AAeon-Aop-8070.pdfAAeon-Aop-8070.pdf
AAeon-Aop-8070.pdfQuang Bui
 
Cnc 3axis-shield
Cnc 3axis-shieldCnc 3axis-shield
Cnc 3axis-shieldhandson28
 
Programming Osmium MIMU4444 Using AVR Dragon
Programming Osmium MIMU4444 Using AVR DragonProgramming Osmium MIMU4444 Using AVR Dragon
Programming Osmium MIMU4444 Using AVR Dragonoblu.io
 
Instructions for assembling testing pc duino robots
Instructions for assembling   testing  pc duino robotsInstructions for assembling   testing  pc duino robots
Instructions for assembling testing pc duino robotsPhát Tấn
 
Ultimaker original assembly_manual_v1.1
Ultimaker original assembly_manual_v1.1Ultimaker original assembly_manual_v1.1
Ultimaker original assembly_manual_v1.1Franck Lecluse
 
Digital Watchdog DW-V960H1612T User Manual
Digital Watchdog DW-V960H1612T User ManualDigital Watchdog DW-V960H1612T User Manual
Digital Watchdog DW-V960H1612T User ManualJMAC Supply
 
Digital Alarm Clock 446 project report
Digital Alarm Clock 446 project reportDigital Alarm Clock 446 project report
Digital Alarm Clock 446 project reportAkash Mhankale
 
BUD17-405: Building a reference IoT product with Zephyr
BUD17-405: Building a reference IoT product with Zephyr BUD17-405: Building a reference IoT product with Zephyr
BUD17-405: Building a reference IoT product with Zephyr Linaro
 
Introduction to MultisimCircuitSimulation.pdf
Introduction to MultisimCircuitSimulation.pdfIntroduction to MultisimCircuitSimulation.pdf
Introduction to MultisimCircuitSimulation.pdfKadiriIbrahim2
 
TEE - kernel support is now upstream. What this means for open source security
TEE - kernel support is now upstream. What this means for open source securityTEE - kernel support is now upstream. What this means for open source security
TEE - kernel support is now upstream. What this means for open source securityLinaro
 
creative 1130
creative 1130creative 1130
creative 1130lobo9000
 
Planning guide - Lenze Smart Geared Motors 25-75Nm
Planning guide - Lenze Smart Geared Motors 25-75NmPlanning guide - Lenze Smart Geared Motors 25-75Nm
Planning guide - Lenze Smart Geared Motors 25-75NmDerek Jones ★ Lenze UK
 
Have you been stalking your servers?
Have you been stalking your servers?Have you been stalking your servers?
Have you been stalking your servers?Martin Marji Cermak
 

Semelhante a Quadrocopter build manual (20)

ECET 3640 Group 2 Project Report
ECET 3640 Group 2 Project ReportECET 3640 Group 2 Project Report
ECET 3640 Group 2 Project Report
 
Oscilloscopes and Scan Tools
Oscilloscopes and Scan ToolsOscilloscopes and Scan Tools
Oscilloscopes and Scan Tools
 
Mahindra projects
Mahindra projectsMahindra projects
Mahindra projects
 
AAeon-Aop-8070.pdf
AAeon-Aop-8070.pdfAAeon-Aop-8070.pdf
AAeon-Aop-8070.pdf
 
Cnc 3axis-shield
Cnc 3axis-shieldCnc 3axis-shield
Cnc 3axis-shield
 
Programming Osmium MIMU4444 Using AVR Dragon
Programming Osmium MIMU4444 Using AVR DragonProgramming Osmium MIMU4444 Using AVR Dragon
Programming Osmium MIMU4444 Using AVR Dragon
 
Instructions for assembling testing pc duino robots
Instructions for assembling   testing  pc duino robotsInstructions for assembling   testing  pc duino robots
Instructions for assembling testing pc duino robots
 
LDR Counter
LDR CounterLDR Counter
LDR Counter
 
Ultimaker original assembly_manual_v1.1
Ultimaker original assembly_manual_v1.1Ultimaker original assembly_manual_v1.1
Ultimaker original assembly_manual_v1.1
 
PCI
PCIPCI
PCI
 
Digital Watchdog DW-V960H1612T User Manual
Digital Watchdog DW-V960H1612T User ManualDigital Watchdog DW-V960H1612T User Manual
Digital Watchdog DW-V960H1612T User Manual
 
Digital Alarm Clock 446 project report
Digital Alarm Clock 446 project reportDigital Alarm Clock 446 project report
Digital Alarm Clock 446 project report
 
Pcb automatic vaccum loader user guidance | SunzonTech
Pcb automatic vaccum loader user guidance | SunzonTechPcb automatic vaccum loader user guidance | SunzonTech
Pcb automatic vaccum loader user guidance | SunzonTech
 
BUD17-405: Building a reference IoT product with Zephyr
BUD17-405: Building a reference IoT product with Zephyr BUD17-405: Building a reference IoT product with Zephyr
BUD17-405: Building a reference IoT product with Zephyr
 
Introduction to MultisimCircuitSimulation.pdf
Introduction to MultisimCircuitSimulation.pdfIntroduction to MultisimCircuitSimulation.pdf
Introduction to MultisimCircuitSimulation.pdf
 
TEE - kernel support is now upstream. What this means for open source security
TEE - kernel support is now upstream. What this means for open source securityTEE - kernel support is now upstream. What this means for open source security
TEE - kernel support is now upstream. What this means for open source security
 
creative 1130
creative 1130creative 1130
creative 1130
 
ADAELS .docx
ADAELS .docxADAELS .docx
ADAELS .docx
 
Planning guide - Lenze Smart Geared Motors 25-75Nm
Planning guide - Lenze Smart Geared Motors 25-75NmPlanning guide - Lenze Smart Geared Motors 25-75Nm
Planning guide - Lenze Smart Geared Motors 25-75Nm
 
Have you been stalking your servers?
Have you been stalking your servers?Have you been stalking your servers?
Have you been stalking your servers?
 

Quadrocopter build manual

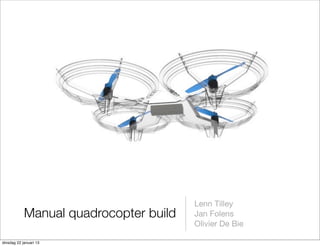
  • 1. Lenn Tilley Manual quadrocopter build Jan Folens Olivier De Bie dinsdag 22 januari 13
  • 2. Components • First of all it is important to know which components you need and what they are. This site is a good reference. • Here you can find a useful tool to see if it is possible to fly, if you have enough power etc. • On the next slide you can see which parts we’ve selected. dinsdag 22 januari 13
  • 3. Components • Here you can find a list of the components we used: ✦ 5 motors : Turnigy D2836/9 950KV Brushless Outrunner Motor - 23A max ✦ 1 charger for lipo :Turnigy Accucel-6 50W 6A Balancer/Charger w/ accessories ✦ 1 Transmitter and 8ch receiver : Turnigy 9X 9Ch Transmitter w/ Module & 8ch Receiver (Mode 1) (v2 Firmware) ✦ 2 batteries : Turnigy 2200mAh 3S 30C Lipo Pack ✦ 4 ESC motor controllers : Turnigy Multistar 30 Amp Multi-rotor Brushless ESC 2-4S ✦ 1 safety bag for charging lipo betteries : Lithium Polymer Charge Pack 18x22cm Sack ✦ 1 Lipo alarm : On Board Lipoly Low Voltage Alarm (2s~4s) ✦ 3 sets of 4 propellers : 10x4.5 SF Props 2pc Standard Rotation/2 pc RH Rotation (Blue) ✦ 1 breadboard with components : Flight controller based on arduino with 6 DOF imu soldered dinsdag 22 januari 13
  • 5. Step 1:Frame • Before you can start with connecting all of your components you need to build a frame. We builded our own frame. The files for the laser cutter are available here. • This is the frame you will get if you build our frame. dinsdag 22 januari 13
  • 6. Step 2: Mounting the parts • Here you can see a video where we mount all the parts to the frame • Invoegen van filmpje waarbij we de onderdelen op het frame plaatsen dinsdag 22 januari 13
  • 7. Step 3: Connecting all parts • Schematics of the connected parts dinsdag 22 januari 13
  • 8. Step 4: Uploading the software • To upload a program to the arduino breadboard we need the arduino software. • You also need the multiwii software. • Adjusting the code trough the multiwii config file. You can find information about this process here. dinsdag 22 januari 13
  • 9. Step 5: Preparing the parts • Setting up the transmitter and receiver • Bounding the transmitter (Turnigy 9x 9Ch Transmitter) with the receiver (Turnigy 9X8C-V2 8-channel receiver) • explanation about the system setting of the transmitter (turnigy DX9) • Initialise and programming the ESC’s • Programming the ESC's with the remote control. You repeat this step for every ESC connected with a motor. • Final settings and calibration trough multiwii GUI. • For calibration and adding functions to the program you can use the multiwii GUI. Here you can find a detailed description. Make sure your sensors are defined good. You can change them in the program by adding a “-” or delete it in the config.ino file of the arduino program. dinsdag 22 januari 13
  • 10. Step 5: Test flight • Now you are ready for your first test flight. • If he flies smooth. We can start the PID regulation process. This process is described in this movie. dinsdag 22 januari 13