
Recomendados
Mais conteúdo relacionado
Mais procurados
Mais procurados (20)
Destaque
Destaque (12)
Semelhante a He module 5
Semelhante a He module 5 (20)
Mais de none
Mais de none (20)
Último
Último (20)
He module 5
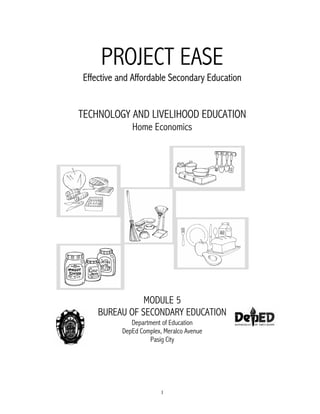
- 1. 1 PROJECT EASE Effective and Affordable Secondary Education TECHNOLOGY AND LIVELIHOOD EDUCATION Home Economics MODULE 5 BUREAU OF SECONDARY EDUCATION Department of Education DepEd Complex, Meralco Avenue Pasig City
- 2. 2 Basic Clothing First Year Module 5 Let’s Get SMART What this module is about
- 3. 3 PRETEST Multiple Choice Directions: Read each statement very well and write the letter of the correct answer in your notebook. 1. Which of the following is a drafting tool used in sewing? a. French curve c. ruler b. hem maker d. tape measure 2. It is used to measure and mark short distances such as hems, seams and tucks. a. hem maker c. L-square b. hip curve d. seam gauge 3. It is an instrument used in drawing perpendicular lines, obtaining square corners and dividing measurement. a. hip curve c. L-square b. French curve d. tape measure 4. It is the best tool for cutting textiles. a. scissors c. shears b. seam ripper d. tracing wheel 5. It is a sewing tool that holds pins. a. needle c. sewing box b. pin cushion d. thread 6. Which holds the thread while sewing? a. bobbin c. head b. feed dog d. spool pin 7. It sets the machine to different stitch lengths, widths or patterns. a. balance wheel c. presser foot b. bobbin d. stitch regulator 8. It holds the material in place while sewing. a. feed dog c. presser bar b. presser bar lifter d. presser foot 9. It is the metal plate that covers the bobbin case or shuttle. a. bobbin c. slide plate b. head d. stitch regulator 10.It controls the tightness of the stitch by controlling the pull of the upper thread.
- 4. 4 a. feed dog c. thread take-up lever b. stitch regulator d. tension regulator 11.What is wrong when the sewing machine needle breaks? a. a too tight belt c. very loose belt b. a bent needle d. a dull needle 12.The balance wheel of the sewing machine does not turn. What must be checked? a. belt c. stitch regulator b. needle d. tension regulator 13.Looping stitches are caused by a. incorrect threading c. a bent needle b. a loose belt d. a tight belt 14.The unusual clucking noise of the sewing machine is remedied by a. adjusting the needle b. changing the needle c. checking the threading d. tightening loose screws 15.Puckered stitches are due to a tight a. belt c. fabric b. needle d. tension Lesson 1 Sewing Tools and Equipment Sewing tools and equipment are classified according to use. There are measuring tools, drafting tools, cutting tools, marking tools, and sewing tools. It is necessary to have a complete set of sewing tools and equipment to facilitate work. A. Measuring Tools 1. Hem maker -an accurate guide for measuring and marking hemlines. A foot rule can be used if an adjustable marker is not available. 2. Ruler -used for drawing straight lines. 3. Seam gauge -measures and marks short lengths such as hems, seams, and tucks. 4. Tape measure -takes body measurements and used in drafting, altering, and laying out patterns. It is 60 inches or 152 centimetres long.
- 5. 5 B. Drafting Tools 1. French curve This is used in shaping necklines, armholes, and collars. 2. Hip curve Used to shape the hip, skirt hemline, and other long curved lines. 3. L-square or tailor’s square This is used to draw perpendicular lines and to obtain square corners and divide measurements. C. Cutting Tools 1. Shears -used to cut fabrics; has a small opening in one handle for the thumb and one larger opening in the other handle for inserting two or more fingers in order to give force in cutting thicker fabrics. 2. Scissors -cuts threads, trims seams, slashes and is used to cut the fabric to make buttonholes. 3. Seam ripper -rips machine stitched seams or any machine stitch which needs to be altered. Ruler Tape Measure L-square French curve Seam ripper Scissors Shears
- 6. 6 D. Marking Tools 1. Dressmaker’s carbon paper -used with a tracing wheel to transfer construction marks from the pattern to the cloth. 2. Tracing wheel -used with the tailor’s chalk and dressmaker’s carbon paper to transfer pattern marks on the cloth. 3. Tailor’s chalk -used to mark the fabrics directly. E. Sewing Tools / Equipment 1. Sewing machine - it is either foot or motor-powered. The two basic types of sewing machines are straight stitch machine for sewing straight lines forward and backward and the zigzag sewing machine. 2. Needles a. For hand sewing -choose one that is easy to use. b. For machine stitching -the kind of fabric and thread should match the size of the needle. The thinner the fabric, the smaller the needle. 3. Pins - these are used to hold the fabric while sewing or tracing. Fine, smooth, and sharp rust proof pins are preferred. 4. Pin cushion – it is used to hold pins and needles. 5. Thimble – protects the middle finger from getting pricked when sewing. 6. Thread – type of thread is determined by the color and weight of the fabric. It should match the fabric or should have a darker shade. Hand and machine sewing is not possible without thread. Activity 1 Group the following sewing tools according to their use. ripper scissors shears dressmakers’ carbon paper ruler L-square hem maker tape measure hip curve tracing wheel thimble thread French curve needle tailor’s chalk Tracing wheel Thimbles Threads Pin cushion
- 7. 7 Measuring Drafting Cutting Marking Sewing Tools Tools Tools Tools Tools 1. 1. 1. 1. 1. 2. 2. 2. 2. 2. 3. 3. 3. 3. 3. Activity 2 Draw the different sewing tools in a cardboard and label each according to use or function. Lesson 2 Parts and Functions of the Sewing Machine Every trade or craft has its own special tools. A cook has utensils and pans particularly designed for cooking. Painters have special brushes for creating masterpieces. Sewing uses special tools, the most important of which is the sewing machine. You should be familiar with the sewing machine for it to be of better service to you. Knowing its parts and functions will enable you to make beautiful projects through sewing. Parts of the sewing machine 15 14 19 17 16 10 9 5 8 1 18 32 11 7 12 13 6 4
- 8. 8 A. Parts of a Sewing Machine 1. Slide plate 11. Upper tension 2. Needle 12. Face plate 3. Throat plate 13. Needle bar thread guide 4. Needle clamp 14. Bobbin winder 5. Thread guide 15. Balance wheel 6. Presser bar lifter 16. Spool pin 7. Stitch regulator 17. Rubber ring 8. Presser foot 18. Feed dog 9. Thread take-up lever 19. Belt 10. Presser bar The sewing machine has three main parts namely: the arm or head, the bed and the wheel. Following are the functions and use of each part. 1. Head a. Spool pin – holds the thread while sewing and is located on top of the machine. b. Thread tension regulator – an adjustable disk which rotates outward to maintain the proper tightness of stitches. Loosens the stitches when rotated inward. c. Presser bar lifter – used to lift or lower the presser bar. d. Presser bar – holds the presser foot. e. Presser foot – holds the material in place while sewing and is attached to the presser bar. f. Needle bar – a metal bar that holds the needle with the help of the needle clamp. As the treadle is moved upward and downward by the feet, the needle bar goes up and down and leaves stitches on the fabric. g. Needle – a sharp metal attached to the needle bar. It makes stitches by collecting the thread up from the bobbin and inserts this in its tiny hole. h. Thread guide – helps maintain the downward flow of the thread and prevents long formation due to the irregular change in speed while sewing. i. Stitch regulator – adjusts the length and evenness of stitches. To determine the desired stitch length, the number indicated on its plate is adjusted accordingly. 2. Bed – the flat metal base that supports the different parts of the head. a. Throat – holds the feed dog while sewing b. Throat plate – covers the feed dog c. Bobbin – a detachable part encased in a bobbin shuttle d. Bobbin case – holds the bobbin e. Slide plate – the metal plate that covers the entry to the bobbin case f. Feed dog – a saw-like metal under the presser foot which moves the fabric while sewing. 3. Wheel – the part of the sewing machine which gives power to the machine. a. Balance wheel – initiates the operation of the machine. It is where the stop-motion screw is attached.
- 9. 9 b. Stop-motion screw – determines the direction of the wheel, clockwise or counterclockwise. c. Drive wheel – the large wheel located under the machine body. It coordinates the movement of the wheel and the treadle. d. Belt – a leather band that connects the balance wheel to the drive wheel. e. Treadle – a foot rest at the bottom of the machine. When stepped on, it makes the machine work. f. Pitman rod – a steel rod that connects the treadle to the drive wheel. B. Threading the Sewing Machine The sewing machine is threaded before use. It is threaded in two ways as follows: 1. Upper Threading a. Lift the take-up lever to its highest position. b. Place the spool of thread on the spool pin and pass the thread through these parts 1. thread guide 2. tension regulator 3. thread take-up lever 4. thread guide 5. thread guide at the needle clamp 6. needle 2. Lower Threading a. Wind the thread on the bobbin. b. Slide the plate that covers the lower parts. c. Hold the bobbin and insert the bobbin case. d. Pull the thread into a notch. Draw it under the tension spring and into the slot. Unwind about 10 cm. e. Hold the bobbin case by its latch and insert at the spindle of the shuttle’s body so that the finger enters the notch at the top of the shuttle. Release the latch and press the bobbin case until it clicks in place. f. Slide the plate back to its original position. g. Hold the end of the needle thread lightly with your left hand and turn the balance wheel slowly towards you so that the needle enters the throat plate. h. Continue turning the balance wheel while holding the needle thread until the needle rises again bringing up the bobbin thread in the air loop. i. Unloop the thread with your fingers. j. Position both the needle and the bobbin thread under the presser foot and draw approximately 10 cm. C. Operating the Sewing Machine 1. Sit on the chair comfortably. The height of the chair should be just right for you and your machine.
- 10. 10 2. Position your feet flat on the treadle with the left foot placed in the upper corner and the right foot at the lower corner. 3. Put on the belt in place. 4. Place your hand in front of the presser foot. Avoid pulling the fabric while sewing because this may bend and break the needle. 5. Using the right hand, turn the balance wheel toward you. 6. As the treadle moves, follow its up and down movement rhythmically with your feet. 7. Stop the machine gradually by placing your right hand on the balance wheel to stop it completely. Activity 3 Label the numbered parts in the illustration. Write your answers in your notebook. Self-check: Match the parts of the sewing machine in Column A with their function and use in Column B. _____1. Thread tension regulator _____2. Drive wheel _____3. Balance wheel _____4. Stop-motion screw _____5. Presser bar lifter _____6. Thread guide _____7. Spool pin _____8. Stitch regulator _____9. Slide plate _____10. Feed dog _____11. Belt _____12. Pitman rod a. makes stitches by collecting the thread up from the bobbin with the thread inserted in its tiny hole b. rotates outward to keep proper tightness in a tiny hole c. holds the material in place d. holds the presser foot e. lifts and lowers the presser bar f. helps maintain the downward flow of the thread while sewing g. holds the thread while sewing 15 14 19 17 16 10 9 5 8 1 18 32 11 7 12 13 6 4
- 11. 11 How many of your answers are correct? Did you get all of them right? If you didn’t for the first time, go back to the lesson again and repeat the self-check. I’m certain you’ll do better this time. Lesson 3 Truly SMART Is your sewing machine running smoothly? What would you do if it suddenly makes a clucking noise? Knowing some of the machine troubles and how these can be fixed by yourself is important. However, it is always good to consult your teacher if your machine does not work. The following table may help you: Common Sewing Machine Troubles Signs of Trouble Possible Cause Remedy _____13. Presser foot _____14. Needle _____15. Presser bar h. used to adjust the length and evenness of stitches i. a metal plate which covers entry to the bobbin case j. moves the fabric while sewing k. holds the feed dog while sewing l. covers the feed dog m. initiates the operation of the machine n. directs the wheel to the treadle o. connects the balance wheel to the drive wheel p. a steel rod that connects the treadle to the drive wheel q. coordinates the movement of the wheel Unusual clucking noise Dirty machine Loose screws Accumulated dust in the shuttle race area Brush away the dirt. Tighten loose screws. Clean the shuttle race with a brush before oiling. Balance wheel does not turn The belt is too loose. Stop the motion when the screw is loose. Tighten the belt. Rotate the stop motion screw clockwise to tighten it.
- 12. 12 Needle break Wrong needle attachments Bent needle Fabric is pulled while sewing. Attach needle properly and tighten the screws. Change the needle. Match the needle with the thickness of the fabric. Avoid pulling the needle out of the stitching line. Guide the fabric with ease. Don’t pull the fabric. Check the bobbin case position and latch the spring of the shuttle race assembly. Reset the shuttle race, if needed. Uneven stitches Bent needle. Needle attached on the wrong side. Size of the needle does not match the thickness of the fabric. Attachment of the needle is too low. The material is pulled back while stitching. Change the needle. Correct the position of the needle. Match needle size with the fabric. Increase pressure on the foot by tightening the screws. Raise the needle higher through the needle camp. Tighten the screw. Guide the material lightly as you sew. Let the machine control the stitches. Heavy functioning Belt is too tight. The machine needs oiling. Dust has accumulated on the bearing and shuttle race area. If the belt is new, it tends to stretch through constant use. Oil the machine. Clean or brush the race and bearing. Oil after cleaning.
- 13. 13 Looping stitches Needle is dull. The machine is threaded improperly. Tension of the upper and lower thread is not balanced. Thread that takes up the spring is crooked or broken. Change the needle. Check the threading of the machine Check the upper threading if loops appear under the tension regulator. Check the lower threading. Inspect the tension guide of the bobbin case for threads. Correct the wrong direction of the thread in the bobbin case. Check the tension of the latch spring of the bobbin case. Change the thread take up spring. Breaking of the upper thread Threading is not correct. The needle is not properly set. The needle is bent or dull. The upper thread is too tight. Thread is of poor quality. The needle and thread do not match. Correct the threading. Set the needle correctly. Change the needle. Adjust the thread tension by resetting the upper tension regulator. Use thread of good quality. Use a needle with the right size. Puckered stitches The needle is too blunt due to the striking metal of the machine or pin. Stitch length is too long for the fabric. Replace the needle. Adjust the stitch regulator to correct the length.
- 14. 14 Activity 4 Practice the following tasks in operating the sewing machine: a. setting the needle b. threading the sewing machine c. adjusting the upper tension Self-check: 1. What will you do, if suddenly, while sewing, the balance wheel does not turn? 2. Give the causes and the remedy. Write the answer in your notebook. L LET’S SUMMARIZE Sewing is easier if you know your sewing tools and equipment and their use. Sewing tools are classified as measuring tools, drafting tools, sewing tools, cutting tools, and marking tools. Before you can maximize the use of the sewing machine, you must first know its parts and their functions. Threading the sewing machine and operating it properly are the main skills in sewing. At times, the sewing machine does not operate well due to certain causes. Knowledge of troubleshooting helps remedy the problem. POSTTEST Directions: Read each statement very well, then write the letter of the correct answer in your notebook. 1. Which of the following is a drafting tool for sewing? a. French curve c. ruler b. hem marker d. tape measure Tension is too tight. Size of the needle and the thread do not match. Feed dog adjustment is too strong. Pressure on the presser foot is too heavy. Adjust the upper and lower tension regulators. Use the appropriate size of needle and thread. Adjust the height of the feed dog. Apply pressure on the presser foot as lightly as you can.
- 15. 15 2. It is used to measure and mark short lengths such as hems, seams, and tucks. a. hem marker c. L-square b. hip curve d. seam gauge 3. An instrument used for drawing perpendicular lines, obtaining square corners and dividing measurement. a. hip curve c. L-square b. French curve d. tape measure 4. The best tool for cutting textiles. a. scissors c. shears b. seam ripper d. tracing wheel 5. A sewing tool that holds pins. a. needle c. sewing box b. pin cushion d. thread 6. Which holds the thread while sewing? a. bobbin c. head b. feed dog d. spool pin 7. It sets the machine to various stitch lengths, widths or patterns. a. balance wheel c. presser foot b. bobbin d. stitch regulator 8. It holds materials in place while sewing. a. feed dog c. presser bar b. presser bar lifter d. presser foot 9. The metal plate covering the bobbin case or shuttle. a. bobbin c. slide plate b. head d. stitch regulator 10.Controls the looseness and tightness of stitches by controlling the pull or the upper thread. a. fed dog c. take-up lever b. stitch regulator d. tension regulator 11.What is wrong when the sewing machine needle breaks? a. too tight belt c. too loose belt b. bent needle d. a dull needle 12.The balance wheel of the sewing machine does not turn. What must be checked? a. belt c. stitch regulator b. needle d. tension regulator
- 16. 16 13.Looping stitches is caused by a. incorrect threading c. a bent needle b. a loose belt d. a tight belt 14.The unusual clucking noise of a sewing machine may be remedied by a. attaching the needle correctly b. changing the needle c. checking the threading d. tightening loose screws 15.Puckered stitches are due to tight a. belt c. fabric b. needle d. tension At this point, you have made a good score. You have been hardworking and patient. You can now relax and take a break. You will then be ready to move on to the next module. Congratulations and God bless you! ANSWER KEY Pretest / Posttest 1. a 2. d 3. c 4. c 5. b 6. d 7. d 8. d 9. c 10.d 11.b 12.a 13.a 14.d 15.d Lesson 2: Self-check 1. b 2. n 3. m 4. q 5. e
- 17. 17 6. f 7. g 8. h 9. i 10.j 11.o 12.p 13.c 14.a 15.d