SlideShare uma empresa Scribd logo
1 de 90
Department of Geo-Resources and Geo-Technical
Structural Geology : Geological Fieldwork
Lecturer : Dr.PICH Bunchoeun
Group 4 : Hout Chyva
Khchao Tel
IM Samnang
Kan Rithy
Khoun Solida
1
Content
1.Introduction
2.Geological Field Techniques:
3.Conclusion
2
Introduction
3
1.Field Equipment and safety
1. The hand lens and
binoculars
• hand lens is an
essential piece of
equipment for the
detailed.
• observation of all rock
types and fossil
material.
4
1.Field Equipment and safety
2. The compass - clinometer
The compass - clinometer is used to measure:
• the orientation of geological planes and lineation's
with respect to north.
• the angle of dip of geological features with respect
to the horizontal. This allows an accurate record of
the geometry of the features to be constructed.
• There are tow types of compass
5
- the first type is made by Brunton, USA, Freiberger, Germany
and Breithaupt, Germany
6
-The second type is made by Silva and Suunto
7
1.Field Equipment and safety
3. Global positioning systems and altimeters
• Global positioning systems (GPS) use ultra high
frequency radio wave signals from satellites to
trigonometrically derive your position to within a few
meters laterally.
8
1.Field Equipment and safety
4. Measuring distance and thickness
We use rule , meters , Jacob staff for measuring
distance and thickness .
9
1.Field Equipment and safety
5. Classification and colure charts
-Various well -established comparison charts can be used to
provide a semi - quantitative description of the rock and any
changes in it. These include grain - size charts and rock
classification diagrams.
10
1.Field Equipment and safety
6. Hammer, chisels, and other hardware
hammer is necessary for most geological
fieldwork, both for the collection of samples and,
where necessary to create fresh surfaces so that
the rock and the minerals within it can be
described.
11
1.Field Equipment and safety
7. The hard copy field notebook or The laptop,
netbook or PDA
• Except for safety equipment, provisions and suitable
clothing the hardcopy or electronic field notebook is
probably the most essential piece of field kit. The
types of data to record in a field notebook.
12
1.Field Equipment and safety
8. Writing equipment, maps and relevant literature
• Pencils : Several pencils for recording notes and
sketches are essential.
• Pencil sharpener or penknife: Conventional pencils
will need to be sharpened.
• Coloured pencils: A few coloured pencils are useful in
the field for recording specific items.
• Eraser: Essential for correcting mistakes.
13
1.Field Equipment and safety
9. Comfort, field safety and field safety equipment:
a. Clothes, backpack/rucksack and personal provisions:
Fieldwork usually involves physical exertion and can
involve being outside in extreme weather conditions
and/or working in inhospitable or remote areas. For these
reasons it is important to select comfortable clothing and
to be prepared for a range of conditions. Find out the
expected weather conditions in the area at the time you
will visit. Most mountain walking and outdoor clothing is
suitable.
14
b. Field safety
There are, however, three aspects that are important for
safety in the field anywhere:
1 .Be prepared :
have the correct equipment
enough food and drink
sufficient clothing for the expected range of weather
a first aid kit
means of raising the emergency services mobile
phone, radio or satellite phone;
15
2. Assess and monitor the potential hazards
Common hazards and the preventative action that can be
taken to avoid them are as follows :
Falling rocks
Mudslides and unconsolidated rocks
Unpredictable weather
Lightning
Dangerous beasties and plants
Fatigue
16
17
3 Know what to do in an emergency
Members of the party should know who is trained in first
aid. In larger field parties it is also advisable to set up a
chain of command in case an incident occurs. Ensure that
you know how to contact the emergency services, what the
emergency telephone number is for the country that you
are visiting, what the local mobile phone signal coverage is
and where you have to go to obtain a signal.
C.Field safety equipment:
Hard hat
Reflective clothing
Goggles
18
1.Field Equipment and safety
10. Conservation, respect and obtaining permission
• Many countries have conservation or protected sites of
either biological and/or geological interest. These sites are
protected from building development but also special rules
may apply to sampling in situ material and sometimes even
to loose material.
19
3.The field notebook
• The field notebook forms the main record of the data you
gather in the field such as their compositional and textural
characteristics, internal features, sample collected, the
position and orientation of any photographs.
1. Field notebook layout
- Preliminary p ages: new notebook ensure that you put
your name, address, email and any other contact details in
a prominent place on the cover.
20
3.The field notebook
- Daily entries : information in your field notebook. The initial
information should include the following type of information,
although the exact details will depend on the purpose of the
fieldwork.
- Date and day of field visit
- area or location visited
- Aims of the fieldwork or a summary of the general hypotheses
- the weather and any other information that will help you to
recall the field day.
- The name(s) of your field partner or the other members of
the team.
- More detailed location information as appropriate
21
3.The field notebook
22
3.The field notebook
• General tip
• cross referencing : Number the pages of your
notebook.
• Use of space : Space your notes
• Organization: Use headings and subheadings as they
make the notes much easier to find
23
3.The field notebook
2. Field s ketches: A picture i s worth a thousand
words
a) Sketch from a field
notebook showing good
use of space, a method
of separating
interpretation (shown in
the cloud at the top
right) from the
observations.
24
3.The field notebook
- Part of a graphic log
showing effective use
of colour to pick out
samples (red) and
photographs (blue).
25
3.The field notebook
• General principles: Aims, s pace and tools
- Sketches are usually drawn freehand in pencil.
26
3.The field notebook
- Space
- Scale: All sketches should include a Scale
- Orientation : All sketches should include an
orientation relative to north and a clear indication as
to whether it is a plan view, oblique view or cross –
section.
- Angles and geometry, Inset boxes for detail,
- Colour: A green coloured pencil can be useful for
showing the vegetation and clearly separates it from
- the geological part of the sketch
27
3.The field notebook
3. Sketches of exposures
• Sketches of whole, or representative parts of, exposures such
as sea - cliffs, road cuts and quarry faces are commonly used
to observe and show one or more of the following:
- the main units and the geometric relationship(s) between
them;
- large - scale (metres to tens of metres) structures such as
folds, faults and angular unconformities;
- the position of more detailed measurements (e.g. samples or
- a graphic log; so that the exact location can be easily
relocated.
28
The field notebook
1. Assess the units 2. Draw outline
29
3.The field notebook
3. Draw the major geological boundaries 4. Draw the boundaries of any
subunits and a weathering profile
30
3.The field notebook
5. Sketch the detail within each of the units 6. Add the finishing touches
31
3.The field notebook
4. Sketching metre – and centimetre - scale features
• All geological features occur in three dimensions,
whether they are due to rock deformation,
sedimentary processes or intrusion processes.
• Draw two or three sketches of faces that are
approximately at right angles to each other to
illustrate the three - dimensional characteristics.
• Record the features as a small - scale map and cross
– section (for instance the anticlines and synclines )
32
3.The field notebook
5. Sketch maps
• .Sketch maps need only to be roughly to scale they should,
however, include an approximate scale and a north arrow.
33
34
Recording features
sedimentary and
constructing graphic logs
Reasons for collecting data from sedimentary
deposits
• Understand sedimentary processes and depositional
environments.
• Understand the potential of a sedimentary basin or
unit for hydrocarbon recovery or for water resources.
•Reconstruct past periods of environmental change,
particularly climate and sea - level change.
• Understand and exploit sedimentary building
materials and mineral deposits. Refine the geological
timescale.
There are four aspects that need
recording in the description of
sedimentary rocks:
(1) the composition;
(2) the texture of the rock;
(3) the sedimentary structures; and
(4) the fossils within them.
Graphic logs have many advantages
because they:
• are a succinct method of summarizing a lot
of data;
• immediately give an impression of the
vertical succession and can therefore aid in
the identification of repetitions and major
changes in the sedimentary facies;
• are a convenient way of testing and making
correlations between sections of similar age
from different places.
Graphic logs
Conventions for graphic logs
-The vertical scale
-The horizontal scale
-Lithology
-Sedimentary structure
-Stratigraphic order
-Other information
Three main types of sedimentary rock
are used to study and construct short -
term changes in climate through time :
(1) fi ne – grained marine sedimentary rocks
deposited on the continental shelf below
storm wave - base or in the deep ocean;
(2) fi ne – grained lake deposits; and
(3) other non - marine deposits such as fine -
grained wind - blown sediment (loess) and
cave deposits.
Recording feathers of
igneous rocks
The main reasons to study igneous rocks
are to:
(1) understand volcanoes and the hazards
they pose to life on Earth;
(2) understand processes beneath the
Earth’s surface that drive plate tectonics and
that contributed to the evolution of Earth
and other planetary bodies;
(3) understand the distribution of ore
minerals; and
(4) for chronology.
Distinguishing characteristics of veins in
igneous rock
When making a graph log of a suspected
pyroclastic deposit, aspects to look out
for in particular include:
-Grain size variation
-The nature of clasts
-Cross stratification
-Flow banding
-Relationships between ash and large
fragments
Graphic logs(pyroclastic)
Classification scheme for igneous rocks types
8.Recording structural information
Our planet has crust and mantle which are subjected to
change stresses that cause rocks to deform, either by breaking or
by bending/stretching
Measuring brittle structures provides information on how
and why the upper crust in particular deforms, specifically the
orientation of regional and local stresses, and the direction of
motion on faults.
49
8.1 Equipment and measurement
To accurate measurement of azimuths, dips and plunges,
a specialist compass - clinometer is recommended.
• Structural measurements and notations
Azimuth (strike; trend of linear feature)
three - digit number 076
Dip or plunge (inclination from horizontal)
two - digit number 76
50
8.2 Brittle structures: Faults, joints
and veins
• Faults that we define as normal, thrust and strike - slip
commonly have steep, gentle and sub-vertical dips
respectively.
• Topography: Break in slope; trough or ridge; scarp; river
gorge; abrupt landscape contrast.
• Erosion: Ravine/gully/stream/river follows fault - line (easily
eroded crushed rock); ridge (if fault mineralization is harder
than country rock
• Drainage: Springs, sag ponds (many fault rocks are
impermeable); sinkholes (limestone one side of fault); abrupt
drainage contrast at fault
51
Vegetation: Sharp change across fault, due to soil and/or
drainage change on different rock types
Offsets: Offset of linear feature (stream, ridge, dyke, road,
fence, railway), especially for active faults
52
• Conjugate veins
With a characteristic
X-shaped pattern and
minor offsets (Switzerland)
• Shear and extensional fractures
Diagram of shear and extensional
fractures on a fold
(based on McClay, 1991)
53
• Joints
Unloading joints in
granite exposure near Balmoral, Scotland, UK: two sets are
subvertical, almost at right angles to each other,
while the third set is roughly parallel to the land surface
54
• Fold analysis
Size, shape and orientation should be considered in describing
folds. Fold sizes can be summarized by recording their
amplitudes and wavelengths (e.g. on a sketch)
Schematic cross: section showing an example of how fold
asymmetry.
55
Isolated asymmetric fold in
calcareous mylonite.
56
10 Making a geological map
10.1 Principles and aims
A geological map shows how geological features (rock
units, faults, etc.) are distributed across a region. It is a two -
dimensional representation of part of the Earth ’s surface, scaled
down to a size that is convenient for displaying on a sheet of
paper or a computer screen.
57
Geological maps are made for a variety of reasons and,
depending on the region, these are to:
• Record the position of particular geological features or
exposures;
• Help us understand the geological history of a region;
• Locate natural resources, and understand the best way to
exploit them;
• Identify potential hazards (e.g. faults, volcanoes, unstable
substrates, hazardous deposits);
• Gain insights into the immediate subsurface environment,
which governs soils, drainage, agriculture and ecosystems;
• Provide a base for constructing a detailed geological cross -
section to deduce and visualize strata below ground.
58
10.2 Preparation and materials
Base maps and other aids
Topographic maps
59
Aerial photographs, Satellite images
Compare these two methods:
Method Advantage Disadvantage
Aerial
photogr
aph
Clear depiction of
landscape features
More detail than map
landforms Clear features
in photographs
Easy to confirm your
location
Limited global coverage
Costly; rarely available for
free
May be old: landscape
may have changed
No contours; slopes may
not be obvious
Satellite
image
Tend to show larger areas
More sources of free
images
Newer images constantly
being
Most are lower resolution
than photographs
Limited coverage of high -
resolution images
High - resolution images
are costly 60
 Equipment for mapping
Mapping equipment:
Ruler, Protractor, Map case, Base maps, Clips/rubber bands
Mapping pens, Full selection of colored pencils
61
10.3 Location
Locating yourself accurately in the field while mapping is
of paramount importance.
 Equipment
Bringing Handheld GPS, and compass (or compass - clinometer)
 Using base maps
Good base maps may allow you to locate yourself relative to
features simply by inspection.
62
10.4 Making a field map
• To record as much relevant information as
possible on the geology.
• Present and interpretation of those
observations in the form of a final fair copy map.
 Information to record on field maps
Field maps are valuable records of observations and data
gathered in the field, from which later geological
interpretations will be drawn.
63
 Additions to a field map
Scale and N arrow
Explanation of colors used
Stratigraphic column (if appropriate)
List of non - standard symbols used
Cross reference to notebook(s) used
Name and contact details of author
Date of mapping
Reference direction for structural data (e.g. grid N)
64
65
 Information to record on a field map
• Rock exposures : Location, extent if appropriate, nature (e.g.
man - made).
• Structural data: Symbols and measurements (dip/strike,
plunge/trend) for bedding, foliations, lineations, fold axes,
joint orientations, etc.
• Notebook localities: Clearly label those localities where you
have made detailed notes in your book
• Specimen localities: Label the locations where samples were
taken (rock, fossil, sediment, water, etc.); it is
best to link these directly to notebook localities
66
• Photographs: sketches Label where photographs were
taken or field sketches made if not at a notebook locality
• Major contacts: Lithological and tectonic: solid where
observed, dashed where inferred.
• Additional evidence: For example topographic features,
drainage, soils, float, vegetation
• Superficial deposits: For example alluvium,
glacial/fluvioglacial material, sand, peat, river terraces, etc.
• Degree of exposure: Comments on quality and quantity
of exposure, weathering, soil cover, etc.
• Hazards: Note of hazards not obvious from base map
67
 Sketch cross - sections
For a geologist, tracing strata such as marker layers across
the land surface leads naturally on to questioning the
subsurface structure.
68
11 Recording numerical data and
use of instruments in the field
11.1 Data collection
Gravity meter: Large - scale surveys of subsurface bodies of
different density or of bodies that are changing mass or volume.
Magnetometer: Medium--to small, scale surveys of bodies
with a magnetic character that is distinctly different from that
of the surrounding rock .
Seismic surveys: Survey of features with an acoustic
impedance contrast (related to density) on a wide range of scales
from tens of meters to thousands of kilometers
69
• Portable XRF: Small-scale variation (decimeters to meters)
in the major and minor element concentrations of rocks
exposed at the surface.
• Gamma - ray spectrometer: Small - scale spatial
variation in the Th, K and U concentration in rocks exposed at
the surface
30 cm to tens of meters.
• Magnetic susceptibility meter: Very small - scale spatial
variation in the response of rocks to an imposed magnetic
field; this relates not only to the composition of rocks
containing magnetic minerals but also paramagnetic minerals
such as clay minerals
70
11.2 Transport and protection of
the instruments
Transport by backpacks/rucksacks and/or one of
the specially designed carrying cases may be necessary.
Advance planning, and possibly permission, will
be necessary for any instrument that under
X - ray looks like a gun (as some detectors do) or
contains radioactive material (e.g. gamma - ray
spectrometer and portable XRF).
71
11.3 Correlation with other data sets
The geophysical data will often need to be
correlated with geological and, in some cases,
topographical data. This is best done when the
measurement grid is set up.
If appropriate to the size and type of survey,
consider incorporating each data set into a GIS that will
allow appropriate display of each set of data and will let
you look for Numerical 11246 correlations.
72
73
74
Photography
75
What is the photograph?
Photograph is the essential key to memorize and
illustrate the geological feature, geological information
and interpretation, and so on in the report.
76
Tip of taking photograph
• First take a general view photo at the locality
• Zoom in the focus point.
77
Tip of taking photograph
• Take note the light condition because the photo field will
change the color. Sunny conditions can show some
geological features better. If the lighting conditions are poor
or variable take several shots with different settings. Note
that underexposed digital photographs can be processed later
to achieve a good image whereas overexposed photographs
do not record all of the information.
Two images of
grey mudstones
from the
Monterey
Formation,
California, USA
showing the
large color
difference
78
Tip of taking photograph
• taking a lot of photographs,
for instance of shell beds or
fine - scale detail, take the
photographs in stratigraphic
order to avoid confusion and
consider marking the rocks in
some manner, for instance
with a marker pen, correction
fluid or a tile scribe, so you
know how the different
photographs relate to each
other.
• It is the best if you shot the
photo near the object.
79
Tip of taking photograph
• Use scale object (knife,
coin, pen and so on) to
compare to the field and
photo.
• Make sure that that
photo is OK before you
leave the locality so that
you can take another
photograph if necessary.
• Rename and note where
the locality on the photo
or note book to avoid
confusing
80
Sampling
81
What is sampling?
Sample is the small amount of the object that
the rest is or should be like in order to do a lab
or on the other purpose.
82
Key points for sampling
• What are the objectives and therefore how much and
what type of sample is required?
• Is the sample representative?
• What does the sampling resolution need to be?
• Is the sample fresh and unweather?
• Does the sample need to be orientated?
• Do I have the appropriate tools for the job?
• Have I recorded exactly where the sample is from?
• What are the conservation issues? Am I taking only
what is necessary, have I got the necessary
permission and have I considered the visual impact
on the environment?
83
Selecting sample
• Sample for thin section : 10 cm
thick × 5 cm × 5 cm
• Oriented sample : mark the
direction, the direction of rock
age or dip and strike line
• Geochemical analysis sample :
fresh rock
• Sample for extraction mineral:
at least 1kg of rock (normally
for core sample)
• Sample for regional studies: a
rock can be representative of a
whole area
84
Labelling and packing sample
• Sample number
• Cross reference to field
notebook page and/or
date collected
• Location
• Whether or not the
sample is orientated
• Rock type
85
Conclusion
86
Before going into the field
• Be clear on the objectives of the fieldwork.
• Consult published and other information
available including relevant web material and
other researchers who have visited the area to
gain a general overview.
• If required, obtain permission to visit the site
and sample.
• Fill in health and safety forms, get first aid
training, etc., as required.
• Put together the necessary fi eld equipment
87
In the field
• Choose the best exposures for the objectives of
the fieldwork.
• Have at least one clear aim
• Check for, and monitor, hazards.
• Collect data and take note.
• At the end review the work that you have
completed and amend the list of further
fieldwork tasks and aims as required.
• If possible allow time to double check any
discrepancies
88
On return from the field
• Curate and store samples as required.
• Check field notes and tidy up any loose ends.
• Discuss data and interpretation with
colleagues and other experts.
• Analyze data and samples.
• Write up the work, for instance as a report or
scientific paper (use the other related report
for helping)
89
Thanks for paying attention
90

Mais conteúdo relacionado

Mais procurados

Lecture 13-electrical method -field procedure
Lecture 13-electrical method -field procedureLecture 13-electrical method -field procedure
Lecture 13-electrical method -field procedure
Kosygin Leishangthem
 

Mais procurados (20)

Siwalik- Stratigraphy
Siwalik- StratigraphySiwalik- Stratigraphy
Siwalik- Stratigraphy
 
Permian triassic boundary by priyansh dwivedi
Permian triassic boundary by priyansh dwivediPermian triassic boundary by priyansh dwivedi
Permian triassic boundary by priyansh dwivedi
 
Residual Mineral Deposits
Residual Mineral DepositsResidual Mineral Deposits
Residual Mineral Deposits
 
GEOID-DETERMINAION
GEOID-DETERMINAIONGEOID-DETERMINAION
GEOID-DETERMINAION
 
Metallogenic Epoch and Province
Metallogenic Epoch and Province Metallogenic Epoch and Province
Metallogenic Epoch and Province
 
Magnetic Survey
Magnetic SurveyMagnetic Survey
Magnetic Survey
 
Geochemical methods in mineral exploration
Geochemical  methods  in  mineral  explorationGeochemical  methods  in  mineral  exploration
Geochemical methods in mineral exploration
 
Tectonc framework of india
Tectonc framework of india Tectonc framework of india
Tectonc framework of india
 
Alluvial mining in geology based
Alluvial mining in geology basedAlluvial mining in geology based
Alluvial mining in geology based
 
Stratigraphy of Trichinopoloy
Stratigraphy of TrichinopoloyStratigraphy of Trichinopoloy
Stratigraphy of Trichinopoloy
 
Extinction angle and Types of Extinction in Minerals.pdf
Extinction angle and Types of Extinction in Minerals.pdfExtinction angle and Types of Extinction in Minerals.pdf
Extinction angle and Types of Extinction in Minerals.pdf
 
A seminar on ramsay classification of fold
A seminar on ramsay classification of foldA seminar on ramsay classification of fold
A seminar on ramsay classification of fold
 
Gravity Method
Gravity MethodGravity Method
Gravity Method
 
Classifications of igneous rocks
Classifications of igneous rocksClassifications of igneous rocks
Classifications of igneous rocks
 
Paired metamorphic belts
Paired metamorphic beltsPaired metamorphic belts
Paired metamorphic belts
 
Mesozoic era
Mesozoic eraMesozoic era
Mesozoic era
 
Chronostratigraphic units Geology By Misson Choudhury
Chronostratigraphic units Geology By Misson Choudhury Chronostratigraphic units Geology By Misson Choudhury
Chronostratigraphic units Geology By Misson Choudhury
 
Lecture 13-electrical method -field procedure
Lecture 13-electrical method -field procedureLecture 13-electrical method -field procedure
Lecture 13-electrical method -field procedure
 
Carbonate rocks
Carbonate rocksCarbonate rocks
Carbonate rocks
 
Fluvial depositional landform geomorphology
Fluvial depositional  landform geomorphologyFluvial depositional  landform geomorphology
Fluvial depositional landform geomorphology
 

Semelhante a Structural geology

2021 icse reducedsylabiix-geography
2021 icse reducedsylabiix-geography2021 icse reducedsylabiix-geography
2021 icse reducedsylabiix-geography
Vahabshaik Shai
 
PHY 103 Final Project Guidelines and RubricOverviewThe final .docx
PHY 103 Final Project Guidelines and RubricOverviewThe final .docxPHY 103 Final Project Guidelines and RubricOverviewThe final .docx
PHY 103 Final Project Guidelines and RubricOverviewThe final .docx
mattjtoni51554
 
Distance Measurement & Chain Surveying
Distance Measurement & Chain SurveyingDistance Measurement & Chain Surveying
Distance Measurement & Chain Surveying
Bahzad5
 

Semelhante a Structural geology (20)

Field work in geology courses by different science
Field work in geology courses by different scienceField work in geology courses by different science
Field work in geology courses by different science
 
Introduction to Surveying and its classification
Introduction to Surveying and its classificationIntroduction to Surveying and its classification
Introduction to Surveying and its classification
 
Surveying.pptx
Surveying.pptxSurveying.pptx
Surveying.pptx
 
GEOLOGICAL FIELD REPORT On Latachapli, Lakkhirhat, Nijampur, NishanBaria, Kha...
GEOLOGICAL FIELD REPORT On Latachapli, Lakkhirhat, Nijampur, NishanBaria, Kha...GEOLOGICAL FIELD REPORT On Latachapli, Lakkhirhat, Nijampur, NishanBaria, Kha...
GEOLOGICAL FIELD REPORT On Latachapli, Lakkhirhat, Nijampur, NishanBaria, Kha...
 
Lecture 1.pptx
Lecture  1.pptxLecture  1.pptx
Lecture 1.pptx
 
Reconnaissance for Hydrographic Surveying Project
Reconnaissance for Hydrographic  Surveying ProjectReconnaissance for Hydrographic  Surveying Project
Reconnaissance for Hydrographic Surveying Project
 
2021 icse reducedsylabiix-geography
2021 icse reducedsylabiix-geography2021 icse reducedsylabiix-geography
2021 icse reducedsylabiix-geography
 
principle of survey
principle of surveyprinciple of survey
principle of survey
 
STRAND 3 NATURAL AND HISTORIC BUILT ENVIRONMENT.pptx
STRAND 3 NATURAL AND HISTORIC BUILT ENVIRONMENT.pptxSTRAND 3 NATURAL AND HISTORIC BUILT ENVIRONMENT.pptx
STRAND 3 NATURAL AND HISTORIC BUILT ENVIRONMENT.pptx
 
V1 s3 raw materials evaluation
V1 s3   raw materials evaluationV1 s3   raw materials evaluation
V1 s3 raw materials evaluation
 
Map making and elementary surveying
Map making and elementary surveyingMap making and elementary surveying
Map making and elementary surveying
 
surveying 1 pdf
surveying 1 pdfsurveying 1 pdf
surveying 1 pdf
 
CE121- Introduction.pptx
CE121- Introduction.pptxCE121- Introduction.pptx
CE121- Introduction.pptx
 
Saurav Poudel__11__Field investigation of landslide.pptx
Saurav Poudel__11__Field investigation of landslide.pptxSaurav Poudel__11__Field investigation of landslide.pptx
Saurav Poudel__11__Field investigation of landslide.pptx
 
PHY 103 Final Project Guidelines and RubricOverviewThe final .docx
PHY 103 Final Project Guidelines and RubricOverviewThe final .docxPHY 103 Final Project Guidelines and RubricOverviewThe final .docx
PHY 103 Final Project Guidelines and RubricOverviewThe final .docx
 
Engineering Geology Lecture 2
Engineering Geology Lecture 2Engineering Geology Lecture 2
Engineering Geology Lecture 2
 
Total station
Total stationTotal station
Total station
 
Distance Measurement & Chain Surveying
Distance Measurement & Chain SurveyingDistance Measurement & Chain Surveying
Distance Measurement & Chain Surveying
 
Survey lecture-notes
Survey lecture-notesSurvey lecture-notes
Survey lecture-notes
 
Landslide monitoring systems & techniques
Landslide monitoring systems & techniquesLandslide monitoring systems & techniques
Landslide monitoring systems & techniques
 

Último

EIS-Webinar-Prompt-Knowledge-Eng-2024-04-08.pptx
EIS-Webinar-Prompt-Knowledge-Eng-2024-04-08.pptxEIS-Webinar-Prompt-Knowledge-Eng-2024-04-08.pptx
EIS-Webinar-Prompt-Knowledge-Eng-2024-04-08.pptx
Earley Information Science
 

Último (20)

TrustArc Webinar - Stay Ahead of US State Data Privacy Law Developments
TrustArc Webinar - Stay Ahead of US State Data Privacy Law DevelopmentsTrustArc Webinar - Stay Ahead of US State Data Privacy Law Developments
TrustArc Webinar - Stay Ahead of US State Data Privacy Law Developments
 
GenCyber Cyber Security Day Presentation
GenCyber Cyber Security Day PresentationGenCyber Cyber Security Day Presentation
GenCyber Cyber Security Day Presentation
 
How to convert PDF to text with Nanonets
How to convert PDF to text with NanonetsHow to convert PDF to text with Nanonets
How to convert PDF to text with Nanonets
 
🐬 The future of MySQL is Postgres 🐘
🐬  The future of MySQL is Postgres   🐘🐬  The future of MySQL is Postgres   🐘
🐬 The future of MySQL is Postgres 🐘
 
Boost Fertility New Invention Ups Success Rates.pdf
Boost Fertility New Invention Ups Success Rates.pdfBoost Fertility New Invention Ups Success Rates.pdf
Boost Fertility New Invention Ups Success Rates.pdf
 
Exploring the Future Potential of AI-Enabled Smartphone Processors
Exploring the Future Potential of AI-Enabled Smartphone ProcessorsExploring the Future Potential of AI-Enabled Smartphone Processors
Exploring the Future Potential of AI-Enabled Smartphone Processors
 
Real Time Object Detection Using Open CV
Real Time Object Detection Using Open CVReal Time Object Detection Using Open CV
Real Time Object Detection Using Open CV
 
Slack Application Development 101 Slides
Slack Application Development 101 SlidesSlack Application Development 101 Slides
Slack Application Development 101 Slides
 
Mastering MySQL Database Architecture: Deep Dive into MySQL Shell and MySQL R...
Mastering MySQL Database Architecture: Deep Dive into MySQL Shell and MySQL R...Mastering MySQL Database Architecture: Deep Dive into MySQL Shell and MySQL R...
Mastering MySQL Database Architecture: Deep Dive into MySQL Shell and MySQL R...
 
The 7 Things I Know About Cyber Security After 25 Years | April 2024
The 7 Things I Know About Cyber Security After 25 Years | April 2024The 7 Things I Know About Cyber Security After 25 Years | April 2024
The 7 Things I Know About Cyber Security After 25 Years | April 2024
 
Advantages of Hiring UIUX Design Service Providers for Your Business
Advantages of Hiring UIUX Design Service Providers for Your BusinessAdvantages of Hiring UIUX Design Service Providers for Your Business
Advantages of Hiring UIUX Design Service Providers for Your Business
 
Apidays Singapore 2024 - Building Digital Trust in a Digital Economy by Veron...
Apidays Singapore 2024 - Building Digital Trust in a Digital Economy by Veron...Apidays Singapore 2024 - Building Digital Trust in a Digital Economy by Veron...
Apidays Singapore 2024 - Building Digital Trust in a Digital Economy by Veron...
 
Handwritten Text Recognition for manuscripts and early printed texts
Handwritten Text Recognition for manuscripts and early printed textsHandwritten Text Recognition for manuscripts and early printed texts
Handwritten Text Recognition for manuscripts and early printed texts
 
The Role of Taxonomy and Ontology in Semantic Layers - Heather Hedden.pdf
The Role of Taxonomy and Ontology in Semantic Layers - Heather Hedden.pdfThe Role of Taxonomy and Ontology in Semantic Layers - Heather Hedden.pdf
The Role of Taxonomy and Ontology in Semantic Layers - Heather Hedden.pdf
 
How to Troubleshoot Apps for the Modern Connected Worker
How to Troubleshoot Apps for the Modern Connected WorkerHow to Troubleshoot Apps for the Modern Connected Worker
How to Troubleshoot Apps for the Modern Connected Worker
 
EIS-Webinar-Prompt-Knowledge-Eng-2024-04-08.pptx
EIS-Webinar-Prompt-Knowledge-Eng-2024-04-08.pptxEIS-Webinar-Prompt-Knowledge-Eng-2024-04-08.pptx
EIS-Webinar-Prompt-Knowledge-Eng-2024-04-08.pptx
 
Data Cloud, More than a CDP by Matt Robison
Data Cloud, More than a CDP by Matt RobisonData Cloud, More than a CDP by Matt Robison
Data Cloud, More than a CDP by Matt Robison
 
2024: Domino Containers - The Next Step. News from the Domino Container commu...
2024: Domino Containers - The Next Step. News from the Domino Container commu...2024: Domino Containers - The Next Step. News from the Domino Container commu...
2024: Domino Containers - The Next Step. News from the Domino Container commu...
 
Raspberry Pi 5: Challenges and Solutions in Bringing up an OpenGL/Vulkan Driv...
Raspberry Pi 5: Challenges and Solutions in Bringing up an OpenGL/Vulkan Driv...Raspberry Pi 5: Challenges and Solutions in Bringing up an OpenGL/Vulkan Driv...
Raspberry Pi 5: Challenges and Solutions in Bringing up an OpenGL/Vulkan Driv...
 
A Domino Admins Adventures (Engage 2024)
A Domino Admins Adventures (Engage 2024)A Domino Admins Adventures (Engage 2024)
A Domino Admins Adventures (Engage 2024)
 

Structural geology

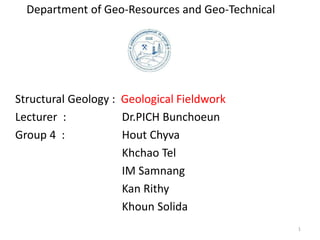
  • 1. Department of Geo-Resources and Geo-Technical Structural Geology : Geological Fieldwork Lecturer : Dr.PICH Bunchoeun Group 4 : Hout Chyva Khchao Tel IM Samnang Kan Rithy Khoun Solida 1
  • 4. 1.Field Equipment and safety 1. The hand lens and binoculars • hand lens is an essential piece of equipment for the detailed. • observation of all rock types and fossil material. 4
  • 5. 1.Field Equipment and safety 2. The compass - clinometer The compass - clinometer is used to measure: • the orientation of geological planes and lineation's with respect to north. • the angle of dip of geological features with respect to the horizontal. This allows an accurate record of the geometry of the features to be constructed. • There are tow types of compass 5
  • 6. - the first type is made by Brunton, USA, Freiberger, Germany and Breithaupt, Germany 6
  • 7. -The second type is made by Silva and Suunto 7
  • 8. 1.Field Equipment and safety 3. Global positioning systems and altimeters • Global positioning systems (GPS) use ultra high frequency radio wave signals from satellites to trigonometrically derive your position to within a few meters laterally. 8
  • 9. 1.Field Equipment and safety 4. Measuring distance and thickness We use rule , meters , Jacob staff for measuring distance and thickness . 9
  • 10. 1.Field Equipment and safety 5. Classification and colure charts -Various well -established comparison charts can be used to provide a semi - quantitative description of the rock and any changes in it. These include grain - size charts and rock classification diagrams. 10
  • 11. 1.Field Equipment and safety 6. Hammer, chisels, and other hardware hammer is necessary for most geological fieldwork, both for the collection of samples and, where necessary to create fresh surfaces so that the rock and the minerals within it can be described. 11
  • 12. 1.Field Equipment and safety 7. The hard copy field notebook or The laptop, netbook or PDA • Except for safety equipment, provisions and suitable clothing the hardcopy or electronic field notebook is probably the most essential piece of field kit. The types of data to record in a field notebook. 12
  • 13. 1.Field Equipment and safety 8. Writing equipment, maps and relevant literature • Pencils : Several pencils for recording notes and sketches are essential. • Pencil sharpener or penknife: Conventional pencils will need to be sharpened. • Coloured pencils: A few coloured pencils are useful in the field for recording specific items. • Eraser: Essential for correcting mistakes. 13
  • 14. 1.Field Equipment and safety 9. Comfort, field safety and field safety equipment: a. Clothes, backpack/rucksack and personal provisions: Fieldwork usually involves physical exertion and can involve being outside in extreme weather conditions and/or working in inhospitable or remote areas. For these reasons it is important to select comfortable clothing and to be prepared for a range of conditions. Find out the expected weather conditions in the area at the time you will visit. Most mountain walking and outdoor clothing is suitable. 14
  • 15. b. Field safety There are, however, three aspects that are important for safety in the field anywhere: 1 .Be prepared : have the correct equipment enough food and drink sufficient clothing for the expected range of weather a first aid kit means of raising the emergency services mobile phone, radio or satellite phone; 15
  • 16. 2. Assess and monitor the potential hazards Common hazards and the preventative action that can be taken to avoid them are as follows : Falling rocks Mudslides and unconsolidated rocks Unpredictable weather Lightning Dangerous beasties and plants Fatigue 16
  • 17. 17
  • 18. 3 Know what to do in an emergency Members of the party should know who is trained in first aid. In larger field parties it is also advisable to set up a chain of command in case an incident occurs. Ensure that you know how to contact the emergency services, what the emergency telephone number is for the country that you are visiting, what the local mobile phone signal coverage is and where you have to go to obtain a signal. C.Field safety equipment: Hard hat Reflective clothing Goggles 18
  • 19. 1.Field Equipment and safety 10. Conservation, respect and obtaining permission • Many countries have conservation or protected sites of either biological and/or geological interest. These sites are protected from building development but also special rules may apply to sampling in situ material and sometimes even to loose material. 19
  • 20. 3.The field notebook • The field notebook forms the main record of the data you gather in the field such as their compositional and textural characteristics, internal features, sample collected, the position and orientation of any photographs. 1. Field notebook layout - Preliminary p ages: new notebook ensure that you put your name, address, email and any other contact details in a prominent place on the cover. 20
  • 21. 3.The field notebook - Daily entries : information in your field notebook. The initial information should include the following type of information, although the exact details will depend on the purpose of the fieldwork. - Date and day of field visit - area or location visited - Aims of the fieldwork or a summary of the general hypotheses - the weather and any other information that will help you to recall the field day. - The name(s) of your field partner or the other members of the team. - More detailed location information as appropriate 21
  • 23. 3.The field notebook • General tip • cross referencing : Number the pages of your notebook. • Use of space : Space your notes • Organization: Use headings and subheadings as they make the notes much easier to find 23
  • 24. 3.The field notebook 2. Field s ketches: A picture i s worth a thousand words a) Sketch from a field notebook showing good use of space, a method of separating interpretation (shown in the cloud at the top right) from the observations. 24
  • 25. 3.The field notebook - Part of a graphic log showing effective use of colour to pick out samples (red) and photographs (blue). 25
  • 26. 3.The field notebook • General principles: Aims, s pace and tools - Sketches are usually drawn freehand in pencil. 26
  • 27. 3.The field notebook - Space - Scale: All sketches should include a Scale - Orientation : All sketches should include an orientation relative to north and a clear indication as to whether it is a plan view, oblique view or cross – section. - Angles and geometry, Inset boxes for detail, - Colour: A green coloured pencil can be useful for showing the vegetation and clearly separates it from - the geological part of the sketch 27
  • 28. 3.The field notebook 3. Sketches of exposures • Sketches of whole, or representative parts of, exposures such as sea - cliffs, road cuts and quarry faces are commonly used to observe and show one or more of the following: - the main units and the geometric relationship(s) between them; - large - scale (metres to tens of metres) structures such as folds, faults and angular unconformities; - the position of more detailed measurements (e.g. samples or - a graphic log; so that the exact location can be easily relocated. 28
  • 29. The field notebook 1. Assess the units 2. Draw outline 29
  • 30. 3.The field notebook 3. Draw the major geological boundaries 4. Draw the boundaries of any subunits and a weathering profile 30
  • 31. 3.The field notebook 5. Sketch the detail within each of the units 6. Add the finishing touches 31
  • 32. 3.The field notebook 4. Sketching metre – and centimetre - scale features • All geological features occur in three dimensions, whether they are due to rock deformation, sedimentary processes or intrusion processes. • Draw two or three sketches of faces that are approximately at right angles to each other to illustrate the three - dimensional characteristics. • Record the features as a small - scale map and cross – section (for instance the anticlines and synclines ) 32
  • 33. 3.The field notebook 5. Sketch maps • .Sketch maps need only to be roughly to scale they should, however, include an approximate scale and a north arrow. 33
  • 34. 34
  • 36. Reasons for collecting data from sedimentary deposits • Understand sedimentary processes and depositional environments. • Understand the potential of a sedimentary basin or unit for hydrocarbon recovery or for water resources. •Reconstruct past periods of environmental change, particularly climate and sea - level change. • Understand and exploit sedimentary building materials and mineral deposits. Refine the geological timescale.
  • 37. There are four aspects that need recording in the description of sedimentary rocks: (1) the composition; (2) the texture of the rock; (3) the sedimentary structures; and (4) the fossils within them.
  • 38. Graphic logs have many advantages because they: • are a succinct method of summarizing a lot of data; • immediately give an impression of the vertical succession and can therefore aid in the identification of repetitions and major changes in the sedimentary facies; • are a convenient way of testing and making correlations between sections of similar age from different places.
  • 40. Conventions for graphic logs -The vertical scale -The horizontal scale -Lithology -Sedimentary structure -Stratigraphic order -Other information
  • 41. Three main types of sedimentary rock are used to study and construct short - term changes in climate through time : (1) fi ne – grained marine sedimentary rocks deposited on the continental shelf below storm wave - base or in the deep ocean; (2) fi ne – grained lake deposits; and (3) other non - marine deposits such as fine - grained wind - blown sediment (loess) and cave deposits.
  • 42. Three main types of sedimentary rock are used to study and construct short - term changes in climate through time : (1) fi ne – grained marine sedimentary rocks deposited on the continental shelf below storm wave - base or in the deep ocean; (2) fi ne – grained lake deposits; and (3) other non - marine deposits such as fine - grained wind - blown sediment (loess) and cave deposits.
  • 44. The main reasons to study igneous rocks are to: (1) understand volcanoes and the hazards they pose to life on Earth; (2) understand processes beneath the Earth’s surface that drive plate tectonics and that contributed to the evolution of Earth and other planetary bodies; (3) understand the distribution of ore minerals; and (4) for chronology.
  • 45. Distinguishing characteristics of veins in igneous rock
  • 46. When making a graph log of a suspected pyroclastic deposit, aspects to look out for in particular include: -Grain size variation -The nature of clasts -Cross stratification -Flow banding -Relationships between ash and large fragments
  • 48. Classification scheme for igneous rocks types
  • 49. 8.Recording structural information Our planet has crust and mantle which are subjected to change stresses that cause rocks to deform, either by breaking or by bending/stretching Measuring brittle structures provides information on how and why the upper crust in particular deforms, specifically the orientation of regional and local stresses, and the direction of motion on faults. 49
  • 50. 8.1 Equipment and measurement To accurate measurement of azimuths, dips and plunges, a specialist compass - clinometer is recommended. • Structural measurements and notations Azimuth (strike; trend of linear feature) three - digit number 076 Dip or plunge (inclination from horizontal) two - digit number 76 50
  • 51. 8.2 Brittle structures: Faults, joints and veins • Faults that we define as normal, thrust and strike - slip commonly have steep, gentle and sub-vertical dips respectively. • Topography: Break in slope; trough or ridge; scarp; river gorge; abrupt landscape contrast. • Erosion: Ravine/gully/stream/river follows fault - line (easily eroded crushed rock); ridge (if fault mineralization is harder than country rock • Drainage: Springs, sag ponds (many fault rocks are impermeable); sinkholes (limestone one side of fault); abrupt drainage contrast at fault 51
  • 52. Vegetation: Sharp change across fault, due to soil and/or drainage change on different rock types Offsets: Offset of linear feature (stream, ridge, dyke, road, fence, railway), especially for active faults 52
  • 53. • Conjugate veins With a characteristic X-shaped pattern and minor offsets (Switzerland) • Shear and extensional fractures Diagram of shear and extensional fractures on a fold (based on McClay, 1991) 53
  • 54. • Joints Unloading joints in granite exposure near Balmoral, Scotland, UK: two sets are subvertical, almost at right angles to each other, while the third set is roughly parallel to the land surface 54
  • 55. • Fold analysis Size, shape and orientation should be considered in describing folds. Fold sizes can be summarized by recording their amplitudes and wavelengths (e.g. on a sketch) Schematic cross: section showing an example of how fold asymmetry. 55
  • 56. Isolated asymmetric fold in calcareous mylonite. 56
  • 57. 10 Making a geological map 10.1 Principles and aims A geological map shows how geological features (rock units, faults, etc.) are distributed across a region. It is a two - dimensional representation of part of the Earth ’s surface, scaled down to a size that is convenient for displaying on a sheet of paper or a computer screen. 57
  • 58. Geological maps are made for a variety of reasons and, depending on the region, these are to: • Record the position of particular geological features or exposures; • Help us understand the geological history of a region; • Locate natural resources, and understand the best way to exploit them; • Identify potential hazards (e.g. faults, volcanoes, unstable substrates, hazardous deposits); • Gain insights into the immediate subsurface environment, which governs soils, drainage, agriculture and ecosystems; • Provide a base for constructing a detailed geological cross - section to deduce and visualize strata below ground. 58
  • 59. 10.2 Preparation and materials Base maps and other aids Topographic maps 59
  • 60. Aerial photographs, Satellite images Compare these two methods: Method Advantage Disadvantage Aerial photogr aph Clear depiction of landscape features More detail than map landforms Clear features in photographs Easy to confirm your location Limited global coverage Costly; rarely available for free May be old: landscape may have changed No contours; slopes may not be obvious Satellite image Tend to show larger areas More sources of free images Newer images constantly being Most are lower resolution than photographs Limited coverage of high - resolution images High - resolution images are costly 60
  • 61.  Equipment for mapping Mapping equipment: Ruler, Protractor, Map case, Base maps, Clips/rubber bands Mapping pens, Full selection of colored pencils 61
  • 62. 10.3 Location Locating yourself accurately in the field while mapping is of paramount importance.  Equipment Bringing Handheld GPS, and compass (or compass - clinometer)  Using base maps Good base maps may allow you to locate yourself relative to features simply by inspection. 62
  • 63. 10.4 Making a field map • To record as much relevant information as possible on the geology. • Present and interpretation of those observations in the form of a final fair copy map.  Information to record on field maps Field maps are valuable records of observations and data gathered in the field, from which later geological interpretations will be drawn. 63
  • 64.  Additions to a field map Scale and N arrow Explanation of colors used Stratigraphic column (if appropriate) List of non - standard symbols used Cross reference to notebook(s) used Name and contact details of author Date of mapping Reference direction for structural data (e.g. grid N) 64
  • 65. 65
  • 66.  Information to record on a field map • Rock exposures : Location, extent if appropriate, nature (e.g. man - made). • Structural data: Symbols and measurements (dip/strike, plunge/trend) for bedding, foliations, lineations, fold axes, joint orientations, etc. • Notebook localities: Clearly label those localities where you have made detailed notes in your book • Specimen localities: Label the locations where samples were taken (rock, fossil, sediment, water, etc.); it is best to link these directly to notebook localities 66
  • 67. • Photographs: sketches Label where photographs were taken or field sketches made if not at a notebook locality • Major contacts: Lithological and tectonic: solid where observed, dashed where inferred. • Additional evidence: For example topographic features, drainage, soils, float, vegetation • Superficial deposits: For example alluvium, glacial/fluvioglacial material, sand, peat, river terraces, etc. • Degree of exposure: Comments on quality and quantity of exposure, weathering, soil cover, etc. • Hazards: Note of hazards not obvious from base map 67
  • 68.  Sketch cross - sections For a geologist, tracing strata such as marker layers across the land surface leads naturally on to questioning the subsurface structure. 68
  • 69. 11 Recording numerical data and use of instruments in the field 11.1 Data collection Gravity meter: Large - scale surveys of subsurface bodies of different density or of bodies that are changing mass or volume. Magnetometer: Medium--to small, scale surveys of bodies with a magnetic character that is distinctly different from that of the surrounding rock . Seismic surveys: Survey of features with an acoustic impedance contrast (related to density) on a wide range of scales from tens of meters to thousands of kilometers 69
  • 70. • Portable XRF: Small-scale variation (decimeters to meters) in the major and minor element concentrations of rocks exposed at the surface. • Gamma - ray spectrometer: Small - scale spatial variation in the Th, K and U concentration in rocks exposed at the surface 30 cm to tens of meters. • Magnetic susceptibility meter: Very small - scale spatial variation in the response of rocks to an imposed magnetic field; this relates not only to the composition of rocks containing magnetic minerals but also paramagnetic minerals such as clay minerals 70
  • 71. 11.2 Transport and protection of the instruments Transport by backpacks/rucksacks and/or one of the specially designed carrying cases may be necessary. Advance planning, and possibly permission, will be necessary for any instrument that under X - ray looks like a gun (as some detectors do) or contains radioactive material (e.g. gamma - ray spectrometer and portable XRF). 71
  • 72. 11.3 Correlation with other data sets The geophysical data will often need to be correlated with geological and, in some cases, topographical data. This is best done when the measurement grid is set up. If appropriate to the size and type of survey, consider incorporating each data set into a GIS that will allow appropriate display of each set of data and will let you look for Numerical 11246 correlations. 72
  • 73. 73
  • 74. 74
  • 76. What is the photograph? Photograph is the essential key to memorize and illustrate the geological feature, geological information and interpretation, and so on in the report. 76
  • 77. Tip of taking photograph • First take a general view photo at the locality • Zoom in the focus point. 77
  • 78. Tip of taking photograph • Take note the light condition because the photo field will change the color. Sunny conditions can show some geological features better. If the lighting conditions are poor or variable take several shots with different settings. Note that underexposed digital photographs can be processed later to achieve a good image whereas overexposed photographs do not record all of the information. Two images of grey mudstones from the Monterey Formation, California, USA showing the large color difference 78
  • 79. Tip of taking photograph • taking a lot of photographs, for instance of shell beds or fine - scale detail, take the photographs in stratigraphic order to avoid confusion and consider marking the rocks in some manner, for instance with a marker pen, correction fluid or a tile scribe, so you know how the different photographs relate to each other. • It is the best if you shot the photo near the object. 79
  • 80. Tip of taking photograph • Use scale object (knife, coin, pen and so on) to compare to the field and photo. • Make sure that that photo is OK before you leave the locality so that you can take another photograph if necessary. • Rename and note where the locality on the photo or note book to avoid confusing 80
  • 82. What is sampling? Sample is the small amount of the object that the rest is or should be like in order to do a lab or on the other purpose. 82
  • 83. Key points for sampling • What are the objectives and therefore how much and what type of sample is required? • Is the sample representative? • What does the sampling resolution need to be? • Is the sample fresh and unweather? • Does the sample need to be orientated? • Do I have the appropriate tools for the job? • Have I recorded exactly where the sample is from? • What are the conservation issues? Am I taking only what is necessary, have I got the necessary permission and have I considered the visual impact on the environment? 83
  • 84. Selecting sample • Sample for thin section : 10 cm thick × 5 cm × 5 cm • Oriented sample : mark the direction, the direction of rock age or dip and strike line • Geochemical analysis sample : fresh rock • Sample for extraction mineral: at least 1kg of rock (normally for core sample) • Sample for regional studies: a rock can be representative of a whole area 84
  • 85. Labelling and packing sample • Sample number • Cross reference to field notebook page and/or date collected • Location • Whether or not the sample is orientated • Rock type 85
  • 87. Before going into the field • Be clear on the objectives of the fieldwork. • Consult published and other information available including relevant web material and other researchers who have visited the area to gain a general overview. • If required, obtain permission to visit the site and sample. • Fill in health and safety forms, get first aid training, etc., as required. • Put together the necessary fi eld equipment 87
  • 88. In the field • Choose the best exposures for the objectives of the fieldwork. • Have at least one clear aim • Check for, and monitor, hazards. • Collect data and take note. • At the end review the work that you have completed and amend the list of further fieldwork tasks and aims as required. • If possible allow time to double check any discrepancies 88
  • 89. On return from the field • Curate and store samples as required. • Check field notes and tidy up any loose ends. • Discuss data and interpretation with colleagues and other experts. • Analyze data and samples. • Write up the work, for instance as a report or scientific paper (use the other related report for helping) 89
  • 90. Thanks for paying attention 90