
Recomendados
Mais conteúdo relacionado
Mais procurados
Mais procurados (18)
Semelhante a Sample Product Information Booklet
Semelhante a Sample Product Information Booklet (20)
Mais de haven832
Mais de haven832 (12)
Último
Último (20)
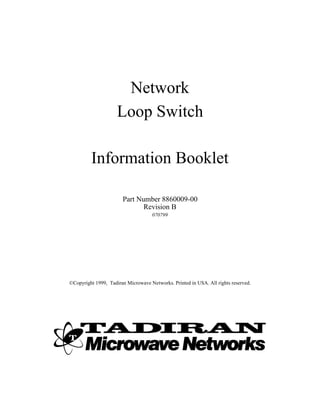
Sample Product Information Booklet
- 1. Network Loop Switch Information Booklet Part Number 8860009-00 Revision B 070799 ©Copyright 1999, Tadiran Microwave Networks. Printed in USA. All rights reserved.
- 2. NOTES ©Copyright 1999, Tadiran Microwave Networks. Printed in USA. All rights reserved.
- 3. SAFETY PRECAUTIONS DO NOT attempt to install equipment if you do not have installation experience. Tadiran Microwave Networks is not liable for personal injury caused by improper installation, nor does the equipment warranty cover equipment damaged by im- proper installation. PERSONAL SAFETY For your own safety, please observe the following precautions when working with microwave equipment. The standard 48-Vdc supply voltage is not normally considered life-threatening, however, your physical reaction to accidental contact with that voltage could cause injury. EQUIPMENT SAFETY Remove the power-supply input fuse from the front-panel before removing any other cable, or cover. A replacement fuse must have the same voltage and amper- age rating as the original fuse as specified in this handbook. After installation, be sure to secure the any cables to a structure to prevent tripping. Be sure to follow all applicable building, electrical, and fire codes. Consider con- duit installation as a minimum. SAFETY CONVENTIONS The following caution and warning symbols are used in this booklet: CAUTION indicates a hazardous situation that, if not avoided, could result in minor or moderate injury. Caution may also be used to indicate unsafe practices or risks of property damage. CAUTION WARNING indicates a potential hazardous situation that, if not avoided, could result WARNING in death or serious injury.
- 4. Tadiran Microwave Networks released the original issue of this booklet, P/N 8860009-00, December 1998. The table below shows revision history. Revision History Pages Changed Date
- 5. Tadiran Microwave Networks Table of Contents Network Loop Switch Table of Contents Product Description 1 Housing . . . . . . . . . . . . . . . . . . . . . . . . . . . . . . . . . . . . . . . . . . 3 Main Card . . . . . . . . . . . . . . . . . . . . . . . . . . . . . . . . . . . . . . . . . 3 Application 5 Installation 6 ESD Notice . . . . . . . . . . . . . . . . . . . . . . . . . . . . . . . . . . . . . . . . 7 Unpacking . . . . . . . . . . . . . . . . . . . . . . . . . . . . . . . . . . . . . . . . . 7 Address and Communications Setup . . . . . . . . . . . . . . . . . . . . . . . . . . . 7 Mounting . . . . . . . . . . . . . . . . . . . . . . . . . . . . . . . . . . . . . . . . . 7 Cabling . . . . . . . . . . . . . . . . . . . . . . . . . . . . . . . . . . . . . . . . . . 7 To Connect Power . . . . . . . . . . . . . . . . . . . . . . . . . . . . . . . . . . . . . . . . . . 8 To Connect Network Management Data (Network Mode only) . . . . . . . 9 To Connect RS232 Signals (DCC Mode only) . . . . . . . . . . . . . . . . . . . 10 To Connect VF and DCC Signals (Network and DCC Modes) . . . . . . 10 To Verify Your Installation . . . . . . . . . . . . . . . . . . . . . . . . . . . . . . . . . . 11 Specifications 12 Environmental . . . . . . . . . . . . . . . . . . . . . . . . . . . . . . . . . . . . . . 12 Electrical & Safety . . . . . . . . . . . . . . . . . . . . . . . . . . . . . . . . . . . . 12 061799 8860009-00 Page vii
- 6. Tadiran Microwave Networks Table of Contents Network Loop Switch Page viii 061799 8860009-00
- 7. Network Loop Switch 1. Product Description The Network Loop Switch (NLS) lets customers with networks of CM microwave radios protect the non-telco channels of those radios. Non-telco channels include network management data, orderwire, and digital clear channels. The NLS can be configured to operate in one of two modes: network mode or DCC mode. Network mode protects network management data as well as orderwire and the digital clear channels. DCC mode protects the orderwire and the digital clear channels. In network mode, radios within the loop must use an omni-directional (4-port) Network Management Unit (NMU) module. Network traffic is unidirectional on radios that have an NMU with the three-port bridge. Depending on a radio’s configuration, master or slave, the NMU routes network traffic differently from its east and west ports. This arrangement does not work well for looped networks since each terminal must dynamically change its configuration to match condition changes of the loop (open or closed). The omni-directional NMU eliminates the master-slave design for one suitable to looped network architecture. The DCC mode works for radio networks that do not use the NMU. This mode protects one digital clear channel (DCC) and the orderwire while one DCC becomes the loop control line. The control line is the port that senses path activity as the next paragraph describes. The Network Loop Switch operates as a path detection device and switching point. Each unit has separate ports for the east and west radio terminals. Detection of identical network activity on both network ports indicates a looped path. When the NLS detects no activity on one port it closes the loop to create a path around a failed link. When the NLS does not detect activity on either side it generates its own pulse on the path to check the path condition. PIN_PADSTACK NET NETWORK LOOP SWITCH + - + - FUSE CH1 CH2 VF1 VF2 RS-485 RS-232 RS-232 RS-485 VF2 VF1 CH2 CH1 PWR X IVE TX/R 20-60V PWR NETWORK NETWORK ACT Figure 1. Network Loop Switch (P/N 8000492-00) Front Panel 8860009-00 052199 Page 1
- 8. Network Loop Switch Product Description The NLS closes normally-open (NO) relays to connect east to west communications paths of the orderwire and data channels and bridges the line drivers and receivers on the network data channel should the data stop. The Network Loop Switch fits into one rack space (1RU, 1.75 inch) of a telco equipment rack with front-panel access to all connections. Two connections for each data type are provided. The voice frequency (VF) orderwire connects on four-pin RJ-11 jacks. The RS-422 digital clear channel (DCC, 19.2-kbps asynchronous data) also connects on four-pin RJ-11 jacks. In the DCC mode, DCC number 1 connects to the RS-232 connectors (see Figure 7). NMS data connects on the RS-485 or RS-232 connectors. RS-485 connects with the standard RS-485 cable assembly; that is RJ-12 modular jacks and 4- or 6-wire twisted pair. RS-232 network communication interfaces with DB-9 connectors and a 1-to-1 serial cable. DC power, ±20 to 60 Vdc, connects through two-pin power plugs. Table-A. Front-Panel Features Item Description J7 and J8. Two-pin power connectors. Use one connector for non-protected systems, both for PWR redundancy protected systems. Input power range is 19 to 56 Vdc at 5 watts or more. Polarity is user selectable (W1, W2). FUSE F1. Main power fuse is a 125V, 0.75 ampere telecommunications type fuse. PWR LED Green; indicates unit has main power. ACTIVE LED Yellow; lights when the relays energize and create a path. TX/RX LED Green; lights when the internal microprocessor is transmitting or receiving data. RS-232 J3 and J6. RS-232 connection of Network Management System (NMS) data. DB-9 female connector. NETWORK RS232-type straight through connection; one connector for each path. RS-485 J1 and J2. RJ-12 6-position jack for NMS data connection at RS-485 levels. NETWORK J13 - VF1a and J14 - VF1b. RJ-11 four-position jack for connection of the orderwire. VF1/2 (A/B) J15 - VF2a and J16 - VF2b. J9 - CH1a and J12 - CH1b. RJ-11 four-position jack for connection of the 19.2 kbps data channel. CH1/2 (A/B) J10 - CH2a and J11 - CH2b. Page 2 8860009-00 061799
- 9. Tadiran Microwave Networks Product Description The Network Data Converter has two major sub-assembles: the housing and the main (Network Loop) card. 1.1. Housing The Network Loop Switch has all status indicators, power and signal connectors, and the power fuse on the front panel. Table A lists all front-panel features and connections. 1.2. Main Card Table B and Figure 2 describes features of the Network Loop card. Table B. Network Data Loop Switch Card Features Item Description Input voltage polarity setting. Set shorting plugs over jumper pins as the card silkscreen shows for W1, W2 positive or negative input voltage (see Figure 2). Sets unique NLS address. Ping messages are based on the network element address. Each NLS in a S1 branch must use a unique address. Set S1 of each NLS to a different decimal value. This value becomes the address. ROCKER 1 IS THE LEAST SIGNIFICANT BIT AND ON = 1, OFF = 0 Sets network data channel communications. ON = 1, OFF = 0 Decimal value Baud Data Bits Parity Stop Bits 0 19200 8 ODD 1 (default setting) S2 1 9600 8 NONE 1 2 19200 8 ODD 2 3-127 19200 8 ODD 1 DC power inputs. Connect to one or both from an SP unit. Connect both inputs from the main and J7, J8 standby side of a protected interface for protected power. F1 Line fuse. Uses a 125V, 0.25 amp. telecommunications-type fuse. J3, J6 DB9 female connectors for RS232 connection of NMS data. J1, J2 RJ-12 jacks for RS-485 connection of NMS data. CR1, CR2, CR3 LED indicators for power, status, and activity. J13, J14 RJ-11 jacks for connection of VF channel 1. J15, J16 RJ-11 jacks for connection of VF channel 2. J9, J11 RJ-11 jacks for connection of digital clear channel 1. J10, J12 RJ-11 jacks for connection of digital clear channel 2. 8860009-00 061799 Page 3
- 10. Page 4 U12 Q1 TADIRAN MICROWAVE NETWORKS * S1 S/N NETWORK LOOP SWITCH 5000492-00 REV 2 1 Y1 TP1 Network Loop Switch 4 -IN -OUT 3 4 U8 1 9 U9 U2 * * 1 *1 U15 C43 8 BCE * B GATE OUT -SENSE E RP1 S2 * Q5 * C TRIM * U4 U5 * E B GATE IN +SENSE 6 2 Q3 C 5 Q2 E B 1 1 +IN +OUT 5 C D6 * J5 RP2 1 PIN_PADSTACK J4 U17 4 1 INPUT POLARITY JUMPERS K2 K3 T1 quot;-quot;INPUT quot;+quot; INPUT K1 U10 U13 U14 NO NO NO NO 2 3 NO NO 1 2 3 W2 1 2 3 W2 * * * Figure 2. Network Loop Card 1 2 3 W1 1 2 3 W1 NC NC NC NC NC NC Y2 * C C SW1 3 Q4 C C C W21 C Y3 W11 3 D1 4 3 D7 U11 1 2 + + - - + + - - + - - G S U3 U6 * * * T2 * C C C * T3* NO NC NC NO NO NO F2 J9 J10 J13 J15 J1 J2 J16 J14 J11 J12 1 5 1 5 1 1 8 1 1 1 1 1 J6 J17 J3 1 1 1 1 1 J7 CR1 CR2 J8 F1 CR3 CR4 CR5 A C A C A C A C A C 1 +- + - 1 9 15 9 6 9 6 OFF 8 7 6 5 4 3 2 1 S1 quot;-quot;INPUT W1 1 W2 1 & S2 1 2 3 W1 1 2 3 W2 3 3 quot;+quot; INPUT 1 2 3 W2 1 2 3 W1 INPUT POLARITY JUMPERS Position 1 8860009-00 061799 Product Description
- 11. Tadiran Microwave Networks Application 2. Application The following illustration shows the NLS in a network. The NLS is required at a single point in each loop and supports multiple loops of a branch. Each unit must have a unique NLS address within the same branch. Each branch can have no more than 250 network elements, and each loop can be no larger than 100 terminals. The Network Loop Switch introduces no delay through its voice and data channel and 11 milliseconds delay through the network/control ports. Normally Normally NLS NLS Open Open NLS Normally Open Figure 3. NLS Locations In a Network Branch 8860009-00 061799 Page 5
- 12. Network Loop Switch Installation 3. Installation First decide whether the NLS will operate in Network mode or DCC mode. In Network mode, the Network Loop Switch protects network data on radios that use the omni-directional network management unit (NMU) and software. Upgrade also includes a reworked ACU and a reworked SCU. Figure 5 shows an example network and the installations involved at its sites. Note: Hardware rework is not a field procedure. Return boards that need rework to the depot. NMU Software change. Software and hardware changes. OMC NLS Figure 4. Types of Installations In the DCC mode—that is, the radios do not use the NMU—connect the radio DCC 1 port as Figure 7 shows. The radio must have a service channel unit (SCU). Set the DCC switch (S1) of the radio SCU as Table C lists. Connect DCC 2 as Figure 9 shows. Table C. Setting for S1 on SCU when using DCC Mode t ta bi bi y od l a da d rit e kb 2 rm op NA au . t Pa 19 it No St m b 1 8- 1 1 2 3 4 5 6 7 8 x 0 0 1 1 0 0 0 ON = 1, OFF = 0 Page 6 8860009-00 061799
- 13. Tadiran Microwave Networks Installation 3.1. ESD Notice Observe all electrostatic discharge precautions. Do all bench work at static-safe workbenches. Don a wrist strap and connect its ground clip or plug to a grounded surface CAUTION when working on the Network Loop Switch. 3.2. Unpacking Upon receipt, and before unpacking anything, inspect the container and report any damage to the delivering carrier. Forward a copy of any damage claim to Tadiran Microwave Networks, Customer Service (281-263-6501). Unpack the equipment carefully to avoid damage. Check the packing material to ensure no parts or accessories remain in the shipping container. Inspect the unit for damage before discarding the shipping containers or packing material, you must show this to the carrier when filing a damage claim. As with damage noted before unpacking, send a copy of the claim to Customer Service. 3.3. Address and Communications Setup If several NLS units are needed in a network branch, set S1on the Network Loop card (Table B, page 3 and Figure 2, page 4) so each NLS address is unique. The decimal value created by the rocker positions create the address. Rocker 1 sets the least significant bit so, for example, rockers 1, 2, and 3 set to 1 is address 7. Set the baud rates on the NMS channels using S2. Default settings are rockers 1 to 8 off (decimal 0––19.2 kbaud, 8 bits, odd parity, and one stop bit). Setting S2 rocker 1 on and rockers 2 to 8 off, decimal 1, results in 9600 baud, 8 bits, no parity, one stop bit. 3.4. Mounting Mount the Network Loop Switch in a relay rack no further than 30.48 meters (100 feet) from its associated radios. The Network (P4) connection uses the RS-485 standard tested to 30.48 meters (100 feet). 3.5. Cabling This section first describes how to connect DC power to the Network Loop Switch (NLS). And since the NLS monitors data from either the RS-485 or the RS-232 radio port, sections 3.4.2 and 3.4.3 discuss how to connect data. 8860009-00 061799 Page 7
- 14. Network Loop Switch Installation 3.5.1. To Connect Power Use this procedure and Figure 6 to wire main power to the Network Loop Switch. 1. Check polarity of the site power supply with a voltmeter (±20 to 60 Vdc). 2. Turn off the main or battery power. Network Loop Switch + - + - FUSE .75A 3. Measure resistance between rack ground and the main power-supply ER S E U TIV PWR W AT PO AC ST TO FRONT PANEL terminals to ensure they are not shorted. SIDE VIEW TOP VIEW TO FRONT PANEL 4. Set W1/W2 (Figure 2) to the polarity of site power. Factory default is POWER LEADS negative fused. 5. Attach two 22 to 16 AWG conductors from the main power source to the SINGLE POWER SOURCE two-position power plug. At the power plug, insert each conductor to the plug contact clamps and tighten the recessed screws on top of the connector. DC + +V J7 Observe negative and positive voltage leads and input pins. The power POWER - -V connector is a Phoenix Contact flange plug, GMSTB 2,5/7,62 type (P/N +V J8 3024077-02). -V OPTIONAL CONNECTION 6 Insert the power plug into one of the two PWR connectors on the front panel. Wire both power connectors for redundancy protected systems – one PROTECTED POWER SOURCE side to main power, the other to standby power. DC + +V J7 7. Finish cabling before applying power. POWER - -V + +V DC J8 POWER - -V pwrwire.cdr Figure 5. Power Connection Page 8 8860009-00 061799
- 15. Tadiran Microwave Networks Installation 3.5.2. To Connect Network Management Data (Network Mode only) The NLS terminates the cascaded network data connection (RS-485 chain) between it and the adjoining radio. To make a cable assembly crimp six-position RJ-12 modular connectors, such as AMP 5-641337-3, on each end of six-conductor telephone cable as Figure 7 shows. Pin 1 on the modular jacks of the NLS is on the left. Connect one end of the cable to the RS485 IN port of the interface. Connect the other end of the cable to the RS-485 Network port on the Network Loop Switch. Typical RS-485 NMS Connections on RJ-11 Jacks Radio Radio Access Panel Network Loop Switch Access Panel Non-directional 1X 1X 1X 1X Non-directional 4-Port 2 R- 2 R- 2 R- 2 R- 4-Port Configuration 3 R+ 3 R+ 3 R+ 3 R+ Configuration 4 T+ 4 T+ 4 T+ 4 T+ 5 T- 5 T- 5 T- 5 T- 6X 6X 6X 6X West Inverted West West Inverted West Cable Cable Radio Radio Access Panel Network Loop Switch Access Panel Non-directional 1X 1X 1X 1X Non-directional 4-Port 2 T- 2 R- 2 R- 2 R- 4-Port Configuration 3 T+ 3 R+ 3 R+ 3 R+ Configuration 4 R+ 4 T+ 4 T+ 4 T+ 5 R- 5 T- 5 T- 5 T- 6X 6X 6X 6X East Standard West West Standard West Through Inverted Cable Cable Radio Radio Access Panel Network Loop Switch Access Panel Non-directional 1X 1X 1X 1X 4-Port NMU 4-Port 2 R- 2 R- 2 R- 2 T+ with early Configuration 3 R+ 3 R+ 3 R+ 3 T- version or 4 T+ 4 T+ 4 T+ 4 R+ 5 T- 5 T- 5 T- 5 R- 4/8/12DS1 6X 6X 6X 6X front panel West Standard West West Special Inverting Adapter Cable Cable Radio Radio Access Panel Network Loop Switch Access Panel 4-Port NMU 1X 1X 1X 1X 4-Port NMU with early 2 T+ 2 R- 2 R- 2 T+ with early version or 3 T- 3 R+ 3 R+ 3 T- version or 4/8/12DS1 4 R+ 4 T+ 4 T+ 4 R+ front panel 5 R- 5 T- 5 T- 5 R- 4/8/12DS1 6X 6X 6X 6X front panel Special West Special West Adapter Adapter Cable Cable Notes: “ ” denotes optional wire. The NLS is always configured in the West Non-directional pinout. Pin 1 of the NLS modular connectors is on the left. DCC MODE Radio Network Loop Switch Radio Access Panel Access Panel Radio Radio without OUT 4 2 IN IN 2 4 OUT without NMU GND 3 3 GND GND 2 3 OUT OUT 3 2 GND NMU IN 1 GND 5 1 IN 5 GND DCC1 RS232 NETWORK DCC1 Figure 6. Network Loop Switch Cabling 8860009-00 061799 Page 9
- 16. Network Loop Switch Installation 3.5.3. To Connect RS232 Signals (DCC Mode only) Wire conductors to the input and output connectors with a DB-9 male connector (Figure 8) to fit front-panel connector labeled RS-232 Network. Leave unused pins open. In the DCC mode, connect DCC1 to the RS232 connector as Figure 7 shows and connect DCC2 to the RJ connector as Figure 9 shows. Pin 1 2 3 4 5 6 7 8 9 RXD TXD Signal NC NC GND NC NC NC NC IN OUT Figure 7. RS232 Network Connection 3.5.4. To Connect VF and DCC Signals (Network and DCC Modes) Crimp four-position RJ-11 modular connectors on each end of a four-conductor telephone cable in straight-through pinning. Connect NLS VF1/2 to radio VF1/2 and NLS CH1/2 to radio CH1/2 (Figure 9). In the DCC mode, connect DCC1 (the control channel) to the RS232 Network (DB9) connector as Figure 7 shows and connect DCC2 using this figure. Pin 1 Pin 1 2 3 4 VF Signal IN TIP IN RING OUT TIP OUT RING DCC Signal RS423 IN * * RS423 OUT * Straight connection to the alternate jack Figure 8. Modular VF and DCC jacks Page 10 8860009-00 061799
- 17. Tadiran Microwave Networks Installation 3.5.5. To Verify Your Installation Testing the NLS in a network requires two people: one person at a local site and one at a remote location—for this discussion local site is the location of observation. Do this test, if possible, during idle or slow traffic periods. To test an existing looped configuration with live data: · Pull the SCU at the remote site. On systems using the orderwire function, pull the SCU from the terminal that does not have the orderwire card. If DCC and orderwire communication is not affected so the NLS works. · Pull the ACU card, which includes the NMU daughter card. The Telescan NMS should only lose communication to the terminal without the ACU so the NLS works. The same functions can also be verified by pulling the cables connecting the two terminals at the remote site to verify NMS, DCC, and orderwire functions. To test the NLS on an inactive network: · Pull the Multiplexer at one remote terminal, which effectively breaks all path communication. In a hot-standby radio pull both A- and B-side multiplexers. Any NMS, DCC, orderwire and customer payload proceeds through the network so the NLS works 8860009-00 061799 Page 11
- 18. Network Loop Switch Specifications 4. Specifications 4.1. Environmental Operating temperature 0 to 55 °C (ambient) Storage temperature -40 to 125°C Humidity 0 to 95% (non-condensing) Rain and dust IP55 spec. Altitude limits 5000 m 4.2. Electrical & Safety The NLS meets or exceeds ETS 300 385 (EMC) IEC 802-2 (ESD) Page 12 8860009-00 061799