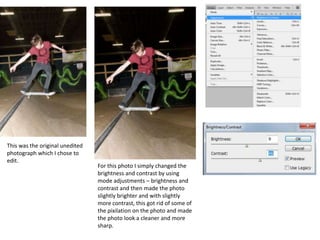
1. This was the original unedited
photograph which I chose to
edit.
For this photo I simply changed the
brightness and contrast by using
mode adjustments – brightness and
contrast and then made the photo
slightly brighter and with slightly
more contrast, this got rid of some of
the pixilation on the photo and made
the photo look a cleaner and more
sharp.
2. Then I went on image adjustments –
exposure and put the exposure level up
slightly, I then clicked on variations and
give the photo a slightly darker tint, this
made the photo more vibrant and
interesting to look at.
3. I then clicked on the layers tab at the side of the
screen and went through to the option luminosity Finally I made another copy of the photo and push it on
which made my photo look black and white with a below the original photo layer, I then went through the layer
slightly blue tint to it. options and changed it to dissolve which made most of the
background and the most of the model disappear apart from
his tee shirt, then when the layers were put together it made
the tee shirt look bright red with most of the picture black
and white, apart from a few hints of colour in parts.
4. This was the original unedited
photograph which I chose to For this photo I simply clicked on image
edit. adjustments, brightness and contrast and then made
the photo darker by turning the brightness down and
turned to contrast up. This made the photo look more
appealing and got rid of some of the pixilation.
5. This was the original unedited
photograph which I chose to
edit.
In this photo I simply went on image
adjustments – brightness and contrast.
Although I only altered the brightness
slightly by making the photo a little
brighter, it was the contrast which affected
the photo by being turned up greatly. This
give the photo a less grainy look
6. Once the brightness and the contrast was
turned up a bit I then went onto image
adjustments – hue/saturation and turned
the saturation down to -100 which made
the photo black and white but still with a
clear and vibrant image.
7. This was the original
unedited photograph
which I chose to edit.
Although this photo doesn’t look
much different to the original
unedited photo it is simply a little
darker with a lot more contrast, this
made the photo look clearer and
more appealing.
8. For the final edit of this photo I went onto
image adjustments , exposure and then
changed the exposure just slightly and changed
the gamma radiation up as this made the photo
look darker and more shadowy which made the
photo look better.