SlideShare uma empresa Scribd logo
1 de 93
Baixar para ler offline
TECNOLOGICO NACIONAL DE MÉXICO 
Materia: Instrumentación Virtual 
Alumno: Perez Espinal Jorge Adrian 
Grupo: 7M1
PRACTICA 1 
Objetivo 
Utilizando Arduino y uno de sus ejemplos que se encuentran en su programa como su lenguaje de programación hacer que un led o diodo emisor de luz se encienda y apague en un periodo de 100 Mili segundos utilizando una práctica ya predeterminada que trae nuestro programa arduino, siguiendo el siguiente programa: 
/* Ejemplo de encendido y apagado de un LED 
*/// Se define el Pin 13 donde se conectara el LED 
int led = 13; 
// Se inicializa el Pin digital como una salida 
void setup() { 
pinMode(led, OUTPUT); 
} 
// Se crea una funcion ciclo donde se enciende y apaga el LED 
// cada segundo. 
void loop() { 
digitalWrite(led, HIGH); // Se enciende el LED 
delay(100); // se espera un segundo 
digitalWrite(led, LOW); // Se apaga el LED 
delay(100); // se espera un segundo 
}
Desarrollo 
Para la correcta programación y funcionamiento de esta práctica se utilizaran: 
- Arduino uno 
- Protoboard 
- Leds 
- Cables 
Para realizar dicha programación y funcionamiento de nuestro programa nos basaremos en el programa utilizado para arduino, utilizando uno de sus ejemplos ya antes mostrado, en la pestaña ARCHIVO, posterior mente en la sub ventana EJEMPLOS, 01.BASICS y abriremos la que dice BLINK, abrirá la practica que utilizaremos y posterior mente para realizar el funcionamiento predeterminado cambiaremos a 100 el valor de 1000 de los delay que se encuentran hasta el final de nuestro programa, verificaremos nuestro programa para ver que no tenga ningún error y si este funciona perfecta mente lo cargaremos a nuestro arduino. 
Posterior mente llevaremos a cabo el montado y conectado de nuestra rotoboard con arduino y cada uno de sus componente ara que esta pueda funcionar adecuada mente, dándonos como resultado la siguiente imagen:
Practica 2 
Objetivo 
Utilizando Arduino y uno de sus ejemplos que se encuentran en su programa como su lenguaje de programación hacer que un led o diodo emisor de luz se encienda y apague en un periodo de 10 Mili segundos utilizando una practica ya predeterminada que trae nuestro programa arduino, siguiendo el siguiente programa: 
/* Ejemplo de encendido y apagado de un LED 
*/// Se define el Pin 13 donde se conectara el LED 
int led = 13; 
// Se inicializa el Pin digital como una salida 
void setup() { 
pinMode(led, OUTPUT); 
} 
// Se crea una funcion ciclo donde se enciende y apaga el LED 
// cada segundo. 
void loop() { 
digitalWrite(led, HIGH); // Se enciende el LED 
delay(10); // se espera un segundo 
digitalWrite(led, LOW); // Se apaga el LED 
delay(10); // se espera un segundo 
}
Desarrollo 
Para la correcta programación y funcionamiento de esta práctica se utilizaran: 
- Arduino uno 
- Protoboard 
- Leds 
- Cables 
Para realizar dicha programación y funcionamiento de nuestro programa nos basaremos en el programa utilizado para arduino, utilizando uno de sus ejemplos ya antes mostrado, en la pestaña ARCHIVO, posterior mente en la sub ventana EJEMPLOS, 01.BASICS y abriremos la que dice BLINK, abrirá la practica que utilizaremos y posterior mente para realizar el funcionamiento predeterminado cambiaremos a 10 el valor de 1000 de los delay que se encuentran hasta el final de nuestro programa, verificaremos nuestro programa para ver que no tenga ningún error y si este funciona perfecta mente lo cargaremos a nuestro arduino. 
Posterior mente llevaremos a cabo el montado y conectado de nuestra rotoboard con arduino y cada uno de sus componente ara que esta pueda funcionar adecuada mente, dándonos como resultado la siguiente imagen:
Practica 3 
Objetivo 
Utilizando Arduino y uno de sus ejemplos que se encuentran en su programa como su lenguaje de programación hacer que un led o diodo emisor de luz se encienda un tiempo de 1000 mili segundos y apague en un periodo de 100 Mili segundos utilizando una practica ya predeterminada que trae nuestro programa arduino, siguiendo el siguiente programa: 
/* Ejemplo de encendido y apagado de un LED 
*/// Se define el Pin 13 donde se conectara el LED 
int led = 13; 
// Se inicializa el Pin digital como una salida 
void setup() { 
pinMode(led, OUTPUT); 
} 
// Se crea una funcion ciclo donde se enciende y apaga el LED 
// cada segundo. 
void loop() { 
digitalWrite(led, HIGH); // Se enciende el LED 
delay(1000); // se espera un segundo 
digitalWrite(led, LOW); // Se apaga el LED 
delay(100); // se espera un segundo 
}
Desarrollo 
Para la correcta programación y funcionamiento de esta práctica se utilizaran: 
- Arduino uno 
- Protoboard 
- Leds 
- Cables 
Para realizar dicha programación y funcionamiento de nuestro programa nos basaremos en el programa utilizado para arduino, utilizando uno de sus ejemplos ya antes mostrado, en la pestaña ARCHIVO, posterior mente en la sub ventana EJEMPLOS, 01.BASICS y abriremos la que dice BLINK, abrirá la práctica que utilizaremos y posterior mente para realizar el funcionamiento predeterminado aremos un ajuste en el tiempo, para que nuestro led Eneida por un periodo de 1000 mili segundos y apague a los 100 mili segundos, este ajuste lo realizaremos cambiando el valor de 1000 de los delay que se encuentran hasta el final de nuestro programa, verificaremos nuestro programa para ver que no tenga ningún error y si este funciona perfecta mente lo cargaremos a nuestro arduino. 
Posterior mente llevaremos a cabo el montado y conectado de nuestra protoboard con arduino y cada uno de sus componente ara que esta pueda funcionar adecuada mente, dándonos como resultado la siguiente imagen:
Practica 4 
Objetivo 
Utilizando Arduino y uno de sus ejemplos que se encuentran en su programa como su lenguaje de programación hacer que un led o diodo emisor de luz se encienda un tiempo de 100 mili segundos y apague en un periodo de 1000 Mili segundos utilizando una practica ya predeterminada que trae nuestro programa arduino, siguiendo el siguiente programa: 
/* Ejemplo de encendido y apagado de un LED 
*/// Se define el Pin 13 donde se conectara el LED 
int led = 13; 
// Se inicializa el Pin digital como una salida 
void setup() { 
pinMode(led, OUTPUT); 
} 
// Se crea una funcion ciclo donde se enciende y apaga el LED 
// cada segundo. 
void loop() { 
digitalWrite(led, HIGH); // Se enciende el LED 
delay(100); // se espera un segundo 
digitalWrite(led, LOW); // Se apaga el LED 
delay(1000); // se espera un segundo 
}
Desarrollo 
Para la correcta programación y funcionamiento de esta práctica se utilizaran: 
- Arduino uno 
- Protoboard 
- Leds 
- Cables 
Para realizar dicha programación y funcionamiento de nuestro programa nos basaremos en el programa utilizado para arduino, utilizando uno de sus ejemplos ya antes mostrado, en la pestaña ARCHIVO, posterior mente en la sub ventana EJEMPLOS, 01.BASICS y abriremos la que dice BLINK, abrirá la practica que utilizaremos y posterior mente para realizar el funcionamiento predeterminado aremos un ajuste en el tiempo, para que nuestro led Eneida por un periodo de 1000 mili segundos y apague a los 1000 mili segundos, este ajuste lo realizaremos cambiando el valor de 100 de los delay que se encuentran hasta el final de nuestro programa, verificaremos nuestro programa para ver que no tenga ningún error y si este funciona perfecta mente lo cargaremos a nuestro arduino. 
Posterior mente llevaremos a cabo el montado y conectado de nuestra rotoboard con arduino y cada uno de sus componente ara que esta pueda funcionar adecuada mente, dándonos como resultado la siguiente imagen:
Practica 5 
Objetivo 
Utilizando Arduino y uno de sus ejemplos que se encuentran en su programa como su lenguaje de programación como ya antes realizado en las practicas hacer que un led parpadee 10 veces y posterior mente se quede encendido, que se apague y vuela a hacer la misma función desde un principio utilizando una práctica ya predeterminada que trae nuestro programa arduino, siguiendo el siguiente programa: 
// Pin 13 has an LED connected on most Arduino boards. 
// give it a name: 
int led = 13; 
// the setup routine runs once when you press reset: 
void setup() { 
// initialize the digital pin as an output. 
pinMode(led, OUTPUT); 
} 
// the loop routine runs over and over again forever: 
void loop() { 
digitalWrite(led, HIGH); // turn the LED on (HIGH is the voltage level) 
delay(1000); // wait for a second 
digitalWrite(led, LOW); // turn the LED off by making the voltage LOW 
delay(1000); // wait for a second 
digitalWrite(led,HIGH);
delay(1000); 
digitalWrite(led,LOW); 
delay(1000); 
digitalWrite(led,HIGH); 
delay(1000); 
digitalWrite(led,LOW); 
delay(1000); 
digitalWrite(led,HIGH); 
delay(1000); 
digitalWrite(led,LOW); 
delay(1000); 
digitalWrite(led,HIGH); 
delay(1000); 
digitalWrite(led,LOW); 
delay(1000); 
digitalWrite(led,HIGH); 
delay(1000); 
digitalWrite(led,LOW); 
delay(1000); 
digitalWrite(led,HIGH); 
delay(1000); 
digitalWrite(led,LOW); 
delay(1000);
digitalWrite(led,HIGH); 
delay(1000); 
digitalWrite(led,LOW); 
delay(1000); 
digitalWrite(led,HIGH); 
delay(1000); 
digitalWrite(led,LOW); 
delay(1000); 
digitalWrite(led,HIGH); 
delay(1000); 
digitalWrite(led,LOW); 
delay(1000); 
// Queda apagado en un tiempo de 1 min. 
digitalWrite(led,HIGH); 
delay(60000); 
}
Desarrollo 
Para la correcta programación y funcionamiento de esta práctica se utilizaran: 
- Arduino uno 
- Protoboard 
- Leds 
- Cables 
Para realizar dicha programación y funcionamiento de nuestro programa nos basaremos en el programa utilizado para arduino, utilizando uno de sus ejemplos ya antes mostrado, en la pestaña ARCHIVO, posterior mente en la sub ventana EJEMPLOS, 01.BASICS y abriremos la que dice BLINK, abrirá la practica que utilizaremos y posterior mente para realizar el funcionamiento predeterminado aremos un ajuste en los encendidos y apagados de nuestro programa, poniendo diez de estos para que nuestro led haga la función de parpadear por 10 tiempos, esto con un debido tiempo de ciertos mili segundos para que no sea tan tardado, para al final de nuestro programa agregar una línea con un encendido permanente de 1 minuto, para que cuando este termine se inicie nueva mente nuestro programa, haciendo un ciclo para cumplirse el objetivo de nuestra practica, todo esto cambiando el valor de delay que se encuentran hasta el final de nuestras líneas de encendido y apagado del programa, verificaremos nuestro programa para ver que no tenga ningún error y si este funciona perfecta mente lo cargaremos a nuestro arduino. 
Posterior mente llevaremos a cabo el montado y conectado de nuestra rotoboard con arduino y cada uno de sus componente ara que esta pueda funcionar adecuada mente, dándonos como resultado la siguiente imagen:
Practica 6 
Objetivo 
Utilizando Arduino y uno de sus ejemplos que se encuentran en su programa como su lenguaje de programación como ya antes realizado en las practicas hacer que un led parpadee 20 veces y posterior mente se quede encendido, que se apague y vuelva a hacer la misma función desde un principio utilizando una práctica ya predeterminada que trae nuestro programa arduino, siguiendo el siguiente programa: 
int led = 13; 
void setup() { 
// initialize the digital pin as an output. 
pinMode(led, OUTPUT); 
} 
// the loop routine runs over and over again forever: 
void loop() { 
digitalWrite(led, HIGH); 
delay(1000); 
digitalWrite(led, LOW); 
delay(1000); 
digitalWrite(led, HIGH); 
delay(1000); 
digitalWrite(led, LOW); 
delay(1000);
digitalWrite(led, HIGH); 
delay(1000); 
digitalWrite(led, LOW); 
delay(1000); 
digitalWrite(led, HIGH); 
delay(1000); 
digitalWrite(led, LOW); 
delay(1000); 
digitalWrite(led, HIGH); 
delay(1000); 
digitalWrite(led, LOW); 
delay(1000); 
digitalWrite(led, HIGH); 
delay(1000); 
digitalWrite(led, LOW); 
delay(1000); 
digitalWrite(led, HIGH); 
delay(1000); 
digitalWrite(led, LOW); 
delay(1000); 
digitalWrite(led, HIGH); 
delay(1000);
digitalWrite(led, LOW); 
delay(1000); 
digitalWrite(led, HIGH); 
delay(1000); 
digitalWrite(led, LOW); 
delay(1000); 
digitalWrite(led, HIGH); 
delay(1000); 
digitalWrite(led, LOW); 
delay(1000); 
digitalWrite(led, HIGH); 
delay(1000); 
digitalWrite(led, LOW); 
delay(1000); 
digitalWrite(led, HIGH); 
delay(1000); 
digitalWrite(led, LOW); 
delay(1000); 
digitalWrite(led, HIGH); 
delay(1000); 
digitalWrite(led, LOW); 
delay(1000);
digitalWrite(led, HIGH); 
delay(1000); 
digitalWrite(led, LOW); 
delay(1000); 
digitalWrite(led, HIGH); 
delay(1000); 
digitalWrite(led, LOW); 
delay(1000); 
digitalWrite(led, HIGH); 
delay(1000); 
digitalWrite(led, LOW); 
delay(1000); 
digitalWrite(led, HIGH); 
delay(1000); 
digitalWrite(led, LOW); 
delay(1000); 
digitalWrite(led, HIGH); 
delay(1000); 
digitalWrite(led, LOW); 
delay(1000); 
digitalWrite(led, HIGH); 
delay(1000); 
digitalWrite(led, LOW);
delay(1000); 
digitalWrite(led, HIGH); 
delay(1000); 
digitalWrite(led, LOW); 
delay(1000); 
digitalWrite(led, HIGH); 
delay(60000); 
}
Desarrollo 
Para la correcta programación y funcionamiento de esta práctica se utilizaran: 
- Arduino uno 
- Protoboard 
- Leds 
- Cables 
Para realizar dicha programación y funcionamiento de nuestro programa nos basaremos en el programa utilizado para arduino, utilizando uno de sus ejemplos ya antes mostrado, en la pestaña ARCHIVO, posterior mente en la sub ventana EJEMPLOS, 01.BASICS y abriremos la que dice BLINK, abrirá la practica que utilizaremos y posterior mente para realizar el funcionamiento predeterminado aremos un ajuste en los encendidos y apagados de nuestro programa, poniendo veinte de estos para que nuestro led haga la función de parpadear por 20 tiempos, esto con un debido tiempo de ciertos mili segundos para que no sea tan tardado, para al final de nuestro programa agregar una línea con un encendido permanente de 1 minuto, para que cuando este termine se inicie nueva mente nuestro programa, haciendo un ciclo para cumplirse el objetivo de nuestra practica, todo esto cambiando el valor de delay que se encuentran hasta el final de nuestras líneas de encendido y apagado del programa, verificaremos nuestro programa para ver que no tenga ningún error y si este funciona perfecta mente lo cargaremos a nuestro arduino. 
Posterior mente llevaremos a cabo el montado y conectado de nuestra rotoboard con arduino y cada uno de sus componente ara que esta pueda funcionar adecuada mente, dándonos como resultado la siguiente imagen:
Practica 7 
Objetivo 
Utilizando Arduino y uno de sus ejemplos que se encuentran en su programa como su lenguaje de programación como ya antes realizado en las practicas hacer que un led encienda por un tiempo de 2000, después en 1000, uno más en 100 y por último en 10 mili segundos, claro al terminar cada uno de estos se apague y se vuelva a encender con el cambio de tiempo, cuando este termine se apague y vuelva a hacer la misma función desde un principio utilizando una práctica ya predeterminada que trae nuestro programa arduino, siguiendo el siguiente programa: 
int led = 13; 
void setup() { 
pinMode(led, OUTPUT); 
} 
void loop() { 
//Empieza la funcion 
digitalWrite(led, HIGH); 
delay(2000); 
digitalWrite(led,LOW); 
delay(1000); 
digitalWrite(led, HIGH); 
delay(1000); 
digitalWrite(led,LOW); 
delay(1000);
digitalWrite(led, HIGH); 
delay(100); 
digitalWrite(led,LOW); 
delay(1000); 
digitalWrite(led, HIGH); 
delay(10); 
digitalWrite(led,LOW); 
delay(1000); 
//Momento en el que se da un tiempo de un minuto apagado 
digitalWrite(led,LOW); 
delay(60000); 
}
Desarrollo 
Para la correcta programación y funcionamiento de esta práctica se utilizaran: 
- Arduino uno 
- Protoboard 
- Leds 
- Cables 
Para realizar dicha programación y funcionamiento de nuestro programa nos basaremos en el programa utilizado para arduino, utilizando uno de sus ejemplos ya antes mostrado, en la pestaña ARCHIVO, posterior mente en la sub ventana EJEMPLOS, 01.BASICS y abriremos la que dice BLINK, abrirá la practica que utilizaremos y posterior mente para realizar el funcionamiento predeterminado aremos un ajuste en los encendidos y apagados de nuestro programa para que este realice el encienda por un tiempo de 2000, después en 1000, uno más en 100 y por último en 10 mili segundos, claro al terminar cada uno de estos se apague y se vuelva a encender con el cambio de tiempo, haciendo un ciclo para cumplirse el objetivo de nuestra practica, todo esto cambiando el valor de delay que se encuentran hasta el final de nuestras líneas de encendido y apagado del programa, verificaremos nuestro programa para ver que no tenga ningún error y si este funciona perfecta mente lo cargaremos a nuestro arduino. 
Posterior mente llevaremos a cabo el montado y conectado de nuestra rotoboard con arduino y cada uno de sus componente ara que esta pueda funcionar adecuada mente, dándonos como resultado la siguiente imagen:
Practica 8 
Objetivo 
Utilizando Arduino y uno de sus ejemplos que se encuentran en su programa como su lenguaje de programación habilitar el pin 12 y hacer que el led o diodo emisor de luz se encienda un tiempo de 100 mili segundos y que el diodo conectado al ya habilitado pin13 lo haga a los 2000 mili segundos, el tiempo de apagado es total mente libre para realizar la programación, esto se realizara con la ya mencionada practica ya predeterminada que trae nuestro programa arduino, siguiendo el siguiente programa: 
// Encendido y apagado de 3 LEDs 
int ledPin1 = 13; // Define las salidas de los LED´s 
int ledPin2 = 12; 
void setup() { // Configura las SALIDAS 
pinMode(ledPin1, OUTPUT); // declarar LEDs como SALIDAS 
pinMode(ledPin2, OUTPUT); 
digitalWrite(ledPin1, LOW); // Apaga los LEDs 
digitalWrite(ledPin2, LOW); 
} 
void loop(){ //Bucle de Funcionamiento 
digitalWrite(ledPin1, HIGH); // Apaga y enciende los leds cada 200 ms 
delay(2000); 
digitalWrite(ledPin1, LOW); 
digitalWrite(ledPin2, HIGH); 
delay(100); 
digitalWrite(ledPin2, LOW); 
digitalWrite(ledPin1, HIGH); // Apaga y enciende los leds cada 200 ms 
delay(100);
digitalWrite(ledPin1, LOW); 
digitalWrite(ledPin2, HIGH); 
delay(2000); 
digitalWrite(ledPin2, LOW); 
}
Desarrollo 
Para la correcta programación y funcionamiento de esta práctica se utilizaran: 
- Arduino uno 
- Protoboard 
- Leds 
- Cables 
Para realizar dicha programación y funcionamiento de nuestro programa nos basaremos en el programa utilizado para arduino, utilizando uno de sus ejemplos ya antes mostrado, en la pestaña ARCHIVO, posterior mente en la sub ventana EJEMPLOS, 01.BASICS y abriremos la que dice BLINK, abrirá la practica que utilizaremos y posterior mente para realizar el funcionamiento predeterminado aremos un ajuste en el tiempo, pero primera mente debemos declarar la salida de nuestro pin 12 con un int y declarando en el void o bucle de funcionamiento el mismo proceso de apagado y encendido que ara nuestro funcionamiento de apagado y encendido, con la debida etiqueta que dara la salida al pin 13, ya echo esto aremos el cambio de tiempo en nuestras diferentes salidas 100 mili segundos en nuestro pin 12 y 2000 en nuestro pin 13 cambiando el delay que se encuentra hasta el final de nuestro programa, verificaremos nuestro programa para ver que no tenga ningún error y si este funciona perfecta mente lo cargaremos a nuestro arduino. 
Posterior mente llevaremos a cabo el montado y conectado de nuestra protoboard con arduino y cada uno de sus componente ara que esta pueda funcionar adecuada mente, dándonos como resultado la siguiente imagen:
Practica 9 
Objetivo 
Utilizando Arduino y su lenguaje de programación realizar la practica de corrimiento de leds de por lo menos 5 leds diodos emisores de luz que valla de izquierda a derecha y que comience nueva mente de la izquierda yendo a la derecha, esto se realizara con el ya mencionado lenguaje de programación de arduino, siguiendo el siguiente programa: 
// Encendido y apagado de 3 LEDs 
int ledPin1 = 13; // Define las salidas de los LED´s 
int ledPin2 = 8; 
int ledPin3 = 7; 
int ledPin4 = 4; 
int ledPin5 = 2; 
void setup() { // Configura las SALIDAS 
pinMode(ledPin1, OUTPUT); // declarar LEDs como SALIDAS
pinMode(ledPin2, OUTPUT); 
pinMode(ledPin3, OUTPUT); 
pinMode(ledPin4, OUTPUT); 
pinMode(ledPin5, OUTPUT); 
digitalWrite(ledPin1, LOW); // Apaga los LEDs 
digitalWrite(ledPin2, LOW); 
digitalWrite(ledPin3, LOW); 
digitalWrite(ledPin4, LOW); 
digitalWrite(ledPin5, LOW); 
} 
void loop(){ //Bucle de Funcionamiento 
digitalWrite(ledPin1, HIGH); // Apaga y enciende los leds cada 200 ms 
delay(500); 
digitalWrite(ledPin1, LOW); 
digitalWrite(ledPin2, HIGH); 
delay(500); 
digitalWrite(ledPin2, LOW); 
digitalWrite(ledPin3, HIGH); 
delay(500); 
digitalWrite(ledPin3, LOW); 
digitalWrite(ledPin4, HIGH); 
delay(500); 
digitalWrite(ledPin4, LOW); 
digitalWrite(ledPin5, HIGH); 
delay(500); 
digitalWrite(ledPin5, LOW); 
}
Desarrollo 
Para la correcta programación y funcionamiento de esta práctica se utilizaran: 
- Arduino uno 
- Protoboard 
- Leds 
- Cables 
Para realizar dicha programación y funcionamiento de nuestro programa nos basaremos en el programa utilizado para arduino, utilizando uno de sus ejemplos ya antes mostrado, en la pestaña ARCHIVO, posterior mente en la sub ventana EJEMPLOS, 01.BASICS y abriremos la que dice BLINK, abrirá la practica que utilizaremos y posterior mente para realizar el funcionamiento predeterminado aremos un ajuste en dicho programa, pero primera mente debemos declarar nuestras salidas 2,4,7,8,13 dichos pines serán nuestras salidas que en la parte mas adelante con el void o bucle de funcionamiento realizara el mismo proceso de encendido y apagado de un led uno por uno, con la debida etiqueta que dara la salida a nuestros ya mencionados pines, según el criterio del programador se podrá cambiar el tiempo en nuestras diferentes salidas como en nuestras practicas anteriores, para continuar con nuestra practica verificaremos nuestro programa para ver que no tenga ningún error y si este funciona perfecta mente lo cargaremos a nuestro arduino.
Posterior mente llevaremos a cabo el montado y conectado de nuestra protoboard con arduino y cada uno de sus componentes ara que esta pueda funcionar adecuada mente, dándonos como resultado la siguiente imagen: 
Practica 10 
Objetivo 
Utilizando Arduino y su lenguaje de programación realizar la practica de corrimiento de leds de por lo menos 5 leds o diodos emisores de luz que valla de derecha a izquierda y que comience nueva mente de la derecha yendo a la izquierda, esto se realizara con el ya mencionado lenguaje de programación de arduino, siguiendo el siguiente programa: 
// Encendido y apagado de 3 LEDs 
int ledPin1 = 2; // Define las salidas de los LED´s 
int ledPin2 = 4; 
int ledPin3 = 7; 
int ledPin4 = 8; 
int ledPin5 = 13; 
void setup() { // Configura las SALIDAS
pinMode(ledPin1, OUTPUT); // declarar LEDs como SALIDAS 
pinMode(ledPin2, OUTPUT); 
pinMode(ledPin3, OUTPUT); 
pinMode(ledPin4, OUTPUT); 
pinMode(ledPin5, OUTPUT); 
digitalWrite(ledPin1, LOW); // Apaga los LEDs 
digitalWrite(ledPin2, LOW); 
digitalWrite(ledPin3, LOW); 
digitalWrite(ledPin4, LOW); 
digitalWrite(ledPin5, LOW); 
} 
void loop(){ //Bucle de Funcionamiento 
digitalWrite(ledPin1, HIGH); // Apaga y enciende los leds cada 200 ms 
delay(500); 
digitalWrite(ledPin1, LOW); 
digitalWrite(ledPin2, HIGH); 
delay(500); 
digitalWrite(ledPin2, LOW); 
digitalWrite(ledPin3, HIGH); 
delay(500); 
digitalWrite(ledPin3, LOW); 
digitalWrite(ledPin4, HIGH); 
delay(500); 
digitalWrite(ledPin4, LOW); 
digitalWrite(ledPin5, HIGH); 
delay(500); 
digitalWrite(ledPin5, LOW); 
}
Desarrollo 
Para la correcta programación y funcionamiento de esta práctica se utilizaran: 
- Arduino uno 
- Protoboard 
- Leds 
- Cables 
Para realizar dicha programación y funcionamiento de nuestro programa nos basaremos en el programa utilizado para arduino, utilizando uno de sus ejemplos ya antes mostrado, en la pestaña ARCHIVO, posterior mente en la sub ventana EJEMPLOS, 01.BASICS y abriremos la que dice BLINK, abrirá la practica que utilizaremos y posterior mente para realizar el funcionamiento predeterminado aremos un ajuste en dicho programa, pero primera mente debemos declarar nuestras salidas que a diferencia de la practica 9 declararemos nuestras salidas inversa mente 13,8,7,4,2 dichos pines serán nuestras salidas que en la parte mas adelante con el void o bucle de funcionamiento realizara el mismo proceso de encendido y apagado de un led uno por uno, con la debida etiqueta que dará la salida a nuestros ya mencionados pines, según el criterio del programador se podrá cambiar el tiempo en nuestras diferentes salidas como en nuestras practicas anteriores, para continuar con nuestra practica verificaremos nuestro programa
para ver que no tenga ningún error y si este funciona perfecta mente lo cargaremos a nuestro arduino. 
Posterior mente llevaremos a cabo el montado y conectado de nuestra protoboard con arduino y cada uno de sus componentes ara que esta pueda funcionar adecuada mente, dándonos como resultado la siguiente imagen: 
Practica 11 
Objetivo 
Con el mismo programa de corrimiento de leds o diodos emisores de luz realizar la programación para que de izquierda a derecha de los 5 leds solo se enciendan 1,3,5 y que comience nueva mente de la izquierda yendo a la derecha, esto se realizara con el ya mencionado lenguaje de programación de arduino, siguiendo el siguiente programa: 
// Encendido y apagado de 3 LEDs 
int ledPin1 = 13; // Define las salidas de los LED´s 
int ledPin2 = 7; 
int ledPin3 = 2; 
void setup() { // Configura las SALIDAS 
pinMode(ledPin1, OUTPUT); // declarar LEDs como SALIDAS
pinMode(ledPin2, OUTPUT); 
pinMode(ledPin3, OUTPUT); 
digitalWrite(ledPin1, LOW); // Apaga los LEDs 
digitalWrite(ledPin2, LOW); 
digitalWrite(ledPin3, LOW); 
} 
void loop(){ //Bucle de Funcionamiento 
digitalWrite(ledPin1, HIGH); // Apaga y enciende los leds cada 200 ms 
delay(500); 
digitalWrite(ledPin1, LOW); 
digitalWrite(ledPin2, HIGH); 
delay(500); 
digitalWrite(ledPin2, LOW); 
digitalWrite(ledPin3, HIGH); 
delay(500); 
digitalWrite(ledPin3, LOW); 
} 
Desarrollo 
Para la correcta programación y funcionamiento de esta práctica se utilizaran: 
- Arduino uno 
- Protoboard 
- Leds 
- Cables 
Llevaremos a cavo una modificación en nuestro programa ya sea de la practica 9 o 10, cualquiera de las dos, ya que estas practicas tienen la base para poder llevar a cavo nuestra practica numero 11 que consistirá del encendido solo de 3 led de 5 para esto de nuestros programas anteriores borraremos 2 salidas antes declaradas y dejaremos solo 3 que serán las encargadas de llevar a cavo nuestra función, declararemos nuestras salidas 13,7,2 dichos pines serán nuestras salidas que en la parte mas adelante con el void o bucle de funcionamiento realizara el mismo proceso de encendido y apagado de un led uno por uno, con la debida etiqueta que dará la salida a nuestros ya mencionados pines, según el criterio del
programador se podrá cambiar el tiempo en nuestras diferentes salidas como en nuestras practicas anteriores, para continuar con nuestra practica verificaremos nuestro programa para ver que no tenga ningún error y si este funciona perfecta mente lo cargaremos a nuestro arduino. 
Posterior mente llevaremos a cabo el montado y conectado de nuestra protoboard con arduino y cada uno de sus componentes ara que esta pueda funcionar adecuada mente, dándonos como resultado la siguiente imagen: 
Practica 12 
Objetivo 
Con el mismo programa de corrimiento de leds o diodos emisores de luz realizar la programación para que el encendido de nuestros leds se haga a la inversa de derecha a izquierda de los 5 leds que solo se encenderán 5,3,1 y que comience nueva mente de la derecha yendo a la izquierda, esto se realizara con el ya mencionado lenguaje de programación de arduino, siguiendo el siguiente programa: 
// Encendido y apagado de 3 LEDs 
int ledPin1 = 2; // Define las salidas de los LED´s 
int ledPin2 = 7; 
int ledPin3 = 13;
void setup() { // Configura las SALIDAS 
pinMode(ledPin1, OUTPUT); // declarar LEDs como SALIDAS 
pinMode(ledPin2, OUTPUT); 
pinMode(ledPin3, OUTPUT); 
digitalWrite(ledPin1, LOW); // Apaga los LEDs 
digitalWrite(ledPin2, LOW); 
digitalWrite(ledPin3, LOW); 
} 
void loop(){ //Bucle de Funcionamiento 
digitalWrite(ledPin1, HIGH); // Apaga y enciende los leds cada 200 ms 
delay(500); 
digitalWrite(ledPin1, LOW); 
digitalWrite(ledPin2, HIGH); 
delay(500); 
digitalWrite(ledPin2, LOW); 
digitalWrite(ledPin3, HIGH); 
delay(500); 
digitalWrite(ledPin3, LOW); 
} 
Desarrollo 
Para la correcta programación y funcionamiento de esta práctica se utilizaran: 
- Arduino uno 
- Protoboard 
- Leds 
- Cables 
Llevaremos a cavo una modificación en nuestro programa ya sea de la practica 9 o 10, cualquiera de las dos, ya que estas practicas tienen la base para poder llevar a cavo nuestra practica numero 11 que consistirá del encendido solo de 3 leds de 5 para esto de nuestros programas anteriores borraremos 2 salidas antes declaradas y dejaremos solo 3 que serán las encargadas de llevar a cavo nuestra función, declararemos nuestras salidas 2,7,13 dichos pines serán nuestras salidas
que en la parte mas adelante con el void o bucle de funcionamiento realizara el mismo proceso de encendido y apagado de un led uno por uno, con la debida etiqueta que dará la salida a nuestros ya mencionados pines, según el criterio del programador se podrá cambiar el tiempo en nuestras diferentes salidas como en nuestras practicas anteriores, para continuar con nuestra practica verificaremos nuestro programa para ver que no tenga ningún error y si este funciona perfecta mente lo cargaremos a nuestro arduino. 
Posterior mente llevaremos a cabo el montado y conectado de nuestra protoboard con arduino y cada uno de sus componentes ara que esta pueda funcionar adecuada mente, dándonos como resultado la siguiente imagen: 
Practica 13 
Objetivo 
Llevar a cavo la programación en arduino para juntar y hacer funcionar la practica 9,10,11 y 12 en un solo programa, que este funcione correcta mente y sin errores como fueron funcionando una por una separadas haciendo el corrimiento de leds de derecha a izquierda, viceversa y de derecha a izquierda solo los leds 1, 3, y 5 y por igual a la inversa para posterior mente comenzar de nuevo por la derecha, esto se realizara con el ya mencionado lenguaje de programación de arduino, siguiendo el siguiente programa: 
// Encendido y apagado de 3 LEDs 
int ledPin1 = 13; // Define las salidas de los LED´s
int ledPin2 = 8; 
int ledPin3 = 7; 
int ledPin4 = 4; 
int ledPin5 = 2; 
void setup() { // Configura las SALIDAS 
pinMode(ledPin1, OUTPUT); // declarar LEDs como SALIDAS 
pinMode(ledPin2, OUTPUT); 
pinMode(ledPin3, OUTPUT); 
pinMode(ledPin4, OUTPUT); 
pinMode(ledPin5, OUTPUT); 
digitalWrite(ledPin1, LOW); // Apaga los LEDs 
digitalWrite(ledPin2, LOW); 
digitalWrite(ledPin3, LOW); 
digitalWrite(ledPin4, LOW); 
digitalWrite(ledPin5, LOW); 
} 
void loop(){ //Bucle de Funcionamiento 
digitalWrite(ledPin1, HIGH); // Apaga y enciende los leds cada 200 ms 
delay(500); 
digitalWrite(ledPin1, LOW); 
digitalWrite(ledPin2, HIGH); 
delay(500); 
digitalWrite(ledPin2, LOW); 
digitalWrite(ledPin3, HIGH); 
delay(500); 
digitalWrite(ledPin3, LOW); 
digitalWrite(ledPin4, HIGH); 
delay(500);
digitalWrite(ledPin4, LOW); 
digitalWrite(ledPin5, HIGH); 
delay(500); 
digitalWrite(ledPin5, LOW); 
//Practica 10 
digitalWrite(ledPin5, HIGH); // Apaga y enciende los leds cada 200 ms 
delay(500); 
digitalWrite(ledPin5, LOW); 
digitalWrite(ledPin4, HIGH); 
delay(500); 
digitalWrite(ledPin4, LOW); 
digitalWrite(ledPin3, HIGH); 
delay(500); 
digitalWrite(ledPin3, LOW); 
digitalWrite(ledPin2, HIGH); 
delay(500); 
digitalWrite(ledPin2, LOW); 
digitalWrite(ledPin1, HIGH); 
delay(500); 
digitalWrite(ledPin1, LOW); 
//Practica 11 
digitalWrite(ledPin1, HIGH); // Apaga y enciende los leds cada 200 ms 
delay(500); 
digitalWrite(ledPin1, LOW); 
digitalWrite(ledPin3, HIGH); 
delay(500);
digitalWrite(ledPin3, LOW); 
digitalWrite(ledPin5, HIGH); 
delay(500); 
digitalWrite(ledPin5, LOW); 
//Practica 12 
digitalWrite(ledPin5, HIGH); // Apaga y enciende los leds cada 200 ms 
delay(500); 
digitalWrite(ledPin5, LOW); 
digitalWrite(ledPin3, HIGH); 
delay(500); 
digitalWrite(ledPin3, LOW); 
digitalWrite(ledPin1, HIGH); 
delay(500); 
digitalWrite(ledPin1, LOW); 
} 
Desarrollo 
Para la correcta programación y funcionamiento de esta práctica se utilizaran: 
- Arduino uno 
- Protoboard 
- Leds 
- Cables 
Llevaremos a cavo una modificación en nuestro programa en base a la practica 9, juntándola con la 10, la 11 y la 12 haciendo el arreglo correcto y correspondiente para que se haga bien y sin problema el funcionamiento de nuestra practica que consistirá ya antes mencionado con el corrimiento de leds uno por uno de derecha a izquierda, a la inversa de esta, cuando termine que comience el encendido de los leds 1, 3 y 5 por igual de derecha a izquierda y cuando termine dicho proceso a la inversa de este. Para ello como en nuestra practica 9 o 10 declararemos nuestras 5 salidas y lo que influirá y realizara todo nuestro proceso para que se
cumpla nuestro objetivo tendrá que ver y hacerse en el void o bucle de funcionamiento que llevara toda la etapa de funcionamiento que realizara los uno por uno los diferentes procesos que se requieran para que no haya problem, con las debidas etiquetas que dará la salida a nuestros ya mencionados pines. 
Posterior mente llevaremos a cabo el montado y conectado de nuestra protoboard con arduino y cada uno de sus componentes ara que esta pueda funcionar adecuada mente, dándonos como resultado la siguiente imagen: 
Practica 14 
Objetivo 
Llevar a cavo la programación en arduino para juntar y hacer funcionar la practica 9,10,11 y 12 en un solo programa pero esta vez cambiaremos la velocidad de su frecuencia de encendido y apagado, que este funcione correcta mente y sin errores como fueron funcionando una por una separadas haciendo el corrimiento de leds de derecha a izquierda, viceversa y de derecha a izquierda solo los leds 1, 3, y 5 y por igual a la inversa para posterior mente comenzar de nuevo por la derecha, esto se realizara con el ya mencionado lenguaje de programación de arduino, siguiendo el siguiente programa: 
// Encendido y apagado de 3 LEDs
int ledPin1 = 13; // Define las salidas de los LED´s 
int ledPin2 = 8; 
int ledPin3 = 7; 
int ledPin4 = 4; 
int ledPin5 = 2; 
void setup() { // Configura las SALIDAS 
pinMode(ledPin1, OUTPUT); // declarar LEDs como SALIDAS 
pinMode(ledPin2, OUTPUT); 
pinMode(ledPin3, OUTPUT); 
pinMode(ledPin4, OUTPUT); 
pinMode(ledPin5, OUTPUT); 
digitalWrite(ledPin1, LOW); // Apaga los LEDs 
digitalWrite(ledPin2, LOW); 
digitalWrite(ledPin3, LOW); 
digitalWrite(ledPin4, LOW); 
digitalWrite(ledPin5, LOW); 
} 
void loop(){ //Bucle de Funcionamiento 
digitalWrite(ledPin1, HIGH); // Apaga y enciende los leds cada 200 ms 
delay(100); 
digitalWrite(ledPin1, LOW); 
digitalWrite(ledPin2, HIGH); 
delay(100); 
digitalWrite(ledPin2, LOW); 
digitalWrite(ledPin3, HIGH); 
delay(100); 
digitalWrite(ledPin3, LOW); 
digitalWrite(ledPin4, HIGH);
delay(100); 
digitalWrite(ledPin4, LOW); 
digitalWrite(ledPin5, HIGH); 
delay(100); 
digitalWrite(ledPin5, LOW); 
//Practica 10 
digitalWrite(ledPin5, HIGH); // Apaga y enciende los leds cada 200 ms 
delay(100); 
digitalWrite(ledPin5, LOW); 
digitalWrite(ledPin4, HIGH); 
delay(100); 
digitalWrite(ledPin4, LOW); 
digitalWrite(ledPin3, HIGH); 
delay(100); 
digitalWrite(ledPin3, LOW); 
digitalWrite(ledPin2, HIGH); 
delay(100); 
digitalWrite(ledPin2, LOW); 
digitalWrite(ledPin1, HIGH); 
delay(100); 
digitalWrite(ledPin1, LOW); 
//Practica 11 
digitalWrite(ledPin1, HIGH); // Apaga y enciende los leds cada 200 ms 
delay(100); 
digitalWrite(ledPin1, LOW); 
digitalWrite(ledPin3, HIGH);
delay(100); 
digitalWrite(ledPin3, LOW); 
digitalWrite(ledPin5, HIGH); 
delay(100); 
digitalWrite(ledPin5, LOW); 
//Practica 12 
digitalWrite(ledPin5, HIGH); // Apaga y enciende los leds cada 200 ms 
delay(100); 
digitalWrite(ledPin5, LOW); 
digitalWrite(ledPin3, HIGH); 
delay(100); 
digitalWrite(ledPin3, LOW); 
digitalWrite(ledPin1, HIGH); 
delay(100); 
digitalWrite(ledPin1, LOW); 
} 
Desarrollo 
Para la correcta programación y funcionamiento de esta práctica se utilizaran: 
- Arduino uno 
- Protoboard 
- Leds 
- Cables 
Llevaremos a cavo una modificación en nuestro programa en base a la practica 9, juntándola con la 10, la 11 y la 12 haciendo el arreglo correcto y correspondiente para que se haga bien y sin problema el funcionamiento de nuestra practica que consistirá ya antes mencionado con el corrimiento de leds uno por uno de derecha a izquierda, a la inversa de esta, cuando termine que comience el encendido de los leds 1, 3 y 5 por igual de derecha a izquierda y cuando termine dicho proceso a la inversa de este. Para ello como en nuestra practica 9 o 10 declararemos nuestras 5 salidas y lo que influirá y realizara todo nuestro proceso para que se
cumpla nuestro objetivo tendrá que ver y hacerse en el void o bucle de funcionamiento que llevara toda la etapa de funcionamiento que realizara uno por uno los diferentes procesos que se requieran para que no haya problema, además de que cambiaremos la frecuencia de su velocidad con las debidas etiquetas que dará la salida a nuestros ya mencionados pines. 
Posterior mente llevaremos a cabo el montado y conectado de nuestra protoboard con arduino y cada uno de sus componentes ara que esta pueda funcionar adecuada mente, dándonos como resultado la siguiente imagen: 
Practica 15 
Objetivo 
Utilizando Arduino y su debido lenguaje de programación 5 leds, cada uno de ellos diez veces, con la misma frecuencia de nuestra practica 14, frecuencia que encenderá y apagara nuestros leds cada cierto periodo de tiempo, claro al terminar cada uno de estos se apague y se vuelva a encender y a hacer la misma función desde un principio utilizando una práctica ya predeterminada que trae nuestro programa arduino, siguiendo el siguiente programa: 
// Pin 13 has an LED connected on most Arduino boards.
// give it a name: 
const int led = 13; 
const int led2 = 12; 
const int led3 = 8; 
const int led4 = 7; 
const int led5 = 4; 
// the setup routine runs once when you press reset: 
void setup() { 
// initialize the digital pin as an output. 
pinMode(led, OUTPUT); 
pinMode(led2, OUTPUT); 
pinMode(led3, OUTPUT); 
pinMode(led4, OUTPUT); 
pinMode(led5, OUTPUT); 
} 
// Prac. 9 the loop routine runs over and over again forever: 
void loop() { 
// led1 
digitalWrite(led, HIGH); // turn the LED on (HIGH is the voltage level) 
delay(1500); // wait for a second 
digitalWrite(led, LOW); // turn the LED off by making the voltage LOW 
delay(150); // wait for a second 
pinMode(led, OUTPUT); 
digitalWrite(led, HIGH); // turn the LED on (HIGH is the voltage level) 
delay(1500); // wait for a second
digitalWrite(led, LOW); // turn the LED off by making the voltage LOW 
delay(150); // wait for a second 
pinMode(led, OUTPUT); 
digitalWrite(led, HIGH); // turn the LED on (HIGH is the voltage level) 
delay(1500); // wait for a second 
digitalWrite(led, LOW); // turn the LED off by making the voltage LOW 
delay(150); // wait for a second 
pinMode(led, OUTPUT); 
digitalWrite(led, HIGH); // turn the LED on (HIGH is the voltage level) 
delay(1500); // wait for a second 
digitalWrite(led, LOW); // turn the LED off by making the voltage LOW 
delay(150); // wait for a second 
pinMode(led, OUTPUT); 
digitalWrite(led, HIGH); // turn the LED on (HIGH is the voltage level) 
delay(1500); // wait for a second 
digitalWrite(led, LOW); // turn the LED off by making the voltage LOW 
delay(150); // wait for a second 
pinMode(led, OUTPUT); 
digitalWrite(led, HIGH); // turn the LED on (HIGH is the voltage level) 
delay(1500); // wait for a second 
digitalWrite(led, LOW); // turn the LED off by making the voltage LOW 
delay(150); // wait for a second 
pinMode(led, OUTPUT);
digitalWrite(led, HIGH); // turn the LED on (HIGH is the voltage level) 
delay(1500); // wait for a second 
digitalWrite(led, LOW); // turn the LED off by making the voltage LOW 
delay(150); // wait for a second 
pinMode(led, OUTPUT); 
digitalWrite(led, HIGH); // turn the LED on (HIGH is the voltage level) 
delay(1500); // wait for a second 
digitalWrite(led, LOW); // turn the LED off by making the voltage LOW 
delay(150); // wait for a second 
pinMode(led, OUTPUT); 
digitalWrite(led, HIGH); // turn the LED on (HIGH is the voltage level) 
delay(1500); // wait for a second 
digitalWrite(led, LOW); // turn the LED off by making the voltage LOW 
delay(150); // wait for a second 
pinMode(led, OUTPUT); 
digitalWrite(led, HIGH); // turn the LED on (HIGH is the voltage level) 
delay(1500); // wait for a second 
digitalWrite(led, LOW); // turn the LED off by making the voltage LOW 
delay(150); // wait for a second 
pinMode(led, OUTPUT); 
// led2 
digitalWrite(led2, HIGH); // turn the LED on (HIGH is the voltage level) 
delay(1500); // wait for a second 
digitalWrite(led2, LOW); // turn the LED off by making the voltage LOW
delay(150); // wait for a second 
pinMode(led2, OUTPUT); 
digitalWrite(led2, HIGH); // turn the LED on (HIGH is the voltage level) 
delay(1500); // wait for a second 
digitalWrite(led2, LOW); // turn the LED off by making the voltage LOW 
delay(150); // wait for a second 
pinMode(led2, OUTPUT); 
digitalWrite(led2, HIGH); // turn the LED on (HIGH is the voltage level) 
delay(1500); // wait for a second 
digitalWrite(led2, LOW); // turn the LED off by making the voltage LOW 
delay(150); // wait for a second 
pinMode(led2, OUTPUT); 
digitalWrite(led2, HIGH); // turn the LED on (HIGH is the voltage level) 
delay(1500); // wait for a second 
digitalWrite(led2, LOW); // turn the LED off by making the voltage LOW 
delay(150); // wait for a second 
pinMode(led2, OUTPUT); 
digitalWrite(led2, HIGH); // turn the LED on (HIGH is the voltage level) 
delay(1500); // wait for a second 
digitalWrite(led2, LOW); // turn the LED off by making the voltage LOW 
delay(150); // wait for a second 
pinMode(led2, OUTPUT); 
digitalWrite(led2, HIGH); // turn the LED on (HIGH is the voltage level)
delay(1500); // wait for a second 
digitalWrite(led2, LOW); // turn the LED off by making the voltage LOW 
delay(150); // wait for a second 
pinMode(led2, OUTPUT); 
digitalWrite(led2, HIGH); // turn the LED on (HIGH is the voltage level) 
delay(1500); // wait for a second 
digitalWrite(led2, LOW); // turn the LED off by making the voltage LOW 
delay(150); // wait for a second 
pinMode(led2, OUTPUT); 
digitalWrite(led2, HIGH); // turn the LED on (HIGH is the voltage level) 
delay(1500); // wait for a second 
digitalWrite(led2, LOW); // turn the LED off by making the voltage LOW 
delay(150); // wait for a second 
pinMode(led2, OUTPUT); 
digitalWrite(led2, HIGH); // turn the LED on (HIGH is the voltage level) 
delay(1500); // wait for a second 
digitalWrite(led2, LOW); // turn the LED off by making the voltage LOW 
delay(150); // wait for a second 
pinMode(led2, OUTPUT); 
digitalWrite(led2, HIGH); // turn the LED on (HIGH is the voltage level) 
delay(1500); // wait for a second 
digitalWrite(led2, LOW); // turn the LED off by making the voltage LOW 
delay(150); // wait for a second 
pinMode(led2, OUTPUT);
//led3 
digitalWrite(led3, HIGH); // turn the LED on (HIGH is the voltage level) 
delay(1500); // wait for a second 
digitalWrite(led3, LOW); // turn the LED off by making the voltage LOW 
delay(150); // wait for a second 
pinMode(led3, OUTPUT); 
digitalWrite(led3, HIGH); // turn the LED on (HIGH is the voltage level) 
delay(1500); // wait for a second 
digitalWrite(led3, LOW); // turn the LED off by making the voltage LOW 
delay(150); // wait for a second 
pinMode(led3, OUTPUT); 
digitalWrite(led3, HIGH); // turn the LED on (HIGH is the voltage level) 
delay(1500); // wait for a second 
digitalWrite(led3, LOW); // turn the LED off by making the voltage LOW 
delay(150); // wait for a second 
pinMode(led3, OUTPUT); 
digitalWrite(led3, HIGH); // turn the LED on (HIGH is the voltage level) 
delay(1500); // wait for a second 
digitalWrite(led3, LOW); // turn the LED off by making the voltage LOW 
delay(150); // wait for a second 
pinMode(led3, OUTPUT); 
digitalWrite(led3, HIGH); // turn the LED on (HIGH is the voltage level) 
delay(1500); // wait for a second
digitalWrite(led3, LOW); // turn the LED off by making the voltage LOW 
delay(150); // wait for a second 
pinMode(led3, OUTPUT); 
digitalWrite(led3, HIGH); // turn the LED on (HIGH is the voltage level) 
delay(1500); // wait for a second 
digitalWrite(led3, LOW); // turn the LED off by making the voltage LOW 
delay(150); // wait for a second 
pinMode(led3, OUTPUT); 
digitalWrite(led3, HIGH); // turn the LED on (HIGH is the voltage level) 
delay(1500); // wait for a second 
digitalWrite(led3, LOW); // turn the LED off by making the voltage LOW 
delay(150); // wait for a second 
pinMode(led3, OUTPUT); 
digitalWrite(led3, HIGH); // turn the LED on (HIGH is the voltage level) 
delay(1500); // wait for a second 
digitalWrite(led3, LOW); // turn the LED off by making the voltage LOW 
delay(150); // wait for a second 
pinMode(led3, OUTPUT); 
digitalWrite(led3, HIGH); // turn the LED on (HIGH is the voltage level) 
delay(1500); // wait for a second 
digitalWrite(led3, LOW); // turn the LED off by making the voltage LOW 
delay(150); // wait for a second 
pinMode(led3, OUTPUT);
digitalWrite(led3, HIGH); // turn the LED on (HIGH is the voltage level) 
delay(1500); // wait for a second 
digitalWrite(led3, LOW); // turn the LED off by making the voltage LOW 
delay(150); // wait for a second 
pinMode(led3, OUTPUT); 
//led4 
digitalWrite(led4, HIGH); // turn the LED on (HIGH is the voltage level) 
delay(1500); // wait for a second 
digitalWrite(led4, LOW); // turn the LED off by making the voltage LOW 
delay(150); // wait for a second 
pinMode(led4, OUTPUT); 
digitalWrite(led4, HIGH); // turn the LED on (HIGH is the voltage level) 
delay(1500); // wait for a second 
digitalWrite(led4, LOW); // turn the LED off by making the voltage LOW 
delay(150); // wait for a second 
pinMode(led4, OUTPUT); 
digitalWrite(led4, HIGH); // turn the LED on (HIGH is the voltage level) 
delay(1500); // wait for a second 
digitalWrite(led4, LOW); // turn the LED off by making the voltage LOW 
delay(150); // wait for a second 
pinMode(led4, OUTPUT); 
digitalWrite(led4, HIGH); // turn the LED on (HIGH is the voltage level) 
delay(1500); // wait for a second 
digitalWrite(led4, LOW); // turn the LED off by making the voltage LOW
delay(150); // wait for a second 
pinMode(led4, OUTPUT); 
digitalWrite(led4, HIGH); // turn the LED on (HIGH is the voltage level) 
delay(1500); // wait for a second 
digitalWrite(led4, LOW); // turn the LED off by making the voltage LOW 
delay(150); // wait for a second 
pinMode(led4, OUTPUT); 
digitalWrite(led4, HIGH); // turn the LED on (HIGH is the voltage level) 
delay(1500); // wait for a second 
digitalWrite(led4, LOW); // turn the LED off by making the voltage LOW 
delay(150); // wait for a second 
pinMode(led4, OUTPUT); 
digitalWrite(led4, HIGH); // turn the LED on (HIGH is the voltage level) 
delay(1500); // wait for a second 
digitalWrite(led4, LOW); // turn the LED off by making the voltage LOW 
delay(150); // wait for a second 
pinMode(led4, OUTPUT); 
digitalWrite(led4, HIGH); // turn the LED on (HIGH is the voltage level) 
delay(1500); // wait for a second 
digitalWrite(led4, LOW); // turn the LED off by making the voltage LOW 
delay(150); // wait for a second 
pinMode(led4, OUTPUT); 
digitalWrite(led4, HIGH); // turn the LED on (HIGH is the voltage level)
delay(1500); // wait for a second 
digitalWrite(led4, LOW); // turn the LED off by making the voltage LOW 
delay(150); // wait for a second 
pinMode(led4, OUTPUT); 
digitalWrite(led4, HIGH); // turn the LED on (HIGH is the voltage level) 
delay(1500); // wait for a second 
digitalWrite(led4, LOW); // turn the LED off by making the voltage LOW 
delay(150); // wait for a second 
pinMode(led4, OUTPUT); 
//led5 
digitalWrite(led5, HIGH); // turn the LED on (HIGH is the voltage level) 
delay(1500); // wait for a second 
digitalWrite(led5, LOW); // turn the LED off by making the voltage LOW 
delay(150); // wait for a second 
pinMode(led5, OUTPUT); 
digitalWrite(led5, HIGH); // turn the LED on (HIGH is the voltage level) 
delay(1500); // wait for a second 
digitalWrite(led5, LOW); // turn the LED off by making the voltage LOW 
delay(150); // wait for a second 
pinMode(led5, OUTPUT); 
digitalWrite(led5, HIGH); // turn the LED on (HIGH is the voltage level) 
delay(1500); // wait for a second 
digitalWrite(led5, LOW); // turn the LED off by making the voltage LOW 
delay(150); // wait for a second
pinMode(led5, OUTPUT); 
digitalWrite(led5, HIGH); // turn the LED on (HIGH is the voltage level) 
delay(1500); // wait for a second 
digitalWrite(led5, LOW); // turn the LED off by making the voltage LOW 
delay(150); // wait for a second 
pinMode(led5, OUTPUT); 
digitalWrite(led5, HIGH); // turn the LED on (HIGH is the voltage level) 
delay(1500); // wait for a second 
digitalWrite(led5, LOW); // turn the LED off by making the voltage LOW 
delay(150); // wait for a second 
pinMode(led5, OUTPUT); 
digitalWrite(led5, HIGH); // turn the LED on (HIGH is the voltage level) 
delay(1500); // wait for a second 
digitalWrite(led5, LOW); // turn the LED off by making the voltage LOW 
delay(150); // wait for a second 
pinMode(led5, OUTPUT); 
digitalWrite(led5, HIGH); // turn the LED on (HIGH is the voltage level) 
delay(1500); // wait for a second 
digitalWrite(led5, LOW); // turn the LED off by making the voltage LOW 
delay(150); // wait for a second 
pinMode(led5, OUTPUT); 
digitalWrite(led5, HIGH); // turn the LED on (HIGH is the voltage level) 
delay(1500); // wait for a second
digitalWrite(led5, LOW); // turn the LED off by making the voltage LOW 
delay(150); // wait for a second 
pinMode(led5, OUTPUT); 
digitalWrite(led5, HIGH); // turn the LED on (HIGH is the voltage level) 
delay(1500); // wait for a second 
digitalWrite(led5, LOW); // turn the LED off by making the voltage LOW 
delay(150); // wait for a second 
pinMode(led5, OUTPUT); 
digitalWrite(led5, HIGH); // turn the LED on (HIGH is the voltage level) 
delay(1500); // wait for a second 
digitalWrite(led5, LOW); // turn the LED off by making the voltage LOW 
delay(150); // wait for a second 
pinMode(led5, OUTPUT); 
// pract.10 led5 
digitalWrite(led5, HIGH); // turn the LED on (HIGH is the voltage level) 
delay(1500); // wait for a second 
digitalWrite(led5, LOW); // turn the LED off by making the voltage LOW 
delay(150); // wait for a second 
pinMode (led5, OUTPUT); 
digitalWrite(led5, HIGH); // turn the LED on (HIGH is the voltage level) 
delay(1500); // wait for a second 
digitalWrite(led5, LOW); // turn the LED off by making the voltage LOW 
delay(150); // wait for a second
pinMode (led5, OUTPUT); 
digitalWrite(led5, HIGH); // turn the LED on (HIGH is the voltage level) 
delay(1500); // wait for a second 
digitalWrite(led5, LOW); // turn the LED off by making the voltage LOW 
delay(150); // wait for a second 
pinMode (led5, OUTPUT); 
digitalWrite(led5, HIGH); // turn the LED on (HIGH is the voltage level) 
delay(1500); // wait for a second 
digitalWrite(led5, LOW); // turn the LED off by making the voltage LOW 
delay(150); // wait for a second 
pinMode (led5, OUTPUT); 
digitalWrite(led5, HIGH); // turn the LED on (HIGH is the voltage level) 
delay(1500); // wait for a second 
digitalWrite(led5, LOW); // turn the LED off by making the voltage LOW 
delay(150); // wait for a second 
pinMode (led5, OUTPUT); 
digitalWrite(led5, HIGH); // turn the LED on (HIGH is the voltage level) 
delay(1500); // wait for a second 
digitalWrite(led5, LOW); // turn the LED off by making the voltage LOW 
delay(150); // wait for a second 
pinMode (led5, OUTPUT); 
digitalWrite(led5, HIGH); // turn the LED on (HIGH is the voltage level) 
delay(1500); // wait for a second
digitalWrite(led5, LOW); // turn the LED off by making the voltage LOW 
delay(150); // wait for a second 
pinMode (led5, OUTPUT); 
digitalWrite(led5, HIGH); // turn the LED on (HIGH is the voltage level) 
delay(1500); // wait for a second 
digitalWrite(led5, LOW); // turn the LED off by making the voltage LOW 
delay(150); // wait for a second 
pinMode (led5, OUTPUT); 
digitalWrite(led5, HIGH); // turn the LED on (HIGH is the voltage level) 
delay(1500); // wait for a second 
digitalWrite(led5, LOW); // turn the LED off by making the voltage LOW 
delay(150); // wait for a second 
pinMode (led5, OUTPUT); 
digitalWrite(led5, HIGH); // turn the LED on (HIGH is the voltage level) 
delay(1500); // wait for a second 
digitalWrite(led5, LOW); // turn the LED off by making the voltage LOW 
delay(150); // wait for a second 
pinMode (led5, OUTPUT); 
//led4 
digitalWrite(led4, HIGH); // turn the LED on (HIGH is the voltage level) 
delay(1500); // wait for a second 
digitalWrite(led4, LOW); // turn the LED off by making the voltage LOW 
delay(150); 
pinMode (led4, OUTPUT);
digitalWrite(led4, HIGH); // turn the LED on (HIGH is the voltage level) 
delay(1500); // wait for a second 
digitalWrite(led4, LOW); // turn the LED off by making the voltage LOW 
delay(150); 
pinMode (led4, OUTPUT); 
digitalWrite(led4, HIGH); // turn the LED on (HIGH is the voltage level) 
delay(1500); // wait for a second 
digitalWrite(led4, LOW); // turn the LED off by making the voltage LOW 
delay(150); 
pinMode (led4, OUTPUT); 
digitalWrite(led4, HIGH); // turn the LED on (HIGH is the voltage level) 
delay(1500); // wait for a second 
digitalWrite(led4, LOW); // turn the LED off by making the voltage LOW 
delay(150); 
pinMode (led4, OUTPUT); 
digitalWrite(led4, HIGH); // turn the LED on (HIGH is the voltage level) 
delay(1500); // wait for a second 
digitalWrite(led4, LOW); // turn the LED off by making the voltage LOW 
delay(150); 
pinMode (led4, OUTPUT); 
digitalWrite(led4, HIGH); // turn the LED on (HIGH is the voltage level) 
delay(1500); // wait for a second 
digitalWrite(led4, LOW); // turn the LED off by making the voltage LOW
delay(150); 
pinMode (led4, OUTPUT); 
digitalWrite(led4, HIGH); // turn the LED on (HIGH is the voltage level) 
delay(1500); // wait for a second 
digitalWrite(led4, LOW); // turn the LED off by making the voltage LOW 
delay(150); 
pinMode (led4, OUTPUT); 
digitalWrite(led4, HIGH); // turn the LED on (HIGH is the voltage level) 
delay(1500); // wait for a second 
digitalWrite(led4, LOW); // turn the LED off by making the voltage LOW 
delay(150); 
pinMode (led4, OUTPUT); 
digitalWrite(led4, HIGH); // turn the LED on (HIGH is the voltage level) 
delay(1500); // wait for a second 
digitalWrite(led4, LOW); // turn the LED off by making the voltage LOW 
delay(150); 
pinMode (led4, OUTPUT); 
digitalWrite(led4, HIGH); // turn the LED on (HIGH is the voltage level) 
delay(1500); // wait for a second 
digitalWrite(led4, LOW); // turn the LED off by making the voltage LOW 
delay(150); 
pinMode (led4, OUTPUT); 
//led3
digitalWrite(led3, HIGH); // turn the LED on (HIGH is the voltage level) 
delay(1500); // wait for a second 
digitalWrite(led3, LOW); // turn the LED off by making the voltage LOW 
delay(150); 
pinMode (led3, OUTPUT); 
digitalWrite(led3, HIGH); // turn the LED on (HIGH is the voltage level) 
delay(1500); // wait for a second 
digitalWrite(led3, LOW); // turn the LED off by making the voltage LOW 
delay(150); 
pinMode (led3, OUTPUT); 
digitalWrite(led3, HIGH); // turn the LED on (HIGH is the voltage level) 
delay(1500); // wait for a second 
digitalWrite(led3, LOW); // turn the LED off by making the voltage LOW 
delay(150); 
pinMode (led3, OUTPUT); 
digitalWrite(led3, HIGH); // turn the LED on (HIGH is the voltage level) 
delay(1500); // wait for a second 
digitalWrite(led3, LOW); // turn the LED off by making the voltage LOW 
delay(150); 
pinMode (led3, OUTPUT); 
digitalWrite(led3, HIGH); // turn the LED on (HIGH is the voltage level) 
delay(1500); // wait for a second 
digitalWrite(led3, LOW); // turn the LED off by making the voltage LOW 
delay(150);
pinMode (led3, OUTPUT); 
digitalWrite(led3, HIGH); // turn the LED on (HIGH is the voltage level) 
delay(1500); // wait for a second 
digitalWrite(led3, LOW); // turn the LED off by making the voltage LOW 
delay(150); 
pinMode (led3, OUTPUT); 
digitalWrite(led3, HIGH); // turn the LED on (HIGH is the voltage level) 
delay(1500); // wait for a second 
digitalWrite(led3, LOW); // turn the LED off by making the voltage LOW 
delay(150); 
pinMode (led3, OUTPUT); 
digitalWrite(led3, HIGH); // turn the LED on (HIGH is the voltage level) 
delay(1500); // wait for a second 
digitalWrite(led3, LOW); // turn the LED off by making the voltage LOW 
delay(150); 
pinMode (led3, OUTPUT); 
digitalWrite(led3, HIGH); // turn the LED on (HIGH is the voltage level) 
delay(1500); // wait for a second 
digitalWrite(led3, LOW); // turn the LED off by making the voltage LOW 
delay(150); 
pinMode (led3, OUTPUT); 
digitalWrite(led3, HIGH); // turn the LED on (HIGH is the voltage level) 
delay(1500); // wait for a second
digitalWrite(led3, LOW); // turn the LED off by making the voltage LOW 
delay(150); 
pinMode (led3, OUTPUT); 
//led2 
digitalWrite(led2, HIGH); // turn the LED on (HIGH is the voltage level) 
delay(1500); // wait for a second 
digitalWrite(led2, LOW); // turn the LED off by making the voltage LOW 
delay(150); 
pinMode (led2, OUTPUT); 
digitalWrite(led2, HIGH); // turn the LED on (HIGH is the voltage level) 
delay(1500); // wait for a second 
digitalWrite(led2, LOW); // turn the LED off by making the voltage LOW 
delay(150); 
pinMode (led2, OUTPUT); 
digitalWrite(led2, HIGH); // turn the LED on (HIGH is the voltage level) 
delay(1500); // wait for a second 
digitalWrite(led2, LOW); // turn the LED off by making the voltage LOW 
delay(150); 
pinMode (led2, OUTPUT); 
digitalWrite(led2, HIGH); // turn the LED on (HIGH is the voltage level) 
delay(1500); // wait for a second 
digitalWrite(led2, LOW); // turn the LED off by making the voltage LOW 
delay(150); 
pinMode (led2, OUTPUT);
digitalWrite(led2, HIGH); // turn the LED on (HIGH is the voltage level) 
delay(1500); // wait for a second 
digitalWrite(led2, LOW); // turn the LED off by making the voltage LOW 
delay(150); 
pinMode (led2, OUTPUT); 
digitalWrite(led2, HIGH); // turn the LED on (HIGH is the voltage level) 
delay(1500); // wait for a second 
digitalWrite(led2, LOW); // turn the LED off by making the voltage LOW 
delay(150); 
pinMode (led2, OUTPUT); 
digitalWrite(led2, HIGH); // turn the LED on (HIGH is the voltage level) 
delay(1500); // wait for a second 
digitalWrite(led2, LOW); // turn the LED off by making the voltage LOW 
delay(150); 
pinMode (led2, OUTPUT); 
digitalWrite(led2, HIGH); // turn the LED on (HIGH is the voltage level) 
delay(1500); // wait for a second 
digitalWrite(led2, LOW); // turn the LED off by making the voltage LOW 
delay(150); 
pinMode (led2, OUTPUT); 
digitalWrite(led2, HIGH); // turn the LED on (HIGH is the voltage level) 
delay(1500); // wait for a second 
digitalWrite(led2, LOW); // turn the LED off by making the voltage LOW
delay(150); 
pinMode (led2, OUTPUT); 
digitalWrite(led2, HIGH); // turn the LED on (HIGH is the voltage level) 
delay(1500); // wait for a second 
digitalWrite(led2, LOW); // turn the LED off by making the voltage LOW 
delay(150); 
pinMode (led2, OUTPUT); 
//led 
digitalWrite(led, HIGH); // turn the LED on (HIGH is the voltage level) 
delay(1500); // wait for a second 
digitalWrite(led, LOW); // turn the LED off by making the voltage LOW 
delay(150); 
pinMode (led, OUTPUT); 
digitalWrite(led, HIGH); // turn the LED on (HIGH is the voltage level) 
delay(1500); // wait for a second 
digitalWrite(led, LOW); // turn the LED off by making the voltage LOW 
delay(150); 
pinMode (led, OUTPUT); 
digitalWrite(led, HIGH); // turn the LED on (HIGH is the voltage level) 
delay(1500); // wait for a second 
digitalWrite(led, LOW); // turn the LED off by making the voltage LOW 
delay(150); 
pinMode (led, OUTPUT);
digitalWrite(led, HIGH); // turn the LED on (HIGH is the voltage level) 
delay(1500); // wait for a second 
digitalWrite(led, LOW); // turn the LED off by making the voltage LOW 
delay(150); 
pinMode (led, OUTPUT); 
digitalWrite(led, HIGH); // turn the LED on (HIGH is the voltage level) 
delay(1500); // wait for a second 
digitalWrite(led, LOW); // turn the LED off by making the voltage LOW 
delay(150); 
pinMode (led, OUTPUT); 
digitalWrite(led, HIGH); // turn the LED on (HIGH is the voltage level) 
delay(1500); // wait for a second 
digitalWrite(led, LOW); // turn the LED off by making the voltage LOW 
delay(150); 
pinMode (led, OUTPUT); 
digitalWrite(led, HIGH); // turn the LED on (HIGH is the voltage level) 
delay(1500); // wait for a second 
digitalWrite(led, LOW); // turn the LED off by making the voltage LOW 
delay(150); 
pinMode (led, OUTPUT); 
digitalWrite(led, HIGH); // turn the LED on (HIGH is the voltage level) 
delay(1500); // wait for a second 
digitalWrite(led, LOW); // turn the LED off by making the voltage LOW 
delay(150);
pinMode (led, OUTPUT); 
digitalWrite(led, HIGH); // turn the LED on (HIGH is the voltage level) 
delay(1500); // wait for a second 
digitalWrite(led, LOW); // turn the LED off by making the voltage LOW 
delay(150); 
pinMode (led, OUTPUT); 
digitalWrite(led, HIGH); // turn the LED on (HIGH is the voltage level) 
delay(1500); // wait for a second 
digitalWrite(led, LOW); // turn the LED off by making the voltage LOW 
delay(150); 
pinMode (led, OUTPUT); 
// pract.11 led 
digitalWrite(led, HIGH); // turn the LED on (HIGH is the voltage level) 
delay(1500); // wait for a second 
digitalWrite(led, LOW); // turn the LED off by making the voltage LOW 
delay(150); // wait for a second 
pinMode(led,OUTPUT); 
digitalWrite(led, HIGH); // turn the LED on (HIGH is the voltage level) 
delay(1500); // wait for a second 
digitalWrite(led, LOW); // turn the LED off by making the voltage LOW 
delay(150); // wait for a second 
pinMode(led,OUTPUT); 
digitalWrite(led, HIGH); // turn the LED on (HIGH is the voltage level)
delay(1500); // wait for a second 
digitalWrite(led, LOW); // turn the LED off by making the voltage LOW 
delay(150); // wait for a second 
pinMode(led,OUTPUT); 
digitalWrite(led, HIGH); // turn the LED on (HIGH is the voltage level) 
delay(1500); // wait for a second 
digitalWrite(led, LOW); // turn the LED off by making the voltage LOW 
delay(150); // wait for a second 
pinMode(led,OUTPUT); 
digitalWrite(led, HIGH); // turn the LED on (HIGH is the voltage level) 
delay(1500); // wait for a second 
digitalWrite(led, LOW); // turn the LED off by making the voltage LOW 
delay(150); // wait for a second 
pinMode(led,OUTPUT); 
digitalWrite(led, HIGH); // turn the LED on (HIGH is the voltage level) 
delay(1500); // wait for a second 
digitalWrite(led, LOW); // turn the LED off by making the voltage LOW 
delay(150); // wait for a second 
pinMode(led,OUTPUT); 
digitalWrite(led, HIGH); // turn the LED on (HIGH is the voltage level) 
delay(1500); // wait for a second 
digitalWrite(led, LOW); // turn the LED off by making the voltage LOW 
delay(150); // wait for a second 
pinMode(led,OUTPUT);
digitalWrite(led, HIGH); // turn the LED on (HIGH is the voltage level) 
delay(1500); // wait for a second 
digitalWrite(led, LOW); // turn the LED off by making the voltage LOW 
delay(150); // wait for a second 
pinMode(led,OUTPUT); 
digitalWrite(led, HIGH); // turn the LED on (HIGH is the voltage level) 
delay(1500); // wait for a second 
digitalWrite(led, LOW); // turn the LED off by making the voltage LOW 
delay(150); // wait for a second 
pinMode(led,OUTPUT); 
digitalWrite(led, HIGH); // turn the LED on (HIGH is the voltage level) 
delay(1500); // wait for a second 
digitalWrite(led, LOW); // turn the LED off by making the voltage LOW 
delay(150); // wait for a second 
pinMode(led,OUTPUT); 
//led3 
digitalWrite(led3, HIGH); // turn the LED on (HIGH is the voltage level) 
delay(1500); // wait for a second 
digitalWrite(led3, LOW); // turn the LED off by making the voltage LOW 
delay(150); // wait for a second 
pinMode(led3,OUTPUT); 
digitalWrite(led3, HIGH); // turn the LED on (HIGH is the voltage level) 
delay(1500); // wait for a second
digitalWrite(led3, LOW); // turn the LED off by making the voltage LOW 
delay(150); // wait for a second 
pinMode(led3,OUTPUT); 
digitalWrite(led3, HIGH); // turn the LED on (HIGH is the voltage level) 
delay(1500); // wait for a second 
digitalWrite(led3, LOW); // turn the LED off by making the voltage LOW 
delay(150); // wait for a second 
pinMode(led3,OUTPUT); 
digitalWrite(led3, HIGH); // turn the LED on (HIGH is the voltage level) 
delay(1500); // wait for a second 
digitalWrite(led3, LOW); // turn the LED off by making the voltage LOW 
delay(150); // wait for a second 
pinMode(led3,OUTPUT); 
digitalWrite(led3, HIGH); // turn the LED on (HIGH is the voltage level) 
delay(1500); // wait for a second 
digitalWrite(led3, LOW); // turn the LED off by making the voltage LOW 
delay(150); // wait for a second 
pinMode(led3,OUTPUT); 
digitalWrite(led3, HIGH); // turn the LED on (HIGH is the voltage level) 
delay(1500); // wait for a second 
digitalWrite(led3, LOW); // turn the LED off by making the voltage LOW 
delay(150); // wait for a second 
pinMode(led3,OUTPUT);
digitalWrite(led3, HIGH); // turn the LED on (HIGH is the voltage level) 
delay(1500); // wait for a second 
digitalWrite(led3, LOW); // turn the LED off by making the voltage LOW 
delay(150); // wait for a second 
pinMode(led3,OUTPUT); 
digitalWrite(led3, HIGH); // turn the LED on (HIGH is the voltage level) 
delay(1500); // wait for a second 
digitalWrite(led3, LOW); // turn the LED off by making the voltage LOW 
delay(150); // wait for a second 
pinMode(led3,OUTPUT); 
digitalWrite(led3, HIGH); // turn the LED on (HIGH is the voltage level) 
delay(1500); // wait for a second 
digitalWrite(led3, LOW); // turn the LED off by making the voltage LOW 
delay(150); // wait for a second 
pinMode(led3,OUTPUT); 
digitalWrite(led3, HIGH); // turn the LED on (HIGH is the voltage level) 
delay(1500); // wait for a second 
digitalWrite(led3, LOW); // turn the LED off by making the voltage LOW 
delay(150); // wait for a second 
pinMode(led3,OUTPUT); 
//led5 
digitalWrite(led5, HIGH); // turn the LED on (HIGH is the voltage level) 
delay(1500); // wait for a second 
digitalWrite(led5, LOW); // turn the LED off by making the voltage LOW
delay(150); // wait for a second 
pinMode(led5,OUTPUT); 
digitalWrite(led5, HIGH); // turn the LED on (HIGH is the voltage level) 
delay(1500); // wait for a second 
digitalWrite(led5, LOW); // turn the LED off by making the voltage LOW 
delay(150); // wait for a second 
pinMode(led5,OUTPUT); 
digitalWrite(led5, HIGH); // turn the LED on (HIGH is the voltage level) 
delay(1500); // wait for a second 
digitalWrite(led5, LOW); // turn the LED off by making the voltage LOW 
delay(150); // wait for a second 
pinMode(led5,OUTPUT); 
digitalWrite(led5, HIGH); // turn the LED on (HIGH is the voltage level) 
delay(1500); // wait for a second 
digitalWrite(led5, LOW); // turn the LED off by making the voltage LOW 
delay(150); // wait for a second 
pinMode(led5,OUTPUT); 
digitalWrite(led5, HIGH); // turn the LED on (HIGH is the voltage level) 
delay(1500); // wait for a second 
digitalWrite(led5, LOW); // turn the LED off by making the voltage LOW 
delay(150); // wait for a second 
pinMode(led5,OUTPUT); 
digitalWrite(led5, HIGH); // turn the LED on (HIGH is the voltage level)
delay(1500); // wait for a second 
digitalWrite(led5, LOW); // turn the LED off by making the voltage LOW 
delay(150); // wait for a second 
pinMode(led5,OUTPUT); 
// pract.12 led5 
digitalWrite(led5, HIGH); // turn the LED on (HIGH is the voltage level) 
delay(1500); // wait for a second 
digitalWrite(led5, LOW); // turn the LED off by making the voltage LOW 
delay(150); // wait for a second 
pinMode(led5,OUTPUT); 
digitalWrite(led5, HIGH); // turn the LED on (HIGH is the voltage level) 
delay(1500); // wait for a second 
digitalWrite(led5, LOW); // turn the LED off by making the voltage LOW 
delay(150); // wait for a second 
pinMode(led5,OUTPUT); 
digitalWrite(led5, HIGH); // turn the LED on (HIGH is the voltage level) 
delay(1500); // wait for a second 
digitalWrite(led5, LOW); // turn the LED off by making the voltage LOW 
delay(150); // wait for a second 
pinMode(led5,OUTPUT); 
digitalWrite(led5, HIGH); // turn the LED on (HIGH is the voltage level) 
delay(1500); // wait for a second 
digitalWrite(led5, LOW); // turn the LED off by making the voltage LOW 
delay(150); // wait for a second
pinMode(led5,OUTPUT); 
digitalWrite(led5, HIGH); // turn the LED on (HIGH is the voltage level) 
delay(1500); // wait for a second 
digitalWrite(led5, LOW); // turn the LED off by making the voltage LOW 
delay(150); // wait for a second 
pinMode(led5,OUTPUT); 
digitalWrite(led5, HIGH); // turn the LED on (HIGH is the voltage level) 
delay(1500); // wait for a second 
digitalWrite(led5, LOW); // turn the LED off by making the voltage LOW 
delay(150); // wait for a second 
pinMode(led5,OUTPUT); 
digitalWrite(led5, HIGH); // turn the LED on (HIGH is the voltage level) 
delay(1500); // wait for a second 
digitalWrite(led5, LOW); // turn the LED off by making the voltage LOW 
delay(150); // wait for a second 
pinMode(led5,OUTPUT); 
digitalWrite(led5, HIGH); // turn the LED on (HIGH is the voltage level) 
delay(1500); // wait for a second 
digitalWrite(led5, LOW); // turn the LED off by making the voltage LOW 
delay(150); // wait for a second 
pinMode(led5,OUTPUT); 
digitalWrite(led5, HIGH); // turn the LED on (HIGH is the voltage level) 
delay(1500); // wait for a second
digitalWrite(led5, LOW); // turn the LED off by making the voltage LOW 
delay(150); // wait for a second 
pinMode(led5,OUTPUT); 
digitalWrite(led5, HIGH); // turn the LED on (HIGH is the voltage level) 
delay(1500); // wait for a second 
digitalWrite(led5, LOW); // turn the LED off by making the voltage LOW 
delay(150); // wait for a second 
pinMode(led5,OUTPUT); 
//led3 
digitalWrite(led3, HIGH); // turn the LED on (HIGH is the voltage level) 
delay(1500); // wait for a second 
digitalWrite(led3, LOW); // turn the LED off by making the voltage LOW 
delay(150); // wait for a second 
pinMode(led3,OUTPUT); 
digitalWrite(led3, HIGH); // turn the LED on (HIGH is the voltage level) 
delay(1500); // wait for a second 
digitalWrite(led3, LOW); // turn the LED off by making the voltage LOW 
delay(150); // wait for a second 
pinMode(led3,OUTPUT); 
digitalWrite(led3, HIGH); // turn the LED on (HIGH is the voltage level) 
delay(1500); // wait for a second 
digitalWrite(led3, LOW); // turn the LED off by making the voltage LOW 
delay(150); // wait for a second 
pinMode(led3,OUTPUT);
digitalWrite(led3, HIGH); // turn the LED on (HIGH is the voltage level) 
delay(1500); // wait for a second 
digitalWrite(led3, LOW); // turn the LED off by making the voltage LOW 
delay(150); // wait for a second 
pinMode(led3,OUTPUT); 
digitalWrite(led3, HIGH); // turn the LED on (HIGH is the voltage level) 
delay(1500); // wait for a second 
digitalWrite(led3, LOW); // turn the LED off by making the voltage LOW 
delay(150); // wait for a second 
pinMode(led3,OUTPUT); 
digitalWrite(led3, HIGH); // turn the LED on (HIGH is the voltage level) 
delay(1500); // wait for a second 
digitalWrite(led3, LOW); // turn the LED off by making the voltage LOW 
delay(150); // wait for a second 
pinMode(led3,OUTPUT); 
digitalWrite(led3, HIGH); // turn the LED on (HIGH is the voltage level) 
delay(1500); // wait for a second 
digitalWrite(led3, LOW); // turn the LED off by making the voltage LOW 
delay(150); // wait for a second 
pinMode(led3,OUTPUT); 
digitalWrite(led3, HIGH); // turn the LED on (HIGH is the voltage level) 
delay(1500); // wait for a second 
digitalWrite(led3, LOW); // turn the LED off by making the voltage LOW
delay(150); // wait for a second 
pinMode(led3,OUTPUT); 
digitalWrite(led3, HIGH); // turn the LED on (HIGH is the voltage level) 
delay(1500); // wait for a second 
digitalWrite(led3, LOW); // turn the LED off by making the voltage LOW 
delay(150); // wait for a second 
pinMode(led3,OUTPUT); 
digitalWrite(led3, HIGH); // turn the LED on (HIGH is the voltage level) 
delay(1500); // wait for a second 
digitalWrite(led3, LOW); // turn the LED off by making the voltage LOW 
delay(150); // wait for a second 
pinMode(led3,OUTPUT); 
//led 
digitalWrite(led, HIGH); // turn the LED on (HIGH is the voltage level) 
delay(1500); // wait for a second 
digitalWrite(led, LOW); // turn the LED off by making the voltage LOW 
delay(150); // wait for a second 
pinMode(led,OUTPUT); 
digitalWrite(led, HIGH); // turn the LED on (HIGH is the voltage level) 
delay(1500); // wait for a second 
digitalWrite(led, LOW); // turn the LED off by making the voltage LOW 
delay(150); // wait for a second 
pinMode(led,OUTPUT);
digitalWrite(led, HIGH); // turn the LED on (HIGH is the voltage level) 
delay(1500); // wait for a second 
digitalWrite(led, LOW); // turn the LED off by making the voltage LOW 
delay(150); // wait for a second 
pinMode(led,OUTPUT); 
digitalWrite(led, HIGH); // turn the LED on (HIGH is the voltage level) 
delay(1500); // wait for a second 
digitalWrite(led, LOW); // turn the LED off by making the voltage LOW 
delay(150); // wait for a second 
pinMode(led,OUTPUT); 
digitalWrite(led, HIGH); // turn the LED on (HIGH is the voltage level) 
delay(1500); // wait for a second 
digitalWrite(led, LOW); // turn the LED off by making the voltage LOW 
delay(150); // wait for a second 
pinMode(led,OUTPUT); 
digitalWrite(led, HIGH); // turn the LED on (HIGH is the voltage level) 
delay(1500); // wait for a second 
digitalWrite(led, LOW); // turn the LED off by making the voltage LOW 
delay(150); // wait for a second 
pinMode(led,OUTPUT); 
digitalWrite(led, HIGH); // turn the LED on (HIGH is the voltage level) 
delay(1500); // wait for a second 
digitalWrite(led, LOW); // turn the LED off by making the voltage LOW 
delay(150); // wait for a second
pinMode(led,OUTPUT); 
digitalWrite(led, HIGH); // turn the LED on (HIGH is the voltage level) 
delay(1500); // wait for a second 
digitalWrite(led, LOW); // turn the LED off by making the voltage LOW 
delay(150); // wait for a second 
pinMode(led,OUTPUT); 
digitalWrite(led, HIGH); // turn the LED on (HIGH is the voltage level) 
delay(1500); // wait for a second 
digitalWrite(led, LOW); // turn the LED off by making the voltage LOW 
delay(150); // wait for a second 
pinMode(led,OUTPUT); 
digitalWrite(led, HIGH); // turn the LED on (HIGH is the voltage level) 
delay(1500); // wait for a second 
digitalWrite(led, LOW); // turn the LED off by making the voltage LOW 
delay(150); // wait for a second 
pinMode(led,OUTPUT); 
} 
Desarrollo 
Para la correcta programación y funcionamiento de esta práctica se utilizaran: 
- Arduino uno 
- Protoboard 
- Leds 
- Cables 
Llevaremos a cavo una modificación en nuestro programa en base a la practica 14, mediante la programación de esta y añadiendo mas líneas a nuestro programa aremos que 5 leds ya antes dispuestos y configurados en dicha practica 14
enciendan cada uno de ellos 10 veces, al hacer esto cada uno saltara al siguiente, al siguiente y al siguiente hasta terminar y vuelva a iniciar nuestro programa desde sus primeras línea. Para ello se llevara a cabo la modificación de nuestra practica 14 y fusionando parte de la 6 o 5 ya dependiendo el gusto de cada quien, para declarar nuestras 5 salidas para que se influya y realice todo nuestro proceso para que se cumpla nuestro objetivo tendrá que ver y hacerse en el void o bucle de funcionamiento que llevara toda la etapa de funcionamiento que realizara uno por uno los diferentes procesos que se requieran para que no haya problema, además de que cambiaremos la frecuencia de su velocidad con las debidas etiquetas que dará la salida a nuestros ya mencionados pines. 
Posterior mente llevaremos a cabo el montado y conectado de nuestra rotoboard con arduino y cada uno de sus componentes ara que esta pueda funcionar adecuada mente, dándonos como resultado la siguiente imagen: 
Practica 16 
Objetivo 
Este ejercicio deberá realizar un rayo de luz que valla de derecha a izquierda, o más poéticamente, una estrella fugaz, moviéndose a través de una línea de LED- s. Podremos configurar tanto la velocidad de la estrella, así como la longitud de la cola. No es muy elegante porque la cola brilla con la misma intensidad que la estrella, y al final, parecerá como si un rayo sólido cruzase la línea de LED-s, esto se realizara con el ya mencionado lenguaje de programación de arduino, siguiendo el siguiente programa: 
// Variable declaración 
// Declaración de los PIN-es mediante un array
int pinArray [] = { 2,3,4,5,6,7,8,9,10,11, }; 
int controlLed = 12; // LED de control 
int waitNextLed = 100; // Tiempo antes de encender el siguiente LED 
// Número de LED-s que permanecen encendidos antes de empezar a apagarlos para 
//formar la cola 
int tailLength = 4; 
// Número de LED-s conectados (que es también el tamaño del array) 
int lineSize = 10; 
void setup() // Configuración de los PIN-es como salida digital 
{ 
int i; 
pinMode (controlLed, OUTPUT); 
for (i=0; i< lineSize; i++) 
{ 
pinMode(pinArray[i], OUTPUT); 
} 
} 
void loop() 
{ 
int i; 
// Se establece la longitud de la cola en un contador 
int tailCounter = tailLength; 
// Se enciende el LED de control para indicar el inicio del loop 
digitalWrite(controlLed, HIGH); 
for (i=0; i<lineSize; i++) 
{ 
digitalWrite(pinArray[i],HIGH); // Se encienden consecutivamente los LED 
// Esta variable de tiempo controla la velocidad a la que se mueve la estrella
delay(waitNextLed); 
if (tailCounter == 0) 
{ 
// Se apagan los LED-s en función de la longitud de la cola. 
digitalWrite(pinArray[i-tailLength],LOW); 
} 
else 
if (tailCounter > 0) 
tailCounter--; 
} 
for (i=(lineSize-tailLength); i<lineSize; i++) 
{ 
digitalWrite(pinArray[i],LOW); // Se apagan los LED 
// Esta variable de tiempo controla la velocidad a la que se mueve la estrella 
delay(waitNextLed); 
} 
} 
Desarrollo 
Hay que conectar 11 LED-s a los pines digitales de la placa a través de resistencias de220 Ohmios tal y como se muestra en la imagen superior. 
El programa comienza encendiendo LED-s hasta que llegue al número de LED-s establecido para la cola. En ese momento seguirá encendiendo LED-s hacia la izquierda (si se monta tal y como se muestra en la fotografía inferior), para mantener el movimiento de la estrella, al mismo tiempo que apaga LED-s por la derecha, para 
asegurarnos de que vemos la cola. De otra forma seguiría encendiendo LED-s hasta 
encenderlos todos. Esto ocurre cuando el tamaño de la cola es igual o mayor que el número de LED-s. 
El tamaño de la cola debería ser relativamente pequeño en comparación con el número de LED-s de forma que podamos ver la estrella.
Posterior mente llevaremos a cabo el montado y conectado de nuestra protoboard con arduino y cada uno de sus componentes ara que esta pueda funcionar adecuada mente, dándonos como resultado la siguiente imagen: 
Practica 17 
Objetivo 
Este ejercicio deberá realizar un rayo de luz que valla de izquierda a derecha, en la misma estrella fugaz, moviéndose a través de una línea de LED-s. Podremos configurar tanto la velocidad de la estrella, así como la longitud de la cola. No es muy elegante porque la cola brilla con la misma intensidad que la estrella, y al final, parecerá como si un rayo sólido cruzase la línea de LED-s, esto se realizara con el ya mencionado lenguaje de programación de arduino, siguiendo el siguiente programa:
// Variable declaración 
// Declaración de los PIN-es mediante un array 
int pinArray [] = { 11,10,9,8,7,6,5,4,3,2, }; 
int controlLed = 12; // LED de control 
int waitNextLed = 100; // Tiempo antes de encender el siguiente LED 
// Número de LED-s que permanecen encendidos antes de empezar a apagarlos para 
//formar la cola 
int tailLength = 4; 
// Número de LED-s conectados (que es también el tamaño del array) 
int lineSize = 10; 
void setup() // Configuración de los PIN-es como salida digital 
{ 
int i; 
pinMode (controlLed, OUTPUT); 
for (i=0; i< lineSize; i++) 
{ 
pinMode(pinArray[i], OUTPUT); 
} 
} 
void loop() 
{ 
int i; 
// Se establece la longitud de la cola en un contador 
int tailCounter = tailLength; 
// Se enciende el LED de control para indicar el inicio del loop 
digitalWrite(controlLed, HIGH); 
for (i=0; i<lineSize; i++)
{ 
digitalWrite(pinArray[i],HIGH); // Se encienden consecutivamente los LED 
// Esta variable de tiempo controla la velocidad a la que se mueve la estrella 
delay(waitNextLed); 
if (tailCounter == 0) 
{ 
// Se apagan los LED-s en función de la longitud de la cola. 
digitalWrite(pinArray[i-tailLength],LOW); 
} 
else 
if (tailCounter > 0) 
tailCounter--; 
} 
for (i=(lineSize-tailLength); i<lineSize; i++) 
{ 
digitalWrite(pinArray[i],LOW); // Se apagan los LED 
// Esta variable de tiempo controla la velocidad a la que se mueve la estrella 
delay(waitNextLed); 
} 
} 
Desarrollo 
Hay que conectar 11 LED-s a los pines digitales de la placa a través de resistencias de220 Ohmios tal y como se muestra en la imagen superior. 
El programa comienza encendiendo LED-s hasta que llegue al número de LED-s establecido para la cola pero a la inversa de nuestra practica 16. En ese momento seguirá encendiendo LED-s hacia la izquierda (si se monta tal y como se muestra en la fotografía inferior), para mantener el movimiento de la estrella, al mismo tiempo que apaga LED-s por la derecha, para
asegurarnos de que vemos la cola. De otra forma seguiría encendiendo LED-s hasta 
encenderlos todos. Esto ocurre cuando el tamaño de la cola es igual o mayor que el número de LED-s. 
El tamaño de la cola debería ser relativamente pequeño en comparación con el número de LED-s de forma que podamos ver la estrella. 
Posterior mente llevaremos a cabo el montado y conectado de nuestra protoboard con arduino y cada uno de sus componentes ara que esta pueda funcionar adecuada mente, dándonos como resultado la siguiente imagen: 
Practica 18 
Objetivo 
Este ejercicio deberá realizar en conjunto de esta practica “estrella fugaz” el conjunto de la practica 13, que ha sido la unión de la practica 9, 10, 11 y 12, todas estas en una sola, el corrimiento de leds de derecha a izquierda con los 5, luego de izquierda a derecha, como posterior mente con solo 3 leds de derecha a izquierda y viceversa para abrir paso a la estrella fugaz que se moverá a través
de una línea de LED-s que parecerá como si un rayo sólido cruzase la línea de LED-s, esto se realizara con el ya mencionado lenguaje de programación de arduino, siguiendo el siguiente programa: 
const int led1 = 2; 
const int led2 = 3; 
const int led3 = 4; 
const int led4 = 5; 
const int led5 = 6; 
int pinArray [] = { 2,3,4,5,6,7,8,9,10,11,11,10,9,8,7,6,5,4,3,2 }; 
int controlLed = 12; // LED de control 
int waitNextLed = 100; // Tiempo antes de encender el siguiente LED 
// Número de LED-s que permanecen encendidos antes de empezar a apagarlos para 
//formar la cola 
int tailLength = 4; 
// Número de LED-s conectados (que es también el tamaño del array) 
int lineSize = 22; 
void setup () 
{ 
pinMode (led1, OUTPUT); //Digital, como salida 
pinMode (led2, OUTPUT); //Digital, como salida 
pinMode (led3, OUTPUT); //Digital, como salida 
pinMode (led4, OUTPUT); //Digital, como salida 
pinMode (led5, OUTPUT); //Digital, como salida 
{ 
int i;
pinMode (controlLed, OUTPUT); 
for (i=0; i< lineSize; i++) 
{ 
pinMode(pinArray[i], OUTPUT); 
} 
} 
} 
void loop () 
{ 
//pract 9 
digitalWrite(led1, HIGH); // Apaga y enciende los leds cada 200 ms 
delay(500); 
digitalWrite(led1, LOW); 
digitalWrite(led2, HIGH); 
delay(500); 
digitalWrite(led2, LOW); 
digitalWrite(led3, HIGH); 
delay(500); 
digitalWrite(led3, LOW); 
digitalWrite(led4, HIGH); 
delay(500); 
digitalWrite(led4, LOW); 
digitalWrite(led5, HIGH); 
delay(500); 
digitalWrite(led5, LOW);
//Practica 10 
digitalWrite(led5, HIGH); // Apaga y enciende los leds cada 200 ms 
delay(500); 
digitalWrite(led5, LOW); 
digitalWrite(led4, HIGH); 
delay(500); 
digitalWrite(led4, LOW); 
digitalWrite(led3, HIGH); 
delay(500); 
digitalWrite(led3, LOW); 
digitalWrite(led2, HIGH); 
delay(500); 
digitalWrite(led2, LOW); 
digitalWrite(led1, HIGH); 
delay(500); 
digitalWrite(led1, LOW); 
//Practica 11 
digitalWrite(led1, HIGH); // Apaga y enciende los leds cada 200 ms 
delay(500); 
digitalWrite(led1, LOW); 
digitalWrite(led3, HIGH); 
delay(500); 
digitalWrite(led3, LOW); 
digitalWrite(led5, HIGH); 
delay(500); 
digitalWrite(led5, LOW);
//Practica 12 
digitalWrite(led5, HIGH); // Apaga y enciende los leds cada 200 ms 
delay(500); 
digitalWrite(led5, LOW); 
digitalWrite(led3, HIGH); 
delay(500); 
digitalWrite(led3, LOW); 
digitalWrite(led1, HIGH); 
delay(500); 
digitalWrite(led1, LOW); 
////////////////////////////////////////practica 18 ida y vuelta 
int i; 
// Se establece la longitud de la cola en un contador 
int tailCounter = tailLength; 
// Se enciende el LED de control para indicar el inicio del loop 
digitalWrite(controlLed, HIGH); 
for (i=0; i<lineSize; i++) 
{ 
digitalWrite(pinArray[i],HIGH); // Se encienden consecutivamente los LED 
// Esta variable de tiempo controla la velocidad a la que se mueve la estrella 
delay(waitNextLed); 
if (tailCounter == 0) 
{
// Se apagan los LED-s en función de la longitud de la cola. 
digitalWrite(pinArray[i-tailLength],LOW); 
} 
else 
if (tailCounter > 0) 
tailCounter--; 
} 
for (i=(lineSize-tailLength); i<lineSize; i++) 
{ 
digitalWrite(pinArray[i],LOW); // Se apagan los LED 
// Esta variable de tiempo controla la velocidad a la que se mueve la estrella 
delay(waitNextLed); 
} 
} 
Desarrollo 
Se conectaran 10 leds, de los cuales primera mente se ejecutaran nuestras primeras 4 practicas solo con la mitad de ellos por medio de los pines digitales de la placa. 
El programa comenzara con el encendido de 5 led de derecha a izquierda, para continuar con el mismo proceso pero ahora de izquierda a derecha y luego lo hará con 3 leds, para posterior mente encender y abrirle paso al corrimiento de leds de la estrella fugaz encendiendo LED-s hasta que llegue al número de LED-s
establecido para la cola. En ese momento seguirá encendiendo LED-s hacia la izquierda, para mantener el movimiento de la estrella, al mismo tiempo que apaga LED-s por la derecha, para asegurarnos de que vemos la cola. De otra forma seguiría encendiendo LED-s hasta encenderlos todos. Esto ocurre cuando el tamaño de la cola es igual o mayor que el número de LED-s. 
El tamaño de la cola debería ser relativamente pequeño en comparación con el número de LED-s de forma que podamos ver la estrella. 
Posterior mente llevaremos a cabo el montado y conectado de nuestra protoboard con arduino y cada uno de sus componentes ara que esta pueda funcionar adecuada mente, dándonos como resultado la siguiente imagen:

Mais conteúdo relacionado

Mais procurados

CIRCUITOS SECUENCIALES
CIRCUITOS SECUENCIALESCIRCUITOS SECUENCIALES
CIRCUITOS SECUENCIALES
Luis Zurita
 
Alfabeto di Arduino - lezione 2
Alfabeto di Arduino - lezione 2Alfabeto di Arduino - lezione 2
Alfabeto di Arduino - lezione 2
Michele Maffucci
 

Mais procurados (20)

CIRCUITOS SECUENCIALES
CIRCUITOS SECUENCIALESCIRCUITOS SECUENCIALES
CIRCUITOS SECUENCIALES
 
Fundamentos de programacion robotica con Arduino
Fundamentos de programacion robotica con ArduinoFundamentos de programacion robotica con Arduino
Fundamentos de programacion robotica con Arduino
 
GUIA BASICA ARDUINO
GUIA BASICA ARDUINOGUIA BASICA ARDUINO
GUIA BASICA ARDUINO
 
Arduino practicas
Arduino practicasArduino practicas
Arduino practicas
 
PLC: arranque y paro con un boton
PLC: arranque y paro con un botonPLC: arranque y paro con un boton
PLC: arranque y paro con un boton
 
Microcontroladores PIC: Manual de practicas PIC C Compiler
Microcontroladores PIC: Manual de practicas PIC C CompilerMicrocontroladores PIC: Manual de practicas PIC C Compiler
Microcontroladores PIC: Manual de practicas PIC C Compiler
 
Informe arduino y proteus
Informe arduino y proteusInforme arduino y proteus
Informe arduino y proteus
 
Sumador\Restador
Sumador\RestadorSumador\Restador
Sumador\Restador
 
Diac
DiacDiac
Diac
 
Codificadores
CodificadoresCodificadores
Codificadores
 
Taller de introducción a Arduino FesTICval 2012
Taller de introducción a Arduino FesTICval 2012Taller de introducción a Arduino FesTICval 2012
Taller de introducción a Arduino FesTICval 2012
 
Circuitos integrados l298 y uln2803
Circuitos  integrados l298 y uln2803Circuitos  integrados l298 y uln2803
Circuitos integrados l298 y uln2803
 
Optoacopladores
OptoacopladoresOptoacopladores
Optoacopladores
 
Multiplexores y demultiplexores en electrónica digital
Multiplexores y demultiplexores en electrónica digitalMultiplexores y demultiplexores en electrónica digital
Multiplexores y demultiplexores en electrónica digital
 
Microprogramacion - Interrupciones y timers
Microprogramacion - Interrupciones y timersMicroprogramacion - Interrupciones y timers
Microprogramacion - Interrupciones y timers
 
Alfabeto di Arduino - lezione 2
Alfabeto di Arduino - lezione 2Alfabeto di Arduino - lezione 2
Alfabeto di Arduino - lezione 2
 
RELOJ DIGITAL TTL 24 horas
RELOJ DIGITAL TTL 24 horas RELOJ DIGITAL TTL 24 horas
RELOJ DIGITAL TTL 24 horas
 
Multiplexor Display de 7 Segmentos con Arduino UNO ATmega328P
Multiplexor Display de 7 Segmentos con Arduino UNO ATmega328PMultiplexor Display de 7 Segmentos con Arduino UNO ATmega328P
Multiplexor Display de 7 Segmentos con Arduino UNO ATmega328P
 
1.1. El Diodo Ideal
1.1. El Diodo Ideal1.1. El Diodo Ideal
1.1. El Diodo Ideal
 
DIAC
DIACDIAC
DIAC
 

Destaque

Arduino Full Tutorial
Arduino Full TutorialArduino Full Tutorial
Arduino Full Tutorial
Akshay Sharma
 
Introduction to arduino
Introduction to arduinoIntroduction to arduino
Introduction to arduino
Ahmed Sakr
 

Destaque (19)

Manual basico de practicas con Arduino uno
Manual basico de practicas con Arduino unoManual basico de practicas con Arduino uno
Manual basico de practicas con Arduino uno
 
20 Magnificos proyectos para ARDUINO
20 Magnificos proyectos para ARDUINO20 Magnificos proyectos para ARDUINO
20 Magnificos proyectos para ARDUINO
 
Vehiculo controlado por app y Arduino
Vehiculo controlado por app y ArduinoVehiculo controlado por app y Arduino
Vehiculo controlado por app y Arduino
 
Taller Arduino espacio-RES 2ª Sesion
Taller Arduino espacio-RES 2ª SesionTaller Arduino espacio-RES 2ª Sesion
Taller Arduino espacio-RES 2ª Sesion
 
Taller Arduino espacio-RES 3ª Sesion
Taller Arduino espacio-RES 3ª SesionTaller Arduino espacio-RES 3ª Sesion
Taller Arduino espacio-RES 3ª Sesion
 
Ejercicios de Arduino resueltos Grupo Sabika
Ejercicios de Arduino resueltos Grupo SabikaEjercicios de Arduino resueltos Grupo Sabika
Ejercicios de Arduino resueltos Grupo Sabika
 
Curso Arduino práctico 2014
Curso Arduino práctico  2014Curso Arduino práctico  2014
Curso Arduino práctico 2014
 
Arduino Full Tutorial
Arduino Full TutorialArduino Full Tutorial
Arduino Full Tutorial
 
WHD global 2017 - Smart Power Plant
WHD global 2017 - Smart Power PlantWHD global 2017 - Smart Power Plant
WHD global 2017 - Smart Power Plant
 
Presentación arduino 4 eso
Presentación arduino 4 esoPresentación arduino 4 eso
Presentación arduino 4 eso
 
Introduction to Arduino Programming
Introduction to Arduino ProgrammingIntroduction to Arduino Programming
Introduction to Arduino Programming
 
Taller Iniciacion Arduino Camara Comercio
Taller Iniciacion Arduino Camara ComercioTaller Iniciacion Arduino Camara Comercio
Taller Iniciacion Arduino Camara Comercio
 
Motores-Arduino
Motores-ArduinoMotores-Arduino
Motores-Arduino
 
Arduino: Programación y Robótica en Secundaria
Arduino: Programación y Robótica en SecundariaArduino: Programación y Robótica en Secundaria
Arduino: Programación y Robótica en Secundaria
 
Arduino
ArduinoArduino
Arduino
 
Libreria webduino
Libreria webduinoLibreria webduino
Libreria webduino
 
Ethernet Shield
Ethernet ShieldEthernet Shield
Ethernet Shield
 
Introduction to arduino
Introduction to arduinoIntroduction to arduino
Introduction to arduino
 
Arduino vs S4A
Arduino vs S4AArduino vs S4A
Arduino vs S4A
 

Semelhante a ITT 18 Practicas Basicas de Arduino

ACTUALIZACIÓN CIENTÍFICO DIDÁCTICA PARA PROFESORES DE TECNOLOGÍA_2022-ARDUINO...
ACTUALIZACIÓN CIENTÍFICO DIDÁCTICA PARA PROFESORES DE TECNOLOGÍA_2022-ARDUINO...ACTUALIZACIÓN CIENTÍFICO DIDÁCTICA PARA PROFESORES DE TECNOLOGÍA_2022-ARDUINO...
ACTUALIZACIÓN CIENTÍFICO DIDÁCTICA PARA PROFESORES DE TECNOLOGÍA_2022-ARDUINO...
ErickJonathanCorzoNe
 

Semelhante a ITT 18 Practicas Basicas de Arduino (20)

Cargando el primer programa de arduino
Cargando el primer programa de arduinoCargando el primer programa de arduino
Cargando el primer programa de arduino
 
Arduino 1
Arduino 1Arduino 1
Arduino 1
 
Proyecto Arduino
Proyecto ArduinoProyecto Arduino
Proyecto Arduino
 
Proyecto Hacienda Domotica
Proyecto Hacienda DomoticaProyecto Hacienda Domotica
Proyecto Hacienda Domotica
 
Proyecto cosa
Proyecto cosaProyecto cosa
Proyecto cosa
 
Netduino
NetduinoNetduino
Netduino
 
Programación de un PIC con Niple
Programación de un PIC con NipleProgramación de un PIC con Niple
Programación de un PIC con Niple
 
Arduino componentes
Arduino componentesArduino componentes
Arduino componentes
 
Trabajo02
Trabajo02Trabajo02
Trabajo02
 
Presentación ARDUINO
Presentación ARDUINO Presentación ARDUINO
Presentación ARDUINO
 
Basicos arduino
Basicos arduinoBasicos arduino
Basicos arduino
 
Básicos arduino
Básicos arduinoBásicos arduino
Básicos arduino
 
Taller robotica libre arduino
Taller robotica libre arduinoTaller robotica libre arduino
Taller robotica libre arduino
 
Taller roboticalibrearduino
Taller roboticalibrearduinoTaller roboticalibrearduino
Taller roboticalibrearduino
 
Taller roboticalibrearduino
Taller roboticalibrearduinoTaller roboticalibrearduino
Taller roboticalibrearduino
 
ACTUALIZACIÓN CIENTÍFICO DIDÁCTICA PARA PROFESORES DE TECNOLOGÍA_2022-ARDUINO...
ACTUALIZACIÓN CIENTÍFICO DIDÁCTICA PARA PROFESORES DE TECNOLOGÍA_2022-ARDUINO...ACTUALIZACIÓN CIENTÍFICO DIDÁCTICA PARA PROFESORES DE TECNOLOGÍA_2022-ARDUINO...
ACTUALIZACIÓN CIENTÍFICO DIDÁCTICA PARA PROFESORES DE TECNOLOGÍA_2022-ARDUINO...
 
Hack x crack_cuaderno_arduino
Hack x crack_cuaderno_arduinoHack x crack_cuaderno_arduino
Hack x crack_cuaderno_arduino
 
Cuaderno_Arduino.pdf
Cuaderno_Arduino.pdfCuaderno_Arduino.pdf
Cuaderno_Arduino.pdf
 
Cuaderno_Arduino.pdf
Cuaderno_Arduino.pdfCuaderno_Arduino.pdf
Cuaderno_Arduino.pdf
 
Cuaderno_Arduino.pdf
Cuaderno_Arduino.pdfCuaderno_Arduino.pdf
Cuaderno_Arduino.pdf
 

Último

Procesos-de-la-Industria-Alimentaria-Envasado-en-la-Produccion-de-Alimentos.pptx
Procesos-de-la-Industria-Alimentaria-Envasado-en-la-Produccion-de-Alimentos.pptxProcesos-de-la-Industria-Alimentaria-Envasado-en-la-Produccion-de-Alimentos.pptx
Procesos-de-la-Industria-Alimentaria-Envasado-en-la-Produccion-de-Alimentos.pptx
JuanPablo452634
 
ANALISIS Y DISEÑO POR VIENTO, DE EDIFICIOS ALTOS, SEGUN ASCE-2016, LAURA RAMIREZ
ANALISIS Y DISEÑO POR VIENTO, DE EDIFICIOS ALTOS, SEGUN ASCE-2016, LAURA RAMIREZANALISIS Y DISEÑO POR VIENTO, DE EDIFICIOS ALTOS, SEGUN ASCE-2016, LAURA RAMIREZ
ANALISIS Y DISEÑO POR VIENTO, DE EDIFICIOS ALTOS, SEGUN ASCE-2016, LAURA RAMIREZ
gustavoiashalom
 
LA APLICACIÓN DE LAS PROPIEDADES TEXTUALES A LOS TEXTOS.pdf
LA APLICACIÓN DE LAS PROPIEDADES TEXTUALES A LOS TEXTOS.pdfLA APLICACIÓN DE LAS PROPIEDADES TEXTUALES A LOS TEXTOS.pdf
LA APLICACIÓN DE LAS PROPIEDADES TEXTUALES A LOS TEXTOS.pdf
bcondort
 
clases de porcinos generales de porcinos
clases de porcinos generales de porcinosclases de porcinos generales de porcinos
clases de porcinos generales de porcinos
DayanaCarolinaAP
 
NTP- Determinación de Cloruros en suelos y agregados (1) (1).pptx
NTP- Determinación de Cloruros  en suelos y agregados (1) (1).pptxNTP- Determinación de Cloruros  en suelos y agregados (1) (1).pptx
NTP- Determinación de Cloruros en suelos y agregados (1) (1).pptx
BRAYANJOSEPTSANJINEZ
 
04. Sistema de fuerzas equivalentes II - UCV 2024 II.pdf
04. Sistema de fuerzas equivalentes II - UCV 2024 II.pdf04. Sistema de fuerzas equivalentes II - UCV 2024 II.pdf
04. Sistema de fuerzas equivalentes II - UCV 2024 II.pdf
CristhianZetaNima
 

Último (20)

Magnetismo y electromagnetismo principios
Magnetismo y electromagnetismo principiosMagnetismo y electromagnetismo principios
Magnetismo y electromagnetismo principios
 
Mapas y cartas topográficas y de suelos.pptx
Mapas y cartas topográficas y de suelos.pptxMapas y cartas topográficas y de suelos.pptx
Mapas y cartas topográficas y de suelos.pptx
 
DOCUMENTO PLAN DE RESPUESTA A EMERGENCIAS MINERAS
DOCUMENTO PLAN DE RESPUESTA A EMERGENCIAS MINERASDOCUMENTO PLAN DE RESPUESTA A EMERGENCIAS MINERAS
DOCUMENTO PLAN DE RESPUESTA A EMERGENCIAS MINERAS
 
Procesos-de-la-Industria-Alimentaria-Envasado-en-la-Produccion-de-Alimentos.pptx
Procesos-de-la-Industria-Alimentaria-Envasado-en-la-Produccion-de-Alimentos.pptxProcesos-de-la-Industria-Alimentaria-Envasado-en-la-Produccion-de-Alimentos.pptx
Procesos-de-la-Industria-Alimentaria-Envasado-en-la-Produccion-de-Alimentos.pptx
 
ARBOL DE CAUSAS ANA INVESTIGACION DE ACC.ppt
ARBOL DE CAUSAS ANA INVESTIGACION DE ACC.pptARBOL DE CAUSAS ANA INVESTIGACION DE ACC.ppt
ARBOL DE CAUSAS ANA INVESTIGACION DE ACC.ppt
 
PPT ELABORARACION DE ADOBES 2023 (1).pdf
PPT ELABORARACION DE ADOBES 2023 (1).pdfPPT ELABORARACION DE ADOBES 2023 (1).pdf
PPT ELABORARACION DE ADOBES 2023 (1).pdf
 
Propuesta para la creación de un Centro de Innovación para la Refundación ...
Propuesta para la creación de un Centro de Innovación para la Refundación ...Propuesta para la creación de un Centro de Innovación para la Refundación ...
Propuesta para la creación de un Centro de Innovación para la Refundación ...
 
PostgreSQL on Kubernetes Using GitOps and ArgoCD
PostgreSQL on Kubernetes Using GitOps and ArgoCDPostgreSQL on Kubernetes Using GitOps and ArgoCD
PostgreSQL on Kubernetes Using GitOps and ArgoCD
 
ANALISIS Y DISEÑO POR VIENTO, DE EDIFICIOS ALTOS, SEGUN ASCE-2016, LAURA RAMIREZ
ANALISIS Y DISEÑO POR VIENTO, DE EDIFICIOS ALTOS, SEGUN ASCE-2016, LAURA RAMIREZANALISIS Y DISEÑO POR VIENTO, DE EDIFICIOS ALTOS, SEGUN ASCE-2016, LAURA RAMIREZ
ANALISIS Y DISEÑO POR VIENTO, DE EDIFICIOS ALTOS, SEGUN ASCE-2016, LAURA RAMIREZ
 
LA APLICACIÓN DE LAS PROPIEDADES TEXTUALES A LOS TEXTOS.pdf
LA APLICACIÓN DE LAS PROPIEDADES TEXTUALES A LOS TEXTOS.pdfLA APLICACIÓN DE LAS PROPIEDADES TEXTUALES A LOS TEXTOS.pdf
LA APLICACIÓN DE LAS PROPIEDADES TEXTUALES A LOS TEXTOS.pdf
 
Sesión 02 TIPOS DE VALORIZACIONES CURSO Cersa
Sesión 02 TIPOS DE VALORIZACIONES CURSO CersaSesión 02 TIPOS DE VALORIZACIONES CURSO Cersa
Sesión 02 TIPOS DE VALORIZACIONES CURSO Cersa
 
nomenclatura de equipo electrico en subestaciones
nomenclatura de equipo electrico en subestacionesnomenclatura de equipo electrico en subestaciones
nomenclatura de equipo electrico en subestaciones
 
CARGAS VIVAS Y CARGAS MUERTASEXPOCI.pptx
CARGAS VIVAS Y CARGAS MUERTASEXPOCI.pptxCARGAS VIVAS Y CARGAS MUERTASEXPOCI.pptx
CARGAS VIVAS Y CARGAS MUERTASEXPOCI.pptx
 
CAPITULO 4 ANODIZADO DE ALUMINIO ,OBTENCION Y PROCESO
CAPITULO 4 ANODIZADO DE ALUMINIO ,OBTENCION Y PROCESOCAPITULO 4 ANODIZADO DE ALUMINIO ,OBTENCION Y PROCESO
CAPITULO 4 ANODIZADO DE ALUMINIO ,OBTENCION Y PROCESO
 
01 MATERIALES AERONAUTICOS VARIOS clase 1.ppt
01 MATERIALES AERONAUTICOS VARIOS clase 1.ppt01 MATERIALES AERONAUTICOS VARIOS clase 1.ppt
01 MATERIALES AERONAUTICOS VARIOS clase 1.ppt
 
tema05 estabilidad en barras mecanicas.pdf
tema05 estabilidad en barras mecanicas.pdftema05 estabilidad en barras mecanicas.pdf
tema05 estabilidad en barras mecanicas.pdf
 
clases de porcinos generales de porcinos
clases de porcinos generales de porcinosclases de porcinos generales de porcinos
clases de porcinos generales de porcinos
 
Principales aportes de la carrera de William Edwards Deming
Principales aportes de la carrera de William Edwards DemingPrincipales aportes de la carrera de William Edwards Deming
Principales aportes de la carrera de William Edwards Deming
 
NTP- Determinación de Cloruros en suelos y agregados (1) (1).pptx
NTP- Determinación de Cloruros  en suelos y agregados (1) (1).pptxNTP- Determinación de Cloruros  en suelos y agregados (1) (1).pptx
NTP- Determinación de Cloruros en suelos y agregados (1) (1).pptx
 
04. Sistema de fuerzas equivalentes II - UCV 2024 II.pdf
04. Sistema de fuerzas equivalentes II - UCV 2024 II.pdf04. Sistema de fuerzas equivalentes II - UCV 2024 II.pdf
04. Sistema de fuerzas equivalentes II - UCV 2024 II.pdf
 

ITT 18 Practicas Basicas de Arduino

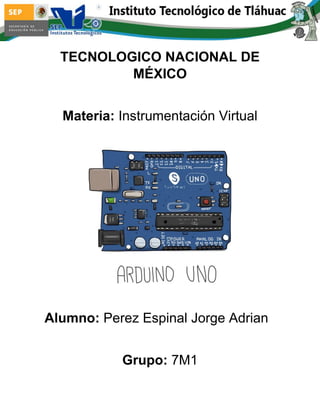
  • 1. TECNOLOGICO NACIONAL DE MÉXICO Materia: Instrumentación Virtual Alumno: Perez Espinal Jorge Adrian Grupo: 7M1
  • 2. PRACTICA 1 Objetivo Utilizando Arduino y uno de sus ejemplos que se encuentran en su programa como su lenguaje de programación hacer que un led o diodo emisor de luz se encienda y apague en un periodo de 100 Mili segundos utilizando una práctica ya predeterminada que trae nuestro programa arduino, siguiendo el siguiente programa: /* Ejemplo de encendido y apagado de un LED */// Se define el Pin 13 donde se conectara el LED int led = 13; // Se inicializa el Pin digital como una salida void setup() { pinMode(led, OUTPUT); } // Se crea una funcion ciclo donde se enciende y apaga el LED // cada segundo. void loop() { digitalWrite(led, HIGH); // Se enciende el LED delay(100); // se espera un segundo digitalWrite(led, LOW); // Se apaga el LED delay(100); // se espera un segundo }
  • 3. Desarrollo Para la correcta programación y funcionamiento de esta práctica se utilizaran: - Arduino uno - Protoboard - Leds - Cables Para realizar dicha programación y funcionamiento de nuestro programa nos basaremos en el programa utilizado para arduino, utilizando uno de sus ejemplos ya antes mostrado, en la pestaña ARCHIVO, posterior mente en la sub ventana EJEMPLOS, 01.BASICS y abriremos la que dice BLINK, abrirá la practica que utilizaremos y posterior mente para realizar el funcionamiento predeterminado cambiaremos a 100 el valor de 1000 de los delay que se encuentran hasta el final de nuestro programa, verificaremos nuestro programa para ver que no tenga ningún error y si este funciona perfecta mente lo cargaremos a nuestro arduino. Posterior mente llevaremos a cabo el montado y conectado de nuestra rotoboard con arduino y cada uno de sus componente ara que esta pueda funcionar adecuada mente, dándonos como resultado la siguiente imagen:
  • 4. Practica 2 Objetivo Utilizando Arduino y uno de sus ejemplos que se encuentran en su programa como su lenguaje de programación hacer que un led o diodo emisor de luz se encienda y apague en un periodo de 10 Mili segundos utilizando una practica ya predeterminada que trae nuestro programa arduino, siguiendo el siguiente programa: /* Ejemplo de encendido y apagado de un LED */// Se define el Pin 13 donde se conectara el LED int led = 13; // Se inicializa el Pin digital como una salida void setup() { pinMode(led, OUTPUT); } // Se crea una funcion ciclo donde se enciende y apaga el LED // cada segundo. void loop() { digitalWrite(led, HIGH); // Se enciende el LED delay(10); // se espera un segundo digitalWrite(led, LOW); // Se apaga el LED delay(10); // se espera un segundo }
  • 5. Desarrollo Para la correcta programación y funcionamiento de esta práctica se utilizaran: - Arduino uno - Protoboard - Leds - Cables Para realizar dicha programación y funcionamiento de nuestro programa nos basaremos en el programa utilizado para arduino, utilizando uno de sus ejemplos ya antes mostrado, en la pestaña ARCHIVO, posterior mente en la sub ventana EJEMPLOS, 01.BASICS y abriremos la que dice BLINK, abrirá la practica que utilizaremos y posterior mente para realizar el funcionamiento predeterminado cambiaremos a 10 el valor de 1000 de los delay que se encuentran hasta el final de nuestro programa, verificaremos nuestro programa para ver que no tenga ningún error y si este funciona perfecta mente lo cargaremos a nuestro arduino. Posterior mente llevaremos a cabo el montado y conectado de nuestra rotoboard con arduino y cada uno de sus componente ara que esta pueda funcionar adecuada mente, dándonos como resultado la siguiente imagen:
  • 6. Practica 3 Objetivo Utilizando Arduino y uno de sus ejemplos que se encuentran en su programa como su lenguaje de programación hacer que un led o diodo emisor de luz se encienda un tiempo de 1000 mili segundos y apague en un periodo de 100 Mili segundos utilizando una practica ya predeterminada que trae nuestro programa arduino, siguiendo el siguiente programa: /* Ejemplo de encendido y apagado de un LED */// Se define el Pin 13 donde se conectara el LED int led = 13; // Se inicializa el Pin digital como una salida void setup() { pinMode(led, OUTPUT); } // Se crea una funcion ciclo donde se enciende y apaga el LED // cada segundo. void loop() { digitalWrite(led, HIGH); // Se enciende el LED delay(1000); // se espera un segundo digitalWrite(led, LOW); // Se apaga el LED delay(100); // se espera un segundo }
  • 7. Desarrollo Para la correcta programación y funcionamiento de esta práctica se utilizaran: - Arduino uno - Protoboard - Leds - Cables Para realizar dicha programación y funcionamiento de nuestro programa nos basaremos en el programa utilizado para arduino, utilizando uno de sus ejemplos ya antes mostrado, en la pestaña ARCHIVO, posterior mente en la sub ventana EJEMPLOS, 01.BASICS y abriremos la que dice BLINK, abrirá la práctica que utilizaremos y posterior mente para realizar el funcionamiento predeterminado aremos un ajuste en el tiempo, para que nuestro led Eneida por un periodo de 1000 mili segundos y apague a los 100 mili segundos, este ajuste lo realizaremos cambiando el valor de 1000 de los delay que se encuentran hasta el final de nuestro programa, verificaremos nuestro programa para ver que no tenga ningún error y si este funciona perfecta mente lo cargaremos a nuestro arduino. Posterior mente llevaremos a cabo el montado y conectado de nuestra protoboard con arduino y cada uno de sus componente ara que esta pueda funcionar adecuada mente, dándonos como resultado la siguiente imagen:
  • 8. Practica 4 Objetivo Utilizando Arduino y uno de sus ejemplos que se encuentran en su programa como su lenguaje de programación hacer que un led o diodo emisor de luz se encienda un tiempo de 100 mili segundos y apague en un periodo de 1000 Mili segundos utilizando una practica ya predeterminada que trae nuestro programa arduino, siguiendo el siguiente programa: /* Ejemplo de encendido y apagado de un LED */// Se define el Pin 13 donde se conectara el LED int led = 13; // Se inicializa el Pin digital como una salida void setup() { pinMode(led, OUTPUT); } // Se crea una funcion ciclo donde se enciende y apaga el LED // cada segundo. void loop() { digitalWrite(led, HIGH); // Se enciende el LED delay(100); // se espera un segundo digitalWrite(led, LOW); // Se apaga el LED delay(1000); // se espera un segundo }
  • 9. Desarrollo Para la correcta programación y funcionamiento de esta práctica se utilizaran: - Arduino uno - Protoboard - Leds - Cables Para realizar dicha programación y funcionamiento de nuestro programa nos basaremos en el programa utilizado para arduino, utilizando uno de sus ejemplos ya antes mostrado, en la pestaña ARCHIVO, posterior mente en la sub ventana EJEMPLOS, 01.BASICS y abriremos la que dice BLINK, abrirá la practica que utilizaremos y posterior mente para realizar el funcionamiento predeterminado aremos un ajuste en el tiempo, para que nuestro led Eneida por un periodo de 1000 mili segundos y apague a los 1000 mili segundos, este ajuste lo realizaremos cambiando el valor de 100 de los delay que se encuentran hasta el final de nuestro programa, verificaremos nuestro programa para ver que no tenga ningún error y si este funciona perfecta mente lo cargaremos a nuestro arduino. Posterior mente llevaremos a cabo el montado y conectado de nuestra rotoboard con arduino y cada uno de sus componente ara que esta pueda funcionar adecuada mente, dándonos como resultado la siguiente imagen:
  • 10. Practica 5 Objetivo Utilizando Arduino y uno de sus ejemplos que se encuentran en su programa como su lenguaje de programación como ya antes realizado en las practicas hacer que un led parpadee 10 veces y posterior mente se quede encendido, que se apague y vuela a hacer la misma función desde un principio utilizando una práctica ya predeterminada que trae nuestro programa arduino, siguiendo el siguiente programa: // Pin 13 has an LED connected on most Arduino boards. // give it a name: int led = 13; // the setup routine runs once when you press reset: void setup() { // initialize the digital pin as an output. pinMode(led, OUTPUT); } // the loop routine runs over and over again forever: void loop() { digitalWrite(led, HIGH); // turn the LED on (HIGH is the voltage level) delay(1000); // wait for a second digitalWrite(led, LOW); // turn the LED off by making the voltage LOW delay(1000); // wait for a second digitalWrite(led,HIGH);
  • 11. delay(1000); digitalWrite(led,LOW); delay(1000); digitalWrite(led,HIGH); delay(1000); digitalWrite(led,LOW); delay(1000); digitalWrite(led,HIGH); delay(1000); digitalWrite(led,LOW); delay(1000); digitalWrite(led,HIGH); delay(1000); digitalWrite(led,LOW); delay(1000); digitalWrite(led,HIGH); delay(1000); digitalWrite(led,LOW); delay(1000); digitalWrite(led,HIGH); delay(1000); digitalWrite(led,LOW); delay(1000);
  • 12. digitalWrite(led,HIGH); delay(1000); digitalWrite(led,LOW); delay(1000); digitalWrite(led,HIGH); delay(1000); digitalWrite(led,LOW); delay(1000); digitalWrite(led,HIGH); delay(1000); digitalWrite(led,LOW); delay(1000); // Queda apagado en un tiempo de 1 min. digitalWrite(led,HIGH); delay(60000); }
  • 13. Desarrollo Para la correcta programación y funcionamiento de esta práctica se utilizaran: - Arduino uno - Protoboard - Leds - Cables Para realizar dicha programación y funcionamiento de nuestro programa nos basaremos en el programa utilizado para arduino, utilizando uno de sus ejemplos ya antes mostrado, en la pestaña ARCHIVO, posterior mente en la sub ventana EJEMPLOS, 01.BASICS y abriremos la que dice BLINK, abrirá la practica que utilizaremos y posterior mente para realizar el funcionamiento predeterminado aremos un ajuste en los encendidos y apagados de nuestro programa, poniendo diez de estos para que nuestro led haga la función de parpadear por 10 tiempos, esto con un debido tiempo de ciertos mili segundos para que no sea tan tardado, para al final de nuestro programa agregar una línea con un encendido permanente de 1 minuto, para que cuando este termine se inicie nueva mente nuestro programa, haciendo un ciclo para cumplirse el objetivo de nuestra practica, todo esto cambiando el valor de delay que se encuentran hasta el final de nuestras líneas de encendido y apagado del programa, verificaremos nuestro programa para ver que no tenga ningún error y si este funciona perfecta mente lo cargaremos a nuestro arduino. Posterior mente llevaremos a cabo el montado y conectado de nuestra rotoboard con arduino y cada uno de sus componente ara que esta pueda funcionar adecuada mente, dándonos como resultado la siguiente imagen:
  • 14. Practica 6 Objetivo Utilizando Arduino y uno de sus ejemplos que se encuentran en su programa como su lenguaje de programación como ya antes realizado en las practicas hacer que un led parpadee 20 veces y posterior mente se quede encendido, que se apague y vuelva a hacer la misma función desde un principio utilizando una práctica ya predeterminada que trae nuestro programa arduino, siguiendo el siguiente programa: int led = 13; void setup() { // initialize the digital pin as an output. pinMode(led, OUTPUT); } // the loop routine runs over and over again forever: void loop() { digitalWrite(led, HIGH); delay(1000); digitalWrite(led, LOW); delay(1000); digitalWrite(led, HIGH); delay(1000); digitalWrite(led, LOW); delay(1000);
  • 15. digitalWrite(led, HIGH); delay(1000); digitalWrite(led, LOW); delay(1000); digitalWrite(led, HIGH); delay(1000); digitalWrite(led, LOW); delay(1000); digitalWrite(led, HIGH); delay(1000); digitalWrite(led, LOW); delay(1000); digitalWrite(led, HIGH); delay(1000); digitalWrite(led, LOW); delay(1000); digitalWrite(led, HIGH); delay(1000); digitalWrite(led, LOW); delay(1000); digitalWrite(led, HIGH); delay(1000);
  • 16. digitalWrite(led, LOW); delay(1000); digitalWrite(led, HIGH); delay(1000); digitalWrite(led, LOW); delay(1000); digitalWrite(led, HIGH); delay(1000); digitalWrite(led, LOW); delay(1000); digitalWrite(led, HIGH); delay(1000); digitalWrite(led, LOW); delay(1000); digitalWrite(led, HIGH); delay(1000); digitalWrite(led, LOW); delay(1000); digitalWrite(led, HIGH); delay(1000); digitalWrite(led, LOW); delay(1000);
  • 17. digitalWrite(led, HIGH); delay(1000); digitalWrite(led, LOW); delay(1000); digitalWrite(led, HIGH); delay(1000); digitalWrite(led, LOW); delay(1000); digitalWrite(led, HIGH); delay(1000); digitalWrite(led, LOW); delay(1000); digitalWrite(led, HIGH); delay(1000); digitalWrite(led, LOW); delay(1000); digitalWrite(led, HIGH); delay(1000); digitalWrite(led, LOW); delay(1000); digitalWrite(led, HIGH); delay(1000); digitalWrite(led, LOW);
  • 18. delay(1000); digitalWrite(led, HIGH); delay(1000); digitalWrite(led, LOW); delay(1000); digitalWrite(led, HIGH); delay(60000); }
  • 19. Desarrollo Para la correcta programación y funcionamiento de esta práctica se utilizaran: - Arduino uno - Protoboard - Leds - Cables Para realizar dicha programación y funcionamiento de nuestro programa nos basaremos en el programa utilizado para arduino, utilizando uno de sus ejemplos ya antes mostrado, en la pestaña ARCHIVO, posterior mente en la sub ventana EJEMPLOS, 01.BASICS y abriremos la que dice BLINK, abrirá la practica que utilizaremos y posterior mente para realizar el funcionamiento predeterminado aremos un ajuste en los encendidos y apagados de nuestro programa, poniendo veinte de estos para que nuestro led haga la función de parpadear por 20 tiempos, esto con un debido tiempo de ciertos mili segundos para que no sea tan tardado, para al final de nuestro programa agregar una línea con un encendido permanente de 1 minuto, para que cuando este termine se inicie nueva mente nuestro programa, haciendo un ciclo para cumplirse el objetivo de nuestra practica, todo esto cambiando el valor de delay que se encuentran hasta el final de nuestras líneas de encendido y apagado del programa, verificaremos nuestro programa para ver que no tenga ningún error y si este funciona perfecta mente lo cargaremos a nuestro arduino. Posterior mente llevaremos a cabo el montado y conectado de nuestra rotoboard con arduino y cada uno de sus componente ara que esta pueda funcionar adecuada mente, dándonos como resultado la siguiente imagen:
  • 20. Practica 7 Objetivo Utilizando Arduino y uno de sus ejemplos que se encuentran en su programa como su lenguaje de programación como ya antes realizado en las practicas hacer que un led encienda por un tiempo de 2000, después en 1000, uno más en 100 y por último en 10 mili segundos, claro al terminar cada uno de estos se apague y se vuelva a encender con el cambio de tiempo, cuando este termine se apague y vuelva a hacer la misma función desde un principio utilizando una práctica ya predeterminada que trae nuestro programa arduino, siguiendo el siguiente programa: int led = 13; void setup() { pinMode(led, OUTPUT); } void loop() { //Empieza la funcion digitalWrite(led, HIGH); delay(2000); digitalWrite(led,LOW); delay(1000); digitalWrite(led, HIGH); delay(1000); digitalWrite(led,LOW); delay(1000);
  • 21. digitalWrite(led, HIGH); delay(100); digitalWrite(led,LOW); delay(1000); digitalWrite(led, HIGH); delay(10); digitalWrite(led,LOW); delay(1000); //Momento en el que se da un tiempo de un minuto apagado digitalWrite(led,LOW); delay(60000); }
  • 22. Desarrollo Para la correcta programación y funcionamiento de esta práctica se utilizaran: - Arduino uno - Protoboard - Leds - Cables Para realizar dicha programación y funcionamiento de nuestro programa nos basaremos en el programa utilizado para arduino, utilizando uno de sus ejemplos ya antes mostrado, en la pestaña ARCHIVO, posterior mente en la sub ventana EJEMPLOS, 01.BASICS y abriremos la que dice BLINK, abrirá la practica que utilizaremos y posterior mente para realizar el funcionamiento predeterminado aremos un ajuste en los encendidos y apagados de nuestro programa para que este realice el encienda por un tiempo de 2000, después en 1000, uno más en 100 y por último en 10 mili segundos, claro al terminar cada uno de estos se apague y se vuelva a encender con el cambio de tiempo, haciendo un ciclo para cumplirse el objetivo de nuestra practica, todo esto cambiando el valor de delay que se encuentran hasta el final de nuestras líneas de encendido y apagado del programa, verificaremos nuestro programa para ver que no tenga ningún error y si este funciona perfecta mente lo cargaremos a nuestro arduino. Posterior mente llevaremos a cabo el montado y conectado de nuestra rotoboard con arduino y cada uno de sus componente ara que esta pueda funcionar adecuada mente, dándonos como resultado la siguiente imagen:
  • 23. Practica 8 Objetivo Utilizando Arduino y uno de sus ejemplos que se encuentran en su programa como su lenguaje de programación habilitar el pin 12 y hacer que el led o diodo emisor de luz se encienda un tiempo de 100 mili segundos y que el diodo conectado al ya habilitado pin13 lo haga a los 2000 mili segundos, el tiempo de apagado es total mente libre para realizar la programación, esto se realizara con la ya mencionada practica ya predeterminada que trae nuestro programa arduino, siguiendo el siguiente programa: // Encendido y apagado de 3 LEDs int ledPin1 = 13; // Define las salidas de los LED´s int ledPin2 = 12; void setup() { // Configura las SALIDAS pinMode(ledPin1, OUTPUT); // declarar LEDs como SALIDAS pinMode(ledPin2, OUTPUT); digitalWrite(ledPin1, LOW); // Apaga los LEDs digitalWrite(ledPin2, LOW); } void loop(){ //Bucle de Funcionamiento digitalWrite(ledPin1, HIGH); // Apaga y enciende los leds cada 200 ms delay(2000); digitalWrite(ledPin1, LOW); digitalWrite(ledPin2, HIGH); delay(100); digitalWrite(ledPin2, LOW); digitalWrite(ledPin1, HIGH); // Apaga y enciende los leds cada 200 ms delay(100);
  • 24. digitalWrite(ledPin1, LOW); digitalWrite(ledPin2, HIGH); delay(2000); digitalWrite(ledPin2, LOW); }
  • 25. Desarrollo Para la correcta programación y funcionamiento de esta práctica se utilizaran: - Arduino uno - Protoboard - Leds - Cables Para realizar dicha programación y funcionamiento de nuestro programa nos basaremos en el programa utilizado para arduino, utilizando uno de sus ejemplos ya antes mostrado, en la pestaña ARCHIVO, posterior mente en la sub ventana EJEMPLOS, 01.BASICS y abriremos la que dice BLINK, abrirá la practica que utilizaremos y posterior mente para realizar el funcionamiento predeterminado aremos un ajuste en el tiempo, pero primera mente debemos declarar la salida de nuestro pin 12 con un int y declarando en el void o bucle de funcionamiento el mismo proceso de apagado y encendido que ara nuestro funcionamiento de apagado y encendido, con la debida etiqueta que dara la salida al pin 13, ya echo esto aremos el cambio de tiempo en nuestras diferentes salidas 100 mili segundos en nuestro pin 12 y 2000 en nuestro pin 13 cambiando el delay que se encuentra hasta el final de nuestro programa, verificaremos nuestro programa para ver que no tenga ningún error y si este funciona perfecta mente lo cargaremos a nuestro arduino. Posterior mente llevaremos a cabo el montado y conectado de nuestra protoboard con arduino y cada uno de sus componente ara que esta pueda funcionar adecuada mente, dándonos como resultado la siguiente imagen:
  • 26. Practica 9 Objetivo Utilizando Arduino y su lenguaje de programación realizar la practica de corrimiento de leds de por lo menos 5 leds diodos emisores de luz que valla de izquierda a derecha y que comience nueva mente de la izquierda yendo a la derecha, esto se realizara con el ya mencionado lenguaje de programación de arduino, siguiendo el siguiente programa: // Encendido y apagado de 3 LEDs int ledPin1 = 13; // Define las salidas de los LED´s int ledPin2 = 8; int ledPin3 = 7; int ledPin4 = 4; int ledPin5 = 2; void setup() { // Configura las SALIDAS pinMode(ledPin1, OUTPUT); // declarar LEDs como SALIDAS
  • 27. pinMode(ledPin2, OUTPUT); pinMode(ledPin3, OUTPUT); pinMode(ledPin4, OUTPUT); pinMode(ledPin5, OUTPUT); digitalWrite(ledPin1, LOW); // Apaga los LEDs digitalWrite(ledPin2, LOW); digitalWrite(ledPin3, LOW); digitalWrite(ledPin4, LOW); digitalWrite(ledPin5, LOW); } void loop(){ //Bucle de Funcionamiento digitalWrite(ledPin1, HIGH); // Apaga y enciende los leds cada 200 ms delay(500); digitalWrite(ledPin1, LOW); digitalWrite(ledPin2, HIGH); delay(500); digitalWrite(ledPin2, LOW); digitalWrite(ledPin3, HIGH); delay(500); digitalWrite(ledPin3, LOW); digitalWrite(ledPin4, HIGH); delay(500); digitalWrite(ledPin4, LOW); digitalWrite(ledPin5, HIGH); delay(500); digitalWrite(ledPin5, LOW); }
  • 28. Desarrollo Para la correcta programación y funcionamiento de esta práctica se utilizaran: - Arduino uno - Protoboard - Leds - Cables Para realizar dicha programación y funcionamiento de nuestro programa nos basaremos en el programa utilizado para arduino, utilizando uno de sus ejemplos ya antes mostrado, en la pestaña ARCHIVO, posterior mente en la sub ventana EJEMPLOS, 01.BASICS y abriremos la que dice BLINK, abrirá la practica que utilizaremos y posterior mente para realizar el funcionamiento predeterminado aremos un ajuste en dicho programa, pero primera mente debemos declarar nuestras salidas 2,4,7,8,13 dichos pines serán nuestras salidas que en la parte mas adelante con el void o bucle de funcionamiento realizara el mismo proceso de encendido y apagado de un led uno por uno, con la debida etiqueta que dara la salida a nuestros ya mencionados pines, según el criterio del programador se podrá cambiar el tiempo en nuestras diferentes salidas como en nuestras practicas anteriores, para continuar con nuestra practica verificaremos nuestro programa para ver que no tenga ningún error y si este funciona perfecta mente lo cargaremos a nuestro arduino.
  • 29. Posterior mente llevaremos a cabo el montado y conectado de nuestra protoboard con arduino y cada uno de sus componentes ara que esta pueda funcionar adecuada mente, dándonos como resultado la siguiente imagen: Practica 10 Objetivo Utilizando Arduino y su lenguaje de programación realizar la practica de corrimiento de leds de por lo menos 5 leds o diodos emisores de luz que valla de derecha a izquierda y que comience nueva mente de la derecha yendo a la izquierda, esto se realizara con el ya mencionado lenguaje de programación de arduino, siguiendo el siguiente programa: // Encendido y apagado de 3 LEDs int ledPin1 = 2; // Define las salidas de los LED´s int ledPin2 = 4; int ledPin3 = 7; int ledPin4 = 8; int ledPin5 = 13; void setup() { // Configura las SALIDAS
  • 30. pinMode(ledPin1, OUTPUT); // declarar LEDs como SALIDAS pinMode(ledPin2, OUTPUT); pinMode(ledPin3, OUTPUT); pinMode(ledPin4, OUTPUT); pinMode(ledPin5, OUTPUT); digitalWrite(ledPin1, LOW); // Apaga los LEDs digitalWrite(ledPin2, LOW); digitalWrite(ledPin3, LOW); digitalWrite(ledPin4, LOW); digitalWrite(ledPin5, LOW); } void loop(){ //Bucle de Funcionamiento digitalWrite(ledPin1, HIGH); // Apaga y enciende los leds cada 200 ms delay(500); digitalWrite(ledPin1, LOW); digitalWrite(ledPin2, HIGH); delay(500); digitalWrite(ledPin2, LOW); digitalWrite(ledPin3, HIGH); delay(500); digitalWrite(ledPin3, LOW); digitalWrite(ledPin4, HIGH); delay(500); digitalWrite(ledPin4, LOW); digitalWrite(ledPin5, HIGH); delay(500); digitalWrite(ledPin5, LOW); }
  • 31. Desarrollo Para la correcta programación y funcionamiento de esta práctica se utilizaran: - Arduino uno - Protoboard - Leds - Cables Para realizar dicha programación y funcionamiento de nuestro programa nos basaremos en el programa utilizado para arduino, utilizando uno de sus ejemplos ya antes mostrado, en la pestaña ARCHIVO, posterior mente en la sub ventana EJEMPLOS, 01.BASICS y abriremos la que dice BLINK, abrirá la practica que utilizaremos y posterior mente para realizar el funcionamiento predeterminado aremos un ajuste en dicho programa, pero primera mente debemos declarar nuestras salidas que a diferencia de la practica 9 declararemos nuestras salidas inversa mente 13,8,7,4,2 dichos pines serán nuestras salidas que en la parte mas adelante con el void o bucle de funcionamiento realizara el mismo proceso de encendido y apagado de un led uno por uno, con la debida etiqueta que dará la salida a nuestros ya mencionados pines, según el criterio del programador se podrá cambiar el tiempo en nuestras diferentes salidas como en nuestras practicas anteriores, para continuar con nuestra practica verificaremos nuestro programa
  • 32. para ver que no tenga ningún error y si este funciona perfecta mente lo cargaremos a nuestro arduino. Posterior mente llevaremos a cabo el montado y conectado de nuestra protoboard con arduino y cada uno de sus componentes ara que esta pueda funcionar adecuada mente, dándonos como resultado la siguiente imagen: Practica 11 Objetivo Con el mismo programa de corrimiento de leds o diodos emisores de luz realizar la programación para que de izquierda a derecha de los 5 leds solo se enciendan 1,3,5 y que comience nueva mente de la izquierda yendo a la derecha, esto se realizara con el ya mencionado lenguaje de programación de arduino, siguiendo el siguiente programa: // Encendido y apagado de 3 LEDs int ledPin1 = 13; // Define las salidas de los LED´s int ledPin2 = 7; int ledPin3 = 2; void setup() { // Configura las SALIDAS pinMode(ledPin1, OUTPUT); // declarar LEDs como SALIDAS
  • 33. pinMode(ledPin2, OUTPUT); pinMode(ledPin3, OUTPUT); digitalWrite(ledPin1, LOW); // Apaga los LEDs digitalWrite(ledPin2, LOW); digitalWrite(ledPin3, LOW); } void loop(){ //Bucle de Funcionamiento digitalWrite(ledPin1, HIGH); // Apaga y enciende los leds cada 200 ms delay(500); digitalWrite(ledPin1, LOW); digitalWrite(ledPin2, HIGH); delay(500); digitalWrite(ledPin2, LOW); digitalWrite(ledPin3, HIGH); delay(500); digitalWrite(ledPin3, LOW); } Desarrollo Para la correcta programación y funcionamiento de esta práctica se utilizaran: - Arduino uno - Protoboard - Leds - Cables Llevaremos a cavo una modificación en nuestro programa ya sea de la practica 9 o 10, cualquiera de las dos, ya que estas practicas tienen la base para poder llevar a cavo nuestra practica numero 11 que consistirá del encendido solo de 3 led de 5 para esto de nuestros programas anteriores borraremos 2 salidas antes declaradas y dejaremos solo 3 que serán las encargadas de llevar a cavo nuestra función, declararemos nuestras salidas 13,7,2 dichos pines serán nuestras salidas que en la parte mas adelante con el void o bucle de funcionamiento realizara el mismo proceso de encendido y apagado de un led uno por uno, con la debida etiqueta que dará la salida a nuestros ya mencionados pines, según el criterio del
  • 34. programador se podrá cambiar el tiempo en nuestras diferentes salidas como en nuestras practicas anteriores, para continuar con nuestra practica verificaremos nuestro programa para ver que no tenga ningún error y si este funciona perfecta mente lo cargaremos a nuestro arduino. Posterior mente llevaremos a cabo el montado y conectado de nuestra protoboard con arduino y cada uno de sus componentes ara que esta pueda funcionar adecuada mente, dándonos como resultado la siguiente imagen: Practica 12 Objetivo Con el mismo programa de corrimiento de leds o diodos emisores de luz realizar la programación para que el encendido de nuestros leds se haga a la inversa de derecha a izquierda de los 5 leds que solo se encenderán 5,3,1 y que comience nueva mente de la derecha yendo a la izquierda, esto se realizara con el ya mencionado lenguaje de programación de arduino, siguiendo el siguiente programa: // Encendido y apagado de 3 LEDs int ledPin1 = 2; // Define las salidas de los LED´s int ledPin2 = 7; int ledPin3 = 13;
  • 35. void setup() { // Configura las SALIDAS pinMode(ledPin1, OUTPUT); // declarar LEDs como SALIDAS pinMode(ledPin2, OUTPUT); pinMode(ledPin3, OUTPUT); digitalWrite(ledPin1, LOW); // Apaga los LEDs digitalWrite(ledPin2, LOW); digitalWrite(ledPin3, LOW); } void loop(){ //Bucle de Funcionamiento digitalWrite(ledPin1, HIGH); // Apaga y enciende los leds cada 200 ms delay(500); digitalWrite(ledPin1, LOW); digitalWrite(ledPin2, HIGH); delay(500); digitalWrite(ledPin2, LOW); digitalWrite(ledPin3, HIGH); delay(500); digitalWrite(ledPin3, LOW); } Desarrollo Para la correcta programación y funcionamiento de esta práctica se utilizaran: - Arduino uno - Protoboard - Leds - Cables Llevaremos a cavo una modificación en nuestro programa ya sea de la practica 9 o 10, cualquiera de las dos, ya que estas practicas tienen la base para poder llevar a cavo nuestra practica numero 11 que consistirá del encendido solo de 3 leds de 5 para esto de nuestros programas anteriores borraremos 2 salidas antes declaradas y dejaremos solo 3 que serán las encargadas de llevar a cavo nuestra función, declararemos nuestras salidas 2,7,13 dichos pines serán nuestras salidas
  • 36. que en la parte mas adelante con el void o bucle de funcionamiento realizara el mismo proceso de encendido y apagado de un led uno por uno, con la debida etiqueta que dará la salida a nuestros ya mencionados pines, según el criterio del programador se podrá cambiar el tiempo en nuestras diferentes salidas como en nuestras practicas anteriores, para continuar con nuestra practica verificaremos nuestro programa para ver que no tenga ningún error y si este funciona perfecta mente lo cargaremos a nuestro arduino. Posterior mente llevaremos a cabo el montado y conectado de nuestra protoboard con arduino y cada uno de sus componentes ara que esta pueda funcionar adecuada mente, dándonos como resultado la siguiente imagen: Practica 13 Objetivo Llevar a cavo la programación en arduino para juntar y hacer funcionar la practica 9,10,11 y 12 en un solo programa, que este funcione correcta mente y sin errores como fueron funcionando una por una separadas haciendo el corrimiento de leds de derecha a izquierda, viceversa y de derecha a izquierda solo los leds 1, 3, y 5 y por igual a la inversa para posterior mente comenzar de nuevo por la derecha, esto se realizara con el ya mencionado lenguaje de programación de arduino, siguiendo el siguiente programa: // Encendido y apagado de 3 LEDs int ledPin1 = 13; // Define las salidas de los LED´s
  • 37. int ledPin2 = 8; int ledPin3 = 7; int ledPin4 = 4; int ledPin5 = 2; void setup() { // Configura las SALIDAS pinMode(ledPin1, OUTPUT); // declarar LEDs como SALIDAS pinMode(ledPin2, OUTPUT); pinMode(ledPin3, OUTPUT); pinMode(ledPin4, OUTPUT); pinMode(ledPin5, OUTPUT); digitalWrite(ledPin1, LOW); // Apaga los LEDs digitalWrite(ledPin2, LOW); digitalWrite(ledPin3, LOW); digitalWrite(ledPin4, LOW); digitalWrite(ledPin5, LOW); } void loop(){ //Bucle de Funcionamiento digitalWrite(ledPin1, HIGH); // Apaga y enciende los leds cada 200 ms delay(500); digitalWrite(ledPin1, LOW); digitalWrite(ledPin2, HIGH); delay(500); digitalWrite(ledPin2, LOW); digitalWrite(ledPin3, HIGH); delay(500); digitalWrite(ledPin3, LOW); digitalWrite(ledPin4, HIGH); delay(500);
  • 38. digitalWrite(ledPin4, LOW); digitalWrite(ledPin5, HIGH); delay(500); digitalWrite(ledPin5, LOW); //Practica 10 digitalWrite(ledPin5, HIGH); // Apaga y enciende los leds cada 200 ms delay(500); digitalWrite(ledPin5, LOW); digitalWrite(ledPin4, HIGH); delay(500); digitalWrite(ledPin4, LOW); digitalWrite(ledPin3, HIGH); delay(500); digitalWrite(ledPin3, LOW); digitalWrite(ledPin2, HIGH); delay(500); digitalWrite(ledPin2, LOW); digitalWrite(ledPin1, HIGH); delay(500); digitalWrite(ledPin1, LOW); //Practica 11 digitalWrite(ledPin1, HIGH); // Apaga y enciende los leds cada 200 ms delay(500); digitalWrite(ledPin1, LOW); digitalWrite(ledPin3, HIGH); delay(500);
  • 39. digitalWrite(ledPin3, LOW); digitalWrite(ledPin5, HIGH); delay(500); digitalWrite(ledPin5, LOW); //Practica 12 digitalWrite(ledPin5, HIGH); // Apaga y enciende los leds cada 200 ms delay(500); digitalWrite(ledPin5, LOW); digitalWrite(ledPin3, HIGH); delay(500); digitalWrite(ledPin3, LOW); digitalWrite(ledPin1, HIGH); delay(500); digitalWrite(ledPin1, LOW); } Desarrollo Para la correcta programación y funcionamiento de esta práctica se utilizaran: - Arduino uno - Protoboard - Leds - Cables Llevaremos a cavo una modificación en nuestro programa en base a la practica 9, juntándola con la 10, la 11 y la 12 haciendo el arreglo correcto y correspondiente para que se haga bien y sin problema el funcionamiento de nuestra practica que consistirá ya antes mencionado con el corrimiento de leds uno por uno de derecha a izquierda, a la inversa de esta, cuando termine que comience el encendido de los leds 1, 3 y 5 por igual de derecha a izquierda y cuando termine dicho proceso a la inversa de este. Para ello como en nuestra practica 9 o 10 declararemos nuestras 5 salidas y lo que influirá y realizara todo nuestro proceso para que se
  • 40. cumpla nuestro objetivo tendrá que ver y hacerse en el void o bucle de funcionamiento que llevara toda la etapa de funcionamiento que realizara los uno por uno los diferentes procesos que se requieran para que no haya problem, con las debidas etiquetas que dará la salida a nuestros ya mencionados pines. Posterior mente llevaremos a cabo el montado y conectado de nuestra protoboard con arduino y cada uno de sus componentes ara que esta pueda funcionar adecuada mente, dándonos como resultado la siguiente imagen: Practica 14 Objetivo Llevar a cavo la programación en arduino para juntar y hacer funcionar la practica 9,10,11 y 12 en un solo programa pero esta vez cambiaremos la velocidad de su frecuencia de encendido y apagado, que este funcione correcta mente y sin errores como fueron funcionando una por una separadas haciendo el corrimiento de leds de derecha a izquierda, viceversa y de derecha a izquierda solo los leds 1, 3, y 5 y por igual a la inversa para posterior mente comenzar de nuevo por la derecha, esto se realizara con el ya mencionado lenguaje de programación de arduino, siguiendo el siguiente programa: // Encendido y apagado de 3 LEDs
  • 41. int ledPin1 = 13; // Define las salidas de los LED´s int ledPin2 = 8; int ledPin3 = 7; int ledPin4 = 4; int ledPin5 = 2; void setup() { // Configura las SALIDAS pinMode(ledPin1, OUTPUT); // declarar LEDs como SALIDAS pinMode(ledPin2, OUTPUT); pinMode(ledPin3, OUTPUT); pinMode(ledPin4, OUTPUT); pinMode(ledPin5, OUTPUT); digitalWrite(ledPin1, LOW); // Apaga los LEDs digitalWrite(ledPin2, LOW); digitalWrite(ledPin3, LOW); digitalWrite(ledPin4, LOW); digitalWrite(ledPin5, LOW); } void loop(){ //Bucle de Funcionamiento digitalWrite(ledPin1, HIGH); // Apaga y enciende los leds cada 200 ms delay(100); digitalWrite(ledPin1, LOW); digitalWrite(ledPin2, HIGH); delay(100); digitalWrite(ledPin2, LOW); digitalWrite(ledPin3, HIGH); delay(100); digitalWrite(ledPin3, LOW); digitalWrite(ledPin4, HIGH);
  • 42. delay(100); digitalWrite(ledPin4, LOW); digitalWrite(ledPin5, HIGH); delay(100); digitalWrite(ledPin5, LOW); //Practica 10 digitalWrite(ledPin5, HIGH); // Apaga y enciende los leds cada 200 ms delay(100); digitalWrite(ledPin5, LOW); digitalWrite(ledPin4, HIGH); delay(100); digitalWrite(ledPin4, LOW); digitalWrite(ledPin3, HIGH); delay(100); digitalWrite(ledPin3, LOW); digitalWrite(ledPin2, HIGH); delay(100); digitalWrite(ledPin2, LOW); digitalWrite(ledPin1, HIGH); delay(100); digitalWrite(ledPin1, LOW); //Practica 11 digitalWrite(ledPin1, HIGH); // Apaga y enciende los leds cada 200 ms delay(100); digitalWrite(ledPin1, LOW); digitalWrite(ledPin3, HIGH);
  • 43. delay(100); digitalWrite(ledPin3, LOW); digitalWrite(ledPin5, HIGH); delay(100); digitalWrite(ledPin5, LOW); //Practica 12 digitalWrite(ledPin5, HIGH); // Apaga y enciende los leds cada 200 ms delay(100); digitalWrite(ledPin5, LOW); digitalWrite(ledPin3, HIGH); delay(100); digitalWrite(ledPin3, LOW); digitalWrite(ledPin1, HIGH); delay(100); digitalWrite(ledPin1, LOW); } Desarrollo Para la correcta programación y funcionamiento de esta práctica se utilizaran: - Arduino uno - Protoboard - Leds - Cables Llevaremos a cavo una modificación en nuestro programa en base a la practica 9, juntándola con la 10, la 11 y la 12 haciendo el arreglo correcto y correspondiente para que se haga bien y sin problema el funcionamiento de nuestra practica que consistirá ya antes mencionado con el corrimiento de leds uno por uno de derecha a izquierda, a la inversa de esta, cuando termine que comience el encendido de los leds 1, 3 y 5 por igual de derecha a izquierda y cuando termine dicho proceso a la inversa de este. Para ello como en nuestra practica 9 o 10 declararemos nuestras 5 salidas y lo que influirá y realizara todo nuestro proceso para que se
  • 44. cumpla nuestro objetivo tendrá que ver y hacerse en el void o bucle de funcionamiento que llevara toda la etapa de funcionamiento que realizara uno por uno los diferentes procesos que se requieran para que no haya problema, además de que cambiaremos la frecuencia de su velocidad con las debidas etiquetas que dará la salida a nuestros ya mencionados pines. Posterior mente llevaremos a cabo el montado y conectado de nuestra protoboard con arduino y cada uno de sus componentes ara que esta pueda funcionar adecuada mente, dándonos como resultado la siguiente imagen: Practica 15 Objetivo Utilizando Arduino y su debido lenguaje de programación 5 leds, cada uno de ellos diez veces, con la misma frecuencia de nuestra practica 14, frecuencia que encenderá y apagara nuestros leds cada cierto periodo de tiempo, claro al terminar cada uno de estos se apague y se vuelva a encender y a hacer la misma función desde un principio utilizando una práctica ya predeterminada que trae nuestro programa arduino, siguiendo el siguiente programa: // Pin 13 has an LED connected on most Arduino boards.
  • 45. // give it a name: const int led = 13; const int led2 = 12; const int led3 = 8; const int led4 = 7; const int led5 = 4; // the setup routine runs once when you press reset: void setup() { // initialize the digital pin as an output. pinMode(led, OUTPUT); pinMode(led2, OUTPUT); pinMode(led3, OUTPUT); pinMode(led4, OUTPUT); pinMode(led5, OUTPUT); } // Prac. 9 the loop routine runs over and over again forever: void loop() { // led1 digitalWrite(led, HIGH); // turn the LED on (HIGH is the voltage level) delay(1500); // wait for a second digitalWrite(led, LOW); // turn the LED off by making the voltage LOW delay(150); // wait for a second pinMode(led, OUTPUT); digitalWrite(led, HIGH); // turn the LED on (HIGH is the voltage level) delay(1500); // wait for a second
  • 46. digitalWrite(led, LOW); // turn the LED off by making the voltage LOW delay(150); // wait for a second pinMode(led, OUTPUT); digitalWrite(led, HIGH); // turn the LED on (HIGH is the voltage level) delay(1500); // wait for a second digitalWrite(led, LOW); // turn the LED off by making the voltage LOW delay(150); // wait for a second pinMode(led, OUTPUT); digitalWrite(led, HIGH); // turn the LED on (HIGH is the voltage level) delay(1500); // wait for a second digitalWrite(led, LOW); // turn the LED off by making the voltage LOW delay(150); // wait for a second pinMode(led, OUTPUT); digitalWrite(led, HIGH); // turn the LED on (HIGH is the voltage level) delay(1500); // wait for a second digitalWrite(led, LOW); // turn the LED off by making the voltage LOW delay(150); // wait for a second pinMode(led, OUTPUT); digitalWrite(led, HIGH); // turn the LED on (HIGH is the voltage level) delay(1500); // wait for a second digitalWrite(led, LOW); // turn the LED off by making the voltage LOW delay(150); // wait for a second pinMode(led, OUTPUT);
  • 47. digitalWrite(led, HIGH); // turn the LED on (HIGH is the voltage level) delay(1500); // wait for a second digitalWrite(led, LOW); // turn the LED off by making the voltage LOW delay(150); // wait for a second pinMode(led, OUTPUT); digitalWrite(led, HIGH); // turn the LED on (HIGH is the voltage level) delay(1500); // wait for a second digitalWrite(led, LOW); // turn the LED off by making the voltage LOW delay(150); // wait for a second pinMode(led, OUTPUT); digitalWrite(led, HIGH); // turn the LED on (HIGH is the voltage level) delay(1500); // wait for a second digitalWrite(led, LOW); // turn the LED off by making the voltage LOW delay(150); // wait for a second pinMode(led, OUTPUT); digitalWrite(led, HIGH); // turn the LED on (HIGH is the voltage level) delay(1500); // wait for a second digitalWrite(led, LOW); // turn the LED off by making the voltage LOW delay(150); // wait for a second pinMode(led, OUTPUT); // led2 digitalWrite(led2, HIGH); // turn the LED on (HIGH is the voltage level) delay(1500); // wait for a second digitalWrite(led2, LOW); // turn the LED off by making the voltage LOW
  • 48. delay(150); // wait for a second pinMode(led2, OUTPUT); digitalWrite(led2, HIGH); // turn the LED on (HIGH is the voltage level) delay(1500); // wait for a second digitalWrite(led2, LOW); // turn the LED off by making the voltage LOW delay(150); // wait for a second pinMode(led2, OUTPUT); digitalWrite(led2, HIGH); // turn the LED on (HIGH is the voltage level) delay(1500); // wait for a second digitalWrite(led2, LOW); // turn the LED off by making the voltage LOW delay(150); // wait for a second pinMode(led2, OUTPUT); digitalWrite(led2, HIGH); // turn the LED on (HIGH is the voltage level) delay(1500); // wait for a second digitalWrite(led2, LOW); // turn the LED off by making the voltage LOW delay(150); // wait for a second pinMode(led2, OUTPUT); digitalWrite(led2, HIGH); // turn the LED on (HIGH is the voltage level) delay(1500); // wait for a second digitalWrite(led2, LOW); // turn the LED off by making the voltage LOW delay(150); // wait for a second pinMode(led2, OUTPUT); digitalWrite(led2, HIGH); // turn the LED on (HIGH is the voltage level)
  • 49. delay(1500); // wait for a second digitalWrite(led2, LOW); // turn the LED off by making the voltage LOW delay(150); // wait for a second pinMode(led2, OUTPUT); digitalWrite(led2, HIGH); // turn the LED on (HIGH is the voltage level) delay(1500); // wait for a second digitalWrite(led2, LOW); // turn the LED off by making the voltage LOW delay(150); // wait for a second pinMode(led2, OUTPUT); digitalWrite(led2, HIGH); // turn the LED on (HIGH is the voltage level) delay(1500); // wait for a second digitalWrite(led2, LOW); // turn the LED off by making the voltage LOW delay(150); // wait for a second pinMode(led2, OUTPUT); digitalWrite(led2, HIGH); // turn the LED on (HIGH is the voltage level) delay(1500); // wait for a second digitalWrite(led2, LOW); // turn the LED off by making the voltage LOW delay(150); // wait for a second pinMode(led2, OUTPUT); digitalWrite(led2, HIGH); // turn the LED on (HIGH is the voltage level) delay(1500); // wait for a second digitalWrite(led2, LOW); // turn the LED off by making the voltage LOW delay(150); // wait for a second pinMode(led2, OUTPUT);
  • 50. //led3 digitalWrite(led3, HIGH); // turn the LED on (HIGH is the voltage level) delay(1500); // wait for a second digitalWrite(led3, LOW); // turn the LED off by making the voltage LOW delay(150); // wait for a second pinMode(led3, OUTPUT); digitalWrite(led3, HIGH); // turn the LED on (HIGH is the voltage level) delay(1500); // wait for a second digitalWrite(led3, LOW); // turn the LED off by making the voltage LOW delay(150); // wait for a second pinMode(led3, OUTPUT); digitalWrite(led3, HIGH); // turn the LED on (HIGH is the voltage level) delay(1500); // wait for a second digitalWrite(led3, LOW); // turn the LED off by making the voltage LOW delay(150); // wait for a second pinMode(led3, OUTPUT); digitalWrite(led3, HIGH); // turn the LED on (HIGH is the voltage level) delay(1500); // wait for a second digitalWrite(led3, LOW); // turn the LED off by making the voltage LOW delay(150); // wait for a second pinMode(led3, OUTPUT); digitalWrite(led3, HIGH); // turn the LED on (HIGH is the voltage level) delay(1500); // wait for a second
  • 51. digitalWrite(led3, LOW); // turn the LED off by making the voltage LOW delay(150); // wait for a second pinMode(led3, OUTPUT); digitalWrite(led3, HIGH); // turn the LED on (HIGH is the voltage level) delay(1500); // wait for a second digitalWrite(led3, LOW); // turn the LED off by making the voltage LOW delay(150); // wait for a second pinMode(led3, OUTPUT); digitalWrite(led3, HIGH); // turn the LED on (HIGH is the voltage level) delay(1500); // wait for a second digitalWrite(led3, LOW); // turn the LED off by making the voltage LOW delay(150); // wait for a second pinMode(led3, OUTPUT); digitalWrite(led3, HIGH); // turn the LED on (HIGH is the voltage level) delay(1500); // wait for a second digitalWrite(led3, LOW); // turn the LED off by making the voltage LOW delay(150); // wait for a second pinMode(led3, OUTPUT); digitalWrite(led3, HIGH); // turn the LED on (HIGH is the voltage level) delay(1500); // wait for a second digitalWrite(led3, LOW); // turn the LED off by making the voltage LOW delay(150); // wait for a second pinMode(led3, OUTPUT);
  • 52. digitalWrite(led3, HIGH); // turn the LED on (HIGH is the voltage level) delay(1500); // wait for a second digitalWrite(led3, LOW); // turn the LED off by making the voltage LOW delay(150); // wait for a second pinMode(led3, OUTPUT); //led4 digitalWrite(led4, HIGH); // turn the LED on (HIGH is the voltage level) delay(1500); // wait for a second digitalWrite(led4, LOW); // turn the LED off by making the voltage LOW delay(150); // wait for a second pinMode(led4, OUTPUT); digitalWrite(led4, HIGH); // turn the LED on (HIGH is the voltage level) delay(1500); // wait for a second digitalWrite(led4, LOW); // turn the LED off by making the voltage LOW delay(150); // wait for a second pinMode(led4, OUTPUT); digitalWrite(led4, HIGH); // turn the LED on (HIGH is the voltage level) delay(1500); // wait for a second digitalWrite(led4, LOW); // turn the LED off by making the voltage LOW delay(150); // wait for a second pinMode(led4, OUTPUT); digitalWrite(led4, HIGH); // turn the LED on (HIGH is the voltage level) delay(1500); // wait for a second digitalWrite(led4, LOW); // turn the LED off by making the voltage LOW
  • 53. delay(150); // wait for a second pinMode(led4, OUTPUT); digitalWrite(led4, HIGH); // turn the LED on (HIGH is the voltage level) delay(1500); // wait for a second digitalWrite(led4, LOW); // turn the LED off by making the voltage LOW delay(150); // wait for a second pinMode(led4, OUTPUT); digitalWrite(led4, HIGH); // turn the LED on (HIGH is the voltage level) delay(1500); // wait for a second digitalWrite(led4, LOW); // turn the LED off by making the voltage LOW delay(150); // wait for a second pinMode(led4, OUTPUT); digitalWrite(led4, HIGH); // turn the LED on (HIGH is the voltage level) delay(1500); // wait for a second digitalWrite(led4, LOW); // turn the LED off by making the voltage LOW delay(150); // wait for a second pinMode(led4, OUTPUT); digitalWrite(led4, HIGH); // turn the LED on (HIGH is the voltage level) delay(1500); // wait for a second digitalWrite(led4, LOW); // turn the LED off by making the voltage LOW delay(150); // wait for a second pinMode(led4, OUTPUT); digitalWrite(led4, HIGH); // turn the LED on (HIGH is the voltage level)
  • 54. delay(1500); // wait for a second digitalWrite(led4, LOW); // turn the LED off by making the voltage LOW delay(150); // wait for a second pinMode(led4, OUTPUT); digitalWrite(led4, HIGH); // turn the LED on (HIGH is the voltage level) delay(1500); // wait for a second digitalWrite(led4, LOW); // turn the LED off by making the voltage LOW delay(150); // wait for a second pinMode(led4, OUTPUT); //led5 digitalWrite(led5, HIGH); // turn the LED on (HIGH is the voltage level) delay(1500); // wait for a second digitalWrite(led5, LOW); // turn the LED off by making the voltage LOW delay(150); // wait for a second pinMode(led5, OUTPUT); digitalWrite(led5, HIGH); // turn the LED on (HIGH is the voltage level) delay(1500); // wait for a second digitalWrite(led5, LOW); // turn the LED off by making the voltage LOW delay(150); // wait for a second pinMode(led5, OUTPUT); digitalWrite(led5, HIGH); // turn the LED on (HIGH is the voltage level) delay(1500); // wait for a second digitalWrite(led5, LOW); // turn the LED off by making the voltage LOW delay(150); // wait for a second
  • 55. pinMode(led5, OUTPUT); digitalWrite(led5, HIGH); // turn the LED on (HIGH is the voltage level) delay(1500); // wait for a second digitalWrite(led5, LOW); // turn the LED off by making the voltage LOW delay(150); // wait for a second pinMode(led5, OUTPUT); digitalWrite(led5, HIGH); // turn the LED on (HIGH is the voltage level) delay(1500); // wait for a second digitalWrite(led5, LOW); // turn the LED off by making the voltage LOW delay(150); // wait for a second pinMode(led5, OUTPUT); digitalWrite(led5, HIGH); // turn the LED on (HIGH is the voltage level) delay(1500); // wait for a second digitalWrite(led5, LOW); // turn the LED off by making the voltage LOW delay(150); // wait for a second pinMode(led5, OUTPUT); digitalWrite(led5, HIGH); // turn the LED on (HIGH is the voltage level) delay(1500); // wait for a second digitalWrite(led5, LOW); // turn the LED off by making the voltage LOW delay(150); // wait for a second pinMode(led5, OUTPUT); digitalWrite(led5, HIGH); // turn the LED on (HIGH is the voltage level) delay(1500); // wait for a second
  • 56. digitalWrite(led5, LOW); // turn the LED off by making the voltage LOW delay(150); // wait for a second pinMode(led5, OUTPUT); digitalWrite(led5, HIGH); // turn the LED on (HIGH is the voltage level) delay(1500); // wait for a second digitalWrite(led5, LOW); // turn the LED off by making the voltage LOW delay(150); // wait for a second pinMode(led5, OUTPUT); digitalWrite(led5, HIGH); // turn the LED on (HIGH is the voltage level) delay(1500); // wait for a second digitalWrite(led5, LOW); // turn the LED off by making the voltage LOW delay(150); // wait for a second pinMode(led5, OUTPUT); // pract.10 led5 digitalWrite(led5, HIGH); // turn the LED on (HIGH is the voltage level) delay(1500); // wait for a second digitalWrite(led5, LOW); // turn the LED off by making the voltage LOW delay(150); // wait for a second pinMode (led5, OUTPUT); digitalWrite(led5, HIGH); // turn the LED on (HIGH is the voltage level) delay(1500); // wait for a second digitalWrite(led5, LOW); // turn the LED off by making the voltage LOW delay(150); // wait for a second
  • 57. pinMode (led5, OUTPUT); digitalWrite(led5, HIGH); // turn the LED on (HIGH is the voltage level) delay(1500); // wait for a second digitalWrite(led5, LOW); // turn the LED off by making the voltage LOW delay(150); // wait for a second pinMode (led5, OUTPUT); digitalWrite(led5, HIGH); // turn the LED on (HIGH is the voltage level) delay(1500); // wait for a second digitalWrite(led5, LOW); // turn the LED off by making the voltage LOW delay(150); // wait for a second pinMode (led5, OUTPUT); digitalWrite(led5, HIGH); // turn the LED on (HIGH is the voltage level) delay(1500); // wait for a second digitalWrite(led5, LOW); // turn the LED off by making the voltage LOW delay(150); // wait for a second pinMode (led5, OUTPUT); digitalWrite(led5, HIGH); // turn the LED on (HIGH is the voltage level) delay(1500); // wait for a second digitalWrite(led5, LOW); // turn the LED off by making the voltage LOW delay(150); // wait for a second pinMode (led5, OUTPUT); digitalWrite(led5, HIGH); // turn the LED on (HIGH is the voltage level) delay(1500); // wait for a second
  • 58. digitalWrite(led5, LOW); // turn the LED off by making the voltage LOW delay(150); // wait for a second pinMode (led5, OUTPUT); digitalWrite(led5, HIGH); // turn the LED on (HIGH is the voltage level) delay(1500); // wait for a second digitalWrite(led5, LOW); // turn the LED off by making the voltage LOW delay(150); // wait for a second pinMode (led5, OUTPUT); digitalWrite(led5, HIGH); // turn the LED on (HIGH is the voltage level) delay(1500); // wait for a second digitalWrite(led5, LOW); // turn the LED off by making the voltage LOW delay(150); // wait for a second pinMode (led5, OUTPUT); digitalWrite(led5, HIGH); // turn the LED on (HIGH is the voltage level) delay(1500); // wait for a second digitalWrite(led5, LOW); // turn the LED off by making the voltage LOW delay(150); // wait for a second pinMode (led5, OUTPUT); //led4 digitalWrite(led4, HIGH); // turn the LED on (HIGH is the voltage level) delay(1500); // wait for a second digitalWrite(led4, LOW); // turn the LED off by making the voltage LOW delay(150); pinMode (led4, OUTPUT);
  • 59. digitalWrite(led4, HIGH); // turn the LED on (HIGH is the voltage level) delay(1500); // wait for a second digitalWrite(led4, LOW); // turn the LED off by making the voltage LOW delay(150); pinMode (led4, OUTPUT); digitalWrite(led4, HIGH); // turn the LED on (HIGH is the voltage level) delay(1500); // wait for a second digitalWrite(led4, LOW); // turn the LED off by making the voltage LOW delay(150); pinMode (led4, OUTPUT); digitalWrite(led4, HIGH); // turn the LED on (HIGH is the voltage level) delay(1500); // wait for a second digitalWrite(led4, LOW); // turn the LED off by making the voltage LOW delay(150); pinMode (led4, OUTPUT); digitalWrite(led4, HIGH); // turn the LED on (HIGH is the voltage level) delay(1500); // wait for a second digitalWrite(led4, LOW); // turn the LED off by making the voltage LOW delay(150); pinMode (led4, OUTPUT); digitalWrite(led4, HIGH); // turn the LED on (HIGH is the voltage level) delay(1500); // wait for a second digitalWrite(led4, LOW); // turn the LED off by making the voltage LOW
  • 60. delay(150); pinMode (led4, OUTPUT); digitalWrite(led4, HIGH); // turn the LED on (HIGH is the voltage level) delay(1500); // wait for a second digitalWrite(led4, LOW); // turn the LED off by making the voltage LOW delay(150); pinMode (led4, OUTPUT); digitalWrite(led4, HIGH); // turn the LED on (HIGH is the voltage level) delay(1500); // wait for a second digitalWrite(led4, LOW); // turn the LED off by making the voltage LOW delay(150); pinMode (led4, OUTPUT); digitalWrite(led4, HIGH); // turn the LED on (HIGH is the voltage level) delay(1500); // wait for a second digitalWrite(led4, LOW); // turn the LED off by making the voltage LOW delay(150); pinMode (led4, OUTPUT); digitalWrite(led4, HIGH); // turn the LED on (HIGH is the voltage level) delay(1500); // wait for a second digitalWrite(led4, LOW); // turn the LED off by making the voltage LOW delay(150); pinMode (led4, OUTPUT); //led3
  • 61. digitalWrite(led3, HIGH); // turn the LED on (HIGH is the voltage level) delay(1500); // wait for a second digitalWrite(led3, LOW); // turn the LED off by making the voltage LOW delay(150); pinMode (led3, OUTPUT); digitalWrite(led3, HIGH); // turn the LED on (HIGH is the voltage level) delay(1500); // wait for a second digitalWrite(led3, LOW); // turn the LED off by making the voltage LOW delay(150); pinMode (led3, OUTPUT); digitalWrite(led3, HIGH); // turn the LED on (HIGH is the voltage level) delay(1500); // wait for a second digitalWrite(led3, LOW); // turn the LED off by making the voltage LOW delay(150); pinMode (led3, OUTPUT); digitalWrite(led3, HIGH); // turn the LED on (HIGH is the voltage level) delay(1500); // wait for a second digitalWrite(led3, LOW); // turn the LED off by making the voltage LOW delay(150); pinMode (led3, OUTPUT); digitalWrite(led3, HIGH); // turn the LED on (HIGH is the voltage level) delay(1500); // wait for a second digitalWrite(led3, LOW); // turn the LED off by making the voltage LOW delay(150);
  • 62. pinMode (led3, OUTPUT); digitalWrite(led3, HIGH); // turn the LED on (HIGH is the voltage level) delay(1500); // wait for a second digitalWrite(led3, LOW); // turn the LED off by making the voltage LOW delay(150); pinMode (led3, OUTPUT); digitalWrite(led3, HIGH); // turn the LED on (HIGH is the voltage level) delay(1500); // wait for a second digitalWrite(led3, LOW); // turn the LED off by making the voltage LOW delay(150); pinMode (led3, OUTPUT); digitalWrite(led3, HIGH); // turn the LED on (HIGH is the voltage level) delay(1500); // wait for a second digitalWrite(led3, LOW); // turn the LED off by making the voltage LOW delay(150); pinMode (led3, OUTPUT); digitalWrite(led3, HIGH); // turn the LED on (HIGH is the voltage level) delay(1500); // wait for a second digitalWrite(led3, LOW); // turn the LED off by making the voltage LOW delay(150); pinMode (led3, OUTPUT); digitalWrite(led3, HIGH); // turn the LED on (HIGH is the voltage level) delay(1500); // wait for a second
  • 63. digitalWrite(led3, LOW); // turn the LED off by making the voltage LOW delay(150); pinMode (led3, OUTPUT); //led2 digitalWrite(led2, HIGH); // turn the LED on (HIGH is the voltage level) delay(1500); // wait for a second digitalWrite(led2, LOW); // turn the LED off by making the voltage LOW delay(150); pinMode (led2, OUTPUT); digitalWrite(led2, HIGH); // turn the LED on (HIGH is the voltage level) delay(1500); // wait for a second digitalWrite(led2, LOW); // turn the LED off by making the voltage LOW delay(150); pinMode (led2, OUTPUT); digitalWrite(led2, HIGH); // turn the LED on (HIGH is the voltage level) delay(1500); // wait for a second digitalWrite(led2, LOW); // turn the LED off by making the voltage LOW delay(150); pinMode (led2, OUTPUT); digitalWrite(led2, HIGH); // turn the LED on (HIGH is the voltage level) delay(1500); // wait for a second digitalWrite(led2, LOW); // turn the LED off by making the voltage LOW delay(150); pinMode (led2, OUTPUT);
  • 64. digitalWrite(led2, HIGH); // turn the LED on (HIGH is the voltage level) delay(1500); // wait for a second digitalWrite(led2, LOW); // turn the LED off by making the voltage LOW delay(150); pinMode (led2, OUTPUT); digitalWrite(led2, HIGH); // turn the LED on (HIGH is the voltage level) delay(1500); // wait for a second digitalWrite(led2, LOW); // turn the LED off by making the voltage LOW delay(150); pinMode (led2, OUTPUT); digitalWrite(led2, HIGH); // turn the LED on (HIGH is the voltage level) delay(1500); // wait for a second digitalWrite(led2, LOW); // turn the LED off by making the voltage LOW delay(150); pinMode (led2, OUTPUT); digitalWrite(led2, HIGH); // turn the LED on (HIGH is the voltage level) delay(1500); // wait for a second digitalWrite(led2, LOW); // turn the LED off by making the voltage LOW delay(150); pinMode (led2, OUTPUT); digitalWrite(led2, HIGH); // turn the LED on (HIGH is the voltage level) delay(1500); // wait for a second digitalWrite(led2, LOW); // turn the LED off by making the voltage LOW
  • 65. delay(150); pinMode (led2, OUTPUT); digitalWrite(led2, HIGH); // turn the LED on (HIGH is the voltage level) delay(1500); // wait for a second digitalWrite(led2, LOW); // turn the LED off by making the voltage LOW delay(150); pinMode (led2, OUTPUT); //led digitalWrite(led, HIGH); // turn the LED on (HIGH is the voltage level) delay(1500); // wait for a second digitalWrite(led, LOW); // turn the LED off by making the voltage LOW delay(150); pinMode (led, OUTPUT); digitalWrite(led, HIGH); // turn the LED on (HIGH is the voltage level) delay(1500); // wait for a second digitalWrite(led, LOW); // turn the LED off by making the voltage LOW delay(150); pinMode (led, OUTPUT); digitalWrite(led, HIGH); // turn the LED on (HIGH is the voltage level) delay(1500); // wait for a second digitalWrite(led, LOW); // turn the LED off by making the voltage LOW delay(150); pinMode (led, OUTPUT);
  • 66. digitalWrite(led, HIGH); // turn the LED on (HIGH is the voltage level) delay(1500); // wait for a second digitalWrite(led, LOW); // turn the LED off by making the voltage LOW delay(150); pinMode (led, OUTPUT); digitalWrite(led, HIGH); // turn the LED on (HIGH is the voltage level) delay(1500); // wait for a second digitalWrite(led, LOW); // turn the LED off by making the voltage LOW delay(150); pinMode (led, OUTPUT); digitalWrite(led, HIGH); // turn the LED on (HIGH is the voltage level) delay(1500); // wait for a second digitalWrite(led, LOW); // turn the LED off by making the voltage LOW delay(150); pinMode (led, OUTPUT); digitalWrite(led, HIGH); // turn the LED on (HIGH is the voltage level) delay(1500); // wait for a second digitalWrite(led, LOW); // turn the LED off by making the voltage LOW delay(150); pinMode (led, OUTPUT); digitalWrite(led, HIGH); // turn the LED on (HIGH is the voltage level) delay(1500); // wait for a second digitalWrite(led, LOW); // turn the LED off by making the voltage LOW delay(150);
  • 67. pinMode (led, OUTPUT); digitalWrite(led, HIGH); // turn the LED on (HIGH is the voltage level) delay(1500); // wait for a second digitalWrite(led, LOW); // turn the LED off by making the voltage LOW delay(150); pinMode (led, OUTPUT); digitalWrite(led, HIGH); // turn the LED on (HIGH is the voltage level) delay(1500); // wait for a second digitalWrite(led, LOW); // turn the LED off by making the voltage LOW delay(150); pinMode (led, OUTPUT); // pract.11 led digitalWrite(led, HIGH); // turn the LED on (HIGH is the voltage level) delay(1500); // wait for a second digitalWrite(led, LOW); // turn the LED off by making the voltage LOW delay(150); // wait for a second pinMode(led,OUTPUT); digitalWrite(led, HIGH); // turn the LED on (HIGH is the voltage level) delay(1500); // wait for a second digitalWrite(led, LOW); // turn the LED off by making the voltage LOW delay(150); // wait for a second pinMode(led,OUTPUT); digitalWrite(led, HIGH); // turn the LED on (HIGH is the voltage level)
  • 68. delay(1500); // wait for a second digitalWrite(led, LOW); // turn the LED off by making the voltage LOW delay(150); // wait for a second pinMode(led,OUTPUT); digitalWrite(led, HIGH); // turn the LED on (HIGH is the voltage level) delay(1500); // wait for a second digitalWrite(led, LOW); // turn the LED off by making the voltage LOW delay(150); // wait for a second pinMode(led,OUTPUT); digitalWrite(led, HIGH); // turn the LED on (HIGH is the voltage level) delay(1500); // wait for a second digitalWrite(led, LOW); // turn the LED off by making the voltage LOW delay(150); // wait for a second pinMode(led,OUTPUT); digitalWrite(led, HIGH); // turn the LED on (HIGH is the voltage level) delay(1500); // wait for a second digitalWrite(led, LOW); // turn the LED off by making the voltage LOW delay(150); // wait for a second pinMode(led,OUTPUT); digitalWrite(led, HIGH); // turn the LED on (HIGH is the voltage level) delay(1500); // wait for a second digitalWrite(led, LOW); // turn the LED off by making the voltage LOW delay(150); // wait for a second pinMode(led,OUTPUT);
  • 69. digitalWrite(led, HIGH); // turn the LED on (HIGH is the voltage level) delay(1500); // wait for a second digitalWrite(led, LOW); // turn the LED off by making the voltage LOW delay(150); // wait for a second pinMode(led,OUTPUT); digitalWrite(led, HIGH); // turn the LED on (HIGH is the voltage level) delay(1500); // wait for a second digitalWrite(led, LOW); // turn the LED off by making the voltage LOW delay(150); // wait for a second pinMode(led,OUTPUT); digitalWrite(led, HIGH); // turn the LED on (HIGH is the voltage level) delay(1500); // wait for a second digitalWrite(led, LOW); // turn the LED off by making the voltage LOW delay(150); // wait for a second pinMode(led,OUTPUT); //led3 digitalWrite(led3, HIGH); // turn the LED on (HIGH is the voltage level) delay(1500); // wait for a second digitalWrite(led3, LOW); // turn the LED off by making the voltage LOW delay(150); // wait for a second pinMode(led3,OUTPUT); digitalWrite(led3, HIGH); // turn the LED on (HIGH is the voltage level) delay(1500); // wait for a second
  • 70. digitalWrite(led3, LOW); // turn the LED off by making the voltage LOW delay(150); // wait for a second pinMode(led3,OUTPUT); digitalWrite(led3, HIGH); // turn the LED on (HIGH is the voltage level) delay(1500); // wait for a second digitalWrite(led3, LOW); // turn the LED off by making the voltage LOW delay(150); // wait for a second pinMode(led3,OUTPUT); digitalWrite(led3, HIGH); // turn the LED on (HIGH is the voltage level) delay(1500); // wait for a second digitalWrite(led3, LOW); // turn the LED off by making the voltage LOW delay(150); // wait for a second pinMode(led3,OUTPUT); digitalWrite(led3, HIGH); // turn the LED on (HIGH is the voltage level) delay(1500); // wait for a second digitalWrite(led3, LOW); // turn the LED off by making the voltage LOW delay(150); // wait for a second pinMode(led3,OUTPUT); digitalWrite(led3, HIGH); // turn the LED on (HIGH is the voltage level) delay(1500); // wait for a second digitalWrite(led3, LOW); // turn the LED off by making the voltage LOW delay(150); // wait for a second pinMode(led3,OUTPUT);
  • 71. digitalWrite(led3, HIGH); // turn the LED on (HIGH is the voltage level) delay(1500); // wait for a second digitalWrite(led3, LOW); // turn the LED off by making the voltage LOW delay(150); // wait for a second pinMode(led3,OUTPUT); digitalWrite(led3, HIGH); // turn the LED on (HIGH is the voltage level) delay(1500); // wait for a second digitalWrite(led3, LOW); // turn the LED off by making the voltage LOW delay(150); // wait for a second pinMode(led3,OUTPUT); digitalWrite(led3, HIGH); // turn the LED on (HIGH is the voltage level) delay(1500); // wait for a second digitalWrite(led3, LOW); // turn the LED off by making the voltage LOW delay(150); // wait for a second pinMode(led3,OUTPUT); digitalWrite(led3, HIGH); // turn the LED on (HIGH is the voltage level) delay(1500); // wait for a second digitalWrite(led3, LOW); // turn the LED off by making the voltage LOW delay(150); // wait for a second pinMode(led3,OUTPUT); //led5 digitalWrite(led5, HIGH); // turn the LED on (HIGH is the voltage level) delay(1500); // wait for a second digitalWrite(led5, LOW); // turn the LED off by making the voltage LOW
  • 72. delay(150); // wait for a second pinMode(led5,OUTPUT); digitalWrite(led5, HIGH); // turn the LED on (HIGH is the voltage level) delay(1500); // wait for a second digitalWrite(led5, LOW); // turn the LED off by making the voltage LOW delay(150); // wait for a second pinMode(led5,OUTPUT); digitalWrite(led5, HIGH); // turn the LED on (HIGH is the voltage level) delay(1500); // wait for a second digitalWrite(led5, LOW); // turn the LED off by making the voltage LOW delay(150); // wait for a second pinMode(led5,OUTPUT); digitalWrite(led5, HIGH); // turn the LED on (HIGH is the voltage level) delay(1500); // wait for a second digitalWrite(led5, LOW); // turn the LED off by making the voltage LOW delay(150); // wait for a second pinMode(led5,OUTPUT); digitalWrite(led5, HIGH); // turn the LED on (HIGH is the voltage level) delay(1500); // wait for a second digitalWrite(led5, LOW); // turn the LED off by making the voltage LOW
  • 73. delay(150); // wait for a second pinMode(led5,OUTPUT); digitalWrite(led5, HIGH); // turn the LED on (HIGH is the voltage level) delay(1500); // wait for a second digitalWrite(led5, LOW); // turn the LED off by making the voltage LOW delay(150); // wait for a second pinMode(led5,OUTPUT); digitalWrite(led5, HIGH); // turn the LED on (HIGH is the voltage level) delay(1500); // wait for a second digitalWrite(led5, LOW); // turn the LED off by making the voltage LOW delay(150); // wait for a second pinMode(led5,OUTPUT); digitalWrite(led5, HIGH); // turn the LED on (HIGH is the voltage level) delay(1500); // wait for a second digitalWrite(led5, LOW); // turn the LED off by making the voltage LOW delay(150); // wait for a second pinMode(led5,OUTPUT); digitalWrite(led5, HIGH); // turn the LED on (HIGH is the voltage level) delay(1500); // wait for a second digitalWrite(led5, LOW); // turn the LED off by making the voltage LOW delay(150); // wait for a second pinMode(led5,OUTPUT); digitalWrite(led5, HIGH); // turn the LED on (HIGH is the voltage level)
  • 74. delay(1500); // wait for a second digitalWrite(led5, LOW); // turn the LED off by making the voltage LOW delay(150); // wait for a second pinMode(led5,OUTPUT); // pract.12 led5 digitalWrite(led5, HIGH); // turn the LED on (HIGH is the voltage level) delay(1500); // wait for a second digitalWrite(led5, LOW); // turn the LED off by making the voltage LOW delay(150); // wait for a second pinMode(led5,OUTPUT); digitalWrite(led5, HIGH); // turn the LED on (HIGH is the voltage level) delay(1500); // wait for a second digitalWrite(led5, LOW); // turn the LED off by making the voltage LOW delay(150); // wait for a second pinMode(led5,OUTPUT); digitalWrite(led5, HIGH); // turn the LED on (HIGH is the voltage level) delay(1500); // wait for a second digitalWrite(led5, LOW); // turn the LED off by making the voltage LOW delay(150); // wait for a second pinMode(led5,OUTPUT); digitalWrite(led5, HIGH); // turn the LED on (HIGH is the voltage level) delay(1500); // wait for a second digitalWrite(led5, LOW); // turn the LED off by making the voltage LOW delay(150); // wait for a second
  • 75. pinMode(led5,OUTPUT); digitalWrite(led5, HIGH); // turn the LED on (HIGH is the voltage level) delay(1500); // wait for a second digitalWrite(led5, LOW); // turn the LED off by making the voltage LOW delay(150); // wait for a second pinMode(led5,OUTPUT); digitalWrite(led5, HIGH); // turn the LED on (HIGH is the voltage level) delay(1500); // wait for a second digitalWrite(led5, LOW); // turn the LED off by making the voltage LOW delay(150); // wait for a second pinMode(led5,OUTPUT); digitalWrite(led5, HIGH); // turn the LED on (HIGH is the voltage level) delay(1500); // wait for a second digitalWrite(led5, LOW); // turn the LED off by making the voltage LOW delay(150); // wait for a second pinMode(led5,OUTPUT); digitalWrite(led5, HIGH); // turn the LED on (HIGH is the voltage level) delay(1500); // wait for a second digitalWrite(led5, LOW); // turn the LED off by making the voltage LOW delay(150); // wait for a second pinMode(led5,OUTPUT); digitalWrite(led5, HIGH); // turn the LED on (HIGH is the voltage level) delay(1500); // wait for a second
  • 76. digitalWrite(led5, LOW); // turn the LED off by making the voltage LOW delay(150); // wait for a second pinMode(led5,OUTPUT); digitalWrite(led5, HIGH); // turn the LED on (HIGH is the voltage level) delay(1500); // wait for a second digitalWrite(led5, LOW); // turn the LED off by making the voltage LOW delay(150); // wait for a second pinMode(led5,OUTPUT); //led3 digitalWrite(led3, HIGH); // turn the LED on (HIGH is the voltage level) delay(1500); // wait for a second digitalWrite(led3, LOW); // turn the LED off by making the voltage LOW delay(150); // wait for a second pinMode(led3,OUTPUT); digitalWrite(led3, HIGH); // turn the LED on (HIGH is the voltage level) delay(1500); // wait for a second digitalWrite(led3, LOW); // turn the LED off by making the voltage LOW delay(150); // wait for a second pinMode(led3,OUTPUT); digitalWrite(led3, HIGH); // turn the LED on (HIGH is the voltage level) delay(1500); // wait for a second digitalWrite(led3, LOW); // turn the LED off by making the voltage LOW delay(150); // wait for a second pinMode(led3,OUTPUT);
  • 77. digitalWrite(led3, HIGH); // turn the LED on (HIGH is the voltage level) delay(1500); // wait for a second digitalWrite(led3, LOW); // turn the LED off by making the voltage LOW delay(150); // wait for a second pinMode(led3,OUTPUT); digitalWrite(led3, HIGH); // turn the LED on (HIGH is the voltage level) delay(1500); // wait for a second digitalWrite(led3, LOW); // turn the LED off by making the voltage LOW delay(150); // wait for a second pinMode(led3,OUTPUT); digitalWrite(led3, HIGH); // turn the LED on (HIGH is the voltage level) delay(1500); // wait for a second digitalWrite(led3, LOW); // turn the LED off by making the voltage LOW delay(150); // wait for a second pinMode(led3,OUTPUT); digitalWrite(led3, HIGH); // turn the LED on (HIGH is the voltage level) delay(1500); // wait for a second digitalWrite(led3, LOW); // turn the LED off by making the voltage LOW delay(150); // wait for a second pinMode(led3,OUTPUT); digitalWrite(led3, HIGH); // turn the LED on (HIGH is the voltage level) delay(1500); // wait for a second digitalWrite(led3, LOW); // turn the LED off by making the voltage LOW
  • 78. delay(150); // wait for a second pinMode(led3,OUTPUT); digitalWrite(led3, HIGH); // turn the LED on (HIGH is the voltage level) delay(1500); // wait for a second digitalWrite(led3, LOW); // turn the LED off by making the voltage LOW delay(150); // wait for a second pinMode(led3,OUTPUT); digitalWrite(led3, HIGH); // turn the LED on (HIGH is the voltage level) delay(1500); // wait for a second digitalWrite(led3, LOW); // turn the LED off by making the voltage LOW delay(150); // wait for a second pinMode(led3,OUTPUT); //led digitalWrite(led, HIGH); // turn the LED on (HIGH is the voltage level) delay(1500); // wait for a second digitalWrite(led, LOW); // turn the LED off by making the voltage LOW delay(150); // wait for a second pinMode(led,OUTPUT); digitalWrite(led, HIGH); // turn the LED on (HIGH is the voltage level) delay(1500); // wait for a second digitalWrite(led, LOW); // turn the LED off by making the voltage LOW delay(150); // wait for a second pinMode(led,OUTPUT);
  • 79. digitalWrite(led, HIGH); // turn the LED on (HIGH is the voltage level) delay(1500); // wait for a second digitalWrite(led, LOW); // turn the LED off by making the voltage LOW delay(150); // wait for a second pinMode(led,OUTPUT); digitalWrite(led, HIGH); // turn the LED on (HIGH is the voltage level) delay(1500); // wait for a second digitalWrite(led, LOW); // turn the LED off by making the voltage LOW delay(150); // wait for a second pinMode(led,OUTPUT); digitalWrite(led, HIGH); // turn the LED on (HIGH is the voltage level) delay(1500); // wait for a second digitalWrite(led, LOW); // turn the LED off by making the voltage LOW delay(150); // wait for a second pinMode(led,OUTPUT); digitalWrite(led, HIGH); // turn the LED on (HIGH is the voltage level) delay(1500); // wait for a second digitalWrite(led, LOW); // turn the LED off by making the voltage LOW delay(150); // wait for a second pinMode(led,OUTPUT); digitalWrite(led, HIGH); // turn the LED on (HIGH is the voltage level) delay(1500); // wait for a second digitalWrite(led, LOW); // turn the LED off by making the voltage LOW delay(150); // wait for a second
  • 80. pinMode(led,OUTPUT); digitalWrite(led, HIGH); // turn the LED on (HIGH is the voltage level) delay(1500); // wait for a second digitalWrite(led, LOW); // turn the LED off by making the voltage LOW delay(150); // wait for a second pinMode(led,OUTPUT); digitalWrite(led, HIGH); // turn the LED on (HIGH is the voltage level) delay(1500); // wait for a second digitalWrite(led, LOW); // turn the LED off by making the voltage LOW delay(150); // wait for a second pinMode(led,OUTPUT); digitalWrite(led, HIGH); // turn the LED on (HIGH is the voltage level) delay(1500); // wait for a second digitalWrite(led, LOW); // turn the LED off by making the voltage LOW delay(150); // wait for a second pinMode(led,OUTPUT); } Desarrollo Para la correcta programación y funcionamiento de esta práctica se utilizaran: - Arduino uno - Protoboard - Leds - Cables Llevaremos a cavo una modificación en nuestro programa en base a la practica 14, mediante la programación de esta y añadiendo mas líneas a nuestro programa aremos que 5 leds ya antes dispuestos y configurados en dicha practica 14
  • 81. enciendan cada uno de ellos 10 veces, al hacer esto cada uno saltara al siguiente, al siguiente y al siguiente hasta terminar y vuelva a iniciar nuestro programa desde sus primeras línea. Para ello se llevara a cabo la modificación de nuestra practica 14 y fusionando parte de la 6 o 5 ya dependiendo el gusto de cada quien, para declarar nuestras 5 salidas para que se influya y realice todo nuestro proceso para que se cumpla nuestro objetivo tendrá que ver y hacerse en el void o bucle de funcionamiento que llevara toda la etapa de funcionamiento que realizara uno por uno los diferentes procesos que se requieran para que no haya problema, además de que cambiaremos la frecuencia de su velocidad con las debidas etiquetas que dará la salida a nuestros ya mencionados pines. Posterior mente llevaremos a cabo el montado y conectado de nuestra rotoboard con arduino y cada uno de sus componentes ara que esta pueda funcionar adecuada mente, dándonos como resultado la siguiente imagen: Practica 16 Objetivo Este ejercicio deberá realizar un rayo de luz que valla de derecha a izquierda, o más poéticamente, una estrella fugaz, moviéndose a través de una línea de LED- s. Podremos configurar tanto la velocidad de la estrella, así como la longitud de la cola. No es muy elegante porque la cola brilla con la misma intensidad que la estrella, y al final, parecerá como si un rayo sólido cruzase la línea de LED-s, esto se realizara con el ya mencionado lenguaje de programación de arduino, siguiendo el siguiente programa: // Variable declaración // Declaración de los PIN-es mediante un array
  • 82. int pinArray [] = { 2,3,4,5,6,7,8,9,10,11, }; int controlLed = 12; // LED de control int waitNextLed = 100; // Tiempo antes de encender el siguiente LED // Número de LED-s que permanecen encendidos antes de empezar a apagarlos para //formar la cola int tailLength = 4; // Número de LED-s conectados (que es también el tamaño del array) int lineSize = 10; void setup() // Configuración de los PIN-es como salida digital { int i; pinMode (controlLed, OUTPUT); for (i=0; i< lineSize; i++) { pinMode(pinArray[i], OUTPUT); } } void loop() { int i; // Se establece la longitud de la cola en un contador int tailCounter = tailLength; // Se enciende el LED de control para indicar el inicio del loop digitalWrite(controlLed, HIGH); for (i=0; i<lineSize; i++) { digitalWrite(pinArray[i],HIGH); // Se encienden consecutivamente los LED // Esta variable de tiempo controla la velocidad a la que se mueve la estrella
  • 83. delay(waitNextLed); if (tailCounter == 0) { // Se apagan los LED-s en función de la longitud de la cola. digitalWrite(pinArray[i-tailLength],LOW); } else if (tailCounter > 0) tailCounter--; } for (i=(lineSize-tailLength); i<lineSize; i++) { digitalWrite(pinArray[i],LOW); // Se apagan los LED // Esta variable de tiempo controla la velocidad a la que se mueve la estrella delay(waitNextLed); } } Desarrollo Hay que conectar 11 LED-s a los pines digitales de la placa a través de resistencias de220 Ohmios tal y como se muestra en la imagen superior. El programa comienza encendiendo LED-s hasta que llegue al número de LED-s establecido para la cola. En ese momento seguirá encendiendo LED-s hacia la izquierda (si se monta tal y como se muestra en la fotografía inferior), para mantener el movimiento de la estrella, al mismo tiempo que apaga LED-s por la derecha, para asegurarnos de que vemos la cola. De otra forma seguiría encendiendo LED-s hasta encenderlos todos. Esto ocurre cuando el tamaño de la cola es igual o mayor que el número de LED-s. El tamaño de la cola debería ser relativamente pequeño en comparación con el número de LED-s de forma que podamos ver la estrella.
  • 84. Posterior mente llevaremos a cabo el montado y conectado de nuestra protoboard con arduino y cada uno de sus componentes ara que esta pueda funcionar adecuada mente, dándonos como resultado la siguiente imagen: Practica 17 Objetivo Este ejercicio deberá realizar un rayo de luz que valla de izquierda a derecha, en la misma estrella fugaz, moviéndose a través de una línea de LED-s. Podremos configurar tanto la velocidad de la estrella, así como la longitud de la cola. No es muy elegante porque la cola brilla con la misma intensidad que la estrella, y al final, parecerá como si un rayo sólido cruzase la línea de LED-s, esto se realizara con el ya mencionado lenguaje de programación de arduino, siguiendo el siguiente programa:
  • 85. // Variable declaración // Declaración de los PIN-es mediante un array int pinArray [] = { 11,10,9,8,7,6,5,4,3,2, }; int controlLed = 12; // LED de control int waitNextLed = 100; // Tiempo antes de encender el siguiente LED // Número de LED-s que permanecen encendidos antes de empezar a apagarlos para //formar la cola int tailLength = 4; // Número de LED-s conectados (que es también el tamaño del array) int lineSize = 10; void setup() // Configuración de los PIN-es como salida digital { int i; pinMode (controlLed, OUTPUT); for (i=0; i< lineSize; i++) { pinMode(pinArray[i], OUTPUT); } } void loop() { int i; // Se establece la longitud de la cola en un contador int tailCounter = tailLength; // Se enciende el LED de control para indicar el inicio del loop digitalWrite(controlLed, HIGH); for (i=0; i<lineSize; i++)
  • 86. { digitalWrite(pinArray[i],HIGH); // Se encienden consecutivamente los LED // Esta variable de tiempo controla la velocidad a la que se mueve la estrella delay(waitNextLed); if (tailCounter == 0) { // Se apagan los LED-s en función de la longitud de la cola. digitalWrite(pinArray[i-tailLength],LOW); } else if (tailCounter > 0) tailCounter--; } for (i=(lineSize-tailLength); i<lineSize; i++) { digitalWrite(pinArray[i],LOW); // Se apagan los LED // Esta variable de tiempo controla la velocidad a la que se mueve la estrella delay(waitNextLed); } } Desarrollo Hay que conectar 11 LED-s a los pines digitales de la placa a través de resistencias de220 Ohmios tal y como se muestra en la imagen superior. El programa comienza encendiendo LED-s hasta que llegue al número de LED-s establecido para la cola pero a la inversa de nuestra practica 16. En ese momento seguirá encendiendo LED-s hacia la izquierda (si se monta tal y como se muestra en la fotografía inferior), para mantener el movimiento de la estrella, al mismo tiempo que apaga LED-s por la derecha, para
  • 87. asegurarnos de que vemos la cola. De otra forma seguiría encendiendo LED-s hasta encenderlos todos. Esto ocurre cuando el tamaño de la cola es igual o mayor que el número de LED-s. El tamaño de la cola debería ser relativamente pequeño en comparación con el número de LED-s de forma que podamos ver la estrella. Posterior mente llevaremos a cabo el montado y conectado de nuestra protoboard con arduino y cada uno de sus componentes ara que esta pueda funcionar adecuada mente, dándonos como resultado la siguiente imagen: Practica 18 Objetivo Este ejercicio deberá realizar en conjunto de esta practica “estrella fugaz” el conjunto de la practica 13, que ha sido la unión de la practica 9, 10, 11 y 12, todas estas en una sola, el corrimiento de leds de derecha a izquierda con los 5, luego de izquierda a derecha, como posterior mente con solo 3 leds de derecha a izquierda y viceversa para abrir paso a la estrella fugaz que se moverá a través
  • 88. de una línea de LED-s que parecerá como si un rayo sólido cruzase la línea de LED-s, esto se realizara con el ya mencionado lenguaje de programación de arduino, siguiendo el siguiente programa: const int led1 = 2; const int led2 = 3; const int led3 = 4; const int led4 = 5; const int led5 = 6; int pinArray [] = { 2,3,4,5,6,7,8,9,10,11,11,10,9,8,7,6,5,4,3,2 }; int controlLed = 12; // LED de control int waitNextLed = 100; // Tiempo antes de encender el siguiente LED // Número de LED-s que permanecen encendidos antes de empezar a apagarlos para //formar la cola int tailLength = 4; // Número de LED-s conectados (que es también el tamaño del array) int lineSize = 22; void setup () { pinMode (led1, OUTPUT); //Digital, como salida pinMode (led2, OUTPUT); //Digital, como salida pinMode (led3, OUTPUT); //Digital, como salida pinMode (led4, OUTPUT); //Digital, como salida pinMode (led5, OUTPUT); //Digital, como salida { int i;
  • 89. pinMode (controlLed, OUTPUT); for (i=0; i< lineSize; i++) { pinMode(pinArray[i], OUTPUT); } } } void loop () { //pract 9 digitalWrite(led1, HIGH); // Apaga y enciende los leds cada 200 ms delay(500); digitalWrite(led1, LOW); digitalWrite(led2, HIGH); delay(500); digitalWrite(led2, LOW); digitalWrite(led3, HIGH); delay(500); digitalWrite(led3, LOW); digitalWrite(led4, HIGH); delay(500); digitalWrite(led4, LOW); digitalWrite(led5, HIGH); delay(500); digitalWrite(led5, LOW);
  • 90. //Practica 10 digitalWrite(led5, HIGH); // Apaga y enciende los leds cada 200 ms delay(500); digitalWrite(led5, LOW); digitalWrite(led4, HIGH); delay(500); digitalWrite(led4, LOW); digitalWrite(led3, HIGH); delay(500); digitalWrite(led3, LOW); digitalWrite(led2, HIGH); delay(500); digitalWrite(led2, LOW); digitalWrite(led1, HIGH); delay(500); digitalWrite(led1, LOW); //Practica 11 digitalWrite(led1, HIGH); // Apaga y enciende los leds cada 200 ms delay(500); digitalWrite(led1, LOW); digitalWrite(led3, HIGH); delay(500); digitalWrite(led3, LOW); digitalWrite(led5, HIGH); delay(500); digitalWrite(led5, LOW);
  • 91. //Practica 12 digitalWrite(led5, HIGH); // Apaga y enciende los leds cada 200 ms delay(500); digitalWrite(led5, LOW); digitalWrite(led3, HIGH); delay(500); digitalWrite(led3, LOW); digitalWrite(led1, HIGH); delay(500); digitalWrite(led1, LOW); ////////////////////////////////////////practica 18 ida y vuelta int i; // Se establece la longitud de la cola en un contador int tailCounter = tailLength; // Se enciende el LED de control para indicar el inicio del loop digitalWrite(controlLed, HIGH); for (i=0; i<lineSize; i++) { digitalWrite(pinArray[i],HIGH); // Se encienden consecutivamente los LED // Esta variable de tiempo controla la velocidad a la que se mueve la estrella delay(waitNextLed); if (tailCounter == 0) {
  • 92. // Se apagan los LED-s en función de la longitud de la cola. digitalWrite(pinArray[i-tailLength],LOW); } else if (tailCounter > 0) tailCounter--; } for (i=(lineSize-tailLength); i<lineSize; i++) { digitalWrite(pinArray[i],LOW); // Se apagan los LED // Esta variable de tiempo controla la velocidad a la que se mueve la estrella delay(waitNextLed); } } Desarrollo Se conectaran 10 leds, de los cuales primera mente se ejecutaran nuestras primeras 4 practicas solo con la mitad de ellos por medio de los pines digitales de la placa. El programa comenzara con el encendido de 5 led de derecha a izquierda, para continuar con el mismo proceso pero ahora de izquierda a derecha y luego lo hará con 3 leds, para posterior mente encender y abrirle paso al corrimiento de leds de la estrella fugaz encendiendo LED-s hasta que llegue al número de LED-s
  • 93. establecido para la cola. En ese momento seguirá encendiendo LED-s hacia la izquierda, para mantener el movimiento de la estrella, al mismo tiempo que apaga LED-s por la derecha, para asegurarnos de que vemos la cola. De otra forma seguiría encendiendo LED-s hasta encenderlos todos. Esto ocurre cuando el tamaño de la cola es igual o mayor que el número de LED-s. El tamaño de la cola debería ser relativamente pequeño en comparación con el número de LED-s de forma que podamos ver la estrella. Posterior mente llevaremos a cabo el montado y conectado de nuestra protoboard con arduino y cada uno de sus componentes ara que esta pueda funcionar adecuada mente, dándonos como resultado la siguiente imagen: