SlideShare uma empresa Scribd logo
1 de 7
Baixar para ler offline
Motion Sensor PSP05
The motion sensor PSP05 has PIR function, based on Z-WaveTM
technology.
This device is a Security Enabled Z-Wave Plus Product. Z-WaveTM
is a
wireless communication protocol designed for home automation,
specifically to remotely control applications in residential and light
commercial environments. The technology uses a low-power RF radio
embedded or retrofitted into home electronics devices and systems,
such as lighting, home access control, entertainment systems and
household appliances.
This product can be included and operated in any Z-WaveTM
network
with other Z-WaveTM
certified devices from other manufacturers and/or
other applications. All non-battery operated nodes within the network
will act as repeaters regardless of vendor to increase reliability of the
network.
The device adopt the Z-WaveTM
500 series chip, when your Z-WaveTM
network system is all made by Z-WaveTM
500 series devices. The
network system will have the advantages as below.
• Concurrent multi-channel support reduces external interference.
• Better RF range, improve about 10 meters in indoor.
• Support 100 Kbps transmit speed, speed up communication.
Add to/Remove from Z-WaveTM
Network
There are two keys in the device, one is tamper key, another is a
button. Button can add, remove, reset or association from Z-WaveTM
network.
In the first time, add the device into the Z-WaveTM
network. First, make
sure the primary controller is in the add mode. And then power on the
device, just take out the insulation Mylar in the back side of the device.
The device will auto start the NWI (Network Wide Inclusion) mode. And
it should be included in 5 seconds. You will see the LED light ON one
second.
Notice: Including a node ID allocated by Z-WaveTM
Controller means
“Add” or “Inclusion”. Excluding a node ID allocated by Z-WaveTM
Controller means “Remove” or “Exclusion”.
Function Description
Add
1. Have Z-WaveTM
Controller entered inclusion mode.
2. Pressing button once to enter the inclusion mode.
3. After add successful, the device will wake to
receive the setting command from Z-WaveTM
Controller about 20 seconds.
Remove
1. Have Z-WaveTM
Controller entered exclusion mode.
2. Pressing button once to enter the exclusion mode.
Node ID has been excluded.
1
Reset
Notice: Use this procedure only in the event
that the primary controller is lost or
otherwise inoperable.
1. Pressing button for about 5 seconds.
2. IDs are excluded and all settings will reset to
factory default.
Association
1. Have Z-WaveTM
Controller entered association
mode.
2. Pressing button one time to enter the association
mode.
Note: The device support 2 groups. The group 1 is for
receiving the report message, like triggered event,
temperature, illumination etc. The group 2 is for light
control, the device will send the “Basic Set” command
to this group. And each group support 8 nodes
maximum.
• Failed or success in add/remove the node ID can be viewed
from Z-WaveTM
Controller.
Notice 1: Always RESET a Z-WaveTM
device before trying to add it to a
Z-WaveTM
network
Notice 2: When the device into NWI mode, the sensor functionality
will useless. The NWI mode will timeout after 30 seconds. You can
press the button one time to abort the NWI mode.
Z-WaveTM
Notification
After the device adding to the network, it will wake-up once per day in
default. When it wake-up it will broadcast the “Wake Up Notification”
message to the network, and wake-up 10 seconds for receive the
setting commands.
The wake-up interval minimum setting is 30 minutes, and maximum
setting is 120 hours. And the interval step is 30 minutes.
If the user want to wake-up the device immediately, please remove the
front cover, and press the button once. The device will wake-up 10
seconds.
Z-WaveTM
Message Report
When the PIR motion triggered, the device will report the trigger event
and also report the battery status.
In default the device will using Notification Report to represent the
trigger event, it can be changed to Sensor Binary Report by setting the
configuration NO. 7 Bit4 to 1.
* Motion Report:
When the PIR motion detected, the device will unsolicited to send the
report to the nodes in the group 1.
Notification Report (V4)
Notification Type: Home Security (0x07)
Event: Motion Detection, Unknown Location (0x08)
Sensor Binary Report (V2)
Sensor Type: Motion (0x0C)
Sensor Value: 0xFF
* Tamper Report:
When tamper key are pressed over 5 seconds. The device will into the
alarm state. In that state, if the tamper key is released, the device will
unsolicited to send the report to the nodes in the group 1.
Notification Report (V4)
Notification Type: Home Security (0x07)
Event: Tampering. Product covering removed (0x03)
Sensor Binary Report (V2)
2
Sensor Type: Tamper (0x08)
Sensor Value: 0xFF
* Timing Report:
Beside the event triggered could report message, the device also
support the timing unsolicited report of the status.
• Battery level report: Every 6 hours report once in default.
It could be changed by setting the configuration NO. 10.
• Low battery report: When the battery level is too low, every 30
minutes will report once.
Notice: The configuration NO. 10 could be setting to zero to disable
the auto report. And the configuration NO. 20 could change the tick
interval, the default value is 30, if setting to 1, that means the
minimum auto report interval will be one minute. And please notice if
setting this value to zero, that means disable all of the timing report
except the low battery detection.
Power Up Procedure
* Battery Power Check
When the device power up, the device will detect the power level of the
battery immediately. If the power level is too low, the LED will continue
flash about 5 seconds. Please change another new battery.
* PIR Warm Up
When the device power on, the PIR need to warm up before the
operation. The warm up time about 1 minute, the LED will flash in
every 2 seconds. After finish the procedure the LED will light ON three
times.
* NWI
When the device power on, the device will check is it already adding to
the network? If doesn't, it will auto start the NWI mode. The LED will
flash in every second and continue 30 seconds. Until timeout or the
device successful to inclusion by controller. The use can presses button
once to abort the NWI mode.
* Wake
When the device power on, the device will wake about 20 seconds. In
this duration, the controller can communicate with the device. Normally
the device is always sleeping to save the battery energy.
Security Network
The device support the security function. When the device included
with a security controller, the device will auto switch to the security
mode. In the security mode, the follow commands need using Security
CC wrapped to communicate, otherwise it will not response.
Note: A “Security Enabled Z-Wave Controller” must be used in order to
fully utilize this function.
COMMAND_CLASS_BATTERY
COMMAND_CLASS_NOTIFICATION_V4
COMMAND_CLASS_ASSOCIATION_V2
COMMAND_CLASS_CONFIGURATION
COMMAND_CLASS_SENSOR_BINARY_V2
COMMAND_CLASS_WAKE_UP_V2
Operation Mode
There are two modes “Test” and “Normal”. “Test Mode” is for the user
test the sensor function when installation.“Normal Mode” is for the
normal operation.
Operation Mode can be switched by pressing tamper key three times.
LED can indicate which mode it is. Lighting on one second means
entering test mode, flashing once means entering normal mode.
3
When the event triggered, normally the LED won't indicated, unless the
battery is in the low level, the LED will flash once. But in the “Test
Mode” the LED also will light ON one second.
When the event triggered, the device will report the messages to the
nodes in the group 1. The messages also include the battery level. The
user can switch the report by setting the configuration NO. 7 bit6
(battery).
When the event triggered, the device will emit the signal to turn ON the
lighting equipment, those nodes are in the group 2. And delay a while
to turn OFF the lighting equipment. The delay time is setting by the
configuration NO. 9.
The PIR motion re-detected interval, in the “Test Mode” fixed to 6
seconds. In the “Normal Mode”, it according to the setting of the
configuration NO. 8.
Choosing a Suitable Location
1. The recommended mounting height is 160cm
2. Don't let the device facing the window or the sunlight.
3. Don't let the device facing the source of heat. For instance the
heater or the air-condition.
Z-Wave Configuration Settings
Notice:
* All of the configuration, the data size is 1.
* The configuration mark with star(*), means after the remove the setting
still keep, don't reset to factory default. Unless the user execute the
“RESET” procedure.
* The reserve bit or not supported bit is allowed any value, but no effect.
Z-Wave Supported Command Class
COMMAND_CLASS_ZWAVEPLUS_INFO_V2
COMMAND_CLASS_BATTERY
COMMAND_CLASS_NOTIFICATION_V4
COMMAND_CLASS_ASSOCIATION_V2
COMMAND_CLASS_CONFIGURATION
COMMAND_CLASS_MANUFACTURER_SPECIFIC_V2
COMMAND_CLASS_VERSION_V2
COMMAND_CLASS_SENSOR_BINARY_V2
COMMAND_CLASS_WAKE_UP_V2
COMMAND_CLASS_ASSOCIATION_GRP_INFO
COMMAND_CLASS_POWERLEVEL
COMMAND_CLASS_DEVICE_RESET_LOCALLY
COMMAND_CLASS_MULTI_CMD
COMMAND_CLASS_SECURITY
4
NO
.
Name Def. Valid Description
2
Basic Set
Level
-1 All
Setting the BASIC command value to turn on
the light. -1(0xFF) means turn on the light.
For dimmer equipment 1 to 100 means the
light strength.
0 means turn off the light.
Caution: The range is from 0x00~0xFF
using hexadecimal notation.
3
(*)
PIR
Sensitivity
80 0 ~ 99
PIR sensitivity setting.
0 means disable the PIR motion.
1 means the lowest sensitivity,
99 means the highest sensitivity.
High sensitivity means can detected long
distance, but if there is more noise signal in
the environment, it will re-trigger too
frequency.
6
(*)
Mult-
Sensor
Function
Switch
5 All
Multisensor function switch. Using bit to
control.
Caution: The range is from 0x00~0xFF
using hexadecimal notation.
0 Bit0: Reserve.
0 Bit1: Reserve.
1 Bit2: Reserve.
0 Bit3: When Bit2 is 0 (Enable), Are the device
and the lighting in the same room?
0: In the same room(Default),
1: In the different room.
Notice: If this bit is 1, it is recommended
also set the Bit1 to 1, cause the PIR
triggered, doesn't mean the people in that
room.
NO
.
Name Def. Valid Description
0
Bit4: Disable delay 5 seconds to turn off the
light, when door/window closed. (1:Disable,
0:Enable)
0
Bit5: Disable auto turn off the light, after
door/window opened to turn on the light.
(1:Disable, 0:Enable)
Notice: If bit2 is zero, this setting is useless.
Notice: If the configuration No.9 is zero,
this setting is useless.
0 Bit6: Reserve.
0 Bit7: Reserve.
7
(*)
Customer
Function 4 All
Customer function switch, using bit control.
Caution: The range is from 0x00~0xFF
using hexadecimal notation.
0 Bit0: Reserve.
0
Bit1: Enable sending motion OFF report.
(0:Disable, 1:Enable)
Note: Depends on the Bit4,
0: Report Notification CC,
Type: 0x07, Event: 0xFE
1: Sensor Binary Report,
Type: 0x0C, Value: 0x00
1
Bit2: Enable PIR super sensitivity mode.
(0:Disable, 1:Enable)
0 Bit3: Reserve.
0 Bit4: Notification Type,
0: Using Notification Report.
1: Using Sensor Binary Report.
5
NO
.
Name Def. Valid Description
0
Bit5: Disable Multi CC in auto report.
(1:Disable, 0:Enable)
0
Bit6: Disable to report battery state when
the device triggered. (1:Disable, 0:Enable)
0 Bit7: Reserve.
8
PIR Re-
Detect
Interval
Time
3 1 ~ 127
In the normal mode, after the PIR motion
detected, setting the re-detect time. 8
seconds per tick, default tick is 3 (24
seconds).
Setting the suitable value to prevent received
the trigger signal too frequently. Also can
save the battery energy.
Notice: If this value bigger than the
configuration setting NO. 9. There is a period
after the light turned off and the PIR not
start detecting.
9
Turn Off
Light
Time
4 0 ~ 127
After turn on the lighting, setting the delay
time to turn off the lighting when the PIR
motion is not detected. 8 seconds per tick,
default tick is 4 (32 seconds).
0 means never send turn off light command.
10
Auto
Report
Battery
Time
12 0 ~ 127
The interval time for auto report the battery
level.
0 means turn off auto report battery.
The default value is 12. The tick time can
setting by the configuration No.20.
20
Auto Report
Tick
Interval
30 -128~127
The interval time for auto report each tick.
Setting this configuration will effect
configuration No.10.
NO
.
Name Def. Valid Description
The unit is 1 minute.
Caution1: Setting to 0 means turn off all
auto report function.
Caution2: The range is from 0x00~0xFF
using hexadecimal notation.
Specifications
Power by CR123A lithium battery.
Signal (Frequency):
868.40 MHz, 869.85 MHz(EU),
908.40 MHz, 916.00 MHz(US),
922~927 MHz(JP/TW),
921.40 MHz, 919.80 MHz(ANZ),
869.00 MHz(RU),
865.20 MHz(IN),
916.00 MHz(IL),
Range:
Minimum 40 meters indoor,
100 meters outdoor line of sight.
Operating Temperature: -10o
C ~ 40o
C
For indoor use only.
Specifications subject to change without notice due to continuing
product improvement.
6
FCC Interference Statement
This equipment has been tested and found to comply with the limits for
a Class B digital device, pursuant to Part 15 of the FCC Rules. These
limits are designed to provide reasonable protection against harmful
interference in a residential installation. This equipment generates, uses
and can radiate radio frequency energy and, if not installed and used in
accordance with the instructions, may cause harmful interference to
radio communications. However, there is no guarantee that
interference will not occur in a particular installation. If this equipment
does cause harmful interference to radio or television reception, which
can be determined by turning the equipment off and on, the user is
encouraged to try to correct the interference by one of the following
measures:
• Reorient or relocate the receiving antenna.
• Increase the separation between the equipment and receiver.
• Connect the equipment into an outlet on a circuit different from
that to which the receiver is connected.
• Consult the dealer or an experienced radio/TV technician for
help.
This device complies with Part 15 of the FCC Rules. Operation is subject
to the following two conditions:
(1) This device may not cause harmful interference, and
(2) This device must accept any interference received, including
interference that may cause undesired operation.
FCC Caution: Any changes or modifications not expressly approved by
the party responsible for compliance could void the user's authority to
operate this equipment.
This transmitter must not be co-located or operating in conjunction
with any other antenna or transmitter.
Warning
Do not dispose of electrical appliances as unsorted municipal waste,
use separate collection facilities. Contact your local government for
information regarding the collection systems available. If electrical
appliances are disposed of in landfills or dumps, hazardous substances
can leak into the groundwater and get into the food chain, damaging
your health and well-being.
When replacing old appliances with new once, the retailer is legally
obligated to take back your old appliance for disposal at least for free
of charge.
7

Mais conteúdo relacionado

Mais procurados

Kaipu Lm20 Z-Wave Plus door contact user guide
Kaipu Lm20 Z-Wave Plus door contact user guideKaipu Lm20 Z-Wave Plus door contact user guide
Kaipu Lm20 Z-Wave Plus door contact user guideDomotica daVinci
 
Everspring sp816 user manual
Everspring sp816 user manualEverspring sp816 user manual
Everspring sp816 user manualDomotica daVinci
 
Benext BE_SCENECTRL_manual_us
Benext BE_SCENECTRL_manual_usBenext BE_SCENECTRL_manual_us
Benext BE_SCENECTRL_manual_usDomotica daVinci
 
Ph psr03-zipato-z-wave-remote-user-manual
Ph psr03-zipato-z-wave-remote-user-manualPh psr03-zipato-z-wave-remote-user-manual
Ph psr03-zipato-z-wave-remote-user-manualDomotica daVinci
 
Aeotec Multisensor 7 Manual
Aeotec Multisensor 7 ManualAeotec Multisensor 7 Manual
Aeotec Multisensor 7 ManualDomotica daVinci
 
Mural Remote Z-Wave Plus Philio PSR04 Manual
Mural Remote Z-Wave Plus Philio PSR04 ManualMural Remote Z-Wave Plus Philio PSR04 Manual
Mural Remote Z-Wave Plus Philio PSR04 ManualDomotica daVinci
 
Orvibo all one_user_manual
Orvibo all one_user_manualOrvibo all one_user_manual
Orvibo all one_user_manualDomotica daVinci
 
Manual eurotronic comet_en
Manual eurotronic comet_enManual eurotronic comet_en
Manual eurotronic comet_enDomotica daVinci
 
Manual Opening Detector with temeperature sensor Z-Wave Plus Version 2- Fibaro
Manual Opening Detector with temeperature sensor Z-Wave Plus Version 2- FibaroManual Opening Detector with temeperature sensor Z-Wave Plus Version 2- Fibaro
Manual Opening Detector with temeperature sensor Z-Wave Plus Version 2- FibaroDomotica daVinci
 
Secure SRT322_User__Installation_instructions
Secure SRT322_User__Installation_instructionsSecure SRT322_User__Installation_instructions
Secure SRT322_User__Installation_instructionsDomotica daVinci
 
wiDom Smart Plug Manual EN
wiDom Smart Plug Manual ENwiDom Smart Plug Manual EN
wiDom Smart Plug Manual ENDomotica daVinci
 
Zipato zipabox backup_module_user_manual
Zipato zipabox backup_module_user_manualZipato zipabox backup_module_user_manual
Zipato zipabox backup_module_user_manualDomotica daVinci
 
Ph psm02-zipato-multisensor-quad-user-manual-v1.4
Ph psm02-zipato-multisensor-quad-user-manual-v1.4Ph psm02-zipato-multisensor-quad-user-manual-v1.4
Ph psm02-zipato-multisensor-quad-user-manual-v1.4Ana Roza Braña
 
Manual solar siren - popp_005107
Manual solar siren - popp_005107Manual solar siren - popp_005107
Manual solar siren - popp_005107Domotica daVinci
 
Eurotronic Spirit Radiator Thermostat Head Z-Wave Plus Manual
Eurotronic Spirit Radiator Thermostat Head Z-Wave Plus ManualEurotronic Spirit Radiator Thermostat Head Z-Wave Plus Manual
Eurotronic Spirit Radiator Thermostat Head Z-Wave Plus ManualDomotica daVinci
 
Manual AEO_ZW080-ZWEU Aeon Labs
Manual AEO_ZW080-ZWEU Aeon LabsManual AEO_ZW080-ZWEU Aeon Labs
Manual AEO_ZW080-ZWEU Aeon LabsDomotica daVinci
 

Mais procurados (20)

Kaipu Lm20 Z-Wave Plus door contact user guide
Kaipu Lm20 Z-Wave Plus door contact user guideKaipu Lm20 Z-Wave Plus door contact user guide
Kaipu Lm20 Z-Wave Plus door contact user guide
 
Everspring sp816 user manual
Everspring sp816 user manualEverspring sp816 user manual
Everspring sp816 user manual
 
Benext BE_SCENECTRL_manual_us
Benext BE_SCENECTRL_manual_usBenext BE_SCENECTRL_manual_us
Benext BE_SCENECTRL_manual_us
 
Ph psr03-zipato-z-wave-remote-user-manual
Ph psr03-zipato-z-wave-remote-user-manualPh psr03-zipato-z-wave-remote-user-manual
Ph psr03-zipato-z-wave-remote-user-manual
 
manual dimmer - Zipato
manual dimmer - Zipatomanual dimmer - Zipato
manual dimmer - Zipato
 
Aeotec Multisensor 7 Manual
Aeotec Multisensor 7 ManualAeotec Multisensor 7 Manual
Aeotec Multisensor 7 Manual
 
Mural Remote Z-Wave Plus Philio PSR04 Manual
Mural Remote Z-Wave Plus Philio PSR04 ManualMural Remote Z-Wave Plus Philio PSR04 Manual
Mural Remote Z-Wave Plus Philio PSR04 Manual
 
Orvibo all one_user_manual
Orvibo all one_user_manualOrvibo all one_user_manual
Orvibo all one_user_manual
 
Manual eurotronic comet_en
Manual eurotronic comet_enManual eurotronic comet_en
Manual eurotronic comet_en
 
Philio_pan08_manual
Philio_pan08_manualPhilio_pan08_manual
Philio_pan08_manual
 
For mim olite
For mim oliteFor mim olite
For mim olite
 
Manual Opening Detector with temeperature sensor Z-Wave Plus Version 2- Fibaro
Manual Opening Detector with temeperature sensor Z-Wave Plus Version 2- FibaroManual Opening Detector with temeperature sensor Z-Wave Plus Version 2- Fibaro
Manual Opening Detector with temeperature sensor Z-Wave Plus Version 2- Fibaro
 
Secure SRT322_User__Installation_instructions
Secure SRT322_User__Installation_instructionsSecure SRT322_User__Installation_instructions
Secure SRT322_User__Installation_instructions
 
wiDom Smart Plug Manual EN
wiDom Smart Plug Manual ENwiDom Smart Plug Manual EN
wiDom Smart Plug Manual EN
 
Zipato zipabox backup_module_user_manual
Zipato zipabox backup_module_user_manualZipato zipabox backup_module_user_manual
Zipato zipabox backup_module_user_manual
 
Ph psm02-zipato-multisensor-quad-user-manual-v1.4
Ph psm02-zipato-multisensor-quad-user-manual-v1.4Ph psm02-zipato-multisensor-quad-user-manual-v1.4
Ph psm02-zipato-multisensor-quad-user-manual-v1.4
 
Manual solar siren - popp_005107
Manual solar siren - popp_005107Manual solar siren - popp_005107
Manual solar siren - popp_005107
 
Eurotronic Spirit Radiator Thermostat Head Z-Wave Plus Manual
Eurotronic Spirit Radiator Thermostat Head Z-Wave Plus ManualEurotronic Spirit Radiator Thermostat Head Z-Wave Plus Manual
Eurotronic Spirit Radiator Thermostat Head Z-Wave Plus Manual
 
Manual AEO_ZW080-ZWEU Aeon Labs
Manual AEO_ZW080-ZWEU Aeon LabsManual AEO_ZW080-ZWEU Aeon Labs
Manual AEO_ZW080-ZWEU Aeon Labs
 
manual aeotec doorbell 6
manual aeotec doorbell 6manual aeotec doorbell 6
manual aeotec doorbell 6
 

Semelhante a Manual Motion sensor Outdoor Z-Wave Plus Round Insert - Philio

4 in 1 multi sensor Philio PSM02 (motion, door/window, temperature, lightness)
4 in 1 multi sensor Philio PSM02 (motion, door/window, temperature, lightness)4 in 1 multi sensor Philio PSM02 (motion, door/window, temperature, lightness)
4 in 1 multi sensor Philio PSM02 (motion, door/window, temperature, lightness)Domotica daVinci
 
3 in 1 multi sensor Philio PSM01 (door, window, temperature, lightness) manual
3 in 1 multi sensor Philio PSM01 (door, window, temperature, lightness) manual3 in 1 multi sensor Philio PSM01 (door, window, temperature, lightness) manual
3 in 1 multi sensor Philio PSM01 (door, window, temperature, lightness) manualDomotica daVinci
 
Manual sensor temperature and humidity z-wave plus - philio
Manual sensor temperature and humidity   z-wave plus - philioManual sensor temperature and humidity   z-wave plus - philio
Manual sensor temperature and humidity z-wave plus - philioDomotica daVinci
 
Ph pat02 - zipato flood multisensor 3 in 1 user manual v1.0
Ph pat02 - zipato flood multisensor 3 in 1 user manual v1.0Ph pat02 - zipato flood multisensor 3 in 1 user manual v1.0
Ph pat02 - zipato flood multisensor 3 in 1 user manual v1.0Domotica daVinci
 
Manual Motion Sensor - Z-Wave Plus - Hank
Manual Motion Sensor - Z-Wave Plus - HankManual Motion Sensor - Z-Wave Plus - Hank
Manual Motion Sensor - Z-Wave Plus - HankDomotica daVinci
 
Ph psm02-zipato-multisensor-quad-user-manual-v1.4
Ph psm02-zipato-multisensor-quad-user-manual-v1.4Ph psm02-zipato-multisensor-quad-user-manual-v1.4
Ph psm02-zipato-multisensor-quad-user-manual-v1.4Domotica daVinci
 
Manual neocoolcam door sensor
Manual neocoolcam door sensorManual neocoolcam door sensor
Manual neocoolcam door sensorDomotica daVinci
 
Wall controller 1 Button rechargeable Remote Z-Wave Plus - Hank Manual
Wall controller 1 Button rechargeable Remote Z-Wave Plus - Hank ManualWall controller 1 Button rechargeable Remote Z-Wave Plus - Hank Manual
Wall controller 1 Button rechargeable Remote Z-Wave Plus - Hank ManualDomotica daVinci
 
Pse02 - zipato siren user manual v1.2 English
Pse02 - zipato siren user manual v1.2 EnglishPse02 - zipato siren user manual v1.2 English
Pse02 - zipato siren user manual v1.2 EnglishDomotica daVinci
 
Manual 10 year smoke detector Z-Wave Plus-Popp
Manual 10 year smoke detector Z-Wave Plus-PoppManual 10 year smoke detector Z-Wave Plus-Popp
Manual 10 year smoke detector Z-Wave Plus-PoppDomotica daVinci
 
Mini Socket Dimmer Z-Wave Everspring manual
Mini Socket Dimmer Z-Wave Everspring manualMini Socket Dimmer Z-Wave Everspring manual
Mini Socket Dimmer Z-Wave Everspring manualDomotica daVinci
 
Manual radiator thermostat -Aeotec
Manual radiator thermostat -AeotecManual radiator thermostat -Aeotec
Manual radiator thermostat -AeotecDomotica daVinci
 
Mini price on off z wave plus everspring
Mini price on  off z wave plus everspringMini price on  off z wave plus everspring
Mini price on off z wave plus everspringDomotica daVinci
 
Manual co detector-popp_en
Manual co detector-popp_enManual co detector-popp_en
Manual co detector-popp_enDomotica daVinci
 

Semelhante a Manual Motion sensor Outdoor Z-Wave Plus Round Insert - Philio (20)

4 in 1 multi sensor Philio PSM02 (motion, door/window, temperature, lightness)
4 in 1 multi sensor Philio PSM02 (motion, door/window, temperature, lightness)4 in 1 multi sensor Philio PSM02 (motion, door/window, temperature, lightness)
4 in 1 multi sensor Philio PSM02 (motion, door/window, temperature, lightness)
 
3 in 1 multi sensor Philio PSM01 (door, window, temperature, lightness) manual
3 in 1 multi sensor Philio PSM01 (door, window, temperature, lightness) manual3 in 1 multi sensor Philio PSM01 (door, window, temperature, lightness) manual
3 in 1 multi sensor Philio PSM01 (door, window, temperature, lightness) manual
 
Manual sensor temperature and humidity z-wave plus - philio
Manual sensor temperature and humidity   z-wave plus - philioManual sensor temperature and humidity   z-wave plus - philio
Manual sensor temperature and humidity z-wave plus - philio
 
Ph pat02 - zipato flood multisensor 3 in 1 user manual v1.0
Ph pat02 - zipato flood multisensor 3 in 1 user manual v1.0Ph pat02 - zipato flood multisensor 3 in 1 user manual v1.0
Ph pat02 - zipato flood multisensor 3 in 1 user manual v1.0
 
Manual Motion Sensor - Z-Wave Plus - Hank
Manual Motion Sensor - Z-Wave Plus - HankManual Motion Sensor - Z-Wave Plus - Hank
Manual Motion Sensor - Z-Wave Plus - Hank
 
Ph psm02-zipato-multisensor-quad-user-manual-v1.4
Ph psm02-zipato-multisensor-quad-user-manual-v1.4Ph psm02-zipato-multisensor-quad-user-manual-v1.4
Ph psm02-zipato-multisensor-quad-user-manual-v1.4
 
Manual neocoolcam door sensor
Manual neocoolcam door sensorManual neocoolcam door sensor
Manual neocoolcam door sensor
 
Wall controller 1 Button rechargeable Remote Z-Wave Plus - Hank Manual
Wall controller 1 Button rechargeable Remote Z-Wave Plus - Hank ManualWall controller 1 Button rechargeable Remote Z-Wave Plus - Hank Manual
Wall controller 1 Button rechargeable Remote Z-Wave Plus - Hank Manual
 
Manual HKZW-FLD01
Manual HKZW-FLD01Manual HKZW-FLD01
Manual HKZW-FLD01
 
Pse02 - zipato siren user manual v1.2 English
Pse02 - zipato siren user manual v1.2 EnglishPse02 - zipato siren user manual v1.2 English
Pse02 - zipato siren user manual v1.2 English
 
Manual 10 year smoke detector Z-Wave Plus-Popp
Manual 10 year smoke detector Z-Wave Plus-PoppManual 10 year smoke detector Z-Wave Plus-Popp
Manual 10 year smoke detector Z-Wave Plus-Popp
 
Eur stellaz manual
Eur stellaz manualEur stellaz manual
Eur stellaz manual
 
Win itemp
Win itempWin itemp
Win itemp
 
Manual pop 004308
Manual pop 004308Manual pop 004308
Manual pop 004308
 
Mini Socket Dimmer Z-Wave Everspring manual
Mini Socket Dimmer Z-Wave Everspring manualMini Socket Dimmer Z-Wave Everspring manual
Mini Socket Dimmer Z-Wave Everspring manual
 
Manual radiator thermostat -Aeotec
Manual radiator thermostat -AeotecManual radiator thermostat -Aeotec
Manual radiator thermostat -Aeotec
 
NEO-EMS01Z Manual
NEO-EMS01Z  ManualNEO-EMS01Z  Manual
NEO-EMS01Z Manual
 
Mini price on off z wave plus everspring
Mini price on  off z wave plus everspringMini price on  off z wave plus everspring
Mini price on off z wave plus everspring
 
Manual co detector-popp_en
Manual co detector-popp_enManual co detector-popp_en
Manual co detector-popp_en
 
Manual ip44 popp_en
Manual ip44 popp_enManual ip44 popp_en
Manual ip44 popp_en
 

Mais de Domotica daVinci

Manual de usuario Dongle Zigbee 3.0 Sonoff
Manual de usuario Dongle Zigbee 3.0 SonoffManual de usuario Dongle Zigbee 3.0 Sonoff
Manual de usuario Dongle Zigbee 3.0 SonoffDomotica daVinci
 
2Channel Dimmer Module Zigbee NetPlus Manual
2Channel Dimmer Module Zigbee NetPlus Manual2Channel Dimmer Module Zigbee NetPlus Manual
2Channel Dimmer Module Zigbee NetPlus ManualDomotica daVinci
 
Shelly Qubini Dry Contact Module Z-Wave Manual
Shelly Qubini Dry Contact Module Z-Wave ManualShelly Qubini Dry Contact Module Z-Wave Manual
Shelly Qubini Dry Contact Module Z-Wave ManualDomotica daVinci
 
Zi-Stick UBS Dongle ZIgbee from Aeotec manual
Zi-Stick UBS Dongle ZIgbee from  Aeotec manualZi-Stick UBS Dongle ZIgbee from  Aeotec manual
Zi-Stick UBS Dongle ZIgbee from Aeotec manualDomotica daVinci
 
Manual controlador de pared Zigbee quatro battery.pdf
Manual controlador de pared Zigbee quatro battery.pdfManual controlador de pared Zigbee quatro battery.pdf
Manual controlador de pared Zigbee quatro battery.pdfDomotica daVinci
 
MOES-User-Manual AL23-211223-MHUB-MS.pdf
MOES-User-Manual AL23-211223-MHUB-MS.pdfMOES-User-Manual AL23-211223-MHUB-MS.pdf
MOES-User-Manual AL23-211223-MHUB-MS.pdfDomotica daVinci
 
Tete thermostatique Zigbee MOES BRT-100 V2.pdf
Tete thermostatique Zigbee MOES BRT-100 V2.pdfTete thermostatique Zigbee MOES BRT-100 V2.pdf
Tete thermostatique Zigbee MOES BRT-100 V2.pdfDomotica daVinci
 
Cherubini Meta Z-Wave Double Switch A510083-84-90
Cherubini Meta Z-Wave Double Switch A510083-84-90Cherubini Meta Z-Wave Double Switch A510083-84-90
Cherubini Meta Z-Wave Double Switch A510083-84-90Domotica daVinci
 
Cherubini Meta Z-Wave Smart Plug Manual A510068
Cherubini Meta Z-Wave Smart Plug Manual A510068Cherubini Meta Z-Wave Smart Plug Manual A510068
Cherubini Meta Z-Wave Smart Plug Manual A510068Domotica daVinci
 
Wave_Shutter_user_guide_multilang_print_V3.pdf
Wave_Shutter_user_guide_multilang_print_V3.pdfWave_Shutter_user_guide_multilang_print_V3.pdf
Wave_Shutter_user_guide_multilang_print_V3.pdfDomotica daVinci
 
Quinto Z-Wave Heltun_HE-RS01_User_Manual_B9AH.pdf
Quinto Z-Wave Heltun_HE-RS01_User_Manual_B9AH.pdfQuinto Z-Wave Heltun_HE-RS01_User_Manual_B9AH.pdf
Quinto Z-Wave Heltun_HE-RS01_User_Manual_B9AH.pdfDomotica daVinci
 
Z-Wave Fan coil Thermostat Heltun_HE-HT01_User_Manual.pdf
Z-Wave Fan coil Thermostat Heltun_HE-HT01_User_Manual.pdfZ-Wave Fan coil Thermostat Heltun_HE-HT01_User_Manual.pdf
Z-Wave Fan coil Thermostat Heltun_HE-HT01_User_Manual.pdfDomotica daVinci
 
Manual Eurotronic Thermostatic Valve Comry Z-Wave
Manual Eurotronic Thermostatic Valve Comry Z-WaveManual Eurotronic Thermostatic Valve Comry Z-Wave
Manual Eurotronic Thermostatic Valve Comry Z-WaveDomotica daVinci
 
Manual sensor Zigbee 3.0 MOES ZSS-X-PIRL-C
Manual  sensor Zigbee 3.0 MOES ZSS-X-PIRL-CManual  sensor Zigbee 3.0 MOES ZSS-X-PIRL-C
Manual sensor Zigbee 3.0 MOES ZSS-X-PIRL-CDomotica daVinci
 
zigbee motion sensor user manual NAS-PD07B2.pdf
zigbee motion sensor user manual NAS-PD07B2.pdfzigbee motion sensor user manual NAS-PD07B2.pdf
zigbee motion sensor user manual NAS-PD07B2.pdfDomotica daVinci
 
Range extender 7 - Aeotec - Manual
Range extender 7 - Aeotec - Manual   Range extender 7 - Aeotec - Manual
Range extender 7 - Aeotec - Manual Domotica daVinci
 
wiDom Smart Roller Shutter Z-Wave Plus Module Manual
wiDom Smart Roller Shutter Z-Wave Plus Module ManualwiDom Smart Roller Shutter Z-Wave Plus Module Manual
wiDom Smart Roller Shutter Z-Wave Plus Module ManualDomotica daVinci
 
wiDom Smart dry contact module Z-Wave Plus Manual
wiDom Smart dry contact module Z-Wave Plus ManualwiDom Smart dry contact module Z-Wave Plus Manual
wiDom Smart dry contact module Z-Wave Plus ManualDomotica daVinci
 

Mais de Domotica daVinci (20)

Manual de usuario Dongle Zigbee 3.0 Sonoff
Manual de usuario Dongle Zigbee 3.0 SonoffManual de usuario Dongle Zigbee 3.0 Sonoff
Manual de usuario Dongle Zigbee 3.0 Sonoff
 
2Channel Dimmer Module Zigbee NetPlus Manual
2Channel Dimmer Module Zigbee NetPlus Manual2Channel Dimmer Module Zigbee NetPlus Manual
2Channel Dimmer Module Zigbee NetPlus Manual
 
Shelly Qubini Dry Contact Module Z-Wave Manual
Shelly Qubini Dry Contact Module Z-Wave ManualShelly Qubini Dry Contact Module Z-Wave Manual
Shelly Qubini Dry Contact Module Z-Wave Manual
 
Zi-Stick UBS Dongle ZIgbee from Aeotec manual
Zi-Stick UBS Dongle ZIgbee from  Aeotec manualZi-Stick UBS Dongle ZIgbee from  Aeotec manual
Zi-Stick UBS Dongle ZIgbee from Aeotec manual
 
Manual controlador de pared Zigbee quatro battery.pdf
Manual controlador de pared Zigbee quatro battery.pdfManual controlador de pared Zigbee quatro battery.pdf
Manual controlador de pared Zigbee quatro battery.pdf
 
MOES-User-Manual AL23-211223-MHUB-MS.pdf
MOES-User-Manual AL23-211223-MHUB-MS.pdfMOES-User-Manual AL23-211223-MHUB-MS.pdf
MOES-User-Manual AL23-211223-MHUB-MS.pdf
 
Tete thermostatique Zigbee MOES BRT-100 V2.pdf
Tete thermostatique Zigbee MOES BRT-100 V2.pdfTete thermostatique Zigbee MOES BRT-100 V2.pdf
Tete thermostatique Zigbee MOES BRT-100 V2.pdf
 
Cherubini Meta Z-Wave Double Switch A510083-84-90
Cherubini Meta Z-Wave Double Switch A510083-84-90Cherubini Meta Z-Wave Double Switch A510083-84-90
Cherubini Meta Z-Wave Double Switch A510083-84-90
 
Cherubini Meta Z-Wave Smart Plug Manual A510068
Cherubini Meta Z-Wave Smart Plug Manual A510068Cherubini Meta Z-Wave Smart Plug Manual A510068
Cherubini Meta Z-Wave Smart Plug Manual A510068
 
Wave_Shutter_user_guide_multilang_print_V3.pdf
Wave_Shutter_user_guide_multilang_print_V3.pdfWave_Shutter_user_guide_multilang_print_V3.pdf
Wave_Shutter_user_guide_multilang_print_V3.pdf
 
Quinto Z-Wave Heltun_HE-RS01_User_Manual_B9AH.pdf
Quinto Z-Wave Heltun_HE-RS01_User_Manual_B9AH.pdfQuinto Z-Wave Heltun_HE-RS01_User_Manual_B9AH.pdf
Quinto Z-Wave Heltun_HE-RS01_User_Manual_B9AH.pdf
 
Z-Wave Fan coil Thermostat Heltun_HE-HT01_User_Manual.pdf
Z-Wave Fan coil Thermostat Heltun_HE-HT01_User_Manual.pdfZ-Wave Fan coil Thermostat Heltun_HE-HT01_User_Manual.pdf
Z-Wave Fan coil Thermostat Heltun_HE-HT01_User_Manual.pdf
 
Manual Eurotronic Thermostatic Valve Comry Z-Wave
Manual Eurotronic Thermostatic Valve Comry Z-WaveManual Eurotronic Thermostatic Valve Comry Z-Wave
Manual Eurotronic Thermostatic Valve Comry Z-Wave
 
Manual sensor Zigbee 3.0 MOES ZSS-X-PIRL-C
Manual  sensor Zigbee 3.0 MOES ZSS-X-PIRL-CManual  sensor Zigbee 3.0 MOES ZSS-X-PIRL-C
Manual sensor Zigbee 3.0 MOES ZSS-X-PIRL-C
 
zigbee motion sensor user manual NAS-PD07B2.pdf
zigbee motion sensor user manual NAS-PD07B2.pdfzigbee motion sensor user manual NAS-PD07B2.pdf
zigbee motion sensor user manual NAS-PD07B2.pdf
 
Range extender 7 - Aeotec - Manual
Range extender 7 - Aeotec - Manual   Range extender 7 - Aeotec - Manual
Range extender 7 - Aeotec - Manual
 
Z stick 7 user guide
Z stick 7 user guideZ stick 7 user guide
Z stick 7 user guide
 
ESB 200 H-Tronic Manual
ESB 200 H-Tronic ManualESB 200 H-Tronic Manual
ESB 200 H-Tronic Manual
 
wiDom Smart Roller Shutter Z-Wave Plus Module Manual
wiDom Smart Roller Shutter Z-Wave Plus Module ManualwiDom Smart Roller Shutter Z-Wave Plus Module Manual
wiDom Smart Roller Shutter Z-Wave Plus Module Manual
 
wiDom Smart dry contact module Z-Wave Plus Manual
wiDom Smart dry contact module Z-Wave Plus ManualwiDom Smart dry contact module Z-Wave Plus Manual
wiDom Smart dry contact module Z-Wave Plus Manual
 

Último

Raspberry Pi 5: Challenges and Solutions in Bringing up an OpenGL/Vulkan Driv...
Raspberry Pi 5: Challenges and Solutions in Bringing up an OpenGL/Vulkan Driv...Raspberry Pi 5: Challenges and Solutions in Bringing up an OpenGL/Vulkan Driv...
Raspberry Pi 5: Challenges and Solutions in Bringing up an OpenGL/Vulkan Driv...Igalia
 
How to convert PDF to text with Nanonets
How to convert PDF to text with NanonetsHow to convert PDF to text with Nanonets
How to convert PDF to text with Nanonetsnaman860154
 
Real Time Object Detection Using Open CV
Real Time Object Detection Using Open CVReal Time Object Detection Using Open CV
Real Time Object Detection Using Open CVKhem
 
Histor y of HAM Radio presentation slide
Histor y of HAM Radio presentation slideHistor y of HAM Radio presentation slide
Histor y of HAM Radio presentation slidevu2urc
 
Artificial Intelligence: Facts and Myths
Artificial Intelligence: Facts and MythsArtificial Intelligence: Facts and Myths
Artificial Intelligence: Facts and MythsJoaquim Jorge
 
Powerful Google developer tools for immediate impact! (2023-24 C)
Powerful Google developer tools for immediate impact! (2023-24 C)Powerful Google developer tools for immediate impact! (2023-24 C)
Powerful Google developer tools for immediate impact! (2023-24 C)wesley chun
 
Breaking the Kubernetes Kill Chain: Host Path Mount
Breaking the Kubernetes Kill Chain: Host Path MountBreaking the Kubernetes Kill Chain: Host Path Mount
Breaking the Kubernetes Kill Chain: Host Path MountPuma Security, LLC
 
Advantages of Hiring UIUX Design Service Providers for Your Business
Advantages of Hiring UIUX Design Service Providers for Your BusinessAdvantages of Hiring UIUX Design Service Providers for Your Business
Advantages of Hiring UIUX Design Service Providers for Your BusinessPixlogix Infotech
 
Driving Behavioral Change for Information Management through Data-Driven Gree...
Driving Behavioral Change for Information Management through Data-Driven Gree...Driving Behavioral Change for Information Management through Data-Driven Gree...
Driving Behavioral Change for Information Management through Data-Driven Gree...Enterprise Knowledge
 
Slack Application Development 101 Slides
Slack Application Development 101 SlidesSlack Application Development 101 Slides
Slack Application Development 101 Slidespraypatel2
 
IAC 2024 - IA Fast Track to Search Focused AI Solutions
IAC 2024 - IA Fast Track to Search Focused AI SolutionsIAC 2024 - IA Fast Track to Search Focused AI Solutions
IAC 2024 - IA Fast Track to Search Focused AI SolutionsEnterprise Knowledge
 
The Codex of Business Writing Software for Real-World Solutions 2.pptx
The Codex of Business Writing Software for Real-World Solutions 2.pptxThe Codex of Business Writing Software for Real-World Solutions 2.pptx
The Codex of Business Writing Software for Real-World Solutions 2.pptxMalak Abu Hammad
 
CNv6 Instructor Chapter 6 Quality of Service
CNv6 Instructor Chapter 6 Quality of ServiceCNv6 Instructor Chapter 6 Quality of Service
CNv6 Instructor Chapter 6 Quality of Servicegiselly40
 
Data Cloud, More than a CDP by Matt Robison
Data Cloud, More than a CDP by Matt RobisonData Cloud, More than a CDP by Matt Robison
Data Cloud, More than a CDP by Matt RobisonAnna Loughnan Colquhoun
 
A Call to Action for Generative AI in 2024
A Call to Action for Generative AI in 2024A Call to Action for Generative AI in 2024
A Call to Action for Generative AI in 2024Results
 
Exploring the Future Potential of AI-Enabled Smartphone Processors
Exploring the Future Potential of AI-Enabled Smartphone ProcessorsExploring the Future Potential of AI-Enabled Smartphone Processors
Exploring the Future Potential of AI-Enabled Smartphone Processorsdebabhi2
 
Factors to Consider When Choosing Accounts Payable Services Providers.pptx
Factors to Consider When Choosing Accounts Payable Services Providers.pptxFactors to Consider When Choosing Accounts Payable Services Providers.pptx
Factors to Consider When Choosing Accounts Payable Services Providers.pptxKatpro Technologies
 
08448380779 Call Girls In Friends Colony Women Seeking Men
08448380779 Call Girls In Friends Colony Women Seeking Men08448380779 Call Girls In Friends Colony Women Seeking Men
08448380779 Call Girls In Friends Colony Women Seeking MenDelhi Call girls
 
Understanding Discord NSFW Servers A Guide for Responsible Users.pdf
Understanding Discord NSFW Servers A Guide for Responsible Users.pdfUnderstanding Discord NSFW Servers A Guide for Responsible Users.pdf
Understanding Discord NSFW Servers A Guide for Responsible Users.pdfUK Journal
 
🐬 The future of MySQL is Postgres 🐘
🐬  The future of MySQL is Postgres   🐘🐬  The future of MySQL is Postgres   🐘
🐬 The future of MySQL is Postgres 🐘RTylerCroy
 

Último (20)

Raspberry Pi 5: Challenges and Solutions in Bringing up an OpenGL/Vulkan Driv...
Raspberry Pi 5: Challenges and Solutions in Bringing up an OpenGL/Vulkan Driv...Raspberry Pi 5: Challenges and Solutions in Bringing up an OpenGL/Vulkan Driv...
Raspberry Pi 5: Challenges and Solutions in Bringing up an OpenGL/Vulkan Driv...
 
How to convert PDF to text with Nanonets
How to convert PDF to text with NanonetsHow to convert PDF to text with Nanonets
How to convert PDF to text with Nanonets
 
Real Time Object Detection Using Open CV
Real Time Object Detection Using Open CVReal Time Object Detection Using Open CV
Real Time Object Detection Using Open CV
 
Histor y of HAM Radio presentation slide
Histor y of HAM Radio presentation slideHistor y of HAM Radio presentation slide
Histor y of HAM Radio presentation slide
 
Artificial Intelligence: Facts and Myths
Artificial Intelligence: Facts and MythsArtificial Intelligence: Facts and Myths
Artificial Intelligence: Facts and Myths
 
Powerful Google developer tools for immediate impact! (2023-24 C)
Powerful Google developer tools for immediate impact! (2023-24 C)Powerful Google developer tools for immediate impact! (2023-24 C)
Powerful Google developer tools for immediate impact! (2023-24 C)
 
Breaking the Kubernetes Kill Chain: Host Path Mount
Breaking the Kubernetes Kill Chain: Host Path MountBreaking the Kubernetes Kill Chain: Host Path Mount
Breaking the Kubernetes Kill Chain: Host Path Mount
 
Advantages of Hiring UIUX Design Service Providers for Your Business
Advantages of Hiring UIUX Design Service Providers for Your BusinessAdvantages of Hiring UIUX Design Service Providers for Your Business
Advantages of Hiring UIUX Design Service Providers for Your Business
 
Driving Behavioral Change for Information Management through Data-Driven Gree...
Driving Behavioral Change for Information Management through Data-Driven Gree...Driving Behavioral Change for Information Management through Data-Driven Gree...
Driving Behavioral Change for Information Management through Data-Driven Gree...
 
Slack Application Development 101 Slides
Slack Application Development 101 SlidesSlack Application Development 101 Slides
Slack Application Development 101 Slides
 
IAC 2024 - IA Fast Track to Search Focused AI Solutions
IAC 2024 - IA Fast Track to Search Focused AI SolutionsIAC 2024 - IA Fast Track to Search Focused AI Solutions
IAC 2024 - IA Fast Track to Search Focused AI Solutions
 
The Codex of Business Writing Software for Real-World Solutions 2.pptx
The Codex of Business Writing Software for Real-World Solutions 2.pptxThe Codex of Business Writing Software for Real-World Solutions 2.pptx
The Codex of Business Writing Software for Real-World Solutions 2.pptx
 
CNv6 Instructor Chapter 6 Quality of Service
CNv6 Instructor Chapter 6 Quality of ServiceCNv6 Instructor Chapter 6 Quality of Service
CNv6 Instructor Chapter 6 Quality of Service
 
Data Cloud, More than a CDP by Matt Robison
Data Cloud, More than a CDP by Matt RobisonData Cloud, More than a CDP by Matt Robison
Data Cloud, More than a CDP by Matt Robison
 
A Call to Action for Generative AI in 2024
A Call to Action for Generative AI in 2024A Call to Action for Generative AI in 2024
A Call to Action for Generative AI in 2024
 
Exploring the Future Potential of AI-Enabled Smartphone Processors
Exploring the Future Potential of AI-Enabled Smartphone ProcessorsExploring the Future Potential of AI-Enabled Smartphone Processors
Exploring the Future Potential of AI-Enabled Smartphone Processors
 
Factors to Consider When Choosing Accounts Payable Services Providers.pptx
Factors to Consider When Choosing Accounts Payable Services Providers.pptxFactors to Consider When Choosing Accounts Payable Services Providers.pptx
Factors to Consider When Choosing Accounts Payable Services Providers.pptx
 
08448380779 Call Girls In Friends Colony Women Seeking Men
08448380779 Call Girls In Friends Colony Women Seeking Men08448380779 Call Girls In Friends Colony Women Seeking Men
08448380779 Call Girls In Friends Colony Women Seeking Men
 
Understanding Discord NSFW Servers A Guide for Responsible Users.pdf
Understanding Discord NSFW Servers A Guide for Responsible Users.pdfUnderstanding Discord NSFW Servers A Guide for Responsible Users.pdf
Understanding Discord NSFW Servers A Guide for Responsible Users.pdf
 
🐬 The future of MySQL is Postgres 🐘
🐬  The future of MySQL is Postgres   🐘🐬  The future of MySQL is Postgres   🐘
🐬 The future of MySQL is Postgres 🐘
 

Manual Motion sensor Outdoor Z-Wave Plus Round Insert - Philio

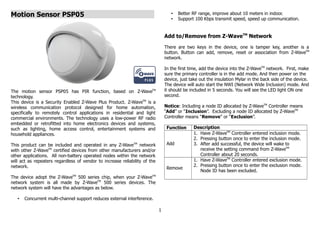
  • 1. Motion Sensor PSP05 The motion sensor PSP05 has PIR function, based on Z-WaveTM technology. This device is a Security Enabled Z-Wave Plus Product. Z-WaveTM is a wireless communication protocol designed for home automation, specifically to remotely control applications in residential and light commercial environments. The technology uses a low-power RF radio embedded or retrofitted into home electronics devices and systems, such as lighting, home access control, entertainment systems and household appliances. This product can be included and operated in any Z-WaveTM network with other Z-WaveTM certified devices from other manufacturers and/or other applications. All non-battery operated nodes within the network will act as repeaters regardless of vendor to increase reliability of the network. The device adopt the Z-WaveTM 500 series chip, when your Z-WaveTM network system is all made by Z-WaveTM 500 series devices. The network system will have the advantages as below. • Concurrent multi-channel support reduces external interference. • Better RF range, improve about 10 meters in indoor. • Support 100 Kbps transmit speed, speed up communication. Add to/Remove from Z-WaveTM Network There are two keys in the device, one is tamper key, another is a button. Button can add, remove, reset or association from Z-WaveTM network. In the first time, add the device into the Z-WaveTM network. First, make sure the primary controller is in the add mode. And then power on the device, just take out the insulation Mylar in the back side of the device. The device will auto start the NWI (Network Wide Inclusion) mode. And it should be included in 5 seconds. You will see the LED light ON one second. Notice: Including a node ID allocated by Z-WaveTM Controller means “Add” or “Inclusion”. Excluding a node ID allocated by Z-WaveTM Controller means “Remove” or “Exclusion”. Function Description Add 1. Have Z-WaveTM Controller entered inclusion mode. 2. Pressing button once to enter the inclusion mode. 3. After add successful, the device will wake to receive the setting command from Z-WaveTM Controller about 20 seconds. Remove 1. Have Z-WaveTM Controller entered exclusion mode. 2. Pressing button once to enter the exclusion mode. Node ID has been excluded. 1
  • 2. Reset Notice: Use this procedure only in the event that the primary controller is lost or otherwise inoperable. 1. Pressing button for about 5 seconds. 2. IDs are excluded and all settings will reset to factory default. Association 1. Have Z-WaveTM Controller entered association mode. 2. Pressing button one time to enter the association mode. Note: The device support 2 groups. The group 1 is for receiving the report message, like triggered event, temperature, illumination etc. The group 2 is for light control, the device will send the “Basic Set” command to this group. And each group support 8 nodes maximum. • Failed or success in add/remove the node ID can be viewed from Z-WaveTM Controller. Notice 1: Always RESET a Z-WaveTM device before trying to add it to a Z-WaveTM network Notice 2: When the device into NWI mode, the sensor functionality will useless. The NWI mode will timeout after 30 seconds. You can press the button one time to abort the NWI mode. Z-WaveTM Notification After the device adding to the network, it will wake-up once per day in default. When it wake-up it will broadcast the “Wake Up Notification” message to the network, and wake-up 10 seconds for receive the setting commands. The wake-up interval minimum setting is 30 minutes, and maximum setting is 120 hours. And the interval step is 30 minutes. If the user want to wake-up the device immediately, please remove the front cover, and press the button once. The device will wake-up 10 seconds. Z-WaveTM Message Report When the PIR motion triggered, the device will report the trigger event and also report the battery status. In default the device will using Notification Report to represent the trigger event, it can be changed to Sensor Binary Report by setting the configuration NO. 7 Bit4 to 1. * Motion Report: When the PIR motion detected, the device will unsolicited to send the report to the nodes in the group 1. Notification Report (V4) Notification Type: Home Security (0x07) Event: Motion Detection, Unknown Location (0x08) Sensor Binary Report (V2) Sensor Type: Motion (0x0C) Sensor Value: 0xFF * Tamper Report: When tamper key are pressed over 5 seconds. The device will into the alarm state. In that state, if the tamper key is released, the device will unsolicited to send the report to the nodes in the group 1. Notification Report (V4) Notification Type: Home Security (0x07) Event: Tampering. Product covering removed (0x03) Sensor Binary Report (V2) 2
  • 3. Sensor Type: Tamper (0x08) Sensor Value: 0xFF * Timing Report: Beside the event triggered could report message, the device also support the timing unsolicited report of the status. • Battery level report: Every 6 hours report once in default. It could be changed by setting the configuration NO. 10. • Low battery report: When the battery level is too low, every 30 minutes will report once. Notice: The configuration NO. 10 could be setting to zero to disable the auto report. And the configuration NO. 20 could change the tick interval, the default value is 30, if setting to 1, that means the minimum auto report interval will be one minute. And please notice if setting this value to zero, that means disable all of the timing report except the low battery detection. Power Up Procedure * Battery Power Check When the device power up, the device will detect the power level of the battery immediately. If the power level is too low, the LED will continue flash about 5 seconds. Please change another new battery. * PIR Warm Up When the device power on, the PIR need to warm up before the operation. The warm up time about 1 minute, the LED will flash in every 2 seconds. After finish the procedure the LED will light ON three times. * NWI When the device power on, the device will check is it already adding to the network? If doesn't, it will auto start the NWI mode. The LED will flash in every second and continue 30 seconds. Until timeout or the device successful to inclusion by controller. The use can presses button once to abort the NWI mode. * Wake When the device power on, the device will wake about 20 seconds. In this duration, the controller can communicate with the device. Normally the device is always sleeping to save the battery energy. Security Network The device support the security function. When the device included with a security controller, the device will auto switch to the security mode. In the security mode, the follow commands need using Security CC wrapped to communicate, otherwise it will not response. Note: A “Security Enabled Z-Wave Controller” must be used in order to fully utilize this function. COMMAND_CLASS_BATTERY COMMAND_CLASS_NOTIFICATION_V4 COMMAND_CLASS_ASSOCIATION_V2 COMMAND_CLASS_CONFIGURATION COMMAND_CLASS_SENSOR_BINARY_V2 COMMAND_CLASS_WAKE_UP_V2 Operation Mode There are two modes “Test” and “Normal”. “Test Mode” is for the user test the sensor function when installation.“Normal Mode” is for the normal operation. Operation Mode can be switched by pressing tamper key three times. LED can indicate which mode it is. Lighting on one second means entering test mode, flashing once means entering normal mode. 3
  • 4. When the event triggered, normally the LED won't indicated, unless the battery is in the low level, the LED will flash once. But in the “Test Mode” the LED also will light ON one second. When the event triggered, the device will report the messages to the nodes in the group 1. The messages also include the battery level. The user can switch the report by setting the configuration NO. 7 bit6 (battery). When the event triggered, the device will emit the signal to turn ON the lighting equipment, those nodes are in the group 2. And delay a while to turn OFF the lighting equipment. The delay time is setting by the configuration NO. 9. The PIR motion re-detected interval, in the “Test Mode” fixed to 6 seconds. In the “Normal Mode”, it according to the setting of the configuration NO. 8. Choosing a Suitable Location 1. The recommended mounting height is 160cm 2. Don't let the device facing the window or the sunlight. 3. Don't let the device facing the source of heat. For instance the heater or the air-condition. Z-Wave Configuration Settings Notice: * All of the configuration, the data size is 1. * The configuration mark with star(*), means after the remove the setting still keep, don't reset to factory default. Unless the user execute the “RESET” procedure. * The reserve bit or not supported bit is allowed any value, but no effect. Z-Wave Supported Command Class COMMAND_CLASS_ZWAVEPLUS_INFO_V2 COMMAND_CLASS_BATTERY COMMAND_CLASS_NOTIFICATION_V4 COMMAND_CLASS_ASSOCIATION_V2 COMMAND_CLASS_CONFIGURATION COMMAND_CLASS_MANUFACTURER_SPECIFIC_V2 COMMAND_CLASS_VERSION_V2 COMMAND_CLASS_SENSOR_BINARY_V2 COMMAND_CLASS_WAKE_UP_V2 COMMAND_CLASS_ASSOCIATION_GRP_INFO COMMAND_CLASS_POWERLEVEL COMMAND_CLASS_DEVICE_RESET_LOCALLY COMMAND_CLASS_MULTI_CMD COMMAND_CLASS_SECURITY 4
  • 5. NO . Name Def. Valid Description 2 Basic Set Level -1 All Setting the BASIC command value to turn on the light. -1(0xFF) means turn on the light. For dimmer equipment 1 to 100 means the light strength. 0 means turn off the light. Caution: The range is from 0x00~0xFF using hexadecimal notation. 3 (*) PIR Sensitivity 80 0 ~ 99 PIR sensitivity setting. 0 means disable the PIR motion. 1 means the lowest sensitivity, 99 means the highest sensitivity. High sensitivity means can detected long distance, but if there is more noise signal in the environment, it will re-trigger too frequency. 6 (*) Mult- Sensor Function Switch 5 All Multisensor function switch. Using bit to control. Caution: The range is from 0x00~0xFF using hexadecimal notation. 0 Bit0: Reserve. 0 Bit1: Reserve. 1 Bit2: Reserve. 0 Bit3: When Bit2 is 0 (Enable), Are the device and the lighting in the same room? 0: In the same room(Default), 1: In the different room. Notice: If this bit is 1, it is recommended also set the Bit1 to 1, cause the PIR triggered, doesn't mean the people in that room. NO . Name Def. Valid Description 0 Bit4: Disable delay 5 seconds to turn off the light, when door/window closed. (1:Disable, 0:Enable) 0 Bit5: Disable auto turn off the light, after door/window opened to turn on the light. (1:Disable, 0:Enable) Notice: If bit2 is zero, this setting is useless. Notice: If the configuration No.9 is zero, this setting is useless. 0 Bit6: Reserve. 0 Bit7: Reserve. 7 (*) Customer Function 4 All Customer function switch, using bit control. Caution: The range is from 0x00~0xFF using hexadecimal notation. 0 Bit0: Reserve. 0 Bit1: Enable sending motion OFF report. (0:Disable, 1:Enable) Note: Depends on the Bit4, 0: Report Notification CC, Type: 0x07, Event: 0xFE 1: Sensor Binary Report, Type: 0x0C, Value: 0x00 1 Bit2: Enable PIR super sensitivity mode. (0:Disable, 1:Enable) 0 Bit3: Reserve. 0 Bit4: Notification Type, 0: Using Notification Report. 1: Using Sensor Binary Report. 5
  • 6. NO . Name Def. Valid Description 0 Bit5: Disable Multi CC in auto report. (1:Disable, 0:Enable) 0 Bit6: Disable to report battery state when the device triggered. (1:Disable, 0:Enable) 0 Bit7: Reserve. 8 PIR Re- Detect Interval Time 3 1 ~ 127 In the normal mode, after the PIR motion detected, setting the re-detect time. 8 seconds per tick, default tick is 3 (24 seconds). Setting the suitable value to prevent received the trigger signal too frequently. Also can save the battery energy. Notice: If this value bigger than the configuration setting NO. 9. There is a period after the light turned off and the PIR not start detecting. 9 Turn Off Light Time 4 0 ~ 127 After turn on the lighting, setting the delay time to turn off the lighting when the PIR motion is not detected. 8 seconds per tick, default tick is 4 (32 seconds). 0 means never send turn off light command. 10 Auto Report Battery Time 12 0 ~ 127 The interval time for auto report the battery level. 0 means turn off auto report battery. The default value is 12. The tick time can setting by the configuration No.20. 20 Auto Report Tick Interval 30 -128~127 The interval time for auto report each tick. Setting this configuration will effect configuration No.10. NO . Name Def. Valid Description The unit is 1 minute. Caution1: Setting to 0 means turn off all auto report function. Caution2: The range is from 0x00~0xFF using hexadecimal notation. Specifications Power by CR123A lithium battery. Signal (Frequency): 868.40 MHz, 869.85 MHz(EU), 908.40 MHz, 916.00 MHz(US), 922~927 MHz(JP/TW), 921.40 MHz, 919.80 MHz(ANZ), 869.00 MHz(RU), 865.20 MHz(IN), 916.00 MHz(IL), Range: Minimum 40 meters indoor, 100 meters outdoor line of sight. Operating Temperature: -10o C ~ 40o C For indoor use only. Specifications subject to change without notice due to continuing product improvement. 6
  • 7. FCC Interference Statement This equipment has been tested and found to comply with the limits for a Class B digital device, pursuant to Part 15 of the FCC Rules. These limits are designed to provide reasonable protection against harmful interference in a residential installation. This equipment generates, uses and can radiate radio frequency energy and, if not installed and used in accordance with the instructions, may cause harmful interference to radio communications. However, there is no guarantee that interference will not occur in a particular installation. If this equipment does cause harmful interference to radio or television reception, which can be determined by turning the equipment off and on, the user is encouraged to try to correct the interference by one of the following measures: • Reorient or relocate the receiving antenna. • Increase the separation between the equipment and receiver. • Connect the equipment into an outlet on a circuit different from that to which the receiver is connected. • Consult the dealer or an experienced radio/TV technician for help. This device complies with Part 15 of the FCC Rules. Operation is subject to the following two conditions: (1) This device may not cause harmful interference, and (2) This device must accept any interference received, including interference that may cause undesired operation. FCC Caution: Any changes or modifications not expressly approved by the party responsible for compliance could void the user's authority to operate this equipment. This transmitter must not be co-located or operating in conjunction with any other antenna or transmitter. Warning Do not dispose of electrical appliances as unsorted municipal waste, use separate collection facilities. Contact your local government for information regarding the collection systems available. If electrical appliances are disposed of in landfills or dumps, hazardous substances can leak into the groundwater and get into the food chain, damaging your health and well-being. When replacing old appliances with new once, the retailer is legally obligated to take back your old appliance for disposal at least for free of charge. 7