Get good white balance with a straight forward grey card
•Transferir como DOCX, PDF•
0 gostou•26 visualizações

Changement d'adresse de Carte Grise en Ligne. Votre Changement d'Adresse de Carte Grise par Internet

Recomendados
Recomendados
Mais conteúdo relacionado
Último
Último (20)
Destaque
Destaque (20)
Get good white balance with a straight forward grey card
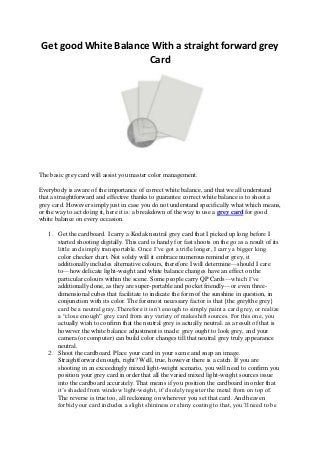
- 1. Get good White Balance With a straight forward grey Card The basic grey card will assist you master color management. Everybody is aware of the importance of correct white balance, and that we all understand that a straightforward and effective thanks to guarantee correct white balance is to shoot a grey card. However simply just in case you do not understand specifically what which means, or the way to act doing it, here it is: a breakdown of the way to use a grey card for good white balance on every occasion. 1. Get the cardboard. I carry a Kodak neutral grey card that I picked up long before I started shooting digitally. This card is handy for fast shoots on the go as a result of its little and simply transportable. Once I’ve got a trifle longer, I carry a bigger king color checker chart. Not solely will it embrace numerous reminder grey, it additionally includes alternative colours, therefore I will determine—should I care to—how delicate light-weight and white balance changes have an effect on the particular colours within the scene. Some people carry QP Cards—which I’ve additionally done, as they are super-portable and pocket friendly—or even three-dimensional cubes that facilitate to indicate the form of the sunshine in question, in conjunction with its color. The foremost necessary factor is that {the grey|the grey} card be a neutral gray. Therefore it isn’t enough to simply paint a card grey, or realize a “close enough” grey card from any variety of makeshift sources. For this one, you actually wish to confirm that the neutral grey is actually neutral. as a result of that is however the white balance adjustment is made: grey ought to look grey, and your camera (or computer) can build color changes till that neutral grey truly appearance neutral. 2. Shoot the cardboard. Place your card in your scene and snap an image. Straightforward enough, right? Well, true, however there is a catch. If you are shooting in an exceedingly mixed light-weight scenario, you will need to confirm you position your grey card in order that all the varied mixed light-weight sources issue into the cardboard accurately. That means if you position the cardboard in order that it’s shaded from window light-weight, it’d solely register the metal from on top of. The reverse is true too, all reckoning on wherever you set that card. And heaven forbid your card includes a slight shininess or shiny coating to that, you’ll need to be
- 2. additional careful to confirm your card isn’t reflective light-weight into the lens associated making an undecipherable highlight on the cardboard wherever later you hope to seek out neutral grey. An honest rule of thumb is to position the cardboard almost about the middle of interest. In an exceedingly portrait, that is sometimes the face. You’ll be able to have your subject hold your card below their chin for an endeavor, and so you are set. If you reposition your setup, you’ll be wanting to film the cardboard similarly. That approach you’ll be able to have the foremost correct white balance for the particular scene that lands up in your camera—as hostile the one you at first planned and came upon to shoot. 3. Click the cardboard. With an endeavor of your grey card currently in hand, you have a range of choices for your next step. (With most D-SLRs, if you’ve got shot a full-frame neutral grey image, you’ll be able to set the in-camera custom white balance to base its settings off of this grey card shot. however that solely works if you fill the frame with the grey card, and if you are not aiming to amendment lighting for the rest of your shoot.) The tactic I like is to stay plugging on in an exceedingly White Balance planned, often reshooting the grey card because the lighting or location changes. Then I take that image into the pc (when I import all of my pictures from a shoot) and use it to pick a custom white balance when capture. I try this most effectively in Lightroom as a result of I shoot RAW. notwithstanding what RAW process program you use—even Adobe Camera Raw—there’s some variation on a custom white balance setting that gives you with associate eyedropper to click within the neutral area of a picture. Click the grey card which sets the new custom white balance within the shot. Then it’s simply a matter of transferring that white balance setting to all or any the next shots within the series. This works otherwise in numerous programs, however the principle is that the same: build one good white balance setting and transfer it to multiple files. It’s quick, straightforward and really effective. It’s however you set all that grey card work into result. An added thing: lest you think that you have got to shoot RAW to form a custom white balance amendment work, you’ll be able to do the precise same factor to your JPEGs. It’s still a good thanks to apply custom white balances to your pictures when you shoot them. the most effective approach for a JPEG shooter would be to alter the in-camera custom White Balance setting for every shoot, however it’s sensible to grasp you have choices once you get your photos within the computer—as long as you created that easy very {little} shot of that easy little card.To know how to change address on car registration (changement d adressesur carte grise) or gray card address change online (changementadresse carte grise en ligne) visit www.changement-adresse-carte-grise.com Read Original Story Vote this story on google+ Google+ | Friendfeed | Linkedin