
Recomendados
Mais conteúdo relacionado
Mais procurados
Mais procurados (20)
Semelhante a B post directions
Semelhante a B post directions (20)
Último
Último (20)
B post directions
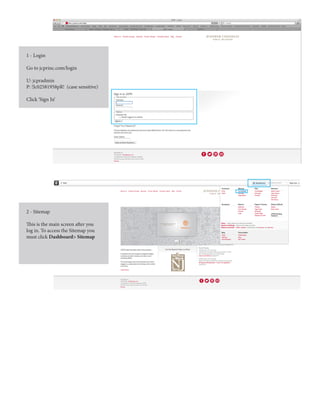
- 1. 1 - Login Go to jcprinc.com/login U: jcpradmin P: !Jc02581958pR! (case sensitive) Click ‘Sign In’ 2 - Sitemap This is the main screen after you log in. To access the Sitemap you must click Dashboard> Sitemap
- 2. 3 - Sitemap You are now at the Sitemap. To add a new blog post choose Blog>Year>Month> Click on Month and select Add Page 4 - Sitemap The Add Page panel will display a variety of page types. Choose Blog Post. Note: Blog summary will be used to add a new month or year to the blog page.
- 3. 5 - Sitemap In the Add Blog Post panel add the Title of the blog post to Name. As you type in the Name it will create the Alias (url) of the page. Copy and paste the body of post into Description. Click Add Page when complete. 6 - Sitemap You will now be in the Sitemap and can see the new page you’ve added. Click on that page and in the panel that appears click ‘Visit’.
- 4. 7 - Blog Post Page You are now at the blog post page you’ve just created. Click Edit in the top left corner. In Editing mode you can add to content to your page.
- 5. 8 - Add Content On the blog post page click on ‘Add To Blog Main’ in the panel that appears click ‘Add Block’ 9 - Add Content In the Add Block panel click Content 10 - Add Content In the Add Content panel you can paste in your content. When complete click Add.
- 6. 11 - Add Author You are now back on the blog page. Click Add to Main, Add Block. Only necessary if you have an author. 12 - Add Author Click Content 13 - Add Author Add author. Click Add.
- 7. 18 - Preview Edits When all edits are complete click the editing button top left. You can preview or publish. Preview is suggested incase further edits need to be made before going public. 19 - Approve Version Review the preview page and once ready to publish refresh the page. In the top right corner you will see an ‘Approve Version’ pop up for about 5 seconds. Click Approve Version. Your blog post is now live.