

Recomendados
Mais conteúdo relacionado
Mais procurados
Mais procurados (20)
Destaque
Semelhante a Hockney photmontage
Semelhante a Hockney photmontage (20)
Mais de Brooke Nelson
Mais de Brooke Nelson (20)
Hockney photmontage
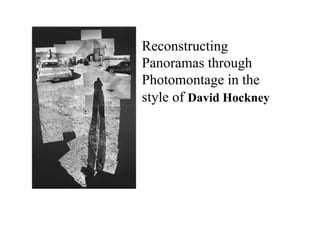
- 1. Reconstructing Panoramas through Photomontage in the style of David Hockney
- 2. David Hockney, Place Furstenberg, Paris, 7,8 et 9 Août 1985 #1 Collage Photographique, 88.9 x 80 cm, Collection personnelle
- 3. David Hockney, English born (1937) painter, draughtsman, printmaker, photographer, designer, and considered the best-known British artist of his generation
- 4. Using varying numbers (5-150) of small polaroid snaps or photolab- prints of a single subject Hockney arranged a patchwork to make a composite (a piece made of many parts) image. HISTORY: http:// www.youtu be.com/ watch? v=sD123sv CFHQ • Pearblossom Highway, 11-18th April 1986 #2
- 5. Mother I, Yorkshire Moors, August 1985 #1 1985
- 6. Breaking Forms into Shapes & CUBISM RELATION? Because these photos are taken from different perspectives and at slightly different times, the resulting work has an affinity with cubist perspective and the way human vision works..
- 7. Cubism In the early 1900s, some artists became interested in African and Native American art. The styles of those cultures inspired cubism. Carafe, Jug, and Fruit Bowl, summer 1909, Pablo Picasso Violin and Palette, autumn 1909, Georges Braque
- 8. Cubism began in France in 1907. Pablo Picasso and George Braque began painting figures that were made up of cubes, spheres, cylinders, cones, and other geometric shapes. The paintings looked like someone had cut them up and glued them back together.
- 9. OPTION 1: Straight forward images -Keep body in one position but move camera top to bottom or left to right.
- 14. OPTION 2: Showing image over time
- 19. OPTION 3: Different perspectives in one image
- 21. THE ASSIGNMENT: 1. Choose ONE subject to photograph so you can create a 10-15 photo David Hockney inspired artwork. 2. Consider the three different ways he took his images: 1-straight forward images 2-showing image over time 3-different perspectives in one image (See below example)
- 23. Tips for taking pictures: • Choose one interesting subject to photograph (can be anything and should be photographed during the day to get the best possible lighting and colors).
- 24. • Standing in one area zoom your camera into the subject and begin taking photos of different parts of the subject. • It is very important that you do not change your location too much and do not change the camera’s zoom as this will make the pieces not fit together properly.
- 25. Tips for taking pictures… Continued: • All 40+ pictures should be taken in one sitting as different times of day will create different lighting.
- 26. Tips for taking pictures… Continued: • Take more pictures than you think you need to prevent missing areas in your finished artwork. • Make sure to include the area around the subject as you may choose to include this in your final artwork.
- 27. • REMINDER: DUE TUESDAY! • Bring your 40 or more pictures into class on Tuesday • You will be learning how to collage them using Photoshop.