SlideShare uma empresa Scribd logo
1 de 28
Baixar para ler offline
NetBeans IDE Field
Guide
Copyright © 2005 Sun Microsystems, Inc. All rights reserved.

Table of Contents
Developing Web Applications...........................................................................................................2
  Representation of Web Applications in the IDE...........................................................................3
      Project View of Web Applications...........................................................................................3
      File View of Web Applications.................................................................................................3
  Adding Files and Libraries to Your Web Application....................................................................5
      Creating Web Pages and Other Public Files..........................................................................7
      Creating Classes, Servlets, and Other Private Files...............................................................7
      Adding External Resources to Your Project............................................................................8
      Adding Tags and Tag Libraries...............................................................................................9
  Editing and Refactoring Web Application Files............................................................................9
      Completing Tags...................................................................................................................10
      Expanding Abbreviations for JSP Files.................................................................................11
      Manually Editing the Deployment Descriptor........................................................................12
      Refactoring Web Components..............................................................................................13
  Deploying a Web Application.....................................................................................................14
      Customizing Contents of the WAR File................................................................................14
      Undeploying a Web Application............................................................................................15
      Redeploying a Web Application............................................................................................15
      Creating a WAR File.............................................................................................................15
      Deploying to a Different Tomcat Server................................................................................15
  Testing and Debugging Your Web Application..........................................................................16
      Checking For JSP Errors......................................................................................................17
      Viewing a JSP File's Servlet..................................................................................................17
      Viewing a File in a Web Browser..........................................................................................17
      Passing Request Parameters to a Web Application.............................................................18
      Debugging JSP and Tag Files..............................................................................................18
  Creating and Deploying Applets.................................................................................................18
      Creating an Applet................................................................................................................19
      Running and Debugging an Applet in the Applet Viewer......................................................19
      Running an Applet in a Web Browser...................................................................................19
      Packaging an Applet into a JAR File.....................................................................................20
      Packaging an Applet into a WAR File...................................................................................20
      Setting Applet Permissions...................................................................................................20
  Changing the IDE's Default Web Browser.................................................................................21
  Monitoring HTTP Transactions..................................................................................................21
      Setting Up the HTTP Monitor................................................................................................22
      Setting Up the HTTP Monitor For Servers Started Outside of the IDE.................................22
      Analyzing the Collected Data................................................................................................24
      Replaying HTTP Requests...................................................................................................27


                                                      NetBeans IDE Field Guide, Developing Web Applications, 1
Developing Web Applications
     NetBeans IDE is an ideal environment for developing Web applications. The IDE eliminates
a lot of the nuisances you normally would encounter, particularly in setting up the application
and in the steps between coding, deploying, debugging, and redeploying your application. And
since Ant is the basis for this automation, there are no proprietary mysteries you need to unravel
if you want to make the project work without the IDE as an intermediary.
     The following are some of the things the IDE does to make Web application development
easier:
        •   Provides a built-in Tomcat Web server on which to deploy, test, and debug
            your applications.
        •   Sets up the file and folder structure of a Web application for you.
        •   Generates and maintains the content of deployment descriptors, including the
            registering of any servlets that you add to your project.
        •   Generates and maintains an Ant script with targets (commands) for
            compiling, cleaning, testing, WAR file creation, and deployment to a server.
            This script saves you from having to manually move files to the Web server.
        •   Ensures that the configuration files that appear in the WEB-INF folder of
            your application are not deleted when you run the Clean command to remove
            results of previous builds.
        •   Provides syntax highlighting, code completion, and other aids for editing
            servlet, JSP, HTML, and tag library files.
        •   Provides the Compile JSP command, which enables you to detect syntax
            errors in JSP files before deploying to your server, whether the errors occur at
            compile time or during the translation of the JSP file into a servlet.
        •   Provides comprehensive debugging support, which includes stepping into JSP
            files and tracking HTTP requests.
    This chapter focuses on issues specific to Web applications, such as creating and editing
Web components, debugging HTTP transactions, etc., but does not include information on
project creation. See Chapter 3 for information on creating projects.
    Most of the topics in this chapter assume that you are using the Tomcat Web server, but it is
also possible to use the Sun Java System Application Server (SJSAS), which supports full J2EE
applications and includes full support for Web services. Most of the tasks detailed here that
involve the Tomcat server are very similar to the equivalent tasks you would perform if
deploying to SJSAS. See Chapter 10 for more information on working with the Sun Java System
Application Server and Chapter 9 for information on developing, exposing, and consuming Web
services.


                                       NetBeans IDE Field Guide, Developing Web Applications, 2
Representation of Web Applications in the IDE
    Web applications are based on a somewhat intricate architecture where the development-time
layout of files differs from that of a built application. The IDE helps you manage this process by:
        • Providing a development-time oriented view of your project in the Projects
          window. This view gives you easy access to your sources and information
          about your classpath but hides build results and project metadata. Perhaps
          more importantly, working in the Projects window ensures that none of the
          files you create will be inadvertently deleted when you run the Clean
          command on your project (as could happen, for example, if you worked
          directly in the WEB-INF folder of a built application).
        • Providing a file-oriented view of your project in the Files window. This
          window is particularly useful for accessing and customizing your build script
          and for browsing your project outputs, such as the project's WAR file and its
          contents.
        • Creating and maintaining an Ant script, which is used when you run typical
          commands such as Build Project and Run Project. Among other things, the
          Ant script automates the placement of your files in the built application, the
          packaging of those files into a WAR file, and deployment to the specified
          server.

Project View of Web Applications
    The Projects window provides a “logical” representation of the application's source structure,
with nodes for the following:
        •   Web Pages (for HTML, JSP, and image files that users of the application will
            have direct access to through their Web browsers)
        •   Source Packages (for Java source packages, which in turn contain servlets
            and other Java classes).
        •   Test Packages (for unit tests)
        •   Configuration Files (for your deployment descriptor and other files)
        •   Web Services (where you can create and register Web services – see Chapter
            9 for more on development of Web services)
        •   Libraries (where you can add libraries or include the results of other IDE
            projects)
        •   Test Libraries (where you can add any libraries necessary for running unit
            tests on your application)

File View of Web Applications
    If you open the Files window, you will see the physical organization of the files on disk (as
shown in Figure 6-1) and find that this organization is consistent with the Apache
recommendation for organizing source files (see Web Application Structure on page XXX). The
IDE also adds the nbproject (to hold project metadata) and test (for unit tests) folders, but
these are not included in the final built application.


                                      NetBeans IDE Field Guide, Developing Web Applications, 3
Figure 6-1
Files window with Web application folder structure
    When you build the application, either through the IDE or by directly running an Ant target,
a build folder is created to hold the compiled classes and the dist folder is created to hold the
generated WAR file as seen in Figure 6-2.


Figure 6-2


Files window showing the structure of the built WAR file


Web Application Structure
Apache Jakarta provides guidelines on how to structure your Web
applications to ensure that they work properly with the Tomcat server.
When you create a project in the IDE and select the Jakarta source
structure, this structure is respected. (Similarly, you can also set up a
project to use the Java BluePrints structure, which is preferred if you will
be deploying to the Sun Java System Application Server.)
The following is a quick rundown on the important structural elements of
the built application according to the Jakarta guidelines:


                                      NetBeans IDE Field Guide, Developing Web Applications, 4
•   The root folder (known as the document base), which contains all of
                 the other files in folders in the application.
             •   Files that are directly available to the users of the application through
                 their Web browsers, such as HTML files, images, and JSP files.
             •   The WEB-INF folder, which contains the deployment descriptor file
                 (web.xml) and the classes, lib, tags, and other folders and files.
                 The contents of WEB-INF comprise the bulk of the application and are
                 not directly available to users.
             •   The classes folder contains compiled class and servlet files with their
                 package hierarchy reflected by sub-folders.
You can find additional information on Tomcat source structure at
http://jakarta.apache.org/tomcat/tomcat-5.0-doc/appdev/source.html.
See Table 6-1 for information on how the various source elements of a
Web application map to their representation in the IDE and where they
end up in the deployed application.
Table 6-1: Matrix of Web Application Elements and Their Representation in the IDE
Content                        Representation in the        Representation in the Files Location Within the Built
                               Projects Window              Window                      WAR File (located in the
                                                                                        dist folder)
Web pages                      Web Pages node               web folder                  root of the file
Java source files, servlets,   Source Packages node         src folder                  WEB-INF/classes folder
etc.
unit tests                     Test Packages node           test folder                 N/A
deployment descriptor          Configuration Files node     web/WEB-INF folder          WEB-INF folder
(web.xml)
Tomcat context                                              web/META-INF folder         META-INF folder
configuration file
(context.xml)
libraries                      Libraries node               web/WEB-INF/lib             WEB-INF/lib folder
                                                            folder
Test classpath entries         Test Libraries node          test folder                 N/A
project metadata including     Project Properties dialog    build.xml file, nbproject   N/A
build script                   box, which you can open by folder
                               right-clicking the project's
                               node and choosing
                               Properties.


Adding Files and Libraries to Your Web Application
    Once you have created a Web project through the New Project wizard, you can start
populating it with Web pages and code.
    The most straightforward way to create files is by opening the Projects window and right-
clicking the project's node or the specific folder where you want to place the file and choosing
New and then a template from the submenu. See Figure 6-3. A short wizard appears for the
template enabling you to set the name and other characteristics of the file. In general, the wizard


                                                NetBeans IDE Field Guide, Developing Web Applications, 5
guides you to help make sure that the files are placed in an appropriate directory to fit the
structure of a well-designed Web application.
        NetBeans IDE Tip
        The New submenu of a node's contextual menu directly displays a
        selection of commonly used templates. If you want to see the full
        selection, choose New | File/Folder.
        The templates are grouped into several categories, such as Java
        Classes, Web, Database. In addition to servlet and JSP file templates,
        the Web category contains templates for filters, Web application
        listeners, tag files, and tag handlers, which contain useful sample code
        for those specific types of files.


Figure 6-3
Creating a new servlet from a package's contextual menu


     Conceptually, files in a Web application break down into a few different types of files, the
function of which determines where you place the file in the application. The main types of files
that you need to add to the project are:
        • Web pages and other public files, meaning files that users of the application
          can access directly through their Web browsers. Typically these include JSP
          files, HTML files, and image files.
        • Private files, meaning files that are not directly viewable to the end users and
          which typically do the bulk of the processing in the application. These
          include Java classes, JSP files, servlets, and tag libraries and end up within
          the web/WEB-INF/classes folder of the compiled Web application.
        • External resources, files created outside of the project that the files in the


                                       NetBeans IDE Field Guide, Developing Web Applications, 6
project depend on. These can include tag libraries, JAR files that are output
           from other IDE projects, and other JAR files and are kept within the WEB-
           INF/lib folder of the compiled Web application.
     In addition, there are configuration files such as the deployment descriptor (web.xml) and
files specific to the server you are deploying to, but the IDE generates and maintains these files
for you. For example, if you create a servlet in the IDE, the servlet is registered in the web.xml
file automatically.
        NetBeans IDE Tip
        Tag libraries can be added to your Web application as libraries or as
        source. See Adding Tags and Tag Libraries on page XXX for more
        information on working with tag libraries.


Creating Web Pages and Other Public Files
    Generally you add Web pages and other public files directly within the Web Pages node of
the Projects window or in a folder of your creation within that node. When the application is
built, these files are placed by the project's Ant script in the application's web folder.
    To add a publicly viewable HTML file, right-click the Web Pages node and choose New |
HTML.
    To add a publicly viewable JSP file, right-click the Web Pages node and choose New | JSP.
The ensuing wizard enables you to specify whether the JSP file uses standard syntax (and has the
.jsp extension) or uses XML syntax (has the .jspx extension). You can also have the file
created as a fragment (using the .jspf extension), which you would later reference from other
pages with include statements.

Creating Classes, Servlets, and Other Private Files
     As with general Java projects, classes are organized within packages under the Source
Packages node. For most projects, this node corresponds with a folder on your disk called src.
When the application is built, these files are placed by the Ant script in the application's WEB-
INF/classes directory.
     To add a class to your project, right-click the Source Packages node or the node of a specific
package and choose New | Java Class. If you have not created any package for the class you are
adding, you can do so in the wizard as you are creating the class.
     To add a servlet to your project, right-click the Source Packages node or the node of a
specific package and choose New | Servlet. The wizard for creating the servlet also guides you
through registering the servlet in the application's deployment descriptor (web.xml file).
     If you would like to add a file based on a more specific template, right-click a package node
and choose New | File/Folder to get a broader list of templates, including some for JavaBeans
components, .properties files, XML files, and specialized Web components. Note that many
of the Web templates have useful skeleton code and suggestions within the comments to get you
started on developing these kinds of objects.
     See Table 6-2 for a list of templates that you can find in the Web category of the New File
wizard.
Table 6-2: Web Templates
Template                          Description
JSP                               Enables you to create a JSP file (standard syntax), JSP document (XML
                                  syntax), or a JSP fragment (which would be statically referenced from another
                                  file).


                                        NetBeans IDE Field Guide, Developing Web Applications, 7
Template                            Description
Servlet                             Creates a Java class which extends the HttpServlet class. Also enables
                                    you to register the servlet in the project's deployment descriptor (web.xml)
                                    file.
Filter                              Creates a Java class which implements the javax.servlet.Filter
                                    interface. Filters enable you to modify HTTP requests to a servlet and
                                    responses from the servlet. In the wizard, you can create either a basic filter or
                                    one that wraps the ServletRequest and ServletResponse objects.
                                    In the template's wizard, you can register the filter in the project's
                                    deployment descriptor (web.xml) file.
Web Application Listener            Creates a Java class which implements one or more of the listener interfaces
                                    available for servlets, such as ServletContextListener and
                                    HttpSessionListener. Depending on the interfaces you select the
                                    wizard, the created class will listen for events, such as when servlet contexts
                                    is initialized or destroyed, the servlet session is created or destroyed, or when
                                    attributes are added to or removed from a context or session.
                                    In the template's wizard, you can register the listener in the project's
                                    deployment descriptor (web.xml) file.
Tag Library Descriptor              Creates a descriptor for a custom tag library. You can then register tag files
                                    and tag handlers in this file manually or when you use the New File wizard to
                                    create new tag files and tag handlers.
Tag File                            Creates an empty .tag file with comments suggesting JSP syntax elements
                                    that you can use to create a custom tag.
Tag Handler                         Creates a Java class for custom JSP tags. The template includes code
                                    comments with sample code and suggestions for how you might go about
                                    creating the custom tags.
HTML                                Creates an HTML with the basic tags entered.
Web Service                         Creates a simple Web service. See Chapter 9 for more information on
                                    extending Web services with Web applications.
Message Handler                     Creates a SOAP-based message handler for Web services. See Chapter 10 for
                                    more information on consuming Web services with Web applications.
Web Service Client                  Creates a Web service client based on JSR 109. See Chapter 9 for more
                                    information on consuming Web services with Web applications.


Adding External Resources to Your Project
    If your Web application needs to be packaged with any libraries, you can add them through
the Libraries node. If your project has been set up to work with the Tomcat server, the JSP and
servlet libraries are included automatically and listed under a subnode for the Tomcat server.
    You can add external resources to your project in one of the following three forms:
           • An individual folder or JAR file.
           • A cluster of resources (or “library”). This cluster might include multiple JAR
             files, sources for the JAR files (which are necessary for code completion or if
             you want to step through the library's code with the debugger), and Javadoc
             documentation. You can create such a cluster in the Library Manager (Tools
             menu).
           • The output of another IDE project.

    To add an individual folder or JAR file to your project, right-click the Libraries node of your
project, choose Add JAR/Folder, and navigate to the folder or JAR file in the file chooser.


                                          NetBeans IDE Field Guide, Developing Web Applications, 8
To add a cluster of related resources to your project, right-click the Libraries node, choose
Add Library, and select the library from the list in the Add Library dialog box. If the library you
are looking for is not there, you can add it to the list by choosing Manage Libraries.
        NetBeans IDE Tip
        Besides providing a way to cluster resources, the Library Manager makes
        it easy to access commonly used resources. Even if you do not need to
        cluster resources, you still might want to add individual resources to the
        Library Manager to save yourself from having to dig through file choosers
        to add resources to other projects.

    To add the results of another IDE project, right-click the Libraries node of the current
project, choose Add JAR/Folder, and navigate to the project's folder on your disk. In the file
chooser, NetBeans IDE project folders are marked with the        icon.
        NetBeans IDE Tip
        If you want to add a JAR file or the output of a project to the WAR file
        without making it part of the project's compilation classpath, you can do
        so through the Packaging node in the Project Properties dialog box. See
        Customizing Contents of the WAR File on page XXX.


Adding Tags and Tag Libraries
   Tags and tag libraries can be added to a Web project in any of the following forms:
        • Packaged in a JAR file containing a tag library descriptor file (TLD) and the
          associated tags, in the form of tag files (using JSP syntax) and/or tag handlers
          (written in Java). Such tag libraries appear in a Web application's WEB-
          INF/lib folder or in the server's shared libraries folder. You can add a tag
          library to a Web project through the Web project's Libraries node (see
          Adding External Resources to Your Project on page XXX).
          If you are developing a tag library from scratch, you can create a Java Library
          project for library and then add that library to a Web project by right-clicking
          the project's Libraries node and choosing Add Project. See Chapter 3 for
          information on creating Java Library projects.
        • As tag files (using either standard or document syntax) included in the Web
          application's WEB-INF/tags folder. You can add new tag files to your
          project by right-clicking the project's node and choosing New | File/Folder
          and then selecting the Tag File template from the Web category in the wizard.
        • As a TLD file located in the WEB-INF/tlds folder and tag handlers (written
          as Java files) within the Source Packages node. You can add new TLD files
          and tag handlers to your project by right-clicking the project's node and
          choosing New | File/Folder and then selecting the templates from the Web
          category in the wizard.


Editing and Refactoring Web Application Files
    The IDE's Source Editor provides a lot of features that make typing and changing of code for
various Web application components easier. This section goes over a few of the features that are
particularly useful for Web applications. See Chapter 4 for more information on IDE editing and
refactoring features.


                                       NetBeans IDE Field Guide, Developing Web Applications, 9
Completing Tags
     The IDE enables you to have tags and tag attributes completed automatically in JSP, HTML,
and XML files. The tag completion feature not only reduces the number of keystrokes that you
type but it also provides popup documentation for the possible ways to complete the tag or
attribute that you are typing as shown in Figure 6-4.


Figure 6-4
The code completion feature in a JSP File
    Open up the tag completion popup by typing the beginning of a tag and pressing Ctrl-Space
or waiting a second for code completion to kick in automatically. If there is only one way to
complete the word you are typing, the end of the word is filled in automatically. If there are
multiple ways to complete the tag, a popup list of those possibilities is displayed. You can keep
typing to narrow the list or select the text you want using the mouse or arrow keys to select the
word you want.
    For example, if you want to add the following statement in a JSP file:

<jsp:useBean id="hello" scope="page"
class="org.mydomain.mypackage.MyClass" />

you can enter it in the following steps (don't worry – the number of steps illustrated here may
seem daunting, but it is only because they are presented in such minute detail):
        1.   Type <jsp:u
        2.   Press Ctrl-Space (seBean is appended).
        3.   Type i
        4.   Press Ctrl-Space (d=”” is appended with the insertion point left between the
             quotation marks).
        5.   Type hello
        6.   Press the right arrow key and then the spacebar
        7.   Type s
        8.   Press Enter (cope=”” is appended with the insertion point left between the
             quotation marks).
        9.   Type p


                                      NetBeans IDE Field Guide, Developing Web Applications, 10
10.Press Ctrl-Space (age is appended).
        11.Press the right arrow key twice.
        12.Type c
        13.Press Enter (lass=”” is appended with the insertion point left between the
           quotation marks).
        14.Type o
        15.Press Ctrl-Space (rg is appended, assuming that the class is part of your
           project).
        16.Type a period (.) and press Ctrl-Space (mydomain is filled in).
        17.Type a period (.) and press Ctrl-Space (mypackage is filled in).
        18.Type a period (.) and press Ctrl-Space (MyClass is filled in).
        19.Press the right arrow key twice and type />
    See Chapter 4: Generating Code Snippets for information on completing Java expressions
and configuring code completion.

Expanding Abbreviations for JSP Files
    For commonly used JSP code snippets, you can take advantage of abbreviations in the
Source Editor to reduce the number of keystrokes. Abbreviations are expanded when you type
the abbreviation and then press the spacebar.
    See Table 6-3 for a list of abbreviations for JSP files. You can also expand abbreviations for
other types of files. See Chapter 4, Table 4-1 for a list of abbreviations for Java classes.
    If an abbreviation is the same as a text that you want to type (i.e. you do not want it to be
expanded into something else), press Shift-Space to keep it from expanding.
    You can modify the list of abbreviations in the Abbreviations dialog box for a type of file.
See Chapter 4, Adding, Changing, and Removing Abbreviations.

Table 6-3: JSP Abbreviations in the Source Editor
Abbreviation                                      Expands to
ag                                                application.getValue("
ap                                                application.putValue("
ar                                                application.removeValue("
cfgi                                              config.getInitParameter("
oup                                               out.print("
oupl                                              out.println("
pcg                                               pageContext.getAttribute("
pcgn                                              pageContext.getAttributeNamesInScope(
pcgs                                              pageContext.getAttributesScope("
pcr                                               pageContext.removeAttribute("
pcs                                               pageContext.setAttribute("
rg                                                request.getParameter("
sg                                                session.getValue("
sp                                                session.putValue("


                                     NetBeans IDE Field Guide, Developing Web Applications, 11
Abbreviation                                      Expands to
sr                                                session.removeValue("
jspf                                              <jsp:forward page="
jg                                                <jsp:getProperty name="
jspg                                              <jsp:getProperty name="
jspi                                              <jsp:include page="
jspp                                              <jsp:plugin type="
jsps                                              <jsp:setProperty name="
jspu                                              <jsp:useBean id="
pg                                                <%@ page
pga                                               <%@ page autoFlush="
pgb                                               <%@ page buffer="
pgc                                               <%@ page contentType="
pgerr                                             <%@ page errorPage="
pgex                                              <%@ page extends="
pgie                                              <%@ page isErrorPage="
pgim                                              <%@ page import="
pgin                                              <%@ page info="
pgit                                              <%@ page isThreadSafe="
pgl                                               <%@ page language="
pgs                                               <%@ page session="
tglb                                              <%@ taglib uri="


Manually Editing the Deployment Descriptor
     Though the IDE guides you through the adding of entries for the deployment descriptor
(web.xml file) as you add servlets, filters, and listeners to your project, you might have occasion
to edit the file by hand.
     To open the deployment descriptor in the Source Editor, open the Projects window, expand
the Configuration Files node (or the Web Pages | Web-INF node) and double-click the web.xml
file. The file opens as a multi-tab document in the Source Editor with the Overview tab open (as
seen in Figure 6-5). You can edit different parts of the web.xml file with the visual editors for
different elements of the file (Overview, Servlets, Filters, and Pages) or you can click the XML
tab to directly edit the file's XML source (see Figure 6-6).
Figure 6-5
Deployment descriptor visual editor


                                      NetBeans IDE Field Guide, Developing Web Applications, 12
Figure 6-6
Deployment descriptor XML editor


Refactoring Web Components
    NetBeans IDE's refactoring support extends to Web applications and enterprise applications.
For example, you can do the following:


                                    NetBeans IDE Field Guide, Developing Web Applications, 13
•   Rename classes, methods, and fields of servlets, tag handlers, and other Web
            components. See Chapter 4, Renaming All Occurrences of the Currently
            Selected Class, Method, or Field Name
        • Move classes to a different packages or projects (resulting in the class being
          packaged in a different WAR file). See Chapter 4, Moving a Class to a
          Different Package.
        • Change method parameters including parameter names, parameter types,
          method visibility, adding method parameters or removing method parameters.
          See Chapter 4, Changing a Method's Signature.
        • Changing visibility of fields and adding getter and setter accessor methods.
          See Chapter 4, Generating Read/Write Properties.
     When you rename a Web component class (such as a servlet or tag handler), any
corresponding name entries in the application's deployment descriptor (web.xml file) and/or tag
library descriptor (TLD) are updated as well. When you move a class and the deployment
descriptor as affected, you are prompted with a Confirm Changes dialog box to make sure that
you want to process changes to the deployment descriptor.
        Important
        Be careful not to rename or change the parameters of a servlet method
        that must be implemented with a given name according to the Servlet or
        Enterprise JavaBeans specifications.


Deploying a Web Application
    By default, a Web application is deployed to the server you have specified when you run that
project.
    For applications that you deploy to the Tomcat server, the application is deployed “in place”,
meaning that the IDE creates an XML file that is placed in the server's
conf/Catalina/localhost/ directory and points Tomcat to the IDE project's build directory
where the applications files reside.
    When you build a Web project in the IDE, a WAR file is also created, which you can
manually deploy to a server.

Customizing Contents of the WAR File
   By default, a Web project's generated WAR file includes:
        • All files displayed within the project's Web Pages node, including the
          web.xml and context.xml files.
        • Compiled class files of the source files within Java Sources node plus any
          other files placed there without the .java and .form file extensions.
        • Any libraries that you have added to the project's Libraries node.

   You can also add JAR files to the WAR file and filter out contents that would normally
appear.
   To customize a WAR file's contents:
        1. Right-click the project's node in the Projects window and choose Properties.
        2. Select the Build | Packaging node.


                                     NetBeans IDE Field Guide, Developing Web Applications, 14
3. If you want to filter out contents from the generated WAR file, modify the
           regular expression in the Exclude From WAR File field.
        4. If you want to add additional folders or files, do so through Add JAR/Folder,
           Add Library, or Add Project buttons.
           The Add JAR/Folder button enables you to add individual JAR files or
           folders, whether or not they come from IDE projects.
           The Add Library button enables you to add any JAR files or clusters of JAR
           files that you have designated in the IDE's Library Manager.
           The Add Project button enables you to add the JAR file that is output from
           another IDE project. When you add an IDE project to the WAR file, that
           project's JAR file is rebuilt every time you build the Web application project.

Undeploying a Web Application
   When you stop a Web application that you have run through the IDE, the application still
remains deployed through a reference to that application in the form of an XML file in Tomcat's
conf/Catalina/localhost directory.
   To undeploy an such an application from Tomcat:
        1. Open the Runtime window.
        2. Expand the Servers node, then expand the node for the Tomcat server and the
           server's Web Applications node.
        3. Right-click the node for the running Web application and choose Undeploy.

Redeploying a Web Application
   To remove your application from the server and then redeploy it, right-click the project's
node and choose Redeploy Project.

Creating a WAR File
    When you run the Build Project command on a Web project in the IDE, a WAR file is
created automatically and placed in the dist folder of the project. You can access this file and
browse its contents in the Files window.

Deploying to a Different Tomcat Server
    The IDE comes bundled with the Tomcat server, which facilitates Web application
development and testing. If you have a different Tomcat installation that you want to test on
and/or deploy to, you can register that installation with the IDE. You can easily switch your
application to work with the different server installations. This is particularly useful if you want
to develop and test on one installation and then deploy to a production environment.
    To set up the IDE to recognize a different Tomcat installation:
        1. Choose Tools | Server Manager .
        2. Click the Add Server button.
        3. On the Choose Server page of the wizard that opens, select a server from the
           Server combo box, enter an IDE display name for that server in the Name
           field, and click Next.


                                      NetBeans IDE Field Guide, Developing Web Applications, 15
4. On the Tomcat Server Instance Properties page, specify the Tomcat
           installation directory (and base directory if it is a shared installation) and fill
           in a user name and password.
           You can also determine whether to enable the IDE's HTTP Monitor. If the
           HTTP Monitor is enabled, you can monitor your application's server requests,
           cookies, and so on, which makes it easier to debug your application.
           However, this option slows down the server, so you will probably want this
           option disabled if you are using this is your production server. See
           Monitoring HTTP Transactions on page XXX for information on using the
           HTTP Monitor.
        5. Verify that the server is not using a port number used by another server. In
           the IDE, you can view the server's port number by mousing over the server's
           node and viewing the node's tooltip.
           If another server instance is using the same port, you need to stop one of the
           servers and change the port it is using. Stop the server right-clicking the
           server's node, choosing Start/Stop Server and clicking Stop Server. Then
           right-click the server node, choose Properties, and change the Server Port
           property. Restart the server by right-clicking the node, choosing Start/Stop
           Server and clicking Start Server.
        6. If you have any existing Web applications within the IDE that you want to
           run on the newly added server, modify the properties for each project to use
           the server. You can do so by right-clicking the project's node in the Projects
           window, choosing Properties, selecting the Run node, and choosing the server
           from the Server combo box.
        NetBeans IDE Tip
        If you later want to change the server's configuration, you can access the
        server's properties opening the Runtime window, expanding the Servers
        node, right-clicking the specific server's node and choosing Properties.


Testing and Debugging Your Web Application
    NetBeans IDE provides a rich environment for troubleshooting and optimizing your Web
applications. Some of the features to ease testing of Web applications include:
        •   The Compile JSP command, which enables you to check individual JSP files
            for errors before deploying to the server.
        •   Debugger integration with JSP files, which means that you can set
            breakpoints in JSP files and step through JSP in the debugger (as opposed to
            having to step through the generated servlet code).
        •   Ability to step through tag files.
        •   Ability to evaluate Expression Language (EL) expressions in JSP files during
            a debugging session (by mousing over the expression or setting a watch).
        •   The HTTP Monitor, which keeps track of HTTP communication between
            servlets and the server. This feature is covered in detail under Monitoring
            HTTP Transactions on page XXX.
    See Chapter 5 for more information on the IDE's general debugging features that these
features extend.


                                      NetBeans IDE Field Guide, Developing Web Applications, 16
Checking For JSP Errors
    JSP files are not compiled like typical Java files before they are deployed. Instead, they are
compiled by the server after they have been deployed (where in fact they are first translated to
servlets, which are then compiled). This makes it more cumbersome to correct errors that
normally are detected when compiling, since it forces you to deploy the application, discover the
error, undeploy, correct the error, and redeploy.
    However, NetBeans IDE enables you to compile JSP files to check for errors before you
package and deploy the application. You can either compile individual JSP files manually or
specify that they be compiled when you build the project.
    To compile a JSP file manually, select the file in the Projects window or in the Source Editor
and select Build | Compile File or press F9.
    To have all JSP files compiled when you run the Build Project command, right-click the
project's node, choose Properties, select the Compiling node, and select the Test Compile All JSP
Files During Builds checkbox.
    The compilation results are reported in the Output window, where you can discover any
errors, whether they occur in the translation to the servlet or in the compilation of the servlet.
    The compiled files themselves are placed in the project's build/generated folder, which
you can view from the Files window. These files are not used when you are building and
packaging the application for deployment.

Viewing a JSP File's Servlet
    The generation of a servlet from a JSP file happens dynamically on the server where the Web
application is deployed. You can view this generated servlet once you have run the project or the
specific JSP associated with it by right-clicking the file and choosing View Servlet.
        NetBeans IDE Tip
        If you would like to see the servlet code that is generated when you run
        the Compile JSP command, open the Files window open the
        build/generated/src folder, and navigate to the file which is named
        according to the JSP file name, but with a _jsp suffix and .java
        extension.


Viewing a File in a Web Browser
    You can open components of a Web application in a Web browser from the IDE.
    To view a specific JSP page in a Web browser, you need to run that file individually (by
right-clicking the file in the Source Editor or pressing Shift-F6).
    To open an HTML file in the Web browser, right-click the HTML page's node in the Projects
window and choose View.
        NetBeans IDE Tip
        The View command for HTML files is not available from the Source
        Editor. If you want to view the current HTML file in the Source Editor
        without your fingers leaving the keyboard, press Ctrl-Shift-1 to jump to the
        file's node in the Projects window, press Shift-F10 to open the node's
        contextual menu, press the down arrow to select View, and press Enter.


                                      NetBeans IDE Field Guide, Developing Web Applications, 17
Passing Request Parameters to a Web Application
    You can manually test the way the Web application will respond to certain input by running
the application with certain request parameters specified ahead of time.
    To pass request parameters to a JSP page:
        1. Right-click the JSP file's node and choose Properties.
        2. In the Request Parameters property, enter the parameters in URL query string
           format (where the expression begins with a URL, continues with a question
           mark (?) to mark the beginning of the query, and completed with the
           parameters as name/value pairs, where the pairs separated by ampersands
           (&)).
    To pass request parameters to a servlet:
        1. Right-click the servlet's node in the Projects window, and choose Tools | Set
           Servlet Execution URI.
        2. In the dialog box, append a question mark plus the name/value pairs, with
           each pair separated by an ampersand.

Debugging JSP and Tag Files
     One of the IDE's features that has long made NetBeans IDE a favorite with Web developers
is the ability of the debugger to step into JSP files. You can set breakpoints in JSP files and step
through the JSP line by line while monitoring the values of variables and other aspects of the
running program.
     NetBeans IDE 4.1 adds the ability to step into tag files.
     To set a breakpoint in a JSP or tag file, select the line where you would like to pause
execution and press Ctrl-F8. See Chapter 5 for more information on debugging.


Creating and Deploying Applets
    NetBeans IDE does not have a specific project type for applets, so the development cycle for
applets is a little different than for other types of projects. You can not designate an applet as a
main project, which means that several project-specific commands (such as Run Project) do not
apply to applets.
    However, you can still create, test, and deploy applets fairly easily. The general outline of
applet development is as follows:
        1. Create a Java Library project to hold the applet.
        2. Create an applet from one of the templates in the New File wizard and fill in
           code for the applet.
        3. Test the applet in the JDK's applet viewer by right-clicking the applet's node
           in the Projects window and choosing Run File.
        4. Create a JAR file for the applet by right-clicking the applet's project node and
           choosing Build Project.
        5. If you want to add the applet to a Web application, add the applet's project (or
           just the applet's JAR file) through the Web project's Libraries node.


                                      NetBeans IDE Field Guide, Developing Web Applications, 18
Creating an Applet
   To create an applet:
       1. Choose New Project, select the General category, select the Java Library
          template, and click Next.
       2. Enter a name and location for the project and click Finish to exit the wizard.
       3. In the Projects window, expand the node for the project you have just created.
          Then right-click the Source Packages node and choose New | File/Folder.
       4. In the New File wizard, select one of the available applet templates. There are
          four available:
               • Java Classes category, JApplet template. This template extends
                  javax.swing.JApplet and is recommended over the Applet
                  template, which is based on the less flexible java.applet.Applet
                  class.
               • Java GUI Forms category, JApplet template. This template extends
                  javax.swing.JApplet and enables you to use the IDE's Form
                  Editor to visually design your applet. This template is recommended
                  over the JApplet template in the AWT Forms sub-category.
               • Java Classes category, Applet template. This template extends
                  java.applet.Applet.
               • Java GUI Forms | AWT Forms category, Applet template. This
                  template extends java.applet.Applet and enables you to use the
                  IDE's Form Editor to visually design your applet.
                  Click Next, specify a name and a package for the applet, and then
                  click Finish.
    You can then code the applet, either by hand or with the assistance of the Form Editor.

Running and Debugging an Applet in the Applet Viewer
    As you are developing the applet, you can use the JDK's applet viewer to test the applet's
functionality. When you use the Run File and Debug File commands, the applet is automatically
displayed in the applet viewer.
    To run an applet, right-click the applet's node in the Projects window and choose Run File.
    To start debugging an applet:
        1. Set a breakpoint in the code by selecting the line where you first want
           execution to pause and press Ctrl-F8.
        2. Right-click the applet's node in the Projects window and choose Debug File.

Running an Applet in a Web Browser
  If you want to see how your applet behaves in an actual Web browser, you can open an
HTML launcher for the applet.
  To run an applet in a Web browser:
        1. Open the Files window and expand the project's build directory.
        2. Right-click the HTML launcher file (it should have the same name as the
           applet class but with an HTML extension) and choose View.


                                     NetBeans IDE Field Guide, Developing Web Applications, 19
The applet opens in the default Web browser specified in the IDE. See Changing the IDE's
Default Web Browser on page XXX if you would like to change the IDE's default Web browser.
        NetBeans IDE Tip
        If you want to customize the HTML launcher file, you can copy the
        generated launcher file into the folder that contains the applet source file.
        This prevents the launcher file from being overwritten every time you run
        the applet.
        When you run the applet or build the applet's project, the HTML file is
        copied into the folder with the compiled applet class. If you do not want
        this file to be included in the JAR that is created when you build the
        project, you can modify the filter for the JAR file's contents. In the
        Projects window, right-click the project's node and choose Properties. In
        the dialog box, select the Packaging node and modify the regular
        expression in the Exclude From JAR File field. For example, you could
        add a comma plus an expression like **/Myapplet.html to make sure
        that your launcher file (no matter which directory it is in) is excluded from
        the built JAR file.


Packaging an Applet into a JAR File
    If you want to put an applet into a JAR file, you can do so by right-clicking the applet's
project node in the Projects window and choosing Build Project.
    The applet is compiled and the compiled class files are placed in a JAR file in the dist
folder, which you can view with the Files window.

Packaging an Applet into a WAR File
   To add an applet to a Web application:
        1. Put the applet into a JAR file. See Packaging an Applet into a JAR File above
           for information on how to do this in the IDE.
        2. Right-click the Web application's project node in the Projects window and
           choose Properties.
        3. In the Project Properties dialog box, select the Build | Packaging node.
        4. Click the Add Project button, navigate to the applet's project folder, and click
           Add Project JAR Files.

Setting Applet Permissions
    When you create and run an applet through the IDE, an applet.policy is created with all
permissions granted and is placed in the root folder of the project (which you can view through
the Files window). You can modify this file by double-clicking its node to open it in the Source
Editor.
    You can also specify a different policy file for the applet. To specify a different policy file:
        1. Right-click the Web application's project node in the Projects window and
           choose Properties.
        2. In the Project Properties dialog box, select the Run node.
        3. In the VM Options field, modify the value of the -Djava.
           security.policy option to point to the policy file.


                                      NetBeans IDE Field Guide, Developing Web Applications, 20
Changing the IDE's Default Web Browser
    To change the IDE's default Web browser, choose Tools | Setup Wizard and select a browser
from the Web Browser combo box.
    If the IDE can not find a given Web browser on your system, you might need to specify the
executable for that Web browser.
    To point the IDE to a Web browser that is listed in the Setup Wizard:
       1. Choose Tools | Options and expand the IDE Configuration | Server and
          External Tools Settings | Web Browsers node.
       2. Select the subnode for the browser that you want and modify the Browser
          Executable property.
   To add to the IDE's list of Web browsers:
       1. Choose Tools | Options and expand the IDE Configuration | Server and
          External Tools Settings | Web Browsers node.
       2. Right-click the Web Browsers node, choose New | External Browser, type the
          browser's name, and click Finish.
       3. Select the subnode for the added browser and modify the Browser Executable
          property to point to that browser's executable.


Monitoring HTTP Transactions
    NetBeans IDE provides a built-in HTTP Monitor to help isolate problems with data flow
from JSP and servlet execution on a Web server. There is no need to add logic to your Web
application to trace HTTP requests and associated state information. The NetBeans IDE built-in
HTTP Monitor can do this for you.
    When the IDE is configured with a Web container or a Web application is deployed with a
NetBeans HTTP Monitor servlet filter and filter mapping, the HTTP Monitor will automatically
record all HTTP requests made to the Web container. For each HTTP request that is processed
by the Web container, the HTTP Monitor not only records the request, it also records state
information maintained in the Web container.
    By using the HTTP Monitor, you can analyze HTTP requests, and store HTTP GET and
HTTP POST requests for future analysis sessions. You can also edit these stored requests and
replay them. This is a powerful feature to help isolate data flow and state information passed
within an HTTP request to a Web container. HTTP requests are stored until you exit the IDE
unless you explicitly save them.
    The following are some of the things that you can do with the IDE's HTTP Monitor:
       •   Analyze HTTP requests records.
       •   Save HTTP request records.
       •   Edit HTTP request records.
       •   Refresh request records.
       •   Sort HTTP request records.
       •   Delete HTTP request records.
       •   Replay HTTP request records.


                                    NetBeans IDE Field Guide, Developing Web Applications, 21
In the following sections, you will learn how to setup the HTTP Monitor, analyze the data
the HTTP Monitor collects and replay recorded HTTP requests.

Setting Up the HTTP Monitor
    When you run a Web application, the HTTP Monitor is generally automatically enabled. If
the HTTP Monitor is not displayed in the bottom of the IDE, then verify the HTTP Monitor is
enabled by performing the following tasks.
        1. Expand the Runtime window's Servers node to show your registered Web
           server. Then right click the server's node and choose Properties.
        2. Place a check box in the Enable HTTP Monitor property.
        3. If the registered Web server is currently running, stop and restart it by right
           clicking your registered Web server under the Runtime window's Servers
           node and selecting Start / Stop Server.
    Figure 6-6 shows the Enable HTTP Monitor property on the Sun Java System Application
Server 8 Properties dialog.


Figure 6-6:
Properties dialog box for the Sun Java System Application Server


Setting Up the HTTP Monitor For Servers Started Outside of the IDE
    You can also use the HTTP Monitor on Web servers started outside the NetBeans IDE. To
do so, execute the following tasks:


                                      NetBeans IDE Field Guide, Developing Web Applications, 22
1. Go to the directory where the NetBeans IDE is installed and copy the
        modules/org-netbeans-modules-schema2beans.jar and
        modules/org-netbeans-modules-web-httpmonitor.jar files to your
        Web module's WEB-INF/lib directory.
     2. Add a filter declaration that is appropriate for your servlet's version to the top
        of your Web module's WEB-INF/web.xml file.
        Filters and filter mapping entries must be specified at the beginning of a
        deployment descriptor. See the examples below for filters for the servlets
        corresponding the 2.3 and 2.4 versions of the Servlet specification.
  A Servlet 2.4 filter declaration might look like the following:

<filter>
  <filter-name>HTTPMonitorFilter</filter-name>
  <filter-class>
    org.netbeans.modules.web.monitor.server.MonitorFilter
  </filter-class>
  <init-param>
    <param-name>
       netbeans.monitor.ide
    </param-name>
    <param-value>
       name-of-host-running NetBeans IDE:http-server-port
    </param-value>
  </init-param>
</filter>
<filter-mapping>
  <filter-name>
    HTTPMonitorFilter
  </filter-name>
  <url-pattern>
    /*
  </url-pattern>
  <dispatcher>
    REQUEST
  </dispatcher>
  <dispatcher>
    FORWARD
  </dispatcher>
  <dispatcher>
    INCLUDE
  </dispatcher>
  <dispatcher>
    ERROR
  </dispatcher>
</filter-mapping>


  A Servlet 2.3 filter declaration might look like the following:

<filter>
  <filter-name>HTTPMonitorFilter</filter-name>
  <filter-class>
    org.netbeans.modules.web.monitor.server.MonitorFilter
  </filter-class>
  <init-param>
    <param-name>
      netbeans.monitor.ide


                                    NetBeans IDE Field Guide, Developing Web Applications, 23
</param-name>
    <param-value>
       name-of-host-running NetBeans IDE:http-server-port
    </param-value>
  </init-param>
</filter>
<filter-mapping>
  <filter-name>
    HTTPMonitorFilter
  </filter-name>
  <url-pattern>
    /*
  </url-pattern>
</filter-mapping>

    A Web application can be monitored with the IDE HTTP Monitor from multiple NetBeans
IDEs by adding additional init-param entries to the Servlet filter declaration in the Web
deployment descriptor. For instance, you would an additional init-parm entry such as the one
shown below:

  <init-param>
    <param-name>
      netbeans.monitor.ide
    </param-name>
    <param-value>
      name-of-2nd-host-running NetBeans IDE:http-server-port
    </param-value>
  </init-param>


       IMPORTANT
       When you deploy the Web module you have been monitoring with the
       HTTP Monitor to a production server, remember to remove the Servlet
       filter and filter mapping declarations from the Web module's deployment
       descriptor. Otherwise, the Web module will be open for HTTP monitoring
       from those NetBeans IDEs specified in the init-param section(s) of the
       servlet filter in the Web module's deployment descriptor.


Analyzing the Collected Data
    After you have setup the HTTP Monitor, you can use the HTTP Monitor to debug your Web
application by observing data flow from your JSP page and servlet execution on the Web server.
The HTTP Monitor records data about each incoming request. The HTTP Monitor is
automatically displayed in the bottom of the IDE. A snapshot of the HTTP Monitor is shown in
Figure 6-7.


                                    NetBeans IDE Field Guide, Developing Web Applications, 24
Figure 6-7
HTTP Monitor


    The HTTP Monitor consists of two panels. On the left is a tree view of HTTP request
records. Every HTTP request made to the HTTP server is recorded in the HTTP Monitor.
Requests resulting from internal dispatches are reflected by nested nodes under those Web
containers which support it. In addition, forwarded or included requests are nested under the
node corresponding to the main request.
    Displayed on the right panel of the HTTP Monitor is additional data for a selected HTTP
request record on the left panel. When you select an HTTP request record on the left, session
data corresponding to the selected record is displayed in the right panel. The additional session
information available in the right panel include; detailed request information, cookie name /
value pairs, session data, servlet context, context attributes, initialization parameters, client /
server information such as client protocol, client IP address, server platform and server host
name along with additional HTTP request header information. The right panel allows you view
specific data in each of these categories by selecting a tab corresponding to the information you
would like to see. Figure 6-7 below shows the additional session information for a selected
HTTP request record.


                                      NetBeans IDE Field Guide, Developing Web Applications, 25
Figure 6-7
HTTP Monitor with a record selected and its request data displayed


    In the tree view, left panel of the HTTP Monitor, there are two categories of records that can
be viewed, Current Records or Saved Records. Current Records represent HTTP request records
collected since the NetBeans IDE has been started. Current Records will persist across restarts of
the Web server, but they will not persist across restarts of the NetBeans IDE. To persist Current
Records across NetBeans IDE restarts, they must be saved. Individual Current Records may be
saved by selecting a HTTP request record, right clicking the selected Current Record and
choosing Save from the displayed menu. You can select multiple HTTP request records by
pressing the Shift or Control keys. Figure 6-8 illustrates the selecting and saving of multiple
HTTP requests.


Figure 6-8
Saving multiple records in the HTTP Monitor
    Notice when you save HTTP requests, the selected records are moved to the Saved Records
category. The selected records are not copied. You should keep this in mind should you want to
replay a sequence of HTTP requests.
    The tree view, left panel of the HTTP Monitor, also provides several viewing options of the
HTTP requests in the upper left portion of the panel in the form of five buttons. For instance, you
can reload all the HTTP request records, sort the HTTP request records by time stamp in
descending or ascending order, sort the records alphabetically and show or hide the time stamp
for each HTTP request record. Table 6-4 summarizes the action for each button.
Table 6-4: HTTP Monitor toolbar buttons
Request Record View Button                Action
reload                                    Reloads all the HTTP request records currently stored
descending sort                           Sorts HTTP request records by time stamp in descending order
ascending sort                            Sorts HTTP request records by time stamp in ascending order
alphabetically sort                       Sorts the HTTP request records alphabetically
time stamp                                Hides or displays the time stamps in the list of HTTP requests


                                     NetBeans IDE Field Guide, Developing Web Applications, 26
In addition to saving HTTP records, HTTP records may also be deleted. The NetBeans IDE
provides much flexibility when deleting HTTP records. For instance, individual and multiple
Current Records or all Current Records may be deleted. Individual, multiple Saved or all Saved
Records can also be deleted.
    To remove an individual Current Record, right click the record to be deleted and choose the
Delete option from the contextual menu. To remove multiple Current Records, select additional
records using the Shift or Control key, then right click the selected records and choose the Delete
option from the contextual menu. To remove all Current Records, right click the Current Records
folder and choose the Delete option. To remove Saved Records, individually select or multiply
select the Saved Records to delete, right click the selected records and choose the Delete option
from the contextual menu. To remove all Saved Records, right click the Saved Records folder
and choose the Delete option from the contextual menu.

Replaying HTTP Requests
    The most powerful feature of the HTTP Monitor is the editing and replaying of HTTP
requests. By editing and replaying HTTP requests, you can quickly and easily trace and diagnose
problems with the flow of data from JSP pages and servlet execution on the Web server. When
you replay an HTTP request, the response appears in your Web browser. Thus you can visually
see the result of a given HTTP request being replayed in your Web browser.
        NetBeans IDE Tip
        The IDE opens your default Web browser when you replay HTTP
        requests. If the IDE cannot find the operating system's default Web
        browser, you can configure the Web browser manually. See Changing
        the IDE's Default Web Browser on page XXX.

     Both Current Records or Saved Records may be replayed. To replay an HTTP request, select
the HTTP request to replay in the left panel tree view and choose the Replay option from the
contextual menu. Figure 6-9 shows a Current Record being selected for replay.


Figure 6-9
Selecting a record to be replayed in the HTTP Monitor
    Notice the selected record is replayed in your browser after you have chosen Replay from the
contextual menu.


                                     NetBeans IDE Field Guide, Developing Web Applications, 27
In addition to replaying HTTP requests, you can also edit an HTTP request before replaying
it. To edit an HTTP request before replaying it, select an HTTP request in the left panel tree
view, either a Current Record or Saved Record, right click the record and choose the Edit and
Replay option from the contextual menu. NOTE: Multiple records and cannot be edited and
replayed. After choosing the Edit and Replay option, a dialog box is displayed where you can
make various modifications.
     The supported modifications in the Edit and Replay of an HTTP request include options to
edit a parameter to query, modify request URI parameters, modify cookies, modify server
execution properties and modify HTTP request parameters.


Figure 6-10
HTTP Monitor Edit and Replay dialog box


     On the Query tab, in Figure 6-10, you can add a query parameter or delete a query parameter
and modify URI request parameters. On the Request tab, you can modify the Request URI by
selecting the ellipsis (...) button next to the request parameter value. You can change the request
method from a GET to a POST or PUT, by selecting the dropdown box to the right of the
Request Method type in the left hand column. You can also modify the Request Protocol by
selecting the ellipsis button next in the far right column of the Request Protocol. On the Cookies
tab, you can add modify or delete cookies associated with the HTTP request. On the Server tab,
you can modify server execution values such as the host name and port where the HTTP request
should be executed. You can add, modify and delete HTTP headers under the Headers tab.
     After making your desired edits to the HTTP request, you can replay the modified request by
pressing the Send HTTP Request button. The resulting HTTP request will then be sent to your
Web browser where the results will be displayed.


                                     NetBeans IDE Field Guide, Developing Web Applications, 28

Mais conteúdo relacionado

Mais procurados

13 asp.net session19
13 asp.net session1913 asp.net session19
13 asp.net session19Niit Care
 
Asp.net presentation by gajanand bohra
Asp.net presentation by gajanand bohraAsp.net presentation by gajanand bohra
Asp.net presentation by gajanand bohraGajanand Bohra
 
16 asp.net session23
16 asp.net session2316 asp.net session23
16 asp.net session23Niit Care
 
Lecture 19 dynamic web - java - part 1
Lecture 19   dynamic web - java - part 1Lecture 19   dynamic web - java - part 1
Lecture 19 dynamic web - java - part 1Д. Ганаа
 
Flex Introduction
Flex Introduction Flex Introduction
Flex Introduction senthil0809
 
Part 7 packaging and deployment
Part 7 packaging and deploymentPart 7 packaging and deployment
Part 7 packaging and deploymenttechbed
 
Soumika wls Resume
Soumika wls Resume Soumika wls Resume
Soumika wls Resume soumika A
 
Web Application Frameworks - Lecture 05 - Web Information Systems (4011474FNR)
Web Application Frameworks - Lecture 05 - Web Information Systems (4011474FNR)Web Application Frameworks - Lecture 05 - Web Information Systems (4011474FNR)
Web Application Frameworks - Lecture 05 - Web Information Systems (4011474FNR)Beat Signer
 
Developing an ASP.NET Web Application
Developing an ASP.NET Web ApplicationDeveloping an ASP.NET Web Application
Developing an ASP.NET Web ApplicationRishi Kothari
 
01 asp.net session01
01 asp.net session0101 asp.net session01
01 asp.net session01Vivek chan
 
React.js alternatives modern web frameworks and lightweight java script libr...
React.js alternatives  modern web frameworks and lightweight java script libr...React.js alternatives  modern web frameworks and lightweight java script libr...
React.js alternatives modern web frameworks and lightweight java script libr...Katy Slemon
 
What’s New for Devs
What’s New for DevsWhat’s New for Devs
What’s New for DevsMicrosoftFeed
 
11 asp.net session16
11 asp.net session1611 asp.net session16
11 asp.net session16Niit Care
 
Developing an aspnet web application
Developing an aspnet web applicationDeveloping an aspnet web application
Developing an aspnet web applicationRahul Bansal
 
14 asp.net session20
14 asp.net session2014 asp.net session20
14 asp.net session20Niit Care
 
Web Sphere Application Server Features
Web Sphere Application Server FeaturesWeb Sphere Application Server Features
Web Sphere Application Server FeaturesSymbyo Technologies
 
15 asp.net session22
15 asp.net session2215 asp.net session22
15 asp.net session22Niit Care
 

Mais procurados (20)

13 asp.net session19
13 asp.net session1913 asp.net session19
13 asp.net session19
 
Asp.net presentation by gajanand bohra
Asp.net presentation by gajanand bohraAsp.net presentation by gajanand bohra
Asp.net presentation by gajanand bohra
 
16 asp.net session23
16 asp.net session2316 asp.net session23
16 asp.net session23
 
Lecture 19 dynamic web - java - part 1
Lecture 19   dynamic web - java - part 1Lecture 19   dynamic web - java - part 1
Lecture 19 dynamic web - java - part 1
 
Flex Introduction
Flex Introduction Flex Introduction
Flex Introduction
 
Part 7 packaging and deployment
Part 7 packaging and deploymentPart 7 packaging and deployment
Part 7 packaging and deployment
 
Soumika wls Resume
Soumika wls Resume Soumika wls Resume
Soumika wls Resume
 
Web Application Frameworks - Lecture 05 - Web Information Systems (4011474FNR)
Web Application Frameworks - Lecture 05 - Web Information Systems (4011474FNR)Web Application Frameworks - Lecture 05 - Web Information Systems (4011474FNR)
Web Application Frameworks - Lecture 05 - Web Information Systems (4011474FNR)
 
Developing an ASP.NET Web Application
Developing an ASP.NET Web ApplicationDeveloping an ASP.NET Web Application
Developing an ASP.NET Web Application
 
Asp net
Asp netAsp net
Asp net
 
01 asp.net session01
01 asp.net session0101 asp.net session01
01 asp.net session01
 
React.js alternatives modern web frameworks and lightweight java script libr...
React.js alternatives  modern web frameworks and lightweight java script libr...React.js alternatives  modern web frameworks and lightweight java script libr...
React.js alternatives modern web frameworks and lightweight java script libr...
 
What’s New for Devs
What’s New for DevsWhat’s New for Devs
What’s New for Devs
 
11 asp.net session16
11 asp.net session1611 asp.net session16
11 asp.net session16
 
Developing an aspnet web application
Developing an aspnet web applicationDeveloping an aspnet web application
Developing an aspnet web application
 
14 asp.net session20
14 asp.net session2014 asp.net session20
14 asp.net session20
 
Web Sphere Application Server Features
Web Sphere Application Server FeaturesWeb Sphere Application Server Features
Web Sphere Application Server Features
 
15 asp.net session22
15 asp.net session2215 asp.net session22
15 asp.net session22
 
Web tech
Web techWeb tech
Web tech
 
Web tech
Web techWeb tech
Web tech
 

Destaque

Getting Started with the NetBeans Platform
Getting Started with the NetBeans PlatformGetting Started with the NetBeans Platform
Getting Started with the NetBeans PlatformGeertjan Wielenga
 
Google I/O 2014 Recap
Google I/O 2014 Recap Google I/O 2014 Recap
Google I/O 2014 Recap Trey Robinson
 
ID Android TechTalk Series #6 : Google Service and Gradle - Anton Nurdin Tuha...
ID Android TechTalk Series #6 : Google Service and Gradle - Anton Nurdin Tuha...ID Android TechTalk Series #6 : Google Service and Gradle - Anton Nurdin Tuha...
ID Android TechTalk Series #6 : Google Service and Gradle - Anton Nurdin Tuha...Dicoding
 
Gradle for Android Developers
Gradle for Android DevelopersGradle for Android Developers
Gradle for Android DevelopersJosiah Renaudin
 
What's New in NetBeans IDE 7.x
What's New in NetBeans IDE 7.xWhat's New in NetBeans IDE 7.x
What's New in NetBeans IDE 7.xGeertjan Wielenga
 
Gradle,the new build system for android
Gradle,the new build system for androidGradle,the new build system for android
Gradle,the new build system for androidzhang ghui
 
Exploring the power of Gradle in android studio - Basics & Beyond
Exploring the power of Gradle in android studio - Basics & BeyondExploring the power of Gradle in android studio - Basics & Beyond
Exploring the power of Gradle in android studio - Basics & BeyondKaushal Dhruw
 
NetBeans Platform for Rich Client Development
NetBeans Platform for Rich Client DevelopmentNetBeans Platform for Rich Client Development
NetBeans Platform for Rich Client DevelopmentWidura Wijenayake
 
Java swing
Java swingJava swing
Java swingprofbnk
 
Begining Android Development
Begining Android DevelopmentBegining Android Development
Begining Android DevelopmentHayi Nukman
 
NetBeans Day 2016 - Getting the best of NetBeans IDE
NetBeans Day 2016 - Getting the best of NetBeans IDENetBeans Day 2016 - Getting the best of NetBeans IDE
NetBeans Day 2016 - Getting the best of NetBeans IDELeonardo Zanivan
 
Presentation JavaFX
Presentation JavaFXPresentation JavaFX
Presentation JavaFXrecon4
 
20120315 netbeansplatform overview
20120315 netbeansplatform overview20120315 netbeansplatform overview
20120315 netbeansplatform overviewpluskjw
 
Netbeans 110511004930-phpapp01
Netbeans 110511004930-phpapp01Netbeans 110511004930-phpapp01
Netbeans 110511004930-phpapp01sagaroceanic11
 

Destaque (20)

Getting Started with the NetBeans Platform
Getting Started with the NetBeans PlatformGetting Started with the NetBeans Platform
Getting Started with the NetBeans Platform
 
Google I/O 2014 Recap
Google I/O 2014 Recap Google I/O 2014 Recap
Google I/O 2014 Recap
 
ID Android TechTalk Series #6 : Google Service and Gradle - Anton Nurdin Tuha...
ID Android TechTalk Series #6 : Google Service and Gradle - Anton Nurdin Tuha...ID Android TechTalk Series #6 : Google Service and Gradle - Anton Nurdin Tuha...
ID Android TechTalk Series #6 : Google Service and Gradle - Anton Nurdin Tuha...
 
Gradle for Android Developers
Gradle for Android DevelopersGradle for Android Developers
Gradle for Android Developers
 
What's New in NetBeans IDE 7.x
What's New in NetBeans IDE 7.xWhat's New in NetBeans IDE 7.x
What's New in NetBeans IDE 7.x
 
Gradle,the new build system for android
Gradle,the new build system for androidGradle,the new build system for android
Gradle,the new build system for android
 
Exploring the power of Gradle in android studio - Basics & Beyond
Exploring the power of Gradle in android studio - Basics & BeyondExploring the power of Gradle in android studio - Basics & Beyond
Exploring the power of Gradle in android studio - Basics & Beyond
 
Shortcuts
ShortcutsShortcuts
Shortcuts
 
NetBeans Platform for Rich Client Development
NetBeans Platform for Rich Client DevelopmentNetBeans Platform for Rich Client Development
NetBeans Platform for Rich Client Development
 
State of NetBeans
State of NetBeansState of NetBeans
State of NetBeans
 
Netbeans help
Netbeans helpNetbeans help
Netbeans help
 
Netbeans+platform+maven
Netbeans+platform+mavenNetbeans+platform+maven
Netbeans+platform+maven
 
Java swing
Java swingJava swing
Java swing
 
Begining Android Development
Begining Android DevelopmentBegining Android Development
Begining Android Development
 
NetBeans Day 2016 - Getting the best of NetBeans IDE
NetBeans Day 2016 - Getting the best of NetBeans IDENetBeans Day 2016 - Getting the best of NetBeans IDE
NetBeans Day 2016 - Getting the best of NetBeans IDE
 
Android 2
Android 2Android 2
Android 2
 
Presentation JavaFX
Presentation JavaFXPresentation JavaFX
Presentation JavaFX
 
Desktop Intro
Desktop IntroDesktop Intro
Desktop Intro
 
20120315 netbeansplatform overview
20120315 netbeansplatform overview20120315 netbeansplatform overview
20120315 netbeansplatform overview
 
Netbeans 110511004930-phpapp01
Netbeans 110511004930-phpapp01Netbeans 110511004930-phpapp01
Netbeans 110511004930-phpapp01
 

Semelhante a Chapter6 web apps-tomcat

Introduction to ejb and struts framework
Introduction to ejb and struts frameworkIntroduction to ejb and struts framework
Introduction to ejb and struts frameworks4al_com
 
Developing Java Web Applications
Developing Java Web ApplicationsDeveloping Java Web Applications
Developing Java Web Applicationshchen1
 
Introduction to j2 ee frameworks
Introduction to j2 ee frameworksIntroduction to j2 ee frameworks
Introduction to j2 ee frameworksMukesh Kumar
 
Ppt for Online music store
Ppt for Online music storePpt for Online music store
Ppt for Online music storeADEEBANADEEM
 
ASP.NET Presentation
ASP.NET PresentationASP.NET Presentation
ASP.NET PresentationRasel Khan
 
Light-up-your-out-of-the-box LightSwitch Application
Light-up-your-out-of-the-box LightSwitch ApplicationLight-up-your-out-of-the-box LightSwitch Application
Light-up-your-out-of-the-box LightSwitch ApplicationBoulos Dib
 
Spring data jpa are used to develop spring applications
Spring data jpa are used to develop spring applicationsSpring data jpa are used to develop spring applications
Spring data jpa are used to develop spring applicationsmichaelaaron25322
 
Intorduction to struts
Intorduction to strutsIntorduction to struts
Intorduction to strutsAnup72
 
Oracle9i application server oracle forms services
Oracle9i application server   oracle forms servicesOracle9i application server   oracle forms services
Oracle9i application server oracle forms servicesFITSFSd
 
Sunserver Open Solaris
Sunserver Open SolarisSunserver Open Solaris
Sunserver Open Solarispankaj009
 

Semelhante a Chapter6 web apps-tomcat (20)

Asp.net
Asp.netAsp.net
Asp.net
 
4. J2EE.pptx
4. J2EE.pptx4. J2EE.pptx
4. J2EE.pptx
 
Servlet programming
Servlet programmingServlet programming
Servlet programming
 
Introduction to ejb and struts framework
Introduction to ejb and struts frameworkIntroduction to ejb and struts framework
Introduction to ejb and struts framework
 
Developing Java Web Applications
Developing Java Web ApplicationsDeveloping Java Web Applications
Developing Java Web Applications
 
Introduction to j2 ee frameworks
Introduction to j2 ee frameworksIntroduction to j2 ee frameworks
Introduction to j2 ee frameworks
 
Ppt for Online music store
Ppt for Online music storePpt for Online music store
Ppt for Online music store
 
ASP.NET Presentation
ASP.NET PresentationASP.NET Presentation
ASP.NET Presentation
 
Light-up-your-out-of-the-box LightSwitch Application
Light-up-your-out-of-the-box LightSwitch ApplicationLight-up-your-out-of-the-box LightSwitch Application
Light-up-your-out-of-the-box LightSwitch Application
 
Spring data jpa are used to develop spring applications
Spring data jpa are used to develop spring applicationsSpring data jpa are used to develop spring applications
Spring data jpa are used to develop spring applications
 
Web techh
Web techhWeb techh
Web techh
 
Web tech
Web techWeb tech
Web tech
 
A comprehensive software infrastructure of .Net
A comprehensive software infrastructure of .Net  A comprehensive software infrastructure of .Net
A comprehensive software infrastructure of .Net
 
Intorduction to struts
Intorduction to strutsIntorduction to struts
Intorduction to struts
 
CODE IGNITER
CODE IGNITERCODE IGNITER
CODE IGNITER
 
Asp.net Vs Vue.js.pdf
Asp.net Vs Vue.js.pdfAsp.net Vs Vue.js.pdf
Asp.net Vs Vue.js.pdf
 
Oracle9i application server oracle forms services
Oracle9i application server   oracle forms servicesOracle9i application server   oracle forms services
Oracle9i application server oracle forms services
 
Sunserver Open Solaris
Sunserver Open SolarisSunserver Open Solaris
Sunserver Open Solaris
 
Mvc
MvcMvc
Mvc
 
Servlet programming
Servlet programmingServlet programming
Servlet programming
 

Chapter6 web apps-tomcat

  • 1. NetBeans IDE Field Guide Copyright © 2005 Sun Microsystems, Inc. All rights reserved. Table of Contents Developing Web Applications...........................................................................................................2 Representation of Web Applications in the IDE...........................................................................3 Project View of Web Applications...........................................................................................3 File View of Web Applications.................................................................................................3 Adding Files and Libraries to Your Web Application....................................................................5 Creating Web Pages and Other Public Files..........................................................................7 Creating Classes, Servlets, and Other Private Files...............................................................7 Adding External Resources to Your Project............................................................................8 Adding Tags and Tag Libraries...............................................................................................9 Editing and Refactoring Web Application Files............................................................................9 Completing Tags...................................................................................................................10 Expanding Abbreviations for JSP Files.................................................................................11 Manually Editing the Deployment Descriptor........................................................................12 Refactoring Web Components..............................................................................................13 Deploying a Web Application.....................................................................................................14 Customizing Contents of the WAR File................................................................................14 Undeploying a Web Application............................................................................................15 Redeploying a Web Application............................................................................................15 Creating a WAR File.............................................................................................................15 Deploying to a Different Tomcat Server................................................................................15 Testing and Debugging Your Web Application..........................................................................16 Checking For JSP Errors......................................................................................................17 Viewing a JSP File's Servlet..................................................................................................17 Viewing a File in a Web Browser..........................................................................................17 Passing Request Parameters to a Web Application.............................................................18 Debugging JSP and Tag Files..............................................................................................18 Creating and Deploying Applets.................................................................................................18 Creating an Applet................................................................................................................19 Running and Debugging an Applet in the Applet Viewer......................................................19 Running an Applet in a Web Browser...................................................................................19 Packaging an Applet into a JAR File.....................................................................................20 Packaging an Applet into a WAR File...................................................................................20 Setting Applet Permissions...................................................................................................20 Changing the IDE's Default Web Browser.................................................................................21 Monitoring HTTP Transactions..................................................................................................21 Setting Up the HTTP Monitor................................................................................................22 Setting Up the HTTP Monitor For Servers Started Outside of the IDE.................................22 Analyzing the Collected Data................................................................................................24 Replaying HTTP Requests...................................................................................................27 NetBeans IDE Field Guide, Developing Web Applications, 1
  • 2. Developing Web Applications NetBeans IDE is an ideal environment for developing Web applications. The IDE eliminates a lot of the nuisances you normally would encounter, particularly in setting up the application and in the steps between coding, deploying, debugging, and redeploying your application. And since Ant is the basis for this automation, there are no proprietary mysteries you need to unravel if you want to make the project work without the IDE as an intermediary. The following are some of the things the IDE does to make Web application development easier: • Provides a built-in Tomcat Web server on which to deploy, test, and debug your applications. • Sets up the file and folder structure of a Web application for you. • Generates and maintains the content of deployment descriptors, including the registering of any servlets that you add to your project. • Generates and maintains an Ant script with targets (commands) for compiling, cleaning, testing, WAR file creation, and deployment to a server. This script saves you from having to manually move files to the Web server. • Ensures that the configuration files that appear in the WEB-INF folder of your application are not deleted when you run the Clean command to remove results of previous builds. • Provides syntax highlighting, code completion, and other aids for editing servlet, JSP, HTML, and tag library files. • Provides the Compile JSP command, which enables you to detect syntax errors in JSP files before deploying to your server, whether the errors occur at compile time or during the translation of the JSP file into a servlet. • Provides comprehensive debugging support, which includes stepping into JSP files and tracking HTTP requests. This chapter focuses on issues specific to Web applications, such as creating and editing Web components, debugging HTTP transactions, etc., but does not include information on project creation. See Chapter 3 for information on creating projects. Most of the topics in this chapter assume that you are using the Tomcat Web server, but it is also possible to use the Sun Java System Application Server (SJSAS), which supports full J2EE applications and includes full support for Web services. Most of the tasks detailed here that involve the Tomcat server are very similar to the equivalent tasks you would perform if deploying to SJSAS. See Chapter 10 for more information on working with the Sun Java System Application Server and Chapter 9 for information on developing, exposing, and consuming Web services. NetBeans IDE Field Guide, Developing Web Applications, 2
  • 3. Representation of Web Applications in the IDE Web applications are based on a somewhat intricate architecture where the development-time layout of files differs from that of a built application. The IDE helps you manage this process by: • Providing a development-time oriented view of your project in the Projects window. This view gives you easy access to your sources and information about your classpath but hides build results and project metadata. Perhaps more importantly, working in the Projects window ensures that none of the files you create will be inadvertently deleted when you run the Clean command on your project (as could happen, for example, if you worked directly in the WEB-INF folder of a built application). • Providing a file-oriented view of your project in the Files window. This window is particularly useful for accessing and customizing your build script and for browsing your project outputs, such as the project's WAR file and its contents. • Creating and maintaining an Ant script, which is used when you run typical commands such as Build Project and Run Project. Among other things, the Ant script automates the placement of your files in the built application, the packaging of those files into a WAR file, and deployment to the specified server. Project View of Web Applications The Projects window provides a “logical” representation of the application's source structure, with nodes for the following: • Web Pages (for HTML, JSP, and image files that users of the application will have direct access to through their Web browsers) • Source Packages (for Java source packages, which in turn contain servlets and other Java classes). • Test Packages (for unit tests) • Configuration Files (for your deployment descriptor and other files) • Web Services (where you can create and register Web services – see Chapter 9 for more on development of Web services) • Libraries (where you can add libraries or include the results of other IDE projects) • Test Libraries (where you can add any libraries necessary for running unit tests on your application) File View of Web Applications If you open the Files window, you will see the physical organization of the files on disk (as shown in Figure 6-1) and find that this organization is consistent with the Apache recommendation for organizing source files (see Web Application Structure on page XXX). The IDE also adds the nbproject (to hold project metadata) and test (for unit tests) folders, but these are not included in the final built application. NetBeans IDE Field Guide, Developing Web Applications, 3
  • 4. Figure 6-1 Files window with Web application folder structure When you build the application, either through the IDE or by directly running an Ant target, a build folder is created to hold the compiled classes and the dist folder is created to hold the generated WAR file as seen in Figure 6-2. Figure 6-2 Files window showing the structure of the built WAR file Web Application Structure Apache Jakarta provides guidelines on how to structure your Web applications to ensure that they work properly with the Tomcat server. When you create a project in the IDE and select the Jakarta source structure, this structure is respected. (Similarly, you can also set up a project to use the Java BluePrints structure, which is preferred if you will be deploying to the Sun Java System Application Server.) The following is a quick rundown on the important structural elements of the built application according to the Jakarta guidelines: NetBeans IDE Field Guide, Developing Web Applications, 4
  • 5. The root folder (known as the document base), which contains all of the other files in folders in the application. • Files that are directly available to the users of the application through their Web browsers, such as HTML files, images, and JSP files. • The WEB-INF folder, which contains the deployment descriptor file (web.xml) and the classes, lib, tags, and other folders and files. The contents of WEB-INF comprise the bulk of the application and are not directly available to users. • The classes folder contains compiled class and servlet files with their package hierarchy reflected by sub-folders. You can find additional information on Tomcat source structure at http://jakarta.apache.org/tomcat/tomcat-5.0-doc/appdev/source.html. See Table 6-1 for information on how the various source elements of a Web application map to their representation in the IDE and where they end up in the deployed application. Table 6-1: Matrix of Web Application Elements and Their Representation in the IDE Content Representation in the Representation in the Files Location Within the Built Projects Window Window WAR File (located in the dist folder) Web pages Web Pages node web folder root of the file Java source files, servlets, Source Packages node src folder WEB-INF/classes folder etc. unit tests Test Packages node test folder N/A deployment descriptor Configuration Files node web/WEB-INF folder WEB-INF folder (web.xml) Tomcat context web/META-INF folder META-INF folder configuration file (context.xml) libraries Libraries node web/WEB-INF/lib WEB-INF/lib folder folder Test classpath entries Test Libraries node test folder N/A project metadata including Project Properties dialog build.xml file, nbproject N/A build script box, which you can open by folder right-clicking the project's node and choosing Properties. Adding Files and Libraries to Your Web Application Once you have created a Web project through the New Project wizard, you can start populating it with Web pages and code. The most straightforward way to create files is by opening the Projects window and right- clicking the project's node or the specific folder where you want to place the file and choosing New and then a template from the submenu. See Figure 6-3. A short wizard appears for the template enabling you to set the name and other characteristics of the file. In general, the wizard NetBeans IDE Field Guide, Developing Web Applications, 5
  • 6. guides you to help make sure that the files are placed in an appropriate directory to fit the structure of a well-designed Web application. NetBeans IDE Tip The New submenu of a node's contextual menu directly displays a selection of commonly used templates. If you want to see the full selection, choose New | File/Folder. The templates are grouped into several categories, such as Java Classes, Web, Database. In addition to servlet and JSP file templates, the Web category contains templates for filters, Web application listeners, tag files, and tag handlers, which contain useful sample code for those specific types of files. Figure 6-3 Creating a new servlet from a package's contextual menu Conceptually, files in a Web application break down into a few different types of files, the function of which determines where you place the file in the application. The main types of files that you need to add to the project are: • Web pages and other public files, meaning files that users of the application can access directly through their Web browsers. Typically these include JSP files, HTML files, and image files. • Private files, meaning files that are not directly viewable to the end users and which typically do the bulk of the processing in the application. These include Java classes, JSP files, servlets, and tag libraries and end up within the web/WEB-INF/classes folder of the compiled Web application. • External resources, files created outside of the project that the files in the NetBeans IDE Field Guide, Developing Web Applications, 6
  • 7. project depend on. These can include tag libraries, JAR files that are output from other IDE projects, and other JAR files and are kept within the WEB- INF/lib folder of the compiled Web application. In addition, there are configuration files such as the deployment descriptor (web.xml) and files specific to the server you are deploying to, but the IDE generates and maintains these files for you. For example, if you create a servlet in the IDE, the servlet is registered in the web.xml file automatically. NetBeans IDE Tip Tag libraries can be added to your Web application as libraries or as source. See Adding Tags and Tag Libraries on page XXX for more information on working with tag libraries. Creating Web Pages and Other Public Files Generally you add Web pages and other public files directly within the Web Pages node of the Projects window or in a folder of your creation within that node. When the application is built, these files are placed by the project's Ant script in the application's web folder. To add a publicly viewable HTML file, right-click the Web Pages node and choose New | HTML. To add a publicly viewable JSP file, right-click the Web Pages node and choose New | JSP. The ensuing wizard enables you to specify whether the JSP file uses standard syntax (and has the .jsp extension) or uses XML syntax (has the .jspx extension). You can also have the file created as a fragment (using the .jspf extension), which you would later reference from other pages with include statements. Creating Classes, Servlets, and Other Private Files As with general Java projects, classes are organized within packages under the Source Packages node. For most projects, this node corresponds with a folder on your disk called src. When the application is built, these files are placed by the Ant script in the application's WEB- INF/classes directory. To add a class to your project, right-click the Source Packages node or the node of a specific package and choose New | Java Class. If you have not created any package for the class you are adding, you can do so in the wizard as you are creating the class. To add a servlet to your project, right-click the Source Packages node or the node of a specific package and choose New | Servlet. The wizard for creating the servlet also guides you through registering the servlet in the application's deployment descriptor (web.xml file). If you would like to add a file based on a more specific template, right-click a package node and choose New | File/Folder to get a broader list of templates, including some for JavaBeans components, .properties files, XML files, and specialized Web components. Note that many of the Web templates have useful skeleton code and suggestions within the comments to get you started on developing these kinds of objects. See Table 6-2 for a list of templates that you can find in the Web category of the New File wizard. Table 6-2: Web Templates Template Description JSP Enables you to create a JSP file (standard syntax), JSP document (XML syntax), or a JSP fragment (which would be statically referenced from another file). NetBeans IDE Field Guide, Developing Web Applications, 7
  • 8. Template Description Servlet Creates a Java class which extends the HttpServlet class. Also enables you to register the servlet in the project's deployment descriptor (web.xml) file. Filter Creates a Java class which implements the javax.servlet.Filter interface. Filters enable you to modify HTTP requests to a servlet and responses from the servlet. In the wizard, you can create either a basic filter or one that wraps the ServletRequest and ServletResponse objects. In the template's wizard, you can register the filter in the project's deployment descriptor (web.xml) file. Web Application Listener Creates a Java class which implements one or more of the listener interfaces available for servlets, such as ServletContextListener and HttpSessionListener. Depending on the interfaces you select the wizard, the created class will listen for events, such as when servlet contexts is initialized or destroyed, the servlet session is created or destroyed, or when attributes are added to or removed from a context or session. In the template's wizard, you can register the listener in the project's deployment descriptor (web.xml) file. Tag Library Descriptor Creates a descriptor for a custom tag library. You can then register tag files and tag handlers in this file manually or when you use the New File wizard to create new tag files and tag handlers. Tag File Creates an empty .tag file with comments suggesting JSP syntax elements that you can use to create a custom tag. Tag Handler Creates a Java class for custom JSP tags. The template includes code comments with sample code and suggestions for how you might go about creating the custom tags. HTML Creates an HTML with the basic tags entered. Web Service Creates a simple Web service. See Chapter 9 for more information on extending Web services with Web applications. Message Handler Creates a SOAP-based message handler for Web services. See Chapter 10 for more information on consuming Web services with Web applications. Web Service Client Creates a Web service client based on JSR 109. See Chapter 9 for more information on consuming Web services with Web applications. Adding External Resources to Your Project If your Web application needs to be packaged with any libraries, you can add them through the Libraries node. If your project has been set up to work with the Tomcat server, the JSP and servlet libraries are included automatically and listed under a subnode for the Tomcat server. You can add external resources to your project in one of the following three forms: • An individual folder or JAR file. • A cluster of resources (or “library”). This cluster might include multiple JAR files, sources for the JAR files (which are necessary for code completion or if you want to step through the library's code with the debugger), and Javadoc documentation. You can create such a cluster in the Library Manager (Tools menu). • The output of another IDE project. To add an individual folder or JAR file to your project, right-click the Libraries node of your project, choose Add JAR/Folder, and navigate to the folder or JAR file in the file chooser. NetBeans IDE Field Guide, Developing Web Applications, 8
  • 9. To add a cluster of related resources to your project, right-click the Libraries node, choose Add Library, and select the library from the list in the Add Library dialog box. If the library you are looking for is not there, you can add it to the list by choosing Manage Libraries. NetBeans IDE Tip Besides providing a way to cluster resources, the Library Manager makes it easy to access commonly used resources. Even if you do not need to cluster resources, you still might want to add individual resources to the Library Manager to save yourself from having to dig through file choosers to add resources to other projects. To add the results of another IDE project, right-click the Libraries node of the current project, choose Add JAR/Folder, and navigate to the project's folder on your disk. In the file chooser, NetBeans IDE project folders are marked with the icon. NetBeans IDE Tip If you want to add a JAR file or the output of a project to the WAR file without making it part of the project's compilation classpath, you can do so through the Packaging node in the Project Properties dialog box. See Customizing Contents of the WAR File on page XXX. Adding Tags and Tag Libraries Tags and tag libraries can be added to a Web project in any of the following forms: • Packaged in a JAR file containing a tag library descriptor file (TLD) and the associated tags, in the form of tag files (using JSP syntax) and/or tag handlers (written in Java). Such tag libraries appear in a Web application's WEB- INF/lib folder or in the server's shared libraries folder. You can add a tag library to a Web project through the Web project's Libraries node (see Adding External Resources to Your Project on page XXX). If you are developing a tag library from scratch, you can create a Java Library project for library and then add that library to a Web project by right-clicking the project's Libraries node and choosing Add Project. See Chapter 3 for information on creating Java Library projects. • As tag files (using either standard or document syntax) included in the Web application's WEB-INF/tags folder. You can add new tag files to your project by right-clicking the project's node and choosing New | File/Folder and then selecting the Tag File template from the Web category in the wizard. • As a TLD file located in the WEB-INF/tlds folder and tag handlers (written as Java files) within the Source Packages node. You can add new TLD files and tag handlers to your project by right-clicking the project's node and choosing New | File/Folder and then selecting the templates from the Web category in the wizard. Editing and Refactoring Web Application Files The IDE's Source Editor provides a lot of features that make typing and changing of code for various Web application components easier. This section goes over a few of the features that are particularly useful for Web applications. See Chapter 4 for more information on IDE editing and refactoring features. NetBeans IDE Field Guide, Developing Web Applications, 9
  • 10. Completing Tags The IDE enables you to have tags and tag attributes completed automatically in JSP, HTML, and XML files. The tag completion feature not only reduces the number of keystrokes that you type but it also provides popup documentation for the possible ways to complete the tag or attribute that you are typing as shown in Figure 6-4. Figure 6-4 The code completion feature in a JSP File Open up the tag completion popup by typing the beginning of a tag and pressing Ctrl-Space or waiting a second for code completion to kick in automatically. If there is only one way to complete the word you are typing, the end of the word is filled in automatically. If there are multiple ways to complete the tag, a popup list of those possibilities is displayed. You can keep typing to narrow the list or select the text you want using the mouse or arrow keys to select the word you want. For example, if you want to add the following statement in a JSP file: <jsp:useBean id="hello" scope="page" class="org.mydomain.mypackage.MyClass" /> you can enter it in the following steps (don't worry – the number of steps illustrated here may seem daunting, but it is only because they are presented in such minute detail): 1. Type <jsp:u 2. Press Ctrl-Space (seBean is appended). 3. Type i 4. Press Ctrl-Space (d=”” is appended with the insertion point left between the quotation marks). 5. Type hello 6. Press the right arrow key and then the spacebar 7. Type s 8. Press Enter (cope=”” is appended with the insertion point left between the quotation marks). 9. Type p NetBeans IDE Field Guide, Developing Web Applications, 10
  • 11. 10.Press Ctrl-Space (age is appended). 11.Press the right arrow key twice. 12.Type c 13.Press Enter (lass=”” is appended with the insertion point left between the quotation marks). 14.Type o 15.Press Ctrl-Space (rg is appended, assuming that the class is part of your project). 16.Type a period (.) and press Ctrl-Space (mydomain is filled in). 17.Type a period (.) and press Ctrl-Space (mypackage is filled in). 18.Type a period (.) and press Ctrl-Space (MyClass is filled in). 19.Press the right arrow key twice and type /> See Chapter 4: Generating Code Snippets for information on completing Java expressions and configuring code completion. Expanding Abbreviations for JSP Files For commonly used JSP code snippets, you can take advantage of abbreviations in the Source Editor to reduce the number of keystrokes. Abbreviations are expanded when you type the abbreviation and then press the spacebar. See Table 6-3 for a list of abbreviations for JSP files. You can also expand abbreviations for other types of files. See Chapter 4, Table 4-1 for a list of abbreviations for Java classes. If an abbreviation is the same as a text that you want to type (i.e. you do not want it to be expanded into something else), press Shift-Space to keep it from expanding. You can modify the list of abbreviations in the Abbreviations dialog box for a type of file. See Chapter 4, Adding, Changing, and Removing Abbreviations. Table 6-3: JSP Abbreviations in the Source Editor Abbreviation Expands to ag application.getValue(" ap application.putValue(" ar application.removeValue(" cfgi config.getInitParameter(" oup out.print(" oupl out.println(" pcg pageContext.getAttribute(" pcgn pageContext.getAttributeNamesInScope( pcgs pageContext.getAttributesScope(" pcr pageContext.removeAttribute(" pcs pageContext.setAttribute(" rg request.getParameter(" sg session.getValue(" sp session.putValue(" NetBeans IDE Field Guide, Developing Web Applications, 11
  • 12. Abbreviation Expands to sr session.removeValue(" jspf <jsp:forward page=" jg <jsp:getProperty name=" jspg <jsp:getProperty name=" jspi <jsp:include page=" jspp <jsp:plugin type=" jsps <jsp:setProperty name=" jspu <jsp:useBean id=" pg <%@ page pga <%@ page autoFlush=" pgb <%@ page buffer=" pgc <%@ page contentType=" pgerr <%@ page errorPage=" pgex <%@ page extends=" pgie <%@ page isErrorPage=" pgim <%@ page import=" pgin <%@ page info=" pgit <%@ page isThreadSafe=" pgl <%@ page language=" pgs <%@ page session=" tglb <%@ taglib uri=" Manually Editing the Deployment Descriptor Though the IDE guides you through the adding of entries for the deployment descriptor (web.xml file) as you add servlets, filters, and listeners to your project, you might have occasion to edit the file by hand. To open the deployment descriptor in the Source Editor, open the Projects window, expand the Configuration Files node (or the Web Pages | Web-INF node) and double-click the web.xml file. The file opens as a multi-tab document in the Source Editor with the Overview tab open (as seen in Figure 6-5). You can edit different parts of the web.xml file with the visual editors for different elements of the file (Overview, Servlets, Filters, and Pages) or you can click the XML tab to directly edit the file's XML source (see Figure 6-6). Figure 6-5 Deployment descriptor visual editor NetBeans IDE Field Guide, Developing Web Applications, 12
  • 13. Figure 6-6 Deployment descriptor XML editor Refactoring Web Components NetBeans IDE's refactoring support extends to Web applications and enterprise applications. For example, you can do the following: NetBeans IDE Field Guide, Developing Web Applications, 13
  • 14. Rename classes, methods, and fields of servlets, tag handlers, and other Web components. See Chapter 4, Renaming All Occurrences of the Currently Selected Class, Method, or Field Name • Move classes to a different packages or projects (resulting in the class being packaged in a different WAR file). See Chapter 4, Moving a Class to a Different Package. • Change method parameters including parameter names, parameter types, method visibility, adding method parameters or removing method parameters. See Chapter 4, Changing a Method's Signature. • Changing visibility of fields and adding getter and setter accessor methods. See Chapter 4, Generating Read/Write Properties. When you rename a Web component class (such as a servlet or tag handler), any corresponding name entries in the application's deployment descriptor (web.xml file) and/or tag library descriptor (TLD) are updated as well. When you move a class and the deployment descriptor as affected, you are prompted with a Confirm Changes dialog box to make sure that you want to process changes to the deployment descriptor. Important Be careful not to rename or change the parameters of a servlet method that must be implemented with a given name according to the Servlet or Enterprise JavaBeans specifications. Deploying a Web Application By default, a Web application is deployed to the server you have specified when you run that project. For applications that you deploy to the Tomcat server, the application is deployed “in place”, meaning that the IDE creates an XML file that is placed in the server's conf/Catalina/localhost/ directory and points Tomcat to the IDE project's build directory where the applications files reside. When you build a Web project in the IDE, a WAR file is also created, which you can manually deploy to a server. Customizing Contents of the WAR File By default, a Web project's generated WAR file includes: • All files displayed within the project's Web Pages node, including the web.xml and context.xml files. • Compiled class files of the source files within Java Sources node plus any other files placed there without the .java and .form file extensions. • Any libraries that you have added to the project's Libraries node. You can also add JAR files to the WAR file and filter out contents that would normally appear. To customize a WAR file's contents: 1. Right-click the project's node in the Projects window and choose Properties. 2. Select the Build | Packaging node. NetBeans IDE Field Guide, Developing Web Applications, 14
  • 15. 3. If you want to filter out contents from the generated WAR file, modify the regular expression in the Exclude From WAR File field. 4. If you want to add additional folders or files, do so through Add JAR/Folder, Add Library, or Add Project buttons. The Add JAR/Folder button enables you to add individual JAR files or folders, whether or not they come from IDE projects. The Add Library button enables you to add any JAR files or clusters of JAR files that you have designated in the IDE's Library Manager. The Add Project button enables you to add the JAR file that is output from another IDE project. When you add an IDE project to the WAR file, that project's JAR file is rebuilt every time you build the Web application project. Undeploying a Web Application When you stop a Web application that you have run through the IDE, the application still remains deployed through a reference to that application in the form of an XML file in Tomcat's conf/Catalina/localhost directory. To undeploy an such an application from Tomcat: 1. Open the Runtime window. 2. Expand the Servers node, then expand the node for the Tomcat server and the server's Web Applications node. 3. Right-click the node for the running Web application and choose Undeploy. Redeploying a Web Application To remove your application from the server and then redeploy it, right-click the project's node and choose Redeploy Project. Creating a WAR File When you run the Build Project command on a Web project in the IDE, a WAR file is created automatically and placed in the dist folder of the project. You can access this file and browse its contents in the Files window. Deploying to a Different Tomcat Server The IDE comes bundled with the Tomcat server, which facilitates Web application development and testing. If you have a different Tomcat installation that you want to test on and/or deploy to, you can register that installation with the IDE. You can easily switch your application to work with the different server installations. This is particularly useful if you want to develop and test on one installation and then deploy to a production environment. To set up the IDE to recognize a different Tomcat installation: 1. Choose Tools | Server Manager . 2. Click the Add Server button. 3. On the Choose Server page of the wizard that opens, select a server from the Server combo box, enter an IDE display name for that server in the Name field, and click Next. NetBeans IDE Field Guide, Developing Web Applications, 15
  • 16. 4. On the Tomcat Server Instance Properties page, specify the Tomcat installation directory (and base directory if it is a shared installation) and fill in a user name and password. You can also determine whether to enable the IDE's HTTP Monitor. If the HTTP Monitor is enabled, you can monitor your application's server requests, cookies, and so on, which makes it easier to debug your application. However, this option slows down the server, so you will probably want this option disabled if you are using this is your production server. See Monitoring HTTP Transactions on page XXX for information on using the HTTP Monitor. 5. Verify that the server is not using a port number used by another server. In the IDE, you can view the server's port number by mousing over the server's node and viewing the node's tooltip. If another server instance is using the same port, you need to stop one of the servers and change the port it is using. Stop the server right-clicking the server's node, choosing Start/Stop Server and clicking Stop Server. Then right-click the server node, choose Properties, and change the Server Port property. Restart the server by right-clicking the node, choosing Start/Stop Server and clicking Start Server. 6. If you have any existing Web applications within the IDE that you want to run on the newly added server, modify the properties for each project to use the server. You can do so by right-clicking the project's node in the Projects window, choosing Properties, selecting the Run node, and choosing the server from the Server combo box. NetBeans IDE Tip If you later want to change the server's configuration, you can access the server's properties opening the Runtime window, expanding the Servers node, right-clicking the specific server's node and choosing Properties. Testing and Debugging Your Web Application NetBeans IDE provides a rich environment for troubleshooting and optimizing your Web applications. Some of the features to ease testing of Web applications include: • The Compile JSP command, which enables you to check individual JSP files for errors before deploying to the server. • Debugger integration with JSP files, which means that you can set breakpoints in JSP files and step through JSP in the debugger (as opposed to having to step through the generated servlet code). • Ability to step through tag files. • Ability to evaluate Expression Language (EL) expressions in JSP files during a debugging session (by mousing over the expression or setting a watch). • The HTTP Monitor, which keeps track of HTTP communication between servlets and the server. This feature is covered in detail under Monitoring HTTP Transactions on page XXX. See Chapter 5 for more information on the IDE's general debugging features that these features extend. NetBeans IDE Field Guide, Developing Web Applications, 16
  • 17. Checking For JSP Errors JSP files are not compiled like typical Java files before they are deployed. Instead, they are compiled by the server after they have been deployed (where in fact they are first translated to servlets, which are then compiled). This makes it more cumbersome to correct errors that normally are detected when compiling, since it forces you to deploy the application, discover the error, undeploy, correct the error, and redeploy. However, NetBeans IDE enables you to compile JSP files to check for errors before you package and deploy the application. You can either compile individual JSP files manually or specify that they be compiled when you build the project. To compile a JSP file manually, select the file in the Projects window or in the Source Editor and select Build | Compile File or press F9. To have all JSP files compiled when you run the Build Project command, right-click the project's node, choose Properties, select the Compiling node, and select the Test Compile All JSP Files During Builds checkbox. The compilation results are reported in the Output window, where you can discover any errors, whether they occur in the translation to the servlet or in the compilation of the servlet. The compiled files themselves are placed in the project's build/generated folder, which you can view from the Files window. These files are not used when you are building and packaging the application for deployment. Viewing a JSP File's Servlet The generation of a servlet from a JSP file happens dynamically on the server where the Web application is deployed. You can view this generated servlet once you have run the project or the specific JSP associated with it by right-clicking the file and choosing View Servlet. NetBeans IDE Tip If you would like to see the servlet code that is generated when you run the Compile JSP command, open the Files window open the build/generated/src folder, and navigate to the file which is named according to the JSP file name, but with a _jsp suffix and .java extension. Viewing a File in a Web Browser You can open components of a Web application in a Web browser from the IDE. To view a specific JSP page in a Web browser, you need to run that file individually (by right-clicking the file in the Source Editor or pressing Shift-F6). To open an HTML file in the Web browser, right-click the HTML page's node in the Projects window and choose View. NetBeans IDE Tip The View command for HTML files is not available from the Source Editor. If you want to view the current HTML file in the Source Editor without your fingers leaving the keyboard, press Ctrl-Shift-1 to jump to the file's node in the Projects window, press Shift-F10 to open the node's contextual menu, press the down arrow to select View, and press Enter. NetBeans IDE Field Guide, Developing Web Applications, 17
  • 18. Passing Request Parameters to a Web Application You can manually test the way the Web application will respond to certain input by running the application with certain request parameters specified ahead of time. To pass request parameters to a JSP page: 1. Right-click the JSP file's node and choose Properties. 2. In the Request Parameters property, enter the parameters in URL query string format (where the expression begins with a URL, continues with a question mark (?) to mark the beginning of the query, and completed with the parameters as name/value pairs, where the pairs separated by ampersands (&)). To pass request parameters to a servlet: 1. Right-click the servlet's node in the Projects window, and choose Tools | Set Servlet Execution URI. 2. In the dialog box, append a question mark plus the name/value pairs, with each pair separated by an ampersand. Debugging JSP and Tag Files One of the IDE's features that has long made NetBeans IDE a favorite with Web developers is the ability of the debugger to step into JSP files. You can set breakpoints in JSP files and step through the JSP line by line while monitoring the values of variables and other aspects of the running program. NetBeans IDE 4.1 adds the ability to step into tag files. To set a breakpoint in a JSP or tag file, select the line where you would like to pause execution and press Ctrl-F8. See Chapter 5 for more information on debugging. Creating and Deploying Applets NetBeans IDE does not have a specific project type for applets, so the development cycle for applets is a little different than for other types of projects. You can not designate an applet as a main project, which means that several project-specific commands (such as Run Project) do not apply to applets. However, you can still create, test, and deploy applets fairly easily. The general outline of applet development is as follows: 1. Create a Java Library project to hold the applet. 2. Create an applet from one of the templates in the New File wizard and fill in code for the applet. 3. Test the applet in the JDK's applet viewer by right-clicking the applet's node in the Projects window and choosing Run File. 4. Create a JAR file for the applet by right-clicking the applet's project node and choosing Build Project. 5. If you want to add the applet to a Web application, add the applet's project (or just the applet's JAR file) through the Web project's Libraries node. NetBeans IDE Field Guide, Developing Web Applications, 18
  • 19. Creating an Applet To create an applet: 1. Choose New Project, select the General category, select the Java Library template, and click Next. 2. Enter a name and location for the project and click Finish to exit the wizard. 3. In the Projects window, expand the node for the project you have just created. Then right-click the Source Packages node and choose New | File/Folder. 4. In the New File wizard, select one of the available applet templates. There are four available: • Java Classes category, JApplet template. This template extends javax.swing.JApplet and is recommended over the Applet template, which is based on the less flexible java.applet.Applet class. • Java GUI Forms category, JApplet template. This template extends javax.swing.JApplet and enables you to use the IDE's Form Editor to visually design your applet. This template is recommended over the JApplet template in the AWT Forms sub-category. • Java Classes category, Applet template. This template extends java.applet.Applet. • Java GUI Forms | AWT Forms category, Applet template. This template extends java.applet.Applet and enables you to use the IDE's Form Editor to visually design your applet. Click Next, specify a name and a package for the applet, and then click Finish. You can then code the applet, either by hand or with the assistance of the Form Editor. Running and Debugging an Applet in the Applet Viewer As you are developing the applet, you can use the JDK's applet viewer to test the applet's functionality. When you use the Run File and Debug File commands, the applet is automatically displayed in the applet viewer. To run an applet, right-click the applet's node in the Projects window and choose Run File. To start debugging an applet: 1. Set a breakpoint in the code by selecting the line where you first want execution to pause and press Ctrl-F8. 2. Right-click the applet's node in the Projects window and choose Debug File. Running an Applet in a Web Browser If you want to see how your applet behaves in an actual Web browser, you can open an HTML launcher for the applet. To run an applet in a Web browser: 1. Open the Files window and expand the project's build directory. 2. Right-click the HTML launcher file (it should have the same name as the applet class but with an HTML extension) and choose View. NetBeans IDE Field Guide, Developing Web Applications, 19
  • 20. The applet opens in the default Web browser specified in the IDE. See Changing the IDE's Default Web Browser on page XXX if you would like to change the IDE's default Web browser. NetBeans IDE Tip If you want to customize the HTML launcher file, you can copy the generated launcher file into the folder that contains the applet source file. This prevents the launcher file from being overwritten every time you run the applet. When you run the applet or build the applet's project, the HTML file is copied into the folder with the compiled applet class. If you do not want this file to be included in the JAR that is created when you build the project, you can modify the filter for the JAR file's contents. In the Projects window, right-click the project's node and choose Properties. In the dialog box, select the Packaging node and modify the regular expression in the Exclude From JAR File field. For example, you could add a comma plus an expression like **/Myapplet.html to make sure that your launcher file (no matter which directory it is in) is excluded from the built JAR file. Packaging an Applet into a JAR File If you want to put an applet into a JAR file, you can do so by right-clicking the applet's project node in the Projects window and choosing Build Project. The applet is compiled and the compiled class files are placed in a JAR file in the dist folder, which you can view with the Files window. Packaging an Applet into a WAR File To add an applet to a Web application: 1. Put the applet into a JAR file. See Packaging an Applet into a JAR File above for information on how to do this in the IDE. 2. Right-click the Web application's project node in the Projects window and choose Properties. 3. In the Project Properties dialog box, select the Build | Packaging node. 4. Click the Add Project button, navigate to the applet's project folder, and click Add Project JAR Files. Setting Applet Permissions When you create and run an applet through the IDE, an applet.policy is created with all permissions granted and is placed in the root folder of the project (which you can view through the Files window). You can modify this file by double-clicking its node to open it in the Source Editor. You can also specify a different policy file for the applet. To specify a different policy file: 1. Right-click the Web application's project node in the Projects window and choose Properties. 2. In the Project Properties dialog box, select the Run node. 3. In the VM Options field, modify the value of the -Djava. security.policy option to point to the policy file. NetBeans IDE Field Guide, Developing Web Applications, 20
  • 21. Changing the IDE's Default Web Browser To change the IDE's default Web browser, choose Tools | Setup Wizard and select a browser from the Web Browser combo box. If the IDE can not find a given Web browser on your system, you might need to specify the executable for that Web browser. To point the IDE to a Web browser that is listed in the Setup Wizard: 1. Choose Tools | Options and expand the IDE Configuration | Server and External Tools Settings | Web Browsers node. 2. Select the subnode for the browser that you want and modify the Browser Executable property. To add to the IDE's list of Web browsers: 1. Choose Tools | Options and expand the IDE Configuration | Server and External Tools Settings | Web Browsers node. 2. Right-click the Web Browsers node, choose New | External Browser, type the browser's name, and click Finish. 3. Select the subnode for the added browser and modify the Browser Executable property to point to that browser's executable. Monitoring HTTP Transactions NetBeans IDE provides a built-in HTTP Monitor to help isolate problems with data flow from JSP and servlet execution on a Web server. There is no need to add logic to your Web application to trace HTTP requests and associated state information. The NetBeans IDE built-in HTTP Monitor can do this for you. When the IDE is configured with a Web container or a Web application is deployed with a NetBeans HTTP Monitor servlet filter and filter mapping, the HTTP Monitor will automatically record all HTTP requests made to the Web container. For each HTTP request that is processed by the Web container, the HTTP Monitor not only records the request, it also records state information maintained in the Web container. By using the HTTP Monitor, you can analyze HTTP requests, and store HTTP GET and HTTP POST requests for future analysis sessions. You can also edit these stored requests and replay them. This is a powerful feature to help isolate data flow and state information passed within an HTTP request to a Web container. HTTP requests are stored until you exit the IDE unless you explicitly save them. The following are some of the things that you can do with the IDE's HTTP Monitor: • Analyze HTTP requests records. • Save HTTP request records. • Edit HTTP request records. • Refresh request records. • Sort HTTP request records. • Delete HTTP request records. • Replay HTTP request records. NetBeans IDE Field Guide, Developing Web Applications, 21
  • 22. In the following sections, you will learn how to setup the HTTP Monitor, analyze the data the HTTP Monitor collects and replay recorded HTTP requests. Setting Up the HTTP Monitor When you run a Web application, the HTTP Monitor is generally automatically enabled. If the HTTP Monitor is not displayed in the bottom of the IDE, then verify the HTTP Monitor is enabled by performing the following tasks. 1. Expand the Runtime window's Servers node to show your registered Web server. Then right click the server's node and choose Properties. 2. Place a check box in the Enable HTTP Monitor property. 3. If the registered Web server is currently running, stop and restart it by right clicking your registered Web server under the Runtime window's Servers node and selecting Start / Stop Server. Figure 6-6 shows the Enable HTTP Monitor property on the Sun Java System Application Server 8 Properties dialog. Figure 6-6: Properties dialog box for the Sun Java System Application Server Setting Up the HTTP Monitor For Servers Started Outside of the IDE You can also use the HTTP Monitor on Web servers started outside the NetBeans IDE. To do so, execute the following tasks: NetBeans IDE Field Guide, Developing Web Applications, 22
  • 23. 1. Go to the directory where the NetBeans IDE is installed and copy the modules/org-netbeans-modules-schema2beans.jar and modules/org-netbeans-modules-web-httpmonitor.jar files to your Web module's WEB-INF/lib directory. 2. Add a filter declaration that is appropriate for your servlet's version to the top of your Web module's WEB-INF/web.xml file. Filters and filter mapping entries must be specified at the beginning of a deployment descriptor. See the examples below for filters for the servlets corresponding the 2.3 and 2.4 versions of the Servlet specification. A Servlet 2.4 filter declaration might look like the following: <filter> <filter-name>HTTPMonitorFilter</filter-name> <filter-class> org.netbeans.modules.web.monitor.server.MonitorFilter </filter-class> <init-param> <param-name> netbeans.monitor.ide </param-name> <param-value> name-of-host-running NetBeans IDE:http-server-port </param-value> </init-param> </filter> <filter-mapping> <filter-name> HTTPMonitorFilter </filter-name> <url-pattern> /* </url-pattern> <dispatcher> REQUEST </dispatcher> <dispatcher> FORWARD </dispatcher> <dispatcher> INCLUDE </dispatcher> <dispatcher> ERROR </dispatcher> </filter-mapping> A Servlet 2.3 filter declaration might look like the following: <filter> <filter-name>HTTPMonitorFilter</filter-name> <filter-class> org.netbeans.modules.web.monitor.server.MonitorFilter </filter-class> <init-param> <param-name> netbeans.monitor.ide NetBeans IDE Field Guide, Developing Web Applications, 23
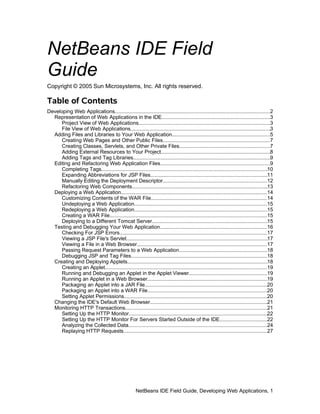
  • 24. </param-name> <param-value> name-of-host-running NetBeans IDE:http-server-port </param-value> </init-param> </filter> <filter-mapping> <filter-name> HTTPMonitorFilter </filter-name> <url-pattern> /* </url-pattern> </filter-mapping> A Web application can be monitored with the IDE HTTP Monitor from multiple NetBeans IDEs by adding additional init-param entries to the Servlet filter declaration in the Web deployment descriptor. For instance, you would an additional init-parm entry such as the one shown below: <init-param> <param-name> netbeans.monitor.ide </param-name> <param-value> name-of-2nd-host-running NetBeans IDE:http-server-port </param-value> </init-param> IMPORTANT When you deploy the Web module you have been monitoring with the HTTP Monitor to a production server, remember to remove the Servlet filter and filter mapping declarations from the Web module's deployment descriptor. Otherwise, the Web module will be open for HTTP monitoring from those NetBeans IDEs specified in the init-param section(s) of the servlet filter in the Web module's deployment descriptor. Analyzing the Collected Data After you have setup the HTTP Monitor, you can use the HTTP Monitor to debug your Web application by observing data flow from your JSP page and servlet execution on the Web server. The HTTP Monitor records data about each incoming request. The HTTP Monitor is automatically displayed in the bottom of the IDE. A snapshot of the HTTP Monitor is shown in Figure 6-7. NetBeans IDE Field Guide, Developing Web Applications, 24
  • 25. Figure 6-7 HTTP Monitor The HTTP Monitor consists of two panels. On the left is a tree view of HTTP request records. Every HTTP request made to the HTTP server is recorded in the HTTP Monitor. Requests resulting from internal dispatches are reflected by nested nodes under those Web containers which support it. In addition, forwarded or included requests are nested under the node corresponding to the main request. Displayed on the right panel of the HTTP Monitor is additional data for a selected HTTP request record on the left panel. When you select an HTTP request record on the left, session data corresponding to the selected record is displayed in the right panel. The additional session information available in the right panel include; detailed request information, cookie name / value pairs, session data, servlet context, context attributes, initialization parameters, client / server information such as client protocol, client IP address, server platform and server host name along with additional HTTP request header information. The right panel allows you view specific data in each of these categories by selecting a tab corresponding to the information you would like to see. Figure 6-7 below shows the additional session information for a selected HTTP request record. NetBeans IDE Field Guide, Developing Web Applications, 25
  • 26. Figure 6-7 HTTP Monitor with a record selected and its request data displayed In the tree view, left panel of the HTTP Monitor, there are two categories of records that can be viewed, Current Records or Saved Records. Current Records represent HTTP request records collected since the NetBeans IDE has been started. Current Records will persist across restarts of the Web server, but they will not persist across restarts of the NetBeans IDE. To persist Current Records across NetBeans IDE restarts, they must be saved. Individual Current Records may be saved by selecting a HTTP request record, right clicking the selected Current Record and choosing Save from the displayed menu. You can select multiple HTTP request records by pressing the Shift or Control keys. Figure 6-8 illustrates the selecting and saving of multiple HTTP requests. Figure 6-8 Saving multiple records in the HTTP Monitor Notice when you save HTTP requests, the selected records are moved to the Saved Records category. The selected records are not copied. You should keep this in mind should you want to replay a sequence of HTTP requests. The tree view, left panel of the HTTP Monitor, also provides several viewing options of the HTTP requests in the upper left portion of the panel in the form of five buttons. For instance, you can reload all the HTTP request records, sort the HTTP request records by time stamp in descending or ascending order, sort the records alphabetically and show or hide the time stamp for each HTTP request record. Table 6-4 summarizes the action for each button. Table 6-4: HTTP Monitor toolbar buttons Request Record View Button Action reload Reloads all the HTTP request records currently stored descending sort Sorts HTTP request records by time stamp in descending order ascending sort Sorts HTTP request records by time stamp in ascending order alphabetically sort Sorts the HTTP request records alphabetically time stamp Hides or displays the time stamps in the list of HTTP requests NetBeans IDE Field Guide, Developing Web Applications, 26
  • 27. In addition to saving HTTP records, HTTP records may also be deleted. The NetBeans IDE provides much flexibility when deleting HTTP records. For instance, individual and multiple Current Records or all Current Records may be deleted. Individual, multiple Saved or all Saved Records can also be deleted. To remove an individual Current Record, right click the record to be deleted and choose the Delete option from the contextual menu. To remove multiple Current Records, select additional records using the Shift or Control key, then right click the selected records and choose the Delete option from the contextual menu. To remove all Current Records, right click the Current Records folder and choose the Delete option. To remove Saved Records, individually select or multiply select the Saved Records to delete, right click the selected records and choose the Delete option from the contextual menu. To remove all Saved Records, right click the Saved Records folder and choose the Delete option from the contextual menu. Replaying HTTP Requests The most powerful feature of the HTTP Monitor is the editing and replaying of HTTP requests. By editing and replaying HTTP requests, you can quickly and easily trace and diagnose problems with the flow of data from JSP pages and servlet execution on the Web server. When you replay an HTTP request, the response appears in your Web browser. Thus you can visually see the result of a given HTTP request being replayed in your Web browser. NetBeans IDE Tip The IDE opens your default Web browser when you replay HTTP requests. If the IDE cannot find the operating system's default Web browser, you can configure the Web browser manually. See Changing the IDE's Default Web Browser on page XXX. Both Current Records or Saved Records may be replayed. To replay an HTTP request, select the HTTP request to replay in the left panel tree view and choose the Replay option from the contextual menu. Figure 6-9 shows a Current Record being selected for replay. Figure 6-9 Selecting a record to be replayed in the HTTP Monitor Notice the selected record is replayed in your browser after you have chosen Replay from the contextual menu. NetBeans IDE Field Guide, Developing Web Applications, 27
  • 28. In addition to replaying HTTP requests, you can also edit an HTTP request before replaying it. To edit an HTTP request before replaying it, select an HTTP request in the left panel tree view, either a Current Record or Saved Record, right click the record and choose the Edit and Replay option from the contextual menu. NOTE: Multiple records and cannot be edited and replayed. After choosing the Edit and Replay option, a dialog box is displayed where you can make various modifications. The supported modifications in the Edit and Replay of an HTTP request include options to edit a parameter to query, modify request URI parameters, modify cookies, modify server execution properties and modify HTTP request parameters. Figure 6-10 HTTP Monitor Edit and Replay dialog box On the Query tab, in Figure 6-10, you can add a query parameter or delete a query parameter and modify URI request parameters. On the Request tab, you can modify the Request URI by selecting the ellipsis (...) button next to the request parameter value. You can change the request method from a GET to a POST or PUT, by selecting the dropdown box to the right of the Request Method type in the left hand column. You can also modify the Request Protocol by selecting the ellipsis button next in the far right column of the Request Protocol. On the Cookies tab, you can add modify or delete cookies associated with the HTTP request. On the Server tab, you can modify server execution values such as the host name and port where the HTTP request should be executed. You can add, modify and delete HTTP headers under the Headers tab. After making your desired edits to the HTTP request, you can replay the modified request by pressing the Send HTTP Request button. The resulting HTTP request will then be sent to your Web browser where the results will be displayed. NetBeans IDE Field Guide, Developing Web Applications, 28