SlideShare uma empresa Scribd logo
1 de 32
Baixar para ler offline
SQL Server Club – grow your knowledge
www.sqlserverclub.com
How to Install SQL Server 2008
A Step by Step guide to installing SQL Server 2008 simply and successfully
with no prior knowledge
Developers and system administrators will find this installation guide useful, as will
seasoned DBAs. It will teach you the basics required for a typical, problem-free
installation of SQL Server 2008, allowing you to add other components later if you
wish.
Remember to install the .Net Framework 3.5
Before you start the installation, you’ll need to install the .Net 3.5 Framework. This
comes pre-installed on Windows 2008 Server, but for earlier versions of Windows,
you’ll need to install it first. This is a straightforward pre-requisite and is usually
included as part of the SQL Server 2008 installation. However, if you don’t know how
to do this, or for some reason you need to download it, check out the guide Installing
.Net Framework 3.5 for SQL Server 2008, also on SQL Server Club.
Once this Framework in installed you can commence the installation of SQL Server
2008.
STEP 1 : Copy the installation files
First off I’d recommend you copy the entire directory structure from the SQL Server
2008 installation disc to the C: drive of the machine you are going to install it on.
Although this means you need to grab a cup of coffee whilst it’s copying, this has
three advantages:
• It makes the installation process much faster than running it from CD/DVD
once it gets started.
• It allows you to easily add or remove components later, without having to
hunt around for the CD/DVD.
• If your media is damaged and a file won’t copy, you get to find out now,
rather than halfway through the installation.
SQL Server Club – grow your knowledge
www.sqlserverclub.com
Here’s what my system looks like after the copy:
STEP 2 : Setup.exe
Double click on the setup.exe file.
After a few seconds a dialog box appears:
SQL Server Club – grow your knowledge
www.sqlserverclub.com
This will disappear from the screen and then the main installation page appears:
SQL Server Club – grow your knowledge
www.sqlserverclub.com
STEP 3 : SQL Server Installation Center
Click on the Installation hyperlink on the left hand side of the screen:
SQL Server Club – grow your knowledge
www.sqlserverclub.com
STEP 4 : SQL Server Installation Center
Click on the "New Server stand-alone installation" link on the right side of the
screen:
The following dialog appears on the screen whilst the install program prepares for
installation:
After a minute or so (the timing will vary according to your system), the following
screen appears:
SQL Server Club – grow your knowledge
www.sqlserverclub.com
STEP 5 (optional) :
If any checks have failed, click on the Show details button or "View detailed
report link" to find out the cause, correct it, then click on the Re-run button to
perform the checks again.
STEP 6 : Product key
If all checks have passed, click on the OK button. After a few moments, the option
to select the edition and to enter the licence key (or “product key”) will appear. Note
that the product key box may already be populated, depending on which edition you
have. Don’t enter the product key we’ve shown here, it won’t work on your system!:
SQL Server Club – grow your knowledge
www.sqlserverclub.com
STEP 7 : Licence Terms
Enter the product key into the box, or choose the free edition if you're evaluating
SQL Server 2008, and click on the Next button:
Click in the "I accept the license terms" check box, then click on the Next
button again.
SQL Server Club – grow your knowledge
www.sqlserverclub.com
STEP 8 : Setup Support Files
The following screen appears; click on the Install button:
SQL Server Club – grow your knowledge
www.sqlserverclub.com
The following screen will appear whilst Windows Installer prepares itself for the
installation. This will take a short while:
After 30 seconds or so the dialog appears again:
SQL Server Club – grow your knowledge
www.sqlserverclub.com
STEP 9 : Setup Support Rules
If all is well, the following screen appears:
Click on the Next button again.
SQL Server Club – grow your knowledge
www.sqlserverclub.com
STEP 10 : Feature Selection
Select the features you want to install.
At a minimum, the following are useful (I'd argue essential), but what you need will
depend on your needs:
Click on the Next button.
SQL Server Club – grow your knowledge
www.sqlserverclub.com
STEP 11 : Instance Configuration
After a short while the following screen appears:
For most installations, keep the default settings.
Click on the Next button.
SQL Server Club – grow your knowledge
www.sqlserverclub.com
STEP 12 : Disk Space Requirements
This screen just tells you if you have sufficient disk space on the drive you’re
installing to, and what’s going to be installed where.
Click on Next.
SQL Server Club – grow your knowledge
www.sqlserverclub.com
STEP 13 : Server Configuration
This step allows you to set up the service accounts that will be used to run SQL
Server. If you have created Windows NT or Active Directory accounts for use with
services, use these.
If not, then just to get the installation up and working, use the built-in Network
Service account for all three services listed (this account does not require a
password).
This allows SQL Server to start up after installation. However, it can be easily
changed later to another account through the Services applet (Control Panel ->
Administrator Tools -> Services):
In addition, remember to change the Startup Type to Automatic, for all three
services. This automatically starts the SQL Server database engine, SQL Agent and
SQL Browser services when the server is re-booted.
The first service runs the SQL Server database engines executable process. The
other two services allow scheduled jobs to run after installation (and after a re-boot),
and allow the SQL Server to be found by clients on the network.
Do not worry about changing the collation tab, unless there is a specific requirement
for anything other than the default collation sequence.
Finally, Click on Next.
SQL Server Club – grow your knowledge
www.sqlserverclub.com
STEP 14 : Database Engine Configuration – Account Provision
This screen allows you to set up database engine security.
Change the Authentication Mode to Mixed Mode unless you are certain you only
need Windows-only authentication.
• Many third party applications rely on SQL Server logins to operate
correctly, so if you are setting up a server for a third party
application, rather than one developed in-house, enabling Mixed Mode
authentication is a good idea.
If you pick Mixed Mode security, you must also enter a password for the sysadmin
account (sa).
Enter and confirm a secure password for the sa account and keep it somewhere safe.
Do not give it to any one you do not want to have access to the SQL Server.
Note that you MUST also provide a Windows NT account on the local machine as a
SQL Server administrator. If you do not want Windows system administrators to be
able walk up to the box and login to SQL Server, create a new, local, dummy
Windows user and add this account instead. Otherwise, add in the local administrator
account, or your own Windows account on the domain in which the SQL Server will
reside.
SQL Server Club – grow your knowledge
www.sqlserverclub.com
STEP 15 : Database Engine Configuration – Data Directories
Click on the Data Directories tab.
Change the directories to specify which drives in your system will be used for the
various types of database files.
Generally it’s advisable to put the User database directory and User log directory on
separate physical drives for performance, but it will depend on how Windows has
been configured and how many disk drives you have available.
If you are installing on a single drive laptop or desktop, then simply specify:
Data root directory C:Program FilesMicrosoft SQL Server
User database directory C:Data
User log directory C:Logs
Temp DB directory C:TempDB
Temp Log directory C:TempDB
Backup directory C:Backups
Do not click on the FILESTREAM tab unless you know you need to change these
options, as it is not generally required for most installations, but can easily be
changed by using sp_configure 'filestream_access_level', '<level>'after SQL Server
has been installed. Click on Next.
SQL Server Club – grow your knowledge
www.sqlserverclub.com
STEP 16 : Error Usage Reporting
This screen simply asks if you want to send error information to Microsoft and can
safely be skipped if you do not want to share any information.
Click boxes if you want to help Microsoft help you.
Click on Next again…
SQL Server Club – grow your knowledge
www.sqlserverclub.com
STEP 16 : Installation Rules
This screen simply checks if there are any processes or other installations running
which will stop the installation of SQL Server 2008.
Click on Next again – you’re almost ready to install:
SQL Server Club – grow your knowledge
www.sqlserverclub.com
STEP 17 : Ready to Install
This screen summarises what you are about to install and gives you a last chance to
cancel or change anything that’s wrongly configured:
Check that what’s being installed is what you want and then click on Install when
you’re sure you want to start the installation process:
SQL Server Club – grow your knowledge
www.sqlserverclub.com
Installation Progress
SQL Server 2008 will now install. How long it takes depends on the speed of your
machine, what load it’s under, the installation media (CD is slower) and what you’ve
chosen to install.
SQL Server Club – grow your knowledge
www.sqlserverclub.com
…More Installation Progress
… and Finally
Finally, the installation will complete:
SQL Server Club – grow your knowledge
www.sqlserverclub.com
…and the following dialog box will appear:
Click on OK, the machine will NOT reboot.
The following will appear:
SQL Server Club – grow your knowledge
www.sqlserverclub.com
…followed by:
Click on the Next button again…
SQL Server Club – grow your knowledge
www.sqlserverclub.com
STEP 18 : Installation Complete
The following screen appears:
It may be worth clicking on the installation log at the top of the screen to check
everything’s gone as expected. Not that this is MUCH smaller than the usual SQL
Server installation log files of old.
Finally, click on the Close button. The following dialog will appear:
Click on OK – your server will NOT re-boot at this point.
SQL Server Club – grow your knowledge
www.sqlserverclub.com
The dialog box will disappear and you will be returned to the Installation Center:
Click on the Close button (the “x”) in the top right of the screen.
Finally, manually reboot your machine to complete the SQL Server 2008 installation.
SQL Server Club – grow your knowledge
www.sqlserverclub.com
Top Tips :
How to check that SQL Server 2008 has installed correctly
Here are a short number of post-installation checks which are useful to perform after
re-booting your new SQL Server. You don’t have to run these, and there are other
ways to check, but they are very useful for non-DBAs to be sure that the installation
is basically sound and a connection can be made to the new SQL Server before
handing it over to someone else.
Check 1: Has the SQL Server Service Started?
Check SQL Server 2008 has started.
Check 2: Does Management Studio Work?
Check Management Studio works by firing it up.
SQL Server Club – grow your knowledge
www.sqlserverclub.com
Click on NO when you see this dialog box:
SQL Server Club – grow your knowledge
www.sqlserverclub.com
Check 3: Can you run a basic query against the new SQL Server?
Check SQL Server works by running a simple query from Management Studio:
SQL Server Club – grow your knowledge
www.sqlserverclub.com
Enter the query shown below and hit F5 to run it:
Check 4: Is SQL Server Agent Running?
Check SQL Server Agent is running for scheduled jobs. There should be a green
arrow next to the SQL Server Agent database symbol (it’s small, you might have to
look hard):
Check 5: Can SQL Server be seen from the Network?
Check that the new SQL Server can be seen from another SQL Server on the same
domain by running isql –L (or osql –L):
If you can’t see the new SQL Server in this list, check that the SQL Server Browser
service is started on the machine where you have just installed SQL Server.
SQL Server Club – grow your knowledge
www.sqlserverclub.com
Check 6: Has the TCP/IP network protocol library been enabled on the
server?
If the browser service is started but you still cannot connect to the server, click on
Start ->Programs -> SQL Server 2008 -> SQL Server Configuration Manager
(on the server where SQL Server’s just been installed)
The SQL Server Configuration Manager window opens.
Click on the SQL Server Network Configuration node and expand it.
In the example below, we have MSSQLSERVER (a base instance of SQL Server), and
SQLEXPRESS showing as installed.
If in doubt, click on Protocols for MSSQLSERVER.
In the above screenshot, the TCP/IP network protocol library is disabled. We need to
enable it in order that remote servers can talk to the newly installed SQL Server.
• A word of explanation : In most installations, Named Pipes can be ignored,
unless there is a requirement for it. In virtually all environments, VIA can also
be ignored as this protocol requires a special network card. Shared memory is
the “local” protocol that SQL Server uses when talking to a client application
on the same server as itself, for example when SQL Server Management
Studio connects to it. It is usually best to leave this enabled.
SQL Server Club – grow your knowledge
www.sqlserverclub.com
You will need the TCP/IP protocol enabled if you need to connect to your new SQL
Server from a remote client or another server via TCP/IP, which is what most
networks use.
If it shows as DISABLED (above), double click on the TCP/IP protocol line, and
the following window will appear:
Ensure that Enabled is set to Yes, and click on OK.
The following warning will appear:
SQL Server Club – grow your knowledge
www.sqlserverclub.com
Click on OK, and you will be returned to the Configuration Manager window, where
TCP/IP will now be shown as enabled:
Go back to the Services applet, and re-start the MSSQLSERVER service so that the
TCP/IP protocol can be used to connect to your new SQL Server.
Then try to connect to it again from a remote machine.
If you have experienced problems with the previous connectivity tests, you should
now be able to repeat at least some of them successfully.
End of Article

Mais conteúdo relacionado

Mais procurados

VMukti Complete Server Installation For V1034 to V1038
VMukti Complete Server Installation For V1034 to V1038VMukti Complete Server Installation For V1034 to V1038
VMukti Complete Server Installation For V1034 to V1038vmukti
 
Dell sonicwall aventail_connect_tunnel_client_windows_user_guide
Dell sonicwall aventail_connect_tunnel_client_windows_user_guideDell sonicwall aventail_connect_tunnel_client_windows_user_guide
Dell sonicwall aventail_connect_tunnel_client_windows_user_guidenewper
 
Installing sql server denali sql server 2011
Installing sql server denali  sql server 2011Installing sql server denali  sql server 2011
Installing sql server denali sql server 2011SQLQueue
 
Administrators manual
Administrators manualAdministrators manual
Administrators manualScrumDesk
 
Linux VMWare image with Informatica , Oracle and Rundeck scheduler
Linux VMWare image with Informatica , Oracle and Rundeck schedulerLinux VMWare image with Informatica , Oracle and Rundeck scheduler
Linux VMWare image with Informatica , Oracle and Rundeck schedulerpcherukumalla
 
SlideShare Ribbon For Microsoft Office Power Point 2007
SlideShare Ribbon For Microsoft Office Power Point 2007SlideShare Ribbon For Microsoft Office Power Point 2007
SlideShare Ribbon For Microsoft Office Power Point 2007Gee-Hsien Chuang
 
Windows Server Install
Windows Server InstallWindows Server Install
Windows Server InstallRobert Crane
 
SharePoint2010 single server farm installation
SharePoint2010 single server farm installationSharePoint2010 single server farm installation
SharePoint2010 single server farm installationparallelminder
 
How to install Java and how to set the path
How to install Java and how to set the pathHow to install Java and how to set the path
How to install Java and how to set the pathyesheeka
 
Central Administration
Central AdministrationCentral Administration
Central AdministrationRobert Crane
 
Configuring a web logic domain and server
Configuring a web logic domain and serverConfiguring a web logic domain and server
Configuring a web logic domain and serverggopinath50
 
Install sccm 2007 on windows server 2008 r2 – step by step
Install sccm 2007 on windows server 2008 r2 – step by stepInstall sccm 2007 on windows server 2008 r2 – step by step
Install sccm 2007 on windows server 2008 r2 – step by stepd0wonload
 
Ms Sql server installation 2008R2
Ms Sql server installation 2008R2Ms Sql server installation 2008R2
Ms Sql server installation 2008R2Harshad Patel
 

Mais procurados (16)

VMukti Complete Server Installation For V1034 to V1038
VMukti Complete Server Installation For V1034 to V1038VMukti Complete Server Installation For V1034 to V1038
VMukti Complete Server Installation For V1034 to V1038
 
Troubleshooting
TroubleshootingTroubleshooting
Troubleshooting
 
Dell sonicwall aventail_connect_tunnel_client_windows_user_guide
Dell sonicwall aventail_connect_tunnel_client_windows_user_guideDell sonicwall aventail_connect_tunnel_client_windows_user_guide
Dell sonicwall aventail_connect_tunnel_client_windows_user_guide
 
Installing sql server denali sql server 2011
Installing sql server denali  sql server 2011Installing sql server denali  sql server 2011
Installing sql server denali sql server 2011
 
Administrators manual
Administrators manualAdministrators manual
Administrators manual
 
Linux VMWare image with Informatica , Oracle and Rundeck scheduler
Linux VMWare image with Informatica , Oracle and Rundeck schedulerLinux VMWare image with Informatica , Oracle and Rundeck scheduler
Linux VMWare image with Informatica , Oracle and Rundeck scheduler
 
SlideShare Ribbon For Microsoft Office Power Point 2007
SlideShare Ribbon For Microsoft Office Power Point 2007SlideShare Ribbon For Microsoft Office Power Point 2007
SlideShare Ribbon For Microsoft Office Power Point 2007
 
Windows Server Install
Windows Server InstallWindows Server Install
Windows Server Install
 
SBS installation
SBS installationSBS installation
SBS installation
 
SharePoint2010 single server farm installation
SharePoint2010 single server farm installationSharePoint2010 single server farm installation
SharePoint2010 single server farm installation
 
How to install Java and how to set the path
How to install Java and how to set the pathHow to install Java and how to set the path
How to install Java and how to set the path
 
Central Administration
Central AdministrationCentral Administration
Central Administration
 
Configuring a web logic domain and server
Configuring a web logic domain and serverConfiguring a web logic domain and server
Configuring a web logic domain and server
 
Install sccm 2007 on windows server 2008 r2 – step by step
Install sccm 2007 on windows server 2008 r2 – step by stepInstall sccm 2007 on windows server 2008 r2 – step by step
Install sccm 2007 on windows server 2008 r2 – step by step
 
Ms Sql server installation 2008R2
Ms Sql server installation 2008R2Ms Sql server installation 2008R2
Ms Sql server installation 2008R2
 
Microsoft Lync Server 2010 Installation
Microsoft Lync Server 2010 InstallationMicrosoft Lync Server 2010 Installation
Microsoft Lync Server 2010 Installation
 

Destaque

Destaque (6)

Trastornos de la conducta alimentaria
Trastornos de la conducta alimentariaTrastornos de la conducta alimentaria
Trastornos de la conducta alimentaria
 
Testimonial - Johanna & Peter 15.06.15
Testimonial - Johanna & Peter 15.06.15Testimonial - Johanna & Peter 15.06.15
Testimonial - Johanna & Peter 15.06.15
 
Singapore HACCP 1
Singapore HACCP 1Singapore HACCP 1
Singapore HACCP 1
 
Mem certification ad
Mem certification adMem certification ad
Mem certification ad
 
TITAN Presentation
TITAN PresentationTITAN Presentation
TITAN Presentation
 
CV
CVCV
CV
 

Semelhante a How to-install-sql-server-2008

SQL Server 2000 Installation Rollout Backout Plan
SQL Server 2000 Installation Rollout Backout PlanSQL Server 2000 Installation Rollout Backout Plan
SQL Server 2000 Installation Rollout Backout Plan► Supreme Mandal ◄
 
Sqlserver 2012 installation step by step
Sqlserver 2012 installation step by stepSqlserver 2012 installation step by step
Sqlserver 2012 installation step by stepOracle Apps DBA
 
Sql Server 2012 Installation..
Sql Server 2012 Installation..Sql Server 2012 Installation..
Sql Server 2012 Installation..Anand Kumar Rajana
 
From home sql_server_tutorials
From home sql_server_tutorialsFrom home sql_server_tutorials
From home sql_server_tutorialsAravindharamanan S
 
Database operations
Database operationsDatabase operations
Database operationsRobert Crane
 
How to install sql server 2008 step by step on windows 7 (32 64 bit)
How to install sql server 2008 step by step on windows 7 (32 64 bit)How to install sql server 2008 step by step on windows 7 (32 64 bit)
How to install sql server 2008 step by step on windows 7 (32 64 bit)Khaliq ur Rehman
 
Installation guide for mysql in windows
Installation guide for mysql in windowsInstallation guide for mysql in windows
Installation guide for mysql in windowssharavanakumar10
 
MS SQL SERVER: Getting Started With Sql Server 2008
MS SQL SERVER: Getting Started With Sql Server 2008MS SQL SERVER: Getting Started With Sql Server 2008
MS SQL SERVER: Getting Started With Sql Server 2008sqlserver content
 
MS Sql Server: Getting Started With Sql Server 2008
MS Sql Server: Getting Started With Sql Server 2008MS Sql Server: Getting Started With Sql Server 2008
MS Sql Server: Getting Started With Sql Server 2008DataminingTools Inc
 
Data Warehousing (Practical Questions Paper) [CBSGS - 75:25 Pattern] {2015 Ma...
Data Warehousing (Practical Questions Paper) [CBSGS - 75:25 Pattern] {2015 Ma...Data Warehousing (Practical Questions Paper) [CBSGS - 75:25 Pattern] {2015 Ma...
Data Warehousing (Practical Questions Paper) [CBSGS - 75:25 Pattern] {2015 Ma...Mumbai B.Sc.IT Study
 
Installation Guide - Octopus
Installation Guide - OctopusInstallation Guide - Octopus
Installation Guide - Octopusvincent.biot
 
VMukti SQL Server Configuration during server installation For V1034 to V1038
VMukti SQL Server Configuration during server installation For V1034 to V1038VMukti SQL Server Configuration during server installation For V1034 to V1038
VMukti SQL Server Configuration during server installation For V1034 to V1038vmukti
 
installation and configuration of informatica server
installation and configuration of informatica serverinstallation and configuration of informatica server
installation and configuration of informatica serverketulp
 
Share point 2019 installation guide
Share point 2019 installation guideShare point 2019 installation guide
Share point 2019 installation guideRudresh Tiwari
 
Share point 2019 installation guide
Share point 2019 installation guideShare point 2019 installation guide
Share point 2019 installation guideRudresh Tiwari
 
Virtualización de Escriorios VMWare View 5
Virtualización de Escriorios VMWare View 5Virtualización de Escriorios VMWare View 5
Virtualización de Escriorios VMWare View 5RaGaZoMe
 
Share point 2013 installation step by step
Share point 2013 installation step by stepShare point 2013 installation step by step
Share point 2013 installation step by stepprasslides
 

Semelhante a How to-install-sql-server-2008 (20)

SQL Server 2000 Installation Rollout Backout Plan
SQL Server 2000 Installation Rollout Backout PlanSQL Server 2000 Installation Rollout Backout Plan
SQL Server 2000 Installation Rollout Backout Plan
 
Sqlserver 2012 installation step by step
Sqlserver 2012 installation step by stepSqlserver 2012 installation step by step
Sqlserver 2012 installation step by step
 
Sql Server 2012 Installation..
Sql Server 2012 Installation..Sql Server 2012 Installation..
Sql Server 2012 Installation..
 
From home sql_server_tutorials
From home sql_server_tutorialsFrom home sql_server_tutorials
From home sql_server_tutorials
 
Database operations
Database operationsDatabase operations
Database operations
 
How to install sql server 2008 step by step on windows 7 (32 64 bit)
How to install sql server 2008 step by step on windows 7 (32 64 bit)How to install sql server 2008 step by step on windows 7 (32 64 bit)
How to install sql server 2008 step by step on windows 7 (32 64 bit)
 
Installation guide for mysql in windows
Installation guide for mysql in windowsInstallation guide for mysql in windows
Installation guide for mysql in windows
 
MS SQL SERVER: Getting Started With Sql Server 2008
MS SQL SERVER: Getting Started With Sql Server 2008MS SQL SERVER: Getting Started With Sql Server 2008
MS SQL SERVER: Getting Started With Sql Server 2008
 
MS Sql Server: Getting Started With Sql Server 2008
MS Sql Server: Getting Started With Sql Server 2008MS Sql Server: Getting Started With Sql Server 2008
MS Sql Server: Getting Started With Sql Server 2008
 
Data Warehousing (Practical Questions Paper) [CBSGS - 75:25 Pattern] {2015 Ma...
Data Warehousing (Practical Questions Paper) [CBSGS - 75:25 Pattern] {2015 Ma...Data Warehousing (Practical Questions Paper) [CBSGS - 75:25 Pattern] {2015 Ma...
Data Warehousing (Practical Questions Paper) [CBSGS - 75:25 Pattern] {2015 Ma...
 
Installation Guide - Octopus
Installation Guide - OctopusInstallation Guide - Octopus
Installation Guide - Octopus
 
VMukti SQL Server Configuration during server installation For V1034 to V1038
VMukti SQL Server Configuration during server installation For V1034 to V1038VMukti SQL Server Configuration during server installation For V1034 to V1038
VMukti SQL Server Configuration during server installation For V1034 to V1038
 
installation and configuration of informatica server
installation and configuration of informatica serverinstallation and configuration of informatica server
installation and configuration of informatica server
 
2. install os
2. install os2. install os
2. install os
 
Share point 2019 installation guide
Share point 2019 installation guideShare point 2019 installation guide
Share point 2019 installation guide
 
Share point 2019 installation guide
Share point 2019 installation guideShare point 2019 installation guide
Share point 2019 installation guide
 
Virtualización de Escriorios VMWare View 5
Virtualización de Escriorios VMWare View 5Virtualización de Escriorios VMWare View 5
Virtualización de Escriorios VMWare View 5
 
Technical Note - ITME: Running StADOSvr.exe as a Service
Technical Note - ITME: Running StADOSvr.exe as a ServiceTechnical Note - ITME: Running StADOSvr.exe as a Service
Technical Note - ITME: Running StADOSvr.exe as a Service
 
HAPPYSQL GUIDE
HAPPYSQL GUIDEHAPPYSQL GUIDE
HAPPYSQL GUIDE
 
Share point 2013 installation step by step
Share point 2013 installation step by stepShare point 2013 installation step by step
Share point 2013 installation step by step
 

Último

HỌC TỐT TIẾNG ANH 11 THEO CHƯƠNG TRÌNH GLOBAL SUCCESS ĐÁP ÁN CHI TIẾT - CẢ NĂ...
HỌC TỐT TIẾNG ANH 11 THEO CHƯƠNG TRÌNH GLOBAL SUCCESS ĐÁP ÁN CHI TIẾT - CẢ NĂ...HỌC TỐT TIẾNG ANH 11 THEO CHƯƠNG TRÌNH GLOBAL SUCCESS ĐÁP ÁN CHI TIẾT - CẢ NĂ...
HỌC TỐT TIẾNG ANH 11 THEO CHƯƠNG TRÌNH GLOBAL SUCCESS ĐÁP ÁN CHI TIẾT - CẢ NĂ...Nguyen Thanh Tu Collection
 
THEORIES OF ORGANIZATION-PUBLIC ADMINISTRATION
THEORIES OF ORGANIZATION-PUBLIC ADMINISTRATIONTHEORIES OF ORGANIZATION-PUBLIC ADMINISTRATION
THEORIES OF ORGANIZATION-PUBLIC ADMINISTRATIONHumphrey A Beña
 
call girls in Kamla Market (DELHI) 🔝 >༒9953330565🔝 genuine Escort Service 🔝✔️✔️
call girls in Kamla Market (DELHI) 🔝 >༒9953330565🔝 genuine Escort Service 🔝✔️✔️call girls in Kamla Market (DELHI) 🔝 >༒9953330565🔝 genuine Escort Service 🔝✔️✔️
call girls in Kamla Market (DELHI) 🔝 >༒9953330565🔝 genuine Escort Service 🔝✔️✔️9953056974 Low Rate Call Girls In Saket, Delhi NCR
 
Inclusivity Essentials_ Creating Accessible Websites for Nonprofits .pdf
Inclusivity Essentials_ Creating Accessible Websites for Nonprofits .pdfInclusivity Essentials_ Creating Accessible Websites for Nonprofits .pdf
Inclusivity Essentials_ Creating Accessible Websites for Nonprofits .pdfTechSoup
 
Visit to a blind student's school🧑‍🦯🧑‍🦯(community medicine)
Visit to a blind student's school🧑‍🦯🧑‍🦯(community medicine)Visit to a blind student's school🧑‍🦯🧑‍🦯(community medicine)
Visit to a blind student's school🧑‍🦯🧑‍🦯(community medicine)lakshayb543
 
4.18.24 Movement Legacies, Reflection, and Review.pptx
4.18.24 Movement Legacies, Reflection, and Review.pptx4.18.24 Movement Legacies, Reflection, and Review.pptx
4.18.24 Movement Legacies, Reflection, and Review.pptxmary850239
 
Incoming and Outgoing Shipments in 3 STEPS Using Odoo 17
Incoming and Outgoing Shipments in 3 STEPS Using Odoo 17Incoming and Outgoing Shipments in 3 STEPS Using Odoo 17
Incoming and Outgoing Shipments in 3 STEPS Using Odoo 17Celine George
 
Karra SKD Conference Presentation Revised.pptx
Karra SKD Conference Presentation Revised.pptxKarra SKD Conference Presentation Revised.pptx
Karra SKD Conference Presentation Revised.pptxAshokKarra1
 
Like-prefer-love -hate+verb+ing & silent letters & citizenship text.pdf
Like-prefer-love -hate+verb+ing & silent letters & citizenship text.pdfLike-prefer-love -hate+verb+ing & silent letters & citizenship text.pdf
Like-prefer-love -hate+verb+ing & silent letters & citizenship text.pdfMr Bounab Samir
 
Roles & Responsibilities in Pharmacovigilance
Roles & Responsibilities in PharmacovigilanceRoles & Responsibilities in Pharmacovigilance
Roles & Responsibilities in PharmacovigilanceSamikshaHamane
 
Science 7 Quarter 4 Module 2: Natural Resources.pptx
Science 7 Quarter 4 Module 2: Natural Resources.pptxScience 7 Quarter 4 Module 2: Natural Resources.pptx
Science 7 Quarter 4 Module 2: Natural Resources.pptxMaryGraceBautista27
 
Q4 English4 Week3 PPT Melcnmg-based.pptx
Q4 English4 Week3 PPT Melcnmg-based.pptxQ4 English4 Week3 PPT Melcnmg-based.pptx
Q4 English4 Week3 PPT Melcnmg-based.pptxnelietumpap1
 
How to Add Barcode on PDF Report in Odoo 17
How to Add Barcode on PDF Report in Odoo 17How to Add Barcode on PDF Report in Odoo 17
How to Add Barcode on PDF Report in Odoo 17Celine George
 
ENGLISH 7_Q4_LESSON 2_ Employing a Variety of Strategies for Effective Interp...
ENGLISH 7_Q4_LESSON 2_ Employing a Variety of Strategies for Effective Interp...ENGLISH 7_Q4_LESSON 2_ Employing a Variety of Strategies for Effective Interp...
ENGLISH 7_Q4_LESSON 2_ Employing a Variety of Strategies for Effective Interp...JhezDiaz1
 
Earth Day Presentation wow hello nice great
Earth Day Presentation wow hello nice greatEarth Day Presentation wow hello nice great
Earth Day Presentation wow hello nice greatYousafMalik24
 
Full Stack Web Development Course for Beginners
Full Stack Web Development Course  for BeginnersFull Stack Web Development Course  for Beginners
Full Stack Web Development Course for BeginnersSabitha Banu
 

Último (20)

HỌC TỐT TIẾNG ANH 11 THEO CHƯƠNG TRÌNH GLOBAL SUCCESS ĐÁP ÁN CHI TIẾT - CẢ NĂ...
HỌC TỐT TIẾNG ANH 11 THEO CHƯƠNG TRÌNH GLOBAL SUCCESS ĐÁP ÁN CHI TIẾT - CẢ NĂ...HỌC TỐT TIẾNG ANH 11 THEO CHƯƠNG TRÌNH GLOBAL SUCCESS ĐÁP ÁN CHI TIẾT - CẢ NĂ...
HỌC TỐT TIẾNG ANH 11 THEO CHƯƠNG TRÌNH GLOBAL SUCCESS ĐÁP ÁN CHI TIẾT - CẢ NĂ...
 
THEORIES OF ORGANIZATION-PUBLIC ADMINISTRATION
THEORIES OF ORGANIZATION-PUBLIC ADMINISTRATIONTHEORIES OF ORGANIZATION-PUBLIC ADMINISTRATION
THEORIES OF ORGANIZATION-PUBLIC ADMINISTRATION
 
call girls in Kamla Market (DELHI) 🔝 >༒9953330565🔝 genuine Escort Service 🔝✔️✔️
call girls in Kamla Market (DELHI) 🔝 >༒9953330565🔝 genuine Escort Service 🔝✔️✔️call girls in Kamla Market (DELHI) 🔝 >༒9953330565🔝 genuine Escort Service 🔝✔️✔️
call girls in Kamla Market (DELHI) 🔝 >༒9953330565🔝 genuine Escort Service 🔝✔️✔️
 
Inclusivity Essentials_ Creating Accessible Websites for Nonprofits .pdf
Inclusivity Essentials_ Creating Accessible Websites for Nonprofits .pdfInclusivity Essentials_ Creating Accessible Websites for Nonprofits .pdf
Inclusivity Essentials_ Creating Accessible Websites for Nonprofits .pdf
 
Visit to a blind student's school🧑‍🦯🧑‍🦯(community medicine)
Visit to a blind student's school🧑‍🦯🧑‍🦯(community medicine)Visit to a blind student's school🧑‍🦯🧑‍🦯(community medicine)
Visit to a blind student's school🧑‍🦯🧑‍🦯(community medicine)
 
4.18.24 Movement Legacies, Reflection, and Review.pptx
4.18.24 Movement Legacies, Reflection, and Review.pptx4.18.24 Movement Legacies, Reflection, and Review.pptx
4.18.24 Movement Legacies, Reflection, and Review.pptx
 
Incoming and Outgoing Shipments in 3 STEPS Using Odoo 17
Incoming and Outgoing Shipments in 3 STEPS Using Odoo 17Incoming and Outgoing Shipments in 3 STEPS Using Odoo 17
Incoming and Outgoing Shipments in 3 STEPS Using Odoo 17
 
Karra SKD Conference Presentation Revised.pptx
Karra SKD Conference Presentation Revised.pptxKarra SKD Conference Presentation Revised.pptx
Karra SKD Conference Presentation Revised.pptx
 
Like-prefer-love -hate+verb+ing & silent letters & citizenship text.pdf
Like-prefer-love -hate+verb+ing & silent letters & citizenship text.pdfLike-prefer-love -hate+verb+ing & silent letters & citizenship text.pdf
Like-prefer-love -hate+verb+ing & silent letters & citizenship text.pdf
 
Roles & Responsibilities in Pharmacovigilance
Roles & Responsibilities in PharmacovigilanceRoles & Responsibilities in Pharmacovigilance
Roles & Responsibilities in Pharmacovigilance
 
Science 7 Quarter 4 Module 2: Natural Resources.pptx
Science 7 Quarter 4 Module 2: Natural Resources.pptxScience 7 Quarter 4 Module 2: Natural Resources.pptx
Science 7 Quarter 4 Module 2: Natural Resources.pptx
 
Raw materials used in Herbal Cosmetics.pptx
Raw materials used in Herbal Cosmetics.pptxRaw materials used in Herbal Cosmetics.pptx
Raw materials used in Herbal Cosmetics.pptx
 
Q4 English4 Week3 PPT Melcnmg-based.pptx
Q4 English4 Week3 PPT Melcnmg-based.pptxQ4 English4 Week3 PPT Melcnmg-based.pptx
Q4 English4 Week3 PPT Melcnmg-based.pptx
 
How to Add Barcode on PDF Report in Odoo 17
How to Add Barcode on PDF Report in Odoo 17How to Add Barcode on PDF Report in Odoo 17
How to Add Barcode on PDF Report in Odoo 17
 
ENGLISH 7_Q4_LESSON 2_ Employing a Variety of Strategies for Effective Interp...
ENGLISH 7_Q4_LESSON 2_ Employing a Variety of Strategies for Effective Interp...ENGLISH 7_Q4_LESSON 2_ Employing a Variety of Strategies for Effective Interp...
ENGLISH 7_Q4_LESSON 2_ Employing a Variety of Strategies for Effective Interp...
 
FINALS_OF_LEFT_ON_C'N_EL_DORADO_2024.pptx
FINALS_OF_LEFT_ON_C'N_EL_DORADO_2024.pptxFINALS_OF_LEFT_ON_C'N_EL_DORADO_2024.pptx
FINALS_OF_LEFT_ON_C'N_EL_DORADO_2024.pptx
 
LEFT_ON_C'N_ PRELIMS_EL_DORADO_2024.pptx
LEFT_ON_C'N_ PRELIMS_EL_DORADO_2024.pptxLEFT_ON_C'N_ PRELIMS_EL_DORADO_2024.pptx
LEFT_ON_C'N_ PRELIMS_EL_DORADO_2024.pptx
 
Model Call Girl in Tilak Nagar Delhi reach out to us at 🔝9953056974🔝
Model Call Girl in Tilak Nagar Delhi reach out to us at 🔝9953056974🔝Model Call Girl in Tilak Nagar Delhi reach out to us at 🔝9953056974🔝
Model Call Girl in Tilak Nagar Delhi reach out to us at 🔝9953056974🔝
 
Earth Day Presentation wow hello nice great
Earth Day Presentation wow hello nice greatEarth Day Presentation wow hello nice great
Earth Day Presentation wow hello nice great
 
Full Stack Web Development Course for Beginners
Full Stack Web Development Course  for BeginnersFull Stack Web Development Course  for Beginners
Full Stack Web Development Course for Beginners
 

How to-install-sql-server-2008

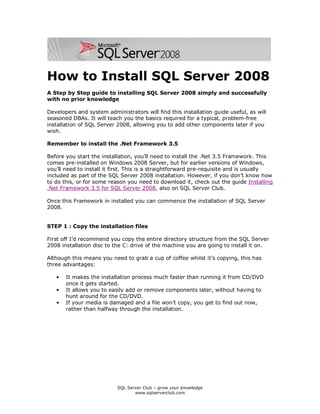
  • 1. SQL Server Club – grow your knowledge www.sqlserverclub.com How to Install SQL Server 2008 A Step by Step guide to installing SQL Server 2008 simply and successfully with no prior knowledge Developers and system administrators will find this installation guide useful, as will seasoned DBAs. It will teach you the basics required for a typical, problem-free installation of SQL Server 2008, allowing you to add other components later if you wish. Remember to install the .Net Framework 3.5 Before you start the installation, you’ll need to install the .Net 3.5 Framework. This comes pre-installed on Windows 2008 Server, but for earlier versions of Windows, you’ll need to install it first. This is a straightforward pre-requisite and is usually included as part of the SQL Server 2008 installation. However, if you don’t know how to do this, or for some reason you need to download it, check out the guide Installing .Net Framework 3.5 for SQL Server 2008, also on SQL Server Club. Once this Framework in installed you can commence the installation of SQL Server 2008. STEP 1 : Copy the installation files First off I’d recommend you copy the entire directory structure from the SQL Server 2008 installation disc to the C: drive of the machine you are going to install it on. Although this means you need to grab a cup of coffee whilst it’s copying, this has three advantages: • It makes the installation process much faster than running it from CD/DVD once it gets started. • It allows you to easily add or remove components later, without having to hunt around for the CD/DVD. • If your media is damaged and a file won’t copy, you get to find out now, rather than halfway through the installation.
  • 2. SQL Server Club – grow your knowledge www.sqlserverclub.com Here’s what my system looks like after the copy: STEP 2 : Setup.exe Double click on the setup.exe file. After a few seconds a dialog box appears:
  • 3. SQL Server Club – grow your knowledge www.sqlserverclub.com This will disappear from the screen and then the main installation page appears:
  • 4. SQL Server Club – grow your knowledge www.sqlserverclub.com STEP 3 : SQL Server Installation Center Click on the Installation hyperlink on the left hand side of the screen:
  • 5. SQL Server Club – grow your knowledge www.sqlserverclub.com STEP 4 : SQL Server Installation Center Click on the "New Server stand-alone installation" link on the right side of the screen: The following dialog appears on the screen whilst the install program prepares for installation: After a minute or so (the timing will vary according to your system), the following screen appears:
  • 6. SQL Server Club – grow your knowledge www.sqlserverclub.com STEP 5 (optional) : If any checks have failed, click on the Show details button or "View detailed report link" to find out the cause, correct it, then click on the Re-run button to perform the checks again. STEP 6 : Product key If all checks have passed, click on the OK button. After a few moments, the option to select the edition and to enter the licence key (or “product key”) will appear. Note that the product key box may already be populated, depending on which edition you have. Don’t enter the product key we’ve shown here, it won’t work on your system!:
  • 7. SQL Server Club – grow your knowledge www.sqlserverclub.com STEP 7 : Licence Terms Enter the product key into the box, or choose the free edition if you're evaluating SQL Server 2008, and click on the Next button: Click in the "I accept the license terms" check box, then click on the Next button again.
  • 8. SQL Server Club – grow your knowledge www.sqlserverclub.com STEP 8 : Setup Support Files The following screen appears; click on the Install button:
  • 9. SQL Server Club – grow your knowledge www.sqlserverclub.com The following screen will appear whilst Windows Installer prepares itself for the installation. This will take a short while: After 30 seconds or so the dialog appears again:
  • 10. SQL Server Club – grow your knowledge www.sqlserverclub.com STEP 9 : Setup Support Rules If all is well, the following screen appears: Click on the Next button again.
  • 11. SQL Server Club – grow your knowledge www.sqlserverclub.com STEP 10 : Feature Selection Select the features you want to install. At a minimum, the following are useful (I'd argue essential), but what you need will depend on your needs: Click on the Next button.
  • 12. SQL Server Club – grow your knowledge www.sqlserverclub.com STEP 11 : Instance Configuration After a short while the following screen appears: For most installations, keep the default settings. Click on the Next button.
  • 13. SQL Server Club – grow your knowledge www.sqlserverclub.com STEP 12 : Disk Space Requirements This screen just tells you if you have sufficient disk space on the drive you’re installing to, and what’s going to be installed where. Click on Next.
  • 14. SQL Server Club – grow your knowledge www.sqlserverclub.com STEP 13 : Server Configuration This step allows you to set up the service accounts that will be used to run SQL Server. If you have created Windows NT or Active Directory accounts for use with services, use these. If not, then just to get the installation up and working, use the built-in Network Service account for all three services listed (this account does not require a password). This allows SQL Server to start up after installation. However, it can be easily changed later to another account through the Services applet (Control Panel -> Administrator Tools -> Services): In addition, remember to change the Startup Type to Automatic, for all three services. This automatically starts the SQL Server database engine, SQL Agent and SQL Browser services when the server is re-booted. The first service runs the SQL Server database engines executable process. The other two services allow scheduled jobs to run after installation (and after a re-boot), and allow the SQL Server to be found by clients on the network. Do not worry about changing the collation tab, unless there is a specific requirement for anything other than the default collation sequence. Finally, Click on Next.
  • 15. SQL Server Club – grow your knowledge www.sqlserverclub.com STEP 14 : Database Engine Configuration – Account Provision This screen allows you to set up database engine security. Change the Authentication Mode to Mixed Mode unless you are certain you only need Windows-only authentication. • Many third party applications rely on SQL Server logins to operate correctly, so if you are setting up a server for a third party application, rather than one developed in-house, enabling Mixed Mode authentication is a good idea. If you pick Mixed Mode security, you must also enter a password for the sysadmin account (sa). Enter and confirm a secure password for the sa account and keep it somewhere safe. Do not give it to any one you do not want to have access to the SQL Server. Note that you MUST also provide a Windows NT account on the local machine as a SQL Server administrator. If you do not want Windows system administrators to be able walk up to the box and login to SQL Server, create a new, local, dummy Windows user and add this account instead. Otherwise, add in the local administrator account, or your own Windows account on the domain in which the SQL Server will reside.
  • 16. SQL Server Club – grow your knowledge www.sqlserverclub.com STEP 15 : Database Engine Configuration – Data Directories Click on the Data Directories tab. Change the directories to specify which drives in your system will be used for the various types of database files. Generally it’s advisable to put the User database directory and User log directory on separate physical drives for performance, but it will depend on how Windows has been configured and how many disk drives you have available. If you are installing on a single drive laptop or desktop, then simply specify: Data root directory C:Program FilesMicrosoft SQL Server User database directory C:Data User log directory C:Logs Temp DB directory C:TempDB Temp Log directory C:TempDB Backup directory C:Backups Do not click on the FILESTREAM tab unless you know you need to change these options, as it is not generally required for most installations, but can easily be changed by using sp_configure 'filestream_access_level', '<level>'after SQL Server has been installed. Click on Next.
  • 17. SQL Server Club – grow your knowledge www.sqlserverclub.com STEP 16 : Error Usage Reporting This screen simply asks if you want to send error information to Microsoft and can safely be skipped if you do not want to share any information. Click boxes if you want to help Microsoft help you. Click on Next again…
  • 18. SQL Server Club – grow your knowledge www.sqlserverclub.com STEP 16 : Installation Rules This screen simply checks if there are any processes or other installations running which will stop the installation of SQL Server 2008. Click on Next again – you’re almost ready to install:
  • 19. SQL Server Club – grow your knowledge www.sqlserverclub.com STEP 17 : Ready to Install This screen summarises what you are about to install and gives you a last chance to cancel or change anything that’s wrongly configured: Check that what’s being installed is what you want and then click on Install when you’re sure you want to start the installation process:
  • 20. SQL Server Club – grow your knowledge www.sqlserverclub.com Installation Progress SQL Server 2008 will now install. How long it takes depends on the speed of your machine, what load it’s under, the installation media (CD is slower) and what you’ve chosen to install.
  • 21. SQL Server Club – grow your knowledge www.sqlserverclub.com …More Installation Progress … and Finally Finally, the installation will complete:
  • 22. SQL Server Club – grow your knowledge www.sqlserverclub.com …and the following dialog box will appear: Click on OK, the machine will NOT reboot. The following will appear:
  • 23. SQL Server Club – grow your knowledge www.sqlserverclub.com …followed by: Click on the Next button again…
  • 24. SQL Server Club – grow your knowledge www.sqlserverclub.com STEP 18 : Installation Complete The following screen appears: It may be worth clicking on the installation log at the top of the screen to check everything’s gone as expected. Not that this is MUCH smaller than the usual SQL Server installation log files of old. Finally, click on the Close button. The following dialog will appear: Click on OK – your server will NOT re-boot at this point.
  • 25. SQL Server Club – grow your knowledge www.sqlserverclub.com The dialog box will disappear and you will be returned to the Installation Center: Click on the Close button (the “x”) in the top right of the screen. Finally, manually reboot your machine to complete the SQL Server 2008 installation.
  • 26. SQL Server Club – grow your knowledge www.sqlserverclub.com Top Tips : How to check that SQL Server 2008 has installed correctly Here are a short number of post-installation checks which are useful to perform after re-booting your new SQL Server. You don’t have to run these, and there are other ways to check, but they are very useful for non-DBAs to be sure that the installation is basically sound and a connection can be made to the new SQL Server before handing it over to someone else. Check 1: Has the SQL Server Service Started? Check SQL Server 2008 has started. Check 2: Does Management Studio Work? Check Management Studio works by firing it up.
  • 27. SQL Server Club – grow your knowledge www.sqlserverclub.com Click on NO when you see this dialog box:
  • 28. SQL Server Club – grow your knowledge www.sqlserverclub.com Check 3: Can you run a basic query against the new SQL Server? Check SQL Server works by running a simple query from Management Studio:
  • 29. SQL Server Club – grow your knowledge www.sqlserverclub.com Enter the query shown below and hit F5 to run it: Check 4: Is SQL Server Agent Running? Check SQL Server Agent is running for scheduled jobs. There should be a green arrow next to the SQL Server Agent database symbol (it’s small, you might have to look hard): Check 5: Can SQL Server be seen from the Network? Check that the new SQL Server can be seen from another SQL Server on the same domain by running isql –L (or osql –L): If you can’t see the new SQL Server in this list, check that the SQL Server Browser service is started on the machine where you have just installed SQL Server.
  • 30. SQL Server Club – grow your knowledge www.sqlserverclub.com Check 6: Has the TCP/IP network protocol library been enabled on the server? If the browser service is started but you still cannot connect to the server, click on Start ->Programs -> SQL Server 2008 -> SQL Server Configuration Manager (on the server where SQL Server’s just been installed) The SQL Server Configuration Manager window opens. Click on the SQL Server Network Configuration node and expand it. In the example below, we have MSSQLSERVER (a base instance of SQL Server), and SQLEXPRESS showing as installed. If in doubt, click on Protocols for MSSQLSERVER. In the above screenshot, the TCP/IP network protocol library is disabled. We need to enable it in order that remote servers can talk to the newly installed SQL Server. • A word of explanation : In most installations, Named Pipes can be ignored, unless there is a requirement for it. In virtually all environments, VIA can also be ignored as this protocol requires a special network card. Shared memory is the “local” protocol that SQL Server uses when talking to a client application on the same server as itself, for example when SQL Server Management Studio connects to it. It is usually best to leave this enabled.
  • 31. SQL Server Club – grow your knowledge www.sqlserverclub.com You will need the TCP/IP protocol enabled if you need to connect to your new SQL Server from a remote client or another server via TCP/IP, which is what most networks use. If it shows as DISABLED (above), double click on the TCP/IP protocol line, and the following window will appear: Ensure that Enabled is set to Yes, and click on OK. The following warning will appear:
  • 32. SQL Server Club – grow your knowledge www.sqlserverclub.com Click on OK, and you will be returned to the Configuration Manager window, where TCP/IP will now be shown as enabled: Go back to the Services applet, and re-start the MSSQLSERVER service so that the TCP/IP protocol can be used to connect to your new SQL Server. Then try to connect to it again from a remote machine. If you have experienced problems with the previous connectivity tests, you should now be able to repeat at least some of them successfully. End of Article