Flash GUI and Tools
•Transferir como PPTX, PDF•
0 gostou•225 visualizações

The document discusses different types of graphics in Flash and tools for working with graphics. It introduces vector graphics, which can be scaled without loss of resolution, and raster graphics, which are dependent on pixel resolution. It then describes various selection, drawing, navigation, text, and modification tools in the Flash interface for working with graphics, including tools for lines, shapes, fills, gradients, and animation.

Recomendados
Mais conteúdo relacionado
Mais procurados
Mais procurados (16)
Destaque
Semelhante a Flash GUI and Tools
Semelhante a Flash GUI and Tools (20)
Flash GUI and Tools
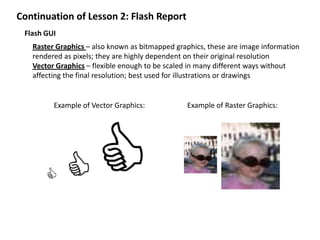
- 1. Continuation of Lesson 2: Flash Report Flash GUI Raster Graphics – also known as bitmapped graphics, these are image information rendered as pixels; they are highly dependent on their original resolution Vector Graphics – flexible enough to be scaled in many different ways without affecting the final resolution; best used for illustrations or drawings Example of Vector Graphics: Example of Raster Graphics:
- 2. The Menu Bar The Timeline Panel Onion skin options Delete layer or folder
- 3. The Stage
- 4. The Panels
- 5. The Tools Window Selection a. Selection [V] – selects, modifies and moves line segments, corners and fills b. Subselection [A] – selects and moves specific points in the image c. Lasso [L] – selects area defined by clicking and dragging 2. Drawing a. Line [N] – creates lines. To limit the tool to draw straight lines, hold down Shift while dragging b. Oval [O] and Rectangle [R] – create their respective shapes. c. Pencil [Y] – lets you draw lines as you would using the pencil d. Brush [B] – lets you paint fills as you would using a paint brush e. Eyedropper [I] – allows you to copy a shape’s attributes and apply them on another f. Ink Bottle [S] – allows you to change the attributes of a stroke. This is useful in changing multiple strokes at a time g. Paint Bucket [K] – allows you to change fills easily h. Eraser [E] – erases shape just like the Brush tool i. Pen [P] – create exact points through which strokes are drawn
- 6. 3. Navigation a. Hand [H] – allows you to move the Stage in order to bring certain portions to view b. Zoom [M] – allows you to zoom in or out of the document 4. Text a. Text [T] – you can insert text into your document using this tool b. Free Transform tool [Q] – allows you to scale, skew, rotate and distort shapes c. Gradient Transform tool [F] – allows you to change the orientation and spread of your gradient d. 3D rotation tool [W] – allows you to rotate a movieclip symbol in 3D space e. 3D Transition tool [G] – allows you to rotate a movieclip symbol in horizontally or vertically f. Deco tool [U] – you can add a certain drawing effects using this tool. g. Bone tool [X] – this tool helps you create inverse kinetic animations like moving limbs or joints h. Bind tool [U] – allows you to edit or fine tune the armatures that you’ve created using the Bone tool
- 7. Modifying Flash Document Properties