Self Grading Tests & Quizzes in Google Docs
•Transferir como PPT, PDF•
4 gostaram•6,595 visualizações

How to create self grading tests and quizzes using Google Docs (Drive)

Recomendados
Recomendados
Mais conteúdo relacionado
Mais procurados
Mais procurados (19)
Destaque
Destaque (18)
Semelhante a Self Grading Tests & Quizzes in Google Docs
Semelhante a Self Grading Tests & Quizzes in Google Docs (20)
Mais de Meredith Martin
Mais de Meredith Martin (20)
Último
Último (20)
Self Grading Tests & Quizzes in Google Docs
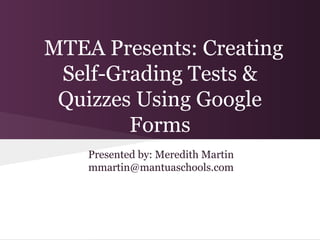
- 1. MTEA Presents: Creating Self-Grading Tests & Quizzes Using Google Forms Presented by: Meredith Martin mmartin@mantuaschools.com
- 2. Sign in to your email, and click on DOCUMENTS at the top.
- 3. Click the red CREATE button and select FORM.
- 4. First, give your form a title, and a description/instructions if you wish.
- 5. Uncheck 'Require Mantua Township Schools Sign-In' since the student accounts are on a different server.
- 6. Google gives you 2 sample questions to begin with. You can select the type of question on the menu.
- 7. EDIT DUPLICATE REMOVE You can also edit, duplicate, or remove a question.
- 8. The ADD ITEM button at the top lets you create more questions.
- 9. Question Types The following are the different types of questions you can create.
- 10. Text allows for a short text answer. You will probably want to make all your questions required!
- 11. A sample Text question.
- 12. Paragraph text allows for longer text answers.
- 13. Sample Paragraph Text question.
- 14. Multiple Choice allows you to have students select one from a list of choices.
- 15. Sample Mutliple Choice question.
- 16. Checkboxes allow for multiple answers.
- 18. Choose From A List creates a dropdown list of choices.
- 19. Sample Choose From A List question.
- 20. Scale questions let you create a scaled answer. You can go all the way up to 10.
- 22. Grid questions allow you to create multiple questions with a grid of choices.
- 24. Themes are a little wonky here at school. They work in some browsers but not in others. If you want a theme but get an error message, try opening Themes in another browser such as IE or Chrome. When your form is complete, you can choose a theme!
- 26. Theme preview. Don't forget to click APPLY to choose your theme.
- 27. Under MORE ACTIONS you can edit the message displayed when students finish the quiz.
- 28. Create any message you like, and you can choose to show them a summary of results when they finish.
- 29. At the bottom of your editing menu is the link to your live form.
- 30. This will take you to your form, and the address at the top is the one to share with your students.
- 31. When you open your form from your Documents list, it opens in spreadsheet view.
- 32. Make changes to your form. Email your form to someone. View the live form. Get the code to embed your form in a website. View graphs of your results. Turn form on or off. On the FORM menu, you can choose to edit form, view live form, see the summary, turn form on or off, and more.
- 33. To make your quiz self-grading, go to TOOLS and select SCRIPT GALLERY.
- 34. On the Gallery, select EDUCATION, and then FLUBAROO.
- 35. Install the Flubaroo script.
- 36. You will now have FLUBAROO as an option on your menu. You can easily grade, regrade, view report, and more from this menu.
- 37. IMPORTANT: Before beginning the Flubaroo script, go to your live form and complete it with the correct answers. This will become the template for grading.
- 38. When you choose to grade, Flubaroo will walk you through it. First, select grading options.
- 39. Next, select the submission you want to be your answer key.
- 40. Flubaroo will then begin grading.
- 41. When grading is complete, you will have a new worksheet called GRADES.
- 42. GRADES will give you your results for each students, along with a summary of responses.
- 43. Flubaroo will also highlight any consistently low scoring questions for you.
- 44. NOTES • You may need to install and run Flubaroo again if you get more responses to your quiz. • For help with Flubaroo, go to: http://www.flubaroo.com/ • For more uses and resources for Google Forms, go to: http://www.livebinders.com/play/play/116971 • If you need help, see me!