1. PowerShell Quick Reference - Security and Compliance Center (v1.01)
$LiveCred = Get-Credential
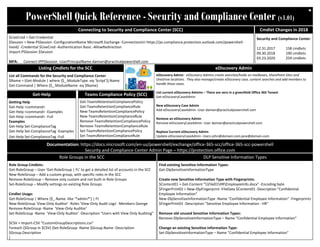
$Session = New-PSSession -ConfigurationName Microsoft.Exchange -ConnectionUri https://ps.compliance.protection.outlook.com/powershell-
liveid/ -Credential $LiveCred -Authentication Basic -AllowRedirection
Import-PSSession $Session
MFA: Connect-IPPSSession -UserPrincipalName damian@practicalpowershell.com
Getting Help
Get-Help <command>
Get-Help <command> -Examples
Get-Help <command> -Full
Examples
Get-Help Set-ComplianceTag
Get-Help Set-ComplianceTag -Examples
Get-Help Set-ComplianceTag -Full
Documentation: https://docs.microsoft.com/en-us/powershell/exchange/office-365-scc/office-365-scc-powershell
Security and Compliance Center Admin Page – https://protection.office.com
Get-Help
Connecting to Security and Compliance Center (SCC)
List all Commands for the Security and Compliance Center
$Name = (Get-Module | where {$_.ModuleType -eq 'Script'}).Name
Get-Command | Where {$_.ModuleName -eq $Name}
Listing Cmdlets for the SCC
Get-TeamsRetentionCompliancePolicy
Get-TeamsRetentionComplianceRule
New-TeamsRetentionCompliancePolicy
New-TeamsRetentionComplianceRule
Remove-TeamsRetentionCompliancePolicy
Remove-TeamsRetentionComplianceRule
Set-TeamsRetentionCompliancePolicy
Set-TeamsRetentionComplianceRule
Teams Compliance Policy (SCC)
eDiscovery Admin - eDiscovery Admins create searches/holds on mailboxes, SharePoint Sites and
OneDrive locations. They also manage/create eDiscovery case, content searches and add members to
handle these cases.
List current eDiscovery Admins – There are zero in a greenfield Office 365 Tenant
Get-eDiscoveryCaseAdmin
New eDiscovery Case Admin
Add-eDiscoveryCaseAdmin -User damian@practicalpowershell.com
Remove an eDiscovery Admin
Remove-eDiscoveryCaseAdmin -User damian@practicalpowershell.com
Replace Current eDiscovery Admin
Update-eDiscoveryCaseAdmin -Users john@domain.com,jane@domain.com
eDiscovery Admin
Role Group Cmdlets:
Get-RoleGroup – User ‘Get-RoleGroup | FL’ to get a detailed list of accounts in the SCC
New-RoleGroup – Add a custom group, with specific roles in the SCC
Remove-RoleGroup – Remove only custom and not built-in Role Groups
Set-RoleGroup – Modify settings on existing Role Groups
Cmdlet Usage:
Get-RoleGroup | Where {$_.Name -like ‘*admin*'} | Ft
New-RoleGroup 'View-Only Auditor' -Roles 'View-Only Audit Logs' -Members George
Remove-RoleGroup -Name 'View-Only Auditor'
Set-RoleGroup -Name 'View-Only Auditor' -Description “Users with View Only Auditing”
$CSV = Import-CSV “CustomGroupDescriptions.csv”
Foreach ($Group in $CSV) {Set-RoleGroup -Name $Group.Name -Description
$Group.Description
}
Role Groups in the SCC
Security and Compliance Center
12.31.2017 158 cmdlets
09.30.2018 190 cmdlets
03.23.2020 259 cmdlets
Cmdlet Changes in 2018
Find existing Sensitive Information Types:
Get-DlpSensitiveInformationType
Create new Sensitive Information Type with Fingerprints:
$Content01 = Get-Content "File01HREmployeeInfo.docx" -Encoding byte
$FingerPrint01 = New-DlpFingerprint -FileData $Content01 -Description "Confidential
Employee Information"
New-DlpSensitiveInformationType -Name "Confidential Employee Information" -Fingerprints
$FingerPrint01 -Description "Sensitive Employee Information - HR"
Remove old unused Sensitive Information Types:
Remove-DlpSensitiveInformationType – Name "Confidential Employee Information"
Change an existing Sensitive Information Type:
Set-DlpSensitiveInformationType – Name "Confidential Employee Information"
DLP Sensitive Information Types
1
2. PowerShell Quick Reference - Security and Compliance Center (v1.01)
Damian Scoles
Microsoft MVP
Book Author
www.practicalpowershell.com
Powershellgeek.com
@PPowerShell
Created By:
Tab through parameters to see all available
Check for latest module version
Read the latest Microsoft Docs for SCC
Read Teams MVP blogs for more tips
Use MFA for better security
Need Help – ‘Get-Help’
Read cmdlet Synopsis for functionality
Helpful Tips
Windows PowerShell Blog
blogs.msdn.com/b/powershell
Script Center
technet.microsoft.com/scriptcenter
PowerShell Tips of the Week
www.practicalpowershell.com/blog
PowerShell Team – GitHub
https://github.com/powershell
More On PowerShell
Get-DlpCompliancePolicy
Get-DlpComplianceRule
Get-DlpComplianceRuleV2
Get-DlpDetectionsReport
Get-DlpKeywordDictionary
Get-DlpSensitiveInformationType
Get-DlpSensitiveInformationTypeRulePackage
Get-DlpSiDetectionsReport
Migrate-DlpFingerprint
New-DlpCompliancePolicy
New-DlpComplianceRule
New-DlpComplianceRuleV2
New-DlpFingerprint
New-DlpKeywordDictionary
New-DlpSensitiveInformationType
New-DlpSensitiveInformationTypeRulePackage
Remove-DlpCompliancePolicy
Remove-DlpComplianceRule
Remove-DlpComplianceRuleV2
Remove-DlpKeywordDictionary
Remove-DlpSensitiveInformationType
Remove-DlpSensitiveInformationTypeRulePackage
Set-DlpCompliancePolicy
Set-DlpComplianceRule
Set-DlpComplianceRuleV2
Set-DlpKeywordDictionary
Set-DlpSensitiveInformationType
Set-DlpSensitiveInformationTypeRulePackage
DLP CMDLETS
$RDDoc1 = Get-Content "z:RDResearchDoc-Contoso.docx" -Encoding byte
$RDDoc1FingerPrint = New-DlpFingerprint -FileData $RDDoc1 -Description "Research and Development Doc 1"
New-DlpSensitiveInformationType -Name "RD Document 1 Fingerprint" -Fingerprints $RDDoc1FingerPrint -Description "Research and
Development Doc 1 - CONFIDENTIAL."
DLP Fingerprinting
Get-SCInsights – provides user totals per workloads –
ExO, Archive, SharePoint, OneDrive and more
Cmdlet Highlight
To use Device Management cmdlets – Enable MDM for tenant first:
https://support.office.com/en-us/article/overview-of-mobile-device-
management-mdm-for-office-365-faa7d8e5-645d-4d59-839c-c8d4c1869e4a
New Device Rule – Tenant Wide, Less Options
New-DeviceTenantRule
New Device Rule – Very Specific Configuration, More Options
New-DeviceConfigurationRule
** Note the two cmdlet above have Set, Get and Remove Verbs as well
Device Rules can be used in conjunction with Conditional Access
Get-DeviceConditionalAccessPolicy
Get-DeviceConditionalAccessRule
New-DeviceConditionalAccessPolicy
New-DeviceConditionalAccessRule
Remove-DeviceConditionalAccessPolicy
Remove-DeviceConditionalAccessRule
Set-DeviceConditionalAccessPolicy
Set-DeviceConditionalAccessRule
Device Compliance
Future Cmdlets (Currently Not Working)
Get-LongTermAuditItems Get-InformationBarrierReportDetails
Get-LongTermAuditStats Get-InformationBarrierReportSummary
Get-DataRetentionReport
Get-DeviceComplianceDetailsReport
Get-DeviceComplianceDetailsReportFilter
Get-DeviceComplianceReportDate
Get-DeviceComplianceSummaryReport
Get-DeviceComplianceUserReport
Get-DlpDetectionsReport
Get-DlpSiDetectionsReport
Get-MailFilterListReport
Get-SupervisoryReviewPolicyReport
Get-SupervisoryReviewReport
Reporting Cmdlets
REGEX Testing / Reference
RegEx Testing
https://regex101.com/
https://regexr.com/
http://osherove.com/tools
Microsoft RegEx Reference
https://docs.microsoft.com/en-us/
dotnet/standard/base-types/regular-
expression-language-quick-reference
2
3. PowerShell Quick Reference - Security and Compliance Center (v1.01)
Add User to Role Group
Add-RoleGroupMember -Identity Reviewer -Member Damian
Add-RoleGroupMember -Identity ComplianceAdministrator -Member “John Smith”
Add-RoleGroupMember -Identity eDiscoveryManager -Member “Scott Schnoll”
Verify Users in Role Group
Get-RoleGroupMember -Identity Reviewer
Get-RoleGroupMember -Identity ComplianceAdministrator
Get-RoleGroupMember -Identity eDiscoveryManager
Remove Users from Role Group
Remove-RoleGroupMember -IdentityReviewer -Member “Greg Taylor”
Remove-RoleGroupMember -Identity ComplianceAdministrator -Member “Van Hybrid”
Remove-RoleGroupMember -Identity eDiscoveryManager -Member “Jason Sherry”
Update Role Group MemberShip
Update-RoleGroupMember -Identity Reviewer -Members “Damian”,”Dave”
Working with Role Groups
Create New Case
New-ComplianceCase -Name “Case # 4302-1” -Description “Legal Case – R&D – 10-2018”
Add Compliance Case Members
Add-ComplianceCaseMember -Case “Case # 4302-1” -Member damian@practicalpowershell.com
Add-ComplianceCaseMember -Case “Case # 4302-1” -Member dave@practicalpowershell.com
Add Searches and Holds to the Case
New-CaseHoldPolicy -Name "Hold - Damian" -Case "Case # 4302-1" -ExchangeLocation "John”
New-ComplianceSearch -Name “Secret Meetings” -ExchangeLocation Damian -
ContentMatchQuery "subject:Secret Meettings"
Start the Search and apply a Search Action
Start-ComplianceSearch -Identity “Secret Meetings”
New-ComplianceSearchAction -SearchName “Secret Meetings” -Export
View Existing Compliance Cases
Get-ComplianceCase
Working with Compliance Cases
Create a new compliance tag:
New-ComplianceTag -Name "R&D" -RetentionAction Delete -RetentionDuration 365 -
RetentionType TaggedAgeInDays
List all current Compliance Tags
Get-ComplianceTag
Removing and existing Compliance Tag
Remove-ComplianceTag-Name "R&D"
Modifying an existing tag by adding a reviewer
Set-ComplianceTag -Name "R&D" -Reviewer damian@practicapowerhsell.com
First, create a Hold Compliance Policy
New-HoldCompliancePolicy -Name “Case 5412-10” -ExchangeLocation john@standard.net
Then create one or more Hold Compliance Rules
New-HoldComplianceRule -Policy “Case 5412-10” -Name “Hold 2017” -ContentDateFrom “01/
01/2017” -ContentDateTo “12/31/17”
Removing policies or rules
Remove-HoldCompliancePolicy “Case 5412-10”
Remove-HoldComplianceRule “Hold 2017”
Modify existing rules or policies:
Set-HoldCompliancePolicy -Name “Case 5412-10” -SharePointLocation "http://
standard.sharepoint.com/sites/Teams/R&D"
Set-HoldComplianceRule -Name “Hold 2017” -ContentDateFrom “07/01/17"
List policies or rules that were created previously
Get-HoldCompliancePolicy
Get-HoldComplianceRule -Name “Hold 2017”
Compliance Holds and Tags
Security, Privacy and Compliance Blog
https://techcommunity.microsoft.com/t5/Security-Privacy-and-
Compliance/bg-p/securityprivacycompliance
Permissions in Security and Compliance Center
https://docs.microsoft.com/en-us/office365/securitycompliance/
permissions-in-the-security-and-compliance-center
Full Security and Compliance Center PowerShell Book – https://PracticalPowershell.com
3
4. View Default Admin Audit Log Settings
Get-AdminAuditLogConfig
Search the Admin Audit Log and send Email of results
New-AdminAuditLogSearch -StartDate 8/1/18 -EndDate 8/15/18 -StatusMailRecipients
damian@practicalpowershell.com
Disable/Enable Office 365 Admin Audit logs
Set-AdminAuditLogConfig -UnifiedAuditLogIngestionEnabled $False
Set-AdminAuditLogConfig -UnifiedAuditLogIngestionEnabled $True
** Note – Changes (using Set) need to be performed in Exchange Online PowerShell
New Unified Log Search – Exchange, SharePoint, OneDrive, Intune, AzureAD and more!
Search-UnifiedAuditLog -StartDate 10/1/2018 -EndDate 10/24/18
Or SharePoint Only - Search-UnifiedAuditLog -StartDate 10/1/2018 -EndDate 10/24/18 -
RecordType SharePoint
Admin Audit Log
Change Audit Config
Set-AuditConfig -Workload Exchange,SharePoint,OneDriveForBusiness,Intune
Audit all operations for a workload:
New-AuditConfigurationPolicy -Workload SharePoint
Remove existing Audit Configuration Policy
Remove-AuditConfigurationPolicy 91f20f6f-7ef9-4561-9a38-d771452d5e45
Audit specific operations in a workload
New-AuditConfigurationRule -Workload Exchange,SharePoint -AuditOperation Delete
Modify existing Audit Configuration Rule
Set-AuditConfigurationRule
Remove existing Audit Configuration Rule
New-AuditConfigurationRule -Identity <GUID of Rule>
Current Configutation:
Get-AuditConfig
Get-AuditConfigurationPolicy
Get-AuditConfigurationRule
Auditing
First we need to create a Supervisory Policy as none exist by default:
New-SupervisoryReviewPolicyV2 -Name "R&D" -Reviewers george@cooltoys.com -Comment
"Monitory R&D emails"
Then create one or more Supervisory Rules:
New-SupervisoryReviewRule -SamplingRate 50 -Policy "R&D" -Condition
(Reviewee:damian@cooltoys.com)
Grab reports or information on the rules / policies created:
Get-SupervisoryReviewPolicyReport, Get-SupervisoryReviewPolicyV2
Get-SupervisoryReviewReport, Get-SupervisoryReviewRule
Remove a policy (** No cmdlet for removing a rule):
Remove-SupervisoryReviewPolicyV2
Modify existing rules/policies
Set-SupervisoryReviewPolicyV2 -Name "R&D" -Reviewers “greg@cooltoys.com”
Set-SupervisoryReviewRule -SamplingRate 25 -Policy "R&D"
Supervisory Review
Create a list of keywords to be used by DLP to protect information in your tenant
Check settings on Existing Dictionary:
Get-DlpKeywordDictionary -Name "Technical Docs"
Create New DLP Keywords Dictionary
$DLPKeywords = "Technical Specifications, Research Grant, Development Methodologies"
$EncodedDLPKeywords = [system.Text.Encoding]::UTF8.GetBytes($DLPKeywords);
New-DlpKeywordDictionary -Name "Technical Docs" -Description "Keywords appearing in
internal docs" -FileData $EncodedDLPKeywords
Remove an unneeded dictionary
Remove-DlpKeywordDictionary -Name "Technical Docs"
Modify an Existing Dictionary (removing keywords in this case)
$DLPKeywords = "Technical Specifications, Development Methodologies"
$EncodedDLPKeywords = [system.Text.Encoding]::UTF8.GetBytes($DLPKeywords);
Set-DlpKeywordDictionary -Name "Technical Docs" -FileData $EncodedDLPKeywords
PowerShell Quick Reference - Security and Compliance Center (v1.01)
Create Custom XML for DLP: http://www.powershellgeek.com/adventures-in-custom-dlp-rules-part-one/
DLP Keyword Dictionary
4
5. Unified Audit Log Retention Policies determine how to handle audit logs for a tenant:
List the settings of a Policy:
Get-UnifiedAuditLogRetentionPolicy
Create a new Policy:
New-UnifiedAuditLogRetentionPolicy -Name "SharePoint Audit Policy" -Description "Six
month retentionpolicy SharePoint log items" -RecordTypes SharePoint -RetentionDuration
SixMonths -Priority 1
PowerShell Quick Reference - Security and Compliance Center (v1.01)
Insider Risk
Insider risk policies are designed to help identify inadvertent and/or suspicious internal
activity. Note that these are very new cmdlets and help is hard to find.
Create a new Insider Risk Policy:
New-InsiderRiskPolicy -Name CheckForLeaks -InsiderRiskScenario LeakOfInformation
List all existing Insider Risk Policies:
Get-InsiderRiskPolicy
List one Insider Risk Policy
Get-InsiderRiskPolicy CheckForLeaks
Remove an existing Insider Risk Policy
Remove-InsiderRiskPolicy CheckForLeaks
Change settings on an existing Insider Risk Policy:
Set-InsiderRiskPolicy CheckForLeaks -AddExchangeLocation Brian
Disable an existing Insider Risk Policy
Set-InsiderRiskPolicy test -Enabled $False
** Requires E5 or E3 with Microsoft E5 Compliance add-on
Information Barriers
Create a new Information Barrier Policy:
New-InformationBarrierPolicy -Name ‘HR-Research’ -AssignedSegment HR -SegmentsBlocked Research -State InActive
List all Information Barrier Policies:
Get-InformationBarrierPolicy | Ft
Remove an existing Information Barrier Policy:
Remove-InformationBarrierPolicy
Change settings on existing Information Barrier Policy:
Set-InformationBarrierPolicy
Quarantine
Remove Quarantine Messages:
Get-QuarantineMessage | Delete-QuarantineMessage
$ID = (Get-QuarantineMessage | Where {$_.Type -eq ‘High Confidence Phish’}).Identity
Delete-QuarantineMessage -identity $ID
Export quarantined email for review (locate message and export to txt file:
$ID = (Get-QuarantineMessage | Where {$_.Type -eq ‘High Confidence Phish’}).Identity
$ExportMessage = Export-QuarantineMessage -Identity $ID
$Encoding = [Convert]::FromBase64String($ExportMessage.Eml)
[IO.File]::WriteAllBytes("C:sciptsExport1.txt", $Encoding)
Find Quarantine messages for 2020:
Get-QuarantineMessage -StartReceivedDate 01/01/2020 -EndReceivedDate 12/30/2020
Find quarantine messages not reported as false positives:
Get-QuarantineMessage -Reported $False | Ft -Auto
Get an email header, using the message identity stored in $ID:
Get-QuarantineMessageHeader $ID
Preview a Quarantined message using the same $ID variable as before:
Preview-QuarantineMessage $ID
Release a message for an end user:
Release-QuarantineMessage <Message Identity>
5
Kick off process to segment accounts:
Start-InformationBarrierPoliciesApplication
Stop the process of segmenting accounts
Stop-InformationBarrierPoliciesApplication
Check on the process of this application:
Get-InformationBarrierPoliciesApplicationStatus
Verify a policied is applies to a user:
Get-InformationBarrierRecipientStatus -Identity JohnSmith
Validate Information Barrier Policies:
Test-InformationBarrierPolicy
Remove and Existing Policy:
Remove-UnifiedAuditLogRetentionPolicy
Change Settings on an existing Policy:
Set-UnifiedAuditLogRetentionPolicy "SharePoint Audit Policy" -Priority 100
Change record types for an existing Policy:
Set-UnifiedAuditLogRetentionPolicy "Office 365 Audit Policy" -RecordTypes SharePoint,
ExchangeAdmin, MicrosoftTeams, Yammer, Sway
Unified Audit Log Retention: https://docs.microsoft.com/en-us/microsoft-365/compliance/audit-log-retention-policies
Information Barriers are a logical construct that prevents communication between groups of people. Any of the people that are blocked from communicating need to be synced to
Azure AD. The filters for users are based off of Azure AD users and the attributes that are allowed for filters.
6. PowerShell Quick Reference - Security and Compliance Center (v1.01)
6
File Plan Manager is a new feature that Microsoft introduced in 2019 to the Security and
Compliance Center. The intended purpose is to help apply tags to data in your tenant to
help search for and discover. All Get-* cmdlets output in a list format by default.
Special Cmdlets for File Plans:
Export an existing File Plan Property:
Export-FilePlanProperty
Import a File Plan Property (using CSV file)
Import-FilePlanProperty -RawCSV ‘FilePlanProperty1.csv’
List the structure of the File plan:
Get-FilePlanPropertyStructure
Retrive the Json for the structure:
Get-FilePlanPropertyStructure | Fl FilePlanStructureJSON
Property - Authorities
List any existing Authorities:
Get-FilePlanPropertyAuthority | Ft -Auto
Create a new Authority:
New-FilePlanPropertyAuthority -Name ‘HR’
Remove an existing Authority:
Remove-FilePlanPropertyAuthority HR
Change a setting on an existing Authority:
Set-FilePlanPropertyAuthority ‘IT’ -DisplayName ‘Information Technology’
Property Categories
List any existing Categories:
Get-FilePlanPropertyCategory | Ft -Auto
Create a new Category:
New-FilePlanPropertyCategory -Name ‘Internal Review’
Remove an existing Category:
Remove-FilePlanPropertyCategory ‘Internal Review’
Change settings on an existing category:
Set-FilePlanPropertyCategory ‘Internal Review’ -Disabled $True
Property - Citation
List any existing Citations configured:
Get-FilePlanPropertyCitation | Ft -Auto
Create new Citation (FTC – Truth in Advertising example):
$CitationURL = ‘https://www.ftc.gov/news-events/media-resources/truth-advertising’
$Name = ‘Truth in Advertising’
$CitationJurisdiction = ‘Federal Trade Commission (FTC)’
New-FilePlanPropertyCitation -Name $Name -CitationURL $CitationURL -
CitationJurisdiction $CitationJurisdiction
Remove an existing Citation:
Remove-FilePlanPropertyCitation ‘Truth in Advertising’
Change a setting on an existing Citation:
Set-FilePlanPropertyCitation $Name -DisplayName ‘ ‘Truth in Advertising (2019)’
Property - Department
List any existing Department:
Get-FilePlanPropertyDepartment | Ft -Auto
Create a new Department:
New-FilePlanPropertyDepartment
Remove an Existing Department
Remove-FilePlanPropertyDepartment
Change a setting on an existing Department:
Set-FilePlanPropertyDepartment
Property – ReferenceID
List any existing ReferenceID:
Get-FilePlanPropertyReferenceId | Ft -Auto
Create a new ReferenceID:
New-FilePlanPropertyReferenceId -Name ‘ID 821’
Remove an existing ReferenceID:
Remove-FilePlanPropertyReferenceId ’ID 812'
Change the settings on an existing ReferenceID:
Set-FilePlanPropertyReferenceId ‘ID 812’ -Disabled $False -Comment ‘Reinstated 12/12/19’
Property SubCategory (Requires a parent Category to exist)
List any existing SubCategory
Get-FilePlanPropertySubCategory | Ft -Auto
Create new SubCategory:
New-FilePlanPropertySubCategory -Name ‘Litigant - Employee 4569’ -ParentId ‘73293e6a-
5612-459e-9b74-fc9022d9e2aa’
Remove an existing SubCategory”
Remove-FilePlanPropertySubCategory -Name ‘Litigant - Employee 4569’
Change settings on an existing Subcategory:
Set-FilePlanPropertySubCategory ‘Litigant - Employee 4569’ -Disabled $True -Comment
‘No longer needed – 01/03/2020’
File Plans
Labels – Add tags from File Plan
Adding File Plan information can be done with PowerShell. It is NOT straightforward.
There are no parameters to handle this. There are two ways to add any of these
properties to an existing or new label – either use the Security and Compliance Center and
the GUI interface or use PowerShell. PowerShell takes a bit of work. A working example is
included in my ‘Practical PowerShell Security and Compliance Center’ book due to the
complexity. There isn’t sufficient space in a Quick Reference for breaking this out.
Full Security and Compliance Center PowerShell Book:
https://PracticalPowershell.com