TrustArc Webinar - Unlock the Power of AI-Driven Data Discovery
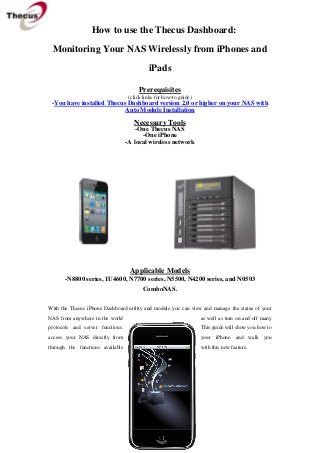
How to use the Thecus Dashboard
1. How to use the Thecus Dashboard:
Monitoring Your NAS Wirelessly from iPhones and
iPads
Prerequisites
(click links for how-to guide)
-You have installed Thecus Dashboard version 2.0 or higher on your NAS with
Auto Module Installation
Necessary Tools
-One Thecus NAS
-One iPhone
-A local wireless network
Applicable Models
-N8800 series, 1U4600, N7700 series, N5500, N4200 series, and N0503
ComboNAS.
With the Thecus iPhone Dashboard utility and module you can view and manage the status of your
NAS from anywhere in the world
as well as turn on and off many
protocols and server functions.
This guide will show you how to
access your NAS directly from
your iPhone and walk you
through the functions available
with this new feature.
2. Contents
This how-to guide is broken up into the following sections:
1.
2.
3.
4.
Downloading Thecus Dashboard
Turning on Bonjour from the Thecus UI
Accessing Your NAS from the Thecus Dashboard
Logging Into Your NAS and Changing Your NAS’s Settings
1. Downloading Thecus Dashboard
-Go to the App Store on your iPhone and search for Thecus Dashboard. Install the app and look at parts
3 and 4 of this guide for detailed instructions on use.
2. Turning on Bonjour from the Thecus UI
-This makes your NAS visible on the local network when browsing with the Thecus Dashboard.
Without this activated, it is still possible to connect to your NAS by manually inputting the IP address
(see part 3 of this guide).
1.
2.
3.
Select “Bonjour” from System Network in the Thecus UI menu.
Bonjour Service: Enable this to be able to find your NAS with the Thecus Dashboard
automatically.
Select “Apply”.
3. Accessing Your NAS from the
Thecus iPhone Dashboard
From the Thecus Dashboard, you can choose to:
A. Browse for your NAS on the local
network (only if you’ve turned
Bonjour on in your NAS as shown in
part 2 of this guide) or
B. Add your NAS’s IP Address manually.
A. 1. Select “local”.
2. A list of all the local NAS with
Bonjour activated will appear, select
your NAS from the list and continue to
3. part 3 of this guide.
*If your NAS is not on the list, you may have to change its IP address or, although
unlikely, your phone’s. Check out the IP Address how-to guide for more
information.
B. 1. Select Edit to add or delete IP address
connections manually.
2. Select “-”, then “Delete” to delete
previously saved IP address connections.
3. Select “+” and skip to step 5 below to
create new IP address connections.
4. Select “Done” when finished.
5. Enter the IP address of the NAS you
would like to connect to. The default port
number is 80.
6. Select “Done”.
7. Your new IP address has been saved to
the list and can be accessed at any time.
4. Logging Into Your NAS and Changing Your NAS’s Settings
NOTE: When you see this warning, that means that you have to install the
Dashboard module in your NAS before accessing all the features of the
Thecus Dashboard. Take a look at the Auto Module Installation how-to
guide for detailed instructions on how to do this. Without the Dashboard
module installed on your NAS you can only view the status of your NAS,
you cannot make any changes.
4. Without the Thecus Dashboard Module installed on your NAS:
Login 1.
Fill in your password.
2.
Choose whether or not to automatically fill in your password
next time.
3.
Select “Login”.
From here you will be taken directly to the monitoring section of the
Thecus Dashboard. With this you can monitor your NAS, but have no
ability to change any settings.
With the Thecus Dashboard Module Installed on your NAS:
Login Page1.
Password - Fill in your password.
2.
Remember Password - Choose
whether or not to automatically
fill in your password next time.
3.
Login - Select “Login”
4.
Reset Administrator Password You can reset your administrator
password
if
necessary.
Your
phone must first be bound to your
NAS, see part C below.
Menu A. Service Status Monitoring View your NAS’s current status and toggle protocols on and off.
5. B. Change User Password - Change each registered user’s password.
C. Bind iPhone to NAS - Selecting this allows you to reset your admin password and doesn’t
allow other phones to bind to your NAS.
See below for more details:
A. Service Status Monitoring - Monitor your NAS’s condition and
turn on and off protocols for accessing your NAS directly from your
iPhone.
B. Change User Password - Select a user and input a new password.
C. Bind iPhone to NAS - This lets your NAS recognize your phone in
the future and allows you to reset the administrator password.
For any questions regarding this How To Guide, please email us:
webmaster@thecus.com
--End--