SlideShare uma empresa Scribd logo
1 de 13
Baixar para ler offline
Working with tables in digital documents
tutorialaicsip.com/2020/06/working-with-tables-in-document-.html
Working with tables in Open Office Writer - IT (402)
Working with tables in open office writer is another important part of digital
documentation software. In your syllabus of IT 402, this content is added after create
and customizing table of contents. So let's start. In this post you will read about the
following:
1. What is a table?
2. How are tables of writer useful?
3. Insert Table
a. Ways of insert table
b. Steps to insert table
4. Autofit Options in table
5. Entering text into a table
6. Selecting row(s)/Columns/Table/Cells
7. Add images
8. Inserting rows, columns, cells
9. Delete rows, columns, cells
10. Merging cells
11. Splitting cells
12. Using formulas in a table
What is a table?
A table is a combination of rows and columns. In other words, A table is a data
representation in a horizontal and vertical manner. The horizontal data representation
is known as row and the vertical data representation is known as a column.
How are tables of writer useful?
Tables are useful in many ways in the document. Few of them are as follows:
1. To represent data in tabular form
2. It adds readability to the document
3. Makes your document more presentable
4. The reader can understand data easily in tables
5. Helps to analyse data
How to insert a table?
As usual, we will follow the same pattern MS Word 2013 and OO writer 4.1.7. Before
1/13
ways of insert table in MS Word
2013
going ahead lets we discuss what are the ways to insert a table in document.
What are the ways to insert the table in MS Word 2013?
There are few ways to insert a table in MS Word 2013 as follows:
Steps to insert a table in MS Word 2013
1. Insert ⇒ Table ⇒ Drag the required table by dimensions of rows and columns. See
the following screenshot where we have inserted table of 5 x 5 (rows x columns).
Insert table 5 X 5 in MS Word 2013
2/13
Insert table using insert table option in MS Word 2013
2. Insert ⇒ Table ⇒ Insert Tabe option. When you insert a table by this option you
will get a dialog box that asks a number of rows and number of columns required
in the table along with the auto behaviour of data on the screen. Look at following
screenshots:
3. Draw a table: You
can draw a table as
per your need. Make
the required boxes
using the pen tool.
4. Convert text to the
table: To use this
option text must be
written in tabular
form for good
results. However,
you can convert any
text into the table.
Steps are as follows:
1. Write the text
in the word
document.
2. Select the text.
3. Now click on
Insert ⇒ Table
⇒ Convert Text
to Table
option.
4. Now convert
text to table
dialog box will
appear. Select
the symbol to
separate the
value in
different
columns as
shown in this
screenshot. In
this example, I
have used
space to
separate values
in columns.
3/13
insert a table using draw table
insert table using convert text to table option
5. Quick tables option is used
to insert a pre-defined
formatted table in the
document.
4/13
Separate text into columns using the symbol in MS
Word
What are the ways to insert the table in OO writer 4.1.7?
There are three ways to insert a table in OO Writer 4.1.7:
1. Insert ⇒ Table - Follow these steps
1. Place your cursor where the table is required.
2. Now click on Insert ⇒ Table option. An insert table dialog box appears.
insert table dialog in OO Writer 4.1.7
5/13
3. Type a table name to maintain this as a part of the document. Then select
the size by the number of rows and number of columns and options like
Heading, Don't split table or border option.
4. Click on OK button.
2. Table ⇒ Insert ⇒ Table: Steps are similar to option 1.
3. From Standard toolbar Table icon
1. Place your cursor where the table is required in the document.
2. Click on the table icon in the standard toolbar.
insert table from standard toolbar in OO Writer
3. When you click on the table icon it will open insert table dialog as above. If
you click on down arrow it allows you to select the number of columns and
number of rows for your table.
Autofit Options in table
Autofit options are useful to fit the contents in the table automatically.
Autofit Options in the table in MS Word 2013
Autofit option is available in Layout ⇒ Autofit in the Cell Size group.
Layout Autofit Options in MS Word
This layout tab is an additional tab which will appear when you select the table or place
your cursor in a table.
MS word provides the following autofit options :
6/13
MS Word 2013 autofit options for table
1. Autofit Contents: Allows to set the column width according to the length of
the content
2. Autofit Window: Allows to set the table width to fit on the window
3. Fixed Column Width: Allows to set columns at a fixed width
Autofit Options in the table in OO Writer 4.1.7
To adjust autofit options in OO Writer click on Table ⇒ Aufofit option. OO Writer
provides following autofit options:
1. Column Width: Content will be adjusted according to the fixed column's
width
2. Optimal Column width: Adjust column width with contents
3. Distribute columns evenly: Adjust selected columns with equal width
4. Row Height: Content will be adjusted according to the fixed row's height
5. Optimal Row Height: Adjust rows height with contents
6. Distribute rows evenly: Adjust selected rows with equal height
7. Allow rows to break across pages and columns: Break the rows with the
number of pages and applied columns on the page
Select the appropriate option as per your document need.
Entering text into a table
7/13
It is a quite simple task. Place your cursor to insert text in the cell and type the text. Use
navigation keys to navigate through the table. Use respective arrow keys to navigate in
the table. For example, to move left side press left arrow key, right arrow to the
right arrow, up arrow key to move up, down arrow key to move down. Tab key is
used to move next cell or row as well as insert a new blank row from the last cell.
Selecting row(s)/Column(s)/Table/Cell(s)
You need to select the row(s) to format them or change the format of the contents. You
can select rows directly through the mouse click. If you want to select from the
command then follow these steps in MS Word 2013.
Click on Layout ⇒ Select ⇒ Select Row(s)/Select Column(s)/Select
Table/Select Cell(s) option.
Select table Row in MS Word 2013
Follow this step to select a row in OO Writer 4.1.7
Click on Table ⇒ Select ⇒ Row(s) / Column(s) / Table / Cell(s)
Add images in table
Insert Image and adjust it according to your need. Place the cursor where the image is
required and insert the image.
Inserting Row(s) and Column(s)
You are required to insert row(s) and column(s)anytime once a table is prepared. To
insert a row at the end of the table is very simple just press tab key at the
last cell of the table. To insert row(s), columns(s) or cell(s) by following steps:
Insert row(s) in MS Word 2013
The layout table contains following options to insert row(s)/Columns:
1. Insert Above
2. Insert Below
3. Insert Left (For Columns(s))
8/13
Insert rows dialog box in OO Writer 4.1.7
4. Insert Right (For Columns(s))
insert rows options in MS Word 2013
Insert row(s) in OO Writer 4.1.7
1. Click on Table ⇒ Insert ⇒ Rows. It will open insert rows dailog box.
2. Type number of rows in
front of Number box.
3. Choose the position
before or after as per your
requirements.
4. Click on Ok button.
Insert column(s) in OO Writer 4.1.7
Click on Table ⇒ Insert ⇒ Rows. It will open insert columns dailog box, type number
of column(s) required and select the position for the columns.
Delete Row(s), Column(s) and Cell(s)
Sometimes row(s), column(s) or cell(s) are required to be deleted. So let us discuss how
to delete them.
Delete row(s)/Column(s)/Cell(s)/Table in MS Word 2013
1. Place your cursor which row is required to be deleted.
9/13
2. Click on Layout ⇒ Delete option. Select appropriate components of the table to
delete.
MS Word 2013 delete options
Delete row(s)/Column(s)/Table in OO Writer 4.1.7
1. Place the cursor which row/column/table requires to be deleted.
2. Click on Table ⇒ Delete ⇒ Table / Rows / Columns
Merging Cells
Merge cells mean that combining more than one rows or columns into one cell. It is
mostly used to generate headings in the table.
Merge Cells in MS Word 2013
1. Select the number of cells to be merged.
2. Click on Layout ⇒ Merge Cells option from Merge group.
Merge Cells in MS word 2013
Merge cells in OO Writer 4.1.7
Click on Table ⇒ Merge Cells
10/13
Merged Cells
Split Cells
Split cells option is used to split one cell into a number of rows and columns. Place your
cursor in a cell where multiple cells are required and follow these steps:
Split Cells in MS Word 2013
1. Click on Layout ⇒ Split Cells.
Split Cells command in MS Word 2013
11/13
2. Split Cells dialog box appears.
The split cells dialog box in MS Word 2013
3. Enter the desired number of rows and columns.
Split Cells in OO Writer 4.1.7
1. Click on Table ⇒ Split Cells.
2. Split Cells dialog box appears.
Split Cells dialog box OO Writer 4.1.7
3. Type the number of cells to be split in Split cells into a box.
4. Select horizontally to split cells in a horizontal direction or vertically to split
cells in a vertical direction.
12/13
5. Click on OK.
Thank you for reading the post. Kindly share the post to your friends those who want to
learn these topics. If you have any query regarding this topic feel free to comment
without any hesitation.
13/13

Mais conteúdo relacionado

Semelhante a Working with tables in digital documents

Teaching Excel
Teaching ExcelTeaching Excel
Teaching Excel
sam ran
 
Microsoft excel training module
Microsoft excel training moduleMicrosoft excel training module
Microsoft excel training module
Jeff Piontek
 
Lesson 11 Formatting Tables
Lesson 11   Formatting TablesLesson 11   Formatting Tables
Lesson 11 Formatting Tables
guevarra_2000
 
Les19 Working With Tables
Les19 Working With TablesLes19 Working With Tables
Les19 Working With Tables
guevarra_2000
 
Les19 Working With Tables
Les19 Working With TablesLes19 Working With Tables
Les19 Working With Tables
guevarra_2000
 
Introduction microsoft excel 2007
Introduction microsoft excel 2007Introduction microsoft excel 2007
Introduction microsoft excel 2007
Celia Bandelier
 
Pivot tableinfo
Pivot tableinfoPivot tableinfo
Pivot tableinfo
KA25EE855
 

Semelhante a Working with tables in digital documents (20)

Working with Tables.pptx
Working with Tables.pptxWorking with Tables.pptx
Working with Tables.pptx
 
KEYBOARDING_3Tables.pptx
KEYBOARDING_3Tables.pptxKEYBOARDING_3Tables.pptx
KEYBOARDING_3Tables.pptx
 
Basic ICT skills. 2.pptx
Basic ICT skills. 2.pptxBasic ICT skills. 2.pptx
Basic ICT skills. 2.pptx
 
MS Excel 2013
MS Excel 2013MS Excel 2013
MS Excel 2013
 
Print11
Print11Print11
Print11
 
Teaching Excel
Teaching ExcelTeaching Excel
Teaching Excel
 
Microsoft excel training module
Microsoft excel training moduleMicrosoft excel training module
Microsoft excel training module
 
Excel notes by satish kumar avunoori
Excel notes by satish kumar avunooriExcel notes by satish kumar avunoori
Excel notes by satish kumar avunoori
 
Lesson 11 Formatting Tables
Lesson 11   Formatting TablesLesson 11   Formatting Tables
Lesson 11 Formatting Tables
 
Libre Office Calc Lesson 2: Formatting and Charts
Libre Office Calc Lesson 2: Formatting and ChartsLibre Office Calc Lesson 2: Formatting and Charts
Libre Office Calc Lesson 2: Formatting and Charts
 
MS Word Tables
MS Word TablesMS Word Tables
MS Word Tables
 
Les19 Working With Tables
Les19 Working With TablesLes19 Working With Tables
Les19 Working With Tables
 
Les19 Working With Tables
Les19 Working With TablesLes19 Working With Tables
Les19 Working With Tables
 
Unit 010 Spreadsheets
Unit 010 SpreadsheetsUnit 010 Spreadsheets
Unit 010 Spreadsheets
 
MS Word Advanced Training
MS Word Advanced TrainingMS Word Advanced Training
MS Word Advanced Training
 
MS Word Advanced Training
MS Word Advanced TrainingMS Word Advanced Training
MS Word Advanced Training
 
kiromax.ppt
kiromax.pptkiromax.ppt
kiromax.ppt
 
Word Chapter 4
Word Chapter 4Word Chapter 4
Word Chapter 4
 
Introduction microsoft excel 2007
Introduction microsoft excel 2007Introduction microsoft excel 2007
Introduction microsoft excel 2007
 
Pivot tableinfo
Pivot tableinfoPivot tableinfo
Pivot tableinfo
 

Último

Jual Obat Aborsi Hongkong ( Asli No.1 ) 085657271886 Obat Penggugur Kandungan...
Jual Obat Aborsi Hongkong ( Asli No.1 ) 085657271886 Obat Penggugur Kandungan...Jual Obat Aborsi Hongkong ( Asli No.1 ) 085657271886 Obat Penggugur Kandungan...
Jual Obat Aborsi Hongkong ( Asli No.1 ) 085657271886 Obat Penggugur Kandungan...
ZurliaSoop
 
The basics of sentences session 3pptx.pptx
The basics of sentences session 3pptx.pptxThe basics of sentences session 3pptx.pptx
The basics of sentences session 3pptx.pptx
heathfieldcps1
 

Último (20)

How to Create and Manage Wizard in Odoo 17
How to Create and Manage Wizard in Odoo 17How to Create and Manage Wizard in Odoo 17
How to Create and Manage Wizard in Odoo 17
 
ICT role in 21st century education and it's challenges.
ICT role in 21st century education and it's challenges.ICT role in 21st century education and it's challenges.
ICT role in 21st century education and it's challenges.
 
Jual Obat Aborsi Hongkong ( Asli No.1 ) 085657271886 Obat Penggugur Kandungan...
Jual Obat Aborsi Hongkong ( Asli No.1 ) 085657271886 Obat Penggugur Kandungan...Jual Obat Aborsi Hongkong ( Asli No.1 ) 085657271886 Obat Penggugur Kandungan...
Jual Obat Aborsi Hongkong ( Asli No.1 ) 085657271886 Obat Penggugur Kandungan...
 
Key note speaker Neum_Admir Softic_ENG.pdf
Key note speaker Neum_Admir Softic_ENG.pdfKey note speaker Neum_Admir Softic_ENG.pdf
Key note speaker Neum_Admir Softic_ENG.pdf
 
Mehran University Newsletter Vol-X, Issue-I, 2024
Mehran University Newsletter Vol-X, Issue-I, 2024Mehran University Newsletter Vol-X, Issue-I, 2024
Mehran University Newsletter Vol-X, Issue-I, 2024
 
How to setup Pycharm environment for Odoo 17.pptx
How to setup Pycharm environment for Odoo 17.pptxHow to setup Pycharm environment for Odoo 17.pptx
How to setup Pycharm environment for Odoo 17.pptx
 
On_Translating_a_Tamil_Poem_by_A_K_Ramanujan.pptx
On_Translating_a_Tamil_Poem_by_A_K_Ramanujan.pptxOn_Translating_a_Tamil_Poem_by_A_K_Ramanujan.pptx
On_Translating_a_Tamil_Poem_by_A_K_Ramanujan.pptx
 
Sociology 101 Demonstration of Learning Exhibit
Sociology 101 Demonstration of Learning ExhibitSociology 101 Demonstration of Learning Exhibit
Sociology 101 Demonstration of Learning Exhibit
 
The basics of sentences session 3pptx.pptx
The basics of sentences session 3pptx.pptxThe basics of sentences session 3pptx.pptx
The basics of sentences session 3pptx.pptx
 
Sensory_Experience_and_Emotional_Resonance_in_Gabriel_Okaras_The_Piano_and_Th...
Sensory_Experience_and_Emotional_Resonance_in_Gabriel_Okaras_The_Piano_and_Th...Sensory_Experience_and_Emotional_Resonance_in_Gabriel_Okaras_The_Piano_and_Th...
Sensory_Experience_and_Emotional_Resonance_in_Gabriel_Okaras_The_Piano_and_Th...
 
Wellbeing inclusion and digital dystopias.pptx
Wellbeing inclusion and digital dystopias.pptxWellbeing inclusion and digital dystopias.pptx
Wellbeing inclusion and digital dystopias.pptx
 
Python Notes for mca i year students osmania university.docx
Python Notes for mca i year students osmania university.docxPython Notes for mca i year students osmania university.docx
Python Notes for mca i year students osmania university.docx
 
HMCS Vancouver Pre-Deployment Brief - May 2024 (Web Version).pptx
HMCS Vancouver Pre-Deployment Brief - May 2024 (Web Version).pptxHMCS Vancouver Pre-Deployment Brief - May 2024 (Web Version).pptx
HMCS Vancouver Pre-Deployment Brief - May 2024 (Web Version).pptx
 
Micro-Scholarship, What it is, How can it help me.pdf
Micro-Scholarship, What it is, How can it help me.pdfMicro-Scholarship, What it is, How can it help me.pdf
Micro-Scholarship, What it is, How can it help me.pdf
 
Towards a code of practice for AI in AT.pptx
Towards a code of practice for AI in AT.pptxTowards a code of practice for AI in AT.pptx
Towards a code of practice for AI in AT.pptx
 
Unit 3 Emotional Intelligence and Spiritual Intelligence.pdf
Unit 3 Emotional Intelligence and Spiritual Intelligence.pdfUnit 3 Emotional Intelligence and Spiritual Intelligence.pdf
Unit 3 Emotional Intelligence and Spiritual Intelligence.pdf
 
Google Gemini An AI Revolution in Education.pptx
Google Gemini An AI Revolution in Education.pptxGoogle Gemini An AI Revolution in Education.pptx
Google Gemini An AI Revolution in Education.pptx
 
Exploring_the_Narrative_Style_of_Amitav_Ghoshs_Gun_Island.pptx
Exploring_the_Narrative_Style_of_Amitav_Ghoshs_Gun_Island.pptxExploring_the_Narrative_Style_of_Amitav_Ghoshs_Gun_Island.pptx
Exploring_the_Narrative_Style_of_Amitav_Ghoshs_Gun_Island.pptx
 
COMMUNICATING NEGATIVE NEWS - APPROACHES .pptx
COMMUNICATING NEGATIVE NEWS - APPROACHES .pptxCOMMUNICATING NEGATIVE NEWS - APPROACHES .pptx
COMMUNICATING NEGATIVE NEWS - APPROACHES .pptx
 
Understanding Accommodations and Modifications
Understanding  Accommodations and ModificationsUnderstanding  Accommodations and Modifications
Understanding Accommodations and Modifications
 

Working with tables in digital documents

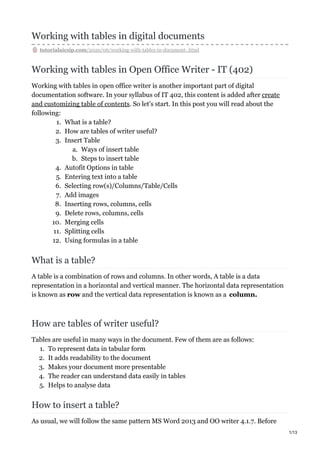
  • 1. Working with tables in digital documents tutorialaicsip.com/2020/06/working-with-tables-in-document-.html Working with tables in Open Office Writer - IT (402) Working with tables in open office writer is another important part of digital documentation software. In your syllabus of IT 402, this content is added after create and customizing table of contents. So let's start. In this post you will read about the following: 1. What is a table? 2. How are tables of writer useful? 3. Insert Table a. Ways of insert table b. Steps to insert table 4. Autofit Options in table 5. Entering text into a table 6. Selecting row(s)/Columns/Table/Cells 7. Add images 8. Inserting rows, columns, cells 9. Delete rows, columns, cells 10. Merging cells 11. Splitting cells 12. Using formulas in a table What is a table? A table is a combination of rows and columns. In other words, A table is a data representation in a horizontal and vertical manner. The horizontal data representation is known as row and the vertical data representation is known as a column. How are tables of writer useful? Tables are useful in many ways in the document. Few of them are as follows: 1. To represent data in tabular form 2. It adds readability to the document 3. Makes your document more presentable 4. The reader can understand data easily in tables 5. Helps to analyse data How to insert a table? As usual, we will follow the same pattern MS Word 2013 and OO writer 4.1.7. Before 1/13
  • 2. ways of insert table in MS Word 2013 going ahead lets we discuss what are the ways to insert a table in document. What are the ways to insert the table in MS Word 2013? There are few ways to insert a table in MS Word 2013 as follows: Steps to insert a table in MS Word 2013 1. Insert ⇒ Table ⇒ Drag the required table by dimensions of rows and columns. See the following screenshot where we have inserted table of 5 x 5 (rows x columns). Insert table 5 X 5 in MS Word 2013 2/13
  • 3. Insert table using insert table option in MS Word 2013 2. Insert ⇒ Table ⇒ Insert Tabe option. When you insert a table by this option you will get a dialog box that asks a number of rows and number of columns required in the table along with the auto behaviour of data on the screen. Look at following screenshots: 3. Draw a table: You can draw a table as per your need. Make the required boxes using the pen tool. 4. Convert text to the table: To use this option text must be written in tabular form for good results. However, you can convert any text into the table. Steps are as follows: 1. Write the text in the word document. 2. Select the text. 3. Now click on Insert ⇒ Table ⇒ Convert Text to Table option. 4. Now convert text to table dialog box will appear. Select the symbol to separate the value in different columns as shown in this screenshot. In this example, I have used space to separate values in columns. 3/13
  • 4. insert a table using draw table insert table using convert text to table option 5. Quick tables option is used to insert a pre-defined formatted table in the document. 4/13
  • 5. Separate text into columns using the symbol in MS Word What are the ways to insert the table in OO writer 4.1.7? There are three ways to insert a table in OO Writer 4.1.7: 1. Insert ⇒ Table - Follow these steps 1. Place your cursor where the table is required. 2. Now click on Insert ⇒ Table option. An insert table dialog box appears. insert table dialog in OO Writer 4.1.7 5/13
  • 6. 3. Type a table name to maintain this as a part of the document. Then select the size by the number of rows and number of columns and options like Heading, Don't split table or border option. 4. Click on OK button. 2. Table ⇒ Insert ⇒ Table: Steps are similar to option 1. 3. From Standard toolbar Table icon 1. Place your cursor where the table is required in the document. 2. Click on the table icon in the standard toolbar. insert table from standard toolbar in OO Writer 3. When you click on the table icon it will open insert table dialog as above. If you click on down arrow it allows you to select the number of columns and number of rows for your table. Autofit Options in table Autofit options are useful to fit the contents in the table automatically. Autofit Options in the table in MS Word 2013 Autofit option is available in Layout ⇒ Autofit in the Cell Size group. Layout Autofit Options in MS Word This layout tab is an additional tab which will appear when you select the table or place your cursor in a table. MS word provides the following autofit options : 6/13
  • 7. MS Word 2013 autofit options for table 1. Autofit Contents: Allows to set the column width according to the length of the content 2. Autofit Window: Allows to set the table width to fit on the window 3. Fixed Column Width: Allows to set columns at a fixed width Autofit Options in the table in OO Writer 4.1.7 To adjust autofit options in OO Writer click on Table ⇒ Aufofit option. OO Writer provides following autofit options: 1. Column Width: Content will be adjusted according to the fixed column's width 2. Optimal Column width: Adjust column width with contents 3. Distribute columns evenly: Adjust selected columns with equal width 4. Row Height: Content will be adjusted according to the fixed row's height 5. Optimal Row Height: Adjust rows height with contents 6. Distribute rows evenly: Adjust selected rows with equal height 7. Allow rows to break across pages and columns: Break the rows with the number of pages and applied columns on the page Select the appropriate option as per your document need. Entering text into a table 7/13
  • 8. It is a quite simple task. Place your cursor to insert text in the cell and type the text. Use navigation keys to navigate through the table. Use respective arrow keys to navigate in the table. For example, to move left side press left arrow key, right arrow to the right arrow, up arrow key to move up, down arrow key to move down. Tab key is used to move next cell or row as well as insert a new blank row from the last cell. Selecting row(s)/Column(s)/Table/Cell(s) You need to select the row(s) to format them or change the format of the contents. You can select rows directly through the mouse click. If you want to select from the command then follow these steps in MS Word 2013. Click on Layout ⇒ Select ⇒ Select Row(s)/Select Column(s)/Select Table/Select Cell(s) option. Select table Row in MS Word 2013 Follow this step to select a row in OO Writer 4.1.7 Click on Table ⇒ Select ⇒ Row(s) / Column(s) / Table / Cell(s) Add images in table Insert Image and adjust it according to your need. Place the cursor where the image is required and insert the image. Inserting Row(s) and Column(s) You are required to insert row(s) and column(s)anytime once a table is prepared. To insert a row at the end of the table is very simple just press tab key at the last cell of the table. To insert row(s), columns(s) or cell(s) by following steps: Insert row(s) in MS Word 2013 The layout table contains following options to insert row(s)/Columns: 1. Insert Above 2. Insert Below 3. Insert Left (For Columns(s)) 8/13
  • 9. Insert rows dialog box in OO Writer 4.1.7 4. Insert Right (For Columns(s)) insert rows options in MS Word 2013 Insert row(s) in OO Writer 4.1.7 1. Click on Table ⇒ Insert ⇒ Rows. It will open insert rows dailog box. 2. Type number of rows in front of Number box. 3. Choose the position before or after as per your requirements. 4. Click on Ok button. Insert column(s) in OO Writer 4.1.7 Click on Table ⇒ Insert ⇒ Rows. It will open insert columns dailog box, type number of column(s) required and select the position for the columns. Delete Row(s), Column(s) and Cell(s) Sometimes row(s), column(s) or cell(s) are required to be deleted. So let us discuss how to delete them. Delete row(s)/Column(s)/Cell(s)/Table in MS Word 2013 1. Place your cursor which row is required to be deleted. 9/13
  • 10. 2. Click on Layout ⇒ Delete option. Select appropriate components of the table to delete. MS Word 2013 delete options Delete row(s)/Column(s)/Table in OO Writer 4.1.7 1. Place the cursor which row/column/table requires to be deleted. 2. Click on Table ⇒ Delete ⇒ Table / Rows / Columns Merging Cells Merge cells mean that combining more than one rows or columns into one cell. It is mostly used to generate headings in the table. Merge Cells in MS Word 2013 1. Select the number of cells to be merged. 2. Click on Layout ⇒ Merge Cells option from Merge group. Merge Cells in MS word 2013 Merge cells in OO Writer 4.1.7 Click on Table ⇒ Merge Cells 10/13
  • 11. Merged Cells Split Cells Split cells option is used to split one cell into a number of rows and columns. Place your cursor in a cell where multiple cells are required and follow these steps: Split Cells in MS Word 2013 1. Click on Layout ⇒ Split Cells. Split Cells command in MS Word 2013 11/13
  • 12. 2. Split Cells dialog box appears. The split cells dialog box in MS Word 2013 3. Enter the desired number of rows and columns. Split Cells in OO Writer 4.1.7 1. Click on Table ⇒ Split Cells. 2. Split Cells dialog box appears. Split Cells dialog box OO Writer 4.1.7 3. Type the number of cells to be split in Split cells into a box. 4. Select horizontally to split cells in a horizontal direction or vertically to split cells in a vertical direction. 12/13
  • 13. 5. Click on OK. Thank you for reading the post. Kindly share the post to your friends those who want to learn these topics. If you have any query regarding this topic feel free to comment without any hesitation. 13/13