
Recomendados
Mais conteúdo relacionado
Mais procurados
Mais procurados (20)
Semelhante a Embedded_Linux_Booting
Semelhante a Embedded_Linux_Booting (20)
Embedded_Linux_Booting
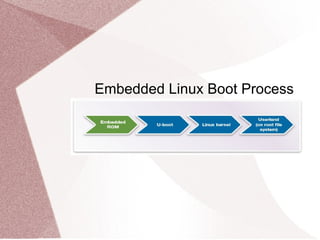
- 1. Embedded Linux Boot Process
- 2. General Booting ROM code X - Loader U - Boot Kernel Internal ROM Internal SRAM External DDR External DDR
- 3. Booting Process ● X – loader : – Basic hardware init (GPIO, clock, SDRAM, etc) – Load and start u-boot ● U – boot : – Hardware initializations – Load and start kernel ● Kernel : – Drivers initializations – Mount root file system ● Init : – First user-space processes – Launch RC scripts – Start graphic environment
- 4. ROM code ● After a processor is reset, it executes ROM startup code ● The ROM startup code initializes the cpu, memory controller and on-chip devices, and it configures the memory map ● Searches the booting devices for a valid booting image ● Loads the x-loader into SRAM and executes it
- 5. X - loader ● It is first stage boot loader ● It is also called as MLO(Memory LOader) ● Runs in an Internal SRAM ● Initializes clocks and memory ● Loads the second stage boot loader(u-boot) in SDRAM and executes it
- 6. U - boot ● U-boot is Universal boot loader, an open source boot loader ● Performs some additional platform initialization ● Sets the boot arguments ● Passes control to the kernel image
- 7. Kernel ● Decompress the kernel into SDRAM ● Sets up peripherals, such as LCD, HDMI, I2C, bus, USB, SD card, audio, etc ● Mounts the root file system that contains all userspace libraries/applications ● Root file system then executes init process
- 8. Booting Techniques 1. Flash Memory 2. EMMc/SD card 3. TFTP/NFS 4. UART/USB
- 9. ● By default, the ROM code in the Sitara AM3359 will boot from the MMC1 interface first (the onboard eMMC), followed by MMC0 (external uSD), UART0 and USB0. ● If the boot switch (S2) is held down during power-up, the ROM will boot from the SPI0 Interface first, followed by MMC0 (external uSD), USB0 and UART0. ● This allows the BeagleBone Black to bypass the onboard eMMC and boot from the removable uSD (provided no valid boot device is found on SPI0.) This can be used to recover from a corrupted onboard eMMC/U-Boot.
- 10. Booting from flash: ● Since default boot is from nand flash, nothing to be done by us for booting from flash. ● Connect usb-to-serial convertor from board to pc for console (“minicom”). ● Power the board with usb cable, now the board automatically boots from flash and it will ask for login, use “root” it will not ask password for root. Now you will be getting beaglebone login prompt.
- 11. Recovering flash memory: ● By default it will boot from flash memory. ● If it is not booted, here are steps to boot from flash ● Unable to boot from flash memory then : copy beaglebone image to sd card using: ● Insert sd card to board, holding down user boot button power up the board and wait until you see the user leds on, now release boot button sudo dd if=bone-debian-7.8-lxde-4gb-armhf-2015-03-01-4gb.img of=/dev/sdbsudo dd if=bone-debian-7.8-lxde-4gb-armhf-2015-03-01-4gb.img of=/dev/sdbsudo dd if=bone-debian-7.8-lxde-4gb-armhf-2015-03-01-4gb.img of=/dev/sdbsudo dd if=bone-debian-7.8-lxde-4gb-armhf-2015-03-01-4gb.img of=/dev/sdbsudo dd if=bone-debian-7.8-lxde-4gb-armhf-2015-03-01-4gb.img of=/dev/sdbsudo dd if=bone-debian-7.8-lxde-4gb-armhf-2015-03-01-4gb.img of=/dev/sdbsudo dd if=bone-debian-7.8-lxde-4gb-armhf-2015-03-01-4gb.img of=/dev/sdbsudo dd if=bone-debian-7.8-lxde-4gb-armhf-2015-03-01-4gb.img of=/dev/sdb
- 12. ● Login : root ● U get this prompt as below – root@beagleBone:~# – In that use this command vi /boot/uEnv.txt In this file, you find last line was commented. Release that comment and save the file ● Then remove sd card and boot ● It will boot from flash memory
- 13. ● After booting from flash:
- 14. Booting from uSD card: ● To boot from uSD card, first we have to copy bootloaders and rootfilesystem to uSD card. ● Before you do copy, we have to partition the uSD card 1. FAT filesystem and Bootable 2.Linux filesystem
- 15. ● After Partitioning the SD card, it will be like this : Disk /dev/sdb: 7.4 GiB, 7948206080 bytes, 15523840 sectors Units: sectors of 1 * 512 = 512 bytes Sector size (logical/physical): 512 bytes / 512 bytes I/O size (minimum/optimal): 512 bytes / 512 bytes Disklabel type: dos Disk identifier: 0x00000000 Device Boot Start End Sectors Size Id Type /dev/sdb1 * 2048 198655 196608 96M e W95 FAT16 (LBA) /dev/sdb2 198656 7577599 7378944 3.5G 83 Linux
- 16. ● After partioning, create file system on newly created partitions using commands: 1. sudo mkfs.vfat -F 32 /dev/sdb1 -n boot 2. sudo mke2fs -L RootFs /dev/sdb2 ● Copy files to partions Boot and RootFs: – MLO, u-boot.img, user.txt, uEnv.txt, .dtb files to Boot – RootFs.xz to RootFs (extract after copying to sd card) ● Insert SD card to board for booting
- 17. ● To boot from uSD card, hold down the user boot button and power up the board
- 18. Demo of Stage by Stage booting ● First copy the MLO source code to sd card and insert to board ● Boot from sd card ● ROM code finds the MLO in sd card and starts booting ● MLO searches for u-boot.img and there is no u-boot.img ● It throws an error message as “error reading u-boot.img”
- 19. MLO
- 20. U - boot
- 21. ● After that copy environment variables and .dtb file in sd card ● Boot from sd card ● Now u-boot.img find all those files it needed and boots ● U-boot.img now loads and starts the kernel ● Finally booted from sd card, both login and password as 'ubuntu' ● Now it is booted and you get prompt like this ubuntu
- 22. ● After that copy environment variables and .dtb file in sd card ● Boot from sd card ● Now u-boot.img find all those files it needed and boots ● U-boot.img now loads and starts the kernel ● Finally booted from sd card, both login and password as 'ubuntu' ● Now it is booted and you get prompt like this ubuntu@ubuntu-armhf:~$
- 23. U – boot and kernel
- 24. Booting from TFTP server ● Copy the uImage and .dtb files to path: /tftpboot ● We are going to boot u-boot through sd card, so copy those files in sd card ● Install nfs server sudo apt-get install rpcbind nfs-kernel-server ● Edit /etc/exports /home 192.168.0.0/255.255.255.0(rw,sync,no_subtree_check) /usr/local 192.168.0.0/255.255.255.0(rw,sync,no_subtree_check) ● After editing exports do: sudo exportfs -ra
- 25. ● Place the root file system in nfs ● User.txt in sd card contents: serverip=192.168.1.5 ipaddr=192.168.1.6 nfsargs= setenv bootargs mpurate=${mpurate} console=$ {console} vram=${vram} root=/dev/nfs nfsroot=192.168.1.5:/home/asvkarthick/workspace/Beagleb one_black/sysplay/Templates/BootingNfs/NFS,nolock rootdelay=15 ip=dhcp,rsize=1024,wsize=1024 uenvcmd=run nfsargs;mmc rescan; tftpboot 0x81000000 am335x-boneblack.dtb; tftpboot 0x80200000 uImage; bootm 0x80200000 - 0x81000000;
- 26. ● Connect ethernet cable from board to pc ● Start the “minicom” ● Power up the board and before the board get booted, press enter or any key continously so it will go to u-boot prompt ● Using dhcp command, get server and our ip address ● Set ip address and server ip address setenv ipaddr 192.168.0.250 setenv serverip 192.168.0.251 ● Next load the kernel and device tree blob tftpboot 0x81000000 am335x-boneblack.dtb tftpboot 0x80200000 uImage-BBB ● Boot from memory location, it will be booted now: bootm 0x80200000 - 0x81000000
- 27. Booting From UART ● For this boot, flash memory should erased before the boot ● Connect the serial port, start minicom, reset the board, now it will display ccccccccccc ● cntrl+A & S, it display 4 options, select xmodem from that option, select first stage boot loader, then ok. It will copy this BL to RAM, it will initiate or load DDR. ● Use loadb <addr of DDR> , cntrl+A and S --> kermit, select MLO again, write to nand flash nand write <addr of DDR> <MLO offset> <size of MLO>
- 28. ● Next execute by command: go <addr of DDR> ● Then, load <addr of DDR> and using kermit mode send u- boot.img(second stage bootloader), write to nand nand write <addr of DDR> <u-boot offset> <size of u- boot.img> ● Next execute by command: go <addr of DDR> ● Then, load <addr of DDR> and using kermit mode send kernel (uImage), write to nand nand write <DDR addr> <kernel offset> <sizeof kernel>
- 29. ● Next execute by command: boot ● For every execute command it will run each stage of bootloader and at last for kernel we have to use “boot” command for loading kernel ● Thus now all file got transfered or written to flash(nand) and booted via serial
- 30. Thank You Presentation by RASHILA R R raghupathy.rashila@adeptchips.com