SlideShare uma empresa Scribd logo
1 de 140
Baixar para ler offline
INSTRUCTION MANUAL
Models #21062, 21064, 31035, 31042, 31045, 31051
(70EQ, 90EQ, 76EQ, 114EQ, 130EQ, 130EQ-MD)
ENGLISH
ENGLISH I 3
CONTENTS
SOLAR WARNING  .  .  .  .  .  .  .  .  .  .  .  .  .  .  .  .  .  .  .  .  .  .  .  .  .  .  .  .  .  .  .  .  .  .  .  .  .  .  .  .  .  .  .  .  .  .  .  .  .  .  .  . 5
WHAT’S IN THE BOX .  .  .  .  .  .  .  .  .  .  .  .  .  .  .  .  .  .  .  .  .  .  .  .  .  .  .  .  .  .  .  .  .  .  .  .  .  .  .  .  .  .  .  .  .  .  .  .  .  .  6
ASSEMBLING YOUR TELESCOPE .  .  .  .  .  .  .  .  .  .  .  .  .  .  .  .  .  .  .  .  .  .  .  .  .  .  .  .  .  .  .  .  .  .  .  .  .  .  .  .  .  .  7
The Tripod and Equatorial Mount . .  .  .  .  .  .  .  .  .  .  .  .  .  .  .  .  .  .  .  .  .  .  .  .  .  .  .  .  .  .  .  .  .  .  .  .  .  .  .  .  .  .  .  .  .  . 7
Counterweight Bar and Counterweights  .  .  .  .  .  .  .  .  .  .  .  .  .  .  .  .  .  .  .  .  .  .  .  .  .  .  .  .  .  .  .  .  .  .  .  .  .  .  .  .  .  . 8
Slow Motion Controls . . . . . . . . . . . . . . . . . . . . . . . . . . . . . . . . . . . . . . . . . . . . . . . . . . . . . 8
The Telescope Tube . .  .  .  .  .  .  .  .  .  .  .  .  .  .  .  .  .  .  .  .  .  .  .  .  .  .  .  .  .  .  .  .  .  .  .  .  .  .  .  .  .  .  .  .  .  .  .  .  .  .  .  .  . 9
The Erect Image Diagonal (Refracting Telescopes Only) .  .  .  .  .  .  .  .  .  .  .  .  .  .  .  .  .  .  .  .  .  .  .  .  .  .  .  .  .  .  .  .  .  . 9
The Eyepiece  .  .  .  .  .  .  .  .  .  .  .  .  .  .  .  .  .  .  .  .  .  .  .  .  .  .  .  .  .  .  .  .  .  .  .  .  .  .  .  .  .  .  .  .  .  .  .  .  .  .  .  .  .  .  .  .  . 10
The StarPointer Finderscope . .  .  .  .  .  .  .  .  .  .  .  .  .  .  .  .  .  .  .  .  .  .  .  .  .  .  .  .  .  .  .  .  .  .  .  .  .  .  .  .  .  .  .  .  .  .  .  . 10
Changing the Finderscope Battery . .  .  .  .  .  .  .  .  .  .  .  .  .  .  .  .  .  .  .  .  .  .  .  .  .  .  .  .  .  .  .  .  .  .  .  .  .  .  .  .  .  .  .  .  . 11
Moving the Telescope  .  .  .  .  .  .  .  .  .  .  .  .  .  .  .  .  .  .  .  .  .  .  .  .  .  .  .  .  .  .  .  .  .  .  .  .  .  .  .  .  .  .  .  .  .  .  .  .  .  .  .  . 11
Aligning the Finderscope . .  .  .  .  .  .  .  .  .  .  .  .  .  .  .  .  .  .  .  .  .  .  .  .  .  .  .  .  .  .  .  .  .  .  .  .  .  .  .  .  .  .  .  .  .  .  .  .  .  . 12
Balancing the Telescope .  .  .  .  .  .  .  .  .  .  .  .  .  .  .  .  .  .  .  .  .  .  .  .  .  .  .  .  .  .  .  .  .  .  .  .  .  .  .  .  .  .  .  .  .  .  .  .  .  .  . 12
POLAR ALIGNMENT  .  .  .  .  .  .  .  .  .  .  .  .  .  .  .  .  .  .  .  .  .  .  .  .  .  .  .  .  .  .  .  .  .  .  .  .  .  .  .  .  .  .  .  .  .  .  .  .  .  .  14
YOUR FIRST ASTRONOMICAL OBSERVING SESSION .  .  .  .  .  .  .  .  .  .  .  .  .  .  .  .  .  .  .  .  .  .  .  .  .  .  .  .  .  .  16
The Moon .  .  .  .  .  .  .  .  .  .  .  .  .  .  .  .  .  .  .  .  .  .  .  .  .  .  .  .  .  .  .  .  .  .  .  .  .  .  .  .  .  .  .  .  .  .  .  .  .  .  .  .  .  .  .  .  .  .  . 16
CELESTIAL OBSERVING TIPS .  .  .  .  .  .  .  .  .  .  .  .  .  .  .  .  .  .  .  .  .  .  .  .  .  .  .  .  .  .  .  .  .  .  .  .  .  .  .  .  .  .  .  .  . 16
Magnification .  .  .  .  .  .  .  .  .  .  .  .  .  .  .  .  .  .  .  .  .  .  .  .  .  .  .  .  .  .  .  .  .  .  .  .  .  .  .  .  .  .  .  .  .  .  .  .  .  .  .  .  .  .  .  .  . 16
Field of View  .  .  .  .  .  .  .  .  .  .  .  .  .  .  .  .  .  .  .  .  .  .  .  .  .  .  .  .  .  .  .  .  .  .  .  .  .  .  .  .  .  .  .  .  .  .  .  .  .  .  .  .  .  .  .  .  . 16
The Planets .  .  .  .  .  .  .  .  .  .  .  .  .  .  .  .  .  .  .  .  .  .  .  .  .  .  .  .  .  .  .  .  .  .  .  .  .  .  .  .  .  .  .  .  .  .  .  .  .  .  .  .  .  .  .  .  .  . 17
Deep-Sky Objects .  .  .  .  .  .  .  .  .  .  .  .  .  .  .  .  .  .  .  .  .  .  .  .  .  .  .  .  .  .  .  .  .  .  .  .  .  .  .  .  .  .  .  .  .  .  .  .  .  .  .  .  .  . 17
Sky Conditions  .  .  .  .  .  .  .  .  .  .  .  .  .  .  .  .  .  .  .  .  .  .  .  .  .  .  .  .  .  .  .  .  .  .  .  .  .  .  .  .  .  .  .  .  .  .  .  .  .  .  .  .  .  .  .  . 18
Selecting an Observing Site .  .  .  .  .  .  .  .  .  .  .  .  .  .  .  .  .  .  .  .  .  .  .  .  .  .  .  .  .  .  .  .  .  .  .  .  .  .  .  .  .  .  .  .  .  .  .  .  . 18
Choosing the Best Time to Observe . .  .  .  .  .  .  .  .  .  .  .  .  .  .  .  .  .  .  .  .  .  .  .  .  .  .  .  .  .  .  .  .  .  .  .  .  .  .  .  .  .  .  .  . 18
Cooling the Telescope .  .  .  .  .  .  .  .  .  .  .  .  .  .  .  .  .  .  .  .  .  .  .  .  .  .  .  .  .  .  .  .  .  .  .  .  .  .  .  .  .  .  .  .  .  .  .  .  .  .  .  . 19
Adapting Your Eyes . .  .  .  .  .  .  .  .  .  .  .  .  .  .  .  .  .  .  .  .  .  .  .  .  .  .  .  .  .  .  .  .  .  .  .  .  .  .  .  .  .  .  .  .  .  .  .  .  .  .  .  .  . 19
Astroimaging .  .  .  .  .  .  .  .  .  .  .  .  .  .  .  .  .  .  .  .  .  .  .  .  .  .  .  .  .  .  .  .  .  .  .  .  .  .  .  .  .  .  .  .  .  .  .  .  .  .  .  .  .  .  .  .  . 19
Deep-Sky Observing Equipment .  .  .  .  .  .  .  .  .  .  .  .  .  .  .  .  .  .  .  .  .  .  .  .  .  .  .  .  .  .  .  .  .  .  .  .  .  .  .  .  .  .  .  .  .  .  . 20
Star Hopping .  .  .  .  .  .  .  .  .  .  .  .  .  .  .  .  .  .  .  .  .  .  .  .  .  .  .  .  .  .  .  .  .  .  .  .  .  .  .  .  .  .  .  .  .  .  .  .  .  .  .  .  .  .  .  .  . 20
CARE AND CLEANING OF THE TELESCOPE  .  .  .  .  .  .  .  .  .  .  .  .  .  .  .  .  .  .  .  .  .  .  .  .  .  .  .  .  .  .  .  .  .  .  .  .  21
COLLIMATION OF A NEWTONIAN TELESCOPE .  .  .  .  .  .  .  .  .  .  .  .  .  .  .  .  .  .  .  .  .  .  .  .  .  .  .  .  .  .  .  .  .  .  . 22
Aligning the Secondary Mirror  .  .  .  .  .  .  .  .  .  .  .  .  .  .  .  .  .  .  .  .  .  .  .  .  .  .  .  .  .  .  .  .  .  .  .  .  .  .  .  .  .  .  .  .  .  .  .  . 23
Aligning the Primary Mirror .  .  .  .  .  .  .  .  .  .  .  .  .  .  .  .  .  .  .  .  .  .  .  .  .  .  .  .  .  .  .  .  .  .  .  .  .  .  .  .  .  .  .  .  .  .  .  .  .  . 23
A Word on Setting Circles .  .  .  .  .  .  .  .  .  .  .  .  .  .  .  .  .  .  .  .  .  .  .  .  .  .  .  .  .  .  .  .  .  .  .  .  .  .  .  .  .  .  .  .  .  .  .  .  .  . 24
NOTES  .  .  .  .  .  .  .  .  .  .  .  .  .  .  .  .  .  .  .  .  .  .  .  .  .  .  .  .  .  .  .  .  .  .  .  .  .  .  .  .  .  .  .  .  .  .  .  .  .  .  .  .  .  .  .  .  .  .  26
CELESTRON TWO YEAR LIMITED WARRANTY  .  .  .  .  .  .  .  .  .  .  .  .  .  .  .  .  .  .  .  .  .  .  .  .  .  .  .  .  .  .  .  .  .  .  . 28
4 I ENGLISH
ENGLISH I 5
• Never look directly at the Sun with the naked eye or with a telescope unless you have the proper solar filter.
Permanent and irreversible eye damage may result.
• Never use your telescope to project an image of the Sun onto any surface. Internal heat build-up can damage the
telescope and any accessories attached to it.
• Never use an eyepiece solar filter or a Herschel wedge. Internal heat build-up inside the telescope can cause these
devices to crack or break, allowing unfiltered sunlight to pass through to the eye.
• Do not leave the telescope unsupervised, either when children are present or adults unfamiliar with the correct operating
procedures of your telescope are present.
SOLAR WARNING
6 I ENGLISH
1. Objective Lens
2. Telescope Tube
3. DEC Setting Circle
4. RA Setting Circle
5. RA Slow Motion Knob
6. Counterweight
7. Counterweight Bar
8. Tripod
9. Accessory Tray
10. Dovetail Mounting bracket
11. StarPointer Finderscope
12. Eyepiece
13. Erect Image Diagonal
14. Focus Knob
15. DEC Slow Motion Knob
16. Equatorial Mount
17. Latitude Adjustment Screw
We recommend saving your telescope box so it can be used to store the telescope when it is not in use. Unpack the box
carefully as some parts are small. Use the parts list below to verify that all parts and accessories are present.
PARTS LIST
WHAT’S IN THE BOX
(130 mm Newtonian shown)
(90 mm refractor shown)
12
11
1
13
7
9
5
14
10
15
16
178
6
4
3
2
1. StarPointer Finderscope
2. Eyepiece
3. Focus Knob
4. Telescope Tube
5. Tube Rings
6. DEC Setting Circle
7. RA Setting Circle
8. Counterweights
9. Counterweight Bar
10. RA Slow Motion Knob
11. Primary Mirror
12. DEC Slow Motion Knob
13. Latitude Adjustment Screw
14. Tripod
15. Accessory Tray
4
3
8
116
1
2
5
7
10
14
15
12
13
9
ENGLISH I 7
ASSEMBLING YOUR TELESCOPE
THE TRIPOD AND EQUATORIAL MOUNT
This section covers the assembly instructions for your
AstroMaster EQ telescope. Your telescope should be set up
indoors the first time so that it is easy to identify the various
parts and familiarize yourself with the correct assembly
procedure before attempting it outdoors.
To assemble tripod:
1.	 Remove the tripod and mount from the box.
2.	 Loosen the hand knobs at the bottom of each leg and
extend the inner section of the leg to the desired length.
Tighten the knobs to secure the legs, being careful not
to over tighten.
3.	Stand the tripod upright and pull the tripod legs apart
until the center brace snaps into place.
4.	Place the accessory tray on top of the center brace lined
up the keyed hole in the center. Rotate the tray until the
tabs at the three points of the tray snap into the holders
on each arm of the tripod’s center brace.
The equatorial mount allows you to tilt the telescope’s axis of
rotation so that you can track celestial targets as they move
across the sky.
1.	 Remove the equatorial mount from the box.
2.	 Set the protrusion base of the equatorial mount into the
indentation on the top of the tripod head.
3.	Use the large hand knob under the tripod head to secure
the mount to the tripod. Thread until snug, but do not
overtighten.
4.	Thread the latitude adjustment screw into the threaded
hole on the back of the mount. You only need to thread
this in a short way as you will adjust this screw later.
Latitude
Screw
Mounting Bolt
8 I ENGLISH
COUNTERWEIGHT BAR AND COUNTERWEIGHTS
In order to properly balance your telescope tube, the mount
comes with a counterweight bar and counterweights.
1.	Remove the counterweight bar from the box and screw
it into the threaded hole on the bottom of the declination
axis of the mount.
2.	 Remove the orange counterweight safety screw from
the bottom end of the counterweight bar.
3.	Loosen the large black locking knob on the side of
the counterweight. Make sure the hole through the
counterweight is unobstructed.
4.	Slide the counterweight onto the counterweight shaft
about half way, then tighten the locking knob to hold the
counterweight in place. If your telescope comes with
more than one counterweight, add the second weight in
the same manner as the first.
5.	Replace the orange counterweight safety screw onto the
bottom of the counterweight shaft. This will prevent the
counterweight from falling off the shaft if it accidentally
comes loose.
SLOW MOTION CONTROLS
The AstroMaster mount comes with two slow motion control
knobs that allow you to make fine pointing adjustments to
the telescope in both Right Ascension and Declination
axes, also referred to as RA and DEC. To install the knobs:
1.	 Locate the two knobs in the box. Both knobs are identical
so it does not matter which one you use on each axis.
2.	Loosen the set screw on the end of one of the two
knobs.
3.	Slide it onto the end of the RA gear shaft as far as it will
go and tighten the setscrew to secure it in place. The
RA knob can be used on either the left or right side of
the mount, based on your preference.
4.	Slide the other knob onto the DEC gear shaft and tighten
the set screw to secure it.
Hole for Counterweight Shaft
Counterweight Shaft
Counterweights
RA Shaft
DEC Shaft
Slow Motion
Control Knobs
ENGLISH I 9
THE ERECT IMAGE DIAGONAL (Refracting telescopes only)
The erect image diagonal attaches to the back of a refracting telescope and contains a small prism that reflects light at
a 90° angle, providing a more comfortable viewing position. Most astronomical telescopes will give a view that is either
inverted or reversed left-to-right. The erect image diagonal corrects the image so that you will have a 100% correctly
oriented image, making your telescope perfect for daytime terrestrial observing.
To insert the diagonal on the AstroMaster 70EQ and 90EQ
refractors:
1.	 Remove the caps from both sides of the diagonal.
2.	Loosen the setscrews on the back of the focuser and
pull out the small dust cap.
3.	Insert the smaller tube on the diagonal into the back of
the focuser and secure it by tightening the setscrews.
You can adjust the angle of the star diagonal to any
desired direction before tightening the screws.
THE TELESCOPE TUBE
The telescope tube attaches to the equatorial mount using
a quick release dovetail system. For all of the refractor
telescopes and the 76 mm Newtonian, the dovetail is
attached directly to the telescope tube. For the 114 mm and
130 mm Newtonian telescopes, the dovetail attaches to tube
rings that hold the telescope tube.
1.	 Loosen the two mounting knobs located on the side of
the dovetail mounting bracket on the top of the equatorial
mount. Make sure they are backed out far enough for the
dovetail bar to slide into the mounting bracket.
2.	Slide the dovetail bar on the telescope tube into the
mounting bracket, making sure the dovetail is fully
seated inside the bracket.
3.	Tighten both mounting knobs to hold the telescope
in place.
NOTE: An erect image diagonal is not able to reach focus on a Newtonian telescope. The image will always appear upside-down. The Newtonian telescopes come
with one special 20 mm erecting eyepiece that has an erecting prism built-in for terrestrial use.
Mounting Knobs
10 I ENGLISH
To install the eyepiece on the the AstroMaster 70EQ and
90EQ refractors:
1.	 Loosen the setscrews on the open end of the star
diagonal.
2.	Insert the silver barrel of the 20 mm eyepiece into the
star diagonal.
3.	 Tighten the setscrews to secure the eyepiece in place.
4.	To see the sharpest image possible, focus by looking
through the eyepiece and slowly turning the focusing
knobs until the image comes into sharp focus.
To install the eyepiece on the AstroMaster 76EQ, 114EQ
and 130EQ Newtonian telescopes:
1.	 Loosen the setscrew on the end of the focuser and
remove the dust cap.
2.	Insert the silver barrel of the 20 mm eyepiece directly
into the focuser.
3.	 Tighten the setscrew to secure the eyepiece in place.
4.	To see the sharpest image possible, focus by looking
through the eyepiece and slowly turning the focusing
knobs until the image comes into sharp focus.
THE STARPOINTER FINDERSCOPE
Your telescope comes with a StarPointer red-dot finderscope
that you will use as a sighting tool when aiming the
telescope at a target.
To install the finderscope:
1.	 Loosen the two Philips–head screws on the side of
the finderscope and slide the clamp over the dovetail
bracket near the telescope focuser. The large window
on the finder should be facing the front of the telescope.
2.	Secure the finderscope in place by tightening the two
Philips-head screws. Do not over tighten these screws.
Just make the connection snug.
3.	Remove the small plastic tab under the battery cover.
This is installed to prevent the battery from accidentally
discharging during transportation.
On/Off
Switch
Battery
Compartment
Left/Right
Adjustment Knob
Up/Down
Adjustment Knob
THE EYEPIECE
Your telescope comes with two eyepieces. The 20 mm which will give low magnification with a moderately wide field of
view. The 10 mm will give you higher magnification, but a narrower field of view. Additional eyepieces can be purchased
to increase or decrease the magnification to your desired level. When first locating an object, it is best to use the 20 mm
eyepiece, then, once the object is centered, change to the 10 mm eyepiece to “zoom in” on it.
ENGLISH I 11
CHANGING THE FINDERSCOPE BATTERY
To replace the StarPointer battery, remove the finder from
the scope and turn it over. The battery compartment is
located directly under the large lens assembly. Using a
small screwdriver or your fingernail, gently lift straight up
on the cover to remove it. The battery is held in place by a
spring contact. Gently lift this contact and turn the finder
on its side. The battery should slip right out. Replace the
battery with a 3-Volt CR2032 button cell battery. Slide
the new battery under the contact, making sure that the
positive terminal of the battery (the side marked with a
“+”) is pointing upward, toward the spring contact. The
battery should snap in place. Replace the cover by lining
up the pins on the cover with the holes in the finderscope
and pressing it down. Be sure to dispose of the old battery
according to your local laws.
Battery
Compartment
MOVING THE TELESCOPE
The AstroMaster equatorial mount was designed to move in
two directions based on the celestial coordinate system. The
Right Ascension, or RA, axis moves the telescope in the East/
West direction). The Declination, or DEC, axis moves the
telescope in the North/South direction. By moving the scope
in RA and DEC, you will be able to point your telescope to any
point in the sky.
To move the telescope over long distances:
1.	 Loosen the RA and DEC clutch knobs located on the
side of the mount by turning them counter-clockwise.
This will allow the scope to spin freely in each direction.
2.	Move the scope by hand in RA and DEC until you are
close to your desired position.
3.	Tighten the two clutch knobs clockwise to secure the
mount in place.
To make fine adjustments to the pointing of the telescope:
1.	 Make sure both clutches are locked.
2.	Turn the RA or DEC slow motion knob as required to
center an object in your eyepiece view.
NOTE: If the clutches are unlocked, the slow motion knobs will not work.
12 I ENGLISH
ALIGNING THE FINDERSCOPE
The StarPointer finderscope is a reflex sight that uses a red LED to project a red dot onto the round glass window. When
you look through the window, you see the red dot superimposed on your target. The first time you assemble your telescope,
you’ll need to align the finderscope with the main optics of the telescope. Although this step can be done at night, it is
significantly easier to do during the day. Once you have completed the finderscope alignment, you should not have to repeat
this step unless the finderscope is bumped or dropped.
To install the StarPointer finderscope:
1. Take the telescope outside during the day. Using your naked eye, find an easily recognizable object, such as a streetlight, car
license plate, or tall tree. The object should be as far away as possible, but at least a quarter mile away.
2. Remove the main dust cover from the telescope and make sure your 20 mm eyepiece is installed.
3. Move the telescope left and right or up and down so that it is roughly pointing toward the object you chose in step 1.
4. Look through the telescope’s eyepiece and manually move the telescope until the object you chose lies in the center of the
view. If the image is blurry, gently turn the focus knobs until it comes into sharp focus.
5. Once the object is centered in your 20 mm eyepiece, turn on the finderscope by turning the power/brightness switch knob
on the side of the unit as far as it will go.
6. With your head positioned about a foot behind the finder, look through the round window and locate the red dot. It will
probably be close to, but not on top of, the object you see when you are looking through the 20 mm eyepiece.
7. Without moving the telescope, use the two adjustment knobs on the side and underneath the finderscope. One controls the
left-right motion of the reticle, while the other controls the up-down motion. Adjust both until the red dot appears over the
same object you are observing in the 20 mm eyepiece.
Now choose some other distant targets to practice aiming your telescope. Look through the StarPointer finderscope window
and place the red dot over the target you are trying to view and verify that it appears in the 20 mm eyepiece of the scope.
NOTE: Be sure to turn off the StarPointer finderscope when not in use to conserve battery power.
BALANCING THE TELESCOPE
To eliminate undue stress on the mount and gears, the telescope should be properly balanced on the mount.
To balance the mount in the RA axis:
1. Make sure the telescope is properly attached to the mount with the dovetail mounting knobs tightly secured.
2. Release the RA clutch knob to allow the scope to spin freely in the RA axis.
3. Rotate the telescope in the RA axis so that the telescope tube is on the side of the mount and the counterweight bar is
parallel to the ground.
4. Slowly release your grip on the telescope and see what side is heavier – the side with the telescope tube or the side with
the counterweight.
5. Ifthe counterweight side is heavier, loosen the counterweight locking knob and slide the counterweight up the shaft
(toward the telescope tube) a small amount, lock the counterweight down in its new position and try the test again.
6. If the telescope tube side is heavier, loosen the counterweight locking knob and slide the counterweight down the shaft (away
from the telescope tube) a small amount, lock the counterweight down in its new position and try the test again.
7. Keep adjusting the position of the weight until you can let the telescope go and it does not move up or down.
ENGLISH I 13
To balance the scope in the DEC axis:
1. Place the telescope in the same position as listed for the RA balance test above with the telescope tube on one side of the
mount and the counterweight bar parallel to the ground. Lock the RA clutch knob to hold the mount in place.
2. Holding the telescope tube securely with one hand, loosen the DEC clutch knob and rotate the telescope so that it is parallel
to the ground.
3. Slowly let go of the telescope tube and see if the telescope starts to rotate upward or downward, then lock the DEC clutch
knob to secure the tube in place.
4. If the nose of the telescope pointed upward, the tube is back-heavy and the balance point will need to change. Loosen the
telescope tube dovetail mounting screws and slide the dovetail forward slightly. Tighten the two dovetail mounting screws
and try the test again.
5. If the nose of the telescope pointed downward, the tube is front-heavy and the balance point will need to change. Loosen
the telescope tube dovetail mounting screws and slide the dovetail back slightly. Tighten the two dovetail mounting screws
and try the test again.
6. Keep adjusting the position of the dovetail bar until you can let the telescope go and it does not rotate up or down.
NOTE: For the 114mm and 130mm Newtonian telescopes, you can adjust the balance point of the telescope without moving the dovetail bar. Simply loosen the
silver screws found on the two tube rings that surround the telescope tube. You can then slide the telescope tube forward or backward within the rings. When
the balance point is reached, tighten the tube ring screws to lock it in place. You can also rotate the tube within the tube rings using this same method to
place the eyepiece at a comfortable angle for viewing.
RA Axis DEC Axis
14 I ENGLISH
Your equatorial mount has the ability to easily track celestial targets by turning the RA slow motion knob or by using an
optional motor drive that will turn it for you. In order for the mount to do this accurately, your mount will need to be “polar
aligned” or setup so the RA axis of rotation is parallel to Earth’s rotational axis. This sounds more complicated than it is and
after you have done it a few times, it will be second nature. The first step of polar aligning is to set your mount at the proper
latitude setting for your observing site.
To set the latitude on your mount:
1. Adjust the height of all three tripod legs so that your mount is level. Eyeballing this is sufficient.
2. Determine your latitude on Earth. If you have GPS enabled device, such as a tablet or smartphone, you should be able to
read your latitude directly from your device. If not, you can find this information online.
3. Locate the latitude scale, found on the side of the equatorial mount near the base.
4. Use the sliding handle to loosen the latitude adjustment locking knob by rotating it counter-clockwise.
5. Adjust the latitude adjustment screw on the back of the mount by rotating it clockwise or counter-clockwise until the
pointer above the altitude scale points at your latitude on Earth.
Example: In Los Angeles, California, our latitude is 33 degrees.
6. Once you have set your latitude correctly, tighten the latitude adjustment locking knob by rotating it clockwise.
NOTE: This latitude setting generally only needs to be done once if you setup the scope in the same location every time you observe. The only time you would need
to change this is if you travel with the telescope far enough North or South to change a degree of latitude. This is approximately 70 miles. Small changes
such as moving the scope from your front yard to your back yard, or even to different locations within a city, will not require you to change this setting.
With your tripod level and your latitude set, the only thing left is to rotate the mount so that the polar axis (the RA axis of
rotation) points north. To do this:
1. Setup the telescope so that the telescope tube is directly above the equatorial mount and the front of the telescope tube
points directly over the counterweight bar. Lock down the RA and DEC clutch knobs to hold the mount in this position.
2. Locate the direction of north. There are two ways of doing this:
a. Use a magnetic compass or a smart device app to find magnetic north. This is the easiest method but unfortunately is
not very accurate. Magnetic north can vary by as much as 15 degrees from true north. This is still a good method to
get up and operating quickly since some compass apps for smart devices can compensate for magnetic variations and
show true north.
Latitude Adjustment Screw
(Rear)
Latitude Adjustment Screw
(Locking Bolt)
POLAR ALIGNMENT
ENGLISH I 15
b. If you have more time and a little knowledge of the night
sky, you can actually find true north by looking for the
Big Dipper and/or the constellation Cassiopeia. The
star Polaris, the North Star, lies about 0.8 degrees away
from true celestial north and is bright enough to find
with the naked eye from suburban skies. Look for the
two stars that form the end of the bowl of the dipper
and draw a straight line through them and it will take
you directly to Polaris. Using Polaris as true north will
get you plenty close to an accurate polar alignment.
3. Slightly loosen the knob between the three tripod legs that
holds the EQ mount to the tripod head. Loosen this just
enough to rotate the mount inside the tripod head.
4. Grab the equatorial mount and rotate it until the optical
tube is pointing in the same direction indicated by the
compass needle. If you used the Polaris method, turn the
mount until you sight down the length of the tube and
see Polaris.
5. Once the mount is aligned to north, tighten the knob
connecting the mount to the tripod to secure it in place.
NOTE: If you are in the Southern Hemisphere, you will use a compass to locate
the south celestial pole. Turn the mount until the telescope points south
when using a compass needle. Instead of Polaris, you can use the star
Sigma Octantis. The Southern Cross is a good guide to finding this star.
With your mount polar aligned, you should find it very easy to track objects as they slowly drift across the sky as Earth rotates
underneath them. You can also locate objects using the setting circles found on your mount. For more details on the use of
setting circles, please see the section at the end of the manual titled “A Word on Setting Circles”.
Cassiopeia
N.C.P. Polaris
(North Star)
Pointer Stars
Big Dipper Little Dipper
16 I ENGLISH
YOUR FIRST ASTRONOMICAL OBSERVING SESSION
THE MOON
Now you are ready to take your telescope out at night and do some real observing!
Let’s start with the Moon. The Moon takes about one month to go through a complete phase cycle, from new Moon to full
Moon and back again. Try observing it at different points during this cycle.
While you can observe the Moon any time it is visible in the sky, the best time to view it is from two days after a new Moon up to
a few days before a full Moon. During this period, you will be able to see the most detail in craters and lunar mountain ranges.
Consult a calendar to find out when the next new Moon will be.
1. With a clear view of the Moon, set up your telescope with the 20 mm eyepiece.
2. Turn on the finderscope and look through it to find the red dot.
3. Move the telescope until you can see the Moon through the finderscope’s window and the red dot is centered on the Moon.
4. Look through the 20 mm eyepiece. Gently turn the focus knobs to adjust the sharpness of the image.
CONGRATULATIONS! YOU HAVE NOW OBSERVED YOUR FIRST CELESTIAL OBJECT!
You can view many other celestial objects, such as planets, star clusters and nebulae using this same basic technique.
CELESTIAL OBSERVING TIPS
This section covers visual observing hints for both solar system and deep-sky objects as well as general observing
conditions which will affect your ability to observe.
MAGNIFICATION
You can change the magnification of your telescope by simply changing eyepieces. Both telescopes and eyepieces
have focal lengths that are measured in millimeters. To calculate the magnification of a given telescope and eyepiece
combination, take the focal length of the telescope and divide it by the focal length of the eyepiece. The resulting number
is the magnification factor.
For example, the AstroMaster 90EQ has a focal length of 1000 mm. Using the 20 mm eyepiece:
1000 mm
= ____________ = 50x
20 mm
Focal length of Telescope
Magnification = _________________________
Focal length of Eyepiece
FIELD OF VIEW
Determining the field of view is important if you want to get an idea of the angular size of the object you are observing. To
calculate the actual field of view, divide the apparent field of the eyepiece (supplied by the eyepiece manufacturer) by the
magnification it gives you in the scope you are using.
Using the example in the previous section, we can determine the field of view using the same telescope and 20 mm
eyepiece. The 20 mm eyepiece has an apparent field of view of 40°.
40°
= ______ = 0.3 degrees of arc
50
Apparent Field of View of Eyepiece
Actual Field Of View = ________________________________
Magnification
The 20 mm eyepiece has an apparent field of view of 40°. Divide the 40° by the magnification, which is 50 power. This
yields an actual field of view of 0.9 degrees or 54 minutes of arc.
ENGLISH I 17
THE PLANETS
In addition to the Moon, your telescope is capable of observing the 5 brightest planets. Since planets change their positions
against the background stars, you will need to consult sources on the web or use a planetarium app on a smart device to
help you locate where these are.
Here are some things to look for:
•	 Mercury and Venus- Just like the Moon, the two inner planets will go through phases ranging from thin crescents to
gibbous phases.
•	Mars- When it is near opposition (the point in its orbit where it is closest to Earth) you should be able to discern the polar
cap and possibly some larger surface features that appear as dark markings on the surface.
•	Jupiter- Look for the darker methane cloud bands that circle the planet just above and below the equator. If the Great Red
Spot is facing the Earth, you may be able to catch a glimpse of it. You will also see the four brightest moons of Jupiter – Io,
Europa, Ganymede, and Callisto. These moons are fun to watch because they can move appreciably over just a couple
of hours. Occasionally they will travel behind Jupiter or into its shadow and disappear for periods of time. They can also
cross the face of Jupiter and you may even see a shadow of the moon crossing with it. There are some useful apps for
smart devise that will help you predict when the Great Red Spot can be seen as well as when any interesting events are
going to occur with Jupiter’s moons.
•	Saturn- The rings! Saturn is arguably one of the most beautiful objects to look at in a telescope. If seeing conditions are
stable enough, you may even catch the shadow of the rings on the planet and the shadow of the planet on the rings. You
should be able to see Titan, the brightest moon of Saturn.
DEEP-SKY OBJECTS
Deep-sky objects are all of those celestial objects that are outside of our solar system. They include star clusters, planetary
nebulae, diffuse nebulae, double stars and other galaxies outside our own Milky Way. Objects such as nebulae and galaxies
can be quite large, but they are also very faint. In order to get the best view, you will need to make sure you are in the darkest
skies possible. The farther you are away from city lights, the better you will see these objects in the eyepiece. In photographs
of nebulae and galaxies, you will see vivid reds and blues. These colors are not visible when you look through the eyepiece.
The colorful images were very long exposure images taken over 15 – 60 minutes or more, where your eye only records data
on an instant by instant basis. Digital sensors are much more sensitive to reds and blues than the human eye is which is
most sensitive in the green part of the spectrum. Still, you will be able to see the soft glow of the Andromeda galaxy and the
expanse of the Orion Nebula.
18 I ENGLISH
SKY CONDITIONS
Sky conditions can significantly affect the performance of your telescope in three ways.
•	 Steadiness of the Air- On windy days, images of the Moon and planets will appear to wave or jump around in the
eyepiece; as if you are looking at them through moving water. Nights where winds are calm will offer the best higher
magnification views of the planets and the Moon. The best way to judge the stability of the atmosphere is to look at bright
stars with the naked eye. If they are “twinkling” or rapidly changing colors, the air is unstable and you are better off using
lower powers and looking for deep sky objects. If the stars are sharp and not twinkling, the air is stable and should offer
great high magnification planetary views.
•	Transparency- How clear is the air you are looking through? If there is a high amount of humidity in the air, the faint light
from galaxies and nebulae can be scattered and diffused before reaching your telescope, causing a loss of brightness
in your image. Debris in the air from local forest fires or even distant volcanic eruptions can contribute to large loss of
brightness. Sometimes this humidity or debris can help stabilize the air, making for good planetary and lunar images, but
the loss of light would make it difficult to see fainter deep-sky objects.
•	Sky Brightness- The amount of ambient light in the atmosphere can also effect deep-sky observing. How dark the sky is
can depend on your local surroundings. In the middle of a city, sky-glow caused by city lights being reflected back to earth
from the sky can overpower the faint light from distant galaxies. Getting away from the bright lights of a major city can
make the difference between seeing a faint deep-sky object and missing it altogether. Planets and the moon are plenty
bright enough on their own so the effect on observing them is minimal.
SELECTING AN OBSERVING SITE
If you are going to be observing deep-sky objects, such as galaxies and nebulae, you should consider traveling to a dark
sky site that is reasonably accessible. It should be away from city lights, a relatively unobstructed view of the horizon, and
upwind of any major source of air pollution. Always choose as high an elevation as possible as this can lower the effects of
atmospheric instability and can ensure that you are above any ground fog. While it can be desirable to take your telescope
to a dark sky site, it is not always necessary. If you plan to view the planets, the Moon or even some of the brighter deep-
sky objects, you can do this from any location, such as your own backyard. Try to setup the scope in a location that is out
of the direct path of streetlights or house lights to help protect your night vision. Try to avoid observing anything that lies
within 5 to 10 degrees over the roof of a building. Rooftops absorb heat during the day and radiate this heat out at night.
This can cause a layer of turbulent air directly over the building that can degrade your image. It is best if you set your
telescope up directly on a dirt or grassy surface. Setting up on any raised platform such as a wooden deck or a hard surface
like concrete or a sidewalk should be avoided as they transmit vibrations easily that can be transferred to the telescope.
Observing through a window is not recommended because the window glass will distort images considerably. And an open
window can be even worse, because warmer indoor air will escape out the window, causing turbulence which also affects
images. Astronomy is an outdoor activity.
CHOOSING THE BEST TIME TO OBSERVE
Try not to view immediately after sunset. After the sun goes down, the Earth is still cooling, causing air turbulence. As the
night goes on, not only will seeing improve, but air pollution and ground lights will often diminish. Some of the best observing
time is often in the early morning hours before dawn. Objects are best observed as they cross the meridian, the imaginary
line that runs from north to south through a point directly over your head. This is the point at which objects reach their highest
points in the sky and your telescope is looking through the least amount of atmosphere possible. Objects that are rising or
setting near the horizon will suffer more atmospheric turbulence since you are looking through a much longer column of air.
It is not always necessary to have cloud-free skies if you are looking at planets or the moon. Often broken cloud conditions
provide excellent seeing.
ENGLISH I 19
COOLING THE TELESCOPE
Telescopes require at least 10 minutes to cool down to outside air temperature. This may take longer if there is a big
difference between the temperature of the telescope and the outside air. This minimizes heat wave distortion inside the
telescope tube (tube currents).
ADAPTING YOUR EYES
If you are planning to observe deep sky objects at a dark sky site, it is best if you allow your eyes to fully adapt to the dark
by avoiding exposure to white light sources such as flashlights, car headlights, streetlights, etc. It will take your pupils about
30 minutes to expand to their maximum diameter and build up the levels of optical pigments to help your eyes see the faint
light from a distant target. If you need light to help setup your telescope in the dark, try using a red LED flashlight at as low a
brightness setting as possible and avoid looking straight at the light source. This will give you the best chance of capturing
those faint deep sky objects.
When observing, it is important to observe with both eyes open. This avoids eye fatigue at the eyepiece. If you find this too
distracting, cover the unused eye with your hand or an eye patch. The center of your eye works well in bright daylight, but is
the least sensitive part of the eye when trying to see subtle detail at low light levels. When looking in the eyepiece for a faint
target, don’t look directly at it. Instead look toward the edge of the field of view and the object will appear brighter.
ASTROIMAGING
One of the first questions most people have about their new telescope is “How can I take images with it?”. Your telescope is
capable of imaging the Moon and planets, but deep-sky objects would require a more advanced telescope and mount with
finely geared motorized tracking. There are a few different methods for using your telescope for imaging:
•	Smart Devices or Point-and-Shoot Cameras- This is the easiest and most straight forward method and works well
for images of the Moon and planets. Simply hold your device’s camera up to the eyepiece and take the image. While you
can use this with any eyepiece, it is generally easier to get an image using a lower power (longer focal length) eyepiece.
You will need a steady hand to hold the phone to the eyepiece but you can get good results.
•	DSLR- Celestron offers adapters that will allow you to attach a Canon or Nikon DSLR body to the telescope in place
of the eyepiece. You would be effectively using your telescope as a telephoto lens. This will require a T-adapter for the
telescope and a T-ring for the camera body. For more information on the adapters for your specific model of telescope,
please go to www.celestron.com.
•	CMOS Planetary Imagers- These are specialized cameras that replace the eyepiece in your telescope. It would connect
to your laptop via a USB port. The camera records video of the planet, then the included software breaks up the video file
into individual still frames. The software then combines the individual frames into a single image that contains more detail
than was visible in any single frame. This method will provide you the best possible lunar and planetary images, but does
require that you have a laptop at the scope. For more information on the planetary camera, please go to www.celestron.com.
20 I ENGLISH
DEEP-SKY OBSERVING EQUIPMENT
There are some tools that will be indispensable to you for identifying and locating deep-sky objects:
•	Red Flashlight- This is an essential tool for deep-sky astronomy for reading finder charts or star atlases. In order to see
the faint light coming from distant objects like nebulae or galaxies, your eyes must be fully dark adapted with your irises
open to the fullest extent to let the most light from your telescope into them. White light from a standard flashlight will
causes your eye’s irises to close down and it can take up to a half-hour for your eyes to return to full dark adaptation. Red
lights do not have the same effect. We recommend any red LED flashlight that has adjustable brightness output, because
even red light, if excessively bright can affect your night vision. These are available through most telescope retailers but
can also be found in camping and hardware stores.
•	Planisphere- A planisphere is a special circular star map that will show you the rough placement of constellations over
your head, so you can navigate your way across the sky. Unlike charts you can print online, planispheres are good for
any time of year, not just the date or month you printed it for. The planisphere consists of two round disks joined at the
center. The bottom disk has a map of the constellations while the top disk has a window cut into it out showing a portion
of the sky map. By turning the inner and outer disks to match your specific date and time, the map will display only those
constellations visible to you at that time. This is handy for finding rough locations of bright stars and constellations.
Planispheres are available through book stores and are available for a number of geographical latitudes in the Northern or
Southern Hemispheres. Be sure to pick one that is designed for your location. To get more detailed information on where
deep-sky objects reside within constellations you will need a Star Atlas.
•	Star Atlas- Star atlases are the roadmaps of the sky. Once you have located a constellation with your planisphere, the
Star Atlas will show you a detailed, close-up view of that region of sky showing the stars and deep-sky objects that reside
in it. These are available through many telescope retailers or bookstores.
•	Apps and Programs- There are many applications available for a smartphone or tablet that can take the place of the
planisphere and star maps. These will give digital representations of the night sky on your device, allowing you to go from
a wide view to a zoomed-in view with a touch of the screen. These can be downloaded or purchased from your application
store, depending on your platform. There are also some great astronomical sky simulation programs available for your
computer that will show you very detailed star maps on screen and can help you plan an observing session before you
get outside with printable star maps customized for your date, location and time.
STAR HOPPING
The easiest way to find your way around the sky is by a technique called star hopping. The first thing you will need to do is
measure the field of view of your finderscope. Look in the sky and locate a constellation with bright stars. You can use your
planisphere or astronomy app to help identify it. Now find the map in your star atlas that shows this constellation. Center your
finderscope on any bright star that you can recognize on the star map. Hold your head 12 inches behind the reflective window
of your StarPointer finderscope and move the telescope so that the bright star is at the edge of the field if view of the window
(it does not matter which direction you pick). Without moving the telescope, look through the finderscope window and locate
another star near the opposite edge of the field of view. Locate this second star on the chart. Measure the distance between
these two stars on the chart using a ruler. This distance is represents one finderscope field of view on your atlas. You can now
use this measurement to locate celestial objects.
ENGLISH I 21
CARE AND CLEANING OF THE TELESCOPE
While your telescope requires little maintenance, there are a few things to remember that will ensure your telescope
performs at its best. Occasionally, dust and/or moisture may build up on the objective lens. Special care should be taken
when cleaning any instrument so as not to damage the optics.
If dust has built up on the optics, follow these steps, in order, to clean your scope:
1. Use a camel hair brush to gently remove the larger particles.
2. Use a photographer’s squeeze bulb to blow away any loose debris. You can also use a can of compressed air, such as those
sold for cleaning computer keyboards, but you need to be careful. Avoid using cans that are almost empty and be sure to hold
the air can vertically. Failure to do this can result in the can spitting propellant out onto the optics. Hold the optical surface at
an angle to the spray from the can for approximately two to four seconds.
3. Use an optical cleaning solution of over-the-counter isopropyl alcohol and distilled water in a 50/50 mixture. Apply this solution
to a white unscented tissue, then apply the tissue paper to the optics. Low pressure strokes should go from the center of the
lens (or mirror) to the outer portion in straight lines like spokes on a wheel. Do not rub in circles!
You may experience dew build-up on the optics of your telescope during an observing session. If you want to continue
observing, the dew must be removed, either with a hair dryer (on low setting) or by pointing the telescope at the ground
until the dew has evaporated. If moisture condenses on the inside of the optics, remove the accessories from the telescope.
Place the telescope in a dust-free environment and point it downward until the moisture evaporates.
To minimize the need to clean your telescope, replace all lens covers once you have finished using it. Since the telescope
tubes are not sealed, the covers should be placed over the openings when not in use. This will prevent contaminants from
entering the tubes.
Internal adjustments and cleaning should be done only by the Celestron repair department. If your telescope is in need of
internal cleaning, please call the factory for a return authorization number and price quote.
22 I ENGLISH
Collimation is a painless process and works like this:
Pull off the lens cap which covers the front of the telescope and look down the optical tube. At the bottom you will see the pri-
mary mirror held in place by three clips 120º apart, and at the top the small oval secondary mirror held in a support and tilted 45º
toward the focuser outside the tube wall.
The secondary mirror is aligned by adjusting the three smaller screws surrounding the central bolt. The primary mirror is adjusted
by the three adjusting screws at the back of your scope. The three locking screws beside them serve to hold the mirror in place
after collimation.
COLLIMATION OF A NEWTONIAN TELESCOPE
While your telescope requires little maintenance, there are a few things to remember that will ensure your telescope
performs at its Collimation is the process of aligning the mirrors of your telescope so that they work in concert with each
other to deliver properly focused light to your eyepiece. By observing out-of-focus star images, you can test whether your
telescope’s optics are aligned. Place a star in the center of the field of view and move the focuser so that the image is
slightly out of focus. If the seeing conditions are good, you will see a central circle of light (the Airy disc) surrounded by a
number of diffraction rings. If the rings are symmetrical about the Airy disc, the telescope’s optics are correctly collimated.
Correctly Aligned Needs Collimation
Primary Mirror Secondary Mirror
Support for
secondary mirror
Focuser
ENGLISH I 23
ALIGNING THE SECONDARY MIRROR
Point the telescope at a lit wall look into the focuser without the eyepiece installed. You may have to twist the focus knob a few
turns until the reflected image of the focuser is out of your view. Keep your eye against the back of and centered in the focus
tube. Look for the three clips holding the primary mirror in place. If you can’t see them, it means that you will have to adjust the
three bolts on the top of the secondary mirror holder, with possibly an Allen wrench or Phillip’s screwdriver. You will have to
alternately loosen one and then compensate for the slack by tightening the other two. Stop when you see all three mirror clips.
Make sure that all three small alignment screws are tightened to secure the secondary mirror in place.
Primary Mirror Clip
Ignore the reflected
image for now
Primary Mirror Clip
Primary Mirror Clip
Primary Mirror Clip
ALIGNING THE PRIMARY MIRROR
There are 3 large bolts and 3 small screws at the back of your telescope. The large bolts are the adjusting screws and the small
screws are the locking screws. Loosen the large bolts by a few turns. Now run your hand around the front of your telescope
keeping your eye to the focuser, you will see the reflected image of your hand. The idea here being to see which way the primary
mirror is defected, you do this by stopping at the point where the reflected image of the secondary mirror is closest to the
primary mirrors’ edge.
When you get to that point, stop and keep your hand there while looking at the back end of your telescope, is there an adjusting
screw there? If there is you will want to loosen it (turn the screw to the left) to bring the mirror away from that point. If there isn’t
an adjusting screw there, then go across to the other side and tighten the adjusting screw on the other side. This will gradually
bring the mirror into alignment. (It helps to have a friend to help for primary mirror collimation. Have your partner adjust the
adjusting screws according to your directions while you look in the focuser).
After dark, go out and point your telescope at Polaris, the North Star. With an eyepiece in the focuser, take the image out of
focus. You will see the same image only now, it will be illuminated by starlight. If necessary, repeat the collimating process only
keep the star centered while tweaking the mirror.
Secondary Mirror
Primary Mirror Stop and keep
your hand here
Both mirrors aligned with eye
looking in focuser
24 I ENGLISH
A WORD ON SETTING CIRCLES
The Declination axis of the Celestial Sphere are broken down into degrees, minutes and seconds of arc. At the Celestial
equator, the Dec coordinate is 0 degrees, with +90 degrees being the North Celestial Pole and -90 degrees being the South
Celestial Pole. The Dec coordinate tells you how far north or south to go to find your target.
Before you can use the setting circles to find objects in the sky you need to align the setting circles first. When you polar
align the mount, you are actually aligning the DEC setting circle as well, so there is nothing more required for this one. The
RA setting circle requires some additional information.
On the RA setting circle there are two sets of numbers on the dial – one for the northern hemisphere (bottom) and one for
the southern hemisphere (top). In order to align the RA setting circle, you will need to be able to identify some of the brighter
stars in the sky. You can use a star atlas or astronomy app to help you with this.
To align the RA setting circle:
1. Locate a bright star near the celestial equator. The farther you are from the celestial pole the better your reading on the RA
setting circle will be.
2. Use your star atlas or you astronomy app to lookup the coordinates of the star you selected.
3. Center the star in the telescope’s eyepiece.
4. Without moving the telescope, rotate the RA setting circle until the RA indicator points at the RA coordinate of the star
you selected.
NOTE: The RA setting circle does NOT move as the telescope moves in RA, the setting circle must be aligned each time you want to use it to find an object. However,
you do not need to use a star each time. Instead, you can use the coordinates of the object you are currently observing.
Once the circles are aligned you can use them to find any object with known coordinates. The accuracy of your setting
circles is directly related to the accuracy of your polar alignment.
The celestial coordinate system is much like the latitude and longitude system that we use to map the Earth. Just like cities
on a map have specific longitude and latitude coordinates, stars and deep-sky objects all have Right Ascension (RA) and
Declination (DEC) coordinates on the Celestial Sphere. Your telescopes comes with two setting circles, one on the RA axis
and one on the DEC axis. The setting circles are 3-inch diameter disks with graduated markings on them that can help you
locate objects in the night sky by their celestial coordinates.
The celestial sphere seen from the outside showing R.A. and DEC.
ENGLISH I 25
To find objects using the setting circles:
1. Select an object to observe. Use a planisphere, star atlas, or astronomy app or program to make sure the object you chose
is above the horizon. As you become more familiar with the night sky, this will no longer be necessary.
2. Look up the coordinates of your target.
3. Hold the telescope and release the DEC lock knob.
4. Move the telescope in declination until the indicator is pointing at the correct declination coordinate.
5. Lock the DEC lock knob to prevent the telescope from moving.
6. Hold the telescope and release the RA lock knob.
7. Move the telescope in RA until the indicator points to the correct coordinate.
8. Lock the RA lock knob to prevent the telescope from slipping in RA.
Due to errors in polar alignment and the accuracy of the setting circles on this equatorial mount, it is unlikely that you will see
the object in your telescope’s eyepiece. You will need to use the slow motion controls and perform a slow circular search
until the object falls into the field of view.
Please note that the use of setting circles is more complicated than the simple method described in the “Star Hopping”
section above. It is recommended to start with Star Hopping, but with a little patience and some practice, setting circles can
be a viable way to locate objects in the night sky. Try practicing on bright stars or even planets as they are relatively easy to
see in your finderscope until you get the hang of it.
26 I ENGLISH
NOTES
ENGLISH I 27
NOTES
28 I ENGLISH
CELESTRON TWO YEAR LIMITED WARRANTY
A. Celestron warrants your telescope to be free from defects in materials and workmanship for two years. Celestron will repair or replace
such product or part thereof which, upon inspection by Celestron, is found to be defective in materials or workmanship. As a condition to
the obligation of Celestron to repair or replace such product, the product must be returned to Celestron together with proof-of-purchase
satisfactory to Celestron.
B. The Proper Return Authorization Number must be obtained from Celestron in advance of return. Call Celestron at (310) 328-9560 to receive
the number to be displayed on the outside of your shipping container.
All returns must be accompanied by a written statement setting forth the name, address, and daytime telephone number of the owner, together
with a brief description of any claimed defects. Parts or product for which replacement is made shall become the property of Celestron.
The customer shall be responsible for all costs of transportation and insurance, both to and from the factory of Celestron, and shall be required
to prepay such costs.
Celestron shall use reasonable efforts to repair or replace any telescope covered by this warranty within thirty days of receipt. In the event repair
or replacement shall require more than thirty days, Celestron shall notify the customer accordingly. Celestron reserves the right to replace any
product which has been discontinued from its product line with a new product of comparable value and function.
This warranty shall be void and of no force of effect in the event a covered product has been modified in design or function, or subjected
to abuse, misuse, mishandling or unauthorized repair. Further, product malfunction or deterioration due to normal wear is not covered by
this warranty.
CELESTRON DISCLAIMS ANY WARRANTIES, EXPRESS OR IMPLIED, WHETHER OF MERCHANTABILITY OF FITNESS FOR A PARTICULAR USE, EXCEPT AS EXPRESSLY SET FORTH HEREIN. THE SOLE
OBLIGATION OF CELESTRON UNDER THIS LIMITED WARRANTY SHALL BE TO REPAIR OR REPLACE THE COVERED PRODUCT, IN ACCORDANCE WITH THE TERMS SET FORTH HEREIN. CELESTRON
EXPRESSLY DISCLAIMS ANY LOST PROFITS, GENERAL, SPECIAL, INDIRECT OR CONSEQUENTIAL DAMAGES WHICH MAY RESULT FROM BREACH OF ANY WARRANTY, OR ARISING OUT OF THE USE OR
INABILITY TO USE ANY CELESTRON PRODUCT. ANY WARRANTIES WHICH ARE IMPLIED AND WHICH CANNOT BE DISCLAIMED SHALL BE LIMITED IN DURATION TO A TERM OF TWO YEARS FROM THE
DATE OF ORIGINAL RETAIL PURCHASE.
Some states do not allow the exclusion or limitation of incidental or consequential damages or limitation on how long an implied warranty lasts,
so the above limitations and exclusions may not apply to you.
This warranty gives you specific legal rights, and you may also have other rights which vary from state to state.
Celestron reserves the right to modify or discontinue, without prior notice to you, any model or style telescope.
If warranty problems arise, or if you need assistance in using your telescope contact: Celestron - 800.421.9649
NOTE: This warranty is valid to U.S.A. and Canadian customers who have purchased this product from an authorized Celestron dealer in the U.S.A. or Canada. Warranty outside the U.S.A. and Canada is valid
only to customers who purchased from a Celestron’s International Distributor or Authorized Celestron Dealer in the specific country. Please contact them for any warranty service.
FCC NOTE: This device complies with Part 15 of the FCC Rules. Operation is subject to the following two conditions: (1) This device
may not cause harmful interference, and (2) this device must accept any interference received, including interference that may cause
undesired operation.
Product design and specifications are subject to change without prior notification.
This product is designed and intended for use by those 14 years of age and older.
© 2017 Celestron • All rights reserved
www.celestron.com
2835 Columbia Street • Torrance, CA 90503 U.S.A.
Telephone: 800.421.9649
01-17
Printed in China
MODE D’EMPLOI
Modèles #21062, 21064, 31035, 31042, 31045, 31051
(70EQ, 90EQ, 76EQ, 114EQ, 130EQ, 130EQ-MD)
FRANÇAIS
FRANÇAIS I 3
SOMMAIRE
AVERTISSEMENT SUR LE SOLEIL .  .  .  .  .  .  .  .  .  .  .  .  .  .  .  .  .  .  .  .  .  .  .  .  .  .  .  .  .  .  .  .  .  .  .  .  .  .  .  .  .  .  5
CONTENU DE LA BOÎTE .  .  .  .  .  .  .  .  .  .  .  .  .  .  .  .  .  .  .  .  .  .  .  .  .  .  .  .  .  .  .  .  .  .  .  .  .  .  .  .  .  .  .  .  .  .  .  .  6
ASSEMBLAGE DE VOTRE TÉLESCOPE .  .  .  .  .  .  .  .  .  .  .  .  .  .  .  .  .  .  .  .  .  .  .  .  .  .  .  .  .  .  .  .  .  .  .  .  .  .  .  7
Le trépied et la monture équatoriale .  .  .  .  .  .  .  .  .  .  .  .  .  .  .  .  .  .  .  .  .  .  .  .  .  .  .  .  .  .  .  .  .  .  .  .  .  .  .  .  .  .  .  .  . 7
Barre de contrepoids et contrepoids  .  .  .  .  .  .  .  .  .  .  .  .  .  .  .  .  .  .  .  .  .  .  .  .  .  .  .  .  .  .  .  .  .  .  .  .  .  .  .  .  .  .  .  . 8
Contrôles de mouvement lent .  .  .  .  .  .  .  .  .  .  .  .  .  .  .  .  .  .  .  .  .  .  .  .  .  .  .  .  .  .  .  .  .  .  .  .  .  .  .  .  .  .  .  .  .  .  .  . 8
Le tube du télescope .  .  .  .  .  .  .  .  .  .  .  .  .  .  .  .  .  .  .  .  .  .  .  .  .  .  .  .  .  .  .  .  .  .  .  .  .  .  .  .  .  .  .  .  .  .  .  .  .  .  .  .  . 9
La diagonale coudée (Télescopes réfracteurs seulement) .  .  .  .  .  .  .  .  .  .  .  .  .  .  .  .  .  .  .  .  .  .  .  .  .  .  .  .  .  .  .  .  . 9
L’oculaire  .  .  .  .  .  .  .  .  .  .  .  .  .  .  .  .  .  .  .  .  .  .  .  .  .  .  .  .  .  .  .  .  .  .  .  .  .  .  .  .  .  .  .  .  .  .  .  .  .  .  .  .  .  .  .  .  .  .  . 10
Le chercheur StarPointer . .  .  .  .  .  .  .  .  .  .  .  .  .  .  .  .  .  .  .  .  .  .  .  .  .  .  .  .  .  .  .  .  .  .  .  .  .  .  .  .  .  .  .  .  .  .  .  .  .  . 10
Changer la pile du chercheur . .  .  .  .  .  .  .  .  .  .  .  .  .  .  .  .  .  .  .  .  .  .  .  .  .  .  .  .  .  .  .  .  .  .  .  .  .  .  .  .  .  .  .  .  .  .  .  . 11
Orienter le télescope .  .  .  .  .  .  .  .  .  .  .  .  .  .  .  .  .  .  .  .  .  .  .  .  .  .  .  .  .  .  .  .  .  .  .  .  .  .  .  .  .  .  .  .  .  .  .  .  .  .  .  .  . 11
Alignement du chercheur . .  .  .  .  .  .  .  .  .  .  .  .  .  .  .  .  .  .  .  .  .  .  .  .  .  .  .  .  .  .  .  .  .  .  .  .  .  .  .  .  .  .  .  .  .  .  .  .  .  . 12
Équilibrer du télescope .  .  .  .  .  .  .  .  .  .  .  .  .  .  .  .  .  .  .  .  .  .  .  .  .  .  .  .  .  .  .  .  .  .  .  .  .  .  .  .  .  .  .  .  .  .  .  .  .  .  .  . 12
ALIGNEMENT POLAIRE .  .  .  .  .  .  .  .  .  .  .  .  .  .  .  .  .  .  .  .  .  .  .  .  .  .  .  .  .  .  .  .  .  .  .  .  .  .  .  .  .  .  .  .  .  .  .  .  14
VOTRE PREMIÈRE SESSION D'OBSERVATION ASTRONOMIQUE .  .  .  .  .  .  .  .  .  .  .  .  .  .  .  .  .  .  .  .  .  .  .  16
La Lune  .  .  .  .  .  .  .  .  .  .  .  .  .  .  .  .  .  .  .  .  .  .  .  .  .  .  .  .  .  .  .  .  .  .  .  .  .  .  .  .  .  .  .  .  .  .  .  .  .  .  .  .  .  .  .  .  .  .  .  . 16
OBSERVATION DU CIEL CONSEILS .  .  .  .  .  .  .  .  .  .  .  .  .  .  .  .  .  .  .  .  .  .  .  .  .  .  .  .  .  .  .  .  .  .  .  .  .  .  .  .  .  16
Agrandissement . .  .  .  .  .  .  .  .  .  .  .  .  .  .  .  .  .  .  .  .  .  .  .  .  .  .  .  .  .  .  .  .  .  .  .  .  .  .  .  .  .  .  .  .  .  .  .  .  .  .  .  .  .  .  . 16
Champ de vision .  .  .  .  .  .  .  .  .  .  .  .  .  .  .  .  .  .  .  .  .  .  .  .  .  .  .  .  .  .  .  .  .  .  .  .  .  .  .  .  .  .  .  .  .  .  .  .  .  .  .  .  .  .  . 16
Les planètes . .  .  .  .  .  .  .  .  .  .  .  .  .  .  .  .  .  .  .  .  .  .  .  .  .  .  .  .  .  .  .  .  .  .  .  .  .  .  .  .  .  .  .  .  .  .  .  .  .  .  .  .  .  .  .  .  . 17
Objets du ciel profond  .  .  .  .  .  .  .  .  .  .  .  .  .  .  .  .  .  .  .  .  .  .  .  .  .  .  .  .  .  .  .  .  .  .  .  .  .  .  .  .  .  .  .  .  .  .  .  .  .  .  .  . 17
Conditions d'observation .  .  .  .  .  .  .  .  .  .  .  .  .  .  .  .  .  .  .  .  .  .  .  .  .  .  .  .  .  .  .  .  .  .  .  .  .  .  .  .  .  .  .  .  .  .  .  .  .  .  . 18
Sélection d’un site d’observation . .  .  .  .  .  .  .  .  .  .  .  .  .  .  .  .  .  .  .  .  .  .  .  .  .  .  .  .  .  .  .  .  .  .  .  .  .  .  .  .  .  .  .  .  .  . 18
Choisir le meilleur moment pour l’observation . .  .  .  .  .  .  .  .  .  .  .  .  .  .  .  .  .  .  .  .  .  .  .  .  .  .  .  .  .  .  .  .  .  .  .  .  .  .  . 18
Refroidir le télescope .  .  .  .  .  .  .  .  .  .  .  .  .  .  .  .  .  .  .  .  .  .  .  .  .  .  .  .  .  .  .  .  .  .  .  .  .  .  .  .  .  .  .  .  .  .  .  .  .  .  .  .  . 19
Adapter vos yeux  .  .  .  .  .  .  .  .  .  .  .  .  .  .  .  .  .  .  .  .  .  .  .  .  .  .  .  .  .  .  .  .  .  .  .  .  .  .  .  .  .  .  .  .  .  .  .  .  .  .  .  .  .  .  . 19
Astrophotographie .  .  .  .  .  .  .  .  .  .  .  .  .  .  .  .  .  .  .  .  .  .  .  .  .  .  .  .  .  .  .  .  .  .  .  .  .  .  .  .  .  .  .  .  .  .  .  .  .  .  .  .  .  . 19
Équipement d’observation des objets du ciel profond  .  .  .  .  .  .  .  .  .  .  .  .  .  .  .  .  .  .  .  .  .  .  .  .  .  .  .  .  .  .  .  .  .  .  . 20
Sauts entre les étoiles .  .  .  .  .  .  .  .  .  .  .  .  .  .  .  .  .  .  .  .  .  .  .  .  .  .  .  .  .  .  .  .  .  .  .  .  .  .  .  .  .  .  .  .  .  .  .  .  .  .  .  . 20
ENTRETIEN ET NETTOYAGE DU TÉLESCOPE  .  .  .  .  .  .  .  .  .  .  .  .  .  .  .  .  .  .  .  .  .  .  .  .  .  .  .  .  .  .  .  .  .  .  .  . 21
COLLIMATION D’UN TÉLESCOPE NEWTONIEN .  .  .  .  .  .  .  .  .  .  .  .  .  .  .  .  .  .  .  .  .  .  .  .  .  .  .  .  .  .  .  .  .  .  . 22
Aligner le miroir secondaire . .  .  .  .  .  .  .  .  .  .  .  .  .  .  .  .  .  .  .  .  .  .  .  .  .  .  .  .  .  .  .  .  .  .  .  .  .  .  .  .  .  .  .  .  .  .  .  .  . 23
Aligner le miroir primaire .  .  .  .  .  .  .  .  .  .  .  .  .  .  .  .  .  .  .  .  .  .  .  .  .  .  .  .  .  .  .  .  .  .  .  .  .  .  .  .  .  .  .  .  .  .  .  .  .  .  . 23
Un mot sur les cercles de réglage .  .  .  .  .  .  .  .  .  .  .  .  .  .  .  .  .  .  .  .  .  .  .  .  .  .  .  .  .  .  .  .  .  .  .  .  .  .  .  .  .  .  .  .  .  . 24
NOTES  .  .  .  .  .  .  .  .  .  .  .  .  .  .  .  .  .  .  .  .  .  .  .  .  .  .  .  .  .  .  .  .  .  .  .  .  .  .  .  .  .  .  .  .  .  .  .  .  .  .  .  .  .  .  .  .  .  .  26
GARANTIE LIMITÉE CELESTRON DE 2 ANS .  .  .  .  .  .  .  .  .  .  .  .  .  .  .  .  .  .  .  .  .  .  .  .  .  .  .  .  .  .  .  .  .  .  .  .  . 28
4 I FRANÇAIS
FRANÇAIS I 5
• Ne regardez jamais directement le Soleil à l'œil nu ou avec un télescope, à moins d'utiliser un filtre adapté.
Cela pourrait entraîner des lésions oculaires permanentes et irréversibles.
• N'utilisez jamais votre télescope pour projeter une image du soleil sur une surface quelconque. Une concentration de
chaleur dangereuse peut être générée à l’intérieur et endommager le télescope et les accessoires attachés.
• Ne jamais utiliser un filtre solaire d'oculaire ou une cale de Herschel. La concentration de chaleur au sein du télescope
peut entraîner des dommages à ces dispositifs, laissant la lumière du Soleil non filtrée arriver directement à vos yeux.
• Ne laissez pas le télescope sans surveillance, particulièrement en présence d’enfants ou d’adultes qui ne sont pas
familiarisés avec son utilisation.
AVERTISSEMENT SUR LE SOLEIL
6 I FRANÇAIS
1. Lentille de l'objectif
2. Tube de télescope
3. Cercle de réglage DEC
4. Cercle de réglage AD
5. Molette de mouvement AD lent
6. Contrepoids
7. Barre de contrepoids
8. Trépied
9. Plateau à accessoires
10. Support à queue d’aronde
11. Chercheur StarPointer
12. Oculaire
13. Diagonale coudée
14. Bouton de mise au point
15. Les molettes de mouvement DEC lent
16. Monture Équatoriale
17. Vis de réglage de latitude
Nous vous recommandons de conserver la boîte de votre télescope afin de pouvoir l'utiliser pour son rangement lorsqu'il
n'est pas utilisé. Déballez le contenu de la boîte avec soin, car certaines pièces sont petites. Utilisez la liste des pièces
ci-dessous pour vous assurer que toutes les pièces et tous les accessoires sont inclus dans la boîte.
LISTE DES PIÈCES
CONTENU DE LA BOÎTE
(Réfracteur Newtonien130 mm illustré)
(Réfracteur 90 mm illustré)
12
11
1
13
7
9
5
14
10
15
16
178
6
4
3
2
1. Lunette de recherche StarPointer
2. Oculaire
3. Molette de mise au point
4. Tube de télescope
5. Anneaux de tube
6. Cercle de réglage DEC
7. Cercle de réglage AD
8. Contrepoids
9. Barre de contrepoids
10. Molette de mouvement AD lent
11. Miroir primaire
12. Les molettes de mouvement DEC lent
13. Vis de réglage de latitude
14. Trépied
15. Plateau à accessoires
4
3
8
116
1
2
5
7
10
14
15
12
13
9
FRANÇAIS I 7
ASSEMBLAGE DE VOTRE TÉLESCOPE
LE TRÉPIED ET LA MONTURE ÉQUATORIALE
Ce chapitre explique comment assembler votre télescope
AstroMaster EQ. Il est recommandé d’assembler votre
télescope en intérieur la première fois afin de pouvoir
identifier facilement les différentes pièces et de vous
familiariser avec la bonne procédure de montage avant de
l’utiliser en extérieur.
Pour assembler le trépied :
1.	 Sortez le trépied et la monture de la boîte.
2.	 Desserrez les molettes au bas de chaque pied et
étendez la partie intérieure du pied à la longueur
souhaitée. Serrez les molettes pour fixer les pieds, en
veillant à ne pas trop les serrer.
3.	Mettez le trépied en position verticale et écartez l'un de
l'autre ses pieds .jusqu'à ce qu'un déclic confirme que
l'entretoise centrale soit bien en place.
4.	Positionnez le plateau à accessoires sur le trou à
détrompeur situé au centre de l’entretoise. Faites pivoter
le plateau jusqu’à ce que les trois onglets de ce dernier
s’enclenchent dans les ouvertures de chaque bras de
l’entretoise centrale.
La monture équatoriale permet d'incliner l'axe de rotation
du télescope de manière à ce que vous puissiez suivre le
déplacement des étoiles dans le ciel.
1.	 Sortez le trépied et la monture de la boîte.
2.	 Positionnez la bosse de la base de la monture équatoriale
dans la dépression présente sur le dessus de la tête du
trépied.
3.	Utilisez la grande molette sous la tête du trépied pour
fixer la monture sur le trépied. Serrez jusqu’à ce que les
pièces soient bien serrées, mais pas en excès.
4.	Vissez la vis de réglage de latitude dans le pas de vis
présent à l’arrière de la monture. Vissez-la légèrement
pour le moment, car vous l’utiliserez pour effectuer des
réglages plus tard.
Latitude
Vis
Boulon de monture
8 I FRANÇAIS
BARRE DE CONTREPOIDS ET CONTREPOIDS
Pour équilibrer correctement le tube de votre télescope, la
monture est livrée avec une barre de contrepoids et
des contrepoids.
1.	Retirez la barre de contrepoids dans la boîte et vissez-la
dans le pas de vis présent sur le dessous de l’axe de
déclinaison de la monture.
2.	 Retirez la vis de sécurité orange du contrepoids située à
l'extrémité basse de la barre de contrepoids.
3.	Desserrez la grande molette noire située sur le côté du
contrepoids. Assurez-vous que le contrepoids n’est pas
obstrué.
4.	Faites glisser le contrepoids jusqu’à environ la moitié
de la barre de contrepoids et serrez la molette de
verrouillage pour maintenir le contrepoids en place. Si
votre télescope est livré avec plus d’un contrepoids,
ajoutez le second de la même manière que le premier.
5.	Remettez en place la vis de sécurité orange du
contrepoids située à l'extrémité basse de la barre de
contrepoids. Cela évitera que le contrepoids ne tombe
de la barre s’il se desserre par accident.
CONTRÔLES DE MOUVEMENT LENT
La monture AstroMaster est équipée de deux molettes de
contrôle de mouvement lent qui vous permettent d’effectuer
des réglages de pointage fins sur les axes d’Ascension
Droite et de Déclinaison, également appelés AD et DEC.
Pour installer les molettes :
1.	 Sortez les deux molettes de la boîte. Les deux molettes
sont identiques, il n’est donc pas important quelle
molette vous utilisez sur chaque axe.
2.	Desserrez la vis de réglage située à l’extrémité des deux
molettes.
3.	Glissez-la dans l’extrémité de l’axe des engrenages AD,
aussi loin que possible puis serrez la vis de réglage pour
la fixer en place. La molette AD peut être installée sur le
côté gauche ou le côté droit de la monture, selon vos
préférences.
4.	Faites glisser l’autre molette dans l’axe des engrenages
DEC puis serrez la vis de réglage pour la fixer en place.
Trou pour la barre
de contrepoids
Barre de contrepoids
Contrepoids
Axe AD
Axe DEC
Mouvement lent
Molettes de contrôle
FRANÇAIS I 9
LA DIAGONALE COUDÉE (télescopes réfracteurs seulement)
La diagonale coudée fixée à l'arrière d'un télescope réfracteur contient un petit prisme qui réfléchit la lumière à un angle de
90°, permettant ainsi d'adopter une position plus confortable pour l'observation. La majorité des télescopes astronomiques
relayent une image soit inversée verticalement ou horizontalement. Ma diagonale coudée corrige cela de manière à ce que
l’image soit à 100% correctement orientée, faisant de votre télescope un outil parfait pour l’observation terrestre de jour.
Pour insérer la diagonale dans les réfracteurs AstroMaster
70EQ et 90EQ :
1.	 Retirez les capuchons des deux extrémités de la
diagonale en étoile.
2.	Desserrez les vis de réglage à l'arrière de le foyer et
retirez le petit capuchon antipoussière.
3.	 Insérez le plus petit tube du renvoi coudé à l'arrière
du foyer et fixez-le en serrant les vis de réglage. Vous
pouvez modifier l’orientation de la diagonale en étoile
comme désiré avant de serrer les vis.
LE TUBE DU TÉLESCOPE
Le tube du télescope s’attache à la monture équatoriale à
l’aide d’un système de retrait rapide en queue d’aronde. Sur
tous les télescopes réfracteurs newtoniens de 76 mm, la
queue d’aronde est fixée directement au tube du télescope.
Dans le cas des télescome newtoniens de 114 mm et de
130 mm, la queue d’aronde est fixée aux anneaux de tube
qui maintiennent le tube.
1.	 Desserrez les deux molettes de fixation présentes sur
les côtés du support en queue d'aronde sur le dessus
de la monture équatoriale. Assurez-vous qu’elles soient
assez desserrées pour permettre à la barre de queue
d’aronde de glisser dans le support.
2.	Faites glisser la barre de queue d’aronde dans le
support de monture, en vous assurant que la queue
d’aronde soit complètement insérée.
3.	Resserrez chaque molette pour fixer le télescope en
position.
NOTE : Une diagonale en étoile ne permet pas d’obtenir la mise au point avec un télescope newtonien. L’image apparaîtra toujours inversée verticalement.
Les télescopes newtoniens sont livrés avec un oculaire coudé de 20 mm spécial qui comporte un prisme de renvoi pour l’observation terrestre.
Molettes de montage
10 I FRANÇAIS
Pour insérer l’oculaire dans les réfracteurs AstroMaster
70EQ et 90EQ :
1.	 Desserrez les vis de réglage situées à l'extrémité ouverte
de la diagonale en étoile.
2.	Insérez le barillet argenté de l'oculaire 20 mm dans la
diagonale en étoile.
3.	 Serrez les vis de réglage pour fixer solidement l'oculaire.
4.	Pour obtenir l'image la plus nette qui soit, effectuez la
mise au point en regardant dans l'oculaire et en tournant
lentement les molettes de mise au point jusqu'à ce que
vous obteniez l'image la plus nette.
Pour insérer l’oculaire dans les réfracteurs AstroMaster
76EQ, 114EQ et 130EQ :
1.	 Desserrez les vis réglage à l'arrière de le foyer et retirez
le petit capuchon antipoussière.
2.	Insérez le barillet argenté de l'oculaire 20 mm
directement dans le foyer.
3.	 Serrez les vis de réglage pour fixer bien en
place l'oculaire.
4.	Pour obtenir l'image la plus nette qui soit, effectuez la
mise au point en regardant dans l'oculaire et en tournant
lentement les molettes de mise au point jusqu'à ce que
vous obteniez l'image la plus nette.
LE CHERCHEUR STARPOINTER
Votre télescope est livré avec un chercheur à point rouge
StarPointer que vous utiliserez comme outil de visée lorsque
vous pointerez le télescope en direction d'une cible.
Pour installer le chercheur :
1.	 Desserrez les deux vis cruciformes sur le côté du
chercheur et faites glisser la pince sur le support en
queue d’aronde situé près du foyer. La grande fenêtre du
chercheur doit être orientée vers l'avant du télescope.
2.	Fixez le chercheur en place en serrant les deux vis
cruciformes. Ne pas serrer trop fort. Veillez simplement
à ce qu’il n’y ait plus de jeu.
3.	Retirez la petite languette de plastique située sous le
capot de la pile en tirant dessus. Cette languette est
présente pour éviter que la pile ne se décharge pendant
la livraison du produit.
Interrupteur On/Off
Pile
Compartiment
Gauche droite Réglage
de mise au point
Haut/Bas
Réglage de mise
au point
L’OCULAIRE
Votre télescope est livré avec deux oculaires. L’oculaire de 20 mm offre un faible agrandissement avec un champ de vision
modérément large. L’oculaire de 10 mm offre un agrandissement plus puissant, mais avec un champ de vision plus étroit.
D'autres oculaires peuvent être achetés pour augmenter ou diminuer le grossissement à votre gré. Lorsque vous localisez
un objet pour la première fois, il est conseillé d’utiliser l’oculaire de 20 mm, et une fois qu’il est centré, de changer avec
l’oculaire de 10 mm pour « agrandir » l’image.
FRANÇAIS I 11
CHANGER LA PILE DU CHERCHEUR
Pour remplacer la pile du StarPointer, retirez le chercheur
du télescope et retournez-le. Le compartiment de la pile
est situé directement en dessous du grand ensemble de
lentille. À l’aide d’un petit tournevis ou de votre ongle,
soulevez doucement le capot pour le retirer. La pile est
maintenue en place par un ressort. Soulevez doucement
le contact et tournez le chercheur sur le côté. La pile sort
aisément de son logement. Remplacez la pile par une pile-
bouton CR2032 de 3V. Faites glisser la pile sous le contact,
en vous assurant que le terminal positif de la pile (le côté
marqué d’un « + ») est tourné vers le haut, vers le ressort. La
pile doit s’enclencher dans le logement. Remettez le capot
en place en faisant correspondre les onglets avec les trous
sous le chercheur et en pressant. Assurez-vous de mettre
l’ancienne pile au rebut dans le respect de l’environnement.
Pile
Compartiment
ORIENTER LE TÉLESCOPE
La monture équatoriale AstroMaster a été conçue pour
permettre le mouvement dans deux directions sur le système
de coordonnées célestes. L’axe d’Ascension Droite, ou AD,
pivote sur un axe est/ouest. L’axe de Déclinaison, ou DEC,
pivote sur un axe nord/sud. En déplaçant le télescope sur
les axes AD et DEC, vous pourrez pointer le télescope sur
n’importe quelle cible dans le ciel.
Pour orienter le télescope sur de longues distances :
1.	 Desserrez les molettes de frein AD et DEC situées sur
le côté de la monture en les faisant tourner dans le sens
anti-horaire. Cela permettra au télescope d’être orienté
librement dans toutes les directions.
2.	Orientez le télescope à la main sur les axes AD et
DEC jusqu’à ce que vous soyez presque sur la position
désirée.
3.	Serrez les deux molettes de frein dans le sens horaire
pour que la monture ne puisse plus bouger.
Pour effectuer des réglages fins :
1.	 Assurez-vous que chaque frein est serré.
2.	Faites tourner les molettes de mouvement lent AD et
DEC comme requis pour centrer un objet dans la vue
de l’oculaire.
NOTE : Si les freins sont desserrés, les molettes de mouvement lent ne
fonctionneront pas.
12 I FRANÇAIS
ALIGNEMENT DU CHERCHEUR
Le chercheur StarPointer est un viseur de type réflexe qui utilise une DEL rouge pour projeter un point rouge sur la fenêtre de
verre ronde. Lorsque vous regardez dans la fenêtre, le point rouge se superpose à la cible. La première fois que vous assemblez
votre télescope, vous devrez aligner le chercheur avec l'élément optique principal du télescope. Bien que cette étape puisse
être effectuée de nuit, il est beaucoup plus facile de l'effectuer en journée. Une fois que vous avez terminé l'alignement du
chercheur, vous ne devriez pas avoir à répéter cette étape à moins que le chercheur ait été déplacé ou retiré.
Pour installer votre chercheur StarPointer :
1. Installez le télescope à l'extérieur pendant la journée. À l'œil nu, trouvez un objet facilement reconnaissable, comme un
lampadaire, une plaque d'immatriculation de voiture ou un grand arbre. L'objet doit être le plus loin possible, de préférence
à au moins 400 m (un quart de mille).
2. Retirez la housse de protection principale du télescope et assurez-vous que votre oculaire 20 mm a été installé.
3. Orientez le télescope horizontalement et verticalement afin qu'il pointe à approximativement vers l'objet que vous avez choisi
à l'étape 1.
4. Regardez à travers l'oculaire du télescope et déplacez manuellement le télescope jusqu'à ce que l'objet que vous avez choisi
se trouve dans le centre de vision. Sil'image est floue, tournez tout doucement les molettes de mise au point jusqu'à ce que
l'image soit nette.
5. Une fois que l'objet est centré dans votre oculaire 20 mm, allumez le chercheur en tournant jusqu'à la fin de sa course la
molette de réglage d'intensité lumineuse/d'alimentation. Cette molette est située au bas de l'appareil.
6. Avec votre tête située à environ 30 cm (1 pied) derrière le chercheur, regardez par la fenêtre ronde du chercheur et localisez
le point rouge. Il sera probablement près de, mais pas exactement sur l'objet que vous voyez lorsque vous regardez à travers
l'oculaire de 20 mm.
7. Sans déplacer le télescope, utilisez les deux molettes de réglage situées sur le côté et en dessous du chercheur. L'une
contrôle le mouvement gauche-droite du réticule, tandis que l'autre contrôle le mouvement haut-bas. Ajustez les deux
molettes jusqu'à ce que le point rouge apparaisse sur l'objet que vous observez dans l'oculaire de 20 mm.
Choisissez maintenant quelques autres cibles lointaines pour vous exercer à pointer votre télescope. Regardez par la fenêtre
du chercheur StarPointer et placez le point rouge sur la cible que vous essayez de visualiser et vérifiez qu'elle est visible dans
l'oculaire de 20 mm du télescope.
NOTE : N'oubliez pas d'éteindre le chercheur lorsqu'il n'est pas utilisé afin d'économiser les piles.
ÉQUILIBRER DU TÉLESCOPE
Pour limiter les tensions non nécessaires subies par la monture, le télescope doit être correctement équilibré autour
de l'axe polaire.
Pour équilibrer la monture sur l’axe AD :
1. Vérifiez que le télescope est correctement attaché à la monture, les molettes de la queue d’aronde serrées.
2. Desserrez la molette de frein AD pour que le télescope puisse être orienté librement sur l’axe AD.
3. Faites pivoter le télescope sur l’axe AD jusqu’à ce que le tube du télescope soit sur le côté de la monture et que la barre de
contrepoids soit parallèle au sol.
4. Lâchez doucement le télescope et notez quel côté est le plus lourd, celui du télescope ou celui du contrepoids.
5. Si le côté du contrepoids est plus lourd, desserrez la molette de verrouillage de ce dernier et faites-le glisser vers le haut de
la barre (vers le tube) sur une courte distance. Serrez la molette et réessayez le test d’équilibre.
6. Si le côté du tube est plus lourd, desserrez la molette de verrouillage de ce dernier et faites-le glisser vers le bas de la barre
(en l’éloignant du tube) sur une courte distance. Serrez la molette et répétez le test d’équilibre.
7. Continuez a effectuer la correction jusqu’à ce que le télescope ne penche plus d’un côté plus que de l’autre lorsque
vous le lâchez.
FRANÇAIS I 13
Pour équilibrer le télescope sur l’axe DEC :
1. Positionnez le télescope de la même manière que celle décrite pour le test d’équilibre AD ci-dessus, le tube du télescope
d’un côté de la monture et la barre de contrepoids de l’autre côté. Serrez la molette de frein AD pour maintenir la
monture en place.
2. En tenant le télescope fermement d’une main, desserrez la molette de frein DEC et faites pivoter le télescope de manière à
ce qu’il soit parallèle au sol.
3. Lâchez doucement le tube du télescope et notez si le télescope commence à pivoter vers le haut ou le bas puis verrouillez
la molette de frein DEC pour fixer le tube en place.
4. Si le nez du télescope pointe vers le haut, le tube est plus lourd sur sa section arrière et le point d’équilibre doit donc être
ajusté. Desserrez les vis de monture de la queue d’aronde et faites-la glisser vers l’avant sur une courte distance. Serrez les
deux vis de monture et répétez le test.
5. Si le nez du télescope pointe vers le bas, le tube est plus lourd sur sa section avant et le point d’équilibre doit donc être
ajusté. Desserrez les vis de monture de la queue d’aronde et faites-la glisser vers l’arrière sur une courte distance. Serrez les
deux vis de monture et répétez le test.
6. Continuez a effectuer la correction jusqu’à ce que le télescope ne pivote plus d’un côté plus que de l’autre lorsque
vous le lâchez.
NOTE : Dans le cas des télescope newtoniens de 114 mm et de 130 mm, vous pouvez effectuer l’équilibrage sans déplacer la barre de queue d’aronde. Desserrez
simplement les vis argentées situées sur les anneaux entourant le tube du télescope. Vous pouvez ensuite faire glisser le tube vers l’avant ou l’arrière dans
les anneaux. Lorsque le point d’équilibre est atteint, serrez les vis argentées de nouveau. Vous pouvez également faire pivoter le tube dans les anneaux en
utilisant la même méthode pour améliorer votre confort d’observation en changeant l’angle de l’oculaire.
Axe AD Axe DEC
14 I FRANÇAIS
Votre monture équatoriale a la capacité de suivre aisément les cibles célestes en faisant tourner le molette de mouvement AD
lent ou en utilisant l’entraînement moteur en option. Pour garantir que la monture fasse cela avec précision, cette dernière devra
être «  alignée sur l’axe polaire », ou configuré de manière à ce que l’axe de rotation AD effectue son mouvement parallèlement à
l’axe de rotation de la Terre. Cela semble plus compliqué à effectuer que ça ne l’est en réalité, et après l’avoir fait quelques fois,
l’opération deviendra simple comme bonjour. La première étape pour effectuer l’alignement sur l’axe polaire est de configurer
la latitude utilisée en corrélation avec votre site d’observation.
Pour définir la latitude de votre monture :
1. Ajustez la hauteur de chacun des trois pieds du trépied. Un ajustement grossier est suffisant.
2. Déterminez votre latitude sur la Terre. Si vous disposez d’un appareil équipé d’une fonction GPS, comme une tablette ou un
téléphone intelligent, vous pourrez lire la latitude directement depuis celui-ci. Sinon, vous pourrez trouver cette information
en ligne.
3. Repérez la graduation de latitude, présente sur le côté de la monture équatoriale, près de sa base.
4. Utilisez la poignée coulissante pour desserrer la molette de verrouillage du réglage de la latitude en la faisant tourner dans
le sens anti-horaire.
5. Ajustez la vis de réglage de latitude située sur l’arrière de la monture en la faisant pivoter dans le sens horaire et anti-horaire
jusqu’à ce que le pointeur situé au-dessus des graduations pointe sur votre latitude sur la Terre.
Exemple : À Los Angeles, en Californie, votre latitude est de 33 degrés.
6. Une fois votre latitude correctement définie, resserrez la molette de réglage de la latitude en la faisant pivoter dans le
sens horaire.
NOTE : Ce réglage de latitude ne doit en général n’être effectué qu’une fois tant que vous utilisez le télescope sur le même lieu d’observation. Son réglage ne
sera requis que si vous-vous déplacez assez loin vers le sud ou le nord entre les observations. Un déplacement d’environ 110 km (70 miles) nécessite
un ajustement de la latitude. De petits déplacements, comme par exemple déplacer le télescope depuis le jardin situé à l’avant de la maison sur celui
situé à l’arrière, ou même sur un autre site de la même ville, ne nécessite pas le réglage de la latitude.
Une fois votre trépied à niveau et votre latitude définie, la seule étape restante est de faire pivoter la monture de manière à ce
que l’axe polaire (l’axe de rotation AD) soit orienté vers le nord. Pour faire cela :
1. Positionnez le télescope de manière à ce que le tube soit directement au-dessus de la monture équatoriale et que l’avant
du tube du télescope pointe directement au-dessus de la barre de contrepoids. Serrez les molette de frein AD et DEC pour
maintenir la monture en place.
2. Repérez le nord. Vous pouvez faire cela de deux manières :
a. Utilisez une boussole ou une application sur un appareil intelligent pour trouver le nord magnétique. Ceci représente le
moyen le plus simple, mais malheureusement le moins précis également. Le nord magnétique peut varier de jusqu’à 15
degrés par rapport au pôle nord géographique. Il est malgré tout un moyen adéquat et rapide car les applications sur les
appareils intelligents sont capables de compenser cette imprécision.
Vis de réglage de la latitude
(Arrière)
Vis de réglage de la latitude
(Boulon de verrouillage)
ALIGNEMENT POLAIRE
FRANÇAIS I 15
b. Si vous disposez de plus de temps et avez une bonne
connaissance du ciel nocturne, vous pouvez trouver
le pôle nord géographique en cherchant la Grande
casserole et/ou la constellation de Cassiopée. L’étoile
Polaire, l’Étoile du nord, se trouve à environ 0,8
degrés du vrai nord céleste et est assez brillante pour
être repérée à l'œil nu depuis les sites en banlieue.
Recherchez les deux étoiles qui forment l’extrémité
du récipient de la casserole et tirez une ligne directe
entre elles pour repérer l’étoile Polaire. Utiliser l’étoile
Polaire comme vrai nord vous permettra de connaître
avec une précision très correcte la position du vrai
nord géographique.
3. Desserrez légèrement la molette située entre les trois
pieds du trépied qui fixe la monture EQ à la tête du
trépied. Desserrez-la juste assez pour pouvoir faire
pivoter la monture sur la tête du trépied.
4. Tenez la tête de la monture équatoriale et faites-la pivoter
jusqu’à ce que le tube du télescope pointe dans la même
direction que l’aiguille de la boussole. Si vous utilisez
l’étoile Polaire pour vous orienter, alignez le tube dans la
longueur sur l’étoile.
5. Une fois la monture alignée sur le nord, serrez la molette
de fixation à la monture pour la fixer en place.
NOTE : Si vous-vous trouvez dans l’hémisphère sud, utilisez une boussole
pour localiser le pôle céleste sud. Tournez la monture jusqu’à ce
que le télescope pointe vers le sud en vous aidant de l’aiguille de
la boussole. Au lieu de l’étoile Polaire, vous pouvez utiliser l’étoile
Sigma Octantis. La Croix du sud est un guide fiable pour trouver
cette étoile.
Une fois votre monture alignée sur l’axe polaire, il devient très facile de suivre les objets sur leur lente dérive dans le ciel causée
par la rotation de la Terre. Vous pouvez localiser les objets en utilisant les cercles de réglage présents sur votre monture. Pour
en savoir plus sur les cercles de réglage, voyez la section « Un mot sur les cercles de réglage », à la fin du mode d’emploi.
Étoiles pointeuses
Petite ourse
Étoile polaire
Étoile du nord
Cassiopée
N.C.P.
Grande ourse
1. Zénith
2. Latitude
3. Sud
4. Direction de l’axe polaire
5. Direction du pôle nord céleste
6. Horizon
7. Latitude Nord
8. Direction du pôle nord céleste
9. Équateur
10. Terre
16 I FRANÇAIS
VOTRE PREMIÈRE SESSION D'OBSERVATION ASTRONOMIQUE
LA LUNE
Vous êtes maintenant prêt à installer votre télescope à l'extérieur et faire de véritables observations pendant la nuit!
Commençons par la Lune. Les phases de la Lune s'étendent sur un cycle complet d'environ un mois, de la nouvelle Lune à la
pleine Lune et vice versa. Essayez de l'observer à différents moments au cours de ce cycle.
Alors que vous pouvez observer la Lune à n'importe quel moment lorsqu'elle est visible dans le ciel nocturne, le meilleur moment
pour la voir est deux jours après une nouvelle Lune jusqu'à quelques jours avant une pleine Lune. Durant cette période, vous
pourrez voir plus de détails relatifs aux cratères et aux chaînes de montagnes lunaires. Consultez un calendrier pour connaître
la prochaine apparition de la nouvelle Lune.
1. Lorsque la Lune se voit clairement, installez votre télescope avec l'oculaire 20 mm.
2. Allumez le chercheur et regardez à travers celui-ci pour trouver les points rouges.
3. Déplacez le télescope de façon à voir la Lune par la fenêtre du chercheur et le point rouge centré sur la Lune.
4. Regardez dans l'oculaire 20 mm. Tournez tout doucement les molettes de mise au point pour régler la netteté de l'image.
FÉLICITATIONS! VOUS AVEZ OBSERVÉ VOTRE PREMIER OBJET CÉLESTE!
Vous pouvez utiliser cette technique de base pour observer d'autres corps célestes, tels que des planètes, des amas
d'étoiles ou des nébuleuses.
OBSERVATION DU CIEL CONSEILS
Cette section offre des conseils sur l'observation des objets du système solaire et du ciel profond ainsi que des
remarques sur les conditions d'observation pouvant avoir une influence sur sa qualité.
AGRANDISSEMENT
Vous pouvez changer l’agrandissement de votre télescope en interchangeant simplement les oculaires. Le télescope et
les oculaires possèdent des longueurs de focale exprimées en millimètres. Pour calculer la puissance d’agrandissement
d’un ensemble télescope-oculaire, divisez la longueur de focale du télescope et divisez-la par celle de l’oculaire. Le
résultat obtenu est le facteur d’agrandissement.
Par exemple, l’AstroMaster 90EQ offre une longueur de focale de 1000 mm. Si vous utilisez un oculaire de 20 mm :
1000 mm
= ____________ = 50x
20 mm
Longueur de focale du télescope
Grossissement = _____________________________
Longueur de focale de l'oculaire
CHAMP DE VISION
Déterminer le champ de vision est important si vous voulez avoir une idée de la taille angulaire de l'objet observé. Pour
calculer le champ de vision réel, divisez le champ de vision apparent de l'oculaire (fourni par le fabricant de l'oculaire) par
l’agrandissement offert par le télescope.
En utilisant l'exemple de la section précédente, nous pouvons déterminer le champ de vision en utilisant le même oculaire
de 20 mm. L'oculaire de 20 mm à un champ de vision apparent de 40°.
40°
= ______ = 0,3 degrés d’arc
50
Champ de vision apparent de l'oculaire
Champ de vision réel = __________________________________
Agrandissement
L'oculaire de 20 mm à un champ de vision apparent de 40°. Divisez les 40° par la valeur de grossissement, qui est de
puissance 50. Cela permet un champ de vision réel de 0,9 degrés, soit 54 minutes d’arc.
FRANÇAIS I 17
LES PLANÈTES
En plus de la Lune, votre télescope est capable d’observer les 5 planètes les plus lumineuses. Les planètes changent
de position sur le fond d’étoiles, il vous sera donc nécessaire de consulter Internet ou une application planétarium sur un
appareil compatible pour vous aider à les localiser.
Voici quelques conseils pour localiser les planètes :
•	 Mercure et Vénus- À l’instar de la Lune, les deux planètes intérieures passent par plusieurs phases, allant d’un
croissant fin à des phases gibbeuses.
•	Mars- Lorsqu’elle est en opposition proche (le point de son orbite le plus proche de la Terre), vous devriez pouvoir
discerner les calottes polaires de la planète et probablement certaines caractéristiques de surface les plus importantes,
visibles comme des marques plus sombres.
•	Jupiter- Essayez d’observer les bandes de nuages de méthane qui encerclent la planète, immédiatement au-dessus
et au-dessous de son équateur. Si la grande Tache rouge fait face à la terre, vous devriez pouvoir la discerner. Vous
verrez également les quatre lunes les plus lumineuses de Jupiter – Io, Europe, Ganymède et Callisto. Ces lunes sont
amusantes à observer, car elles se déplacent de manière visible en l’espace de quelques heures. Occasionnellement,
elles passeront derrière Jupiter ou seront occultées par son ombre, et disparaîtront pendant un moment. Elles peuvent
également passer devant la face de Jupiter, projetant sur elle une ombre observable. Il existe quelques applications
utiles qui vous aideront à prédire quand la grande Tache rouge sera visible ainsi que d’être au fait des événements
intéressants subits par les lunes.
•	Saturne- Les anneaux! Saturne est sans doute l’un des plus beaux objets à observer à l’aide d’un télescope. Si les
conditions d’observations sont assez stables, vous pourriez même pouvoir observer l’ombre projetée par les anneaux
sur la planète ou celle projetée par la planète sur les anneaux. Vous devriez également être capable de discerner Titan,
la Lune la plus brillante de Saturne.
OBJETS DU CIEL PROFOND
Les objets du ciel profond sont tous ceux situés en dehors des limites de notre système solaire. Ces objets sont des amas
d'étoiles, des nébuleuses planétaires, des nébuleuses diffuses, des étoiles doubles et d’autres galaxies situées en dehors
de notre Voie lactée. Les objets comme les nébuleuses et les galaxies peuvent être de grande taille, mais également peu
brillants. Pour garantir la meilleure observation, assurez-vous de choisir une nuit aussi sombre que possible. Plus vous
êtes éloigné des lumières de la ville, plus aisément vous pourrez observer ces objets dans l’oculaire. Sur les photos des
nébuleuses et des galaxies, vous verrez des rouges et des bleus vifs. Ces couleurs ne sont pas visibles dans l’oculaire.
Ces images colorées sont des images effectuées à de très longues expositions de 15 à 60 minutes ou plus, alors que
votre œil ne capture les données visuelles qu’à un instant T seulement. Les capteurs numériques sont beaucoup plus
sensibles aux bleus et aux rouges que l'œil humain, qui est plus sensible à la partie verte du spectre des couleurs. Malgré
tout, vous pourrez observer l’éclat doux de la galaxie d’Andromède et la vaste surface de la nébuleuse d’Orion.
Instruction Manual | Celestron AstroMaster EQ | Telescopes | Optics Trade

Mais conteúdo relacionado

Mais procurados

Mais procurados (16)

Luận văn: Kế toán doanh thu, chi phí tại công ty logistic, HAY
Luận văn: Kế toán doanh thu, chi phí tại công ty logistic, HAYLuận văn: Kế toán doanh thu, chi phí tại công ty logistic, HAY
Luận văn: Kế toán doanh thu, chi phí tại công ty logistic, HAY
 
Hoàn thiện công tác kế toán bán hàng và xác định kết quả bán hàng tại công ty...
Hoàn thiện công tác kế toán bán hàng và xác định kết quả bán hàng tại công ty...Hoàn thiện công tác kế toán bán hàng và xác định kết quả bán hàng tại công ty...
Hoàn thiện công tác kế toán bán hàng và xác định kết quả bán hàng tại công ty...
 
Đề tài tốt nghiệp: Kế toán công tác về hàng tồn kho, HOT, 2019
Đề tài tốt nghiệp: Kế toán công tác về hàng tồn kho, HOT, 2019Đề tài tốt nghiệp: Kế toán công tác về hàng tồn kho, HOT, 2019
Đề tài tốt nghiệp: Kế toán công tác về hàng tồn kho, HOT, 2019
 
Đề tài: Biện pháp tăng lợi nhuận ở Công ty Sản Xuất Tân Á, HAY - Gửi miễn phí...
Đề tài: Biện pháp tăng lợi nhuận ở Công ty Sản Xuất Tân Á, HAY - Gửi miễn phí...Đề tài: Biện pháp tăng lợi nhuận ở Công ty Sản Xuất Tân Á, HAY - Gửi miễn phí...
Đề tài: Biện pháp tăng lợi nhuận ở Công ty Sản Xuất Tân Á, HAY - Gửi miễn phí...
 
Đề tài: Lập và phân tích bảng cân đối kế toán tại công ty Nghĩa Thắng
Đề tài: Lập và phân tích bảng cân đối kế toán tại công ty Nghĩa ThắngĐề tài: Lập và phân tích bảng cân đối kế toán tại công ty Nghĩa Thắng
Đề tài: Lập và phân tích bảng cân đối kế toán tại công ty Nghĩa Thắng
 
Đề tài: Hoàn thiện kế toán hàng tồn kho tại Công ty Tân Thuận, HOT
Đề tài: Hoàn thiện kế toán hàng tồn kho tại Công ty Tân Thuận, HOTĐề tài: Hoàn thiện kế toán hàng tồn kho tại Công ty Tân Thuận, HOT
Đề tài: Hoàn thiện kế toán hàng tồn kho tại Công ty Tân Thuận, HOT
 
Đề tài: Kế toán doanh thu, chi phí tại Công ty vận tải dịch vụ, 9đ
Đề tài: Kế toán doanh thu, chi phí tại Công ty vận tải dịch vụ, 9đĐề tài: Kế toán doanh thu, chi phí tại Công ty vận tải dịch vụ, 9đ
Đề tài: Kế toán doanh thu, chi phí tại Công ty vận tải dịch vụ, 9đ
 
Đề tài khả năng sinh lời công ty bất động sản, ĐIỂM CAO
Đề tài  khả năng sinh lời công ty bất động sản, ĐIỂM CAOĐề tài  khả năng sinh lời công ty bất động sản, ĐIỂM CAO
Đề tài khả năng sinh lời công ty bất động sản, ĐIỂM CAO
 
Phân tích tình hình tài chính của công ty tnhh một thành viên vận tải thiên minh
Phân tích tình hình tài chính của công ty tnhh một thành viên vận tải thiên minhPhân tích tình hình tài chính của công ty tnhh một thành viên vận tải thiên minh
Phân tích tình hình tài chính của công ty tnhh một thành viên vận tải thiên minh
 
Đề tài: Kế toán doanh thu kết quả kinh doanh tại Công ty Vận tải
Đề tài: Kế toán doanh thu kết quả kinh doanh tại Công ty Vận tảiĐề tài: Kế toán doanh thu kết quả kinh doanh tại Công ty Vận tải
Đề tài: Kế toán doanh thu kết quả kinh doanh tại Công ty Vận tải
 
Đề tài: Bảng cân đối kế toán tại Công ty xuất nhập khẩu Vinh Phát
Đề tài: Bảng cân đối kế toán tại Công ty xuất nhập khẩu Vinh PhátĐề tài: Bảng cân đối kế toán tại Công ty xuất nhập khẩu Vinh Phát
Đề tài: Bảng cân đối kế toán tại Công ty xuất nhập khẩu Vinh Phát
 
Luận văn: Kế toán doanh thu chi phí tại Công ty vận tải biển, HAY
Luận văn: Kế toán doanh thu chi phí tại Công ty vận tải biển, HAYLuận văn: Kế toán doanh thu chi phí tại Công ty vận tải biển, HAY
Luận văn: Kế toán doanh thu chi phí tại Công ty vận tải biển, HAY
 
Đề tài: Kế toán thanh toán tại Công ty xuất nhập khẩu vận tải, HOT
Đề tài: Kế toán thanh toán tại Công ty xuất nhập khẩu vận tải, HOTĐề tài: Kế toán thanh toán tại Công ty xuất nhập khẩu vận tải, HOT
Đề tài: Kế toán thanh toán tại Công ty xuất nhập khẩu vận tải, HOT
 
Đề tài phân tích tài chính công ty cổ phần xây dựng Nhật Thanh, ĐIỂM CAO
Đề tài  phân tích tài chính công ty cổ phần xây dựng Nhật Thanh,  ĐIỂM CAOĐề tài  phân tích tài chính công ty cổ phần xây dựng Nhật Thanh,  ĐIỂM CAO
Đề tài phân tích tài chính công ty cổ phần xây dựng Nhật Thanh, ĐIỂM CAO
 
Phân tích tình hình tài chính tại công ty tnhh thương mại toàn thắng
Phân tích tình hình tài chính tại công ty tnhh thương mại toàn thắngPhân tích tình hình tài chính tại công ty tnhh thương mại toàn thắng
Phân tích tình hình tài chính tại công ty tnhh thương mại toàn thắng
 
Đề tài: Phân tích tình hình tài chính tại Công ty thương mại vận tải
Đề tài: Phân tích tình hình tài chính tại Công ty thương mại vận tảiĐề tài: Phân tích tình hình tài chính tại Công ty thương mại vận tải
Đề tài: Phân tích tình hình tài chính tại Công ty thương mại vận tải
 

Semelhante a Instruction Manual | Celestron AstroMaster EQ | Telescopes | Optics Trade

Giao trinh quang hoc.1089003
Giao trinh quang hoc.1089003Giao trinh quang hoc.1089003
Giao trinh quang hoc.1089003
Phi Phi
 
Caterpillar cat ec55 n forklift lift trucks service repair manual sna2ec5 602...
Caterpillar cat ec55 n forklift lift trucks service repair manual sna2ec5 602...Caterpillar cat ec55 n forklift lift trucks service repair manual sna2ec5 602...
Caterpillar cat ec55 n forklift lift trucks service repair manual sna2ec5 602...
fjskekdmmse
 
innoperm centre of science collabpration
innoperm centre of science collabprationinnoperm centre of science collabpration
innoperm centre of science collabpration
Andrey Mushchinkin
 
214275799 cours-cned-6-eme-maths
214275799 cours-cned-6-eme-maths214275799 cours-cned-6-eme-maths
214275799 cours-cned-6-eme-maths
Ettaoufik Elayedi
 
Crown wd2300 s series walkie reach stacker service repair manual
Crown wd2300 s series walkie reach stacker service repair manualCrown wd2300 s series walkie reach stacker service repair manual
Crown wd2300 s series walkie reach stacker service repair manual
fhhsjdkmem
 

Semelhante a Instruction Manual | Celestron AstroMaster EQ | Telescopes | Optics Trade (20)

Instruction Manual | Celestron LCM Telescopes | Optics Trade
Instruction Manual | Celestron LCM Telescopes | Optics TradeInstruction Manual | Celestron LCM Telescopes | Optics Trade
Instruction Manual | Celestron LCM Telescopes | Optics Trade
 
Instruction Manual | Celestron AstroMaster AZ Telescopes | Optics Trade
Instruction Manual | Celestron AstroMaster AZ Telescopes | Optics TradeInstruction Manual | Celestron AstroMaster AZ Telescopes | Optics Trade
Instruction Manual | Celestron AstroMaster AZ Telescopes | Optics Trade
 
20081219 bda10964fr-1
20081219 bda10964fr-120081219 bda10964fr-1
20081219 bda10964fr-1
 
Giao trinh quang hoc.1089003
Giao trinh quang hoc.1089003Giao trinh quang hoc.1089003
Giao trinh quang hoc.1089003
 
TCB
TCBTCB
TCB
 
9000230712
90002307129000230712
9000230712
 
Complet
CompletComplet
Complet
 
Le livre blanc des systemes embarques
Le livre blanc des systemes embarquesLe livre blanc des systemes embarques
Le livre blanc des systemes embarques
 
Le rapport semestriel de la banque mondiale sur la situation du Senegal
Le rapport semestriel de la banque mondiale sur la situation du Senegal Le rapport semestriel de la banque mondiale sur la situation du Senegal
Le rapport semestriel de la banque mondiale sur la situation du Senegal
 
Caterpillar cat ec55 n forklift lift trucks service repair manual sna2ec5 602...
Caterpillar cat ec55 n forklift lift trucks service repair manual sna2ec5 602...Caterpillar cat ec55 n forklift lift trucks service repair manual sna2ec5 602...
Caterpillar cat ec55 n forklift lift trucks service repair manual sna2ec5 602...
 
innoperm centre of science collabpration
innoperm centre of science collabprationinnoperm centre of science collabpration
innoperm centre of science collabpration
 
89302f111f notice installation flotax fb
89302f111f   notice installation flotax fb89302f111f   notice installation flotax fb
89302f111f notice installation flotax fb
 
Στο δρόμο για τον PISA
Στο δρόμο για τον PISAΣτο δρόμο για τον PISA
Στο δρόμο για τον PISA
 
Langage c
Langage cLangage c
Langage c
 
Mode d'emploi multicuiseur 4 en 1 Cuisinart msc600e - Notice
Mode d'emploi multicuiseur 4 en 1 Cuisinart msc600e - NoticeMode d'emploi multicuiseur 4 en 1 Cuisinart msc600e - Notice
Mode d'emploi multicuiseur 4 en 1 Cuisinart msc600e - Notice
 
Etat art pompage solaire
Etat art pompage solaireEtat art pompage solaire
Etat art pompage solaire
 
214275799 cours-cned-6-eme-maths
214275799 cours-cned-6-eme-maths214275799 cours-cned-6-eme-maths
214275799 cours-cned-6-eme-maths
 
Crown wd2300 s series walkie reach stacker service repair manual
Crown wd2300 s series walkie reach stacker service repair manualCrown wd2300 s series walkie reach stacker service repair manual
Crown wd2300 s series walkie reach stacker service repair manual
 
Crown wd2300 s series walkie reach stacker service repair manual
Crown wd2300 s series walkie reach stacker service repair manualCrown wd2300 s series walkie reach stacker service repair manual
Crown wd2300 s series walkie reach stacker service repair manual
 
Crown wd2300 s series walkie reach stacker service repair manual
Crown wd2300 s series walkie reach stacker service repair manualCrown wd2300 s series walkie reach stacker service repair manual
Crown wd2300 s series walkie reach stacker service repair manual
 

Mais de Optics-Trade

Mais de Optics-Trade (20)

Technical Data | Sig Sauer Easy6 BDX 1-6x24 | Optics Trade
Technical Data | Sig Sauer Easy6 BDX 1-6x24 | Optics TradeTechnical Data | Sig Sauer Easy6 BDX 1-6x24 | Optics Trade
Technical Data | Sig Sauer Easy6 BDX 1-6x24 | Optics Trade
 
Technical Data | ThermTec Wild 650L | Optics Trade
Technical Data | ThermTec Wild 650L | Optics TradeTechnical Data | ThermTec Wild 650L | Optics Trade
Technical Data | ThermTec Wild 650L | Optics Trade
 
Technical Data | ThermTec Wild 635L | Optics Trade
Technical Data | ThermTec Wild 635L | Optics TradeTechnical Data | ThermTec Wild 635L | Optics Trade
Technical Data | ThermTec Wild 635L | Optics Trade
 
Technical Data | ThermTec Wild 650 | Optics Trade
Technical Data | ThermTec Wild 650 | Optics TradeTechnical Data | ThermTec Wild 650 | Optics Trade
Technical Data | ThermTec Wild 650 | Optics Trade
 
Technical Data | ThermTec Wild 635 | Optics Trade
Technical Data | ThermTec Wild 635 | Optics TradeTechnical Data | ThermTec Wild 635 | Optics Trade
Technical Data | ThermTec Wild 635 | Optics Trade
 
Technical Data | ThermTec Wild 335 | Optics Trade
Technical Data | ThermTec Wild 335 | Optics TradeTechnical Data | ThermTec Wild 335 | Optics Trade
Technical Data | ThermTec Wild 335 | Optics Trade
 
Technical Data | ThermTec Wild 325 | Optics Trade
Technical Data | ThermTec Wild 325 | Optics TradeTechnical Data | ThermTec Wild 325 | Optics Trade
Technical Data | ThermTec Wild 325 | Optics Trade
 
Instruction Manual | ThermTec Wild Thermal Monoculars | Optics Trade
Instruction Manual | ThermTec Wild Thermal Monoculars | Optics TradeInstruction Manual | ThermTec Wild Thermal Monoculars | Optics Trade
Instruction Manual | ThermTec Wild Thermal Monoculars | Optics Trade
 
Technical Data | ThermTec Hunt 335 | Optics Trade
Technical Data | ThermTec Hunt 335 | Optics TradeTechnical Data | ThermTec Hunt 335 | Optics Trade
Technical Data | ThermTec Hunt 335 | Optics Trade
 
Instruction Manual | ThermTec Hunt Thermal Clip-On Series | Optics Trade
Instruction Manual | ThermTec Hunt Thermal Clip-On Series | Optics TradeInstruction Manual | ThermTec Hunt Thermal Clip-On Series | Optics Trade
Instruction Manual | ThermTec Hunt Thermal Clip-On Series | Optics Trade
 
Instruction Manual | Steiner eRanger LRF 10x42 | Optics Trade
Instruction Manual | Steiner eRanger LRF 10x42 | Optics TradeInstruction Manual | Steiner eRanger LRF 10x42 | Optics Trade
Instruction Manual | Steiner eRanger LRF 10x42 | Optics Trade
 
Flyer | Guide DN Series Handheld Digital Binoculars | Optics Trade
Flyer | Guide DN Series Handheld Digital Binoculars | Optics TradeFlyer | Guide DN Series Handheld Digital Binoculars | Optics Trade
Flyer | Guide DN Series Handheld Digital Binoculars | Optics Trade
 
Quick Start Guide | Guide TB Series | Optics Trade
Quick Start Guide | Guide TB Series | Optics TradeQuick Start Guide | Guide TB Series | Optics Trade
Quick Start Guide | Guide TB Series | Optics Trade
 
Instruction Manual | Pard FD1 Digital NV Front Attachment | Optics Trade
Instruction Manual | Pard FD1 Digital NV Front Attachment | Optics TradeInstruction Manual | Pard FD1 Digital NV Front Attachment | Optics Trade
Instruction Manual | Pard FD1 Digital NV Front Attachment | Optics Trade
 
Instruction Manual | EOTech Vudu X 2-12x40 | Optics Trade
Instruction Manual | EOTech Vudu X 2-12x40 | Optics TradeInstruction Manual | EOTech Vudu X 2-12x40 | Optics Trade
Instruction Manual | EOTech Vudu X 2-12x40 | Optics Trade
 
Instruction Manual | EOTech Vudu X 1-6x24 | Optics Trade
Instruction Manual | EOTech Vudu X 1-6x24 | Optics TradeInstruction Manual | EOTech Vudu X 1-6x24 | Optics Trade
Instruction Manual | EOTech Vudu X 1-6x24 | Optics Trade
 
Instruction Manual | Nightforce CFS 6-36x50 F1 | Optics Trade
Instruction Manual | Nightforce CFS 6-36x50 F1 | Optics TradeInstruction Manual | Nightforce CFS 6-36x50 F1 | Optics Trade
Instruction Manual | Nightforce CFS 6-36x50 F1 | Optics Trade
 
Instruction Manual | Athlon Cronus Tactical G2 ED 7-42x60 | Optics Trade
Instruction Manual | Athlon Cronus Tactical G2 ED 7-42x60 | Optics TradeInstruction Manual | Athlon Cronus Tactical G2 ED 7-42x60 | Optics Trade
Instruction Manual | Athlon Cronus Tactical G2 ED 7-42x60 | Optics Trade
 
Insrtuction Manual | Swarovski CL Companion Habicht | Optics Trade
Insrtuction Manual | Swarovski CL Companion Habicht | Optics TradeInsrtuction Manual | Swarovski CL Companion Habicht | Optics Trade
Insrtuction Manual | Swarovski CL Companion Habicht | Optics Trade
 
Technical Data | Swarovski CL Companion Habicht | Optics Trade
Technical Data | Swarovski CL Companion Habicht | Optics TradeTechnical Data | Swarovski CL Companion Habicht | Optics Trade
Technical Data | Swarovski CL Companion Habicht | Optics Trade
 

Instruction Manual | Celestron AstroMaster EQ | Telescopes | Optics Trade

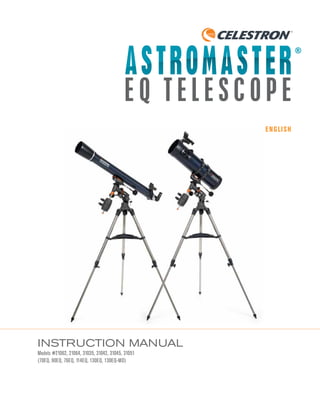
  • 1. INSTRUCTION MANUAL Models #21062, 21064, 31035, 31042, 31045, 31051 (70EQ, 90EQ, 76EQ, 114EQ, 130EQ, 130EQ-MD) ENGLISH
  • 2.
  • 3. ENGLISH I 3 CONTENTS SOLAR WARNING . . . . . . . . . . . . . . . . . . . . . . . . . . . . . . . . . . . . . . . . . . . . . . . . . . . . 5 WHAT’S IN THE BOX . . . . . . . . . . . . . . . . . . . . . . . . . . . . . . . . . . . . . . . . . . . . . . . . . . 6 ASSEMBLING YOUR TELESCOPE . . . . . . . . . . . . . . . . . . . . . . . . . . . . . . . . . . . . . . . . . . 7 The Tripod and Equatorial Mount . . . . . . . . . . . . . . . . . . . . . . . . . . . . . . . . . . . . . . . . . . . . . . . 7 Counterweight Bar and Counterweights . . . . . . . . . . . . . . . . . . . . . . . . . . . . . . . . . . . . . . . . . . 8 Slow Motion Controls . . . . . . . . . . . . . . . . . . . . . . . . . . . . . . . . . . . . . . . . . . . . . . . . . . . . . 8 The Telescope Tube . . . . . . . . . . . . . . . . . . . . . . . . . . . . . . . . . . . . . . . . . . . . . . . . . . . . . . 9 The Erect Image Diagonal (Refracting Telescopes Only) . . . . . . . . . . . . . . . . . . . . . . . . . . . . . . . . . . 9 The Eyepiece . . . . . . . . . . . . . . . . . . . . . . . . . . . . . . . . . . . . . . . . . . . . . . . . . . . . . . . . . 10 The StarPointer Finderscope . . . . . . . . . . . . . . . . . . . . . . . . . . . . . . . . . . . . . . . . . . . . . . . . . 10 Changing the Finderscope Battery . . . . . . . . . . . . . . . . . . . . . . . . . . . . . . . . . . . . . . . . . . . . . . 11 Moving the Telescope . . . . . . . . . . . . . . . . . . . . . . . . . . . . . . . . . . . . . . . . . . . . . . . . . . . . 11 Aligning the Finderscope . . . . . . . . . . . . . . . . . . . . . . . . . . . . . . . . . . . . . . . . . . . . . . . . . . . 12 Balancing the Telescope . . . . . . . . . . . . . . . . . . . . . . . . . . . . . . . . . . . . . . . . . . . . . . . . . . . 12 POLAR ALIGNMENT . . . . . . . . . . . . . . . . . . . . . . . . . . . . . . . . . . . . . . . . . . . . . . . . . . 14 YOUR FIRST ASTRONOMICAL OBSERVING SESSION . . . . . . . . . . . . . . . . . . . . . . . . . . . . . . 16 The Moon . . . . . . . . . . . . . . . . . . . . . . . . . . . . . . . . . . . . . . . . . . . . . . . . . . . . . . . . . . . 16 CELESTIAL OBSERVING TIPS . . . . . . . . . . . . . . . . . . . . . . . . . . . . . . . . . . . . . . . . . . . . . 16 Magnification . . . . . . . . . . . . . . . . . . . . . . . . . . . . . . . . . . . . . . . . . . . . . . . . . . . . . . . . . 16 Field of View . . . . . . . . . . . . . . . . . . . . . . . . . . . . . . . . . . . . . . . . . . . . . . . . . . . . . . . . . 16 The Planets . . . . . . . . . . . . . . . . . . . . . . . . . . . . . . . . . . . . . . . . . . . . . . . . . . . . . . . . . . 17 Deep-Sky Objects . . . . . . . . . . . . . . . . . . . . . . . . . . . . . . . . . . . . . . . . . . . . . . . . . . . . . . 17 Sky Conditions . . . . . . . . . . . . . . . . . . . . . . . . . . . . . . . . . . . . . . . . . . . . . . . . . . . . . . . . 18 Selecting an Observing Site . . . . . . . . . . . . . . . . . . . . . . . . . . . . . . . . . . . . . . . . . . . . . . . . . 18 Choosing the Best Time to Observe . . . . . . . . . . . . . . . . . . . . . . . . . . . . . . . . . . . . . . . . . . . . . 18 Cooling the Telescope . . . . . . . . . . . . . . . . . . . . . . . . . . . . . . . . . . . . . . . . . . . . . . . . . . . . 19 Adapting Your Eyes . . . . . . . . . . . . . . . . . . . . . . . . . . . . . . . . . . . . . . . . . . . . . . . . . . . . . . 19 Astroimaging . . . . . . . . . . . . . . . . . . . . . . . . . . . . . . . . . . . . . . . . . . . . . . . . . . . . . . . . . 19 Deep-Sky Observing Equipment . . . . . . . . . . . . . . . . . . . . . . . . . . . . . . . . . . . . . . . . . . . . . . . 20 Star Hopping . . . . . . . . . . . . . . . . . . . . . . . . . . . . . . . . . . . . . . . . . . . . . . . . . . . . . . . . . 20 CARE AND CLEANING OF THE TELESCOPE . . . . . . . . . . . . . . . . . . . . . . . . . . . . . . . . . . . . 21 COLLIMATION OF A NEWTONIAN TELESCOPE . . . . . . . . . . . . . . . . . . . . . . . . . . . . . . . . . . . 22 Aligning the Secondary Mirror . . . . . . . . . . . . . . . . . . . . . . . . . . . . . . . . . . . . . . . . . . . . . . . . 23 Aligning the Primary Mirror . . . . . . . . . . . . . . . . . . . . . . . . . . . . . . . . . . . . . . . . . . . . . . . . . . 23 A Word on Setting Circles . . . . . . . . . . . . . . . . . . . . . . . . . . . . . . . . . . . . . . . . . . . . . . . . . . 24 NOTES . . . . . . . . . . . . . . . . . . . . . . . . . . . . . . . . . . . . . . . . . . . . . . . . . . . . . . . . . . 26 CELESTRON TWO YEAR LIMITED WARRANTY . . . . . . . . . . . . . . . . . . . . . . . . . . . . . . . . . . . 28
  • 5. ENGLISH I 5 • Never look directly at the Sun with the naked eye or with a telescope unless you have the proper solar filter. Permanent and irreversible eye damage may result. • Never use your telescope to project an image of the Sun onto any surface. Internal heat build-up can damage the telescope and any accessories attached to it. • Never use an eyepiece solar filter or a Herschel wedge. Internal heat build-up inside the telescope can cause these devices to crack or break, allowing unfiltered sunlight to pass through to the eye. • Do not leave the telescope unsupervised, either when children are present or adults unfamiliar with the correct operating procedures of your telescope are present. SOLAR WARNING
  • 6. 6 I ENGLISH 1. Objective Lens 2. Telescope Tube 3. DEC Setting Circle 4. RA Setting Circle 5. RA Slow Motion Knob 6. Counterweight 7. Counterweight Bar 8. Tripod 9. Accessory Tray 10. Dovetail Mounting bracket 11. StarPointer Finderscope 12. Eyepiece 13. Erect Image Diagonal 14. Focus Knob 15. DEC Slow Motion Knob 16. Equatorial Mount 17. Latitude Adjustment Screw We recommend saving your telescope box so it can be used to store the telescope when it is not in use. Unpack the box carefully as some parts are small. Use the parts list below to verify that all parts and accessories are present. PARTS LIST WHAT’S IN THE BOX (130 mm Newtonian shown) (90 mm refractor shown) 12 11 1 13 7 9 5 14 10 15 16 178 6 4 3 2 1. StarPointer Finderscope 2. Eyepiece 3. Focus Knob 4. Telescope Tube 5. Tube Rings 6. DEC Setting Circle 7. RA Setting Circle 8. Counterweights 9. Counterweight Bar 10. RA Slow Motion Knob 11. Primary Mirror 12. DEC Slow Motion Knob 13. Latitude Adjustment Screw 14. Tripod 15. Accessory Tray 4 3 8 116 1 2 5 7 10 14 15 12 13 9
  • 7. ENGLISH I 7 ASSEMBLING YOUR TELESCOPE THE TRIPOD AND EQUATORIAL MOUNT This section covers the assembly instructions for your AstroMaster EQ telescope. Your telescope should be set up indoors the first time so that it is easy to identify the various parts and familiarize yourself with the correct assembly procedure before attempting it outdoors. To assemble tripod: 1. Remove the tripod and mount from the box. 2. Loosen the hand knobs at the bottom of each leg and extend the inner section of the leg to the desired length. Tighten the knobs to secure the legs, being careful not to over tighten. 3. Stand the tripod upright and pull the tripod legs apart until the center brace snaps into place. 4. Place the accessory tray on top of the center brace lined up the keyed hole in the center. Rotate the tray until the tabs at the three points of the tray snap into the holders on each arm of the tripod’s center brace. The equatorial mount allows you to tilt the telescope’s axis of rotation so that you can track celestial targets as they move across the sky. 1. Remove the equatorial mount from the box. 2. Set the protrusion base of the equatorial mount into the indentation on the top of the tripod head. 3. Use the large hand knob under the tripod head to secure the mount to the tripod. Thread until snug, but do not overtighten. 4. Thread the latitude adjustment screw into the threaded hole on the back of the mount. You only need to thread this in a short way as you will adjust this screw later. Latitude Screw Mounting Bolt
  • 8. 8 I ENGLISH COUNTERWEIGHT BAR AND COUNTERWEIGHTS In order to properly balance your telescope tube, the mount comes with a counterweight bar and counterweights. 1. Remove the counterweight bar from the box and screw it into the threaded hole on the bottom of the declination axis of the mount. 2. Remove the orange counterweight safety screw from the bottom end of the counterweight bar. 3. Loosen the large black locking knob on the side of the counterweight. Make sure the hole through the counterweight is unobstructed. 4. Slide the counterweight onto the counterweight shaft about half way, then tighten the locking knob to hold the counterweight in place. If your telescope comes with more than one counterweight, add the second weight in the same manner as the first. 5. Replace the orange counterweight safety screw onto the bottom of the counterweight shaft. This will prevent the counterweight from falling off the shaft if it accidentally comes loose. SLOW MOTION CONTROLS The AstroMaster mount comes with two slow motion control knobs that allow you to make fine pointing adjustments to the telescope in both Right Ascension and Declination axes, also referred to as RA and DEC. To install the knobs: 1. Locate the two knobs in the box. Both knobs are identical so it does not matter which one you use on each axis. 2. Loosen the set screw on the end of one of the two knobs. 3. Slide it onto the end of the RA gear shaft as far as it will go and tighten the setscrew to secure it in place. The RA knob can be used on either the left or right side of the mount, based on your preference. 4. Slide the other knob onto the DEC gear shaft and tighten the set screw to secure it. Hole for Counterweight Shaft Counterweight Shaft Counterweights RA Shaft DEC Shaft Slow Motion Control Knobs
  • 9. ENGLISH I 9 THE ERECT IMAGE DIAGONAL (Refracting telescopes only) The erect image diagonal attaches to the back of a refracting telescope and contains a small prism that reflects light at a 90° angle, providing a more comfortable viewing position. Most astronomical telescopes will give a view that is either inverted or reversed left-to-right. The erect image diagonal corrects the image so that you will have a 100% correctly oriented image, making your telescope perfect for daytime terrestrial observing. To insert the diagonal on the AstroMaster 70EQ and 90EQ refractors: 1. Remove the caps from both sides of the diagonal. 2. Loosen the setscrews on the back of the focuser and pull out the small dust cap. 3. Insert the smaller tube on the diagonal into the back of the focuser and secure it by tightening the setscrews. You can adjust the angle of the star diagonal to any desired direction before tightening the screws. THE TELESCOPE TUBE The telescope tube attaches to the equatorial mount using a quick release dovetail system. For all of the refractor telescopes and the 76 mm Newtonian, the dovetail is attached directly to the telescope tube. For the 114 mm and 130 mm Newtonian telescopes, the dovetail attaches to tube rings that hold the telescope tube. 1. Loosen the two mounting knobs located on the side of the dovetail mounting bracket on the top of the equatorial mount. Make sure they are backed out far enough for the dovetail bar to slide into the mounting bracket. 2. Slide the dovetail bar on the telescope tube into the mounting bracket, making sure the dovetail is fully seated inside the bracket. 3. Tighten both mounting knobs to hold the telescope in place. NOTE: An erect image diagonal is not able to reach focus on a Newtonian telescope. The image will always appear upside-down. The Newtonian telescopes come with one special 20 mm erecting eyepiece that has an erecting prism built-in for terrestrial use. Mounting Knobs
  • 10. 10 I ENGLISH To install the eyepiece on the the AstroMaster 70EQ and 90EQ refractors: 1. Loosen the setscrews on the open end of the star diagonal. 2. Insert the silver barrel of the 20 mm eyepiece into the star diagonal. 3. Tighten the setscrews to secure the eyepiece in place. 4. To see the sharpest image possible, focus by looking through the eyepiece and slowly turning the focusing knobs until the image comes into sharp focus. To install the eyepiece on the AstroMaster 76EQ, 114EQ and 130EQ Newtonian telescopes: 1. Loosen the setscrew on the end of the focuser and remove the dust cap. 2. Insert the silver barrel of the 20 mm eyepiece directly into the focuser. 3. Tighten the setscrew to secure the eyepiece in place. 4. To see the sharpest image possible, focus by looking through the eyepiece and slowly turning the focusing knobs until the image comes into sharp focus. THE STARPOINTER FINDERSCOPE Your telescope comes with a StarPointer red-dot finderscope that you will use as a sighting tool when aiming the telescope at a target. To install the finderscope: 1. Loosen the two Philips–head screws on the side of the finderscope and slide the clamp over the dovetail bracket near the telescope focuser. The large window on the finder should be facing the front of the telescope. 2. Secure the finderscope in place by tightening the two Philips-head screws. Do not over tighten these screws. Just make the connection snug. 3. Remove the small plastic tab under the battery cover. This is installed to prevent the battery from accidentally discharging during transportation. On/Off Switch Battery Compartment Left/Right Adjustment Knob Up/Down Adjustment Knob THE EYEPIECE Your telescope comes with two eyepieces. The 20 mm which will give low magnification with a moderately wide field of view. The 10 mm will give you higher magnification, but a narrower field of view. Additional eyepieces can be purchased to increase or decrease the magnification to your desired level. When first locating an object, it is best to use the 20 mm eyepiece, then, once the object is centered, change to the 10 mm eyepiece to “zoom in” on it.
  • 11. ENGLISH I 11 CHANGING THE FINDERSCOPE BATTERY To replace the StarPointer battery, remove the finder from the scope and turn it over. The battery compartment is located directly under the large lens assembly. Using a small screwdriver or your fingernail, gently lift straight up on the cover to remove it. The battery is held in place by a spring contact. Gently lift this contact and turn the finder on its side. The battery should slip right out. Replace the battery with a 3-Volt CR2032 button cell battery. Slide the new battery under the contact, making sure that the positive terminal of the battery (the side marked with a “+”) is pointing upward, toward the spring contact. The battery should snap in place. Replace the cover by lining up the pins on the cover with the holes in the finderscope and pressing it down. Be sure to dispose of the old battery according to your local laws. Battery Compartment MOVING THE TELESCOPE The AstroMaster equatorial mount was designed to move in two directions based on the celestial coordinate system. The Right Ascension, or RA, axis moves the telescope in the East/ West direction). The Declination, or DEC, axis moves the telescope in the North/South direction. By moving the scope in RA and DEC, you will be able to point your telescope to any point in the sky. To move the telescope over long distances: 1. Loosen the RA and DEC clutch knobs located on the side of the mount by turning them counter-clockwise. This will allow the scope to spin freely in each direction. 2. Move the scope by hand in RA and DEC until you are close to your desired position. 3. Tighten the two clutch knobs clockwise to secure the mount in place. To make fine adjustments to the pointing of the telescope: 1. Make sure both clutches are locked. 2. Turn the RA or DEC slow motion knob as required to center an object in your eyepiece view. NOTE: If the clutches are unlocked, the slow motion knobs will not work.
  • 12. 12 I ENGLISH ALIGNING THE FINDERSCOPE The StarPointer finderscope is a reflex sight that uses a red LED to project a red dot onto the round glass window. When you look through the window, you see the red dot superimposed on your target. The first time you assemble your telescope, you’ll need to align the finderscope with the main optics of the telescope. Although this step can be done at night, it is significantly easier to do during the day. Once you have completed the finderscope alignment, you should not have to repeat this step unless the finderscope is bumped or dropped. To install the StarPointer finderscope: 1. Take the telescope outside during the day. Using your naked eye, find an easily recognizable object, such as a streetlight, car license plate, or tall tree. The object should be as far away as possible, but at least a quarter mile away. 2. Remove the main dust cover from the telescope and make sure your 20 mm eyepiece is installed. 3. Move the telescope left and right or up and down so that it is roughly pointing toward the object you chose in step 1. 4. Look through the telescope’s eyepiece and manually move the telescope until the object you chose lies in the center of the view. If the image is blurry, gently turn the focus knobs until it comes into sharp focus. 5. Once the object is centered in your 20 mm eyepiece, turn on the finderscope by turning the power/brightness switch knob on the side of the unit as far as it will go. 6. With your head positioned about a foot behind the finder, look through the round window and locate the red dot. It will probably be close to, but not on top of, the object you see when you are looking through the 20 mm eyepiece. 7. Without moving the telescope, use the two adjustment knobs on the side and underneath the finderscope. One controls the left-right motion of the reticle, while the other controls the up-down motion. Adjust both until the red dot appears over the same object you are observing in the 20 mm eyepiece. Now choose some other distant targets to practice aiming your telescope. Look through the StarPointer finderscope window and place the red dot over the target you are trying to view and verify that it appears in the 20 mm eyepiece of the scope. NOTE: Be sure to turn off the StarPointer finderscope when not in use to conserve battery power. BALANCING THE TELESCOPE To eliminate undue stress on the mount and gears, the telescope should be properly balanced on the mount. To balance the mount in the RA axis: 1. Make sure the telescope is properly attached to the mount with the dovetail mounting knobs tightly secured. 2. Release the RA clutch knob to allow the scope to spin freely in the RA axis. 3. Rotate the telescope in the RA axis so that the telescope tube is on the side of the mount and the counterweight bar is parallel to the ground. 4. Slowly release your grip on the telescope and see what side is heavier – the side with the telescope tube or the side with the counterweight. 5. Ifthe counterweight side is heavier, loosen the counterweight locking knob and slide the counterweight up the shaft (toward the telescope tube) a small amount, lock the counterweight down in its new position and try the test again. 6. If the telescope tube side is heavier, loosen the counterweight locking knob and slide the counterweight down the shaft (away from the telescope tube) a small amount, lock the counterweight down in its new position and try the test again. 7. Keep adjusting the position of the weight until you can let the telescope go and it does not move up or down.
  • 13. ENGLISH I 13 To balance the scope in the DEC axis: 1. Place the telescope in the same position as listed for the RA balance test above with the telescope tube on one side of the mount and the counterweight bar parallel to the ground. Lock the RA clutch knob to hold the mount in place. 2. Holding the telescope tube securely with one hand, loosen the DEC clutch knob and rotate the telescope so that it is parallel to the ground. 3. Slowly let go of the telescope tube and see if the telescope starts to rotate upward or downward, then lock the DEC clutch knob to secure the tube in place. 4. If the nose of the telescope pointed upward, the tube is back-heavy and the balance point will need to change. Loosen the telescope tube dovetail mounting screws and slide the dovetail forward slightly. Tighten the two dovetail mounting screws and try the test again. 5. If the nose of the telescope pointed downward, the tube is front-heavy and the balance point will need to change. Loosen the telescope tube dovetail mounting screws and slide the dovetail back slightly. Tighten the two dovetail mounting screws and try the test again. 6. Keep adjusting the position of the dovetail bar until you can let the telescope go and it does not rotate up or down. NOTE: For the 114mm and 130mm Newtonian telescopes, you can adjust the balance point of the telescope without moving the dovetail bar. Simply loosen the silver screws found on the two tube rings that surround the telescope tube. You can then slide the telescope tube forward or backward within the rings. When the balance point is reached, tighten the tube ring screws to lock it in place. You can also rotate the tube within the tube rings using this same method to place the eyepiece at a comfortable angle for viewing. RA Axis DEC Axis
  • 14. 14 I ENGLISH Your equatorial mount has the ability to easily track celestial targets by turning the RA slow motion knob or by using an optional motor drive that will turn it for you. In order for the mount to do this accurately, your mount will need to be “polar aligned” or setup so the RA axis of rotation is parallel to Earth’s rotational axis. This sounds more complicated than it is and after you have done it a few times, it will be second nature. The first step of polar aligning is to set your mount at the proper latitude setting for your observing site. To set the latitude on your mount: 1. Adjust the height of all three tripod legs so that your mount is level. Eyeballing this is sufficient. 2. Determine your latitude on Earth. If you have GPS enabled device, such as a tablet or smartphone, you should be able to read your latitude directly from your device. If not, you can find this information online. 3. Locate the latitude scale, found on the side of the equatorial mount near the base. 4. Use the sliding handle to loosen the latitude adjustment locking knob by rotating it counter-clockwise. 5. Adjust the latitude adjustment screw on the back of the mount by rotating it clockwise or counter-clockwise until the pointer above the altitude scale points at your latitude on Earth. Example: In Los Angeles, California, our latitude is 33 degrees. 6. Once you have set your latitude correctly, tighten the latitude adjustment locking knob by rotating it clockwise. NOTE: This latitude setting generally only needs to be done once if you setup the scope in the same location every time you observe. The only time you would need to change this is if you travel with the telescope far enough North or South to change a degree of latitude. This is approximately 70 miles. Small changes such as moving the scope from your front yard to your back yard, or even to different locations within a city, will not require you to change this setting. With your tripod level and your latitude set, the only thing left is to rotate the mount so that the polar axis (the RA axis of rotation) points north. To do this: 1. Setup the telescope so that the telescope tube is directly above the equatorial mount and the front of the telescope tube points directly over the counterweight bar. Lock down the RA and DEC clutch knobs to hold the mount in this position. 2. Locate the direction of north. There are two ways of doing this: a. Use a magnetic compass or a smart device app to find magnetic north. This is the easiest method but unfortunately is not very accurate. Magnetic north can vary by as much as 15 degrees from true north. This is still a good method to get up and operating quickly since some compass apps for smart devices can compensate for magnetic variations and show true north. Latitude Adjustment Screw (Rear) Latitude Adjustment Screw (Locking Bolt) POLAR ALIGNMENT
  • 15. ENGLISH I 15 b. If you have more time and a little knowledge of the night sky, you can actually find true north by looking for the Big Dipper and/or the constellation Cassiopeia. The star Polaris, the North Star, lies about 0.8 degrees away from true celestial north and is bright enough to find with the naked eye from suburban skies. Look for the two stars that form the end of the bowl of the dipper and draw a straight line through them and it will take you directly to Polaris. Using Polaris as true north will get you plenty close to an accurate polar alignment. 3. Slightly loosen the knob between the three tripod legs that holds the EQ mount to the tripod head. Loosen this just enough to rotate the mount inside the tripod head. 4. Grab the equatorial mount and rotate it until the optical tube is pointing in the same direction indicated by the compass needle. If you used the Polaris method, turn the mount until you sight down the length of the tube and see Polaris. 5. Once the mount is aligned to north, tighten the knob connecting the mount to the tripod to secure it in place. NOTE: If you are in the Southern Hemisphere, you will use a compass to locate the south celestial pole. Turn the mount until the telescope points south when using a compass needle. Instead of Polaris, you can use the star Sigma Octantis. The Southern Cross is a good guide to finding this star. With your mount polar aligned, you should find it very easy to track objects as they slowly drift across the sky as Earth rotates underneath them. You can also locate objects using the setting circles found on your mount. For more details on the use of setting circles, please see the section at the end of the manual titled “A Word on Setting Circles”. Cassiopeia N.C.P. Polaris (North Star) Pointer Stars Big Dipper Little Dipper
  • 16. 16 I ENGLISH YOUR FIRST ASTRONOMICAL OBSERVING SESSION THE MOON Now you are ready to take your telescope out at night and do some real observing! Let’s start with the Moon. The Moon takes about one month to go through a complete phase cycle, from new Moon to full Moon and back again. Try observing it at different points during this cycle. While you can observe the Moon any time it is visible in the sky, the best time to view it is from two days after a new Moon up to a few days before a full Moon. During this period, you will be able to see the most detail in craters and lunar mountain ranges. Consult a calendar to find out when the next new Moon will be. 1. With a clear view of the Moon, set up your telescope with the 20 mm eyepiece. 2. Turn on the finderscope and look through it to find the red dot. 3. Move the telescope until you can see the Moon through the finderscope’s window and the red dot is centered on the Moon. 4. Look through the 20 mm eyepiece. Gently turn the focus knobs to adjust the sharpness of the image. CONGRATULATIONS! YOU HAVE NOW OBSERVED YOUR FIRST CELESTIAL OBJECT! You can view many other celestial objects, such as planets, star clusters and nebulae using this same basic technique. CELESTIAL OBSERVING TIPS This section covers visual observing hints for both solar system and deep-sky objects as well as general observing conditions which will affect your ability to observe. MAGNIFICATION You can change the magnification of your telescope by simply changing eyepieces. Both telescopes and eyepieces have focal lengths that are measured in millimeters. To calculate the magnification of a given telescope and eyepiece combination, take the focal length of the telescope and divide it by the focal length of the eyepiece. The resulting number is the magnification factor. For example, the AstroMaster 90EQ has a focal length of 1000 mm. Using the 20 mm eyepiece: 1000 mm = ____________ = 50x 20 mm Focal length of Telescope Magnification = _________________________ Focal length of Eyepiece FIELD OF VIEW Determining the field of view is important if you want to get an idea of the angular size of the object you are observing. To calculate the actual field of view, divide the apparent field of the eyepiece (supplied by the eyepiece manufacturer) by the magnification it gives you in the scope you are using. Using the example in the previous section, we can determine the field of view using the same telescope and 20 mm eyepiece. The 20 mm eyepiece has an apparent field of view of 40°. 40° = ______ = 0.3 degrees of arc 50 Apparent Field of View of Eyepiece Actual Field Of View = ________________________________ Magnification The 20 mm eyepiece has an apparent field of view of 40°. Divide the 40° by the magnification, which is 50 power. This yields an actual field of view of 0.9 degrees or 54 minutes of arc.
  • 17. ENGLISH I 17 THE PLANETS In addition to the Moon, your telescope is capable of observing the 5 brightest planets. Since planets change their positions against the background stars, you will need to consult sources on the web or use a planetarium app on a smart device to help you locate where these are. Here are some things to look for: • Mercury and Venus- Just like the Moon, the two inner planets will go through phases ranging from thin crescents to gibbous phases. • Mars- When it is near opposition (the point in its orbit where it is closest to Earth) you should be able to discern the polar cap and possibly some larger surface features that appear as dark markings on the surface. • Jupiter- Look for the darker methane cloud bands that circle the planet just above and below the equator. If the Great Red Spot is facing the Earth, you may be able to catch a glimpse of it. You will also see the four brightest moons of Jupiter – Io, Europa, Ganymede, and Callisto. These moons are fun to watch because they can move appreciably over just a couple of hours. Occasionally they will travel behind Jupiter or into its shadow and disappear for periods of time. They can also cross the face of Jupiter and you may even see a shadow of the moon crossing with it. There are some useful apps for smart devise that will help you predict when the Great Red Spot can be seen as well as when any interesting events are going to occur with Jupiter’s moons. • Saturn- The rings! Saturn is arguably one of the most beautiful objects to look at in a telescope. If seeing conditions are stable enough, you may even catch the shadow of the rings on the planet and the shadow of the planet on the rings. You should be able to see Titan, the brightest moon of Saturn. DEEP-SKY OBJECTS Deep-sky objects are all of those celestial objects that are outside of our solar system. They include star clusters, planetary nebulae, diffuse nebulae, double stars and other galaxies outside our own Milky Way. Objects such as nebulae and galaxies can be quite large, but they are also very faint. In order to get the best view, you will need to make sure you are in the darkest skies possible. The farther you are away from city lights, the better you will see these objects in the eyepiece. In photographs of nebulae and galaxies, you will see vivid reds and blues. These colors are not visible when you look through the eyepiece. The colorful images were very long exposure images taken over 15 – 60 minutes or more, where your eye only records data on an instant by instant basis. Digital sensors are much more sensitive to reds and blues than the human eye is which is most sensitive in the green part of the spectrum. Still, you will be able to see the soft glow of the Andromeda galaxy and the expanse of the Orion Nebula.
  • 18. 18 I ENGLISH SKY CONDITIONS Sky conditions can significantly affect the performance of your telescope in three ways. • Steadiness of the Air- On windy days, images of the Moon and planets will appear to wave or jump around in the eyepiece; as if you are looking at them through moving water. Nights where winds are calm will offer the best higher magnification views of the planets and the Moon. The best way to judge the stability of the atmosphere is to look at bright stars with the naked eye. If they are “twinkling” or rapidly changing colors, the air is unstable and you are better off using lower powers and looking for deep sky objects. If the stars are sharp and not twinkling, the air is stable and should offer great high magnification planetary views. • Transparency- How clear is the air you are looking through? If there is a high amount of humidity in the air, the faint light from galaxies and nebulae can be scattered and diffused before reaching your telescope, causing a loss of brightness in your image. Debris in the air from local forest fires or even distant volcanic eruptions can contribute to large loss of brightness. Sometimes this humidity or debris can help stabilize the air, making for good planetary and lunar images, but the loss of light would make it difficult to see fainter deep-sky objects. • Sky Brightness- The amount of ambient light in the atmosphere can also effect deep-sky observing. How dark the sky is can depend on your local surroundings. In the middle of a city, sky-glow caused by city lights being reflected back to earth from the sky can overpower the faint light from distant galaxies. Getting away from the bright lights of a major city can make the difference between seeing a faint deep-sky object and missing it altogether. Planets and the moon are plenty bright enough on their own so the effect on observing them is minimal. SELECTING AN OBSERVING SITE If you are going to be observing deep-sky objects, such as galaxies and nebulae, you should consider traveling to a dark sky site that is reasonably accessible. It should be away from city lights, a relatively unobstructed view of the horizon, and upwind of any major source of air pollution. Always choose as high an elevation as possible as this can lower the effects of atmospheric instability and can ensure that you are above any ground fog. While it can be desirable to take your telescope to a dark sky site, it is not always necessary. If you plan to view the planets, the Moon or even some of the brighter deep- sky objects, you can do this from any location, such as your own backyard. Try to setup the scope in a location that is out of the direct path of streetlights or house lights to help protect your night vision. Try to avoid observing anything that lies within 5 to 10 degrees over the roof of a building. Rooftops absorb heat during the day and radiate this heat out at night. This can cause a layer of turbulent air directly over the building that can degrade your image. It is best if you set your telescope up directly on a dirt or grassy surface. Setting up on any raised platform such as a wooden deck or a hard surface like concrete or a sidewalk should be avoided as they transmit vibrations easily that can be transferred to the telescope. Observing through a window is not recommended because the window glass will distort images considerably. And an open window can be even worse, because warmer indoor air will escape out the window, causing turbulence which also affects images. Astronomy is an outdoor activity. CHOOSING THE BEST TIME TO OBSERVE Try not to view immediately after sunset. After the sun goes down, the Earth is still cooling, causing air turbulence. As the night goes on, not only will seeing improve, but air pollution and ground lights will often diminish. Some of the best observing time is often in the early morning hours before dawn. Objects are best observed as they cross the meridian, the imaginary line that runs from north to south through a point directly over your head. This is the point at which objects reach their highest points in the sky and your telescope is looking through the least amount of atmosphere possible. Objects that are rising or setting near the horizon will suffer more atmospheric turbulence since you are looking through a much longer column of air. It is not always necessary to have cloud-free skies if you are looking at planets or the moon. Often broken cloud conditions provide excellent seeing.
  • 19. ENGLISH I 19 COOLING THE TELESCOPE Telescopes require at least 10 minutes to cool down to outside air temperature. This may take longer if there is a big difference between the temperature of the telescope and the outside air. This minimizes heat wave distortion inside the telescope tube (tube currents). ADAPTING YOUR EYES If you are planning to observe deep sky objects at a dark sky site, it is best if you allow your eyes to fully adapt to the dark by avoiding exposure to white light sources such as flashlights, car headlights, streetlights, etc. It will take your pupils about 30 minutes to expand to their maximum diameter and build up the levels of optical pigments to help your eyes see the faint light from a distant target. If you need light to help setup your telescope in the dark, try using a red LED flashlight at as low a brightness setting as possible and avoid looking straight at the light source. This will give you the best chance of capturing those faint deep sky objects. When observing, it is important to observe with both eyes open. This avoids eye fatigue at the eyepiece. If you find this too distracting, cover the unused eye with your hand or an eye patch. The center of your eye works well in bright daylight, but is the least sensitive part of the eye when trying to see subtle detail at low light levels. When looking in the eyepiece for a faint target, don’t look directly at it. Instead look toward the edge of the field of view and the object will appear brighter. ASTROIMAGING One of the first questions most people have about their new telescope is “How can I take images with it?”. Your telescope is capable of imaging the Moon and planets, but deep-sky objects would require a more advanced telescope and mount with finely geared motorized tracking. There are a few different methods for using your telescope for imaging: • Smart Devices or Point-and-Shoot Cameras- This is the easiest and most straight forward method and works well for images of the Moon and planets. Simply hold your device’s camera up to the eyepiece and take the image. While you can use this with any eyepiece, it is generally easier to get an image using a lower power (longer focal length) eyepiece. You will need a steady hand to hold the phone to the eyepiece but you can get good results. • DSLR- Celestron offers adapters that will allow you to attach a Canon or Nikon DSLR body to the telescope in place of the eyepiece. You would be effectively using your telescope as a telephoto lens. This will require a T-adapter for the telescope and a T-ring for the camera body. For more information on the adapters for your specific model of telescope, please go to www.celestron.com. • CMOS Planetary Imagers- These are specialized cameras that replace the eyepiece in your telescope. It would connect to your laptop via a USB port. The camera records video of the planet, then the included software breaks up the video file into individual still frames. The software then combines the individual frames into a single image that contains more detail than was visible in any single frame. This method will provide you the best possible lunar and planetary images, but does require that you have a laptop at the scope. For more information on the planetary camera, please go to www.celestron.com.
  • 20. 20 I ENGLISH DEEP-SKY OBSERVING EQUIPMENT There are some tools that will be indispensable to you for identifying and locating deep-sky objects: • Red Flashlight- This is an essential tool for deep-sky astronomy for reading finder charts or star atlases. In order to see the faint light coming from distant objects like nebulae or galaxies, your eyes must be fully dark adapted with your irises open to the fullest extent to let the most light from your telescope into them. White light from a standard flashlight will causes your eye’s irises to close down and it can take up to a half-hour for your eyes to return to full dark adaptation. Red lights do not have the same effect. We recommend any red LED flashlight that has adjustable brightness output, because even red light, if excessively bright can affect your night vision. These are available through most telescope retailers but can also be found in camping and hardware stores. • Planisphere- A planisphere is a special circular star map that will show you the rough placement of constellations over your head, so you can navigate your way across the sky. Unlike charts you can print online, planispheres are good for any time of year, not just the date or month you printed it for. The planisphere consists of two round disks joined at the center. The bottom disk has a map of the constellations while the top disk has a window cut into it out showing a portion of the sky map. By turning the inner and outer disks to match your specific date and time, the map will display only those constellations visible to you at that time. This is handy for finding rough locations of bright stars and constellations. Planispheres are available through book stores and are available for a number of geographical latitudes in the Northern or Southern Hemispheres. Be sure to pick one that is designed for your location. To get more detailed information on where deep-sky objects reside within constellations you will need a Star Atlas. • Star Atlas- Star atlases are the roadmaps of the sky. Once you have located a constellation with your planisphere, the Star Atlas will show you a detailed, close-up view of that region of sky showing the stars and deep-sky objects that reside in it. These are available through many telescope retailers or bookstores. • Apps and Programs- There are many applications available for a smartphone or tablet that can take the place of the planisphere and star maps. These will give digital representations of the night sky on your device, allowing you to go from a wide view to a zoomed-in view with a touch of the screen. These can be downloaded or purchased from your application store, depending on your platform. There are also some great astronomical sky simulation programs available for your computer that will show you very detailed star maps on screen and can help you plan an observing session before you get outside with printable star maps customized for your date, location and time. STAR HOPPING The easiest way to find your way around the sky is by a technique called star hopping. The first thing you will need to do is measure the field of view of your finderscope. Look in the sky and locate a constellation with bright stars. You can use your planisphere or astronomy app to help identify it. Now find the map in your star atlas that shows this constellation. Center your finderscope on any bright star that you can recognize on the star map. Hold your head 12 inches behind the reflective window of your StarPointer finderscope and move the telescope so that the bright star is at the edge of the field if view of the window (it does not matter which direction you pick). Without moving the telescope, look through the finderscope window and locate another star near the opposite edge of the field of view. Locate this second star on the chart. Measure the distance between these two stars on the chart using a ruler. This distance is represents one finderscope field of view on your atlas. You can now use this measurement to locate celestial objects.
  • 21. ENGLISH I 21 CARE AND CLEANING OF THE TELESCOPE While your telescope requires little maintenance, there are a few things to remember that will ensure your telescope performs at its best. Occasionally, dust and/or moisture may build up on the objective lens. Special care should be taken when cleaning any instrument so as not to damage the optics. If dust has built up on the optics, follow these steps, in order, to clean your scope: 1. Use a camel hair brush to gently remove the larger particles. 2. Use a photographer’s squeeze bulb to blow away any loose debris. You can also use a can of compressed air, such as those sold for cleaning computer keyboards, but you need to be careful. Avoid using cans that are almost empty and be sure to hold the air can vertically. Failure to do this can result in the can spitting propellant out onto the optics. Hold the optical surface at an angle to the spray from the can for approximately two to four seconds. 3. Use an optical cleaning solution of over-the-counter isopropyl alcohol and distilled water in a 50/50 mixture. Apply this solution to a white unscented tissue, then apply the tissue paper to the optics. Low pressure strokes should go from the center of the lens (or mirror) to the outer portion in straight lines like spokes on a wheel. Do not rub in circles! You may experience dew build-up on the optics of your telescope during an observing session. If you want to continue observing, the dew must be removed, either with a hair dryer (on low setting) or by pointing the telescope at the ground until the dew has evaporated. If moisture condenses on the inside of the optics, remove the accessories from the telescope. Place the telescope in a dust-free environment and point it downward until the moisture evaporates. To minimize the need to clean your telescope, replace all lens covers once you have finished using it. Since the telescope tubes are not sealed, the covers should be placed over the openings when not in use. This will prevent contaminants from entering the tubes. Internal adjustments and cleaning should be done only by the Celestron repair department. If your telescope is in need of internal cleaning, please call the factory for a return authorization number and price quote.
  • 22. 22 I ENGLISH Collimation is a painless process and works like this: Pull off the lens cap which covers the front of the telescope and look down the optical tube. At the bottom you will see the pri- mary mirror held in place by three clips 120º apart, and at the top the small oval secondary mirror held in a support and tilted 45º toward the focuser outside the tube wall. The secondary mirror is aligned by adjusting the three smaller screws surrounding the central bolt. The primary mirror is adjusted by the three adjusting screws at the back of your scope. The three locking screws beside them serve to hold the mirror in place after collimation. COLLIMATION OF A NEWTONIAN TELESCOPE While your telescope requires little maintenance, there are a few things to remember that will ensure your telescope performs at its Collimation is the process of aligning the mirrors of your telescope so that they work in concert with each other to deliver properly focused light to your eyepiece. By observing out-of-focus star images, you can test whether your telescope’s optics are aligned. Place a star in the center of the field of view and move the focuser so that the image is slightly out of focus. If the seeing conditions are good, you will see a central circle of light (the Airy disc) surrounded by a number of diffraction rings. If the rings are symmetrical about the Airy disc, the telescope’s optics are correctly collimated. Correctly Aligned Needs Collimation Primary Mirror Secondary Mirror Support for secondary mirror Focuser
  • 23. ENGLISH I 23 ALIGNING THE SECONDARY MIRROR Point the telescope at a lit wall look into the focuser without the eyepiece installed. You may have to twist the focus knob a few turns until the reflected image of the focuser is out of your view. Keep your eye against the back of and centered in the focus tube. Look for the three clips holding the primary mirror in place. If you can’t see them, it means that you will have to adjust the three bolts on the top of the secondary mirror holder, with possibly an Allen wrench or Phillip’s screwdriver. You will have to alternately loosen one and then compensate for the slack by tightening the other two. Stop when you see all three mirror clips. Make sure that all three small alignment screws are tightened to secure the secondary mirror in place. Primary Mirror Clip Ignore the reflected image for now Primary Mirror Clip Primary Mirror Clip Primary Mirror Clip ALIGNING THE PRIMARY MIRROR There are 3 large bolts and 3 small screws at the back of your telescope. The large bolts are the adjusting screws and the small screws are the locking screws. Loosen the large bolts by a few turns. Now run your hand around the front of your telescope keeping your eye to the focuser, you will see the reflected image of your hand. The idea here being to see which way the primary mirror is defected, you do this by stopping at the point where the reflected image of the secondary mirror is closest to the primary mirrors’ edge. When you get to that point, stop and keep your hand there while looking at the back end of your telescope, is there an adjusting screw there? If there is you will want to loosen it (turn the screw to the left) to bring the mirror away from that point. If there isn’t an adjusting screw there, then go across to the other side and tighten the adjusting screw on the other side. This will gradually bring the mirror into alignment. (It helps to have a friend to help for primary mirror collimation. Have your partner adjust the adjusting screws according to your directions while you look in the focuser). After dark, go out and point your telescope at Polaris, the North Star. With an eyepiece in the focuser, take the image out of focus. You will see the same image only now, it will be illuminated by starlight. If necessary, repeat the collimating process only keep the star centered while tweaking the mirror. Secondary Mirror Primary Mirror Stop and keep your hand here Both mirrors aligned with eye looking in focuser
  • 24. 24 I ENGLISH A WORD ON SETTING CIRCLES The Declination axis of the Celestial Sphere are broken down into degrees, minutes and seconds of arc. At the Celestial equator, the Dec coordinate is 0 degrees, with +90 degrees being the North Celestial Pole and -90 degrees being the South Celestial Pole. The Dec coordinate tells you how far north or south to go to find your target. Before you can use the setting circles to find objects in the sky you need to align the setting circles first. When you polar align the mount, you are actually aligning the DEC setting circle as well, so there is nothing more required for this one. The RA setting circle requires some additional information. On the RA setting circle there are two sets of numbers on the dial – one for the northern hemisphere (bottom) and one for the southern hemisphere (top). In order to align the RA setting circle, you will need to be able to identify some of the brighter stars in the sky. You can use a star atlas or astronomy app to help you with this. To align the RA setting circle: 1. Locate a bright star near the celestial equator. The farther you are from the celestial pole the better your reading on the RA setting circle will be. 2. Use your star atlas or you astronomy app to lookup the coordinates of the star you selected. 3. Center the star in the telescope’s eyepiece. 4. Without moving the telescope, rotate the RA setting circle until the RA indicator points at the RA coordinate of the star you selected. NOTE: The RA setting circle does NOT move as the telescope moves in RA, the setting circle must be aligned each time you want to use it to find an object. However, you do not need to use a star each time. Instead, you can use the coordinates of the object you are currently observing. Once the circles are aligned you can use them to find any object with known coordinates. The accuracy of your setting circles is directly related to the accuracy of your polar alignment. The celestial coordinate system is much like the latitude and longitude system that we use to map the Earth. Just like cities on a map have specific longitude and latitude coordinates, stars and deep-sky objects all have Right Ascension (RA) and Declination (DEC) coordinates on the Celestial Sphere. Your telescopes comes with two setting circles, one on the RA axis and one on the DEC axis. The setting circles are 3-inch diameter disks with graduated markings on them that can help you locate objects in the night sky by their celestial coordinates. The celestial sphere seen from the outside showing R.A. and DEC.
  • 25. ENGLISH I 25 To find objects using the setting circles: 1. Select an object to observe. Use a planisphere, star atlas, or astronomy app or program to make sure the object you chose is above the horizon. As you become more familiar with the night sky, this will no longer be necessary. 2. Look up the coordinates of your target. 3. Hold the telescope and release the DEC lock knob. 4. Move the telescope in declination until the indicator is pointing at the correct declination coordinate. 5. Lock the DEC lock knob to prevent the telescope from moving. 6. Hold the telescope and release the RA lock knob. 7. Move the telescope in RA until the indicator points to the correct coordinate. 8. Lock the RA lock knob to prevent the telescope from slipping in RA. Due to errors in polar alignment and the accuracy of the setting circles on this equatorial mount, it is unlikely that you will see the object in your telescope’s eyepiece. You will need to use the slow motion controls and perform a slow circular search until the object falls into the field of view. Please note that the use of setting circles is more complicated than the simple method described in the “Star Hopping” section above. It is recommended to start with Star Hopping, but with a little patience and some practice, setting circles can be a viable way to locate objects in the night sky. Try practicing on bright stars or even planets as they are relatively easy to see in your finderscope until you get the hang of it.
  • 28. 28 I ENGLISH CELESTRON TWO YEAR LIMITED WARRANTY A. Celestron warrants your telescope to be free from defects in materials and workmanship for two years. Celestron will repair or replace such product or part thereof which, upon inspection by Celestron, is found to be defective in materials or workmanship. As a condition to the obligation of Celestron to repair or replace such product, the product must be returned to Celestron together with proof-of-purchase satisfactory to Celestron. B. The Proper Return Authorization Number must be obtained from Celestron in advance of return. Call Celestron at (310) 328-9560 to receive the number to be displayed on the outside of your shipping container. All returns must be accompanied by a written statement setting forth the name, address, and daytime telephone number of the owner, together with a brief description of any claimed defects. Parts or product for which replacement is made shall become the property of Celestron. The customer shall be responsible for all costs of transportation and insurance, both to and from the factory of Celestron, and shall be required to prepay such costs. Celestron shall use reasonable efforts to repair or replace any telescope covered by this warranty within thirty days of receipt. In the event repair or replacement shall require more than thirty days, Celestron shall notify the customer accordingly. Celestron reserves the right to replace any product which has been discontinued from its product line with a new product of comparable value and function. This warranty shall be void and of no force of effect in the event a covered product has been modified in design or function, or subjected to abuse, misuse, mishandling or unauthorized repair. Further, product malfunction or deterioration due to normal wear is not covered by this warranty. CELESTRON DISCLAIMS ANY WARRANTIES, EXPRESS OR IMPLIED, WHETHER OF MERCHANTABILITY OF FITNESS FOR A PARTICULAR USE, EXCEPT AS EXPRESSLY SET FORTH HEREIN. THE SOLE OBLIGATION OF CELESTRON UNDER THIS LIMITED WARRANTY SHALL BE TO REPAIR OR REPLACE THE COVERED PRODUCT, IN ACCORDANCE WITH THE TERMS SET FORTH HEREIN. CELESTRON EXPRESSLY DISCLAIMS ANY LOST PROFITS, GENERAL, SPECIAL, INDIRECT OR CONSEQUENTIAL DAMAGES WHICH MAY RESULT FROM BREACH OF ANY WARRANTY, OR ARISING OUT OF THE USE OR INABILITY TO USE ANY CELESTRON PRODUCT. ANY WARRANTIES WHICH ARE IMPLIED AND WHICH CANNOT BE DISCLAIMED SHALL BE LIMITED IN DURATION TO A TERM OF TWO YEARS FROM THE DATE OF ORIGINAL RETAIL PURCHASE. Some states do not allow the exclusion or limitation of incidental or consequential damages or limitation on how long an implied warranty lasts, so the above limitations and exclusions may not apply to you. This warranty gives you specific legal rights, and you may also have other rights which vary from state to state. Celestron reserves the right to modify or discontinue, without prior notice to you, any model or style telescope. If warranty problems arise, or if you need assistance in using your telescope contact: Celestron - 800.421.9649 NOTE: This warranty is valid to U.S.A. and Canadian customers who have purchased this product from an authorized Celestron dealer in the U.S.A. or Canada. Warranty outside the U.S.A. and Canada is valid only to customers who purchased from a Celestron’s International Distributor or Authorized Celestron Dealer in the specific country. Please contact them for any warranty service. FCC NOTE: This device complies with Part 15 of the FCC Rules. Operation is subject to the following two conditions: (1) This device may not cause harmful interference, and (2) this device must accept any interference received, including interference that may cause undesired operation. Product design and specifications are subject to change without prior notification. This product is designed and intended for use by those 14 years of age and older. © 2017 Celestron • All rights reserved www.celestron.com 2835 Columbia Street • Torrance, CA 90503 U.S.A. Telephone: 800.421.9649 01-17 Printed in China
  • 29. MODE D’EMPLOI Modèles #21062, 21064, 31035, 31042, 31045, 31051 (70EQ, 90EQ, 76EQ, 114EQ, 130EQ, 130EQ-MD) FRANÇAIS
  • 30.
  • 31. FRANÇAIS I 3 SOMMAIRE AVERTISSEMENT SUR LE SOLEIL . . . . . . . . . . . . . . . . . . . . . . . . . . . . . . . . . . . . . . . . . . 5 CONTENU DE LA BOÎTE . . . . . . . . . . . . . . . . . . . . . . . . . . . . . . . . . . . . . . . . . . . . . . . . 6 ASSEMBLAGE DE VOTRE TÉLESCOPE . . . . . . . . . . . . . . . . . . . . . . . . . . . . . . . . . . . . . . . 7 Le trépied et la monture équatoriale . . . . . . . . . . . . . . . . . . . . . . . . . . . . . . . . . . . . . . . . . . . . . 7 Barre de contrepoids et contrepoids . . . . . . . . . . . . . . . . . . . . . . . . . . . . . . . . . . . . . . . . . . . . 8 Contrôles de mouvement lent . . . . . . . . . . . . . . . . . . . . . . . . . . . . . . . . . . . . . . . . . . . . . . . . 8 Le tube du télescope . . . . . . . . . . . . . . . . . . . . . . . . . . . . . . . . . . . . . . . . . . . . . . . . . . . . . 9 La diagonale coudée (Télescopes réfracteurs seulement) . . . . . . . . . . . . . . . . . . . . . . . . . . . . . . . . . 9 L’oculaire . . . . . . . . . . . . . . . . . . . . . . . . . . . . . . . . . . . . . . . . . . . . . . . . . . . . . . . . . . . 10 Le chercheur StarPointer . . . . . . . . . . . . . . . . . . . . . . . . . . . . . . . . . . . . . . . . . . . . . . . . . . . 10 Changer la pile du chercheur . . . . . . . . . . . . . . . . . . . . . . . . . . . . . . . . . . . . . . . . . . . . . . . . . 11 Orienter le télescope . . . . . . . . . . . . . . . . . . . . . . . . . . . . . . . . . . . . . . . . . . . . . . . . . . . . . 11 Alignement du chercheur . . . . . . . . . . . . . . . . . . . . . . . . . . . . . . . . . . . . . . . . . . . . . . . . . . . 12 Équilibrer du télescope . . . . . . . . . . . . . . . . . . . . . . . . . . . . . . . . . . . . . . . . . . . . . . . . . . . . 12 ALIGNEMENT POLAIRE . . . . . . . . . . . . . . . . . . . . . . . . . . . . . . . . . . . . . . . . . . . . . . . . 14 VOTRE PREMIÈRE SESSION D'OBSERVATION ASTRONOMIQUE . . . . . . . . . . . . . . . . . . . . . . . 16 La Lune . . . . . . . . . . . . . . . . . . . . . . . . . . . . . . . . . . . . . . . . . . . . . . . . . . . . . . . . . . . . 16 OBSERVATION DU CIEL CONSEILS . . . . . . . . . . . . . . . . . . . . . . . . . . . . . . . . . . . . . . . . . 16 Agrandissement . . . . . . . . . . . . . . . . . . . . . . . . . . . . . . . . . . . . . . . . . . . . . . . . . . . . . . . . 16 Champ de vision . . . . . . . . . . . . . . . . . . . . . . . . . . . . . . . . . . . . . . . . . . . . . . . . . . . . . . . 16 Les planètes . . . . . . . . . . . . . . . . . . . . . . . . . . . . . . . . . . . . . . . . . . . . . . . . . . . . . . . . . . 17 Objets du ciel profond . . . . . . . . . . . . . . . . . . . . . . . . . . . . . . . . . . . . . . . . . . . . . . . . . . . . 17 Conditions d'observation . . . . . . . . . . . . . . . . . . . . . . . . . . . . . . . . . . . . . . . . . . . . . . . . . . . 18 Sélection d’un site d’observation . . . . . . . . . . . . . . . . . . . . . . . . . . . . . . . . . . . . . . . . . . . . . . . 18 Choisir le meilleur moment pour l’observation . . . . . . . . . . . . . . . . . . . . . . . . . . . . . . . . . . . . . . . . 18 Refroidir le télescope . . . . . . . . . . . . . . . . . . . . . . . . . . . . . . . . . . . . . . . . . . . . . . . . . . . . . 19 Adapter vos yeux . . . . . . . . . . . . . . . . . . . . . . . . . . . . . . . . . . . . . . . . . . . . . . . . . . . . . . . 19 Astrophotographie . . . . . . . . . . . . . . . . . . . . . . . . . . . . . . . . . . . . . . . . . . . . . . . . . . . . . . 19 Équipement d’observation des objets du ciel profond . . . . . . . . . . . . . . . . . . . . . . . . . . . . . . . . . . . 20 Sauts entre les étoiles . . . . . . . . . . . . . . . . . . . . . . . . . . . . . . . . . . . . . . . . . . . . . . . . . . . . 20 ENTRETIEN ET NETTOYAGE DU TÉLESCOPE . . . . . . . . . . . . . . . . . . . . . . . . . . . . . . . . . . . . 21 COLLIMATION D’UN TÉLESCOPE NEWTONIEN . . . . . . . . . . . . . . . . . . . . . . . . . . . . . . . . . . . 22 Aligner le miroir secondaire . . . . . . . . . . . . . . . . . . . . . . . . . . . . . . . . . . . . . . . . . . . . . . . . . . 23 Aligner le miroir primaire . . . . . . . . . . . . . . . . . . . . . . . . . . . . . . . . . . . . . . . . . . . . . . . . . . . 23 Un mot sur les cercles de réglage . . . . . . . . . . . . . . . . . . . . . . . . . . . . . . . . . . . . . . . . . . . . . . 24 NOTES . . . . . . . . . . . . . . . . . . . . . . . . . . . . . . . . . . . . . . . . . . . . . . . . . . . . . . . . . . 26 GARANTIE LIMITÉE CELESTRON DE 2 ANS . . . . . . . . . . . . . . . . . . . . . . . . . . . . . . . . . . . . . 28
  • 33. FRANÇAIS I 5 • Ne regardez jamais directement le Soleil à l'œil nu ou avec un télescope, à moins d'utiliser un filtre adapté. Cela pourrait entraîner des lésions oculaires permanentes et irréversibles. • N'utilisez jamais votre télescope pour projeter une image du soleil sur une surface quelconque. Une concentration de chaleur dangereuse peut être générée à l’intérieur et endommager le télescope et les accessoires attachés. • Ne jamais utiliser un filtre solaire d'oculaire ou une cale de Herschel. La concentration de chaleur au sein du télescope peut entraîner des dommages à ces dispositifs, laissant la lumière du Soleil non filtrée arriver directement à vos yeux. • Ne laissez pas le télescope sans surveillance, particulièrement en présence d’enfants ou d’adultes qui ne sont pas familiarisés avec son utilisation. AVERTISSEMENT SUR LE SOLEIL
  • 34. 6 I FRANÇAIS 1. Lentille de l'objectif 2. Tube de télescope 3. Cercle de réglage DEC 4. Cercle de réglage AD 5. Molette de mouvement AD lent 6. Contrepoids 7. Barre de contrepoids 8. Trépied 9. Plateau à accessoires 10. Support à queue d’aronde 11. Chercheur StarPointer 12. Oculaire 13. Diagonale coudée 14. Bouton de mise au point 15. Les molettes de mouvement DEC lent 16. Monture Équatoriale 17. Vis de réglage de latitude Nous vous recommandons de conserver la boîte de votre télescope afin de pouvoir l'utiliser pour son rangement lorsqu'il n'est pas utilisé. Déballez le contenu de la boîte avec soin, car certaines pièces sont petites. Utilisez la liste des pièces ci-dessous pour vous assurer que toutes les pièces et tous les accessoires sont inclus dans la boîte. LISTE DES PIÈCES CONTENU DE LA BOÎTE (Réfracteur Newtonien130 mm illustré) (Réfracteur 90 mm illustré) 12 11 1 13 7 9 5 14 10 15 16 178 6 4 3 2 1. Lunette de recherche StarPointer 2. Oculaire 3. Molette de mise au point 4. Tube de télescope 5. Anneaux de tube 6. Cercle de réglage DEC 7. Cercle de réglage AD 8. Contrepoids 9. Barre de contrepoids 10. Molette de mouvement AD lent 11. Miroir primaire 12. Les molettes de mouvement DEC lent 13. Vis de réglage de latitude 14. Trépied 15. Plateau à accessoires 4 3 8 116 1 2 5 7 10 14 15 12 13 9
  • 35. FRANÇAIS I 7 ASSEMBLAGE DE VOTRE TÉLESCOPE LE TRÉPIED ET LA MONTURE ÉQUATORIALE Ce chapitre explique comment assembler votre télescope AstroMaster EQ. Il est recommandé d’assembler votre télescope en intérieur la première fois afin de pouvoir identifier facilement les différentes pièces et de vous familiariser avec la bonne procédure de montage avant de l’utiliser en extérieur. Pour assembler le trépied : 1. Sortez le trépied et la monture de la boîte. 2. Desserrez les molettes au bas de chaque pied et étendez la partie intérieure du pied à la longueur souhaitée. Serrez les molettes pour fixer les pieds, en veillant à ne pas trop les serrer. 3. Mettez le trépied en position verticale et écartez l'un de l'autre ses pieds .jusqu'à ce qu'un déclic confirme que l'entretoise centrale soit bien en place. 4. Positionnez le plateau à accessoires sur le trou à détrompeur situé au centre de l’entretoise. Faites pivoter le plateau jusqu’à ce que les trois onglets de ce dernier s’enclenchent dans les ouvertures de chaque bras de l’entretoise centrale. La monture équatoriale permet d'incliner l'axe de rotation du télescope de manière à ce que vous puissiez suivre le déplacement des étoiles dans le ciel. 1. Sortez le trépied et la monture de la boîte. 2. Positionnez la bosse de la base de la monture équatoriale dans la dépression présente sur le dessus de la tête du trépied. 3. Utilisez la grande molette sous la tête du trépied pour fixer la monture sur le trépied. Serrez jusqu’à ce que les pièces soient bien serrées, mais pas en excès. 4. Vissez la vis de réglage de latitude dans le pas de vis présent à l’arrière de la monture. Vissez-la légèrement pour le moment, car vous l’utiliserez pour effectuer des réglages plus tard. Latitude Vis Boulon de monture
  • 36. 8 I FRANÇAIS BARRE DE CONTREPOIDS ET CONTREPOIDS Pour équilibrer correctement le tube de votre télescope, la monture est livrée avec une barre de contrepoids et des contrepoids. 1. Retirez la barre de contrepoids dans la boîte et vissez-la dans le pas de vis présent sur le dessous de l’axe de déclinaison de la monture. 2. Retirez la vis de sécurité orange du contrepoids située à l'extrémité basse de la barre de contrepoids. 3. Desserrez la grande molette noire située sur le côté du contrepoids. Assurez-vous que le contrepoids n’est pas obstrué. 4. Faites glisser le contrepoids jusqu’à environ la moitié de la barre de contrepoids et serrez la molette de verrouillage pour maintenir le contrepoids en place. Si votre télescope est livré avec plus d’un contrepoids, ajoutez le second de la même manière que le premier. 5. Remettez en place la vis de sécurité orange du contrepoids située à l'extrémité basse de la barre de contrepoids. Cela évitera que le contrepoids ne tombe de la barre s’il se desserre par accident. CONTRÔLES DE MOUVEMENT LENT La monture AstroMaster est équipée de deux molettes de contrôle de mouvement lent qui vous permettent d’effectuer des réglages de pointage fins sur les axes d’Ascension Droite et de Déclinaison, également appelés AD et DEC. Pour installer les molettes : 1. Sortez les deux molettes de la boîte. Les deux molettes sont identiques, il n’est donc pas important quelle molette vous utilisez sur chaque axe. 2. Desserrez la vis de réglage située à l’extrémité des deux molettes. 3. Glissez-la dans l’extrémité de l’axe des engrenages AD, aussi loin que possible puis serrez la vis de réglage pour la fixer en place. La molette AD peut être installée sur le côté gauche ou le côté droit de la monture, selon vos préférences. 4. Faites glisser l’autre molette dans l’axe des engrenages DEC puis serrez la vis de réglage pour la fixer en place. Trou pour la barre de contrepoids Barre de contrepoids Contrepoids Axe AD Axe DEC Mouvement lent Molettes de contrôle
  • 37. FRANÇAIS I 9 LA DIAGONALE COUDÉE (télescopes réfracteurs seulement) La diagonale coudée fixée à l'arrière d'un télescope réfracteur contient un petit prisme qui réfléchit la lumière à un angle de 90°, permettant ainsi d'adopter une position plus confortable pour l'observation. La majorité des télescopes astronomiques relayent une image soit inversée verticalement ou horizontalement. Ma diagonale coudée corrige cela de manière à ce que l’image soit à 100% correctement orientée, faisant de votre télescope un outil parfait pour l’observation terrestre de jour. Pour insérer la diagonale dans les réfracteurs AstroMaster 70EQ et 90EQ : 1. Retirez les capuchons des deux extrémités de la diagonale en étoile. 2. Desserrez les vis de réglage à l'arrière de le foyer et retirez le petit capuchon antipoussière. 3. Insérez le plus petit tube du renvoi coudé à l'arrière du foyer et fixez-le en serrant les vis de réglage. Vous pouvez modifier l’orientation de la diagonale en étoile comme désiré avant de serrer les vis. LE TUBE DU TÉLESCOPE Le tube du télescope s’attache à la monture équatoriale à l’aide d’un système de retrait rapide en queue d’aronde. Sur tous les télescopes réfracteurs newtoniens de 76 mm, la queue d’aronde est fixée directement au tube du télescope. Dans le cas des télescome newtoniens de 114 mm et de 130 mm, la queue d’aronde est fixée aux anneaux de tube qui maintiennent le tube. 1. Desserrez les deux molettes de fixation présentes sur les côtés du support en queue d'aronde sur le dessus de la monture équatoriale. Assurez-vous qu’elles soient assez desserrées pour permettre à la barre de queue d’aronde de glisser dans le support. 2. Faites glisser la barre de queue d’aronde dans le support de monture, en vous assurant que la queue d’aronde soit complètement insérée. 3. Resserrez chaque molette pour fixer le télescope en position. NOTE : Une diagonale en étoile ne permet pas d’obtenir la mise au point avec un télescope newtonien. L’image apparaîtra toujours inversée verticalement. Les télescopes newtoniens sont livrés avec un oculaire coudé de 20 mm spécial qui comporte un prisme de renvoi pour l’observation terrestre. Molettes de montage
  • 38. 10 I FRANÇAIS Pour insérer l’oculaire dans les réfracteurs AstroMaster 70EQ et 90EQ : 1. Desserrez les vis de réglage situées à l'extrémité ouverte de la diagonale en étoile. 2. Insérez le barillet argenté de l'oculaire 20 mm dans la diagonale en étoile. 3. Serrez les vis de réglage pour fixer solidement l'oculaire. 4. Pour obtenir l'image la plus nette qui soit, effectuez la mise au point en regardant dans l'oculaire et en tournant lentement les molettes de mise au point jusqu'à ce que vous obteniez l'image la plus nette. Pour insérer l’oculaire dans les réfracteurs AstroMaster 76EQ, 114EQ et 130EQ : 1. Desserrez les vis réglage à l'arrière de le foyer et retirez le petit capuchon antipoussière. 2. Insérez le barillet argenté de l'oculaire 20 mm directement dans le foyer. 3. Serrez les vis de réglage pour fixer bien en place l'oculaire. 4. Pour obtenir l'image la plus nette qui soit, effectuez la mise au point en regardant dans l'oculaire et en tournant lentement les molettes de mise au point jusqu'à ce que vous obteniez l'image la plus nette. LE CHERCHEUR STARPOINTER Votre télescope est livré avec un chercheur à point rouge StarPointer que vous utiliserez comme outil de visée lorsque vous pointerez le télescope en direction d'une cible. Pour installer le chercheur : 1. Desserrez les deux vis cruciformes sur le côté du chercheur et faites glisser la pince sur le support en queue d’aronde situé près du foyer. La grande fenêtre du chercheur doit être orientée vers l'avant du télescope. 2. Fixez le chercheur en place en serrant les deux vis cruciformes. Ne pas serrer trop fort. Veillez simplement à ce qu’il n’y ait plus de jeu. 3. Retirez la petite languette de plastique située sous le capot de la pile en tirant dessus. Cette languette est présente pour éviter que la pile ne se décharge pendant la livraison du produit. Interrupteur On/Off Pile Compartiment Gauche droite Réglage de mise au point Haut/Bas Réglage de mise au point L’OCULAIRE Votre télescope est livré avec deux oculaires. L’oculaire de 20 mm offre un faible agrandissement avec un champ de vision modérément large. L’oculaire de 10 mm offre un agrandissement plus puissant, mais avec un champ de vision plus étroit. D'autres oculaires peuvent être achetés pour augmenter ou diminuer le grossissement à votre gré. Lorsque vous localisez un objet pour la première fois, il est conseillé d’utiliser l’oculaire de 20 mm, et une fois qu’il est centré, de changer avec l’oculaire de 10 mm pour « agrandir » l’image.
  • 39. FRANÇAIS I 11 CHANGER LA PILE DU CHERCHEUR Pour remplacer la pile du StarPointer, retirez le chercheur du télescope et retournez-le. Le compartiment de la pile est situé directement en dessous du grand ensemble de lentille. À l’aide d’un petit tournevis ou de votre ongle, soulevez doucement le capot pour le retirer. La pile est maintenue en place par un ressort. Soulevez doucement le contact et tournez le chercheur sur le côté. La pile sort aisément de son logement. Remplacez la pile par une pile- bouton CR2032 de 3V. Faites glisser la pile sous le contact, en vous assurant que le terminal positif de la pile (le côté marqué d’un « + ») est tourné vers le haut, vers le ressort. La pile doit s’enclencher dans le logement. Remettez le capot en place en faisant correspondre les onglets avec les trous sous le chercheur et en pressant. Assurez-vous de mettre l’ancienne pile au rebut dans le respect de l’environnement. Pile Compartiment ORIENTER LE TÉLESCOPE La monture équatoriale AstroMaster a été conçue pour permettre le mouvement dans deux directions sur le système de coordonnées célestes. L’axe d’Ascension Droite, ou AD, pivote sur un axe est/ouest. L’axe de Déclinaison, ou DEC, pivote sur un axe nord/sud. En déplaçant le télescope sur les axes AD et DEC, vous pourrez pointer le télescope sur n’importe quelle cible dans le ciel. Pour orienter le télescope sur de longues distances : 1. Desserrez les molettes de frein AD et DEC situées sur le côté de la monture en les faisant tourner dans le sens anti-horaire. Cela permettra au télescope d’être orienté librement dans toutes les directions. 2. Orientez le télescope à la main sur les axes AD et DEC jusqu’à ce que vous soyez presque sur la position désirée. 3. Serrez les deux molettes de frein dans le sens horaire pour que la monture ne puisse plus bouger. Pour effectuer des réglages fins : 1. Assurez-vous que chaque frein est serré. 2. Faites tourner les molettes de mouvement lent AD et DEC comme requis pour centrer un objet dans la vue de l’oculaire. NOTE : Si les freins sont desserrés, les molettes de mouvement lent ne fonctionneront pas.
  • 40. 12 I FRANÇAIS ALIGNEMENT DU CHERCHEUR Le chercheur StarPointer est un viseur de type réflexe qui utilise une DEL rouge pour projeter un point rouge sur la fenêtre de verre ronde. Lorsque vous regardez dans la fenêtre, le point rouge se superpose à la cible. La première fois que vous assemblez votre télescope, vous devrez aligner le chercheur avec l'élément optique principal du télescope. Bien que cette étape puisse être effectuée de nuit, il est beaucoup plus facile de l'effectuer en journée. Une fois que vous avez terminé l'alignement du chercheur, vous ne devriez pas avoir à répéter cette étape à moins que le chercheur ait été déplacé ou retiré. Pour installer votre chercheur StarPointer : 1. Installez le télescope à l'extérieur pendant la journée. À l'œil nu, trouvez un objet facilement reconnaissable, comme un lampadaire, une plaque d'immatriculation de voiture ou un grand arbre. L'objet doit être le plus loin possible, de préférence à au moins 400 m (un quart de mille). 2. Retirez la housse de protection principale du télescope et assurez-vous que votre oculaire 20 mm a été installé. 3. Orientez le télescope horizontalement et verticalement afin qu'il pointe à approximativement vers l'objet que vous avez choisi à l'étape 1. 4. Regardez à travers l'oculaire du télescope et déplacez manuellement le télescope jusqu'à ce que l'objet que vous avez choisi se trouve dans le centre de vision. Sil'image est floue, tournez tout doucement les molettes de mise au point jusqu'à ce que l'image soit nette. 5. Une fois que l'objet est centré dans votre oculaire 20 mm, allumez le chercheur en tournant jusqu'à la fin de sa course la molette de réglage d'intensité lumineuse/d'alimentation. Cette molette est située au bas de l'appareil. 6. Avec votre tête située à environ 30 cm (1 pied) derrière le chercheur, regardez par la fenêtre ronde du chercheur et localisez le point rouge. Il sera probablement près de, mais pas exactement sur l'objet que vous voyez lorsque vous regardez à travers l'oculaire de 20 mm. 7. Sans déplacer le télescope, utilisez les deux molettes de réglage situées sur le côté et en dessous du chercheur. L'une contrôle le mouvement gauche-droite du réticule, tandis que l'autre contrôle le mouvement haut-bas. Ajustez les deux molettes jusqu'à ce que le point rouge apparaisse sur l'objet que vous observez dans l'oculaire de 20 mm. Choisissez maintenant quelques autres cibles lointaines pour vous exercer à pointer votre télescope. Regardez par la fenêtre du chercheur StarPointer et placez le point rouge sur la cible que vous essayez de visualiser et vérifiez qu'elle est visible dans l'oculaire de 20 mm du télescope. NOTE : N'oubliez pas d'éteindre le chercheur lorsqu'il n'est pas utilisé afin d'économiser les piles. ÉQUILIBRER DU TÉLESCOPE Pour limiter les tensions non nécessaires subies par la monture, le télescope doit être correctement équilibré autour de l'axe polaire. Pour équilibrer la monture sur l’axe AD : 1. Vérifiez que le télescope est correctement attaché à la monture, les molettes de la queue d’aronde serrées. 2. Desserrez la molette de frein AD pour que le télescope puisse être orienté librement sur l’axe AD. 3. Faites pivoter le télescope sur l’axe AD jusqu’à ce que le tube du télescope soit sur le côté de la monture et que la barre de contrepoids soit parallèle au sol. 4. Lâchez doucement le télescope et notez quel côté est le plus lourd, celui du télescope ou celui du contrepoids. 5. Si le côté du contrepoids est plus lourd, desserrez la molette de verrouillage de ce dernier et faites-le glisser vers le haut de la barre (vers le tube) sur une courte distance. Serrez la molette et réessayez le test d’équilibre. 6. Si le côté du tube est plus lourd, desserrez la molette de verrouillage de ce dernier et faites-le glisser vers le bas de la barre (en l’éloignant du tube) sur une courte distance. Serrez la molette et répétez le test d’équilibre. 7. Continuez a effectuer la correction jusqu’à ce que le télescope ne penche plus d’un côté plus que de l’autre lorsque vous le lâchez.
  • 41. FRANÇAIS I 13 Pour équilibrer le télescope sur l’axe DEC : 1. Positionnez le télescope de la même manière que celle décrite pour le test d’équilibre AD ci-dessus, le tube du télescope d’un côté de la monture et la barre de contrepoids de l’autre côté. Serrez la molette de frein AD pour maintenir la monture en place. 2. En tenant le télescope fermement d’une main, desserrez la molette de frein DEC et faites pivoter le télescope de manière à ce qu’il soit parallèle au sol. 3. Lâchez doucement le tube du télescope et notez si le télescope commence à pivoter vers le haut ou le bas puis verrouillez la molette de frein DEC pour fixer le tube en place. 4. Si le nez du télescope pointe vers le haut, le tube est plus lourd sur sa section arrière et le point d’équilibre doit donc être ajusté. Desserrez les vis de monture de la queue d’aronde et faites-la glisser vers l’avant sur une courte distance. Serrez les deux vis de monture et répétez le test. 5. Si le nez du télescope pointe vers le bas, le tube est plus lourd sur sa section avant et le point d’équilibre doit donc être ajusté. Desserrez les vis de monture de la queue d’aronde et faites-la glisser vers l’arrière sur une courte distance. Serrez les deux vis de monture et répétez le test. 6. Continuez a effectuer la correction jusqu’à ce que le télescope ne pivote plus d’un côté plus que de l’autre lorsque vous le lâchez. NOTE : Dans le cas des télescope newtoniens de 114 mm et de 130 mm, vous pouvez effectuer l’équilibrage sans déplacer la barre de queue d’aronde. Desserrez simplement les vis argentées situées sur les anneaux entourant le tube du télescope. Vous pouvez ensuite faire glisser le tube vers l’avant ou l’arrière dans les anneaux. Lorsque le point d’équilibre est atteint, serrez les vis argentées de nouveau. Vous pouvez également faire pivoter le tube dans les anneaux en utilisant la même méthode pour améliorer votre confort d’observation en changeant l’angle de l’oculaire. Axe AD Axe DEC
  • 42. 14 I FRANÇAIS Votre monture équatoriale a la capacité de suivre aisément les cibles célestes en faisant tourner le molette de mouvement AD lent ou en utilisant l’entraînement moteur en option. Pour garantir que la monture fasse cela avec précision, cette dernière devra être «  alignée sur l’axe polaire », ou configuré de manière à ce que l’axe de rotation AD effectue son mouvement parallèlement à l’axe de rotation de la Terre. Cela semble plus compliqué à effectuer que ça ne l’est en réalité, et après l’avoir fait quelques fois, l’opération deviendra simple comme bonjour. La première étape pour effectuer l’alignement sur l’axe polaire est de configurer la latitude utilisée en corrélation avec votre site d’observation. Pour définir la latitude de votre monture : 1. Ajustez la hauteur de chacun des trois pieds du trépied. Un ajustement grossier est suffisant. 2. Déterminez votre latitude sur la Terre. Si vous disposez d’un appareil équipé d’une fonction GPS, comme une tablette ou un téléphone intelligent, vous pourrez lire la latitude directement depuis celui-ci. Sinon, vous pourrez trouver cette information en ligne. 3. Repérez la graduation de latitude, présente sur le côté de la monture équatoriale, près de sa base. 4. Utilisez la poignée coulissante pour desserrer la molette de verrouillage du réglage de la latitude en la faisant tourner dans le sens anti-horaire. 5. Ajustez la vis de réglage de latitude située sur l’arrière de la monture en la faisant pivoter dans le sens horaire et anti-horaire jusqu’à ce que le pointeur situé au-dessus des graduations pointe sur votre latitude sur la Terre. Exemple : À Los Angeles, en Californie, votre latitude est de 33 degrés. 6. Une fois votre latitude correctement définie, resserrez la molette de réglage de la latitude en la faisant pivoter dans le sens horaire. NOTE : Ce réglage de latitude ne doit en général n’être effectué qu’une fois tant que vous utilisez le télescope sur le même lieu d’observation. Son réglage ne sera requis que si vous-vous déplacez assez loin vers le sud ou le nord entre les observations. Un déplacement d’environ 110 km (70 miles) nécessite un ajustement de la latitude. De petits déplacements, comme par exemple déplacer le télescope depuis le jardin situé à l’avant de la maison sur celui situé à l’arrière, ou même sur un autre site de la même ville, ne nécessite pas le réglage de la latitude. Une fois votre trépied à niveau et votre latitude définie, la seule étape restante est de faire pivoter la monture de manière à ce que l’axe polaire (l’axe de rotation AD) soit orienté vers le nord. Pour faire cela : 1. Positionnez le télescope de manière à ce que le tube soit directement au-dessus de la monture équatoriale et que l’avant du tube du télescope pointe directement au-dessus de la barre de contrepoids. Serrez les molette de frein AD et DEC pour maintenir la monture en place. 2. Repérez le nord. Vous pouvez faire cela de deux manières : a. Utilisez une boussole ou une application sur un appareil intelligent pour trouver le nord magnétique. Ceci représente le moyen le plus simple, mais malheureusement le moins précis également. Le nord magnétique peut varier de jusqu’à 15 degrés par rapport au pôle nord géographique. Il est malgré tout un moyen adéquat et rapide car les applications sur les appareils intelligents sont capables de compenser cette imprécision. Vis de réglage de la latitude (Arrière) Vis de réglage de la latitude (Boulon de verrouillage) ALIGNEMENT POLAIRE
  • 43. FRANÇAIS I 15 b. Si vous disposez de plus de temps et avez une bonne connaissance du ciel nocturne, vous pouvez trouver le pôle nord géographique en cherchant la Grande casserole et/ou la constellation de Cassiopée. L’étoile Polaire, l’Étoile du nord, se trouve à environ 0,8 degrés du vrai nord céleste et est assez brillante pour être repérée à l'œil nu depuis les sites en banlieue. Recherchez les deux étoiles qui forment l’extrémité du récipient de la casserole et tirez une ligne directe entre elles pour repérer l’étoile Polaire. Utiliser l’étoile Polaire comme vrai nord vous permettra de connaître avec une précision très correcte la position du vrai nord géographique. 3. Desserrez légèrement la molette située entre les trois pieds du trépied qui fixe la monture EQ à la tête du trépied. Desserrez-la juste assez pour pouvoir faire pivoter la monture sur la tête du trépied. 4. Tenez la tête de la monture équatoriale et faites-la pivoter jusqu’à ce que le tube du télescope pointe dans la même direction que l’aiguille de la boussole. Si vous utilisez l’étoile Polaire pour vous orienter, alignez le tube dans la longueur sur l’étoile. 5. Une fois la monture alignée sur le nord, serrez la molette de fixation à la monture pour la fixer en place. NOTE : Si vous-vous trouvez dans l’hémisphère sud, utilisez une boussole pour localiser le pôle céleste sud. Tournez la monture jusqu’à ce que le télescope pointe vers le sud en vous aidant de l’aiguille de la boussole. Au lieu de l’étoile Polaire, vous pouvez utiliser l’étoile Sigma Octantis. La Croix du sud est un guide fiable pour trouver cette étoile. Une fois votre monture alignée sur l’axe polaire, il devient très facile de suivre les objets sur leur lente dérive dans le ciel causée par la rotation de la Terre. Vous pouvez localiser les objets en utilisant les cercles de réglage présents sur votre monture. Pour en savoir plus sur les cercles de réglage, voyez la section « Un mot sur les cercles de réglage », à la fin du mode d’emploi. Étoiles pointeuses Petite ourse Étoile polaire Étoile du nord Cassiopée N.C.P. Grande ourse 1. Zénith 2. Latitude 3. Sud 4. Direction de l’axe polaire 5. Direction du pôle nord céleste 6. Horizon 7. Latitude Nord 8. Direction du pôle nord céleste 9. Équateur 10. Terre
  • 44. 16 I FRANÇAIS VOTRE PREMIÈRE SESSION D'OBSERVATION ASTRONOMIQUE LA LUNE Vous êtes maintenant prêt à installer votre télescope à l'extérieur et faire de véritables observations pendant la nuit! Commençons par la Lune. Les phases de la Lune s'étendent sur un cycle complet d'environ un mois, de la nouvelle Lune à la pleine Lune et vice versa. Essayez de l'observer à différents moments au cours de ce cycle. Alors que vous pouvez observer la Lune à n'importe quel moment lorsqu'elle est visible dans le ciel nocturne, le meilleur moment pour la voir est deux jours après une nouvelle Lune jusqu'à quelques jours avant une pleine Lune. Durant cette période, vous pourrez voir plus de détails relatifs aux cratères et aux chaînes de montagnes lunaires. Consultez un calendrier pour connaître la prochaine apparition de la nouvelle Lune. 1. Lorsque la Lune se voit clairement, installez votre télescope avec l'oculaire 20 mm. 2. Allumez le chercheur et regardez à travers celui-ci pour trouver les points rouges. 3. Déplacez le télescope de façon à voir la Lune par la fenêtre du chercheur et le point rouge centré sur la Lune. 4. Regardez dans l'oculaire 20 mm. Tournez tout doucement les molettes de mise au point pour régler la netteté de l'image. FÉLICITATIONS! VOUS AVEZ OBSERVÉ VOTRE PREMIER OBJET CÉLESTE! Vous pouvez utiliser cette technique de base pour observer d'autres corps célestes, tels que des planètes, des amas d'étoiles ou des nébuleuses. OBSERVATION DU CIEL CONSEILS Cette section offre des conseils sur l'observation des objets du système solaire et du ciel profond ainsi que des remarques sur les conditions d'observation pouvant avoir une influence sur sa qualité. AGRANDISSEMENT Vous pouvez changer l’agrandissement de votre télescope en interchangeant simplement les oculaires. Le télescope et les oculaires possèdent des longueurs de focale exprimées en millimètres. Pour calculer la puissance d’agrandissement d’un ensemble télescope-oculaire, divisez la longueur de focale du télescope et divisez-la par celle de l’oculaire. Le résultat obtenu est le facteur d’agrandissement. Par exemple, l’AstroMaster 90EQ offre une longueur de focale de 1000 mm. Si vous utilisez un oculaire de 20 mm : 1000 mm = ____________ = 50x 20 mm Longueur de focale du télescope Grossissement = _____________________________ Longueur de focale de l'oculaire CHAMP DE VISION Déterminer le champ de vision est important si vous voulez avoir une idée de la taille angulaire de l'objet observé. Pour calculer le champ de vision réel, divisez le champ de vision apparent de l'oculaire (fourni par le fabricant de l'oculaire) par l’agrandissement offert par le télescope. En utilisant l'exemple de la section précédente, nous pouvons déterminer le champ de vision en utilisant le même oculaire de 20 mm. L'oculaire de 20 mm à un champ de vision apparent de 40°. 40° = ______ = 0,3 degrés d’arc 50 Champ de vision apparent de l'oculaire Champ de vision réel = __________________________________ Agrandissement L'oculaire de 20 mm à un champ de vision apparent de 40°. Divisez les 40° par la valeur de grossissement, qui est de puissance 50. Cela permet un champ de vision réel de 0,9 degrés, soit 54 minutes d’arc.
  • 45. FRANÇAIS I 17 LES PLANÈTES En plus de la Lune, votre télescope est capable d’observer les 5 planètes les plus lumineuses. Les planètes changent de position sur le fond d’étoiles, il vous sera donc nécessaire de consulter Internet ou une application planétarium sur un appareil compatible pour vous aider à les localiser. Voici quelques conseils pour localiser les planètes : • Mercure et Vénus- À l’instar de la Lune, les deux planètes intérieures passent par plusieurs phases, allant d’un croissant fin à des phases gibbeuses. • Mars- Lorsqu’elle est en opposition proche (le point de son orbite le plus proche de la Terre), vous devriez pouvoir discerner les calottes polaires de la planète et probablement certaines caractéristiques de surface les plus importantes, visibles comme des marques plus sombres. • Jupiter- Essayez d’observer les bandes de nuages de méthane qui encerclent la planète, immédiatement au-dessus et au-dessous de son équateur. Si la grande Tache rouge fait face à la terre, vous devriez pouvoir la discerner. Vous verrez également les quatre lunes les plus lumineuses de Jupiter – Io, Europe, Ganymède et Callisto. Ces lunes sont amusantes à observer, car elles se déplacent de manière visible en l’espace de quelques heures. Occasionnellement, elles passeront derrière Jupiter ou seront occultées par son ombre, et disparaîtront pendant un moment. Elles peuvent également passer devant la face de Jupiter, projetant sur elle une ombre observable. Il existe quelques applications utiles qui vous aideront à prédire quand la grande Tache rouge sera visible ainsi que d’être au fait des événements intéressants subits par les lunes. • Saturne- Les anneaux! Saturne est sans doute l’un des plus beaux objets à observer à l’aide d’un télescope. Si les conditions d’observations sont assez stables, vous pourriez même pouvoir observer l’ombre projetée par les anneaux sur la planète ou celle projetée par la planète sur les anneaux. Vous devriez également être capable de discerner Titan, la Lune la plus brillante de Saturne. OBJETS DU CIEL PROFOND Les objets du ciel profond sont tous ceux situés en dehors des limites de notre système solaire. Ces objets sont des amas d'étoiles, des nébuleuses planétaires, des nébuleuses diffuses, des étoiles doubles et d’autres galaxies situées en dehors de notre Voie lactée. Les objets comme les nébuleuses et les galaxies peuvent être de grande taille, mais également peu brillants. Pour garantir la meilleure observation, assurez-vous de choisir une nuit aussi sombre que possible. Plus vous êtes éloigné des lumières de la ville, plus aisément vous pourrez observer ces objets dans l’oculaire. Sur les photos des nébuleuses et des galaxies, vous verrez des rouges et des bleus vifs. Ces couleurs ne sont pas visibles dans l’oculaire. Ces images colorées sont des images effectuées à de très longues expositions de 15 à 60 minutes ou plus, alors que votre œil ne capture les données visuelles qu’à un instant T seulement. Les capteurs numériques sont beaucoup plus sensibles aux bleus et aux rouges que l'œil humain, qui est plus sensible à la partie verte du spectre des couleurs. Malgré tout, vous pourrez observer l’éclat doux de la galaxie d’Andromède et la vaste surface de la nébuleuse d’Orion.