1. HOW TO CREATE A BLOG AND MAINTAIN IT
A blog is an essential part of building your reputation as an individual, or brand as a company.
It also helps you show your online presence to others/customers/followers etc.
Don’t be afraid!! Hang on, it’s an easy process, just be with me…
Step 1:
Understand the purpose of your blog
Answer these questions before proceeding with your blogging efforts:
What about blogging caught your attention?
Why blogging instead of other activities?
Do you have the time to blog consistently?
Are you willing to make sacrifices to commit to your blog?
What do you hope to achieve with your blog?
Only when you’re fully aware of why you’re blogging and whether you can fully commit should you continue with
establishing your blog.
Step 2:
There are many brands that do blog hosting for free:
Wix.
Weebly.
WordPress.
000webhost.
x10hosting.
Medium.
Ghost.
Blogger.
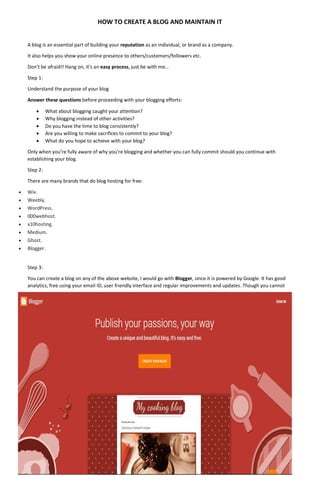
Step 3:
You can create a blog on any of the above website, I would go with Blogger, since it is powered by Google. It has good
analytics, free using your email ID, user friendly interface and regular improvements and updates. Though you cannot
2. many changes to the appearances, you need to focus more on content and images. We don’t even need that unless you
are from IT, Google does it all for you.
Search for Blogger on Google
Click on “CREATE YOUR BLOG”
Then it will ask you to login via your Gmail Account, do the login. You can create a new account there itself if you don’t
have one.
It will then give you access to your Google+ profile.
Click on “View my complete profile” to view yours. You can update your info there, Google+ is very similar to Facebook.
Then click on “Continue to Blogger”
Your welcome screen will show a notice regarding cookies.
It is shown due to copyright issues. It means that the content you are going to upload will go through proof-reading
every time you upload anything (image, video or article).
3. You just have to take care that you use your own content.
If you want to make your blog look good using images not copyrighted, go to www.unsplash.com . This website hosts
free images of all categories.
In settings you can change your host from Google+ to Blogger. It means your blog URL will consist of
example.blogger.com
Click on “Reading List” to read about latest updates and suggestions regarding Blogging. It will help you create an
impressive page.
Now let’s get working!! Just create your First Blog!!
Click on “New Blog” on left corner of your screen. You will see…
You can give an attractive title for your blog here. For ex. “5 things you should know about the newly launched iPhone
before you buy it”
The address bar will ask for your favorite domain name for this blog. You can try using some common words, Google will
check automatically for its availability. Keep on trying new words, combination of words or letters to get a domain
name for you.
Once it is available, it will show the following screen.
4. You can pick up a theme quickly and go ahead with your content.
Once you select your favorite one, click on “Create Blog”
It will give you an option for creating a specific title for this blog post and block it for you so others wont use similar
phrase.
This is needed when there are multiple bloggers talking about same thing, like reviewing a new car launch.
Right now, click on “No thanks” and then you will see this.
5. It will show options specific to this blog.
In STATS you can see all the information regarding people who read your blog, traffic etc.
6. In COMMENTS you can see people comments. Google blocks spams in comments automatically.
In EARNINGS you will see this. You can click of “HOW TO QUALIFY FOR ADSENSE” if you want to sign up for adsense, let
others post their ads on your blog page and start earning based on number of clicks. This is useful if you can drive a lot
of traffic on your page though useful content.
7. CAMPAIGNS help you promote your page using adwords.
These are the first 2-3 lines that appear when you search something on Google. You have to pay for it.
PAGES are the individual pages of your post, in case you have a lot of content to share.
8. LAYOUT: This screen is of your interest! This page helps you create the page before you actually PUBLISH it. You can
write your content here, upload links etc.
THEME: This will give you a preview of how your blog will look on desktop and mobile website.
You can customize your page here, you can change the theme also using more options available below.
9. Click on “View Blog” to see how your page will look after you publish it.
To create a post, go to POSTS, click on NEW POST and start writing your ideas.
You can insert whatever you want here.
You can see a preview using PREVIEW button to see the blog.
10. Then If you have finished with everything, Click on PUBLISH.
You will see either of the below windows:
For Google + as Host:
To upload using Blogger.com as host go to Settings>User Settings. Select blogger and save settings. The next screen is
this.
11. Click on “Switch to a limited Blogger Profile”. This is individual choice, but I would use Google+ - it's way more flexible. I
can embed tweets, Instagram or Flickr photos, public Facebook posts, hyperlink to my YouTube Videos, upload my own
photos, videos, use Twitter cards, draft and save posts, schedule posts, etc.
Here you will have to fill your data, since Google+ data isn’t used now.
Then click on Publish once you fill your data
Your blog is live now!!
Congratulations!! You are live now, keep updating your blog and reply to comments asap.
Thanks.
Naynish Ladkat
PGPM
Symbiosis institute of Mangement Studies, Khadki