
Recomendados
Mais conteúdo relacionado
Mais procurados
Destaque
Semelhante a Creating Concept Shows
Semelhante a Creating Concept Shows (20)
Último
Último (20)
Creating Concept Shows
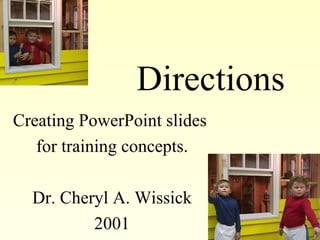
- 1. Directions Creating PowerPoint slides for training concepts. Dr. Cheryl A. Wissick 2001
- 2. What is on this CD-Rom? • Use the slide shows on this CD-ROM for examples of the possibilities. • Use the directions as easy steps to create simple activities. • Enlist the support of older students in the school to assist. • Have fun.
- 3. Comparing Concepts • This presentation provides directions to create one photo, two photo and independent practice with feedback. • You can use the appropriate instructional prompts for your students. – Compare one concept to not examples of that same concept. (in front versus NOT in front) – Compare two concepts (in front versus in back) • You can modify slide shows to create levels of learning. • You can use many photos to provide multiple examples of each concept.
- 4. • Introduction Types of Slide Shows The boy is ON the path. •Discrimination Which one shows the boys ON the bench? •Independent Practice As the boys got ready to leave they stood in front of the bench. Click on the picture that shows the boys in FRONT
- 5. Descriptions of slide types 1 Introducing the concepts : one photo on each slide. Use example and not example or examples and opposite. 2 Discriminating & testing the concepts - one photo asking for a yes/no response - two photos comparing concepts on each slide. 3 Practicing the concepts independently - two photos on each slide with buttons to provide feedback on response.
- 6. Steps for One Photo slides • Create a new presentation. • Begin with a title slide, label your show. • Click new slide • Choose the slide with title only.
- 7. Adding one picture to a slide • Insert • Picture, From File instead of clip art • Locate photo in your file list. Remember to choose the disk drive, if you are using photos you saved on disk.
- 8. Finishing your picture on the slide • Center photo on page • Use the crop tool to take out parts of the photo you might not want. • Label photo The boy is ON the path.
- 9. Final Example: Introducing Concepts The boys are sitting on the bench.
- 10. Example with one photo: Understanding of one concept. Are the boys OFF the bench?
- 11. Steps for Two Photos - Comparison • To create a new slide show easily you can repurpose the slide show you completed using one photo. • Open the slide show for one photo • Remember to Rename the slide show, so that you do not rewrite that show you just finished – example: zoocepts and zoocepts2
- 12. Repurposing slides • Start with the first slide with a photo. • Resize the photo to fix on half the slide. 1. 2. Are the boys OFF the bench?
- 13. Locate an opposite photo and copy or insert the photo on that page. At this point you have two photos on the slide but they probably do not fit nicely! Resize the pasted or inserted photo to fit. Add a new caption. Which one shows the boys on the bench?
- 14. Final Example: Testing concepts Comparing two concepts Which one shows the boys ON the bench?
- 15. Creating Independent Practice • Use your slide show with two pictures on each slide to create an activity for independent practice. • Be aware that this process is not foolproof or kidproof. – You can accidentally have an invisible button in the wrong place!! – Your students can still find ways to click in the wrong place to make the slide show go to the next page!!
- 16. Independent Practice The slides for independent practice look similar to slides with two pictures. The difference is that these slides have invisible buttons over the pictures. When a student clicks on the correct picture, the student receives the appropriate feedback. Click on the underlined word “invisible” Click here for an to hear another sound. example of button for sound
- 17. Example: Independent Practice click on the pictures As the boys got ready to leave they stood in front of the bench. Click on the picture that shows the boys in FRONT
- 18. Creating Buttons • Before you start creating invisible buttons, try to create a few buttons that add sounds or have some effect. • From the AutoShapes menu: Select Action Buttons and then choose the first option: the blank button
- 19. Adding Effects to Buttons • Resize your button • Select the Action settings
- 20. Changing the color of the button Double click on the button to change format the autoshape. To make a clear button, select NO Fill and NO Line
- 21. Create clear, invisible buttons on top of each picture. Where is the sign in the middle? Create “no effect” buttons to have spaces where students might click so the show will not advance.
- 22. GREAT you got the right answer! Yes the sign is in the middle. Now you can add buttons to all the pages.
- 23. Remember to have fun. • This presentation will get you starting in the creation of slide shows for concepts. • Have students take pictures. • If you do not want to create your own, feel free to use the slide shows on this CD.
- 24. Slide Shows to Use • Zooconcepts- Introducing concepts A day at the Zoo. • Zoocepts2- Discriminating two concepts • Zoo- Practicing concepts independently • Concepts - Introducing concepts: A Day at the Park. • Concepts2 - Discriminating concepts: A Day at the Park.
- 25. Additional Slide Shows Sequencing & Cooking • Cocoa- Ms Jackson’s class makes cocoa • Makecoa - making cocoa at home • Makingoatswater - task analysis with boiling water and then adding to the oats • Makingoatmicro - task analysis with mixing water with oats and then in micro