

Recomendados
Mais conteúdo relacionado
Mais procurados
Mais procurados (20)
Destaque
Destaque (11)
Semelhante a Plan601E Session 4 Demo
Semelhante a Plan601E Session 4 Demo (20)
Mais de Michael Haggerty
Mais de Michael Haggerty (17)
Plan601E Session 4 Demo
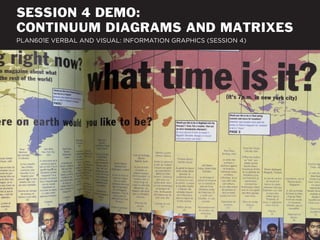
- 1. SESSION 4 DEMO: CONTINUUM DIAGRAMS AND MATRIXES PLAN601E VERBAL AND VISUAL: INFORMATION GRAPHICS (SESSION 4)
- 2. Ground Floor Transparency in Alphabet City (Source: Google Street Map) CREATING A CONTINUUM Let’s make a continuum diagram that presents an DIAGRAM WITH ILLUSTRATOR evalution of ground floor transparency in the East Village.
- 3. 2 1 TYPE CREATING A CONTINUUM Steps: 1) draw a line with arrowheads on both ends; 2) use DIAGRAM WITH ILLUSTRATOR type settings to differentiate between 1st and 2nd labels.
- 4. 3 CREATING A CONTINUUM Steps: 3) flatten and crop images. DIAGRAM WITH ILLUSTRATOR
- 5. 4 CREATING A CONTINUUM Steps: 4) adjust brightness with autocolor. DIAGRAM WITH ILLUSTRATOR
- 6. 5 LEVELS CREATING A CONTINUUM Steps: 5) adjust levels and save as .jpeg. DIAGRAM WITH ILLUSTRATOR
- 7. 7 7 7 7 CREATING A CONTINUUM Steps: 7) create graphic conventions for displaying photos, DIAGRAM WITH ILLUSTRATOR aerials, and labels; use pathfinder to create talkie-box.
- 8. 8 8 LINKS CREATING A CONTINUUM Steps: 8) copy photo box and relink images with the links DIAGRAM WITH ILLUSTRATOR palette (alternative to placing each image individually).
- 9. 9 9 CREATING A CONTINUUM Steps: 9) key photos into the arrow by adjusting anchors DIAGRAM WITH ILLUSTRATOR on the box utilizing the direct selection tool.
- 10. 10 CREATING A CONTINUUM Steps: 10) add descriptive labels with the type tool. DIAGRAM WITH ILLUSTRATOR
- 11. 11 CREATING A CONTINUUM Steps: 11) convert the arrow into a polygon utilizing DIAGRAM WITH ILLUSTRATOR flatten transparency.
- 12. 12 CREATING A CONTINUUM Steps: 12) create a compound path with the pathfinder. DIAGRAM WITH ILLUSTRATOR
- 13. 13 CREATING A CONTINUUM Steps: 13) add blue and orange to the gradient palette by DIAGRAM WITH ILLUSTRATOR dragging the color from the fill.
- 14. 14 14 CREATING A CONTINUUM Steps: 14) create a new polygon with the gradient fill and DIAGRAM WITH ILLUSTRATOR then use the eyedropper to color the arrow.
- 15. Ground Floor Transparency in Alphabet City (Source: Google Street Map) CREATING A CONTINUUM Let’s try out another convention for displaying the DIAGRAM WITH ILLUSTRATOR photo documentation.
- 16. 15 LAYERS CREATING A CONTINUUM Steps: 15) open image in photoshop, create layer DIAGRAM WITH ILLUSTRATOR from background by double-clicking “background.”
- 17. 16 16 LAYERS CREATING A CONTINUUM Steps: 16) select an area of the image with the lasso tool, DIAGRAM WITH ILLUSTRATOR then select the inverse.
- 18. CREATING A CONTINUUM Steps: 17) press “delete” to delete the inverse area. DIAGRAM WITH ILLUSTRATOR
- 19. 18 CREATING A CONTINUUM Steps: 18) change the mode to greyscale. DIAGRAM WITH ILLUSTRATOR
- 20. CREATING A CONTINUUM Steps: 19) save as a .psd. DIAGRAM WITH ILLUSTRATOR
- 21. 20 20 CREATING A CONTINUUM Steps: 20) replace photos with greyscale images; create DIAGRAM WITH ILLUSTRATOR new convention for key map.
- 22. 21 CREATING A CONTINUUM Steps: 21) key images into to the arrow. DIAGRAM WITH ILLUSTRATOR
- 23. Ground Floor Transparency in Alphabet City (Source: Google Street Map) CREATING A CONTINUUM Let’s try out another convention for displaying the DIAGRAM WITH ILLUSTRATOR photo documentation.
- 24. The basic menus and tool palettes in Indesign are similar to those of Illustrator and Photoshop. MENUS SELECTION TEXT Indesign is utilized to format layouts of both vector and INDESIGN REVIEW raster graphics plus text.
- 25. Use the direct / indirect selection tools tool to adjust the size and shape of polygons . RECTANGLE Indesign is utilized to format layouts of both vector and INDESIGN REVIEW raster graphics plus text.
- 26. Indesign displays images by referencing jpeg, tiff, or other files on your desktop. PLACE Indesign is utilized to format layouts of both vector and INDESIGN REVIEW raster graphics plus text.
- 27. The pen tools allows you to draw new polygons – anchor by anchor. PEN Indesign is utilized to format layouts of both vector and INDESIGN REVIEW raster graphics plus text.
- 28. Palettes provide options for the display and management of your Indesign document. PAGES COLORS Indesign is utilized to format layouts of both vector and INDESIGN REVIEW raster graphics plus text.
- 29. HEALTH INFRASTRUCTURE IN ALPHABET CITY PROMOTES FRESH COMMUNITY HEALTH PUBLIC ACTIVITY FOOD SPACE SERVICES ACCESS POSITIVE IMPACT NO IMPACT NEGATIVE IMPACT CREATING A MATRIX Let’s make a matrix that evaluates the contribution of WITH ADOBE ILLUSTRATOR activites in the East Village to “health infrastructure.”
- 30. VIEW 1 1 STROKE CREATING A MATRIX Steps: 1) use document grid as guide for setting up a grid WITH ADOBE ILLUSTRATOR of lines with the pen tool.
- 31. 2 CREATING A MATRIX Steps: 2) place an image in the document, adjust frame and WITH ADOBE ILLUSTRATOR with selection tool, adjust size with direct selection tool.
- 32. LINKS 3 3 CREATING A MATRIX Steps: 3) copy image and then use relink button in links WITH ADOBE ILLUSTRATOR palette to switch out images.
- 33. 4 CREATING A MATRIX Steps: 4) copy / paste icons from Illustrator; use icons to WITH ADOBE ILLUSTRATOR define categories for each matrix cell.
- 34. 5 ALIGN CREATING A MATRIX Steps: 5) create labels for the matrix cells using text tool; WITH ADOBE ILLUSTRATOR clean up using align palette.
- 35. 6 CREATING A MATRIX Steps: 6) fill in matrix cells with symbol icons. WITH ADOBE ILLUSTRATOR
- 36. 7 7 CREATING A MATRIX Steps: 7) add background fills utlizing the rectangle tool. WITH ADOBE ILLUSTRATOR
- 37. COLORS 8 8 STROKE 8 CREATING A MATRIX Steps: 8) modify line styles, icon and text colors; make WITH ADOBE ILLUSTRATOR photos greyscale in photoshop.
- 38. 9 CREATING A MATRIX Steps: 9) add a title and key with text tool. WITH ADOBE ILLUSTRATOR
- 39. HEALTH INFRASTRUCTURE IN ALPHABET CITY PROMOTES FRESH COMMUNITY HEALTH PUBLIC ACTIVITY FOOD SPACE SERVICES ACCESS POSITIVE IMPACT NO IMPACT NEGATIVE IMPACT CREATING A MATRIX No need to make an export because the diagram is WITH ADOBE ILLUSTRATOR already in Indesign!