
Recomendados
Mais conteúdo relacionado
Mais procurados
Mais procurados (20)
Destaque
Destaque (20)
Semelhante a Glogs onlinemultimediaposters
Semelhante a Glogs onlinemultimediaposters (20)
Glogs onlinemultimediaposters
- 1. Glogs – Online Multimedia Posters Sunrise SD September 24, 2010 http://sunrisemypd2010.pbworks.com Adapted From: Glog On! Glog One! Glog All! Jan McGee, Technology Coordinator West Monroe High School 201 Riggs Street West Monroe, LA 71291 Library Coordinator Ouachita Parish School System jmcgee@opsb.net
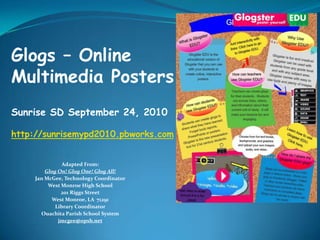
- 2. A Glog is like a poster . . . only better Glogs allow students to create an online poster using photographs images graphics video files sound files hyperlinks
- 3. What is Glogster? A WEB 2.0 platform that easily allows users to upload photos, videos, text, audio and other exciting resources to create a unique online, interactive poster. A new and creative digital outlet for educators to keep students ENGAGED and make learning more fun! A easy to use interface designed to introduce basic concepts to students. A series of teamwork mechanisms that allow users anywhere to publish, share their creations, and collaborate with others on joint efforts.
- 4. What is Glogster?Cont. A secure, private, and safe platform that can be monitored directly by teachers. A valuable learning tool that integratesdiverse core subjects including math, science, history, technology, art, photography, music and more. A learning tool that fosters development of essential skills as students progress through grade levels. A virtual, digital, educational platform that transcends age, gender, culture, grade level, subject matter, school type, location, etc.
- 5. 9 Reasons to Use a Glog 1. It allows students to create an online poster 2. It is free 3. It is web-based 4. It uses no ink 5. It allows students to add images, video—such as YouTube--music, text, and hyperlinks (What cardboard poster does that?)
- 6. Reasons, continued 6. It easily incorporates student research and educational content 7. It addresses multiple learning styles 8. It can be accessed from any location with an Internet connection 9. Did I mention that it is economical because it uses NO ink?
- 7. Example: History/Biography Project Glog contains Researched information Images Video from YouTube Podcast of speech Hyperlinks to JFK websites
- 10. Glog Example 1:Elements of a Story
- 11. Glog Example 2:The Giver
- 12. Glogging Across the Curriculum Hockey in Canada Science Fair Hints Plants and Photosynthesis A Day in the Life of an Integer
- 13. Getting Started 1. Go to: http://www.glogster.com 2. Click Register 3. Fill out online registration form. Type code from box above
- 14. Profile Page Email Reminder Click “Create a New Glog” NOTE: A generic icon will appear beside your name unless you import a photo or other image.
- 15. Create Glog A blank glog screen will appear.
- 16. To Remove Page Elements Remove page elements by selecting it, then clicking the red trash can that appears.
- 17. Magnet Toolbar Use the magnet toolbar to add page elements Toolbar will slide up and down the page Begin with the “Wall” tool to select a background Once other page elements have been added, the wall cannot be changed
- 18. Naming Your Glog At the top of the glog screen, there will be a rectangular box labeled “Glog name” next to it. When you first open your glog, it is only identified with a glog number. Click in the box and give your glog a unique name.
- 19. Save and Publish Select a category. Add some “tags” to make it more searchable Mark as “Public” or “Private.” Click “Save & Publish” You will be taken back to your main blog screen with the option to “View” or “Continue Editing.”
- 20. Glog Wall & Page Wall Select “Wall” from toolbar Backgrounds are arranged by themes Select a “Glog Wall” Click “Use it” Select a “Page Wall” The Glog wall is the background for the main part of the glog. The page wall is like an outside border or frame.
- 21. Text To add text, select “TEXT” from the toolbar Choose a textbox (default), a title box, bubbles or stickers for your text A wide variety of text box styles are available from each category TIP:Text boxes are square. Titles are rectangular, as in a banner or heading
- 22. Add a Title Select “Title” View the sample styles by clicking the numbers at the bottom of the screen or by clicking the list of styles on the left-hand side of the screen. Basic title creates a title without a frame.
- 23. Titles Select the style you want and click “USE IT.” The textbox will appear at the bottom of your glog screen.
- 24. Title Fonts The title appears as “poster yourself” Click the “EDIT” button to change/ add text Click “Ab1” to change to font style, color, size or justification
- 25. Title Effects Click the “fx” button to create special effects such as title shadows Change the shadow, use a blur effect, adjust the distance, angle, etc. Click “APPLY” Click “OK”
- 26. Adding a Hyperlink to a Title To hyperlink your title to a website, select the link button An “Add URL” window will open Paste the URL of the website into the “Link” box Click “APPLY”
- 27. Creating Text Boxes To create a regular (square) textbox, select “TEXT” on the toolbar Choose “Sticker” from the text menu list.
- 28. Text Box Styles “Basic Text” creates a box without a frame. The other styles appear as a “sticker” in which text may be typed. Select a style Click “USE IT”
- 29. Text Effects Font styles, size, color and alignment are accessed from the same Menu icons used with Title effects. Hyperlinks may also be added to text boxes and stickers.
- 30. Images Locate images from the Internet, digital camera, or other sources and save to a folder on computer Click “IMAGE” on menu Select “UPLOAD” button
- 31. Uploading Images Browse to folder Select the image Click “Open” Image will upload to image collection.
- 32. Adding the Image Select image Image will appear on the right Click “USE IT” to add it to glog OR Add a frame by clicking “ADD A FRAME” button
- 33. Adding a Frame Use menu on left to view and select a frame around image Click “USE IT” to add image and frame to glog Remove a frame before adding to glog by choosing “Basic” frame
- 34. Image Adjustment Adjust size and placement of image using handles on side Use menu bar above image to bring image forward, send to back for layering or duplicate image. Choose trash can to delete image. Bring to front Send to back Clone image
- 35. Hyperlink to Image Select image Click “EDIT” Select link button on menu Paste or type URL into link box Click “APPLY”
- 36. Add Video File Select “Video” from Magnet Toolbar Click “UPLOAD” to navigate to a downloaded video on your computer (such as a video from UnitedStreaming) OR
- 37. Link to Web-based Video Click “LINK” to add a web-based video from YouTube, TeacherTube or other online video resource Paste or type the URL of the video Click “ADD TO YOUR FILES”
- 38. Web-based Video Video will be added to library Select video Choose a player or frame by selecting “Add a Player” button Click “USE IT”
- 39. Add an Audio File Audio files are added in the same manner as video files Choose “SOUND” from the Magnet Toolbar Select “UPLOAD” for downloaded sound file OR Select “LINK” to an audio file on the web
- 40. Audio File and Frame Choose a player frame from the themes menu OR Use “as is” Click “USE IT”
- 41. Add Graphics Select “Graphics” from Magnet Tools Choose a graphic from any of the themes on menu Select “USE IT” NOTE: Some graphics are animated
- 42. Save and Publish Select “SAVE & PUBLISH” from top menu of glog Edit name, category, or tags if needed Optional: Change from “Private” to “Public” Click “SAVE & PUBLISH”
- 43. Publishing and Sharing Glog Use this screen to view glog, email glog, or post to web Use URL link to post a link on a website or wiki Click “Email” to email link Click “Copy” button to copy html code to embed URL Link Email Copy HTML
- 44. Glog Embedded into Wiki Embed a glog into a wiki to use as a “homepage”
- 45. Miniature Copy of Glog Locate and click “+SHARE GLOG” at bottom right of screen
- 46. Miniature Version of Glog Click “COPY” button to copy HTML code Paste code into website or wiki for a downsized, working version of wiki
- 47. A Glog is like a poster. . . . . . . . . Only BETTER