College Magazine Planning Work Presentation
•Transferir como PPT, PDF•
2 gostaram•987 visualizações

planning my college magazine

Recomendados
Mais conteúdo relacionado
Mais procurados
Mais procurados (18)
Semelhante a College Magazine Planning Work Presentation
Semelhante a College Magazine Planning Work Presentation (20)
Mais de Jordan
Mais de Jordan (17)
Último
Último (20)
College Magazine Planning Work Presentation
- 1. College Magazine Planning Work
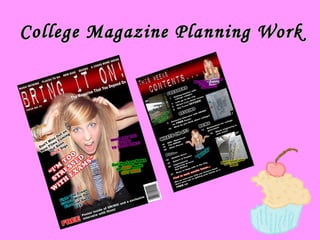
- 2. Inspiration - front cover My inspiration for my magazine cover have come from two existing college/university magazines that I have previously analysed.
- 3. I chose this magazine cover because :- I like how this main picture is a action shot and this has given me an idea for what I want my picture to be like on my own magazine. I also like the plain background with scribbles as it makes the main image stand out. The mast head is big and clear so that the audience knows what it is called, also the slogo under it gives you more information about what the magazine is all about. This magazine targets it’s audience to a young generation as its loud and informal. Which is what my magazine needs to represent. Like this magazines cover line, mine needs to be big and bold so that my target audience knows what the main story is in my magazine
- 4. I also chose this magazine cover because :- I like how the main image is layered on top of the mast head, this is something I could interpret into my own design. The mast head also takes up the whole of the top of the page so its clear to know what the name is so it stands out from the rest of the text on the page, I could also interpret this into my own. Also I like how the main image is centred in the middle of the page, as it stands out more. There is no main pull quote on this cover, but I like how the cover lines are around the image and slightly over lay on the image. There is also a barcode to show that you have to pay for it. Which makes it more of a magazine but is not that important to the design of it. The different colours for the I like, because they make it more bold and point out what's’ more important and catch the target audience eye first
- 5. 1 st Cover Design My Flat Plans
- 7. Inspiration – Contents page For my contents I have picked these two existing college/university content pages, which I also previously analysed.
- 8. I chose this contents page because :- I like how there are pictures, that represent stories that are inside the magazine, as it gives it a more visual context as well as just writing on the page. Also I like how there is a small detailed description for each page, on what you’ll find on that page. Also a header for each subject which is a good idea, although this is a bit over board for a college magazine, but makes it detailed. The text is in black and blue which stands out because these are noticeable colours that are easy to read against the back ground colour. There's a photo linking to the photo on the front, which also continuous the house style of the magazine.
- 9. Also I picked out this magazine because :- There’s a big header indicating it’s the contents, which is visible, black and red. Red is an alarming colour so it attracts the target reader eye. Again I like the idea of photos from pages indicating there subject matter. Page headings and descriptions again used in this magazine. Good idea to add other important details on the contents, as this is were would refer to the most. The text is highlighted in pastel colour boxes. This makes the text separate from the background so it’s easy to see. All the text is written in black as it is a formal and readable colour, use of different colours would make it hard to read.
- 11. 2 nd Contents Design
- 12. Making My College Magazine – Front Cover
- 14. 2. I then took the magic lasso tool and cut just the body from the background, and pasted into my blank canvas, which is my front cover of my college magazine. 3. Then took the free transform tool, and resized the image and moved it into the position.
- 15. 4. I then went to dafont.com, and got the typeface for my header, that I created.
- 16. 5. After that I pasted it into my front cover and placed it behind my main image, as my main image is what I want the reader to see first, because of it’s visual attraction. 6. Then added a black background. 7. And added my main pull quote to go with my main image.
- 17. 8. Added the outer glow to stand out, in red and white. And layered over the image so it doesn’t look too formal and slightly on the wonk.
- 18. 9. After finished that I added in my slogo line a flag head.
- 19. 10. And a issue number.
- 20. 11. I then started to add in my other pull quotes to the cover and my ‘FREE’ caption. Layering on top of the main image so they are clear to read.
- 21. 12.More pull quotes and a barcode, to make it more realistic.
- 22. 13.I then added colour to the pull quotes and highlighted the important words to grasp the reader attention. And behind the mast head I added a red gradient to make it more interesting and to stand out. My Finished Cover
- 23. - Contents Page
- 25. 4. I then decided to add a white box behind my image so it would stand out from the dark background. 5. After I went to dafont.com and chose the same typeface as my mast head to create my header for the contents.
- 26. 6. After making the header, I decided to scrap the white box idea and add the red gradient like the front cover, and added a description to the picture, leading back to my main image on my front cover. Again more development on the consistent house style. 7. I then started to add the pages and pictures.
- 27. 8. My contents then started to take more shape, referring again to my flat plans. The images placed in the right position and more text added.
- 28. 9. More text added and additional information. The page numbers and descriptions.
- 29. 10. Finally, played about with the positioning of everything. My Finished Contents Page