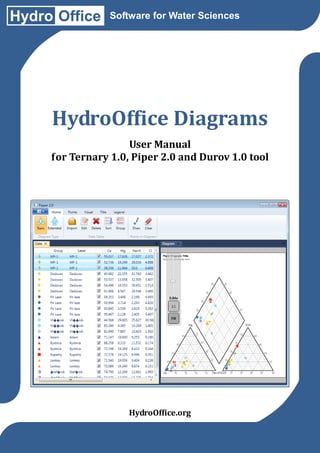
HydroOffice Diagrams - User Manual
•
1 gostou•626 visualizações

User manual for three hydrogeochemical diagraming tools. These tools can be used for preparing Piper diagram, Durov diagram and Ternary diagram.

Recomendados
Mais conteúdo relacionado
Semelhante a HydroOffice Diagrams - User Manual
Semelhante a HydroOffice Diagrams - User Manual (20)
Último
Último (20)
HydroOffice Diagrams - User Manual
- 1. Hydro Office Software for Water Sciences HydroOffice Diagrams User Manual for Ternary 1.0, Piper 2.0 and Durov 1.0 tool HydroOffice.org
- 2. Gregor M. 2013. HydroOffice Diagrams – user manual for Ternary1.0, Piper 2.0 and Citation: Durov 1.0 tool. HydroOffice.org, Online Only, 29 p. © Miloš Gregor, PhD. / milos.gregor@hydrooffice.org HydroOffice.org – software for water science This file is published under Creative Common License 1 / 29
- 3. Table of Contents 1 Introduction ............................................................................................................................................... 3 2 Installing and starting the programs................................................................................................. 4 3 User interface of tools ............................................................................................................................ 5 3.1 Ribbon Main Menu .............................................................................................................................. 5 3.2.1 Home Tab.............................................................................................................................................. 7 3.2 Ribbon Toolbar ..................................................................................................................................... 7 3.2.1.1 Diagram Type .................................................................................................................................. 8 3.2.1.2 Data Table .......................................................................................................................................... 9 3.2.1.2 Points in Diagram ......................................................................................................................... 12 3.2.2 Points Tab ........................................................................................................................................... 13 3.2.3 Visual Tab ........................................................................................................................................... 15 3.2.4 Title Tab ............................................................................................................................................... 20 3.2.5 Legend Tab ......................................................................................................................................... 22 Conclusion .................................................................................................................................................. 24 Appendix 1: Examples of diagram segment backgrounds......................................................................... 25 Appendix 2: Examples of diagram segment grid lines and labels ........................................................... 26 Appendix 3: Example of a Ternary diagram ................................................................................................... 27 Appendix 4: Example of the basic Durov diagram ....................................................................................... 28 Appendix 5: Example of an extended Piper diagram................................................................................... 29 2 / 29
- 4. 1 Introduction This manual describes working with three tools in the HydroOffice software package. These tools are used to visualize data in specialized charts, and they are called Ternary 1.0, Durov 1.0 and Piper 2.0 (Fig. 1). These programs can be used to visualize the chemical composition of water in specialized diagrams, and the Ternary 1.0 program can also be used to visualize arbitrary values in ternary diagrams; for example, those with clay-sand-gravel content in the sediment. The first two tools are completely new and are therefore released as the primary1.0 version, while the Piper program now has its second version. The first version was not publicly available and it was used personally with my colleagues at work. After re-processing, based on our experience and observations it is now distributed in the HydroOffice package as an independent tool. Since all three programs have the same graphical user interface, their functions are described together. Where functionality differs, every difference in each program is highlighted. Programs for this purpose have been developed in many forms, from simple free macros in MS Excel to tools in large commercial packages. However, most of these have several disadvantages or limitations that I have improved in these tools. Perhaps the biggest difference in relationship to other programs is that our three tools are programmed using the “vector graphic” approach, and therefore they can be zoomed, scrolled and re-sized without restriction. You will find all improvements in the following manual text. Fig. 1: Examples of diagrams that can be created using the described tools (Left – Piper diagram; Middle – Durov diagram; Right – Ternary diagram). 3 / 29
- 5. 2 Installing and starting the programs These programs can not be installed and run independently, therefore we use the HydroOffice program in version 2012 (or higher), where the individual tools can be installed and run (Fig. 2). Fig. 2: The main window of HydroOffice software. The described programs are distributed under different licences. The Ternary 1.0 program can be used as freeware for all purposes without any restrictions. However, this situation is different for the Piper 2.0 and Durov 1.0 programs. If displaying a maximum of five chemical analyses is sufficient for your purposes, you can use the demonstration (demo) versions of these programs. If you want to see more than five analyses, it is necessary for you to purchase a licence for the selected tool. Although this limitation in number of displayed points exists, the functionality of the programs is unlimited, and therefore you can try them before buying them. Tool Licence Demo Version Ternary 1.0 Freeware - Piper 2.0 Commercial maximum of 5 points Durov 1.0 Commercial maximum of 5 points 4 / 29
- 6. 3 User interface of tools The user interface is the same for all three programs. This means that when you know use one program, you can use all three. An example of the main window is shown in Figure 3. Fig. 3: Example of the program user interface. The user interface has the latest features, and the layout allows you to quickly understand all program options. The Ribbon Main Menu is located directly under the program icon, and this menu holds the basic functions of the program. Other features and tools are distributed in separate tabs of the ribbon toolbar. The largest part of the window is for the area of documents. Here, there are two separate documents, which can be docked and moved freely according to your needs. The first document contains the table that stores individual data you want to display in the diagram, while the second document has the actual diagram in which you display your selected data. These elements constitute the main window, and they are described in detail in the following chapters. Firstly, the functions of the Main Ribbon Menu are now described. 3.1 Ribbon Main Menu As already mentioned, the main features of the program are grouped under the Ribbon Main Menu element. When you click on this button, the menu in Figure 4 appears. Using the first item in the menu you can save two types of files on the disc. The Save – Points function allows you to store the data on the disc, together with the set of defined points colour, size and type. These points are stored in specific files, and they can be saved into a file in the three different programs which have the different extension of *.pnt, *.dnt or *.tnt (for Piper, Durov and Ternary respectively). These different extensions are used because the data structure of each program is a little different. When you export data with your chosen extension you can later re-import it into the program with all your settings. The second function Save – Visual Properties allows you to save your set of visual properties on disk. So if your company or institution uses 5 / 29
- 7. specific colours for visualization, you can export them to a separate file and then re-use them as needed. With this feature, you can save all visual settings, such as fonts, colours, diagram size, label settings and diagram grid lines. The current versions of the programs don’t allow you to save only one parameter – the background gradient colour. Now, these three new tools allow you to adjust all visual parameters using functions in the Visual ribbon tab, shown in Figure 6, and you can save them all in your file. Here again, these Fig. 4: Functions of the Ribbon Main Menu. files are linked individually to each program and they can not be used in the other programs. Features under the Open menu item have a different focus. Using these features you, can import your data and visual properties back into the program. When your table contains data, the program will ask you whether you want to replace these for the ones in your current data, or if you want to add them to that you already have in the table. When you import your visual settings, they are immediately used in the diagram. Under the item named Diagram, there are functions to export the diagram to an image file (Fig. 5 top). In this case you have two options. (1) Use the command Diagram – Export Diagram, the entire diagram can be saved to a disk as an image in defined resolution, or (2) the command Diagram – Export Diagram Visible Part allows you to export the currently visible part of the diagram. Using these features, for example, you can zoom to a selected part of the diagram and save it as a picture. You use this option when you want to present a specific part of the diagram with specific information, as in Figure 5. Fig. 5: The possibilities of diagram export (Top – functions for diagram export in Ribbon Main Menu; Bottom Left – diagram export in defined resolution; Bottom Right – export of actually visible part of the diagram). 6 / 29
- 8. The use of the remaining functions in the main menu is clear. You can use the Help command to display this manual. The About command displays basic information about the program and the HydroOffice Online function loads the website of the HydroOffice project. The End button in the bottom right corner allows you to exit the program. 3.2 Ribbon Toolbar The functionality and layout of the ribbon toolbar is almost identical in all three programs. The only difference is in the character of the diagrams. The individual function of each ribbon tab seen in Figure 6 is described in the following sections; and when differences exist between the programs you will be alerted to this fact. Overall, each program includes six ribbon tabs and these features are logically divided according to their function. The Home tab contains basic functions, such as setting the diagram type as either basic or extended, data import from the CSV file, data editing, table sorting and grouping functions and also functions for point drawing and deleting within the diagram. Using the functions on the tab named Points enables you to define the visual settings of points; such as their colour, size, type and transparency. The Visual tab contains functions for editing the visual properties of your diagram. The Title tab includes tools for defining and setting a diagram title and the Legend tab gives features which define your diagram legend. Functions and commands from the Home ribbon tab are now described first: Fig. 6: Functions in individual ribbon toolbar tabs. 3.2.1 Home Tab The Home ribbon tab contains the essential features for working with the program (Fig. 7). Individual functions are divided into sub-groups named Diagram Type, Data Table and Points in Diagram. Functions under Diagram Type set the type of diagram. Functions under the Data Table allow you to work with data in a table and the last group lets you draw or delete selected points in your diagrams. 7 / 29
- 9. Fig. 7: Function groups in the Home ribbon tab. 3.2.1.1 Diagram Type The functions of the Diagram Type sub-group are only in the Piper 2.0 and Durov 1.0 programs. The Ternary 1.0 program does not have this extension. These features allow you to set the type of the selected diagram, and examples of this setting in Piper 2.0 are shown in Figure 8. Fig. 8: Display types of the Piper diagram (Left – basic Piper diagram; Right – extended Piper diagram). In this Piper diagram you can display the basic view of cationic, anionic and summary segments or you can have an extended view where the next bottom segment is added into the diagram. This segment is not frequently seen in international literature, but it is used successfully in the Middle-European region. It displays, for example, the total mineralization or temperature of water samples in regional geo-chemical assessments. Additional information is also seen in the diagram, where you can adjust the axis of the extended segment. These features are described in section “3.2.3 Visual Tab”. This extension can also be displayed in the Durov diagram, as depicted in Figure 9. Fig. 9: Display types of the Durov diagram (Left – basic view; Middle – extended view; Right – double extended view). 8 / 29
- 10. You can choose from any of three required modes of visualization in the Durov diagram. You can set the basic mode with cationic, anionic and summary segments, and then extend this view by one or two more segments. These segments are most often used to display the total mineralization of water and water pH values. 3.2.1.2 Data Table You can work with the data in the table section of the program with these functions. Using the Import button, you can load the data from your prepared CSV file. This text file can be prepared in any program such as MS Excel or Open Office, and its structure is shown in Figure 10. This is a text file with the extension *.txt or *.csv, where each line is for one sample analysis. Individual values for each sample in the row are separated by tabs. For example, you can prepare this file structure in MS Excel using the Save As function, when you select the option called “Tab Separated Text File”. Fig. 10: Example of CSV input file structure. The file in the first row contains labels for each column. Other lines already contain individual records. One prepared CSV file can be imported into each of the three described programs, but each program allows a different number of columns to be imported; as listed in the table below. Program Required Columns Optional Columns Ternary 1.0 Ca, Mg, Na+K, (or 3 other equivalent columns) Label, Group, A, B, C Piper 2.0 Ca, Mg, Na+K, Cl, SO4, HCO3 Label, Group, A, B, C, Ext1 Durov 1.0 Ca, Mg, Na+K, Cl, SO4, HCO3 Label, Group, A, B, C, Ext1, Ext 2 Individual columns in the input data file can be divided into required and optional groups. (1) The required groups are those needed for the basic rendering of points in diagrams (cations and anions), where the total sums of cations (Ca, Mg, Na+K) and anions (Cl, SO4, HCO3) must be 100 %. If these conditions are not confirmed, the program automatically recalculates the values to a percentage ratio to comply with this condition. In the Ternary 1.0 program, these values need not be only cations, and any arbitrary values whose sum is 100 % can be used. The column headings in Figure 10 are only a descriptive example; and you can enter any headings you wish, such as the sand, clay and gravel contents in sediments. Individual labels in the Ternary diagram are editable. 9 / 29
- 11. (2) The next category is for optional parameters not imported into the data table from an input file. Details under the Label column give the ID (Name) of the sample or locality. The column Group contains text strings, which defines your groups of samples. This grouping depends on your needs. For example, it can be used for grouping of samples from one locality, from one type of rock or from one time period. Moreover, all the programs have additional columns A, B and C. These columns can contain other numerical values (integers or decimals) which can be used for grouping or sorting, or for defining the colour and size of the points. For example, imported values of the altitude of collected water samples can be entered here, and points are coloured in the diagram to display a two-colour linear gradient based on altitude. This function is explained in section 3.2.2 Points Tab. In both the Piper 2.0 and Durov 1.0 programs, parameters Ext1 and Ext2 can be loaded into data tables from CSV files, and these can then be displayed in extended segments. When you press the Open button on the ribbon toolbar and select the CSV file with required structure, the individual dialog in Figure 11 appears. A parsed file is shown in this window. Fig. 11: Setting data import from a CSV file into a table in the main window. When you load data into a dialog, the program tries to set all individual columns from a file into the correct columns of a table in the main window. This is handled by the combo boxes below the table. These columns are set automatically where the columns in the file have the same name, but if the file column header descriptions are different you must set them manually. After setting them, just press the button Add New Data Set and the program automatically retrieves data according to the settings into the main table. As stated above, you only need to set the required columns- and the others are optional. After loading, the predefined properties of points-loading are automatically set, and the main table will look like Figure 12. The first column defines the points preview. These visual properties can be then changed, and a detailed explanation of their function is contained in Chapter 3.2.2. You can not edit the individual data in this table; so when you want to modify them, just click on the Edit button. The data is then displayed in a separate window where you can edit them manually (Fig. 13). If you change the percentages of cationic or anionic components, you must again ensure that their sum totals 100 %. Otherwise they will not be rendered correctly in the diagram. If you want to add a new record manually, click on the Add Row button and an empty row is added for you to enter your values. If you want to delete a selected row, just press the Delete button on your keyboard. All these adjustments automatically update the parent table in the main window. 10 / 29
- 12. Fig. 12: Example of values imported into the program. Fig. 13: Editing the values of main window in an external dialog. The next button in the ribbon toolbar is used to delete records from a table. You select them in the table by clicking the CRTL or SHIFT key, and then click on the Delete button in the ribbon toolbar thus deleting the records. The next two buttons set sorting and grouping of records in your table. When you press these buttons, dialogs appear where you can set these properties (Fig. 14), and then you can work more effectively with your data, especially if your records are initially arranged chaotically or if you want to see them in different visual settings. These sorting and grouping features are not very efficient for tables with extremely large amounts of data because they significantly delay updates. 11 / 29
- 13. Fig. 14: Dialogs to set the sorting (Left) and grouping (Right) of records in the main table. Data can be sorted in one-to-three columns in the main table. If you want to enable sorting, click on the check box for activation, as in Figure 14, set the sorting columns you want and then set the sorting direction in either ascending or descending order. If you want to group the data in your table according to values in a selected column you can do it using the second dialog. As in the previous case, this data can be grouped according to one to three columns. For example, you can group the data just in the column named Group. The difference between the representation of data with and without grouping is shown in Figure 15. With grouping, you can expand or contract individual groups in the table and work faster and more efficiently with your imported data. Fig. 15: An example of a table with and without using the grouping features. 3.2.1.2 Points in Diagram The last two buttons in the ribbon table draw and erase points from the diagram. When you click the first button (Draw), the selected points are rendered, and when you click the second button (Clear), all points will be deleted. This character has been designed in this way to render the same points several times in one diagram. Therefore you click on the Draw button multiple times and the same points are rendered that number of times, and not deleted. This allows specific treatment of your data as shown in Figure 16. 12 / 29
- 14. Fig. 16: Example of multiple rendering of identical points with different settings. The points in this picture are drawn by point types not set in the program choices. Points with different background and border colours are not internally programmed. You set them yourself by filling a blue circle with 50% transparency and draw them. Then change these to empty circles with a red opaque edge and draw them again on those current points. You can therefore prepare any types of points you want that are not directly provided in the selection of point display types. If you want to delete points from the chart, just click on the Clear button. 3.2.2 Points Tab Point’s visual characteristics can be modified and adjusted using the Points functions on the ribbon tab (Fig. 16). Just select records you intend to adjust in the table and click on the selected function in the ribbon toolbar. Fig. 16: Functions in the Points tab of the ribbon toolbar. The first button sets the colour of your selected points (Fig. 17). Clicking this button gives you fast choice of available colours, and if you want something different, just click All Colors on the main menu. A dialog appears where you can set any colour and its transparency. If you want to set only the transparency of the points, click on the last menu item and set your transparency values in the input box as a percentage (100 % = full transparency). Fig. 17: Options for setting the point colour and transparency (Left – quick options; Middle – colour dialog; Right – an example of set transparency points). 13 / 29
- 15. The size of selected points is adjusted with the Size button, and the following button allows you to set the type of point you want (Fig. 18). The program gives a choice of 28 types of point representation. If you want to see an image instead of a predefined point type in the diagram, you can do this using a different button (Fig. 19). After clicking the function Image – Set... you select an image on the disk and this file is then displayed in the diagram as the point with the defined size and transparency. If you want to return to the predefined view of your point, just delete the image by pressing the Image – Clear command Titles in the label column can be collectively changed with the Set Label function, and Set Group has a similar function. Using Visibility determines whether the records in your table will be visible in the diagram, Fig. 18: Options for and this is adjustable using the check boxes in the fourth column of the setting the point type. main table (as in the second function line in Figure 6). The last two buttons seen on the second line of the main table in Figure 6 are used to adjust the size and colour of your selected points in the selected column. The colour gradient can be set using the dialog in Figure 20. After selecting this, the gradient definition for the colour must be defined in the top combo box. Here you can insert your component from columns A, B and C. After selecting this column your minimum and maximum values are automatically entered in the next two text boxes. These values are Fig. 19: Setting images as point items in the diagram (Left – used to define the range of colours, functions on the ribbon toolbar; Right – example of images used either automatically loaded or you as points in your diagram. can adjust your range manually. Figure 20 shows the colour gradient definition content for the HCO3 component, with minimum value of 15 % and maximum 98 %. This range is extended to values between 0 and 100 %. The following two combo boxes define the initial and final colour of the gradient. The last three text boxes are used for editing the legend item, defining the gradient title and for initial and final values. Here we added the required unit of percentage (%). When you click the Apply button, all selected colours are repainted and the legend item is added to the diagram. In this figure, this setting was used for all the points in the table. Before using this feature, you must first create a diagram with several parallel gradients for the points where you want to apply a function. An example of this is where one gradient is used for the analysis of surface water and the other for groundwater. You can import discharges for surface water and groundwater into auxiliary column A and sampling depths below the surface into column B. These components can then be displayed as colour gradients in the diagram. Figure 20 shows a similar example where colour changes depend on the percentage content of the HCO3 component. 14 / 29
- 16. Fig. 20: Left – dialog for setting the colour gradient of points; Right – an example of setting the colour gradient according to the percentage content of the HCO3 component. You can define the size of the points in your diagram in a similar manner. An example is shown in Figure 21. The only difference here is that you set the point size gradient instead of the colour gradient. The figure shows an example where we have interpolated point size based on the content of the HCO3 component. The point size is often used, for example, to display the total mineralization of water. As in the previous case, this setting applies only to items that have been selected in the table before you launch the dialogue, and the program then adds a new item into the legend. The items in the legend can be edited and this editing is explained in chapter 3.2.5. In addition, these two point size and colour gradient settings can also be combined, so that you can view much more information in this program’s diagram than you can use any other tool. Fig. 21: Left – dialog for setting the point size gradient; Right – an example of setting the size gradient of points depending on the content of the HCO3 component. 3.2.3 Visual Tab Features for setting the visual properties of the diagram can be found on the following ribbon tab called Visual (Fig. 22). The most significant differences between the 3 programs are found under this tab, but their functionality has a similar character. 15 / 29
- 17. Fig. 22: Basic display of the Visual ribbon tab. Using this tab, you can set diagram parameters such as background colour, line thickness, fonts, labels or object visibility. The object that you want to edit must be set in all applications before adjustments of these properties can be made. This is set in the first combo box (Fig. 23). After selecting the object you want to modify, the visibility and position of some buttons on the ribbon tab change according to what you want to set, as shown in Figure 23. The upper part shows the example of functions for setting the individual diagram segments and the lower part shows the functions for setting the properties of the diagram area for your objects. Fig. 23: The Visual ribbon tab after selecting different sets of objects. The choices of objects in individual programs that can be visually edited are displayed in Figure 24. This especially applies to objects in the Ternary 1.0 program. If you select the first item (All Objects) you can simultaneously edit the properties of all objects. If you select All Diagram Segments, you can adjust the properties of all segments for points rendering. Visualization, for example, can select border colour and thickness for the entire visualization. The layout of each object is shown in Figure 25. The first figure shows the entire visualized object. The second shows coloured objects in the diagram, title and legend areas, while the last shows the individual diagram segments. These are set visually either simultaneously or individually by using the following combo box items. After selecting the item you want to set, the next part of ribbon tab displays the parameters that can be set. The check box under the objects combo box can be activated to show or hide your selected objects, thereby changing the visibility. Another check box with the label “Is Border Visible” can show or hide the border of selected object, and its colour can be changed with the Border Color button. The Object Margin button sets the object’s margin, and the following button changes the border thickness. 16 / 29
- 18. Fig. 24: The selection of visual objects in individual programs (Left – Piper 2.0; Middle – Durov 1.0; Right – Ternary 1.0). Fig. 25: The layout of visualization of objects (Left – normal entire object visualization; Middle – diagram area = red, legend area = green; title area = blue; Right - boundaries of segments in diagram area). Functions to set the background colour of the selected object can be found under the Background button (Fig. 26). After starting the program, each object has normal set background transparency and if you want to set the background for the entire visualization you can use the Visualization command in the combo box in Figure 24; and this property is further illustrated in the title, legend and diagram area. You can then set the background colour of the objects Fig. 26: Options for setting objects’ background colour. contained in the Visualization object. The background can be set as Solid Background Color, Linear Gradient or Radial Gradient as in Figure 26. If you use a Solid Background Color, you can choose from the fast selection or you can activate the Color Dialog. If you choose a linear or radial type of gradient setting, the dialogue in Figure 27 appears. For both types of gradient you set two colours to create your gradient. If you use the Linear Gradient, in the combo box you can set the gradient direction as Top-Bottom, Left Diagonal or Vertical Center. You click the Apply button and your defined gradient is applied to the selected 17 / 29
- 19. object(-s). Similar settings are also used for the radial gradient, but here you set the coordinates for the gradient origin and not for the gradient direction. This is complemented by clicking on the preview area. Finally the defined gradient is presented by pressing the Apply button. Fig. 27: Dialogs to set background gradients (Left – linear gradient; Right – radial gradient). Examples of gradient application in Figure 27 are further visualized in Figure 28. The defined gradients were applied simultaneously to all segments of the diagram. The left picture shows, a linear gradient used in the vertical direction and the right shows a radial gradient where the coordinate of the gradient origin was moved to the lower right corner. Similarly, one set of background colours can be used for the entire diagram or you can set different background colours for each individual diagram segment. Fig. 28: Examples of background colour gradients in diagram segments (Left – linear gradient; Right – radial gradient). When you select one of the segments in the combo box, more setting options are displayed in the ribbon tab. Examples of these are in Figure 29. The numeric axis labels of segments are found under the Axis Text ribbon button. Here, you can set their visibility, font, colour, or their steps of display, while the settings of the main axes labels come under the Labels button. As in the previous case, you can set visibility, colour or font. The Ternary 1.0 program allows you the further option of setting the text for the labels (Fig. 30). In addition, you can use the next two buttons to separately set the parameters for Major and Minor Grid Lines in individual segments. Here, you can set visibility, colour, thickness, style and the steps of display. 18 / 29
- 20. Fig. 29: Specialized setup options of diagram segments (Left – setting numeric axes labels; Middle – setting axis labels; Right – setting major grid lines). Fig. 30: Options for setting the axis text captions in the Ternary 1.0 program. Extended segments can also be set in the Piper 2.0 and Durov 1.0 programs. While standard features such as colour and line thickness can be set by the previous commands, value ranges must be set individually, depending on what values you want to see. This means that if rendered values are outside the range, they are not shown in these segments. This applies, for example, to the different value ranges used in water pH or total dissolved solids in water; and the help dialog appears when you click on the last button called Settings (Fig. 31). Fig. 31: Properties of extended segments (Left – dialogue with the settings; Right – example of extended segment with logarithmic display). Using this dialog you set the minimum and maximum range of values. The actual values can be displayed on a linear or exponential axis. Then you set the step for minor grid lines in the last combo box. If you set a Zero value here, these lines will be not shown. You can set also values of 2, 19 / 29
- 21. 5 or 10 which define the number of extra lines between the major grid lines. The value set in the displayed example is 10. When you select editing of the Diagram Object in the main combo box of the ribbon tab, two new buttons appear in the toolbar (Fig. 32). You can set the size of the diagram object using the Size button, in all programs. While the minimum size value is 500, the maximum size is unlimited so that you can create visualization with extremely high resolution. The Piper 2.0 program also allows you to set the margin of diagram segments. An example with different values is shown in Figure 32. Fig. 32: Left – commands for setting diagram size and segment margins; Right – examples of different values for the diagram segment margins. 3.2.4 Title Tab The following ribbon tab contains functions for working with the diagram Title (Fig. 33). The title has a specific position and works differently. The functions of the tab can be divided into two groups. The first group of functions adjusts the position, alignment and size of the title object. The second group includes basic editing functions, such as options for text Copy, Selection or Undo/Redo commands. Other visual features such as background colour and border thickness were set by commands in the previous ribbon tab seen in Figure 23; (and explanation for their use is also available there). Fig. 33: Commands from the Title ribbon tab. Actual editing of text is performed directly in the diagram by clicking in the title area (Fig. 34). When the text area is activated, you can directly edit the text. If you want to format a selected portion of the text, just select it and the program automatically displays the format bar where you can set the font, the size and the text and background colours. Fig. 34: Direct editing and formatting of the diagram’s title text content. 20 / 29
- 22. An example of a prepared title is shown in Figure 35. Here, the resultant title can be freely edited and formatted to your desired state. Fig. 35: Example of a prepared diagram title. To set the other properties, you use the first three commands in Figure 36. The first adjusts the position of the title in relation to the diagram. You can then move the title to the top or bottom of the diagram, to the left side or the right, or you can insert it inside the diagram. Fig. 36: Functions for setting the position, alignment and size of the title object. For title positioning, if you put the title inside the diagram, it will not be editable. In addition, if the diagram area background is not set to transparent, the title will not be visible, because it lies physically behind the diagram. If you insert the title in the diagram area, it will be stretched to its maximum width and height, but this can then be adjusted using the buttons that follow. An example of different size and position settings of the title object is shown in Figure 37. Fig. 37: Examples of the title position setting in the visualization (Left – above the diagram; Middle – under the diagram; Right – inside the diagram with changed parameters of the alignment and size). 21 / 29
- 23. Alignment and size features are also contained in Figure 36. You can set the horizontal and vertical alignment of the title. It can be aligned in both directions in the middle of the field, stretched through the entire possible area or it can be aligned to a selected border. For example, in Figure 37 (Right) the title is aligned to the upper left corner of the diagram. The last button sets the height and width of the title object. These parameters can be set to your exact value, or the setting can be left to Auto. If you set the width to Auto, the title expands to fill the entire possible width. With these settings, you can put the title anywhere in the visualization and adjust its size and alignment. 3.2.5 Legend Tab The last ribbon tab contains functions for working with the diagram legend (Fig. 38). Fig. 38: Functions for working with the diagram legend. The first part of the function of this ribbon tab is similar to the previous one where these commands set the legend position, alignment and size. Moreover, this also includes a function to set the orientation of legend items (Fig. 39). This button sets the orientation of each item in the legend. An example is shown in Figure 40 where firstly vertical orientation was used for Fig. 39: Orientation item arrangement, and then horizontal orientation was used. of legend items. Fig. 40: Example of setting the legend items’ orientation (Left – vertical orientation; Right – horizontal orientation). Additional buttons are used to manually edit the legend items (Fig. 41). Using the Clear All button you can delete all the legend items, while, in contrast, the other buttons adds them or adds to their features. 22 / 29
- 24. Clicking on these buttons gives dialogs where you can define new legend items (Figs. 42 and 43). Dialogs for adding colour and size gradients work similarly to the dialogs for definition of point sizes and colour gradients. The difference here is that these dialogs are not linked to the main table, and therefore Fig. 41: Functions for work you can add new items into the legend without affecting the visual with legend items. settings of the points in the table. After defining all required parameters and pressing the Add button, the prepared legend item will be added to the end of the currently existing items. A new dialog adds individual point items to the legend (Fig. 43). In the first four controls, you set the size, type, colour and label of your item and add it to the list using the Add Item button. In this way, you can add all required items manually. Another way is to use the From Table button which copies all points from the main table to the list. Then you can delete unnecessary items and change the text description. Finally, if you want to define a title for this legend item, you use the last text box and press the Add button to add the item into the legend. An example is shown in Figure 44. Fig. 42: Dialogues for adding legend items that describe the point colour and size gradients. Fig. 43: Dialog for setting the point items in a legend. If you want to display these items horizontally, this parameter must be previously set using the Orientation button in the ribbon tab. Fonts and font size and colour can not be set directly. However, using properties from the cationic segment enables their definition. This means that if you want to modify these properties indirectly, set these values for the cationic segment before you create the legend items. Then you can change the properties of the cationic segment back to the originals. 23 / 29
- 25. An example of point items generated for the legend is shown in Figure 44. Their definition and settings depend only on your requirements. Fig. 44: Example of generated legend items. Conclusion The foregoing text describes the ways of creating diagrams with three new tools from the HydroOffice software package. The Ternary 1.0 program is distributed free of charge and without any limitations, and you can also freely use the demo versions of the Piper 2.0 and Durov 1.0 programs plotting a maximum of five points. However, if you want to plot an unlimited number of points you must buy a licence for the selected program. These licences can be purchased through a reseller in your country or through http://hydrooffice.org page under your user account. From the programs functional description, it is obvious that these tools bring many new features and improvements compared to other programs. If you find a bug in the program, this will be corrected and you will be able to install a repaired tool. If you have any comments please feel free to contact me. I will be grateful for any response. Finally, in the following APPENDIX you can find examples of diagrams which can be created by the described software tools. 24 / 29
- 26. Appendix 1: Examples of diagram segment backgrounds 25 / 29
- 27. Appendix 2: Examples of diagram segment grid lines and labels 26 / 29
- 28. Appendix 3: Example of a Ternary diagram 27 / 29
- 29. Appendix 4: Example of the basic Durov diagram 28 / 29
- 30. Appendix 5: Example of an extended Piper diagram 29 / 29