Social Media Crisis Guidelines
•
0 gostou•376 visualizações

Un par de páginitas en inglés, sobre como actuar ante una crisis en Facebook

Recomendados
Mais conteúdo relacionado
Semelhante a Social Media Crisis Guidelines
Semelhante a Social Media Crisis Guidelines (20)
Mais de MARIA JOSE CAVERO
Último
Último (20)
Social Media Crisis Guidelines
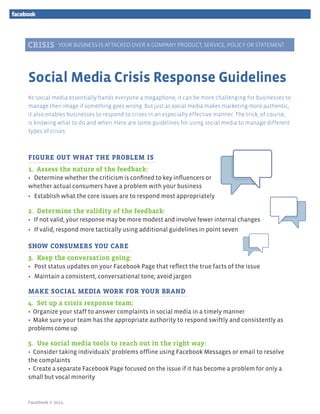
- 1. YOUR BUSINESS IS ATTACKED OVER A COMPANY PRODUCT, SERVICE, POLICY OR STATEMENT Social Media Crisis Response Guidelines As social media essentially hands everyone a megaphone, it can be more challenging for businesses to manage their image if something goes wrong. But just as social media makes marketing more authentic, it also enables businesses to respond to crises in an especially effective manner. The trick, of course, is knowing what to do and when. Here are some guidelines for using social media to manage different types of crises: FIGURE OUT WHAT THE PROBLEM IS 1. Assess the nature of the feedback: • Determine whether the criticism is confined to key influencers or whether actual consumers have a problem with your business • Establish what the core issues are to respond most appropriately 2. Determine the validity of the feedback: • If not valid, your response may be more modest and involve fewer internal changes • If valid, respond more tactically using additional guidelines in point seven SHOW CONSUMERS YOU CARE 3. Keep the conversation going: • Post status updates on your Facebook Page that reflect the true facts of the issue • Maintain a consistent, conversational tone; avoid jargon MAKE SOCIAL MEDIA WORK FOR YOUR BRAND 4. Set up a crisis response team: • Organize your staff to answer complaints in social media in a timely manner • Make sure your team has the appropriate authority to respond swiftly and consistently as problems come up 5. Use social media tools to reach out in the right way: • Consider taking individuals’ problems offline using Facebook Messages or email to resolve the complaints • Create a separate Facebook Page focused on the issue if it has become a problem for only a small but vocal minority Facebook © 2011
- 2. 6. Empower your loyal consumers and advocates: • Take the time to post a ‘thank you’ note to a fan’s Wall if they say something positive about your business • Consider asking loyal customers for permission to repost their comments that would serve to counter negative comments on your Page or elsewhere IF WARRANTED, MAKE CHANGES 7. If there is validity to the problem that triggered the crisis, resolve it swiftly: • Make sure you have leaders in place who can take responsibility not just for the problem, but also for the solution • Communicate to consumers that you are working on the problem, even if you have no new information • When you come up with your solution, make sure to involve your critics in your communication plan PAGE GUIDELINES Facebook facilitates the sharing of opinions, even when we don’t agree with them or with the manner in which they are delivered. But we do give Page administrators the tools to delete abusive, derogatory, and irrelevant comments, as well as spam, to ensure a positive experience for the majority of people. Please follow these instructions to remove offending posts. TO DELETE INDIVIDUAL PIECES OF TO BAN INDIVIDUAL FANS CONTENT FROM YOUR PAGE’S WALL: FROM ACCESSING YOUR PAGE: 1. Move your mouse over the post you wish to remove If there are specific fans who are continuing to post in order to reveal the “Remove Post” button. abusive content on your Page’s Wall, you can ban them 2. Click on the “Remove Post” button and then on the from being able to access your Page. “Delete” button. 1. While viewing your Page, click “people like this” TO CHANGE THE DEFAULT VIEW under the “x People Like this” section. OF YOUR PAGE’S WALL: 2. Select the “X” next to a user’s name. While you can delete individual posts from your Page’s 3. Check the box next to “Ban Permanently”. Wall, you can also temporarily change the part of your 4. Click “Remove”. Page that users are defaulted to when they visit the Page. We recommend that you change this default to TO TEMPORARILY REMOVE THE ABILITY FOR FANS TO POST TO YOUR PAGE’S WALL: “Only Posts by Page” so that the posts you are removing are not immediately visible. You have the option of removing the ability of your fans to post on your Wall. 1. While viewing your Page, click on the “Edit Page” button on the upper right-hand corner of the Page. 1. While viewing your Page, click on the “Edit Page” 2. Click on the “Manage Permissions” tab on the left button on the upper right-hand corner of the Page. navigation bar. 2. Click on the “Manage Permissions” tab on the left 3. In the “Wall Tab Shows” field, select “Only Posts by Page”. navigation bar. 3. In the “Posting Ability” section, uncheck the check- box next to “users can write or post content on the Wall”. You can re-enable this ability again at any time. Facebook © 2011